When you click on links to various merchants on this site and make a purchase, this can result in this site earning a commission. Affiliate programs and affiliations include, but are not limited to, the eBay Partner Network.
nice car fellow hump backer!
Doing mine same way also nice survivor like yours. gotta put a Big block set back fire wall in to clear the front mount throttle body to radiator though. If you run a carb it may fit without but will be very tight. I ran an SBC prior to the current teardown.
You will want an F body oil pan or something like that. The truck pan will hang WAY too far down.
Oh and if you change to bear claw latches this are the best quality and go in, in a flash and hook right up to the factory inner door handle. the latches are very heavy duty unlike the pile of junk china auto loc's.
Bear claw latches in less than 2 hours and you can always weld in the plate after the fact to make it seamless.
I stumbled on this guy a few months ago and tried them out. triquemfg.com
Last edited by gto65lvr; Mar 20, 2016 at 04:56 PM.
Glad to see you on here. I have been watching you on FB. Some day I'm going to have to get over there and check it out in person.
I have gain alot of LS knowlege here. I hang out in this section mostly, but I have a craving for a turbo ls motor so I am in the Forced Induction section trying to learn everything I can....
nice car fellow hump backer!
Doing mine same way also nice survivor like yours. gotta put a Big block set back fire wall in to clear the front mount throttle body to radiator though. If you run a carb it may fit without but will be very tight. I ran an SBC prior to the current teardown.
You will want an F body oil pan or something like that. The truck pan will hang WAY too far down.
Oh and if you change to bear claw latches this are the best quality and go in, in a flash and hook right up to the factory inner door handle. the latches are very heavy duty unlike the pile of junk china auto loc's.
Bear claw latches in less than 2 hours and you can always weld in the plate after the fact to make it seamless.
I stumbled on this guy a few months ago and tried them out. triquemfg.com
GTO65lvr thanks for the feedback I do have a big block firewall to install at some point pretty soon. It looks like you have just done what I am about to do. I looked through your posts and I didn't see one where you were doing any fab work on your car. Did you document and of your car build on this site? If so I would really like to look through it.
Glad to see you on here. I have been watching you on FB. Some day I'm going to have to get over there and check it out in person.
I have gain alot of LS knowlege here. I hang out in this section mostly, but I have a craving for a turbo ls motor so I am in the Forced Induction section trying to learn everything I can....
aggie91 good to see you on here too. I ended up with Kharp as a user name since aggie91 was taken . I will probably taper off with the FB posts and post the rest of the build on here. I have already met some good resources in a matter of days! You have an open invitation to come over to my shop and check out the project whenever you get ready the sooner the better.
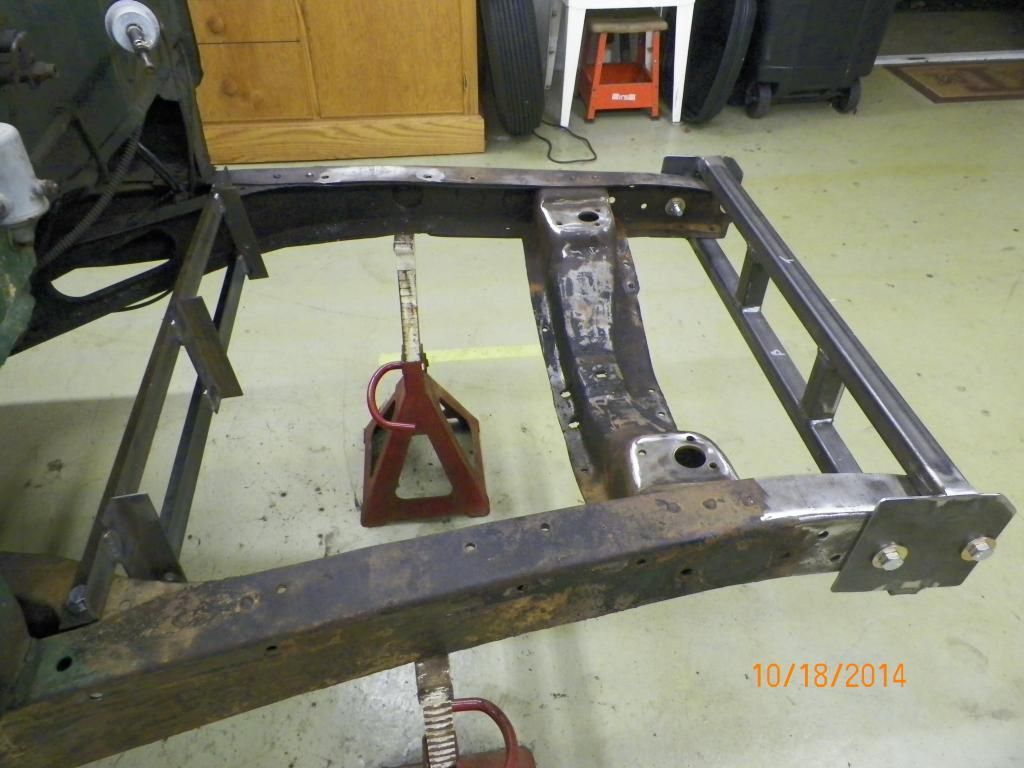
I made 2 frame fixtures for each side of where the original cross member will be coming out. The fixture on the front of the frame will also be used later for mounting the frame on a rotisserie.
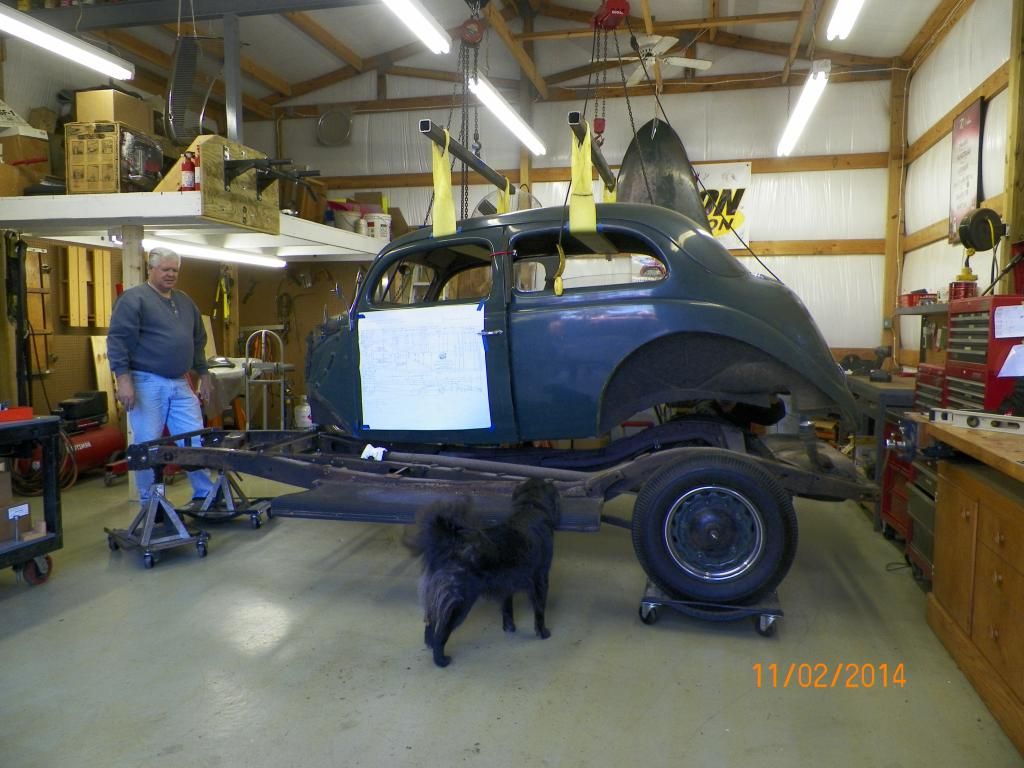
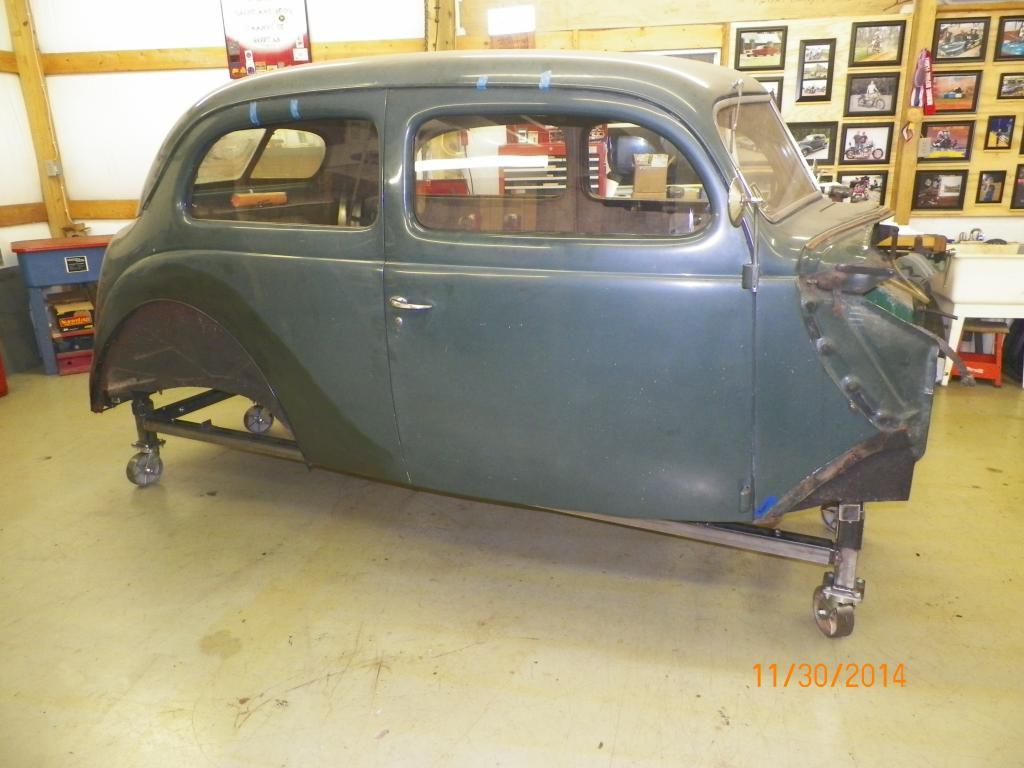
I made some spreader bars to lift the body by the roof. 2 hoists were used with wide straps to spread out the weight as much as possible. My father in law, Glen, was a big help on the day the body was lifted off for the first time after 77 years, and my dog, Sugar, had plenty of new smells to sniff that lasted for days!
Wood blocks were used for the body to rest on until a body dolly is constructed.
GTO65lvr thanks for the feedback I do have a big block firewall to install at some point pretty soon. It looks like you have just done what I am about to do. I looked through your posts and I didn't see one where you were doing any fab work on your car. Did you document and of your car build on this site? If so I would really like to look through it.
NO up until recently mine has been a slow build due to other stuff going on. Just recently jumping on it so no built thread. I am not a body man but work in a body shop and it is still a huge challenge to get body stuff done. I did get the fire wall put in on trade with a body man and was able to use the shops spot welder for the firewall. It made for a real clean and quick install versus plug welds. I may start a thread soon with in process pics once I get the motor back from the builder. I will keep an eye on yours looks like with your progress we will be neck and neck on things getting done LOL. I bet you beat me my spare time is very limited
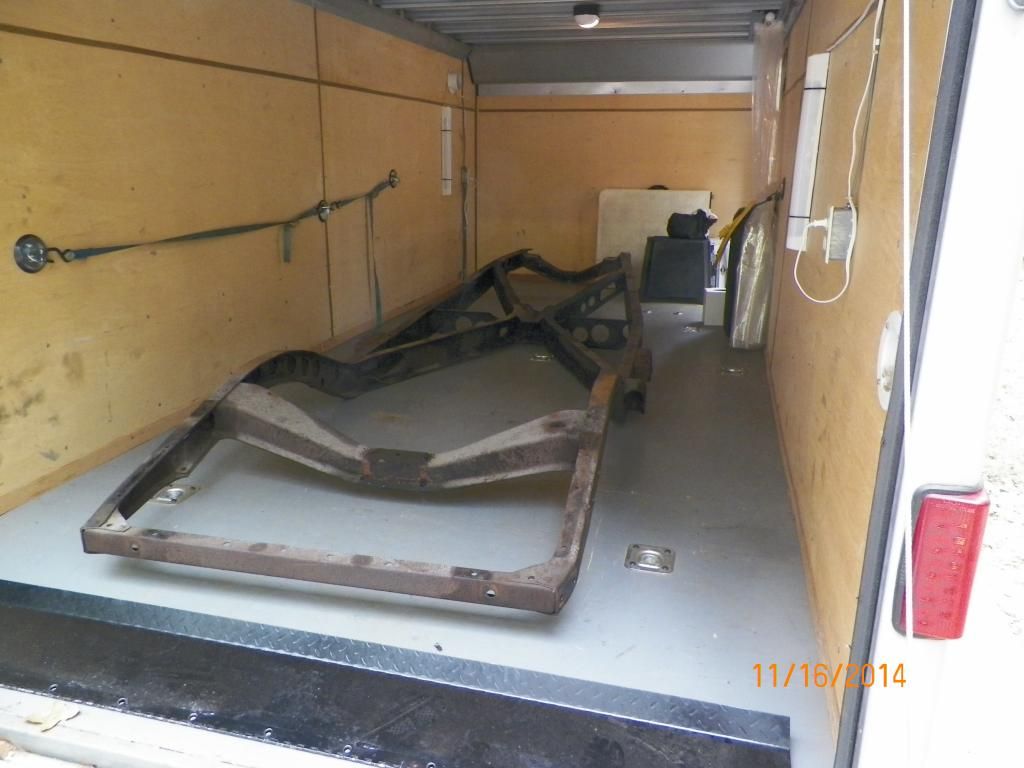
Nothing left to take off. I'm going to degrease the bare frame at the car wash, and then head over to the sandblaster so I have something a little cleaner to work on. After all the fab is done I plan on having it powder coated.
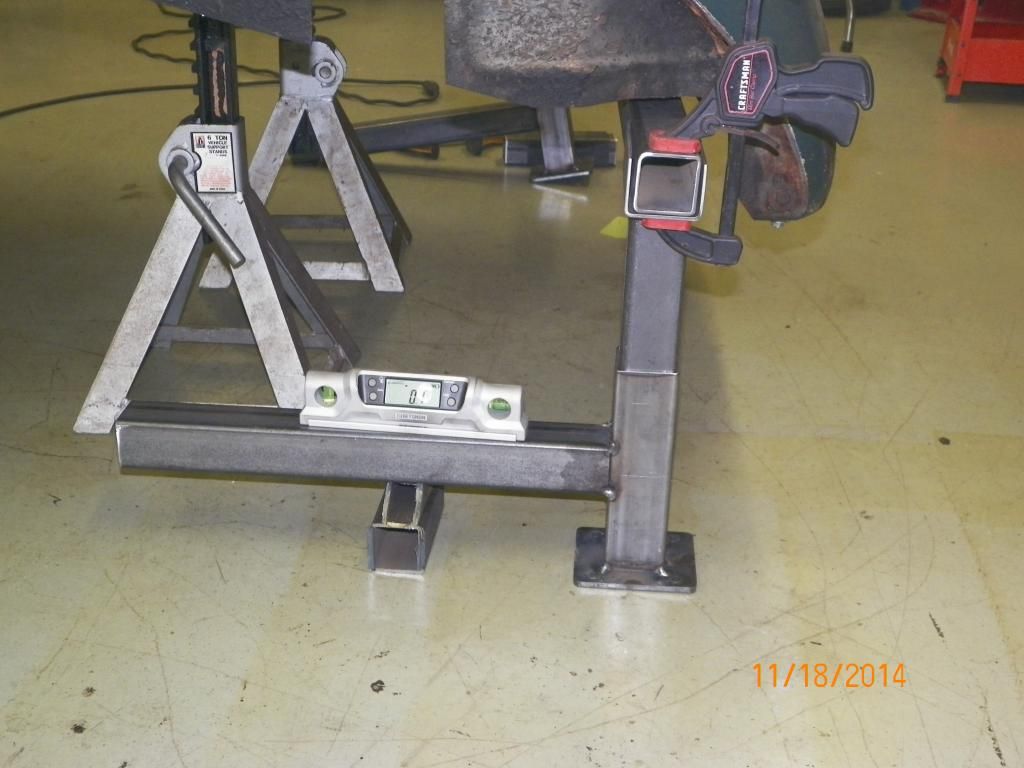
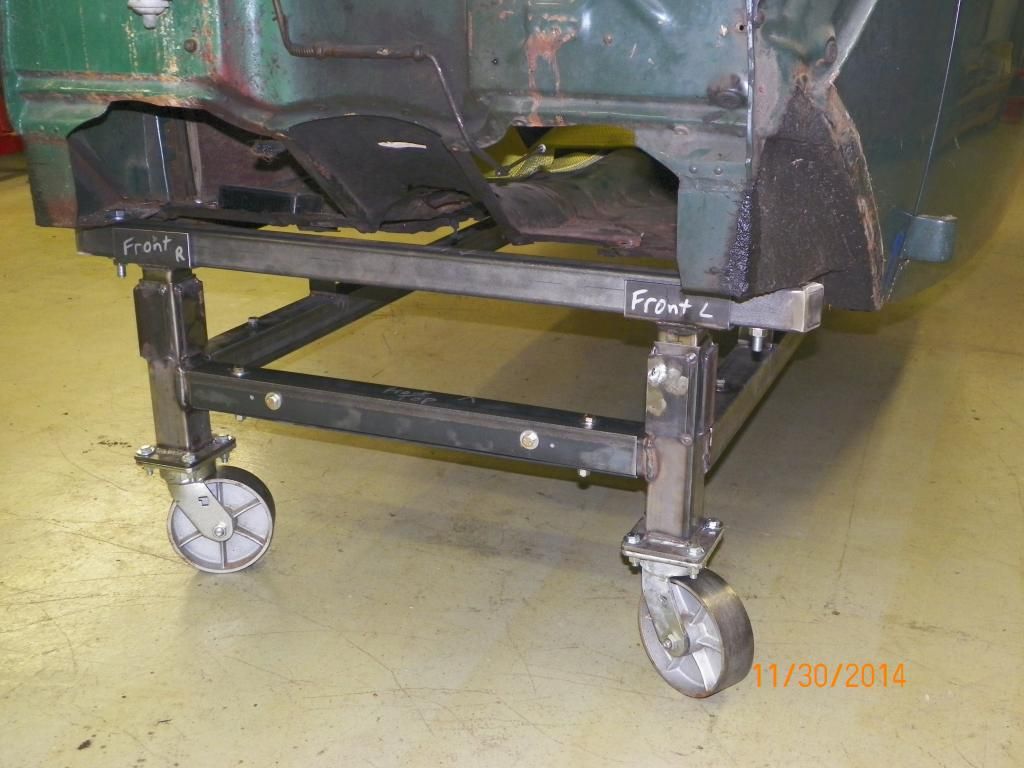
While the frame was at the sandblaster I started on a body dolly. I had several criteria I wanted to try to meet. I wanted to be able to take it apart for better storage and I wanted to be able to adjust the size for any future projects. Also I wanted a way I could move the body from the dolly to the car frame and vice versa easily by myself for fitting purposes during the fab process. Must not stick out past the body and have adjustable height for the body shop. Here is a photo of the general concept mocked up.
Here is a shot of the front. I mounted 2" square tubing to the car on the front and rear, and that tubing drops in some saddles on each corner. It works great for pushing it around the shop. I'll add some sort of pins to lock it down when I haul it to the body shop.
Basically there are 4 corner pieces that are tied together with angle iron side to side. From end to end I used some seamless tubing that slides over the 2". I still need to brace the floorboard so work can be done inside the car, but at least I can push it around at this point.
In retrospect there are a couple things I would have done differently in my 37 build......I should have not gone with the Leaf spring rear suspension........4 Bar and coil-overs would have been a lot better........the other thing was that most everyone that builds one of these cars put a full length steering column in them to get the steering universals and linkage down where it needs to be.......problem is that the column is now down by the Brake pedal and in the way.........I chose to not go that way and put in a shorty column to clean-up the floor area.......that required additional universals and supports in the linkage........It was O.K. but there was angles and turns to clear everything that resulted in some slight "Binding" when turning the wheel thru it's turning range..........After spending all that money on universals and trying to figure the support points in the linkage........It would have been smarter to buy a "Steer Clear" unit that would have resolved those issues very easily........Just Say'in........
In retrospect there are a couple things I would have done differently in my 37 build......I should have not gone with the Leaf spring rear suspension........4 Bar and coil-overs would have been a lot better........the other thing was that most everyone that builds one of these cars put a full length steering column in them to get the steering universals and linkage down where it needs to be.......problem is that the column is now down by the Brake pedal and in the way.........I chose to not go that way and put in a shorty column to clean-up the floor area.......that required additional universals and supports in the linkage........It was O.K. but there was angles and turns to clear everything that resulted in some slight "Binding" when turning the wheel thru it's turning range..........After spending all that money on universals and trying to figure the support points in the linkage........It would have been smarter to buy a "Steer Clear" unit that would have resolved those issues very easily........Just Say'in........
Ken I've already been dreading the steering deal and I've been eyeing the offset piece you mentioned. Based on your advice I need to put this in my budget and save some potential headaches later. I REALLY liked how you tried to clean up the floor with the drop down from dash console that didn't go all the way to the floor, column shift, etc. Its a great time for me to start planning those things out.
Now for the rear suspension I've already bought a leaf spring TCI kit with only 2 springs (believe they call it parabolic). Anyway, not that I couldn't back up a little and make a change, but I'm really curious about why you would go with 4 bar and coil overs?
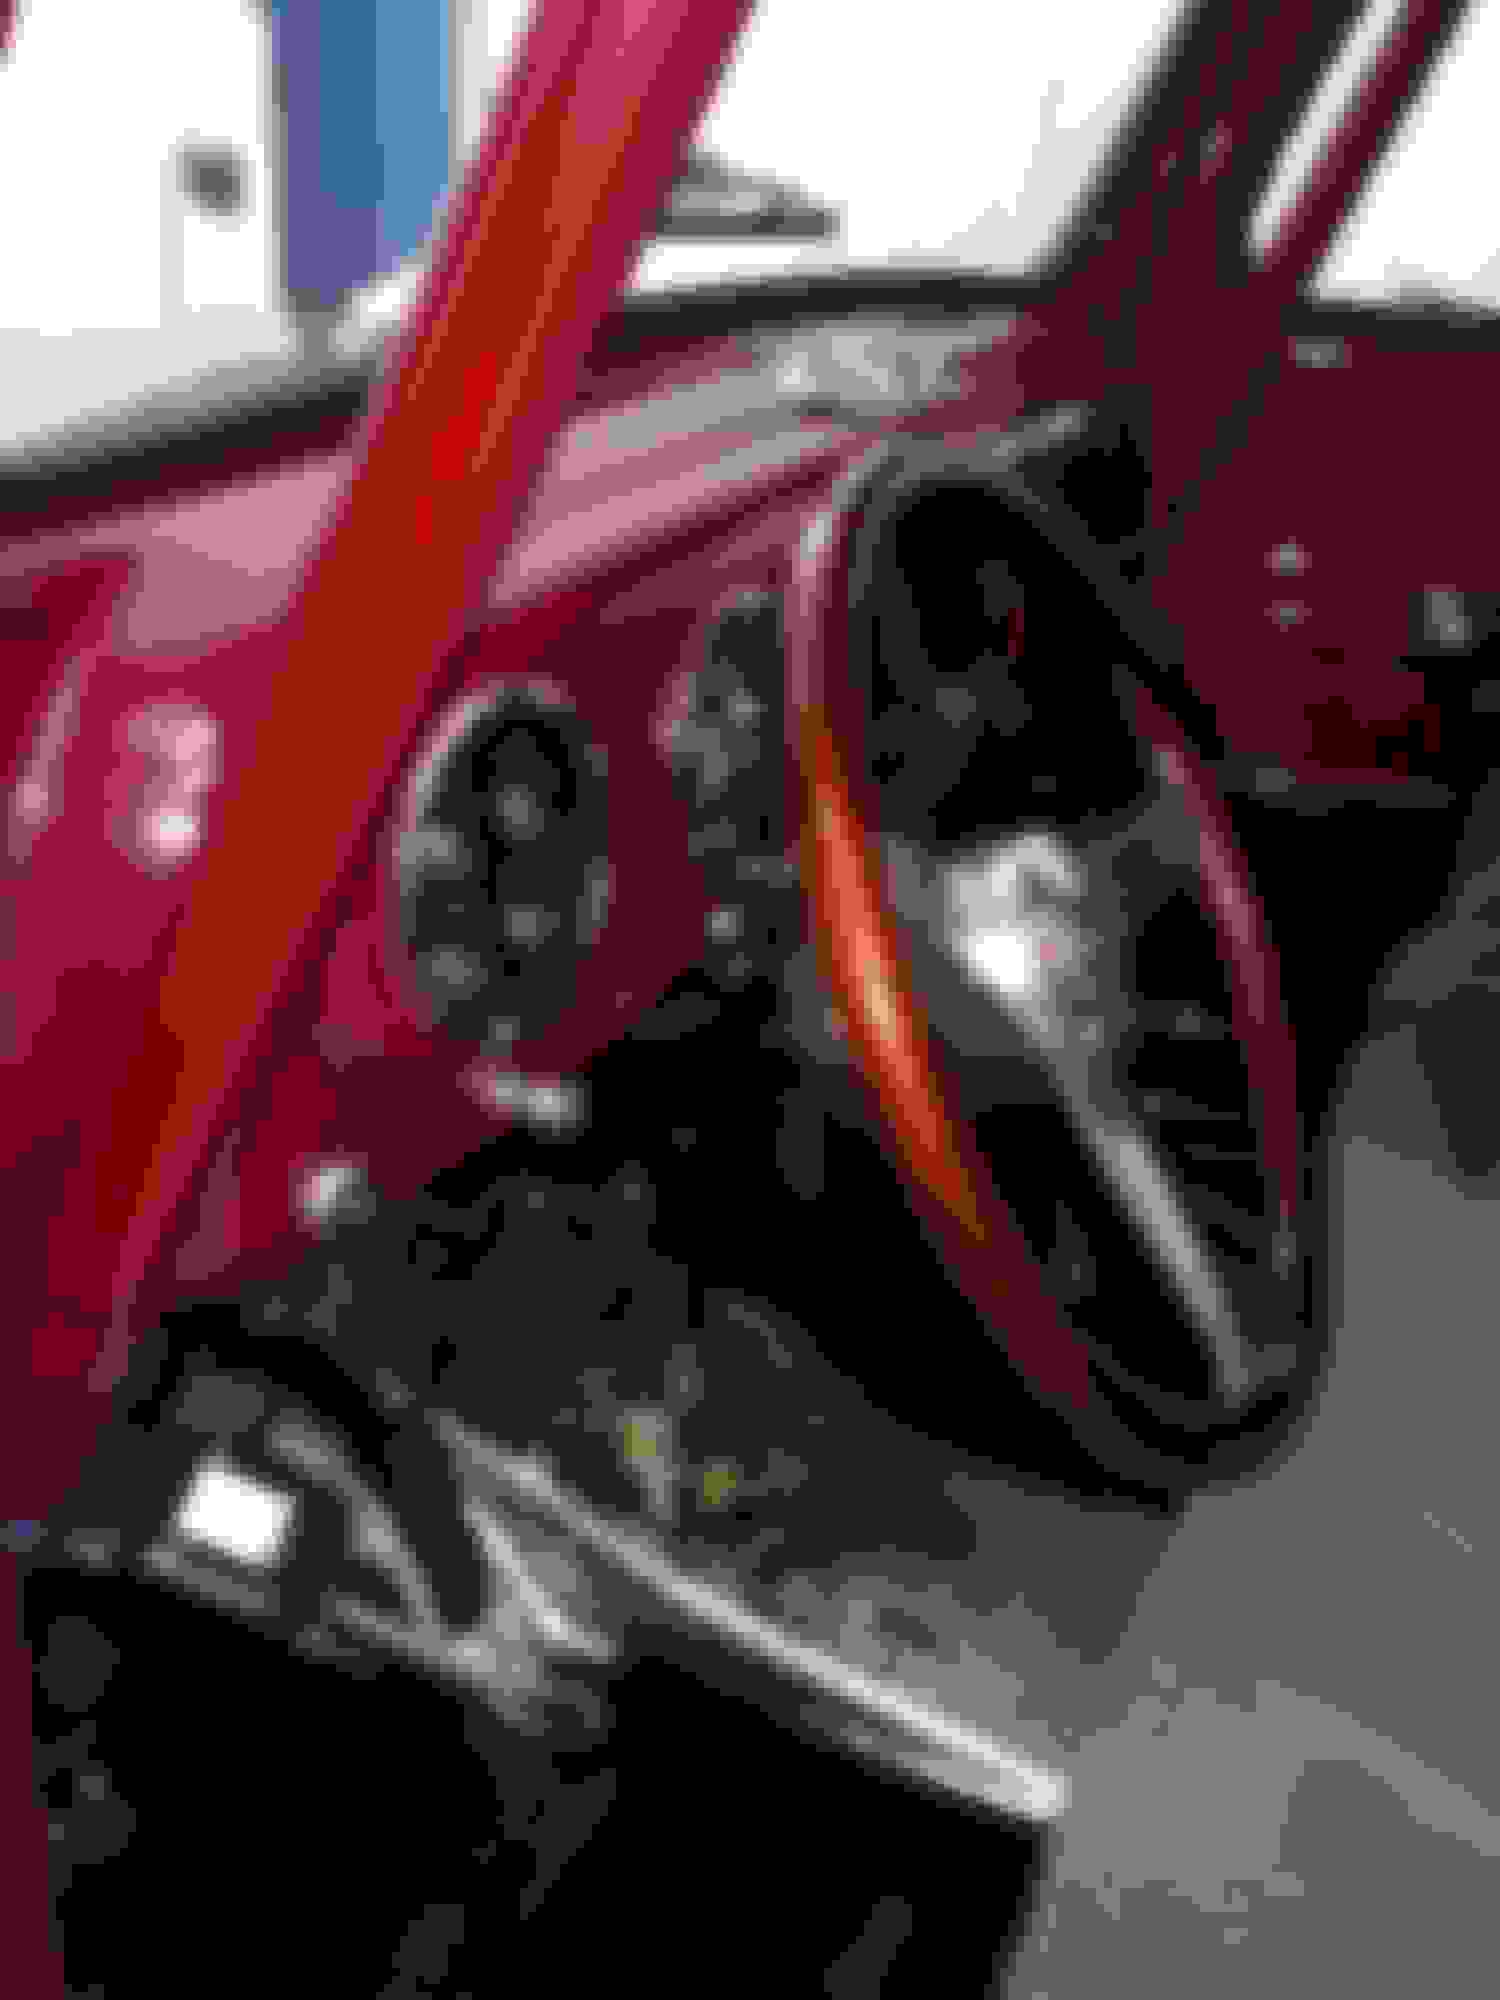
I also have a really short steering column, it's a cut down van column, like probably not even two feet long. Like Ken said, I didn't want the column between the brake and gas pedals. It's mounted at a more modern car angle, and does have several universial joints in it, but works great, I'm surprised Ken had any issue? I also have a carrier bearing of sorts where the shaft goes through the fire wall, and it's at an odd looking angle, but I did that to kick the linkage around the exhaust manifold. I can get you some pics if you want.
Awesome project! Eager to see updates. I have a restomod 51 ford pickup and had good results with my steering setup using a double Ujoint (up to 50 degrees of offset or so) to work around the exhaust. I was in to the whole setup about $300 in u joints, including the double and some double D shaft. I cut down the original column to make my own shorty.
Check out welderseries.com they have all kinds of things you can use on your project. I bought their triangulated four link on the rear with coilovers from Viking which were double adjustable (compression and rebound) for the cost of QA1s single adjustable.
The ride quality is tremendously better over (and tunable) the leaf springs I removed also the leafs wrapped under anything over 50% throttle. The resulting vibrations were incredibly unnerving too under axle wrap.
Hope this helps and doesn't take away from your thread.
Double ujoint
Support heims installed in bugs welded to frame
Aligning the hole
Using oak dowel for mock up.
Shorty column with custom machined flanged poly bearing installed in firewall end
I also have a really short steering column, it's a cut down van column, like probably not even two feet long. Like Ken said, I didn't want the column between the brake and gas pedals. It's mounted at a more modern car angle, and does have several universial joints in it, but works great, I'm surprised Ken had any issue? I also have a carrier bearing of sorts where the shaft goes through the fire wall, and it's at an odd looking angle, but I did that to kick the linkage around the exhaust manifold. I can get you some pics if you want.
I appreciate the offer and may eventually take you up on that, but right now I'd hate for you to go to any trouble since I am not close to the point of really needing it.
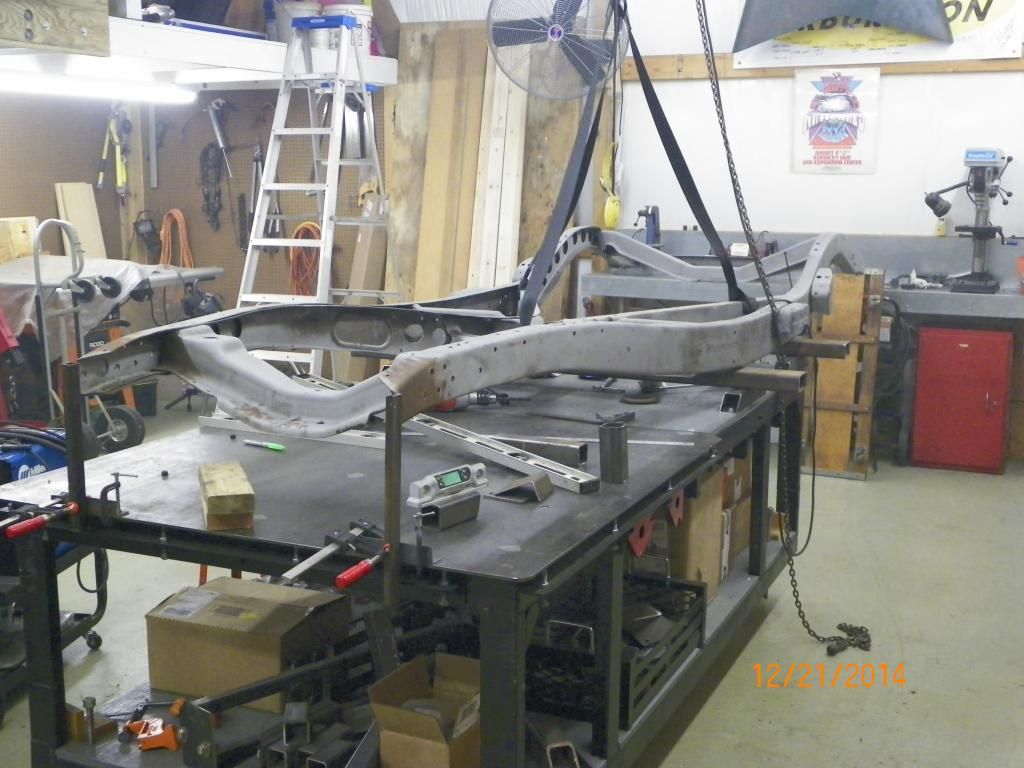
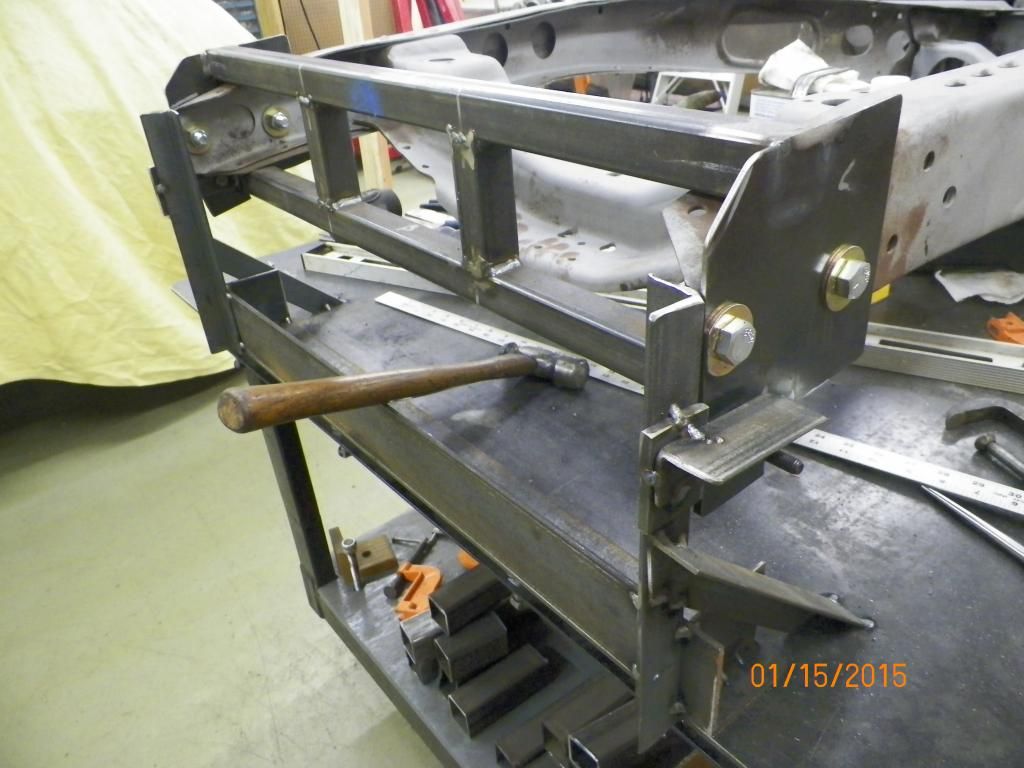
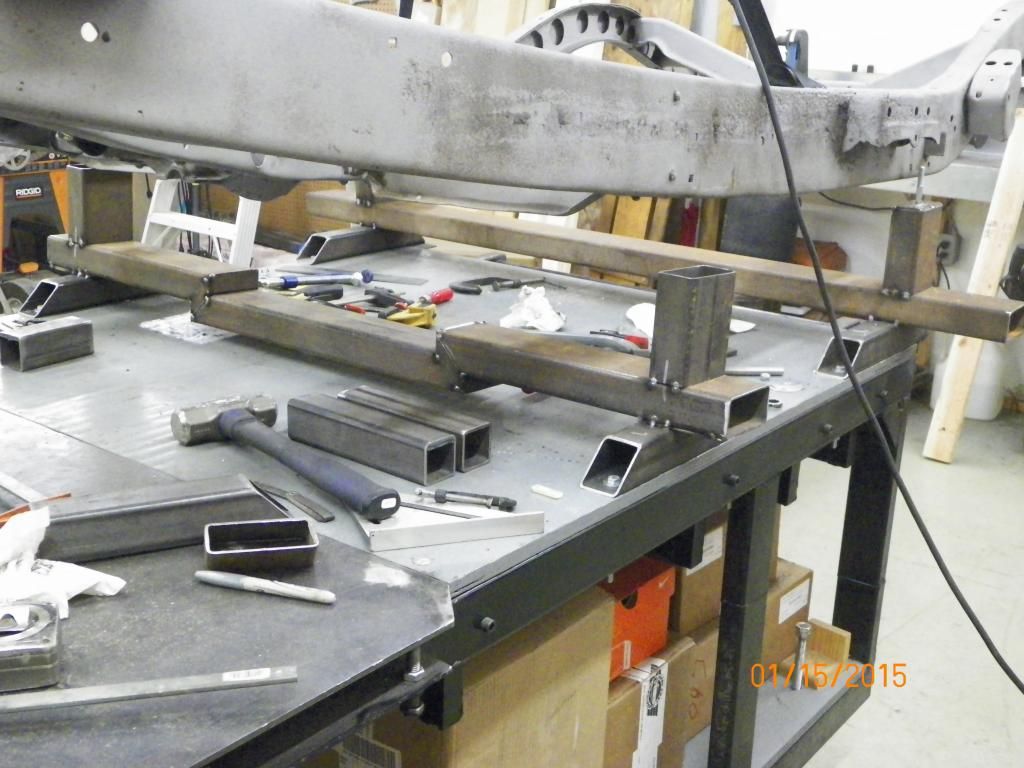
Please be patient as I make a few more posts to catch up with where the build actually is today. This is a frame fixture that will be used as a reference throughout the fab process.
When the frame returned from the sandblaster I started constructing a fixture, with some help, on my table that I could drop the frame in and check a few critical points - the main ones being on the very front.
The frame is placed exactly at the front edge of the table for easy measuring later.
I had to drop the support that goes under the x brace. I didn't realize the x brace went down that far until I started trying to clear it.
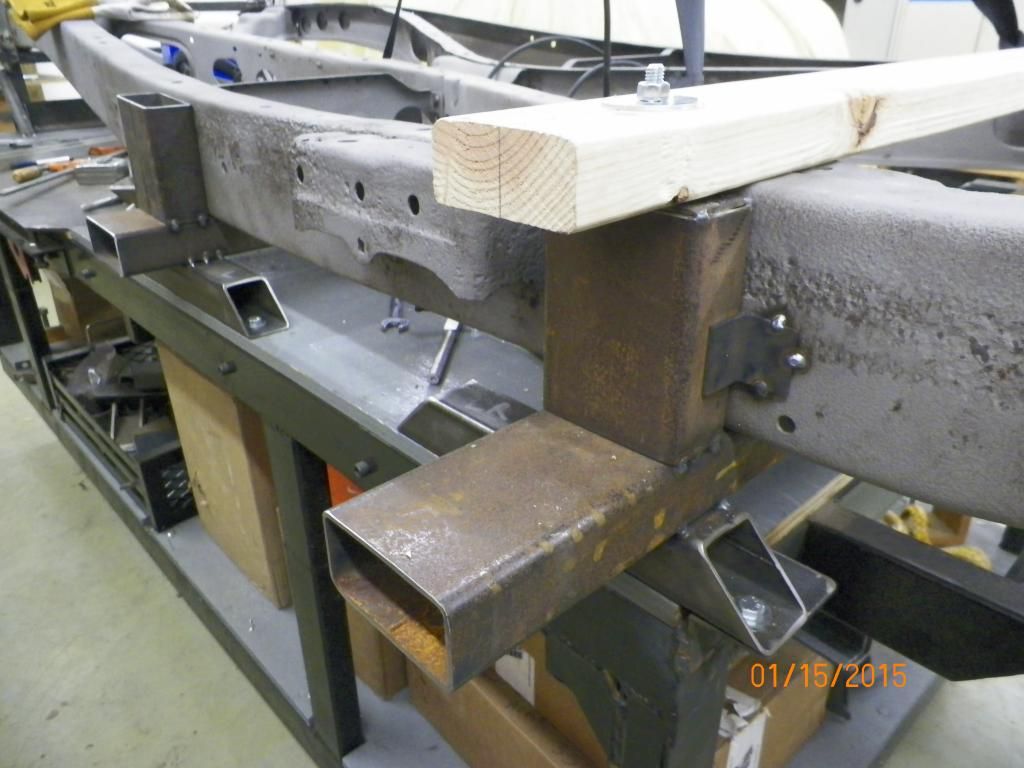
Welded a couple of temporary tabs on the side of the frame for positive stops. This way the frame slides up to the tabs and then is pinned/bolted on the very front, and the 2x4 acts as a vise to hold it in. The fame fixture is extra work in building a car, but hopefully it will pay off later.....
6 Common C5 Corvette Failures and What's Involved In Repairing Them
Slideshow: From wobbling harmonic balancers to failed EBCMs, these are the issues that define long-term C5 ownership and what repairs typically involve.
Retro Modern Bandit Pontiac Trans AM Comes With Burt Reynolds' Autograph
Slideshow: A modern Camaro transformed into a retro icon, this limited-run "Bandit" build blends nostalgia with brute force in a way few revivals manage.
Top 10 Greatest Cadillac V Series Performance Models Ever, Ranked
Slideshow: Cadillac didn't just crash the high-performance luxury vehicle party, it showed up loud, supercharged, and occasionally a little unhinged...
Coachbuilt N2A Anteros Is an LS2-Powered C6 Corvette In Italian Clothes
Slideshow: A one-off sports car that looks like a vintage Italian exotic-but hides a C6 Corvette underneath-just sold for the price of a new mid-engine Corvette.


 . I will probably taper off with the FB posts and post the rest of the build on here. I have already met some good resources in a matter of days! You have an open invitation to come over to my shop and check out the project whenever you get ready the sooner the better.