


5.3 TH350 into a '65 C10
Thread Starter
TECH Apprentice
Joined: Oct 2013
Posts: 319
Likes: 4
From: Longview, TX
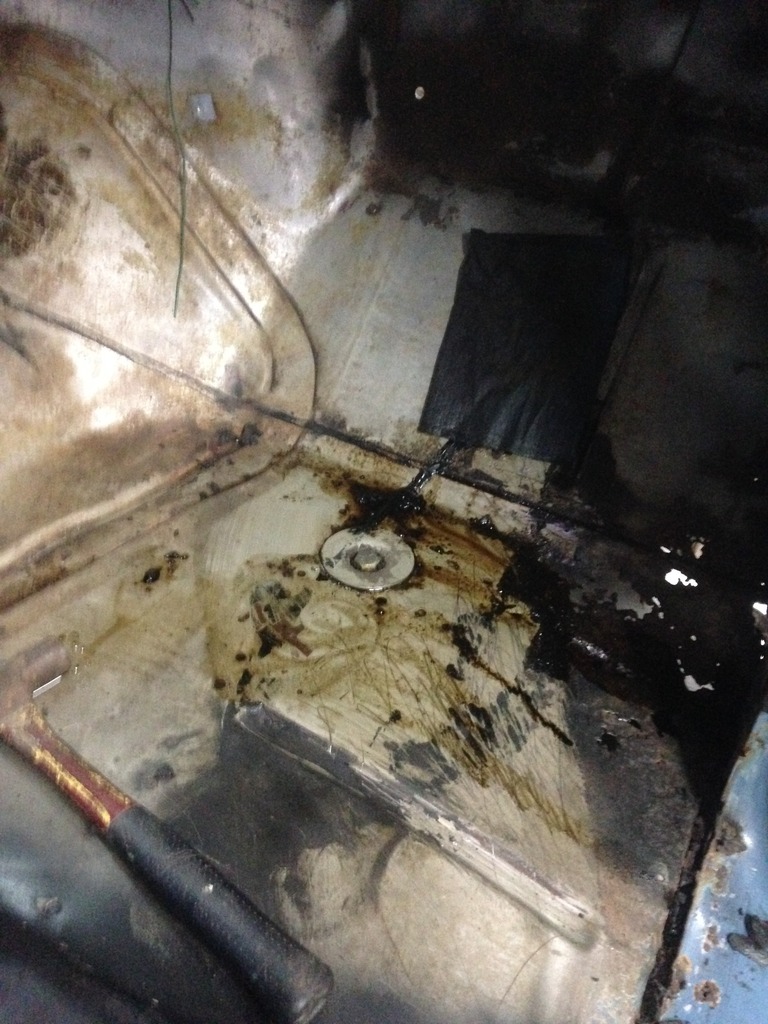
The last two nights was all about the floor of the cab. I still had a bunch of that factory sound deadener that I wanted to remove. So I soaked it with Toluene and that worked pretty well to soften it up and get some of it removed. I ran out the night before, so I had to get more. Stopped at Home Depot to get some. They do not carry it, so instead I tried Xylene which they had in quarts and gallons. I got a quart and a 3" wide chisel edge scrapper they had in the flooring department.
Got home and tried it out. I think it might have even worked a bit better. Got all the thick stuff off and them poured out a little more and scrubbed with a 3M stripping pad. Got it all off down to the factory paint. Went over the hole floor in front of the seat area with a wire cup wheel in my grinder. Looks pretty good for a 52 year old floor with a little rust...
What I needed to remove: That thick brown stuff...

In the middle of the process:
After the wire wheel:
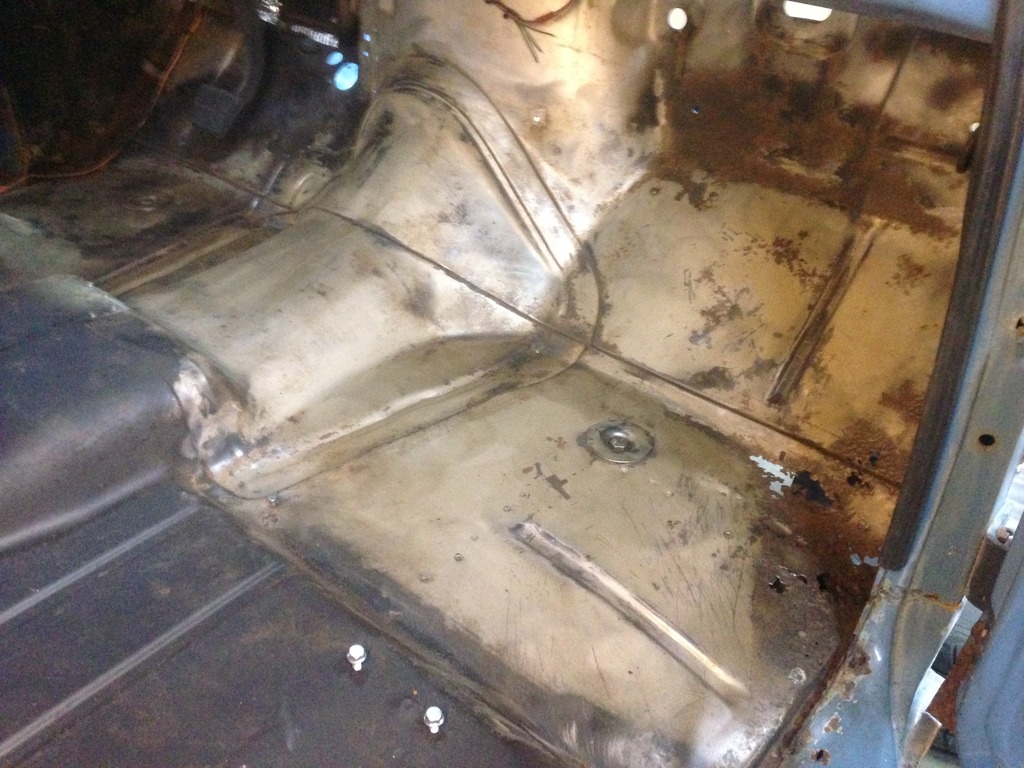
I wish I had not scrapped thru the OE paint in places, but I am happy to get that stuff off. I'm not gonna paint or coat the floor now, just don't have the time before LST. I will go back to it someday...
Got home and tried it out. I think it might have even worked a bit better. Got all the thick stuff off and them poured out a little more and scrubbed with a 3M stripping pad. Got it all off down to the factory paint. Went over the hole floor in front of the seat area with a wire cup wheel in my grinder. Looks pretty good for a 52 year old floor with a little rust...
What I needed to remove: That thick brown stuff...

In the middle of the process:

After the wire wheel:


I wish I had not scrapped thru the OE paint in places, but I am happy to get that stuff off. I'm not gonna paint or coat the floor now, just don't have the time before LST. I will go back to it someday...
Thread Starter
TECH Apprentice
Joined: Oct 2013
Posts: 319
Likes: 4
From: Longview, TX
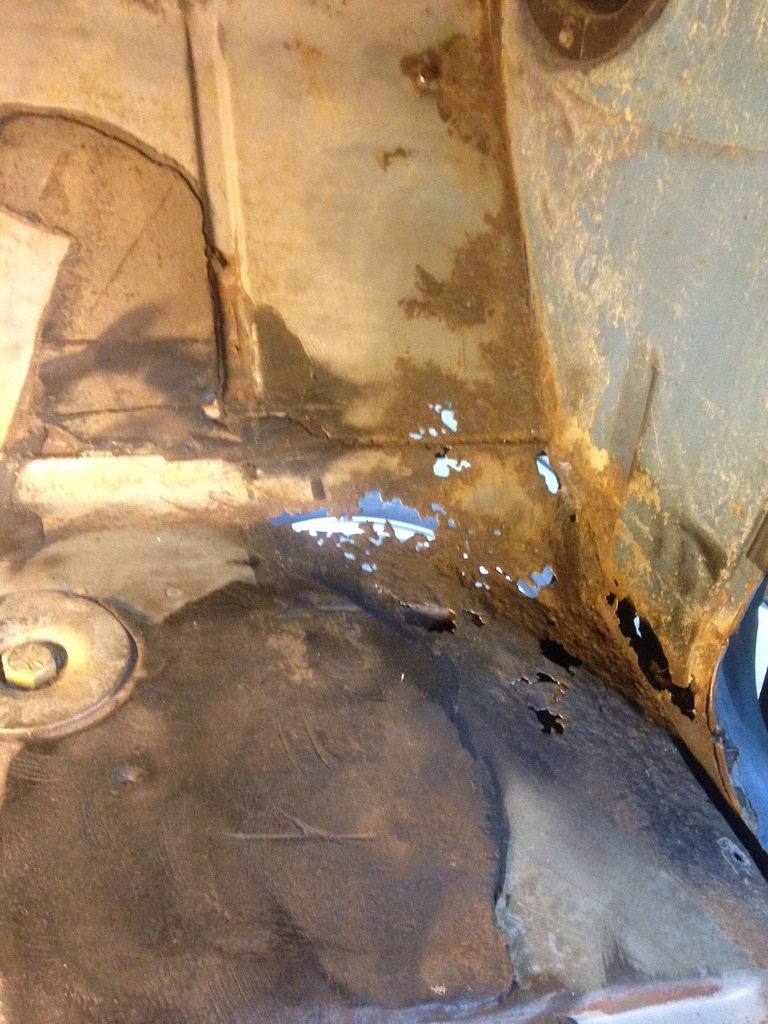
After getting the floor cleaned up, I needed to do some rust repair to the floor so I can drive it on the street without getting wet or cold from the holes in the floor...
So, since I don't have the time right now to do a proper patch and replace job, I thought of other ways to take care of the problem. Here is my solution. Korbin has challenged me to not be so detailed and do it the full blown expensive way (which I would normally do because of my OCD ways) but instead do it more the way of Matt's Sloppy Mechanics style...
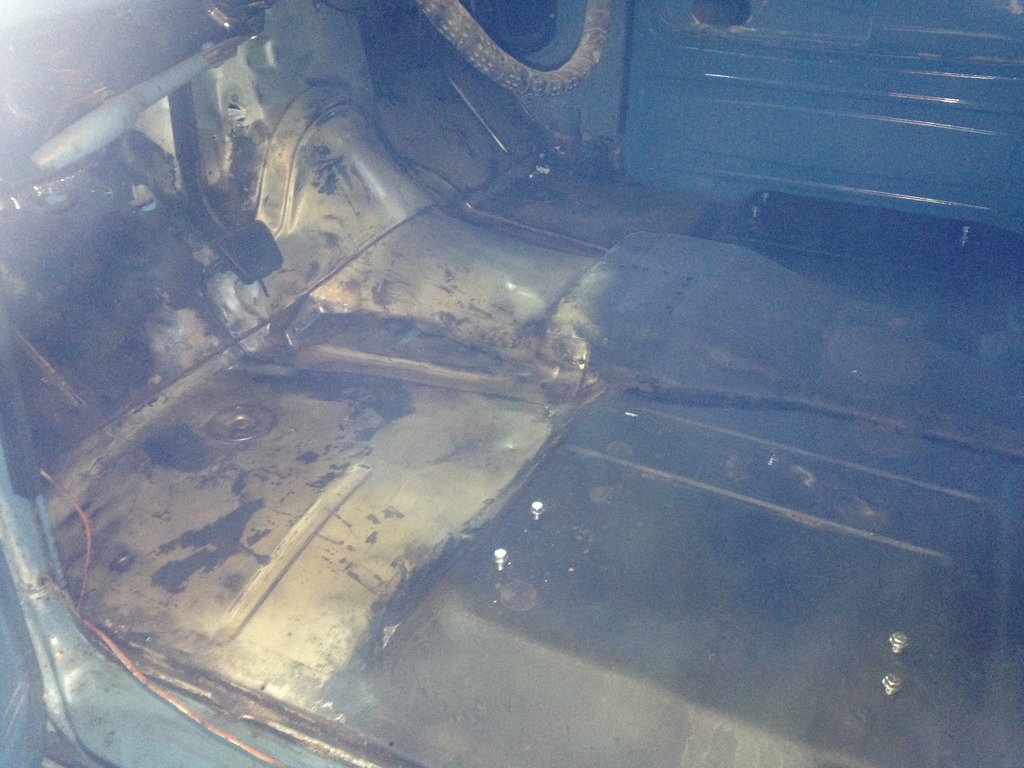
So, here it is, Sloppy Style Rust Repair:
Before:
After:

It my be a bit getto, but I think it will work for now...
So, since I don't have the time right now to do a proper patch and replace job, I thought of other ways to take care of the problem. Here is my solution. Korbin has challenged me to not be so detailed and do it the full blown expensive way (which I would normally do because of my OCD ways) but instead do it more the way of Matt's Sloppy Mechanics style...
So, here it is, Sloppy Style Rust Repair:
Before:

After:

It my be a bit getto, but I think it will work for now...

TECH Regular


Joined: Mar 2015
Posts: 485
Likes: 123
From: Tyler, TX
Spent the weekend gathering pieces for a small bead blaster that is now in operation. But don't let shop upgrades slow your project down like mine because you have a very tight timeline  GO KARL GO.....

GO KARL GO..... Thread Starter
TECH Apprentice
Joined: Oct 2013
Posts: 319
Likes: 4
From: Longview, TX
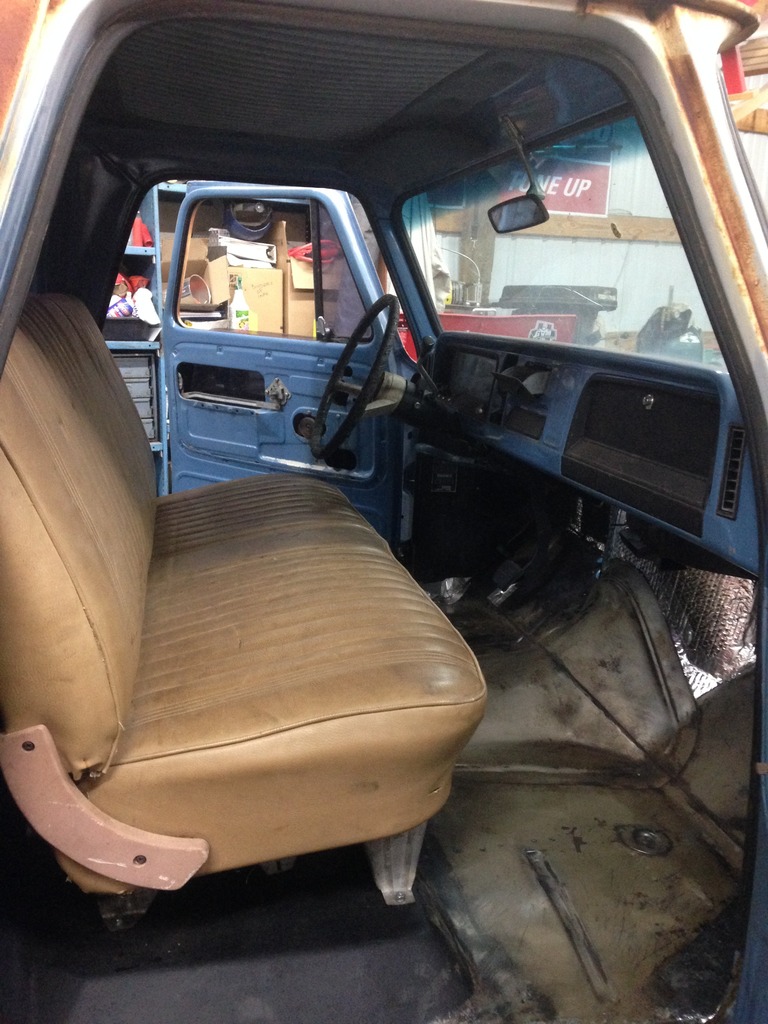
I think I made good progress this weekend. I got the last brake line made up and installed, got the M/C painted, bench bled, and mounted to the firewall and brake pedal. System is now ready to bleed.

Also got the heater box mounted to the firewall, the plug for the rear light harness install, and the gas pedal linkage at the firewall install.
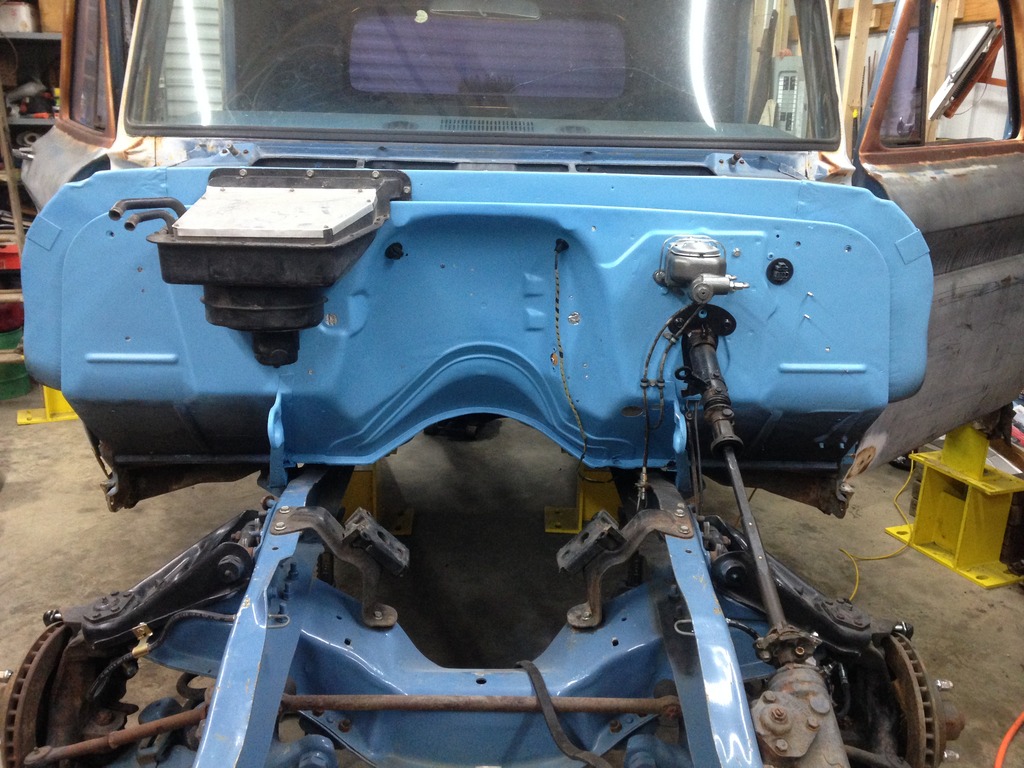
Must have installed the gas pedal linkage after I took that picture...sorry about that...
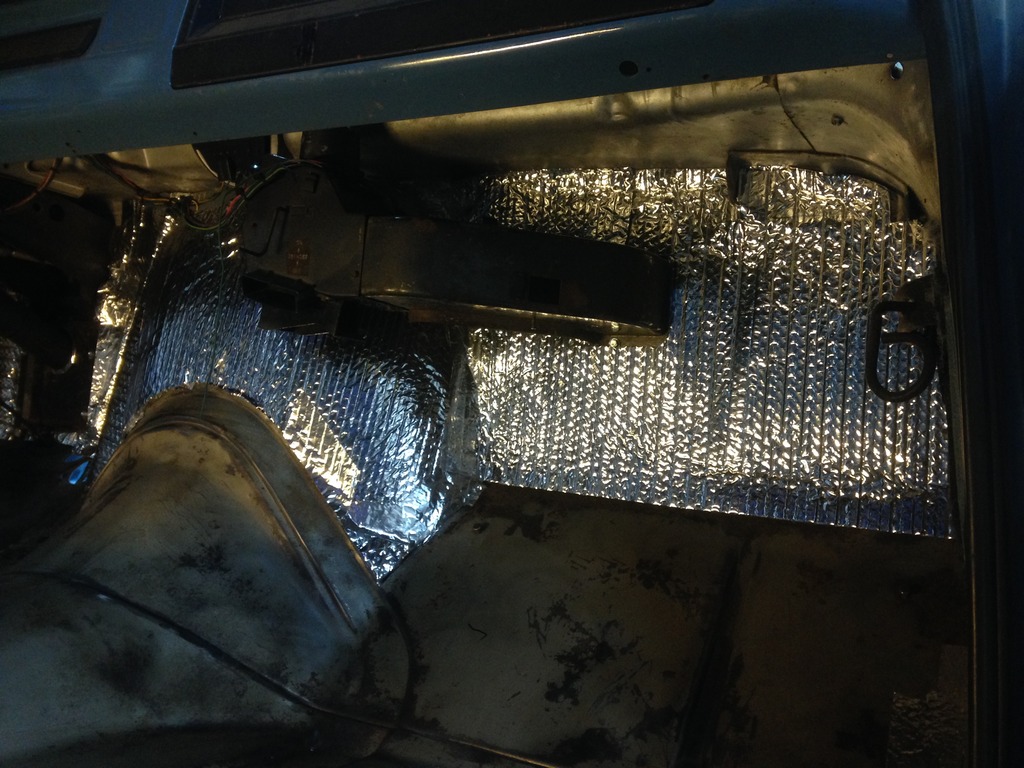
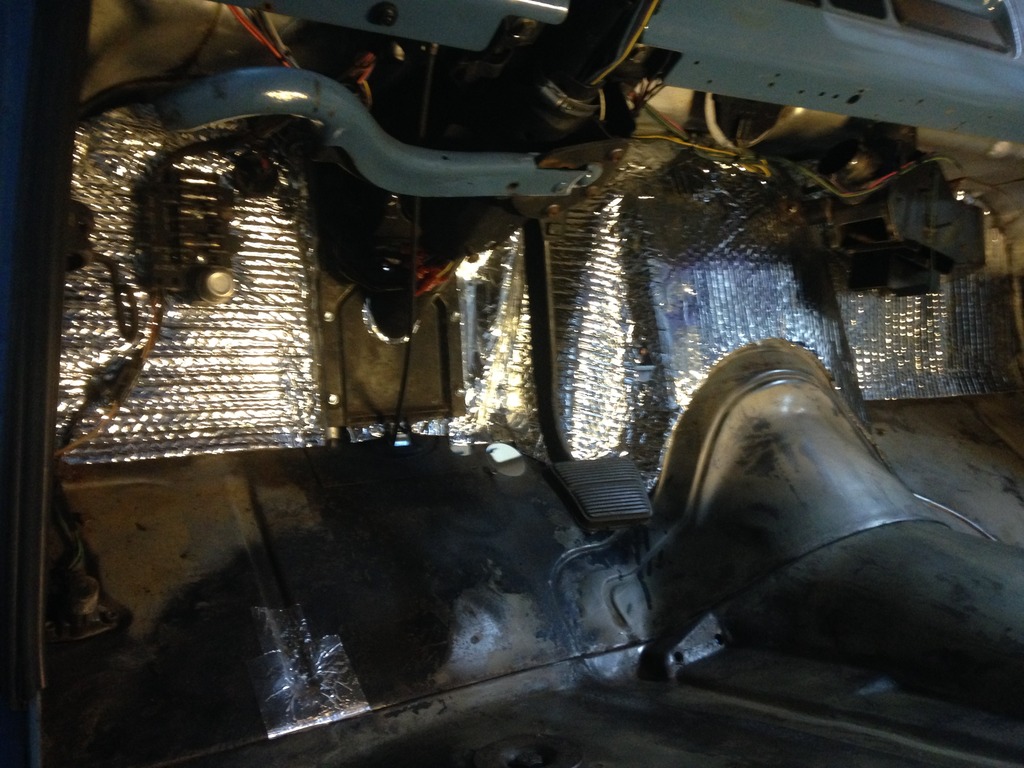
Added a little reflective insulation to the inside of the firewall. Just need to finish up the wiring for the heater and the hoses to the dash vents.
Finished the day by putting the seat back in the cab. Looks like I need to lower it a bit, but will live with it for now. I can still squeeze my fat a$$ between the seat and steering wheel.


Also got the heater box mounted to the firewall, the plug for the rear light harness install, and the gas pedal linkage at the firewall install.

Must have installed the gas pedal linkage after I took that picture...sorry about that...
Added a little reflective insulation to the inside of the firewall. Just need to finish up the wiring for the heater and the hoses to the dash vents.


Finished the day by putting the seat back in the cab. Looks like I need to lower it a bit, but will live with it for now. I can still squeeze my fat a$$ between the seat and steering wheel.

Thread Starter
TECH Apprentice
Joined: Oct 2013
Posts: 319
Likes: 4
From: Longview, TX
Well another week has past and still no engine for this project. I continued to work on parts of the truck that don't require the engine and trans to be available.
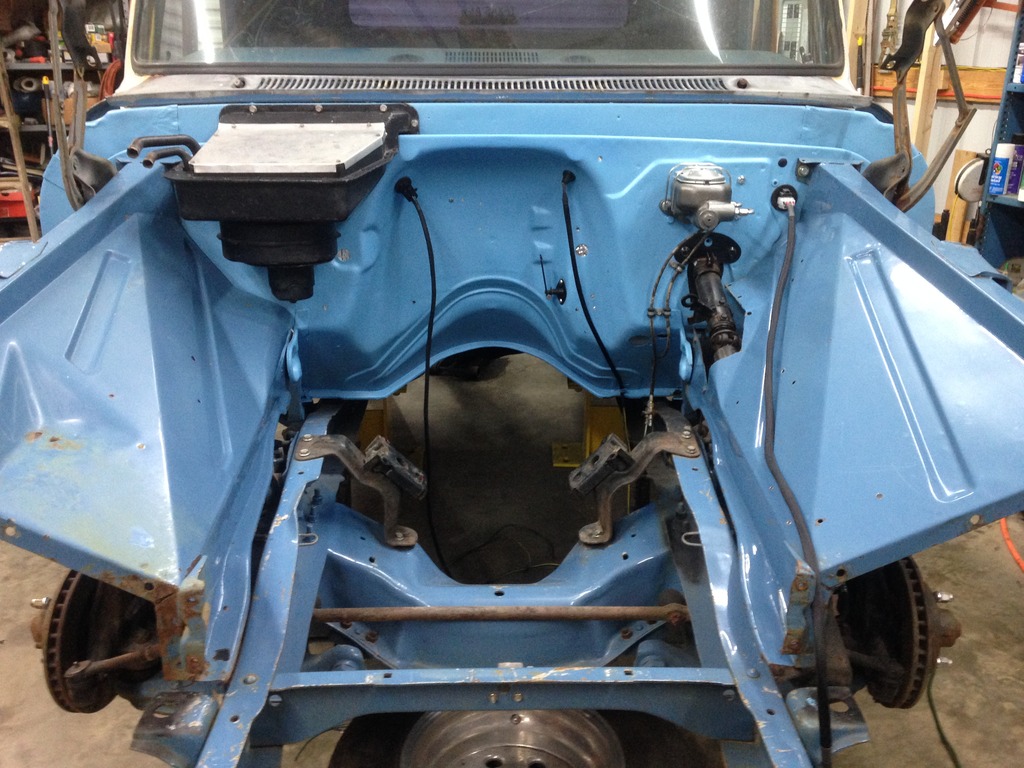
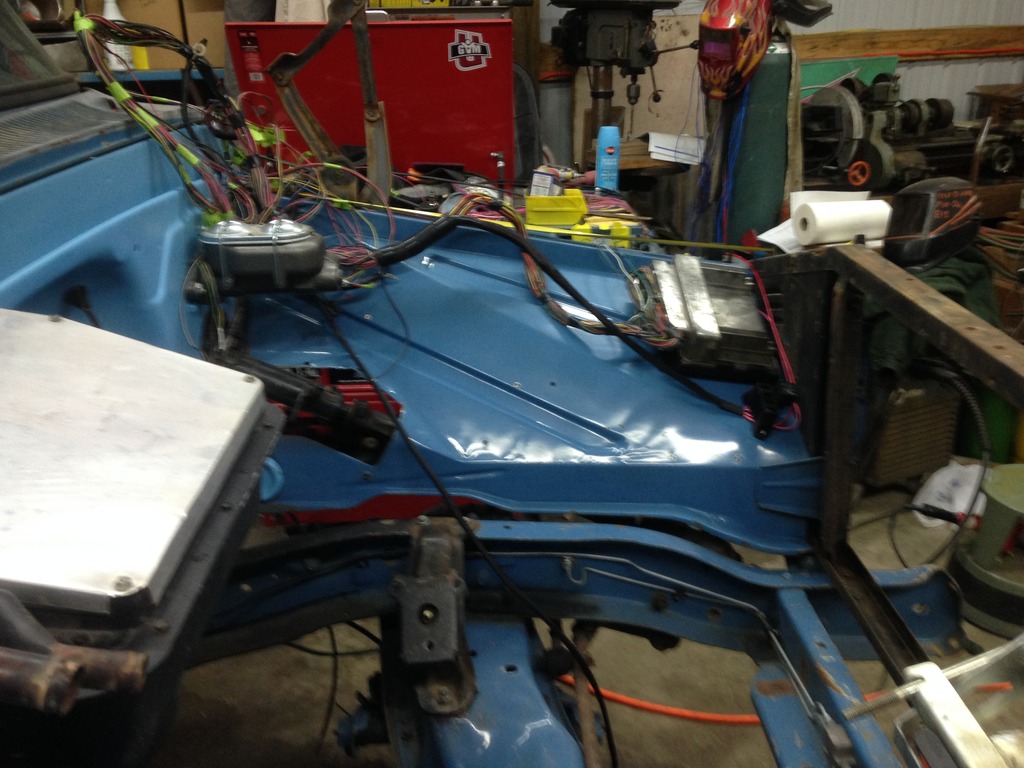
I worked on getting the front clip mocked up and started the front wiring and PCM placement. I used some Riv-Nuts to mount the PCM and to anchor the wire harness to the inner fenderwells. I was able to borrow a pneumatic riv-nut tool from work, and boy is that that way to put them in! Here are some pics of what has been done. The last one is how I walked out of the shop last night.
This week I will get the brakes bleed, the taillights mounted, the tailgate mounted, mount the fuel tank and get the wheels mounted up. If I do one item a night that will get me to next weekend...
I worked on getting the front clip mocked up and started the front wiring and PCM placement. I used some Riv-Nuts to mount the PCM and to anchor the wire harness to the inner fenderwells. I was able to borrow a pneumatic riv-nut tool from work, and boy is that that way to put them in! Here are some pics of what has been done. The last one is how I walked out of the shop last night.


This week I will get the brakes bleed, the taillights mounted, the tailgate mounted, mount the fuel tank and get the wheels mounted up. If I do one item a night that will get me to next weekend...
LS1 Tech Stories
The Best V8 Stories One Small Block at Time

Gas Monkey Built a 6-Wheel Ferrari Testarossa With a Corvette LT4 Engine
Verdad Gallardo
7 Most Reliable High-Performance Engines GM Has Ever Built
Verdad Gallardo
Amazing '71 Camaro Restomod Is Modern Muscle Car Under the Skin
Verdad Gallardo
6 Common C5 Corvette Failures and What's Involved In Repairing Them
Pouria Savadkouei
Retro Modern Bandit Pontiac Trans AM Comes With Burt Reynolds' Autograph
Verdad Gallardo
Top 10 Greatest Cadillac V Series Performance Models Ever, Ranked
Pouria Savadkouei
Top 10 Most Powerful Chevy Trucks Ever Made!

Hennessey's New Supercharged Silverado ZR2 Has 700 HP
Verdad Gallardo
Coachbuilt N2A Anteros Is an LS2-Powered C6 Corvette In Italian Clothes
Verdad Gallardo Thread Starter
TECH Apprentice
Joined: Oct 2013
Posts: 319
Likes: 4
From: Longview, TX
Well last night was a no go on shop time. By the time I finally got home to stay for awhile it was after 10pm. I'm old and I need my sleep.
I did get a few parts ordered during my lunch break. I was going to use a battery mount I had from an old build, but I did not like the way it looked, so I ordered stock replacement parts from Classic Parts. The aluminum radiator I had at one time, was MIA. After searching the WHOLE shop, Korbin and I believe that I sold it at the Pate Swap Meet last year. Like I said I'm old...
I got on ebay and found one for a 60-62 C10 that will work and mount the way I want. It was $179 + free shipping or Best Offer. I made an offer that was accepted and it should be on its way here. Here is the one I bought:
3 ROW ALL ALUMINUM RADIATOR
Hope it works out the way it does in my head...


Thread Starter
TECH Apprentice
Joined: Oct 2013
Posts: 319
Likes: 4
From: Longview, TX
Thread Starter
TECH Apprentice
Joined: Oct 2013
Posts: 319
Likes: 4
From: Longview, TX
Thanks for the offer Keith, but this weekend is going to be shot due to other events that I have been committed to. I hope to sneak in some time on Saturday, but its not looking good at this time.
Thread Starter
TECH Apprentice
Joined: Oct 2013
Posts: 319
Likes: 4
From: Longview, TX
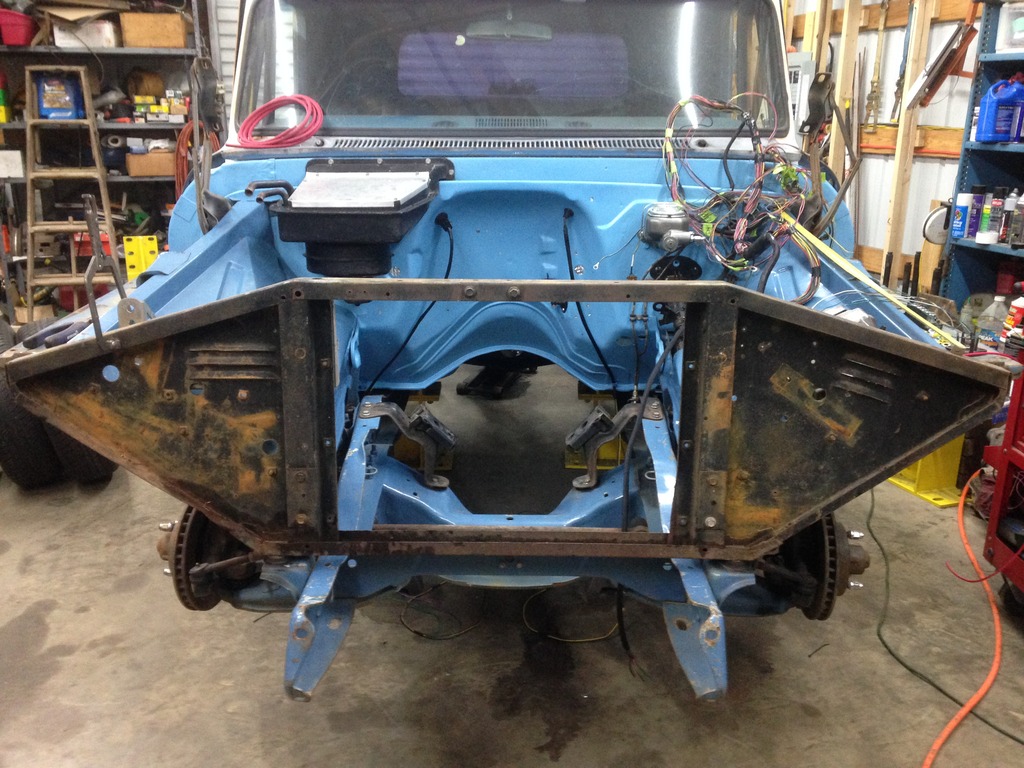
My plans for this week went straight out the window on Monday night. I finally got out to the shop at about 9 something last night. Since some of my wiring parts I have been waiting on came in yesterday, I worked on the front main harness.
Here is what I got done:
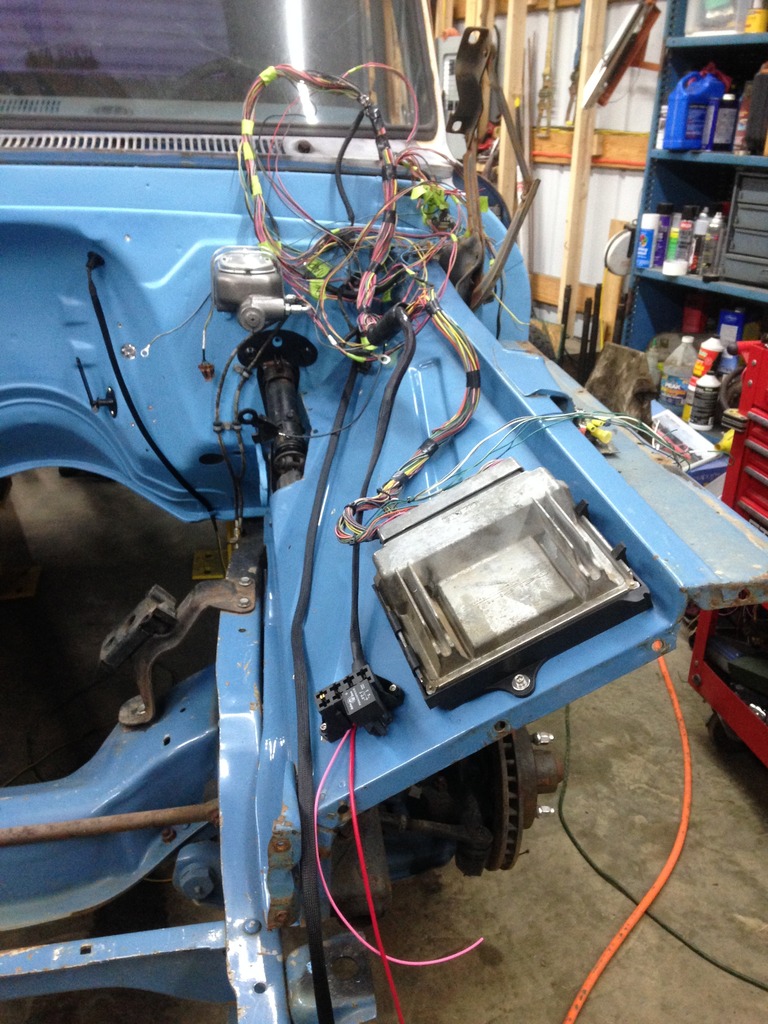
Mounted a power distribution block to the core support. This will serve as a main feed of Battery Power.
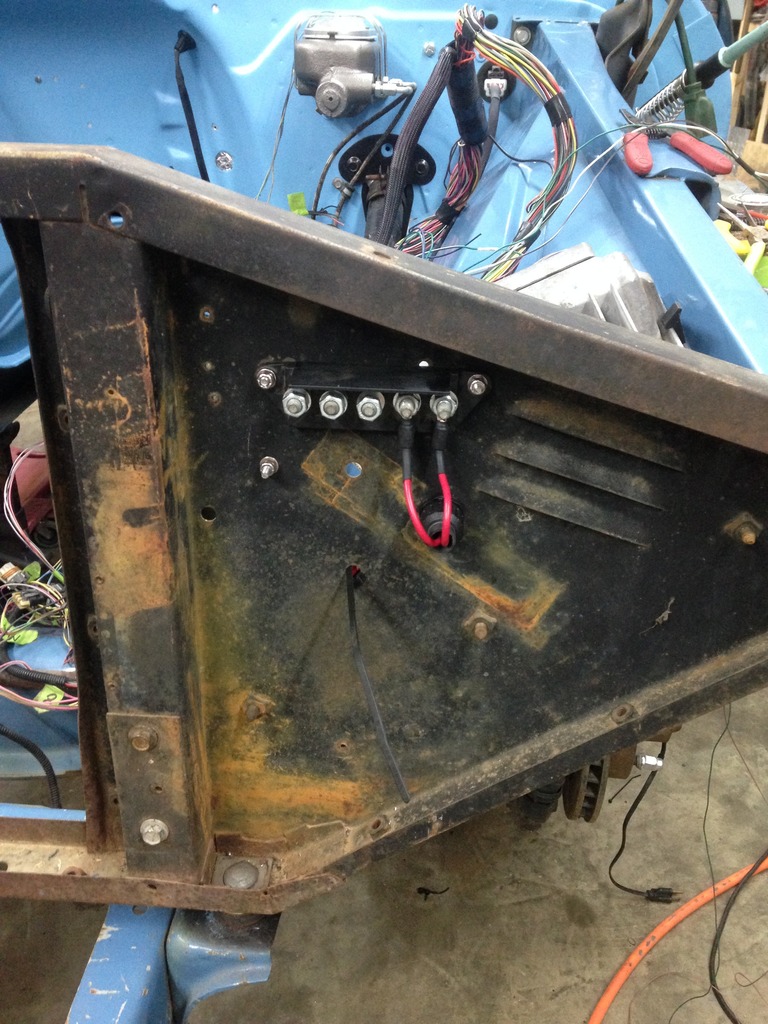
When the truck is all together, it is covered with a panel, it is easily removed for access to the block.
On the inside of the core support I mounted a 4 place terminal block. The four wires feeding it are: Pink - 12V Key On; Black - Horn Signal from Column; Tan - Low Beam Headlights from Switch; Green - High Beam Headlights from Switch.
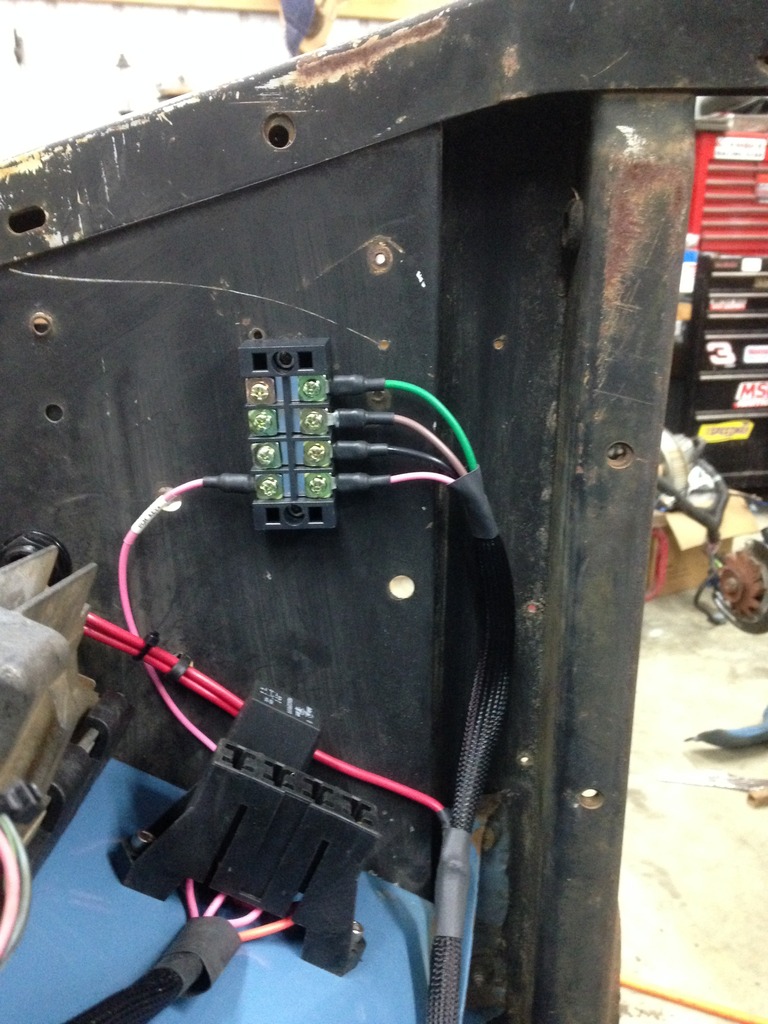
From that block, I will run each circuit as needed to a relay for the lights and horn, the 12V Key power turns on the relay below that turns on the PCM.
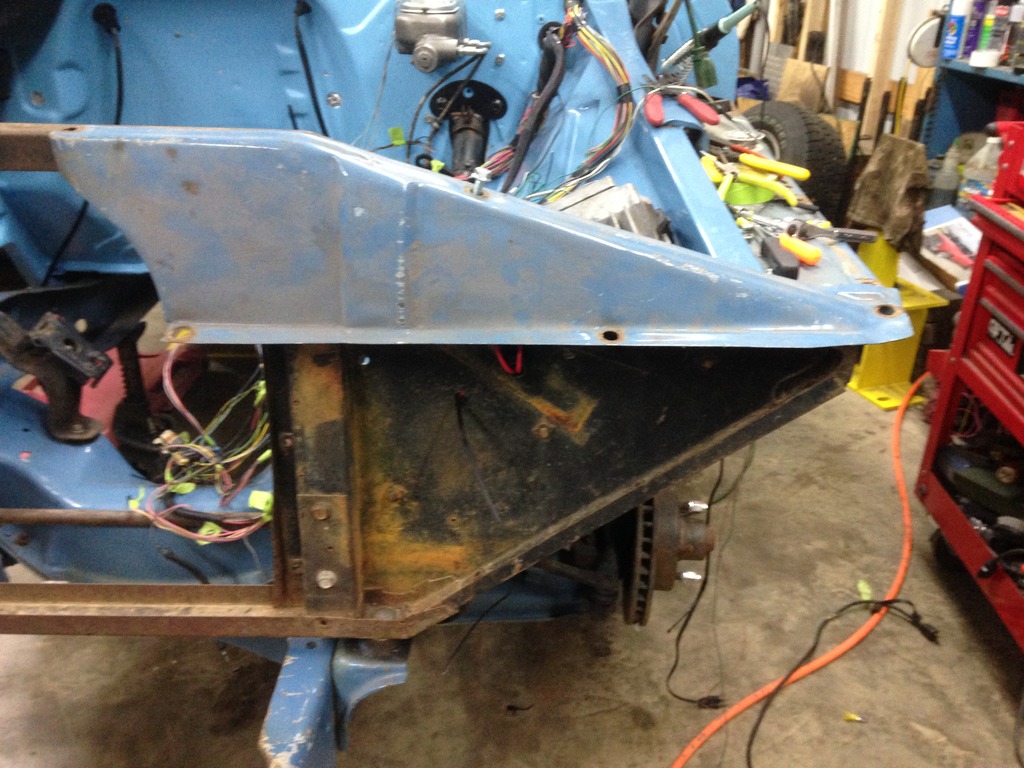
Another view of that area:
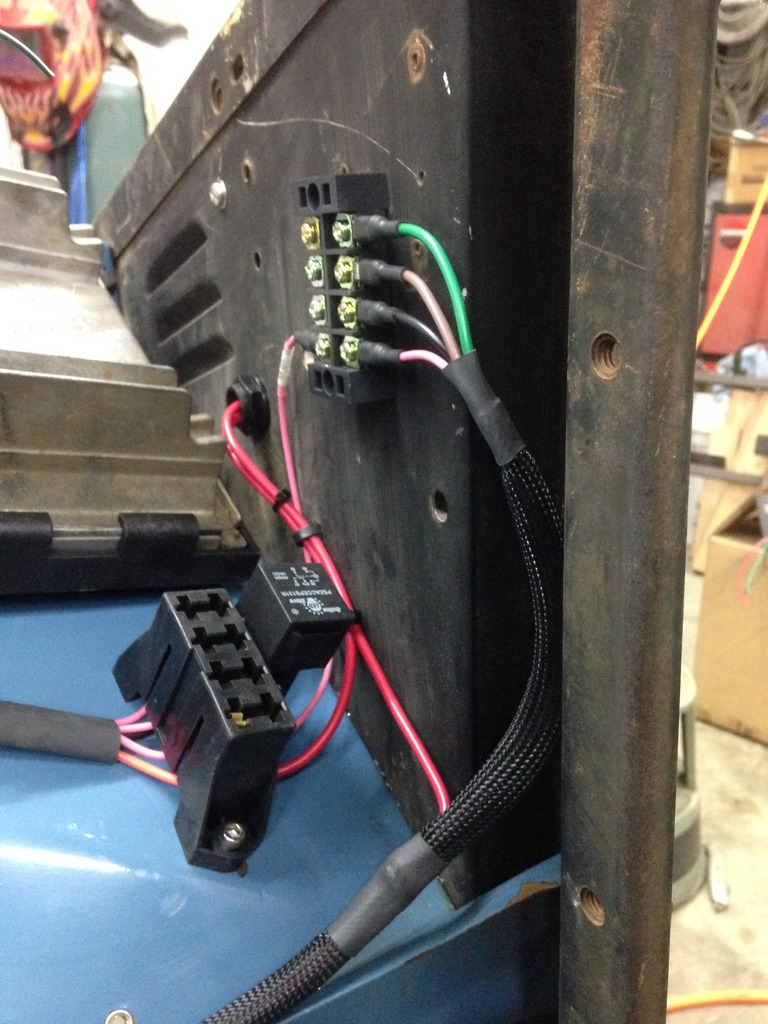
In that last picture, you can see that I branched out the 12ga Red wire that provides Battery Power to the trucks fuse block. You can see the pick wire connected to the terminal strip that feeds the fuse/relay block below it.
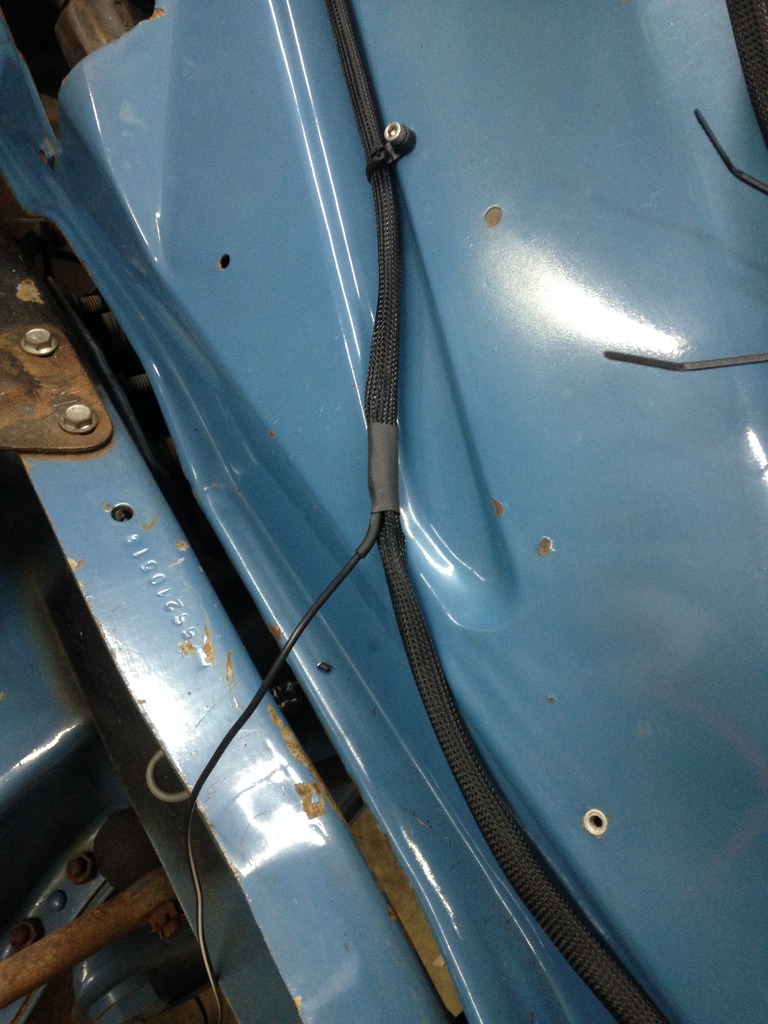
Here you can see that I branched out the GEN light feed wire, this will go to the alternator, you can also see how I am attaching the harness to the inner fender.
Not sure what I will work on tonight, I made a list to keep track of what needs to be done. I guess I will pick something off of that to complete and get marked off...
Here is what I got done:
Mounted a power distribution block to the core support. This will serve as a main feed of Battery Power.

When the truck is all together, it is covered with a panel, it is easily removed for access to the block.

On the inside of the core support I mounted a 4 place terminal block. The four wires feeding it are: Pink - 12V Key On; Black - Horn Signal from Column; Tan - Low Beam Headlights from Switch; Green - High Beam Headlights from Switch.

From that block, I will run each circuit as needed to a relay for the lights and horn, the 12V Key power turns on the relay below that turns on the PCM.
Another view of that area:

In that last picture, you can see that I branched out the 12ga Red wire that provides Battery Power to the trucks fuse block. You can see the pick wire connected to the terminal strip that feeds the fuse/relay block below it.
Here you can see that I branched out the GEN light feed wire, this will go to the alternator, you can also see how I am attaching the harness to the inner fender.

Not sure what I will work on tonight, I made a list to keep track of what needs to be done. I guess I will pick something off of that to complete and get marked off...
Thread Starter
TECH Apprentice
Joined: Oct 2013
Posts: 319
Likes: 4
From: Longview, TX
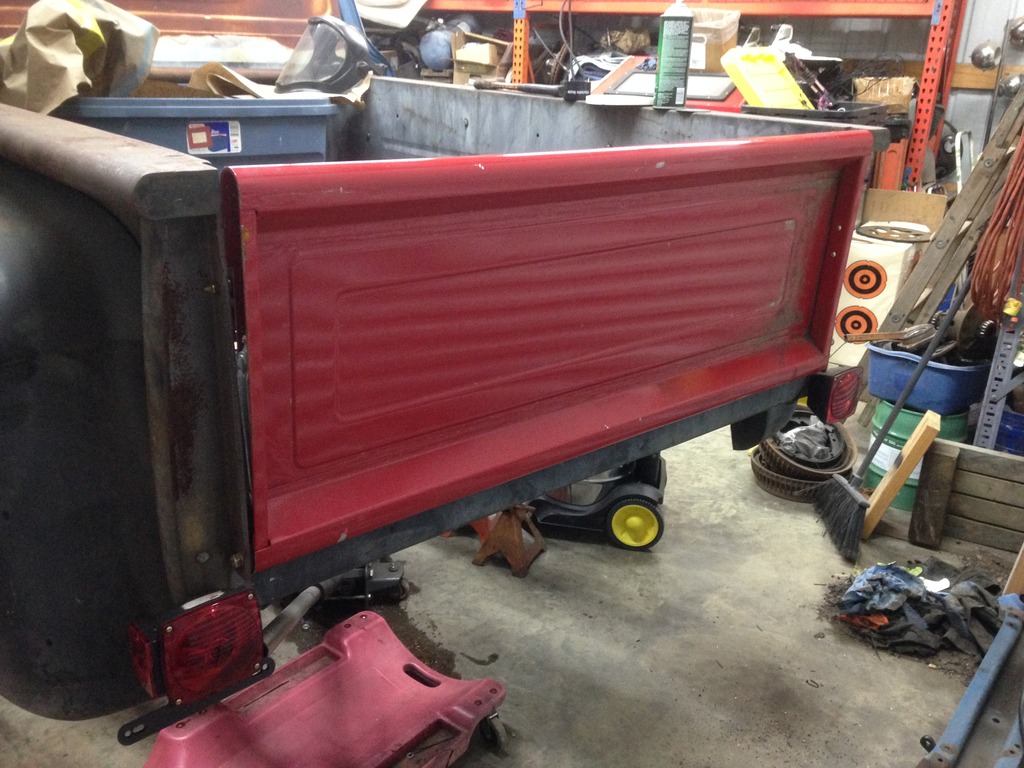
Got two items crossed off my list. I hooked up some taillights along with a license plate bracket. I don't like these lights, but do to time and money and the fact that I had these brand new for a trailer, I used them for now.
I also installed a tailgate that was reclaimed from Sunburn after its unfortunate end. Now part of that project will live on for now on my truck. I will sport the red paint for now since exterior cosmetics are being avoided for LST. The tailgate has link supports from Mar-K that support it like a fleetside tailgate in the down position. I just need to come up with a better solution for keeping it shut while in the up position.
I also working on the PCM wiring that goes into the cab. I extended the Tach, MIL, and Serial Data wires and put them in loom to run into the cab. I started on the wires for the Fuel Pump Relay Control and the Fan 1 & 2 wires, but did not have enough wire to finish those. I will get what I need today and finish up that section tonight.
I also installed a tailgate that was reclaimed from Sunburn after its unfortunate end. Now part of that project will live on for now on my truck. I will sport the red paint for now since exterior cosmetics are being avoided for LST. The tailgate has link supports from Mar-K that support it like a fleetside tailgate in the down position. I just need to come up with a better solution for keeping it shut while in the up position.

I also working on the PCM wiring that goes into the cab. I extended the Tach, MIL, and Serial Data wires and put them in loom to run into the cab. I started on the wires for the Fuel Pump Relay Control and the Fan 1 & 2 wires, but did not have enough wire to finish those. I will get what I need today and finish up that section tonight.
TECH Regular
Joined: Mar 2015
Posts: 485
Likes: 123
From: Tyler, TX
Anxiously waiting to hear about the weekend progress and see some pics....only 12 days left!
Curious about the black sleeve I saw on some of your wiring pics. It looks nice where did you get it?
Curious about the black sleeve I saw on some of your wiring pics. It looks nice where did you get it?
Thread Starter
TECH Apprentice
Joined: Oct 2013
Posts: 319
Likes: 4
From: Longview, TX
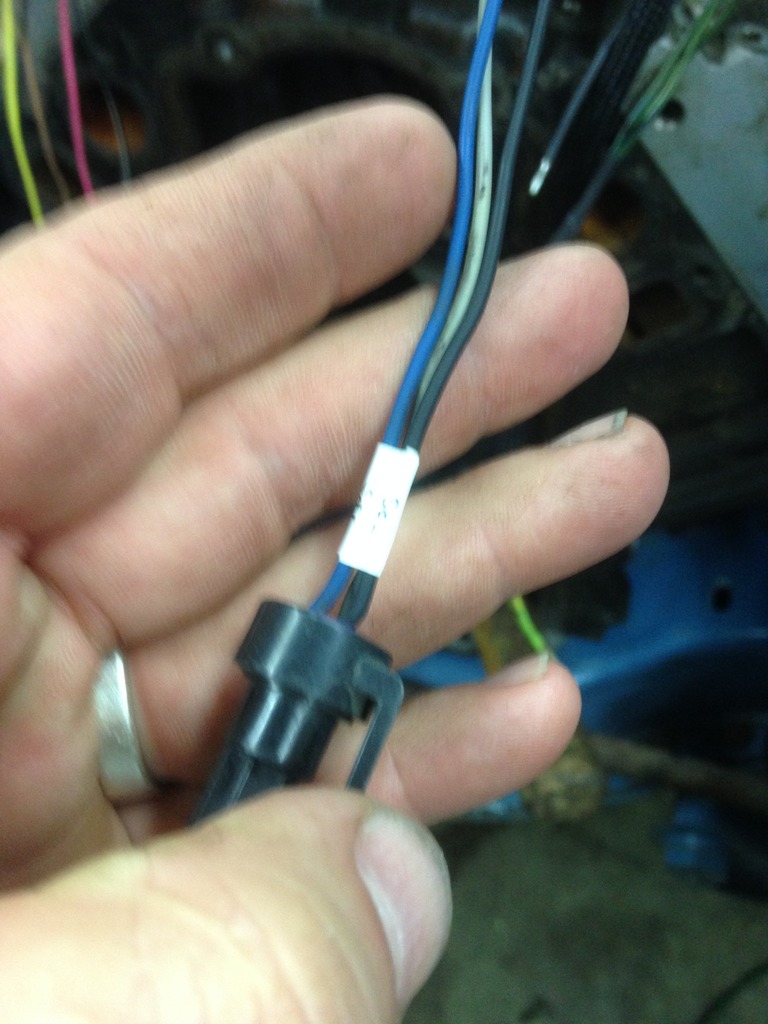
Weekend progress was pretty good even though my time was limited more than I had hoped. Korbin brought a block, oil pan, and two heads over. That gave me something to work on. So, Owen and I mated it up to the transmission and worked on getting it mocked up. Got it in and the mounts all tacked up in a position that I like. after getting that in, I added the heads, intake and headers. Crap, the driver's header hits the frame stand...
So, I move on to the wire routing and connector repairs. Got the wires where I like them, so now I need to splice in the injector harnesses that I made up since this OEM harness was missing those. Its all laid out how I want it, but I don't have enough of the loom that I want to use. I will pick up about 3 feet of it today for the injector harnesses so that maybe I can finish those up today. I think that for time constraints, I will leave the rest out of loom for now to get to LST.
Here are pics from this weekend. Mostly after I got all the work done, no in progress shots..
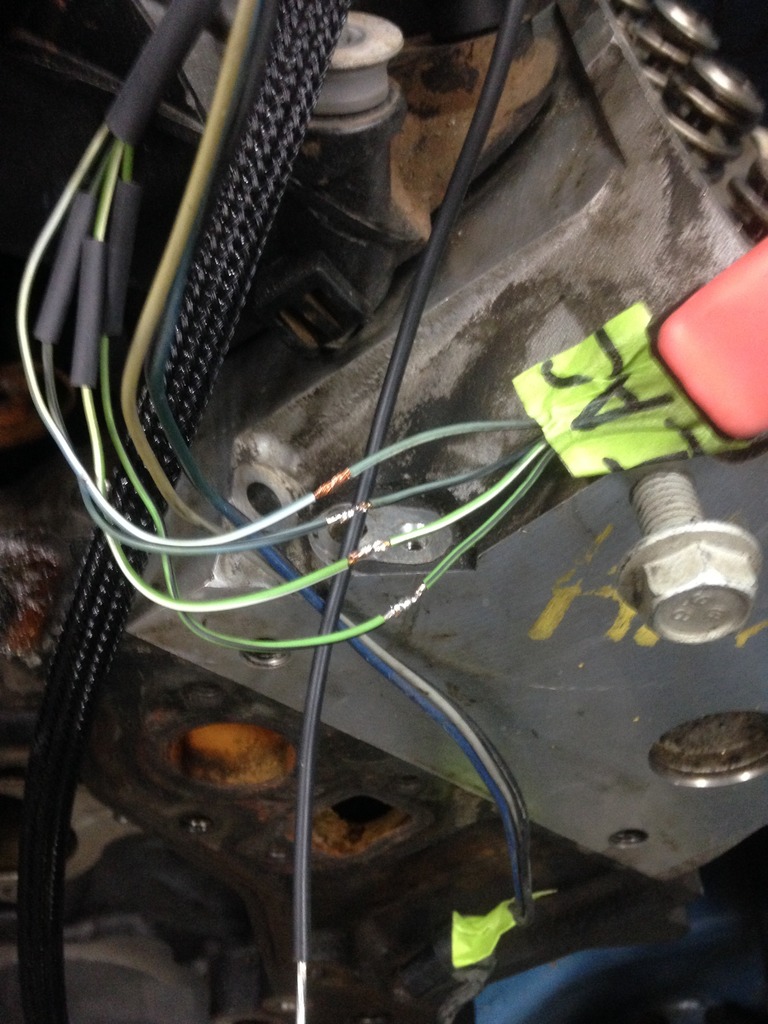
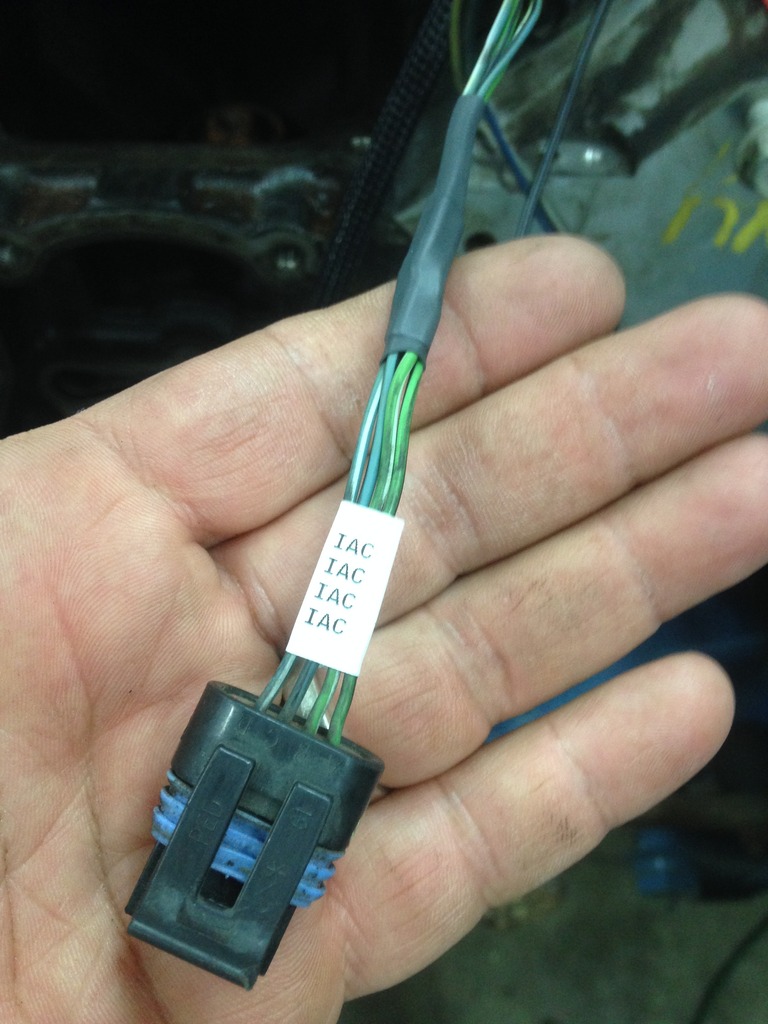
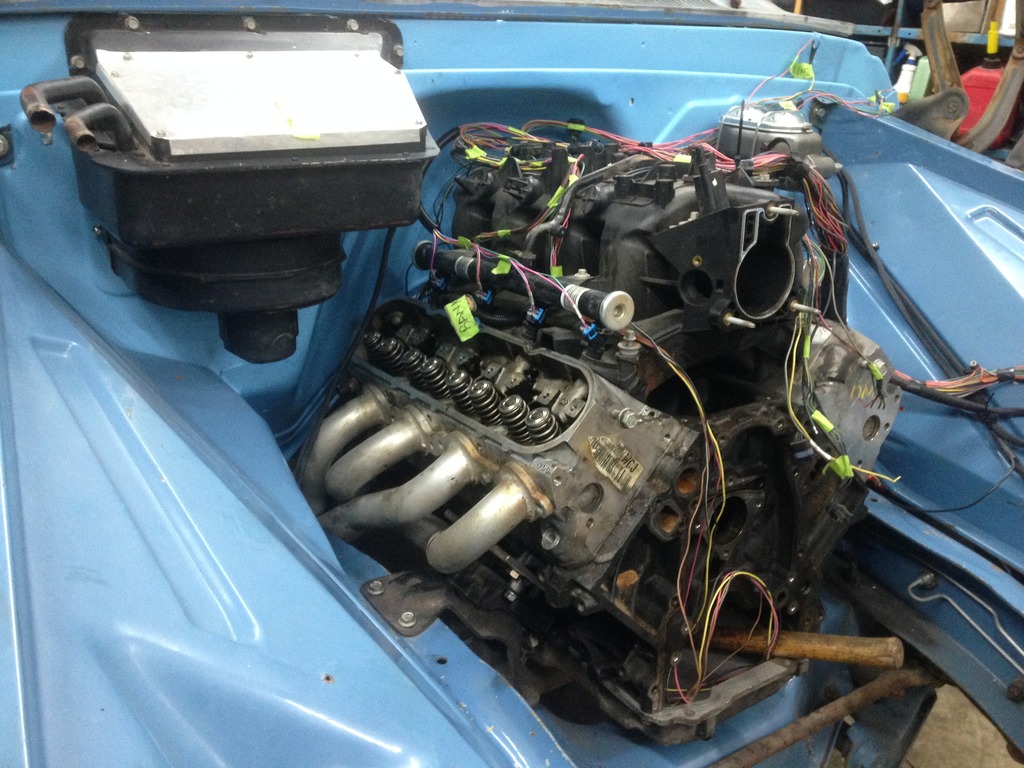
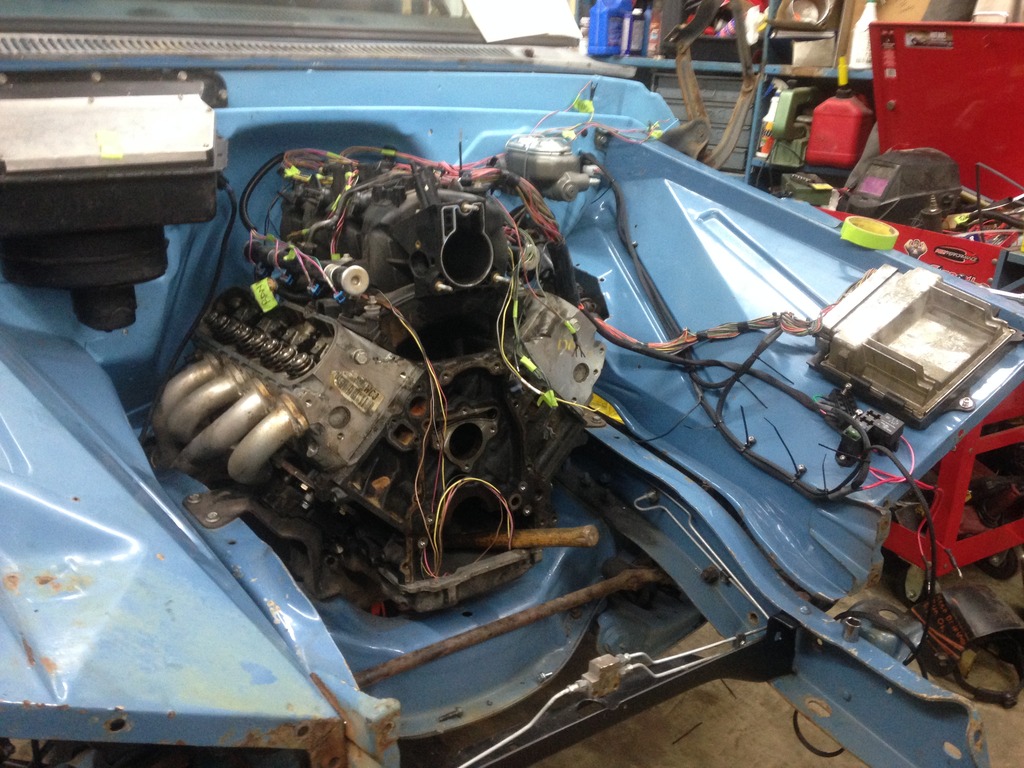
While I worked on the wiring, Owen wire wheel the core support and got a coat of satin black paint on it. Turned out good for what he started with. I really should replace it, its kinda beat up, but it works for now.
Here is a link to the loom I am using on this. The first on is a expandable sleeve that is not split. I use this one on the wires that I have to terminate at least one end of the wires. I can slide it over before terminating and looks better in my opinion. The second on is the same look, but has a split and an overlap that allows it the be put on bundles of wires that already exist.
It come in many sizes, so far for the first type, I have used 3/8" and 3/4". For the split stuff, I will need a bit of 1-1/4", 3/4", 1/2", and 3/8 or 1/4" stuff. It gets a bit expensive when you have to buy 10' and only need 3' of it...Amazon seems to have the best pricing if you have a Prime account.
So, I move on to the wire routing and connector repairs. Got the wires where I like them, so now I need to splice in the injector harnesses that I made up since this OEM harness was missing those. Its all laid out how I want it, but I don't have enough of the loom that I want to use. I will pick up about 3 feet of it today for the injector harnesses so that maybe I can finish those up today. I think that for time constraints, I will leave the rest out of loom for now to get to LST.
Here are pics from this weekend. Mostly after I got all the work done, no in progress shots..


While I worked on the wiring, Owen wire wheel the core support and got a coat of satin black paint on it. Turned out good for what he started with. I really should replace it, its kinda beat up, but it works for now.
Here is a link to the loom I am using on this. The first on is a expandable sleeve that is not split. I use this one on the wires that I have to terminate at least one end of the wires. I can slide it over before terminating and looks better in my opinion. The second on is the same look, but has a split and an overlap that allows it the be put on bundles of wires that already exist.
It come in many sizes, so far for the first type, I have used 3/8" and 3/4". For the split stuff, I will need a bit of 1-1/4", 3/4", 1/2", and 3/8 or 1/4" stuff. It gets a bit expensive when you have to buy 10' and only need 3' of it...Amazon seems to have the best pricing if you have a Prime account.

TECH Senior Member


Joined: Jul 2009
Posts: 8,034
Likes: 663