

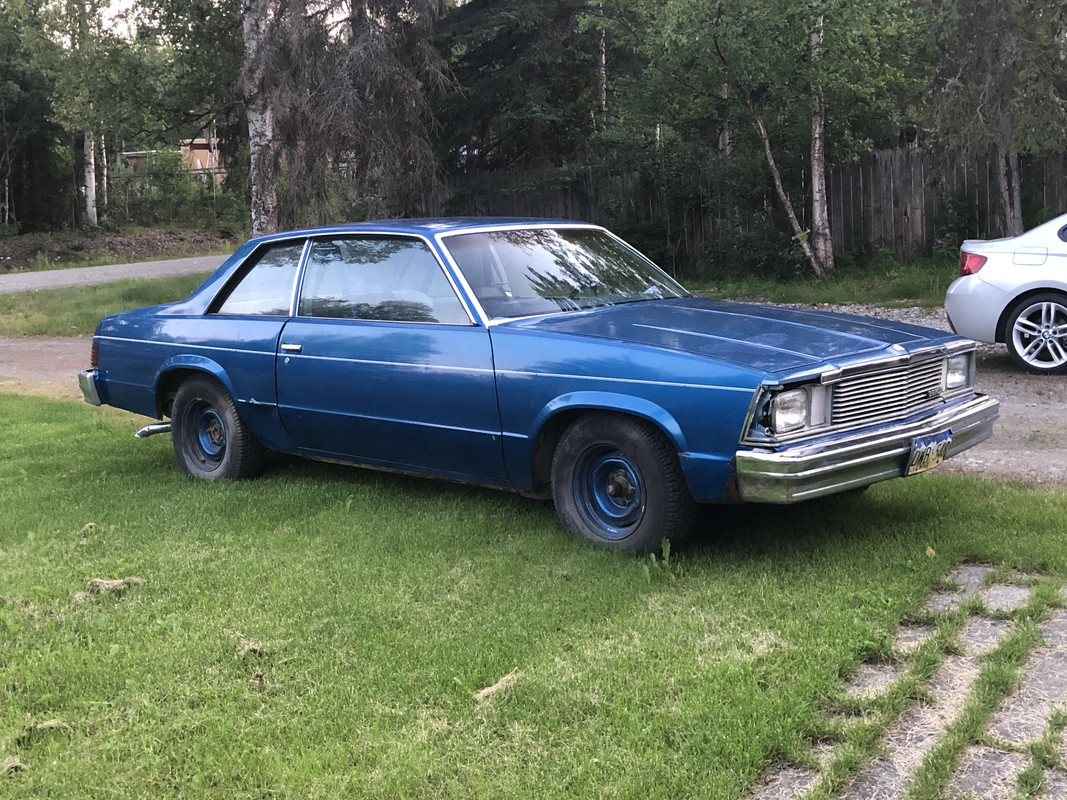
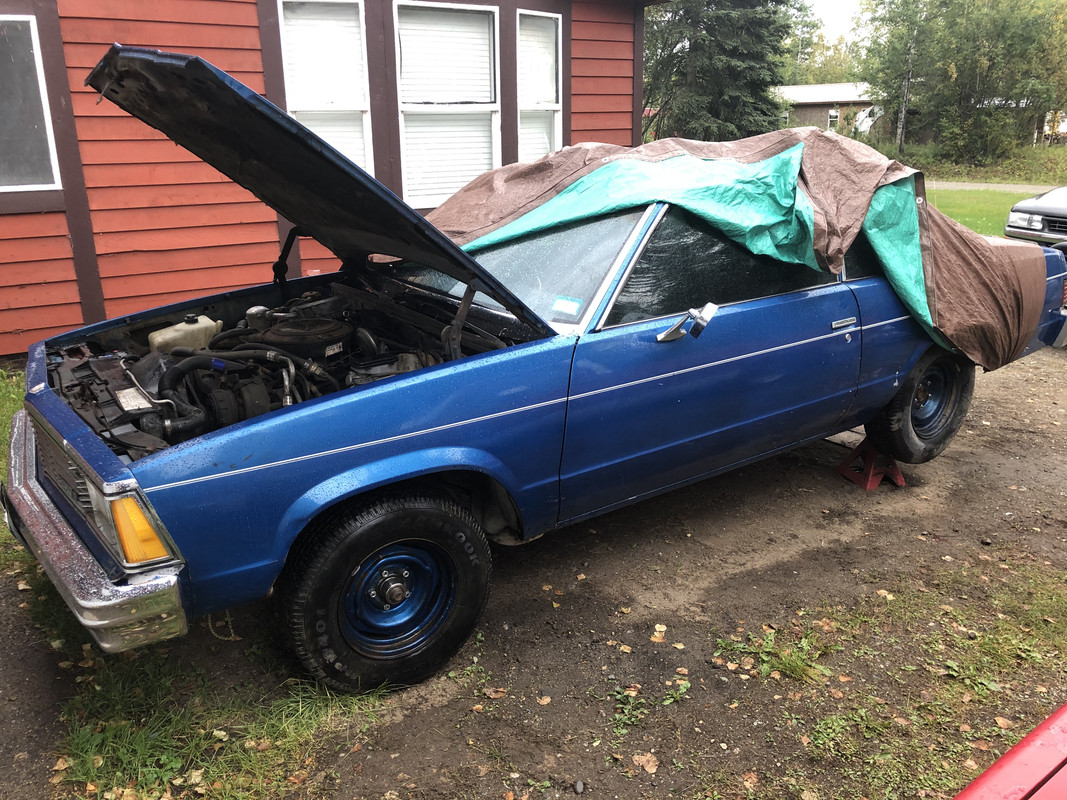
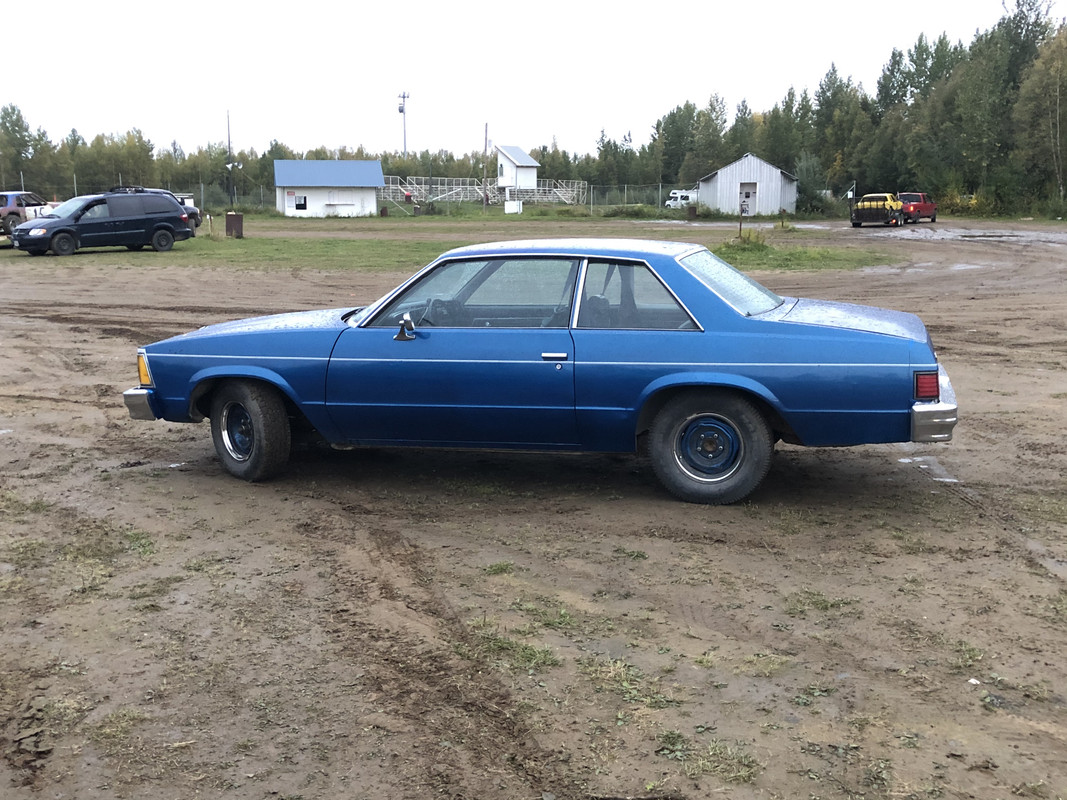
1981 Chevy Malibu - future LS swap!


Thread Starter
TECH Regular


Joined: Oct 2011
Posts: 453
Likes: 178
From: Alaska
Thank you guys!
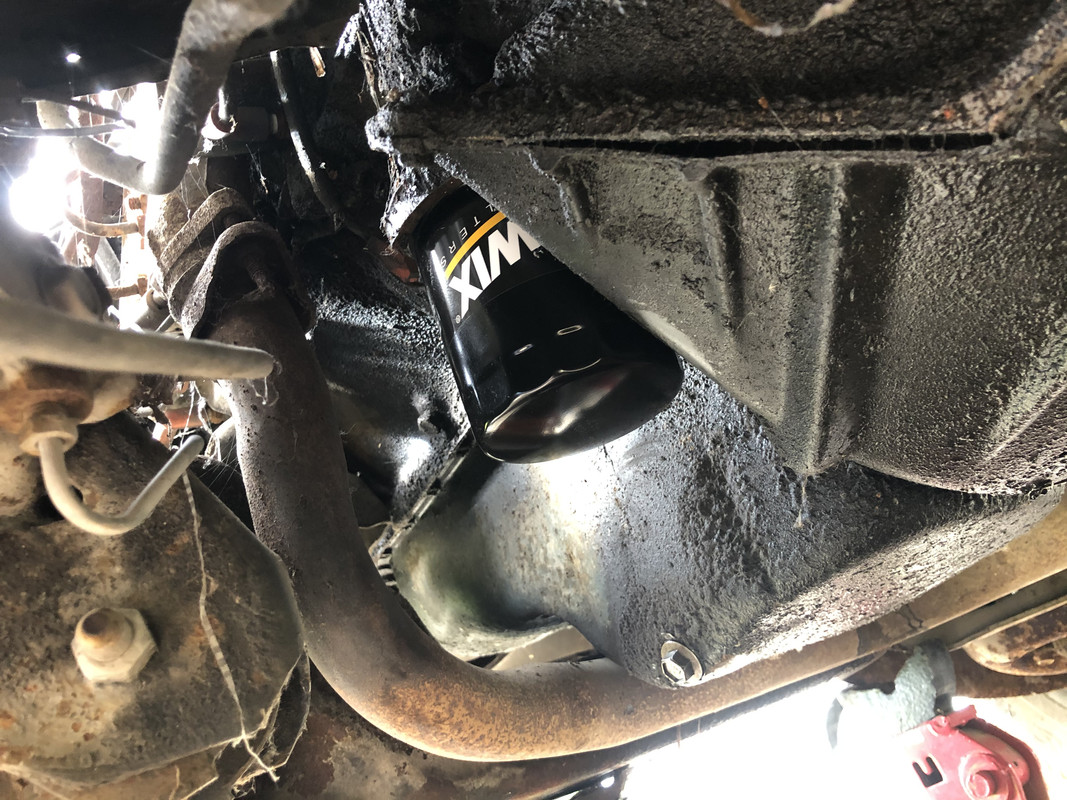
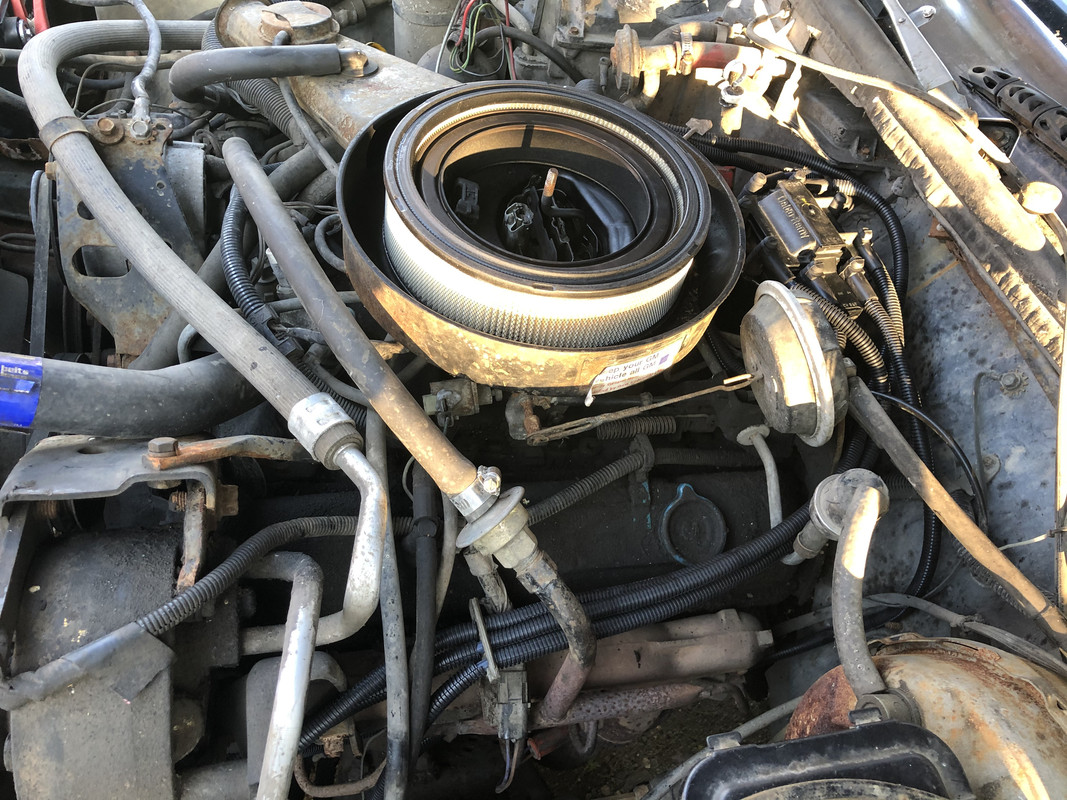
Started off this weekend with an oil change on the old girl. The old oil was used but looked good with no metallic deposits, so that's definitely a good sign!
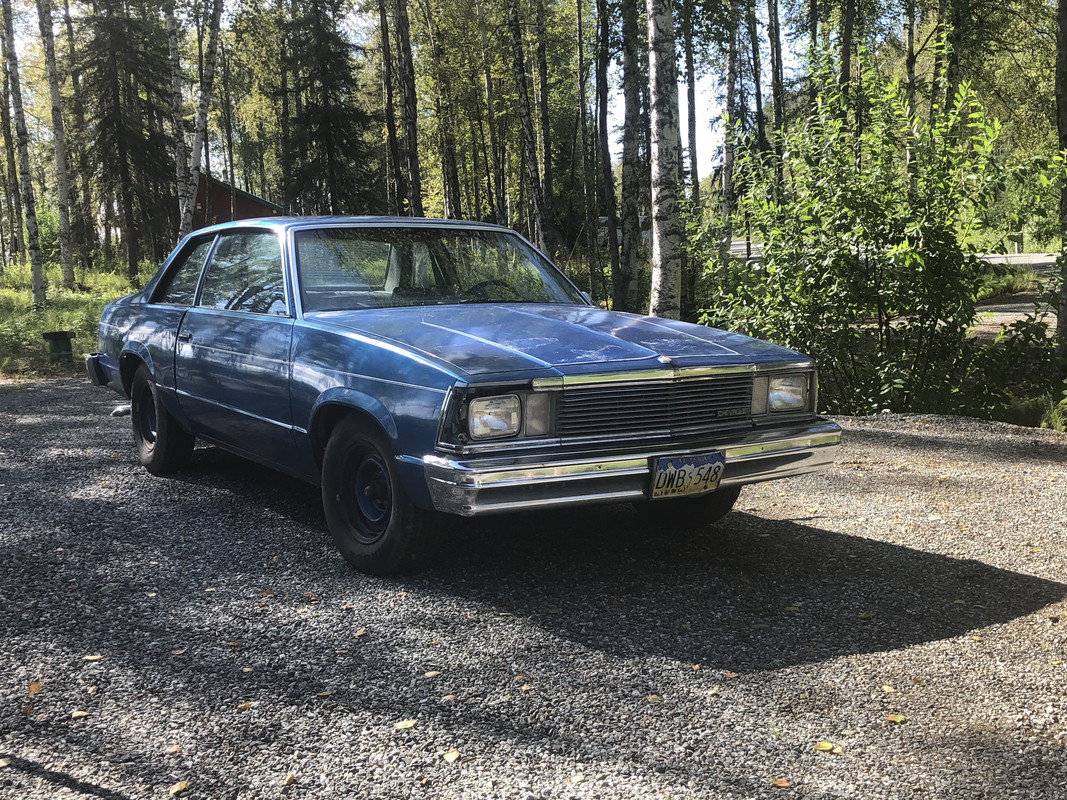
After the oil change, I decided to connect a battery and see if the starter motor works, I bumped the key and the engine moved! After priming the engine, I poured a bit of fuel down the carb and this is what happened! The little 267 fired up, ran, and even idled like it was only running yesterday!
https://www.youtube.com/watch?v=3j1F...ature=youtu.be
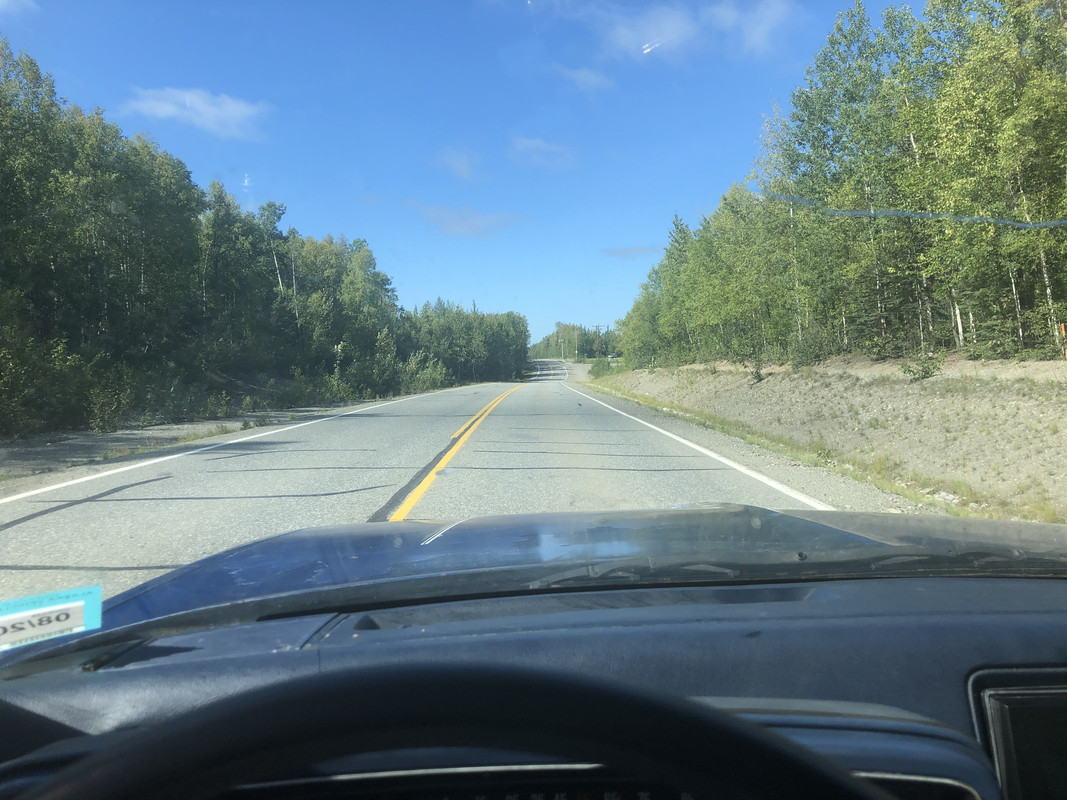
After warming it up and ensuring that there were no immediate issues, the battery was receiving full charge from the alternator, the waterpump was circulating and the radiator was hot, the power steering functioned, and the transmission would go into gear after adding a few quarts of new fluid, and verifying that the brakes at least kind of work (the front brakes do nothing whatsoever - the car only has rear brakes at the moment!), I took her out for a quick test drive to top the fuel tank off at the gas station and run it up and down a back road to check that the transmission shifted through all the gears. It was already pretty popular, I had people asking about it and taking pictures and loved the fact that it had been sitting for over 16 years and only became a running car about 10 minutes ago!
Also sneaked it around town over to my parent's place to show it off there too!
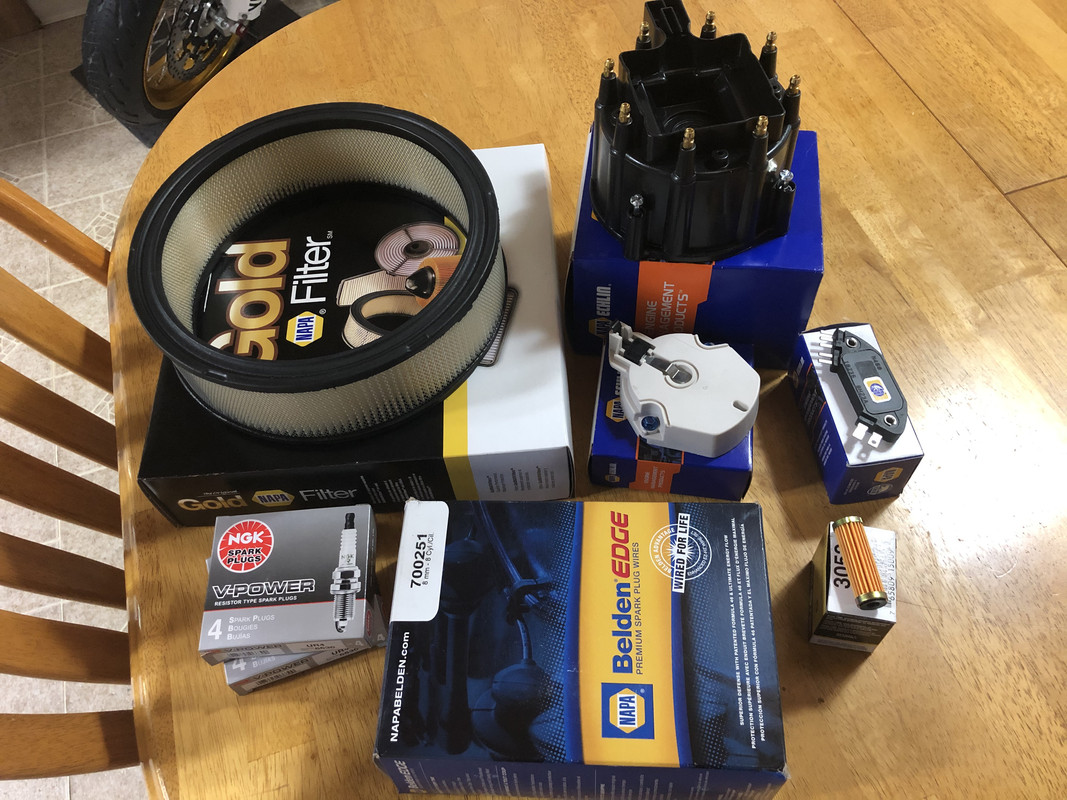
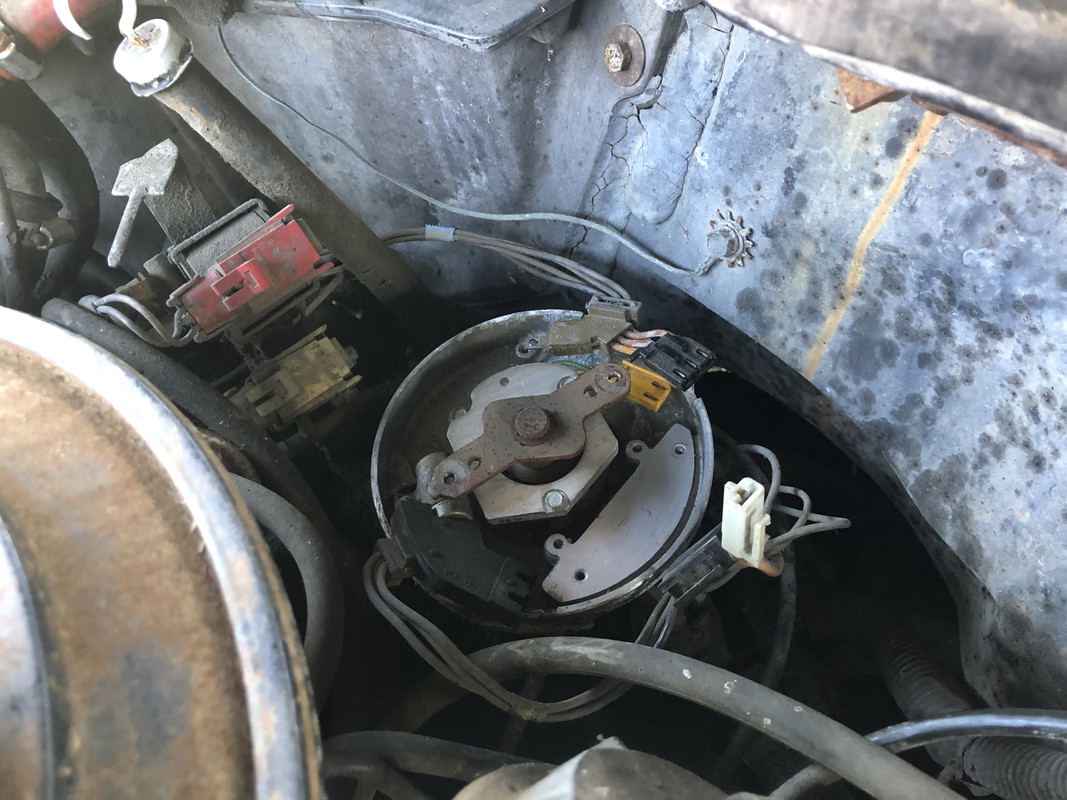
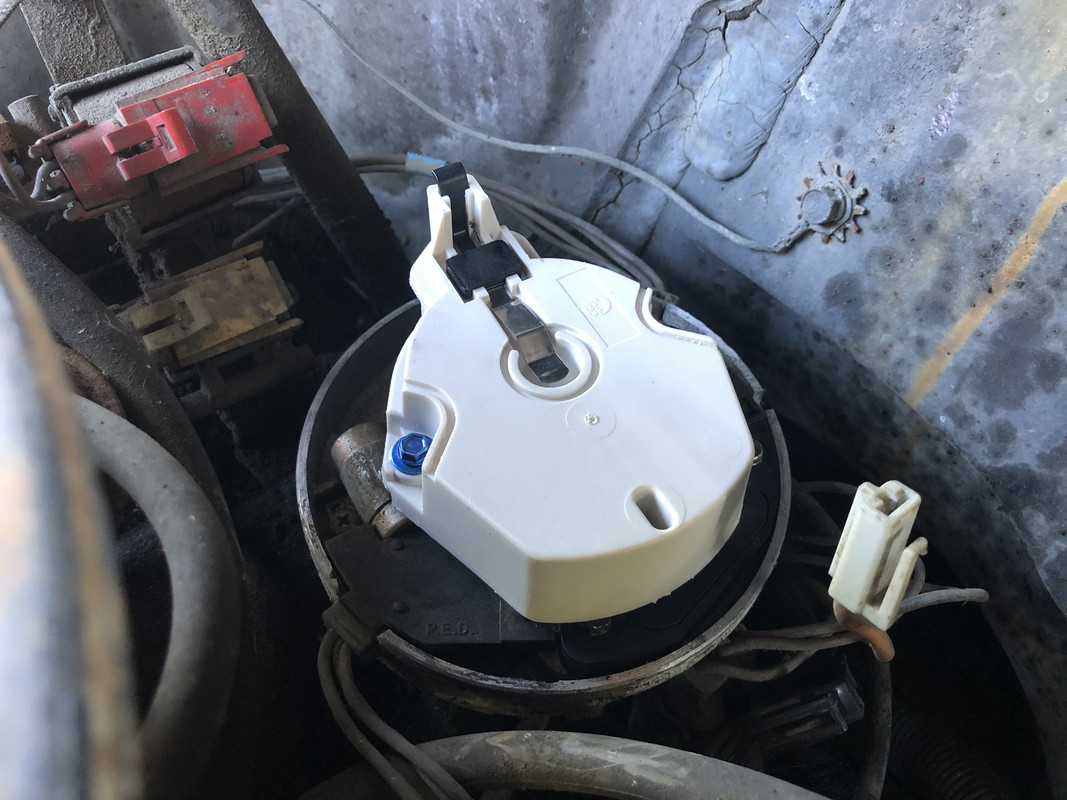
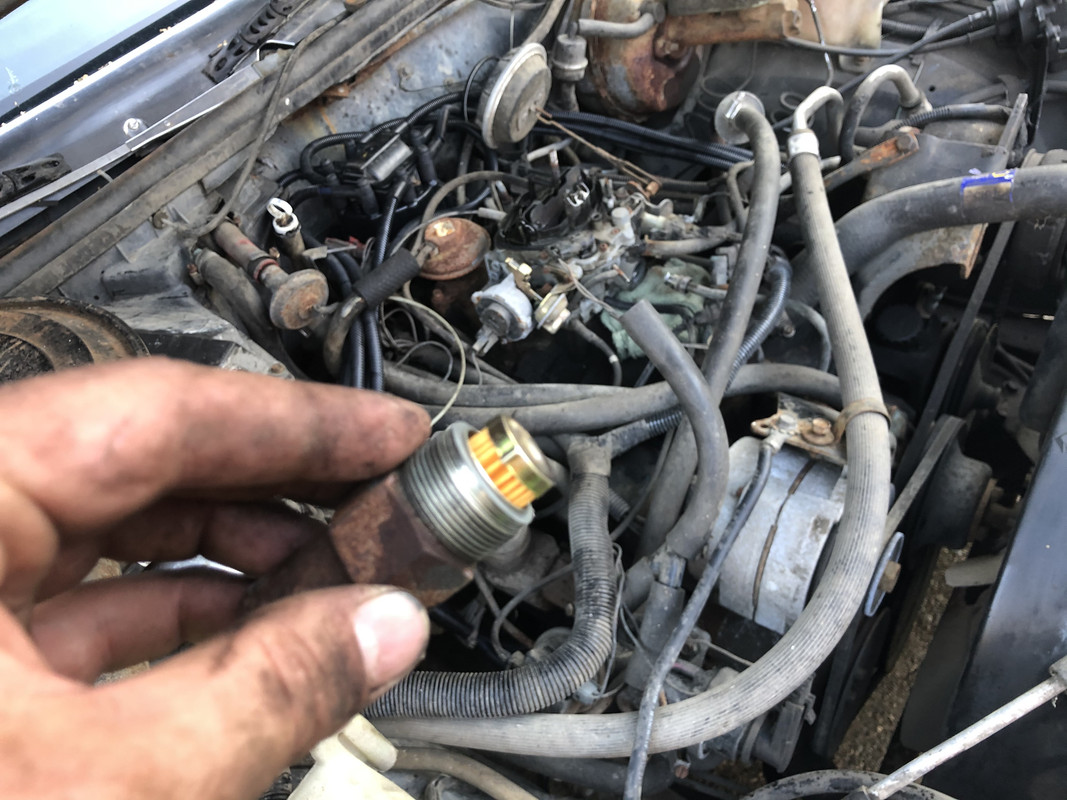
After all the fun of cruising around town, I headed back home only for the car to completely die right outside of the driveway! I held the pedal wide open and tried to restart it, then tried pouring some fuel down the carb again, but I could see the accelerator pump squirting fuel so this is likely an ignition problem. After speaking to the previous owner, she seemed to remember that the car randomly dying and failing to restart was the reason that it was parked originally. It probably didn't help that those same parts have this many years of sitting now added to the mix, so now that the car has proven it's potential to run, it's earned a tune up! I was fairly confident that the ignition module was what was causing the dying issue, especially since the car fired right back up after cooling off, so the car got a new ignition module, spark plugs, plug wires, distributor cap and rotor, and a fresh fuel filter and air filter! The air filter was so plugged that it would almost kill the engine by itself when the lid was installed!
Old module removed
New module installed!
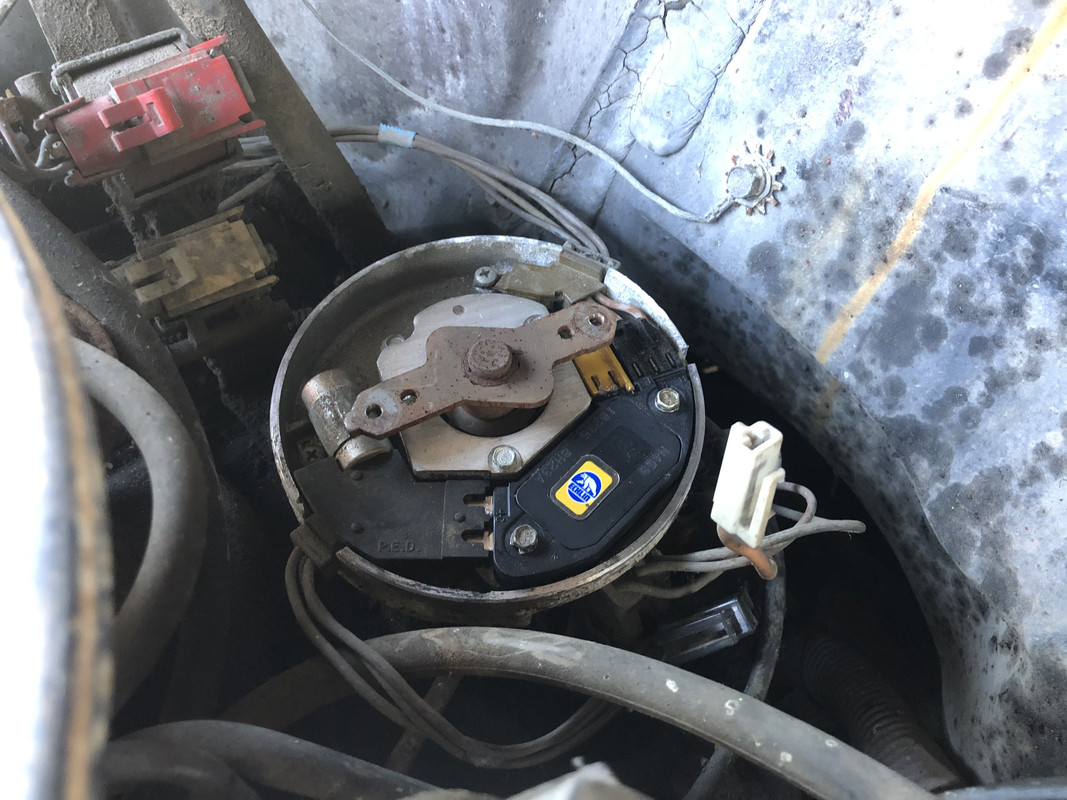
New rotor!
New fuel filter!
New cap, wires, spark plugs, and air filter all installed!
After all that, the engine ran MUCH better! It pretty much eliminated any hesitation, stumble, hiccup, and runs very smoothly now! In fact, it's actually hard to even hear that it is running! I took another test drive this evening, and while I don't have much time on it yet, I'm feel confidant that the ignition issue is fixed!
Started off this weekend with an oil change on the old girl. The old oil was used but looked good with no metallic deposits, so that's definitely a good sign!
After the oil change, I decided to connect a battery and see if the starter motor works, I bumped the key and the engine moved! After priming the engine, I poured a bit of fuel down the carb and this is what happened! The little 267 fired up, ran, and even idled like it was only running yesterday!
https://www.youtube.com/watch?v=3j1F...ature=youtu.be
After warming it up and ensuring that there were no immediate issues, the battery was receiving full charge from the alternator, the waterpump was circulating and the radiator was hot, the power steering functioned, and the transmission would go into gear after adding a few quarts of new fluid, and verifying that the brakes at least kind of work (the front brakes do nothing whatsoever - the car only has rear brakes at the moment!), I took her out for a quick test drive to top the fuel tank off at the gas station and run it up and down a back road to check that the transmission shifted through all the gears. It was already pretty popular, I had people asking about it and taking pictures and loved the fact that it had been sitting for over 16 years and only became a running car about 10 minutes ago!
Also sneaked it around town over to my parent's place to show it off there too!
After all the fun of cruising around town, I headed back home only for the car to completely die right outside of the driveway! I held the pedal wide open and tried to restart it, then tried pouring some fuel down the carb again, but I could see the accelerator pump squirting fuel so this is likely an ignition problem. After speaking to the previous owner, she seemed to remember that the car randomly dying and failing to restart was the reason that it was parked originally. It probably didn't help that those same parts have this many years of sitting now added to the mix, so now that the car has proven it's potential to run, it's earned a tune up! I was fairly confident that the ignition module was what was causing the dying issue, especially since the car fired right back up after cooling off, so the car got a new ignition module, spark plugs, plug wires, distributor cap and rotor, and a fresh fuel filter and air filter! The air filter was so plugged that it would almost kill the engine by itself when the lid was installed!
Old module removed
New module installed!
New rotor!
New fuel filter!
New cap, wires, spark plugs, and air filter all installed!
After all that, the engine ran MUCH better! It pretty much eliminated any hesitation, stumble, hiccup, and runs very smoothly now! In fact, it's actually hard to even hear that it is running! I took another test drive this evening, and while I don't have much time on it yet, I'm feel confidant that the ignition issue is fixed!
Thread Starter
TECH Regular
Joined: Oct 2011
Posts: 453
Likes: 178
From: Alaska
Thank you!
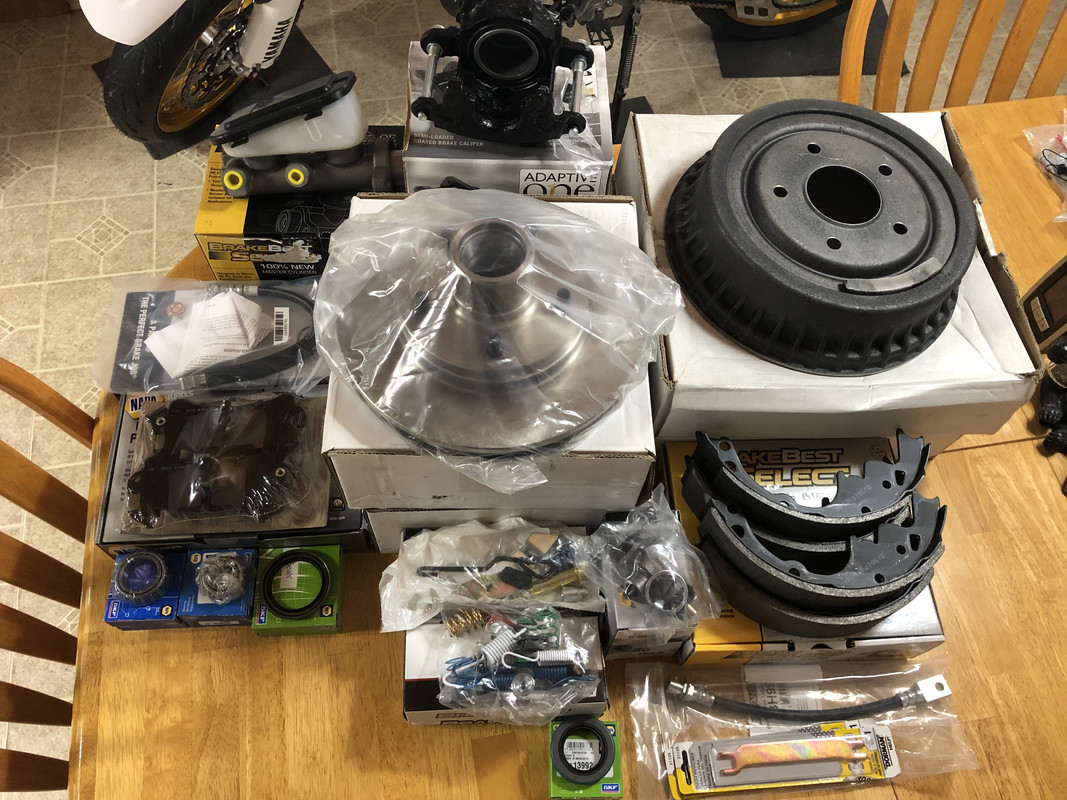
Picked up a couple more things needed to get this party started!
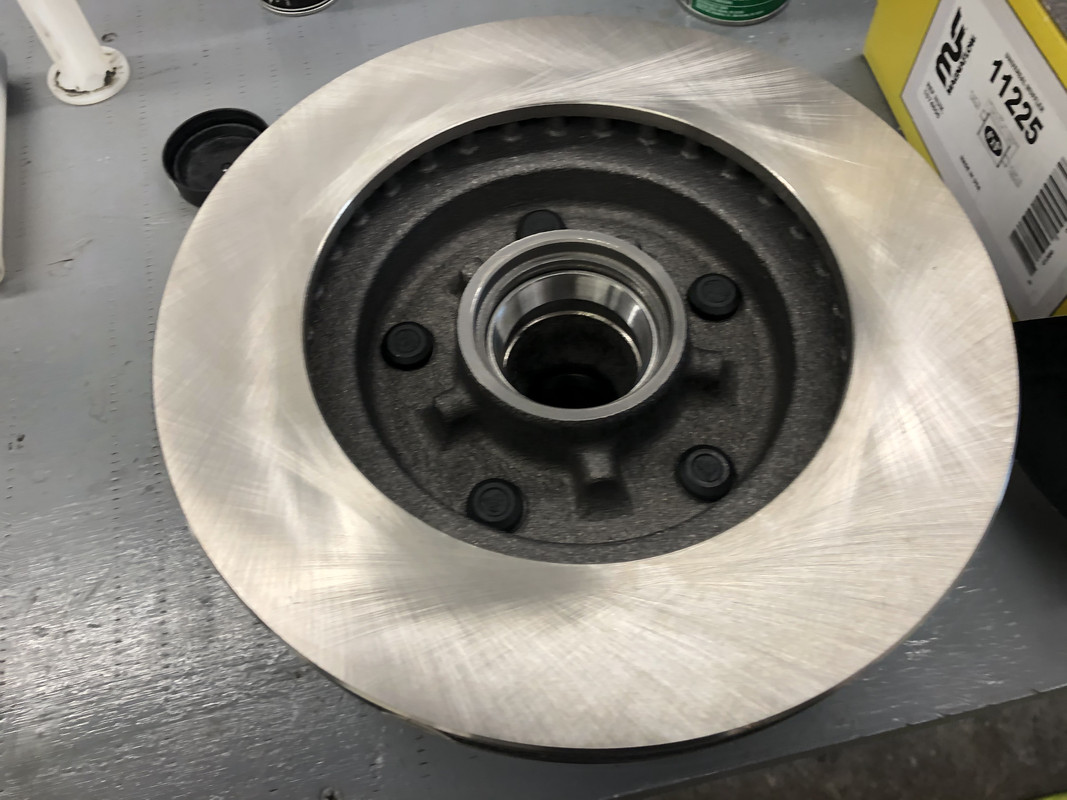
New rotors cleaned and ready for bearings!
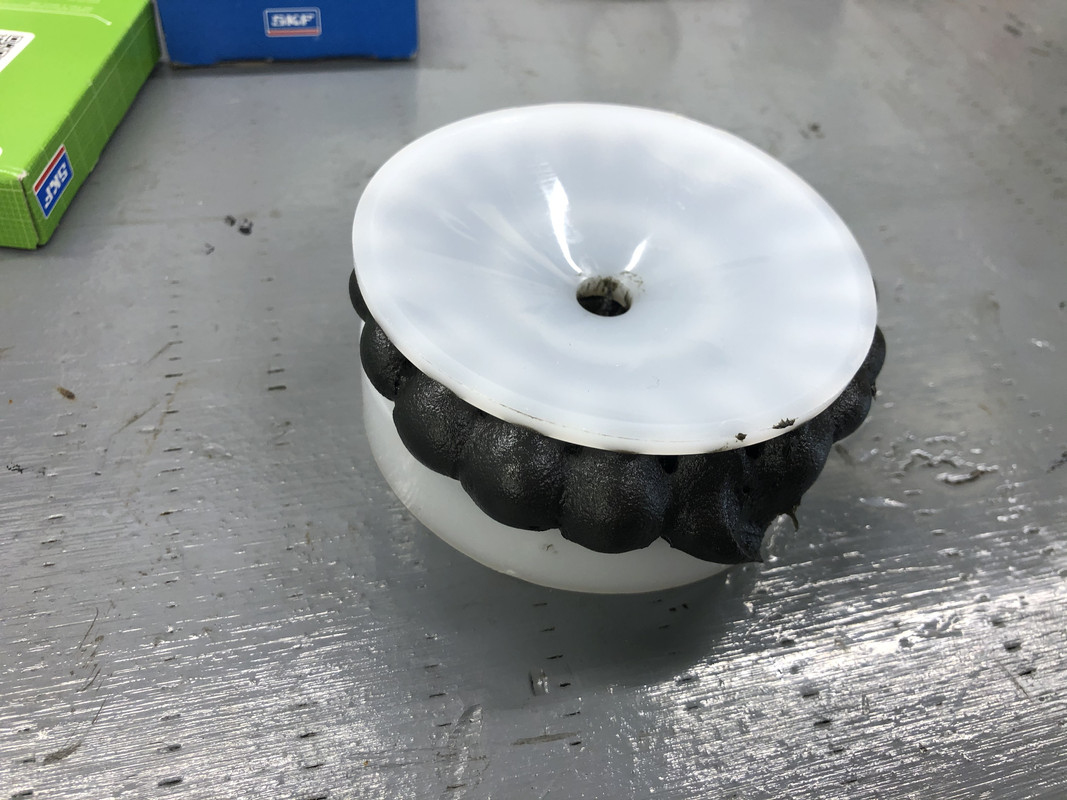
Packing the new wheel bearings
Bearings and seals installed in the rear
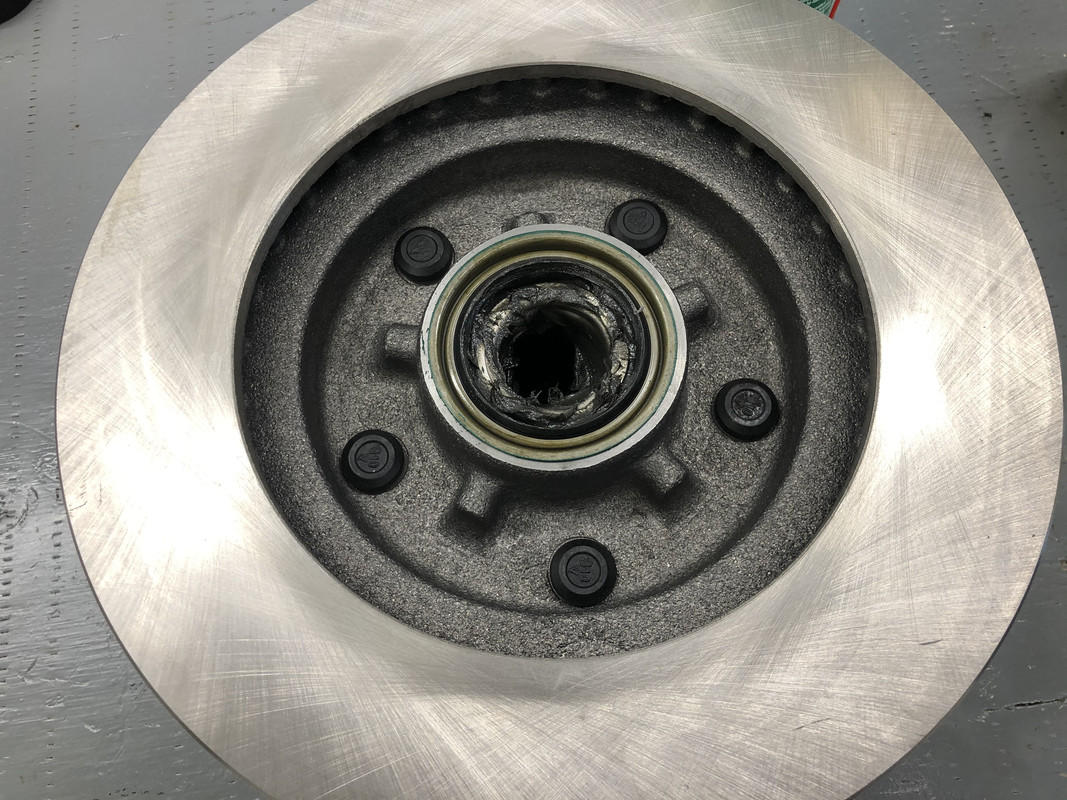
Hubs packed and front bearings also installed!
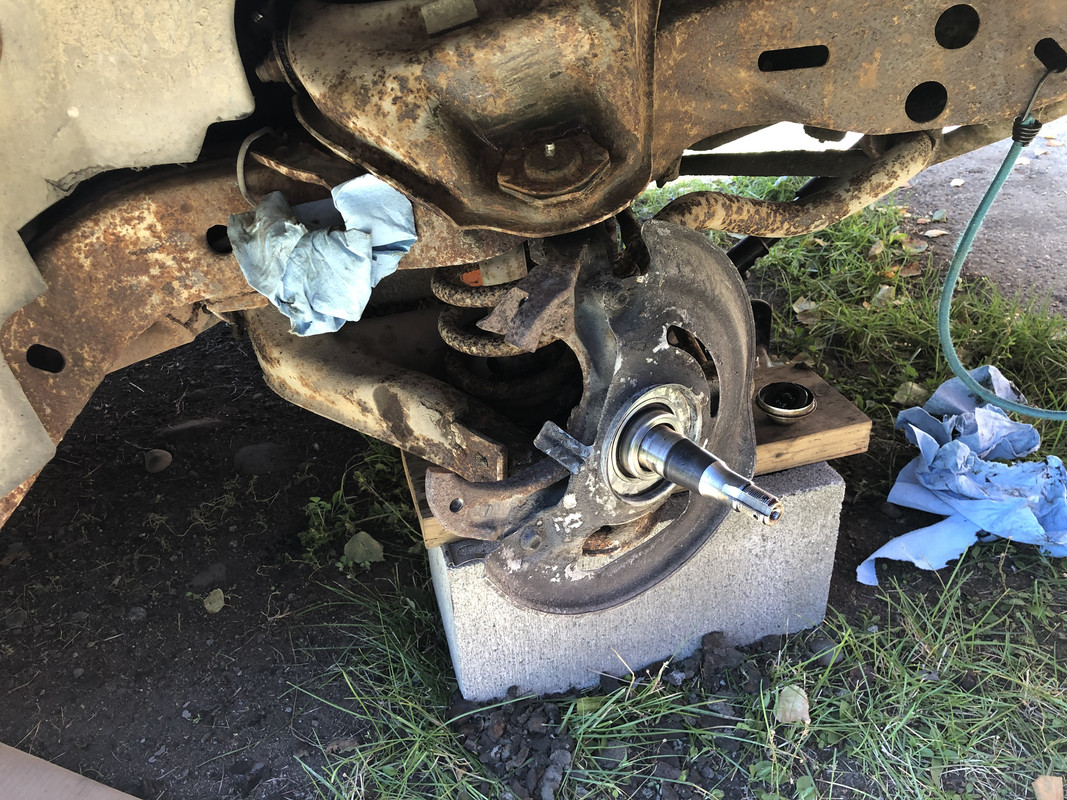
The old, crusty junk. Actually, it wasn't in too bad of shape aside from the stuck calipers.
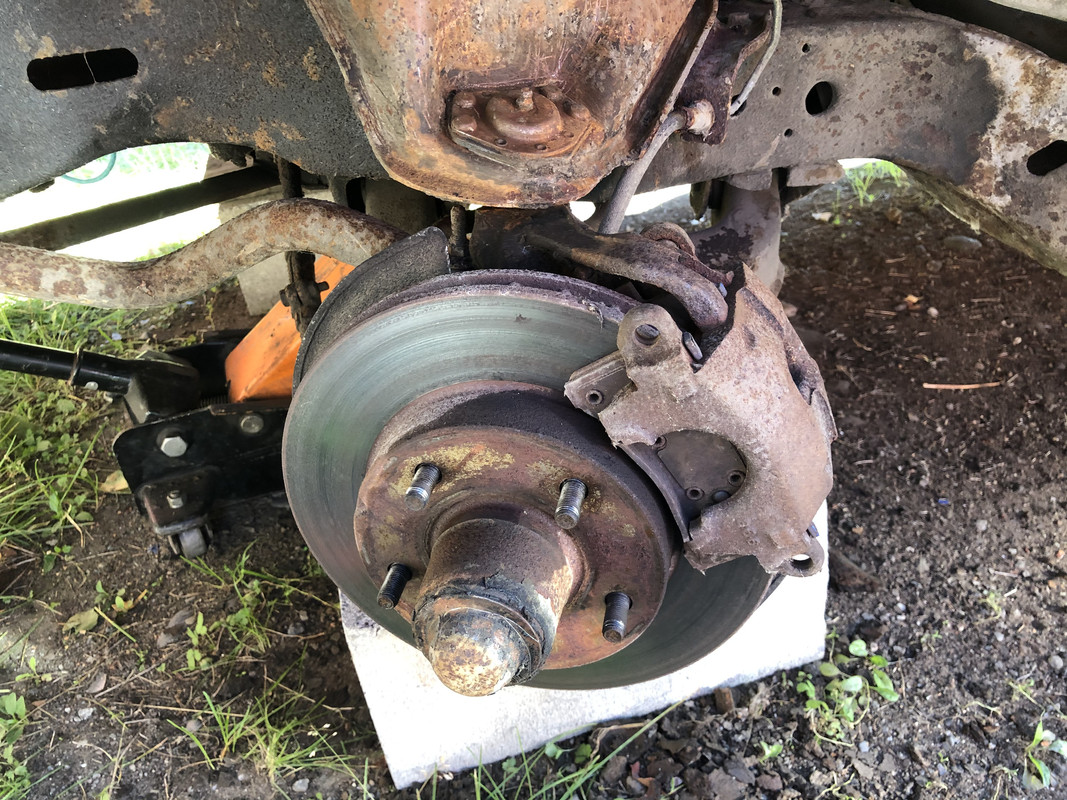
Old calipers and rotors removed. The spindles are in good condition!
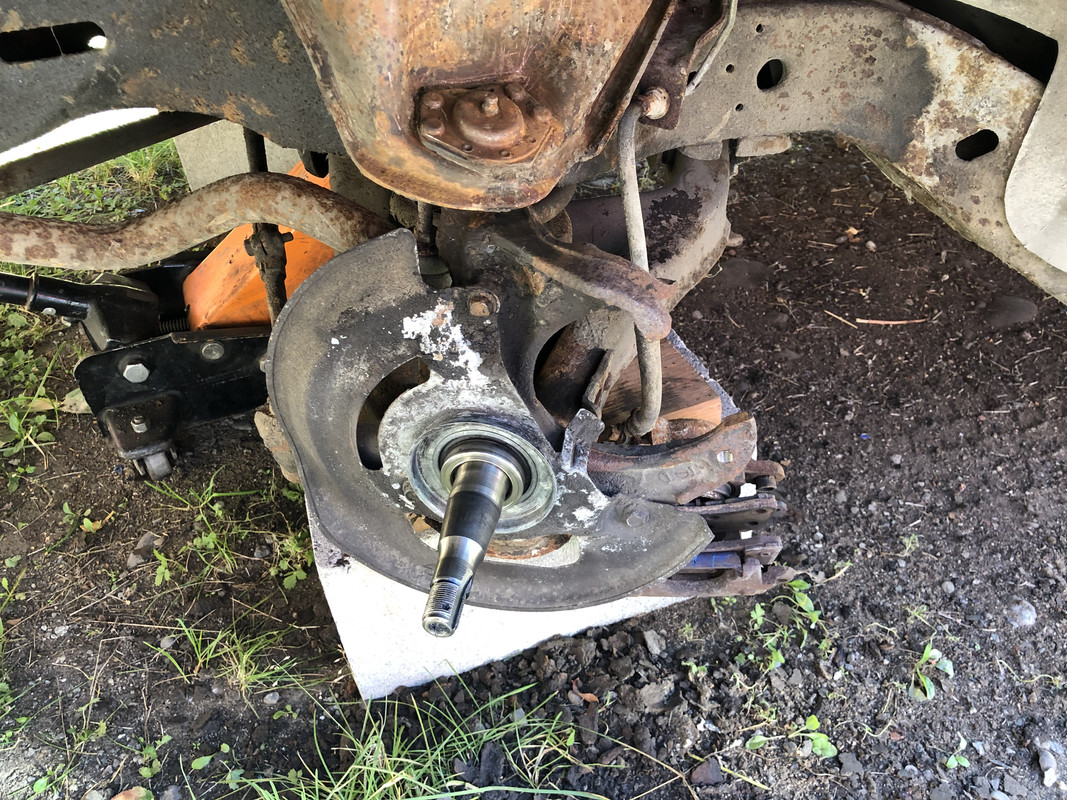
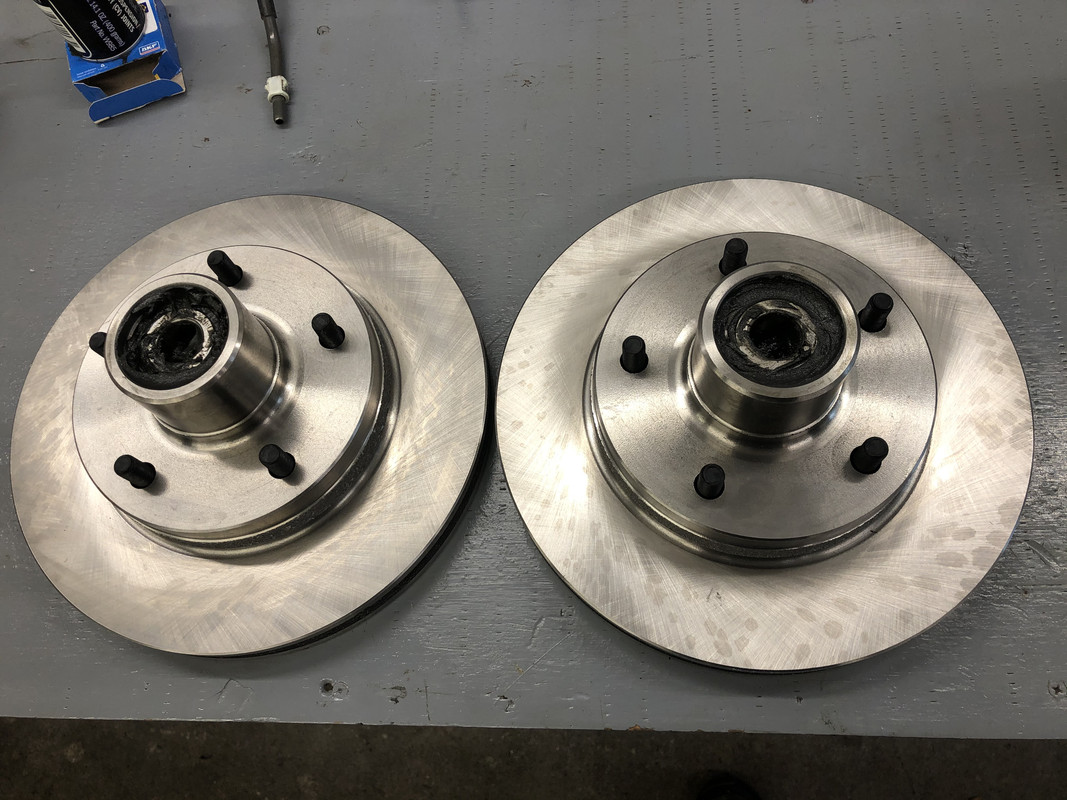
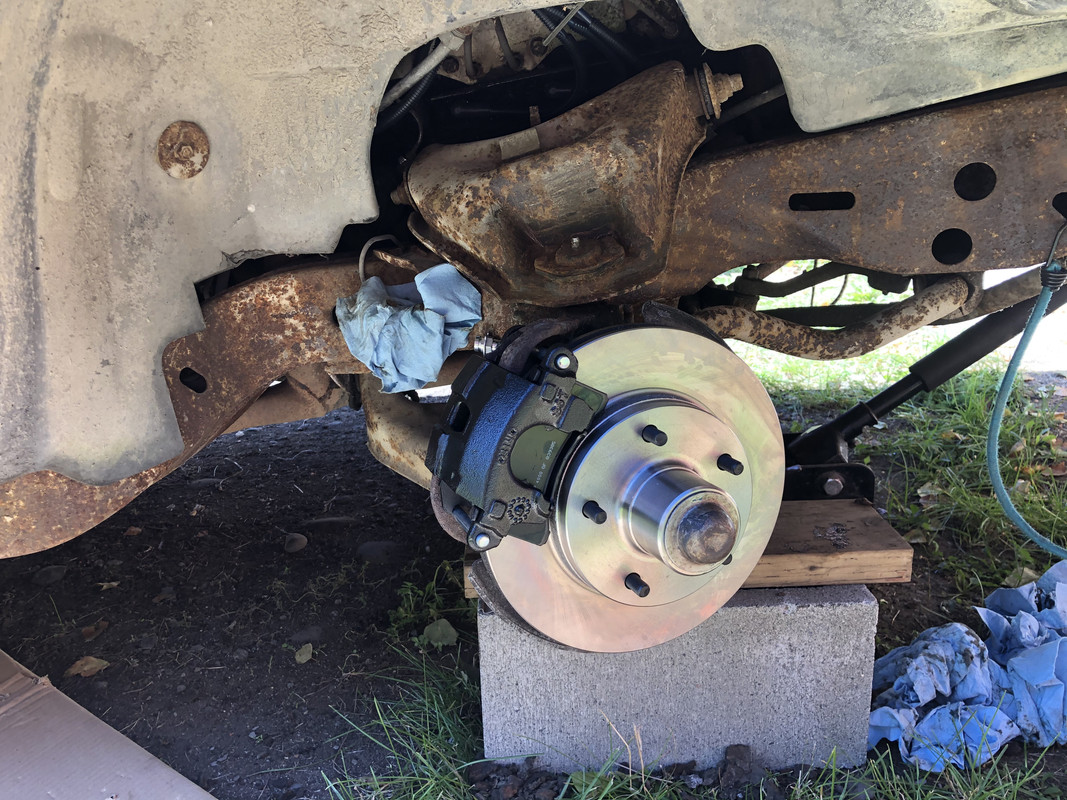
New rotors installed!
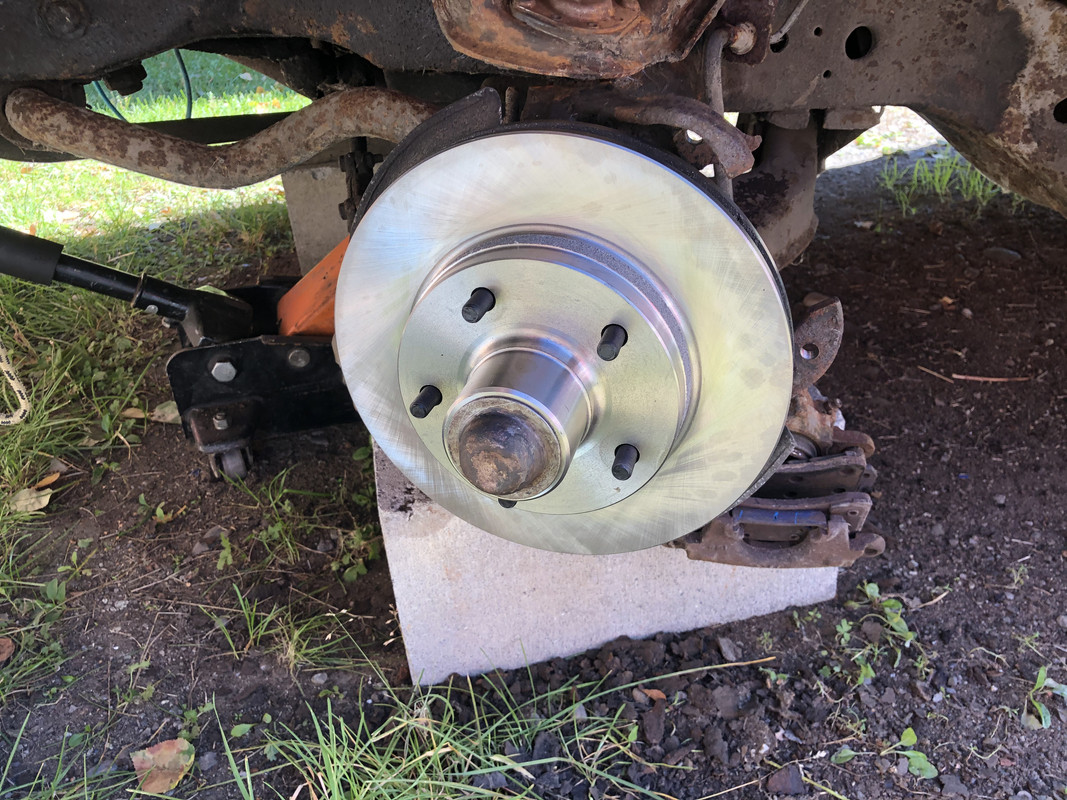
New calipers, pads, and brake hoses on next!
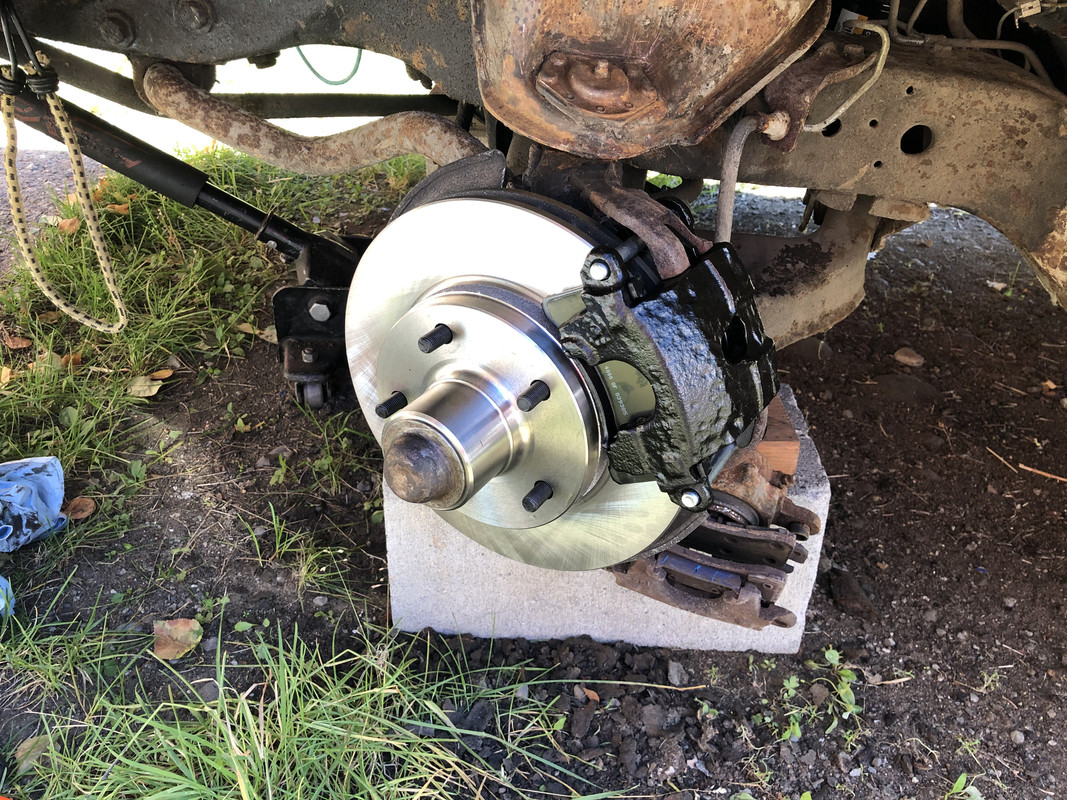
Other side!
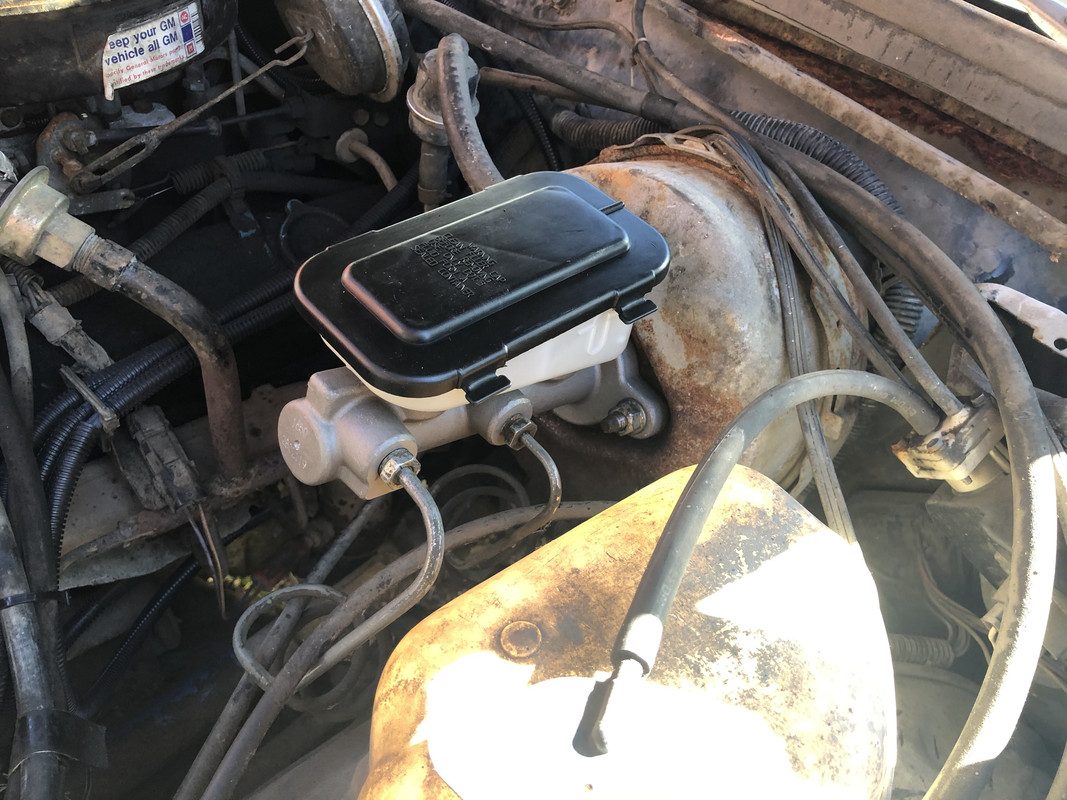
New master cylinder bench bled and installed!
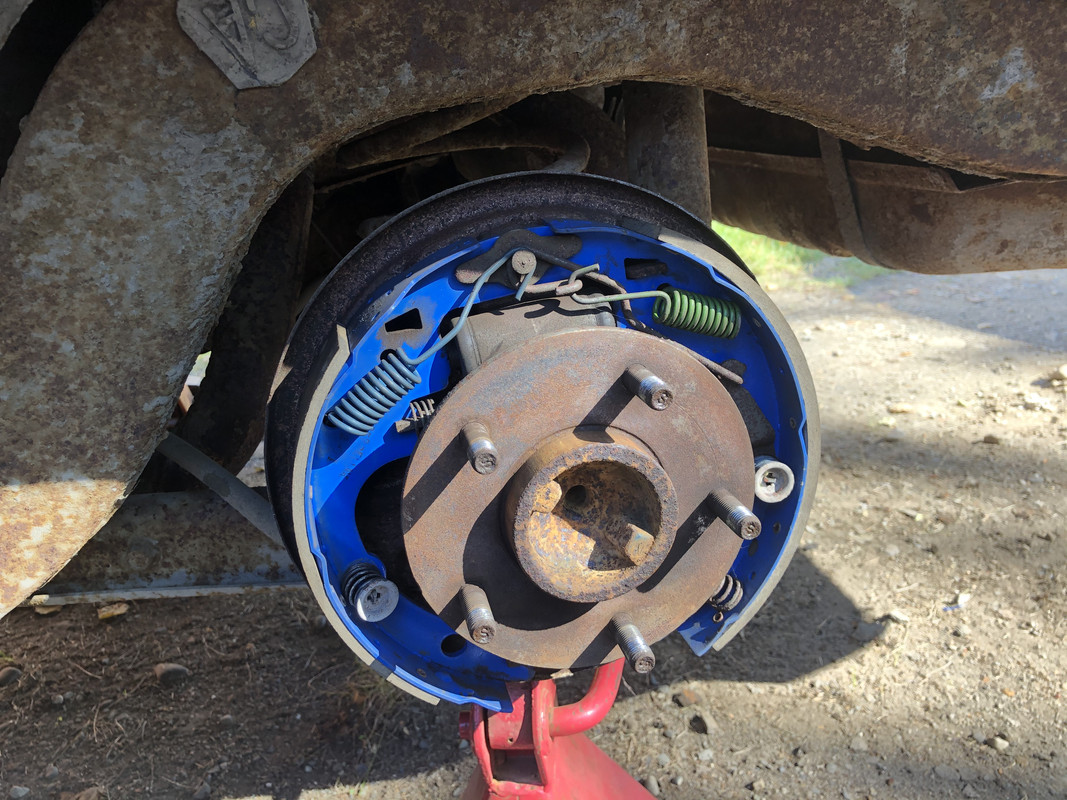
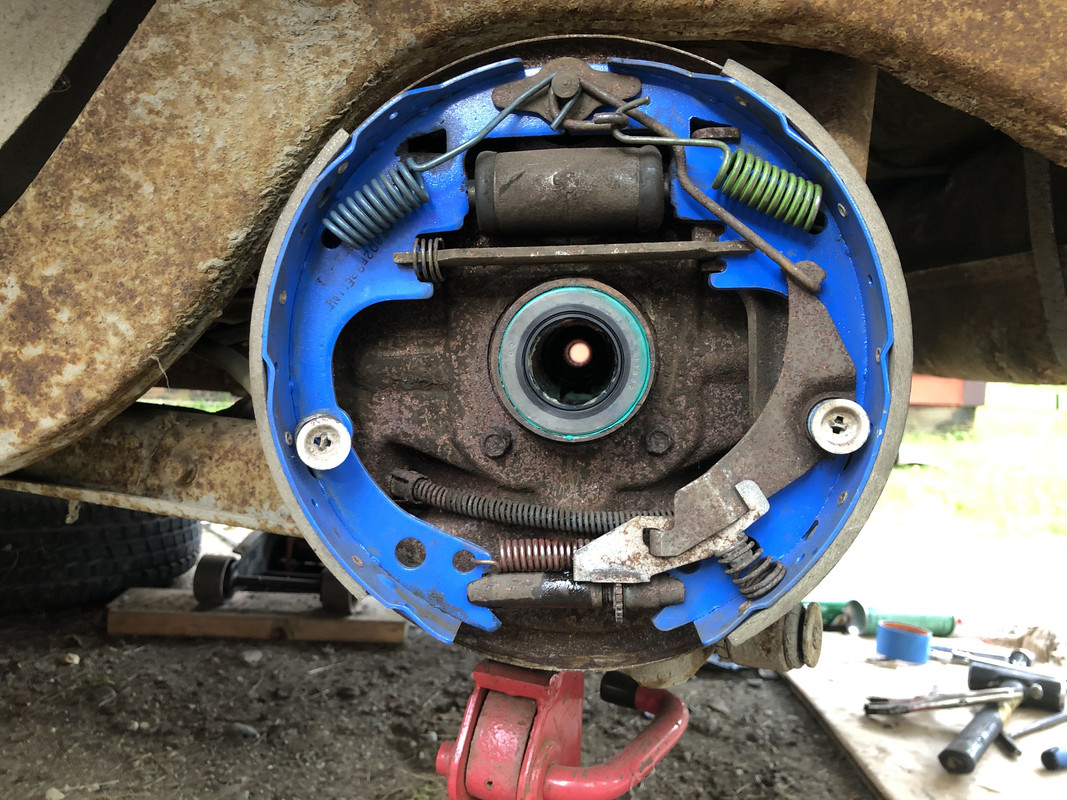
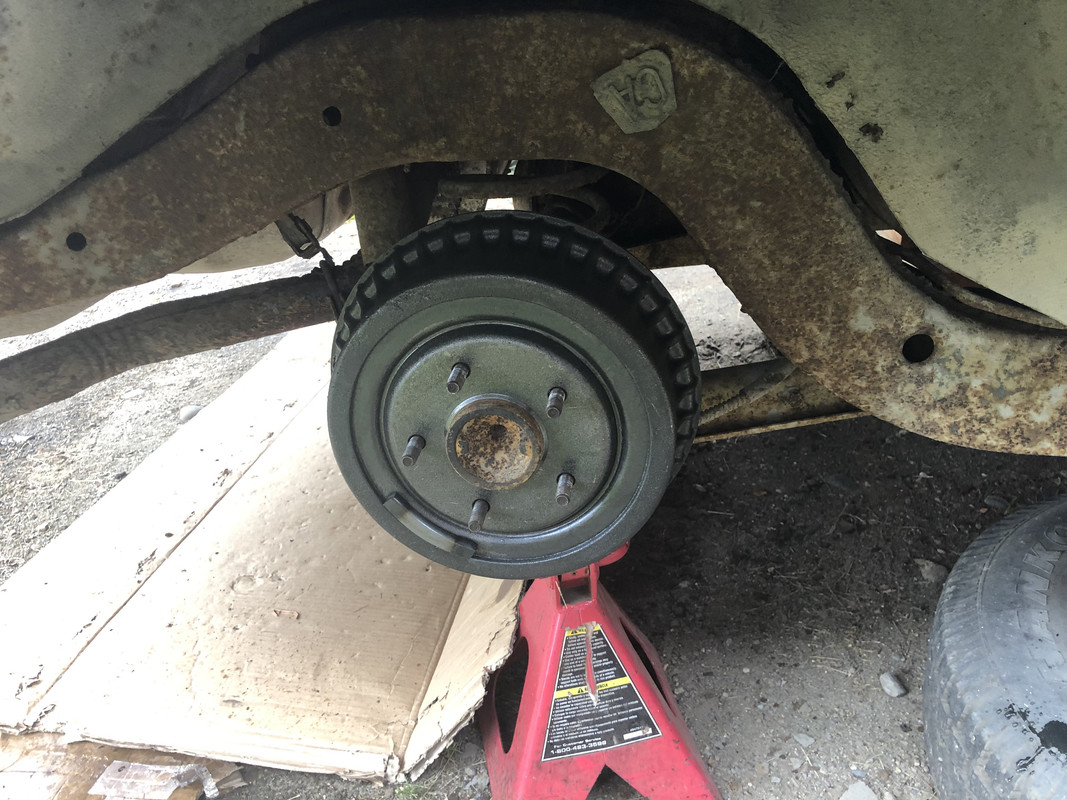
The rear drum brakes are in surprisingly good condition as well. It looks like they may have been replaced right before the car was originally parked!
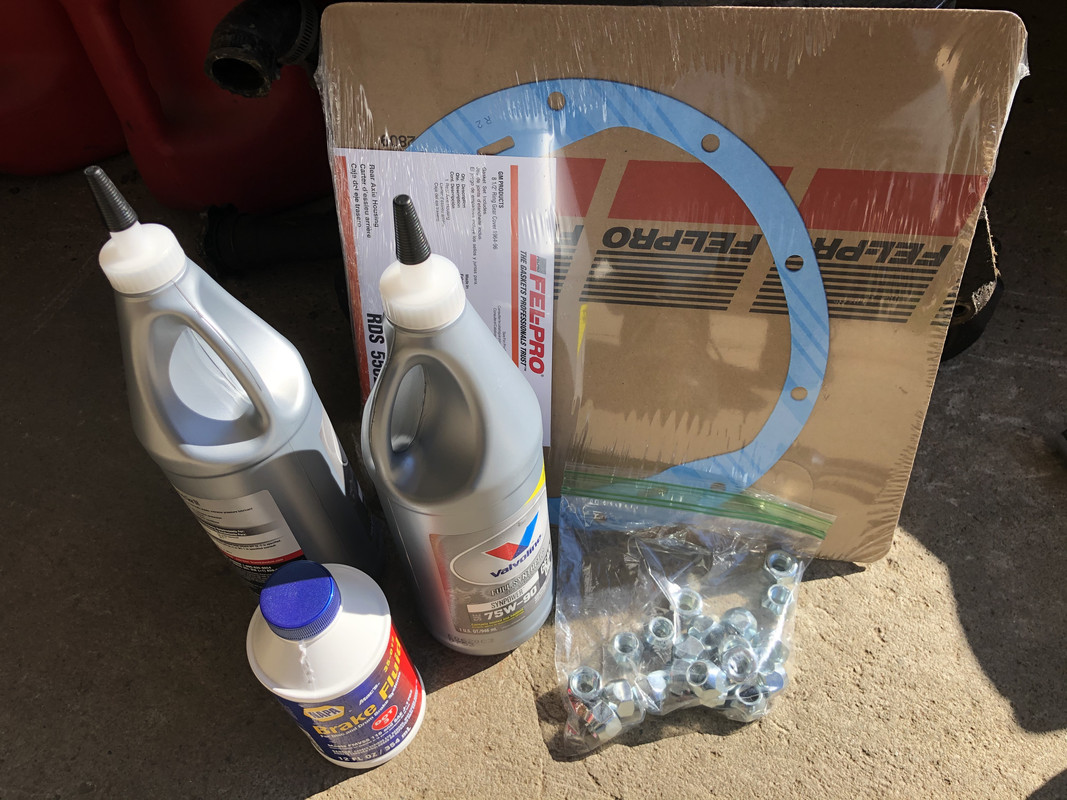
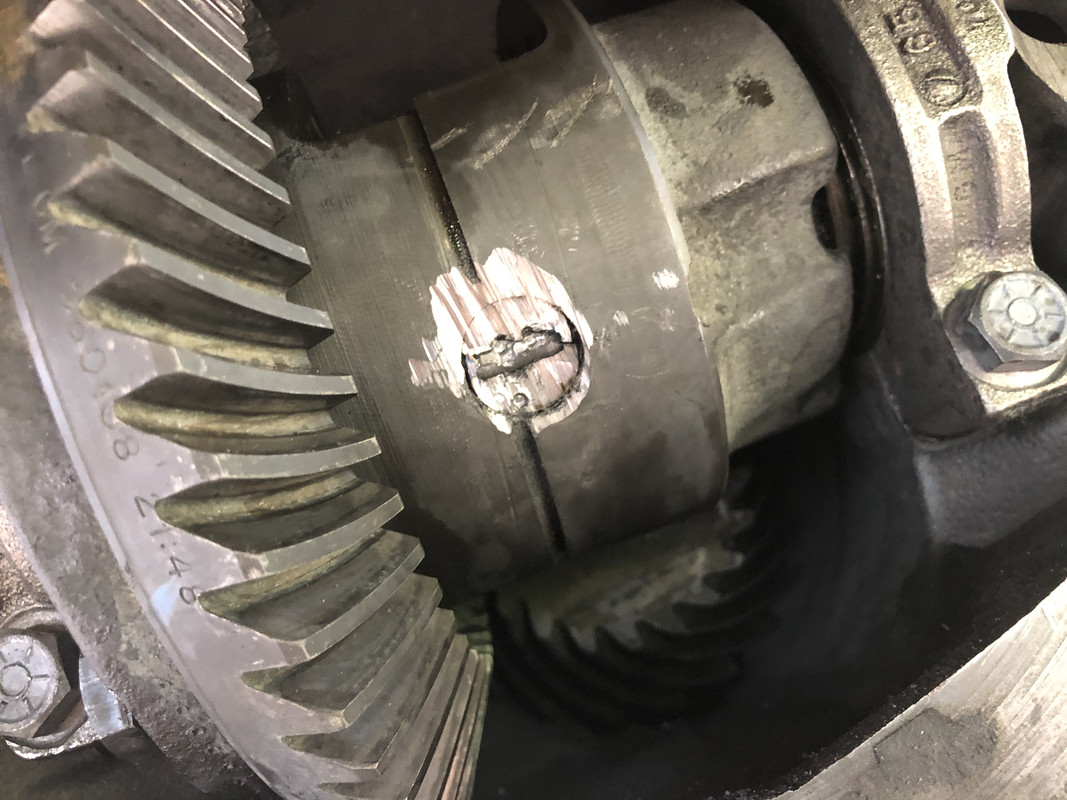
Part of the plan is to change the rear axle seals, so the rear housing needs to be disassembled. Looks like I have a bonus - LSD!
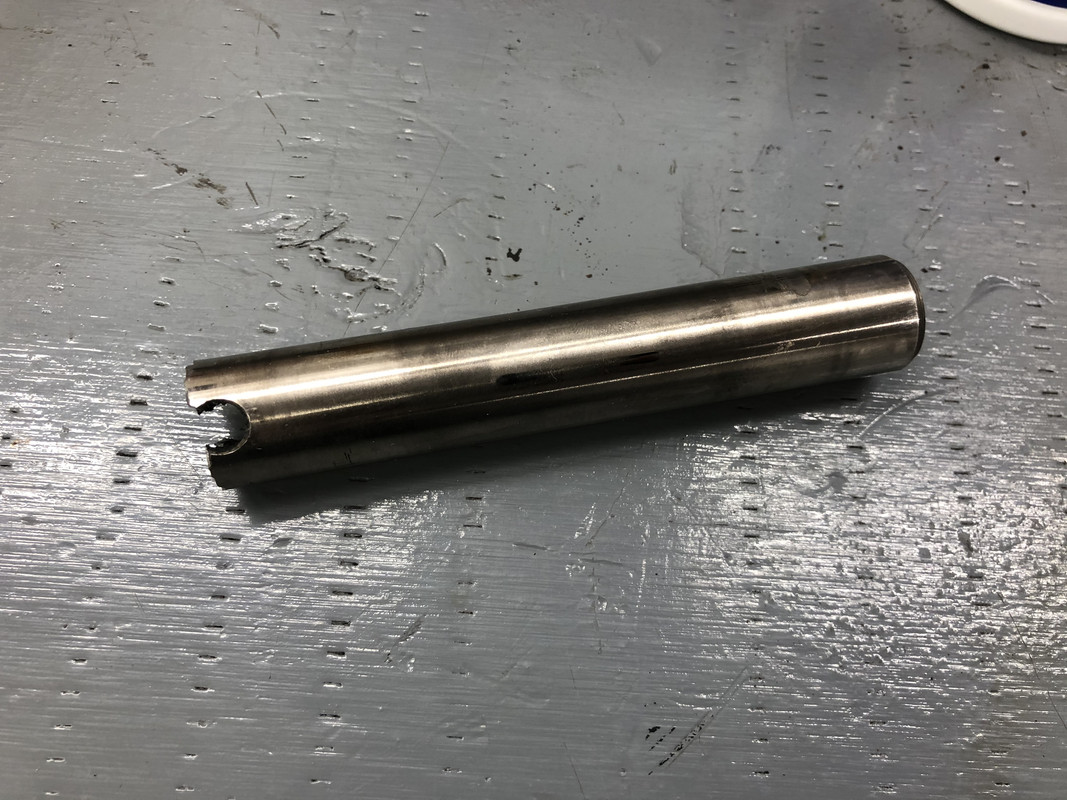
Fortunately, the rear fluid was in great condition as well with no traces of water! Unfortunately though, the cross shaft retaining bolt was sheared off and stuck tight inside the cross shaft, and after screwing around with it for several hours, I ended up just grinding the top of the pin off to expose the bolt.
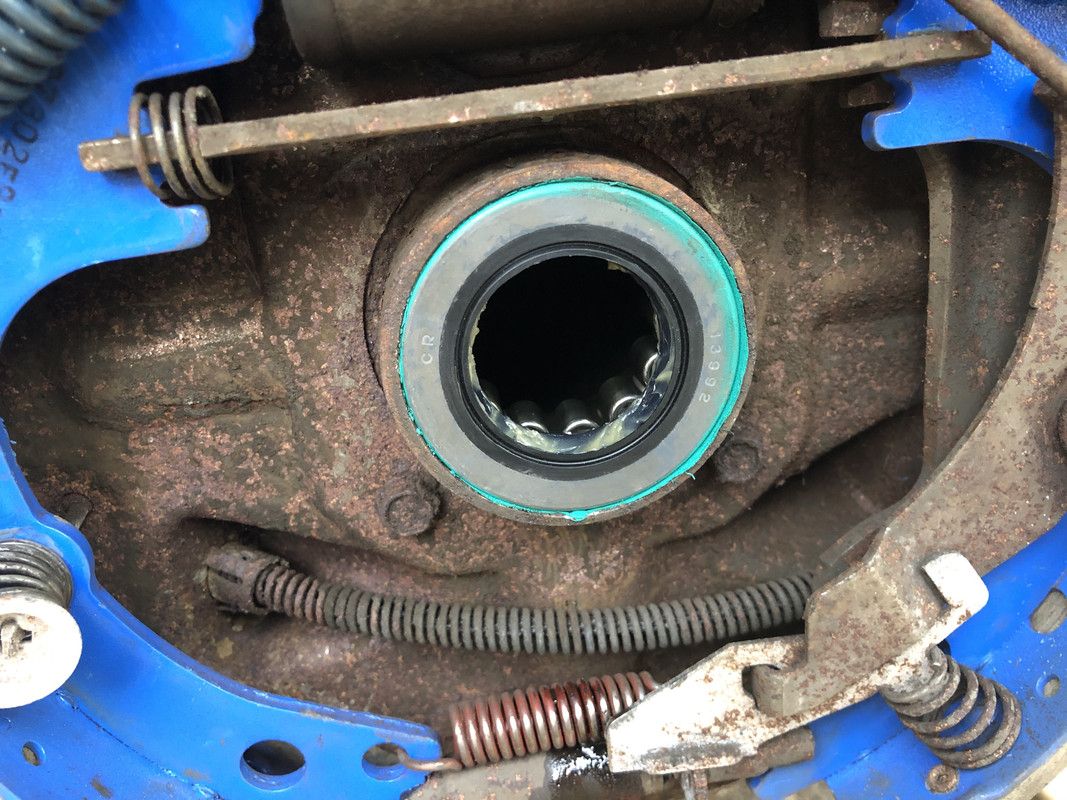
New axle seals installed!
Passenger side!
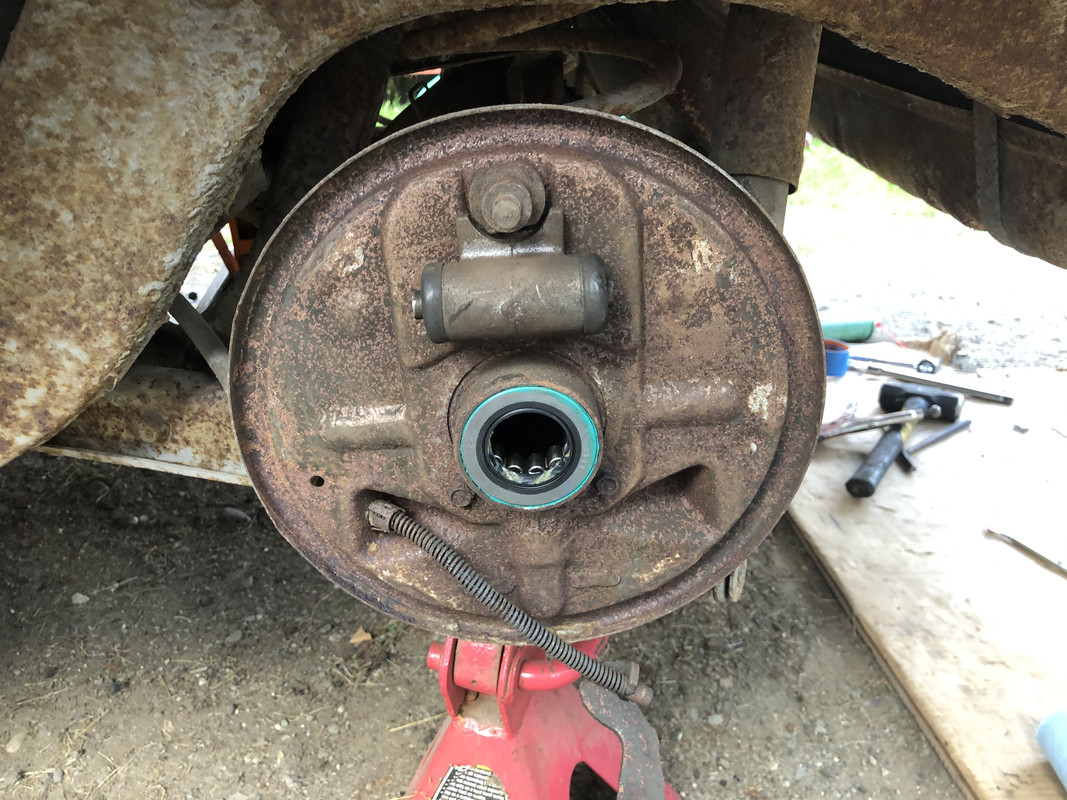
Stripped the housing down. These rear wheel seal retainers have to be one of the stupidest designs I've ever seen. What was wrong with two bolts, GM?!
The new brake shoes I bought were mispackaged and included 1 leading shoe, and 3 trailing shoes. Oops. I decided to just return them and reuse my current ones, since they looked like they were right out of the box themselves. Replaced the wheel cylinders and all the internal hardware.
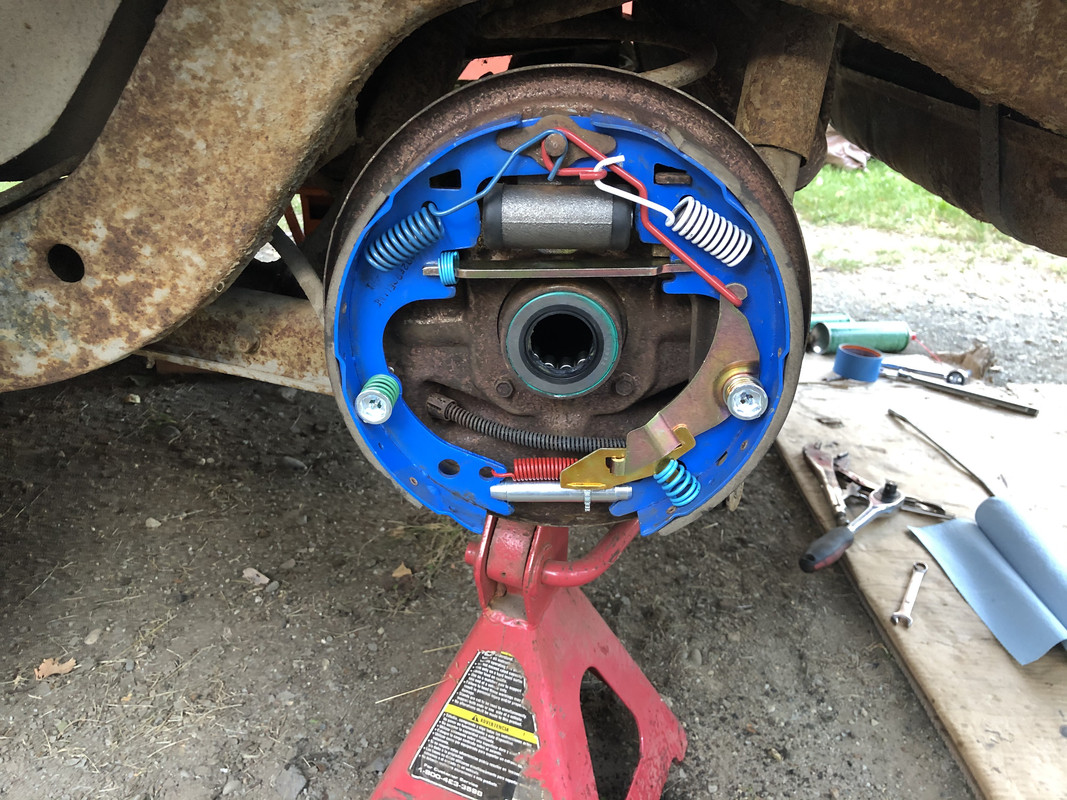
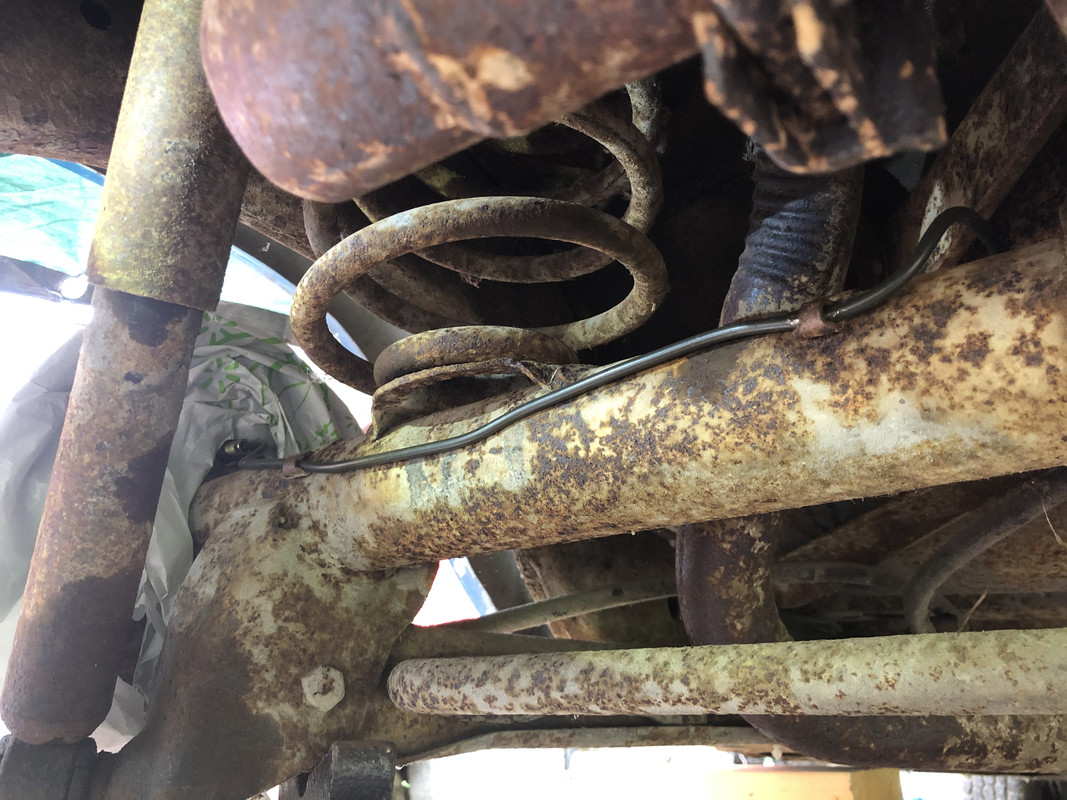
Replaced the rear rubber hose from the frame to the axle housing.
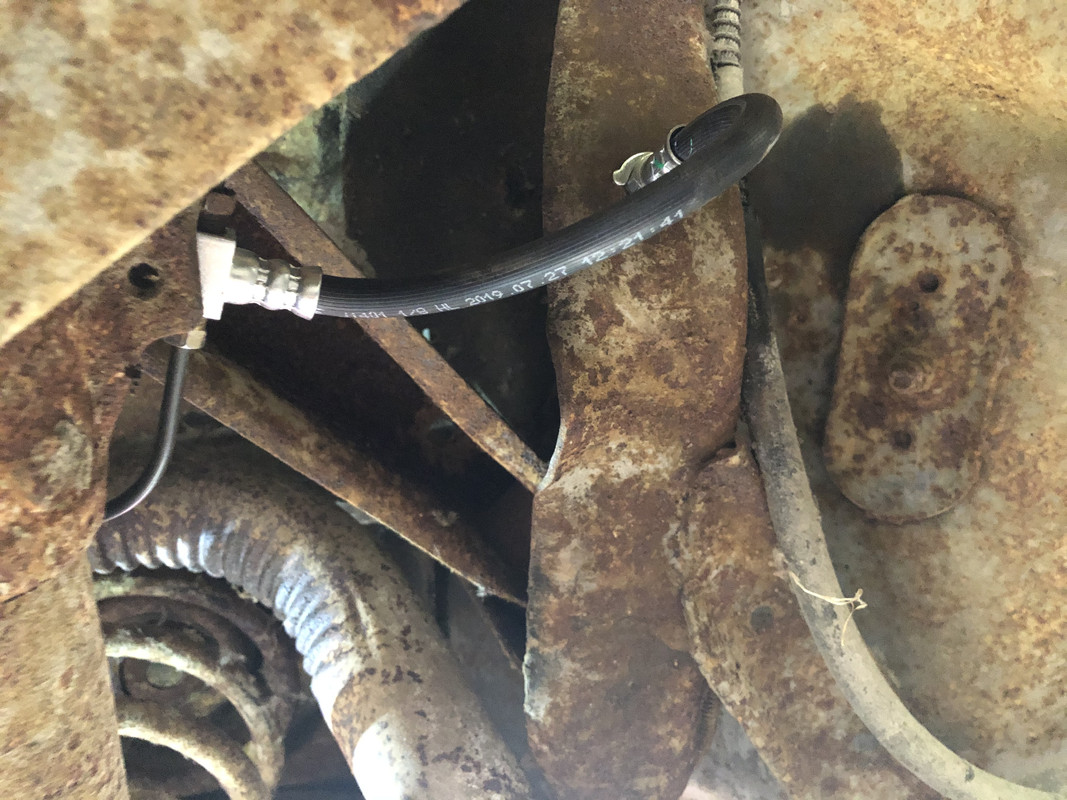
This hard line broke off at the wheel cylinder, so I fabricated a new one.
Picked up a replacement cross shaft and new bolt!

Unfortunately ended up getting into the housing a little bit, but nothing that will be concerning.

Cover installed on the axle, new gasket!
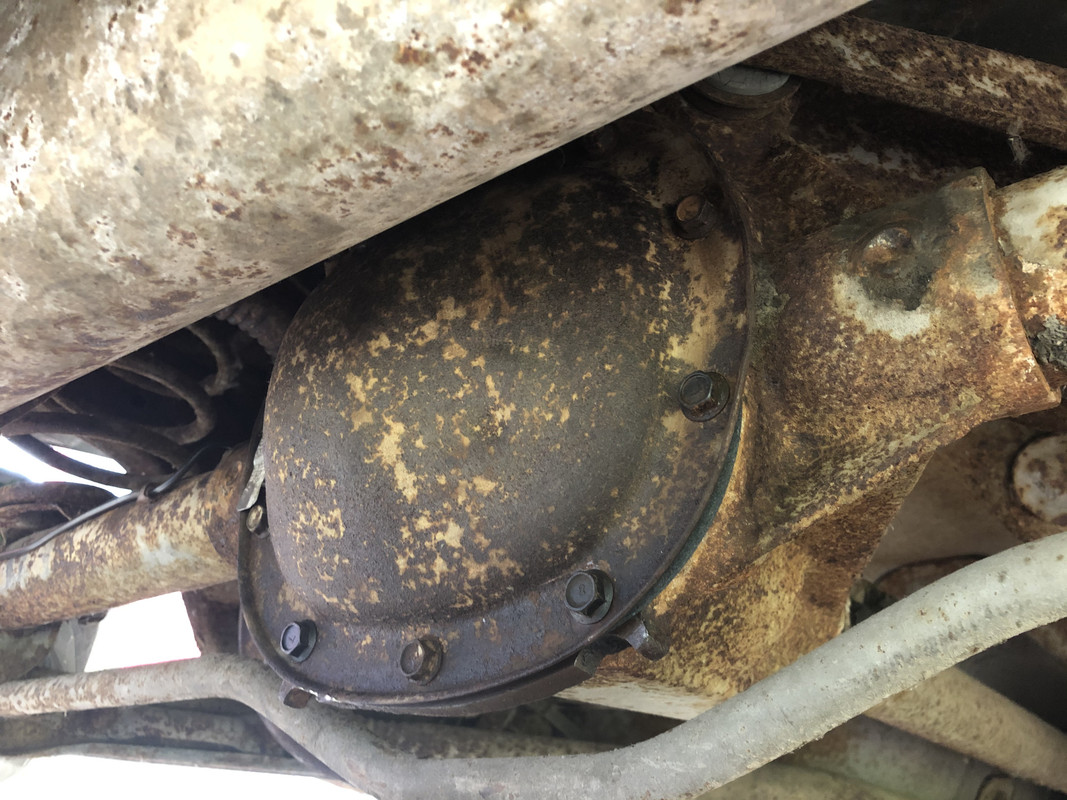
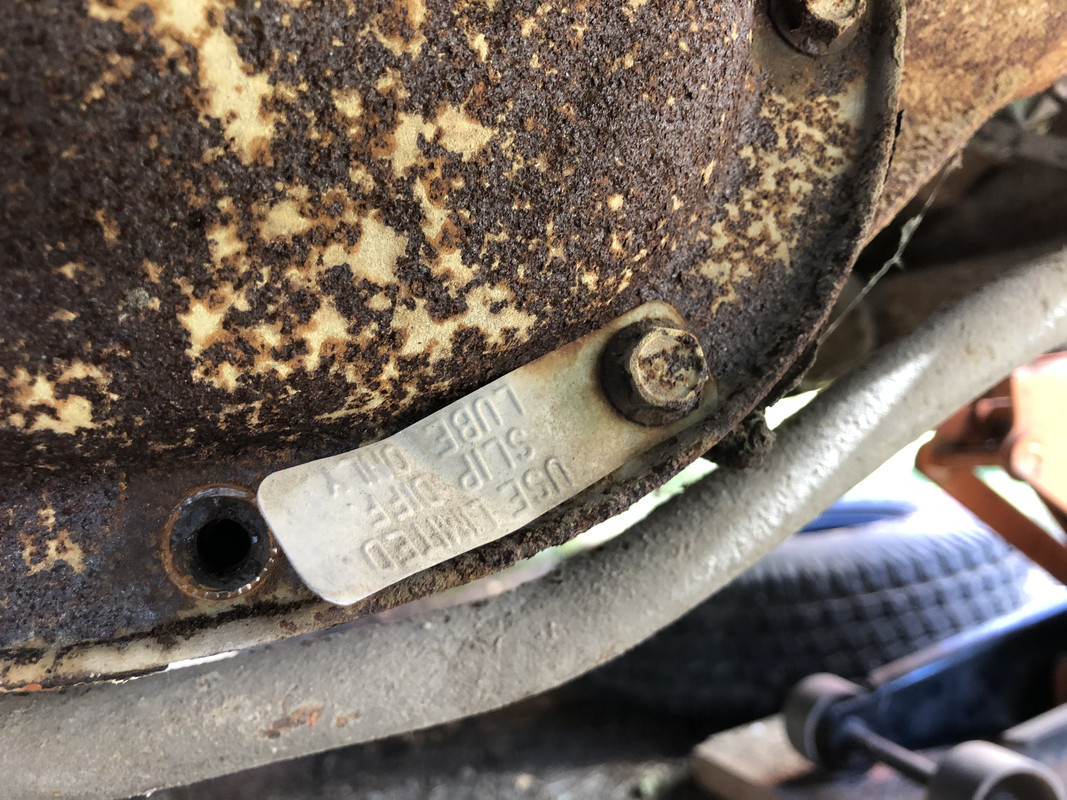
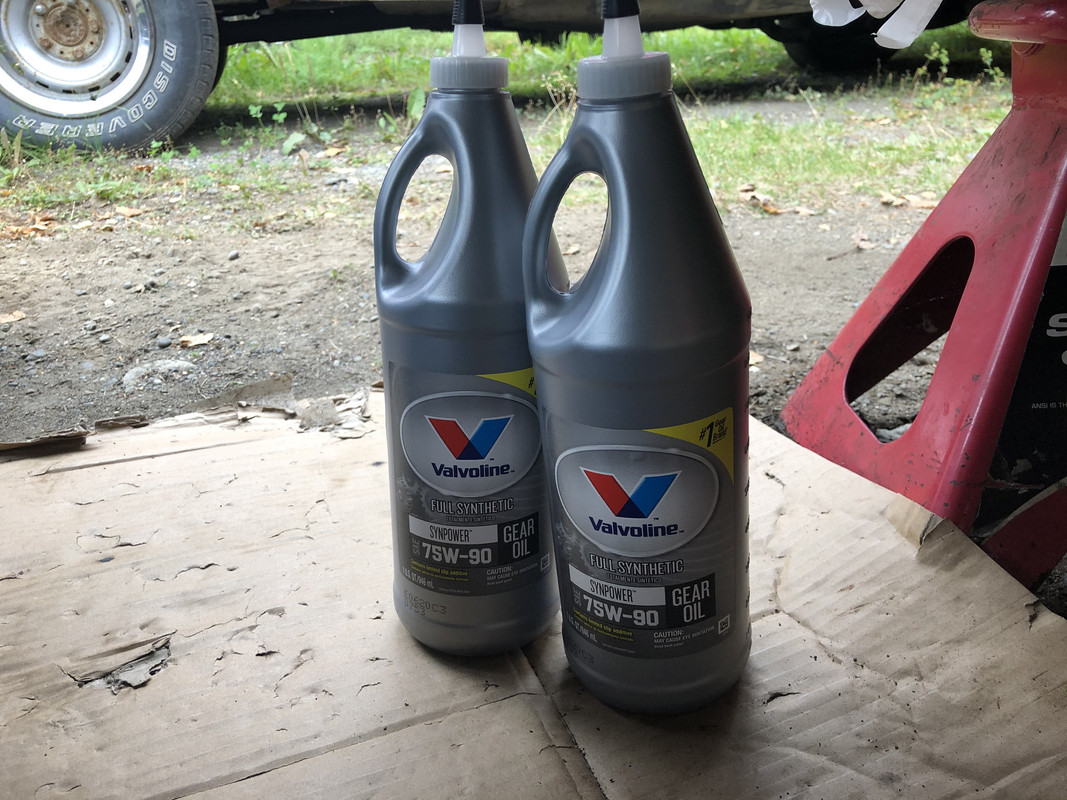
Added a couple drops of lube!
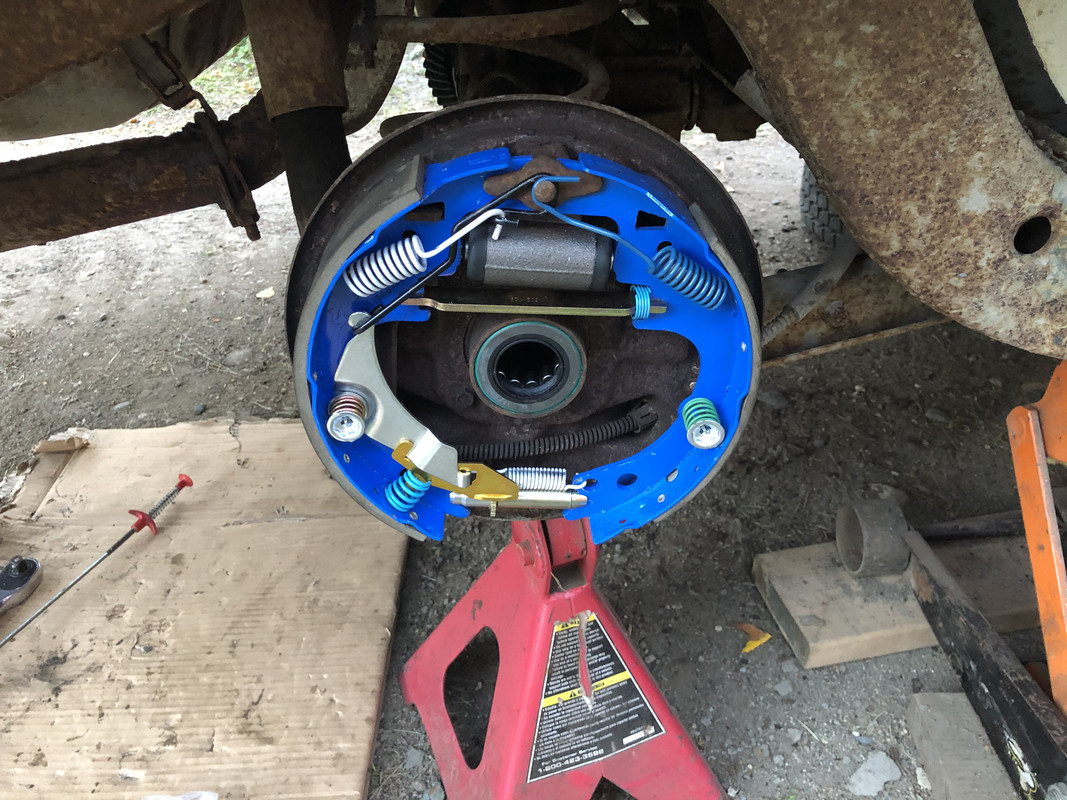
Clear coated and installed the new brake drums after adjusting the brake shoes.
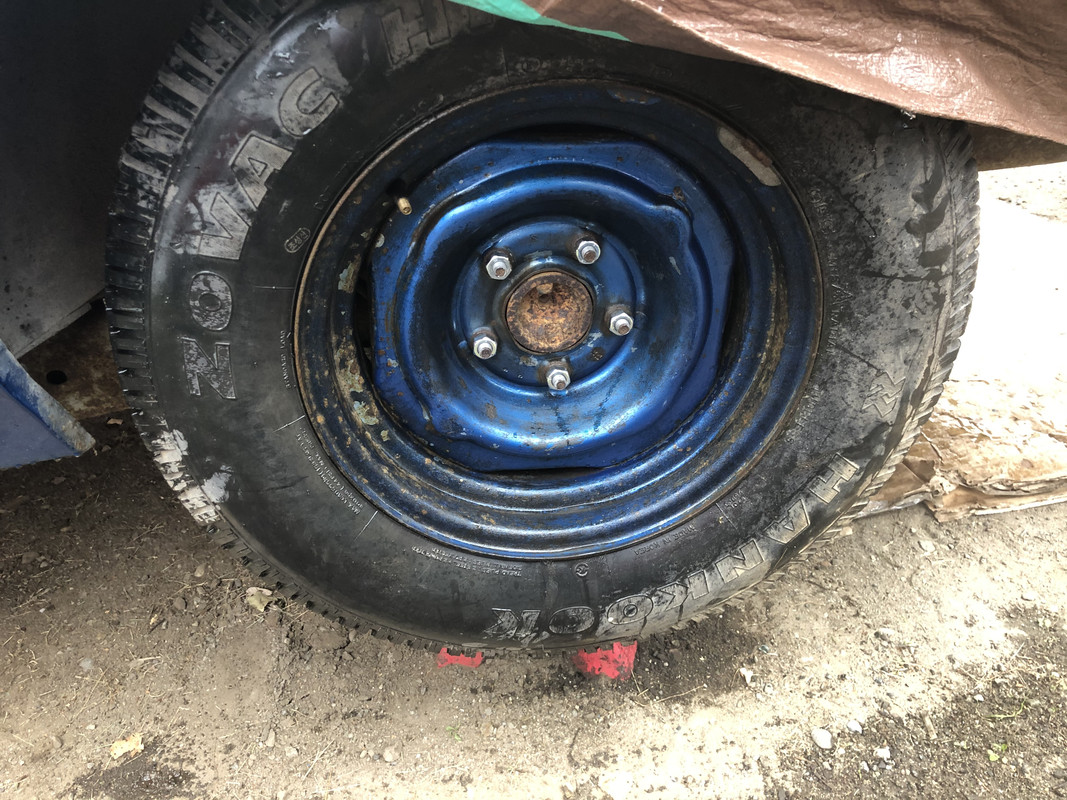
Wheels reinstalled with new lug nuts!
Bled the brakes myself and the pedal feels solid!
Picked up a couple more things needed to get this party started!
New rotors cleaned and ready for bearings!
Packing the new wheel bearings
Bearings and seals installed in the rear
Hubs packed and front bearings also installed!
The old, crusty junk. Actually, it wasn't in too bad of shape aside from the stuck calipers.
Old calipers and rotors removed. The spindles are in good condition!
New rotors installed!
New calipers, pads, and brake hoses on next!
Other side!
New master cylinder bench bled and installed!
The rear drum brakes are in surprisingly good condition as well. It looks like they may have been replaced right before the car was originally parked!
Part of the plan is to change the rear axle seals, so the rear housing needs to be disassembled. Looks like I have a bonus - LSD!
Fortunately, the rear fluid was in great condition as well with no traces of water! Unfortunately though, the cross shaft retaining bolt was sheared off and stuck tight inside the cross shaft, and after screwing around with it for several hours, I ended up just grinding the top of the pin off to expose the bolt.
New axle seals installed!
Passenger side!
Stripped the housing down. These rear wheel seal retainers have to be one of the stupidest designs I've ever seen. What was wrong with two bolts, GM?!
The new brake shoes I bought were mispackaged and included 1 leading shoe, and 3 trailing shoes. Oops. I decided to just return them and reuse my current ones, since they looked like they were right out of the box themselves. Replaced the wheel cylinders and all the internal hardware.
Replaced the rear rubber hose from the frame to the axle housing.
This hard line broke off at the wheel cylinder, so I fabricated a new one.
Picked up a replacement cross shaft and new bolt!
Unfortunately ended up getting into the housing a little bit, but nothing that will be concerning.
Cover installed on the axle, new gasket!
Added a couple drops of lube!
Clear coated and installed the new brake drums after adjusting the brake shoes.
Wheels reinstalled with new lug nuts!
Bled the brakes myself and the pedal feels solid!

Thread Starter
TECH Regular
Joined: Oct 2011
Posts: 453
Likes: 178
From: Alaska
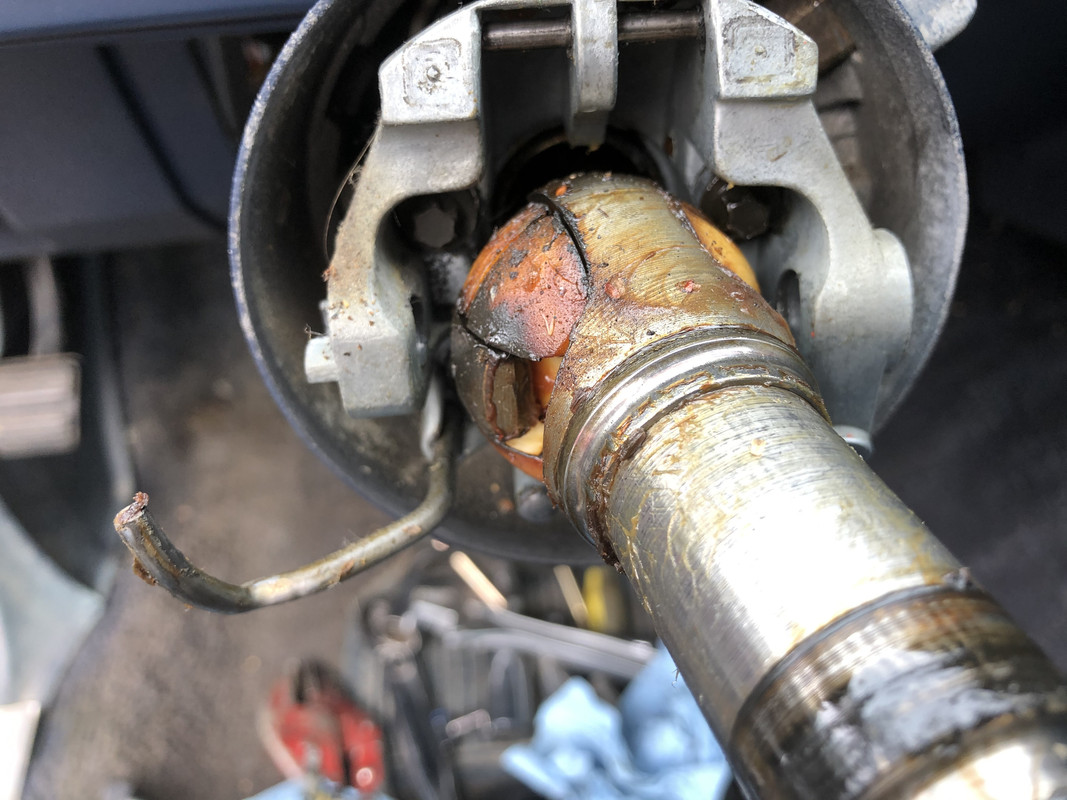
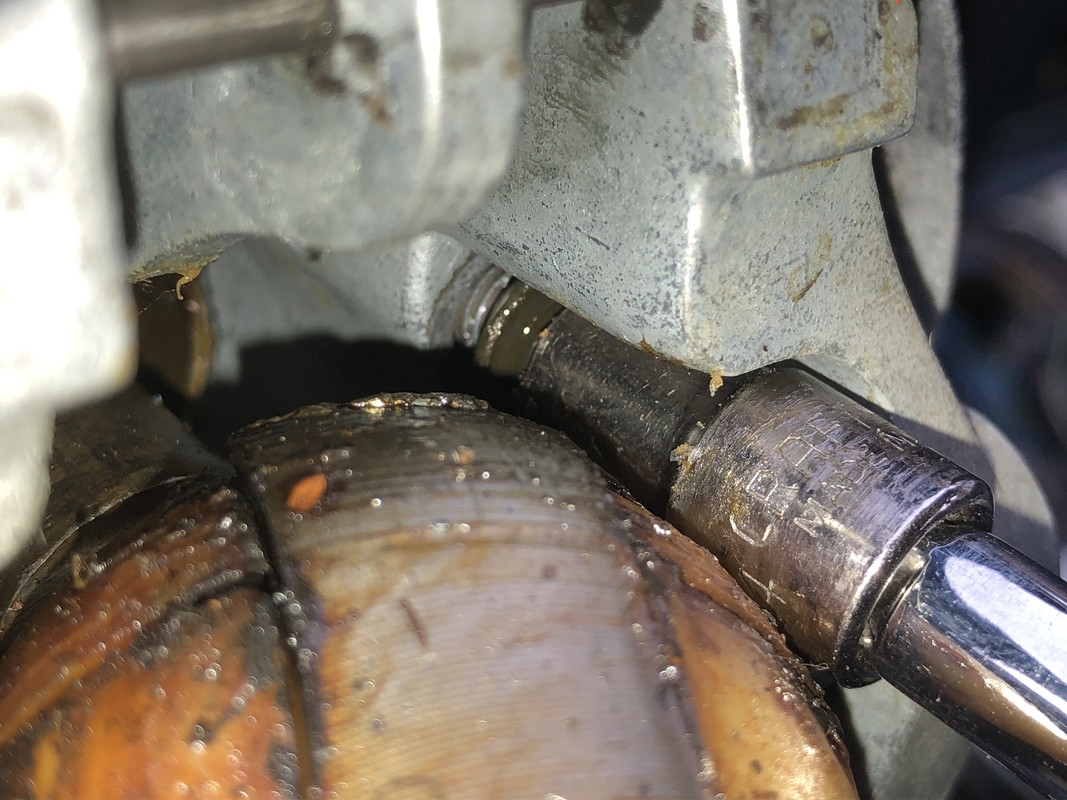
If you take a close look in the picture, I used a grinder on the tip of the cross shaft until the bolt shank was exposed as much as possible. I used a small drill to make a few holes in the bolt, then used a punch to drive it out.
Thread Starter
TECH Regular
Joined: Oct 2011
Posts: 453
Likes: 178
From: Alaska
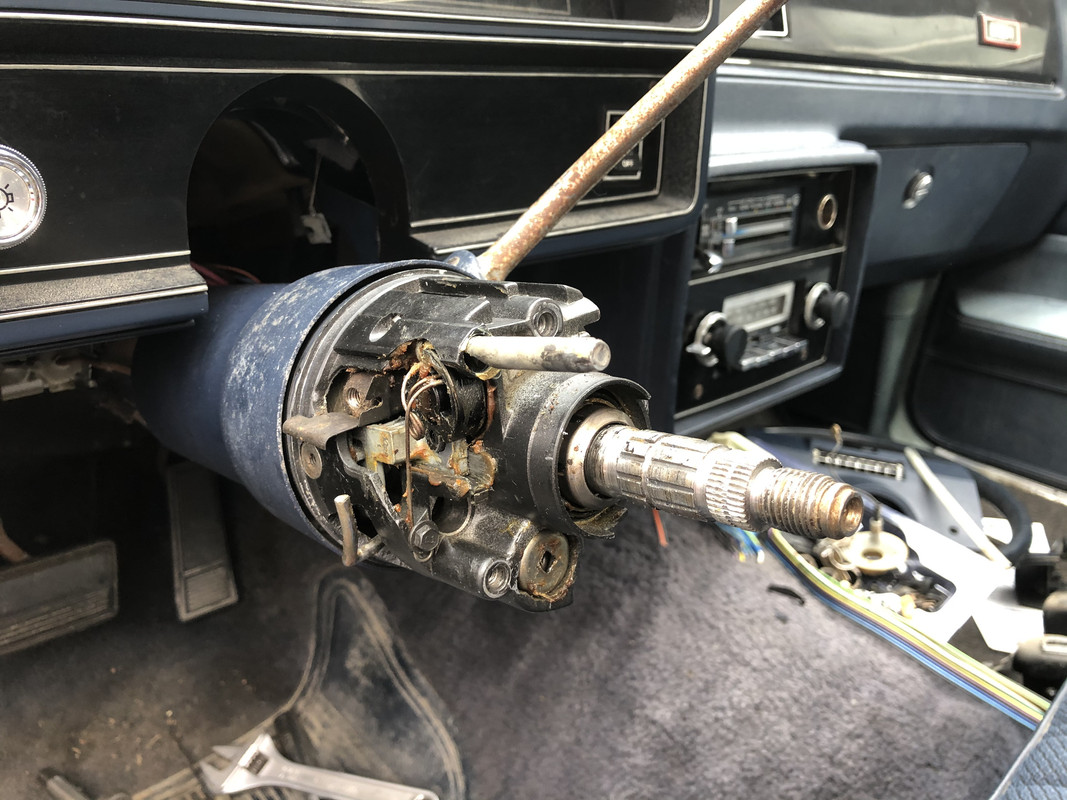
I've been working at getting all the lights to operate properly but kept running into weird little issues, so I figured some new switches were probably in order. I picked up the tools to disassemble the steering column as well, since the turn signal switch needed to be replaced and the tilt portion of the column flops around like a limp dick.
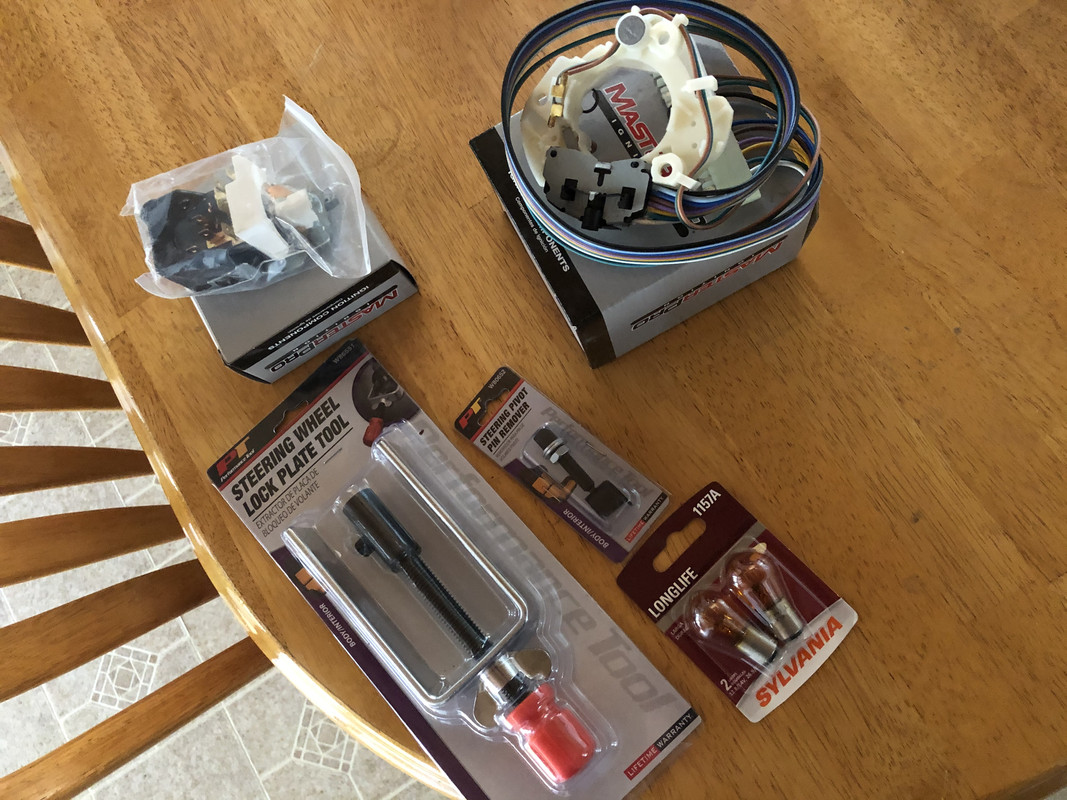
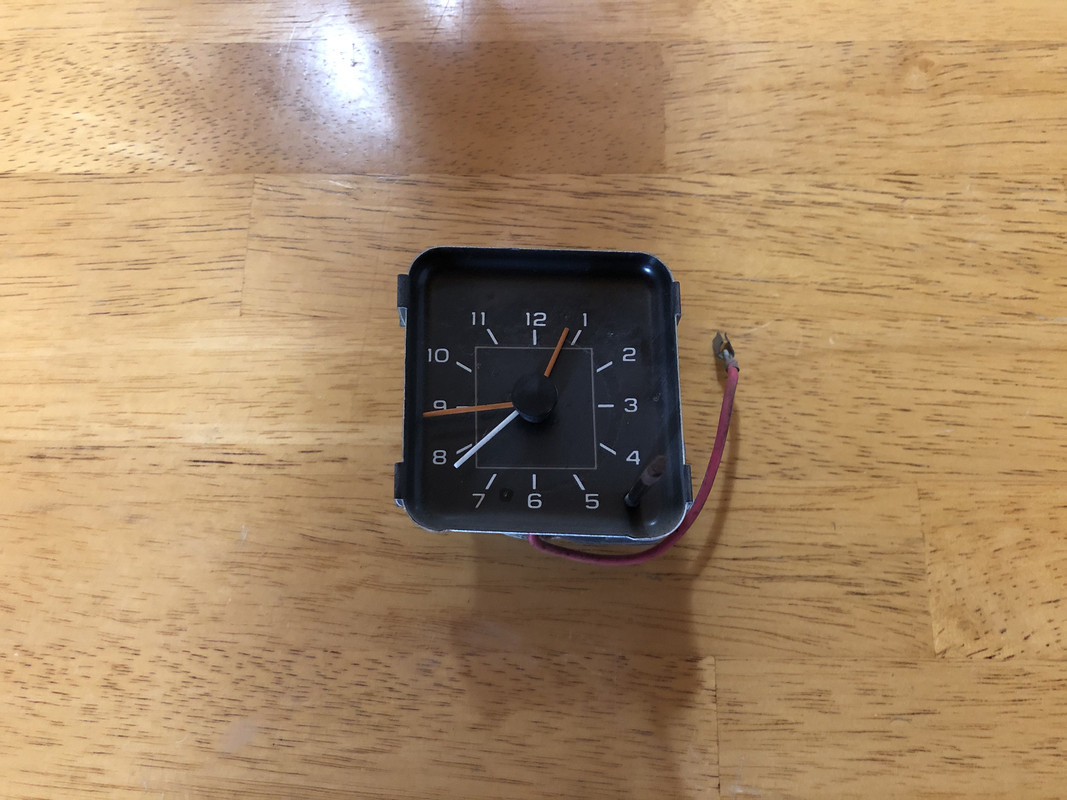
I also scored this sweet factory dash clock, it needed the points filed and a good cleaning and lube, but it still works great and keeps time!
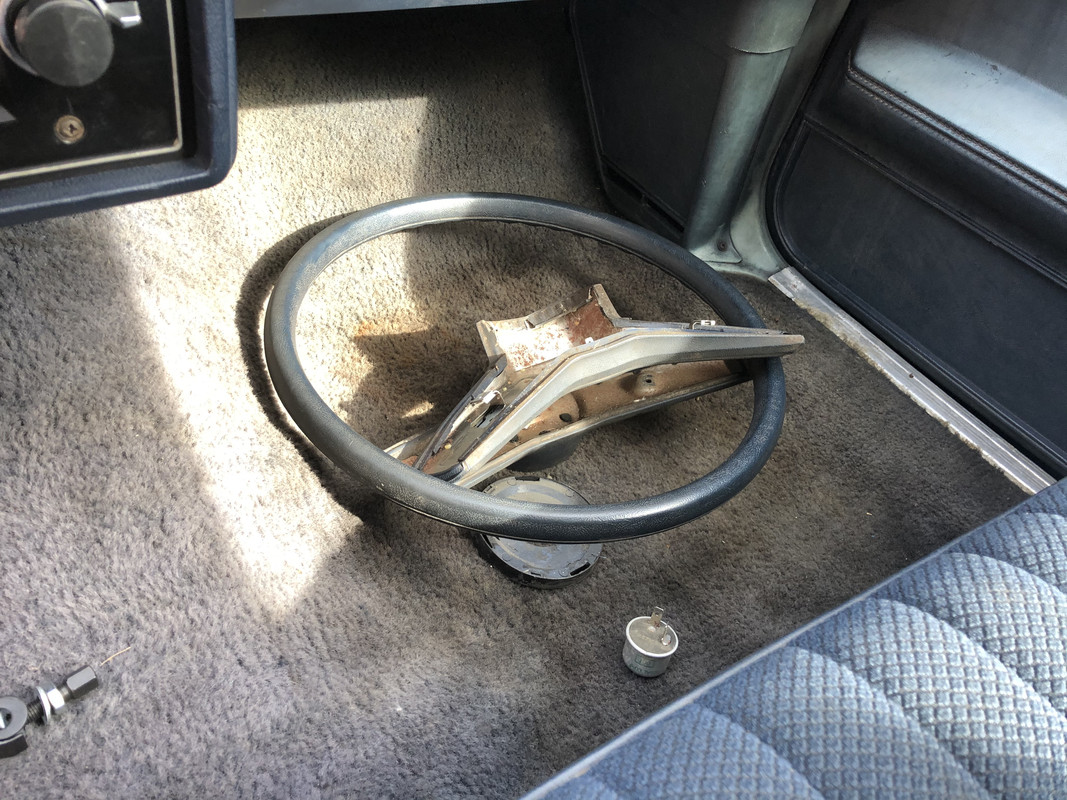
Steering wheel removed!
Removing the lock mechanism.
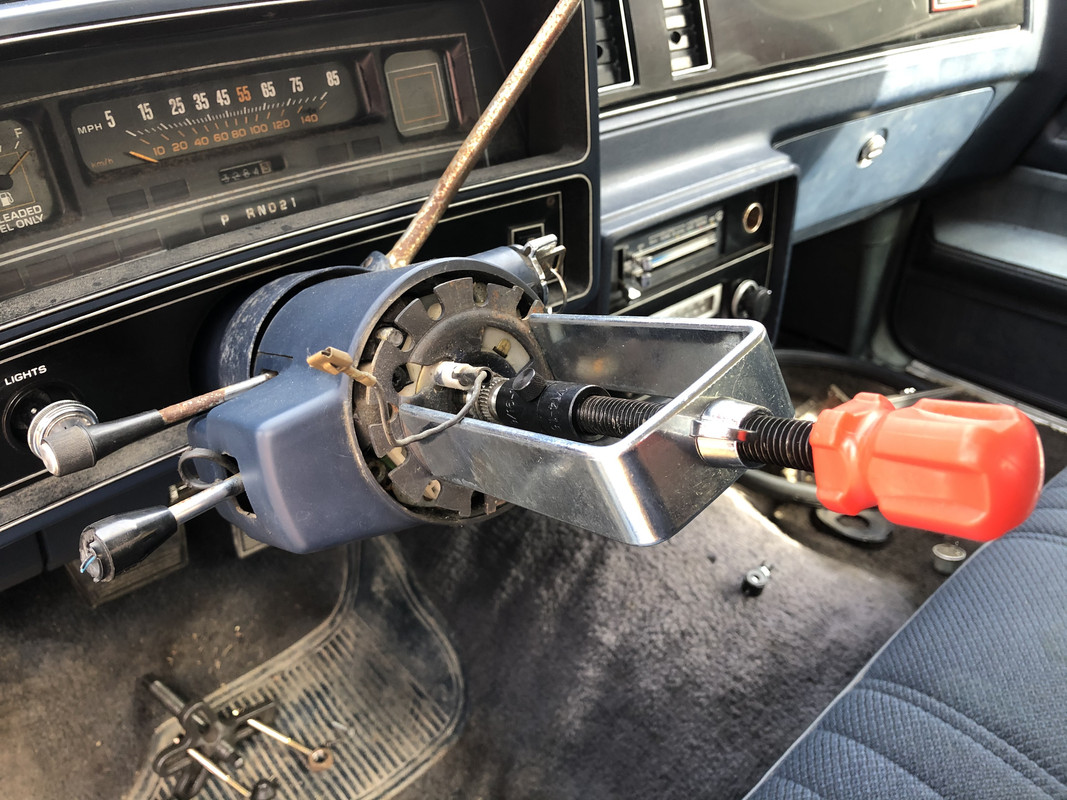
The turn signal switch assembly, this one wouldn't work at all.
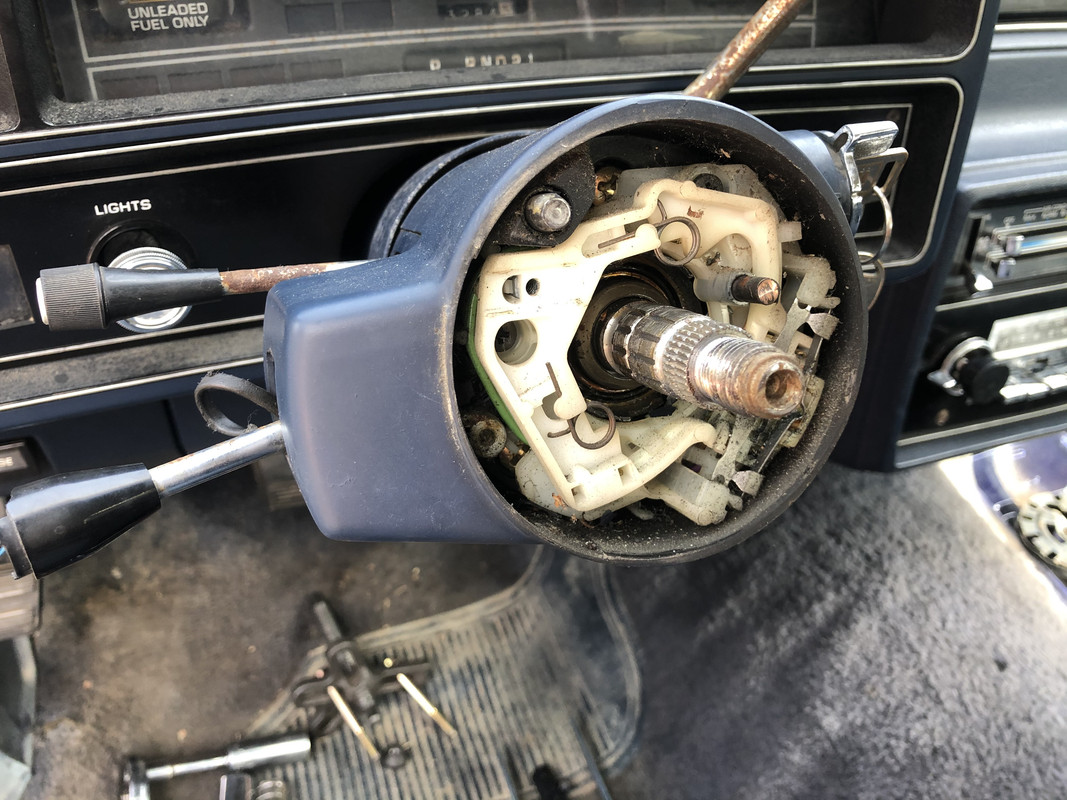
Inner housings removed, here you can spot the 4 bolts that are causing the column to become loose.
You can see just how far this one backed out!
Going back together!
I replaced the key switch as well, since it was worn almost to the point of not working anymore.
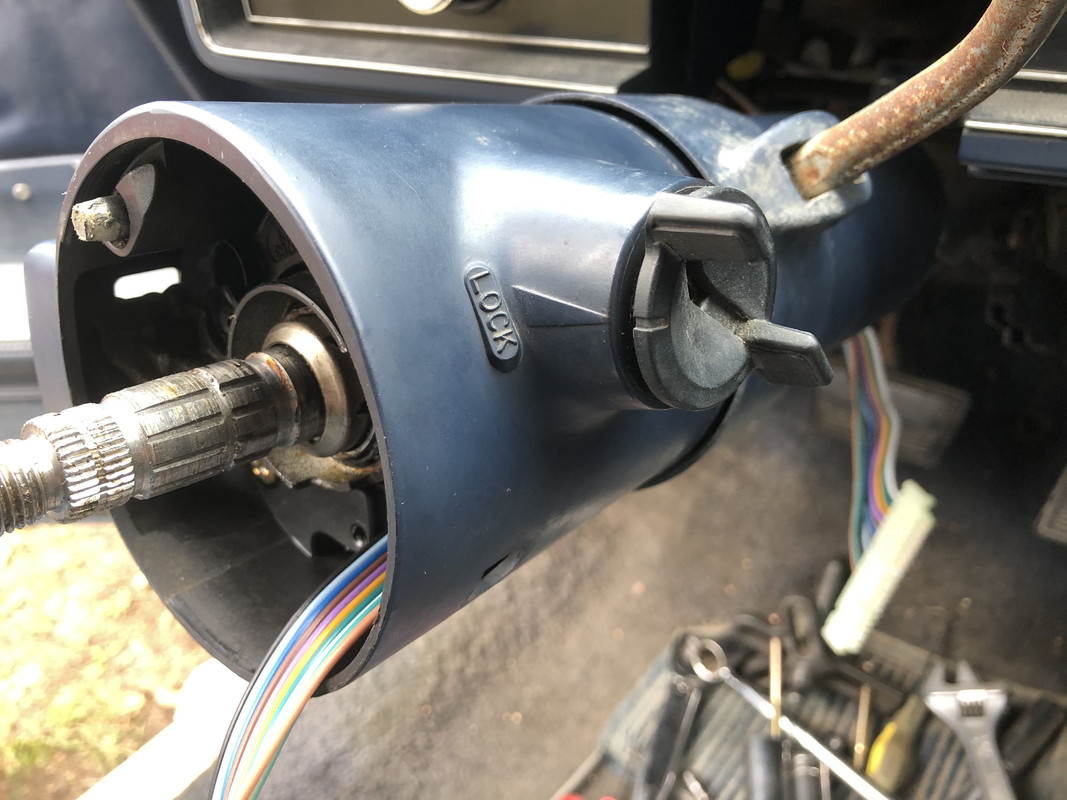
All back together!
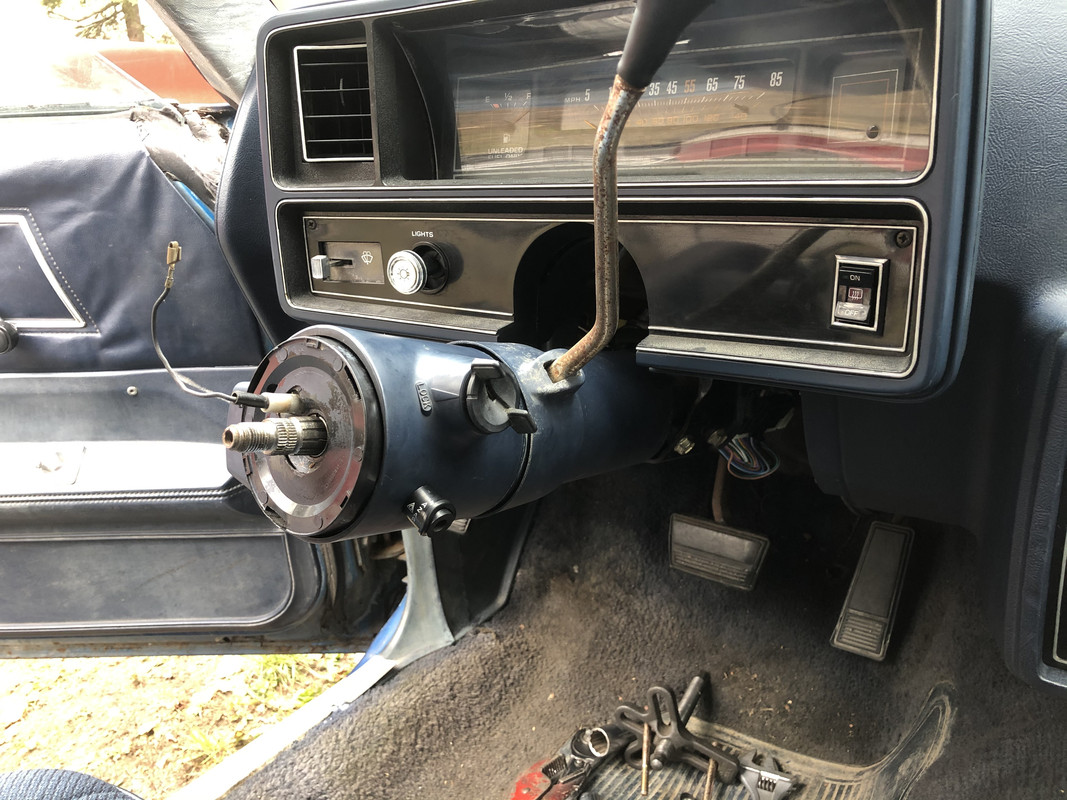
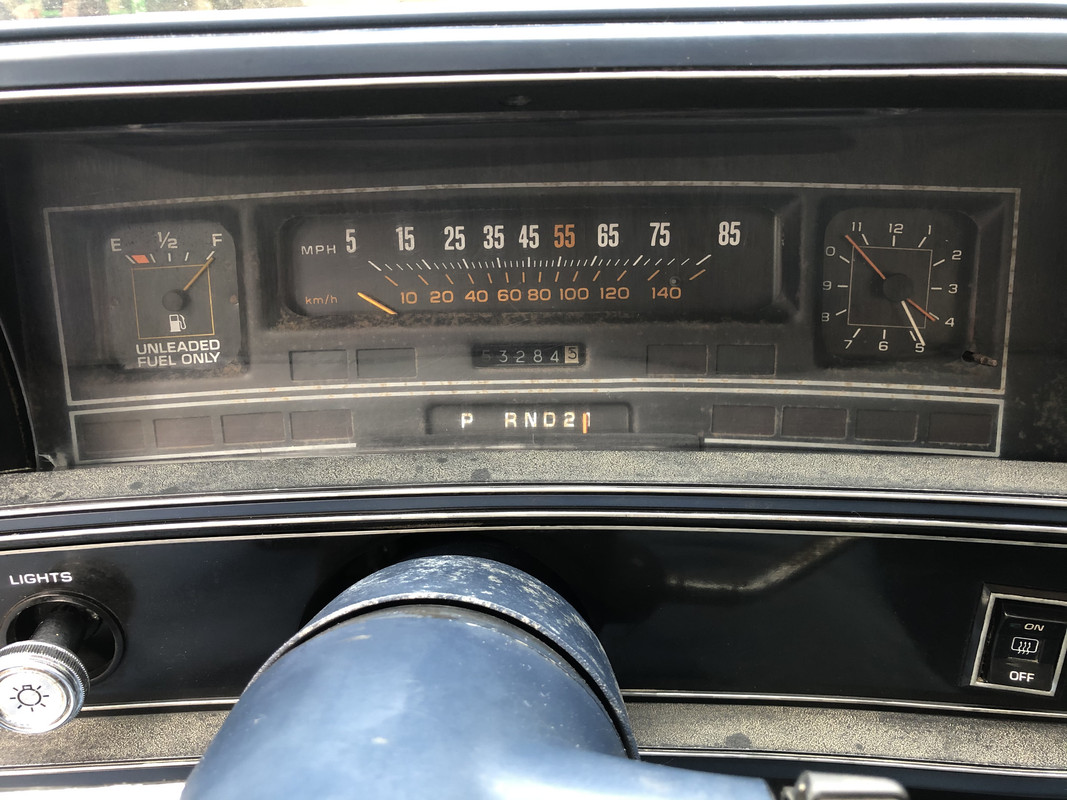
Took the gauge cluster back out and swapped out the headlight switch and installed the clock!
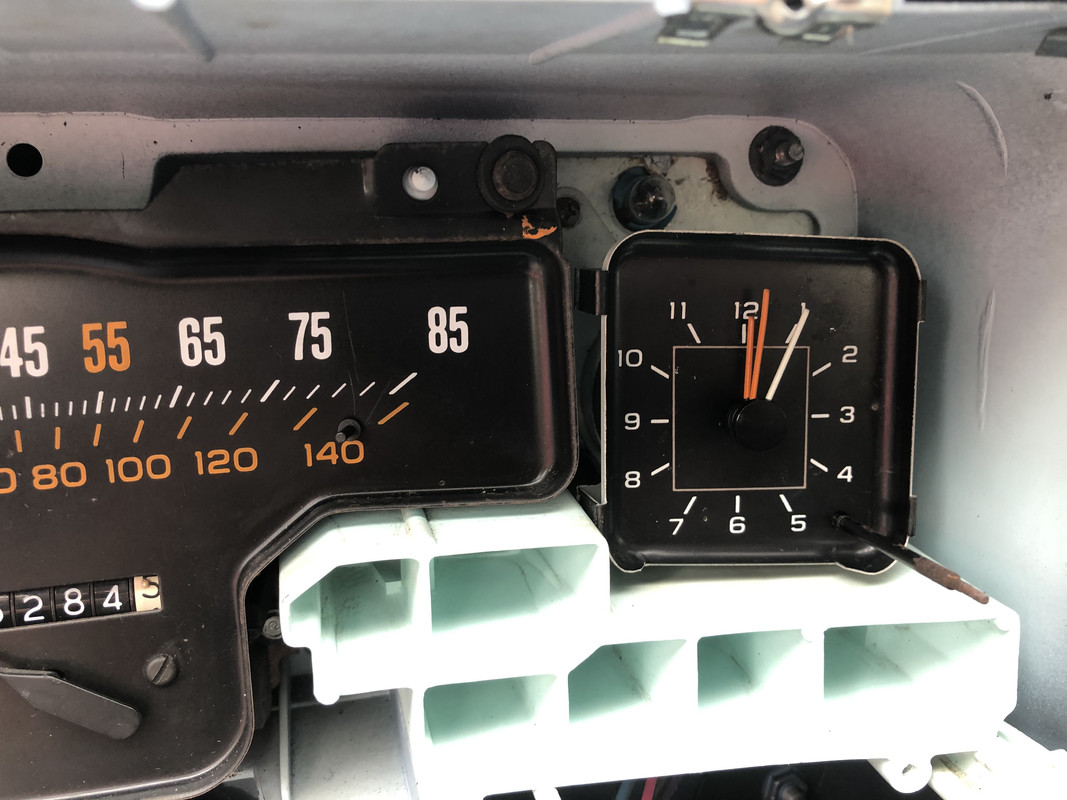
Dash completed! All lights work!
I also scored this sweet factory dash clock, it needed the points filed and a good cleaning and lube, but it still works great and keeps time!
Steering wheel removed!
Removing the lock mechanism.
The turn signal switch assembly, this one wouldn't work at all.
Inner housings removed, here you can spot the 4 bolts that are causing the column to become loose.
You can see just how far this one backed out!
Going back together!
I replaced the key switch as well, since it was worn almost to the point of not working anymore.
All back together!
Took the gauge cluster back out and swapped out the headlight switch and installed the clock!
Dash completed! All lights work!
Thread Starter
TECH Regular
Joined: Oct 2011
Posts: 453
Likes: 178
From: Alaska
Thank you! And yes, there�s a lot of little things to take care of, but they really make the biggest difference.
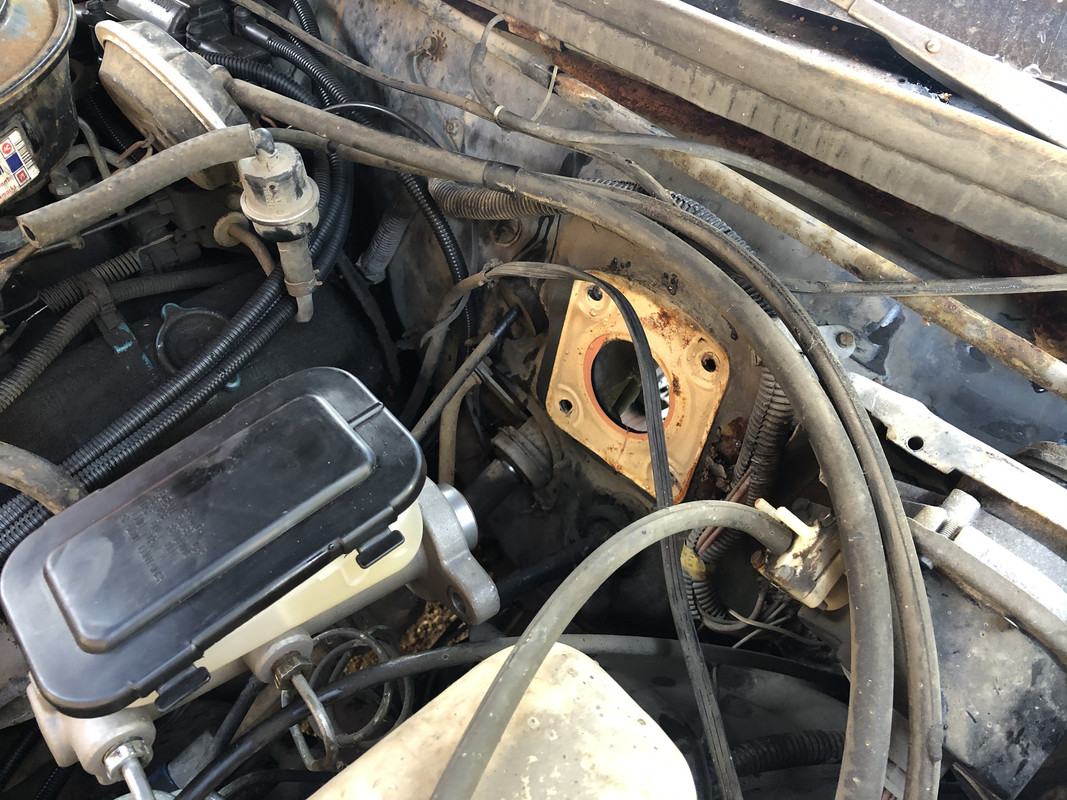
I got the car registered and insured and took it out for a test drive. I still wasn�t impressed with the brakes, so i performed some tests on the brake booster and it gave me the big middle finger, so I swapped it out! New part:

Old booster removed!
They hung out together for a bit.
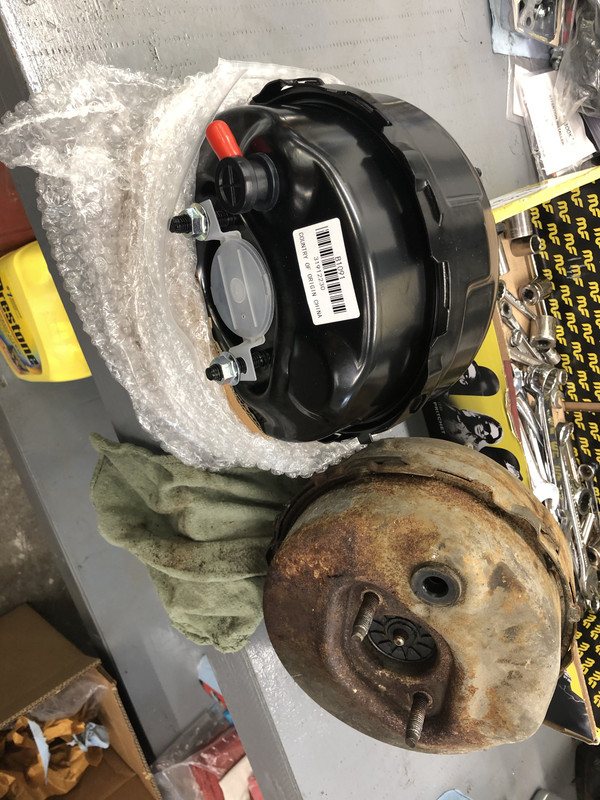
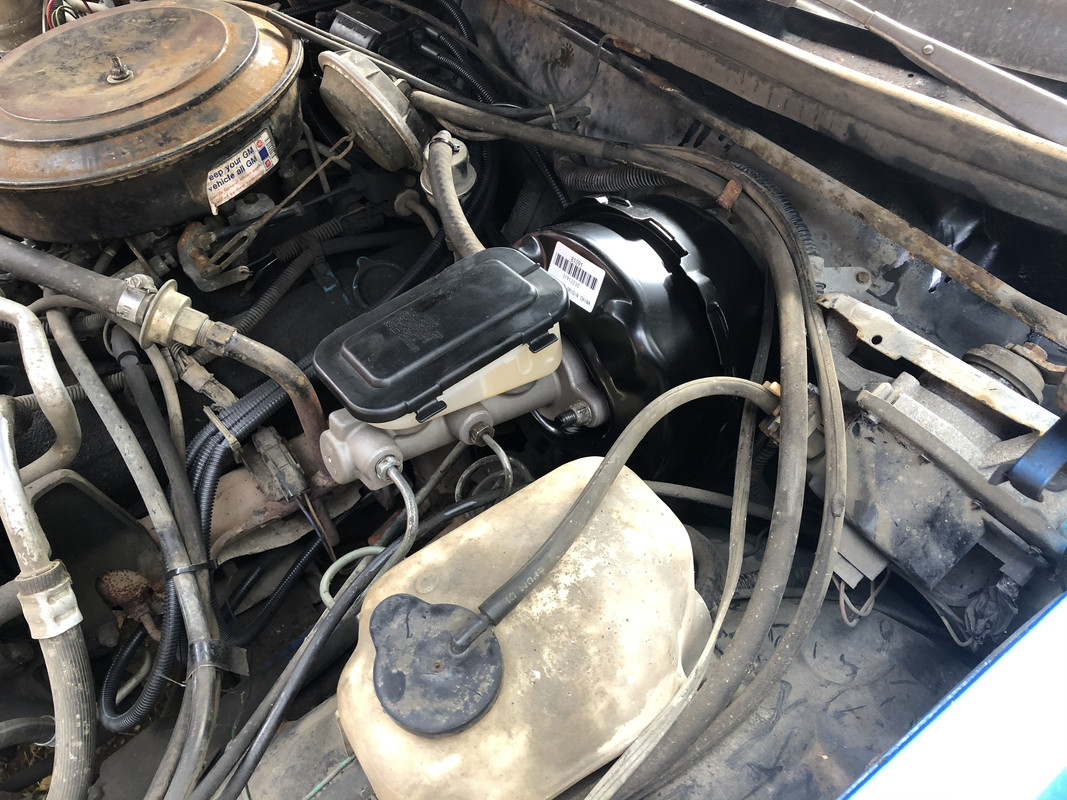
The new booster installed! The brakes work exactly like they�re supposed to now!
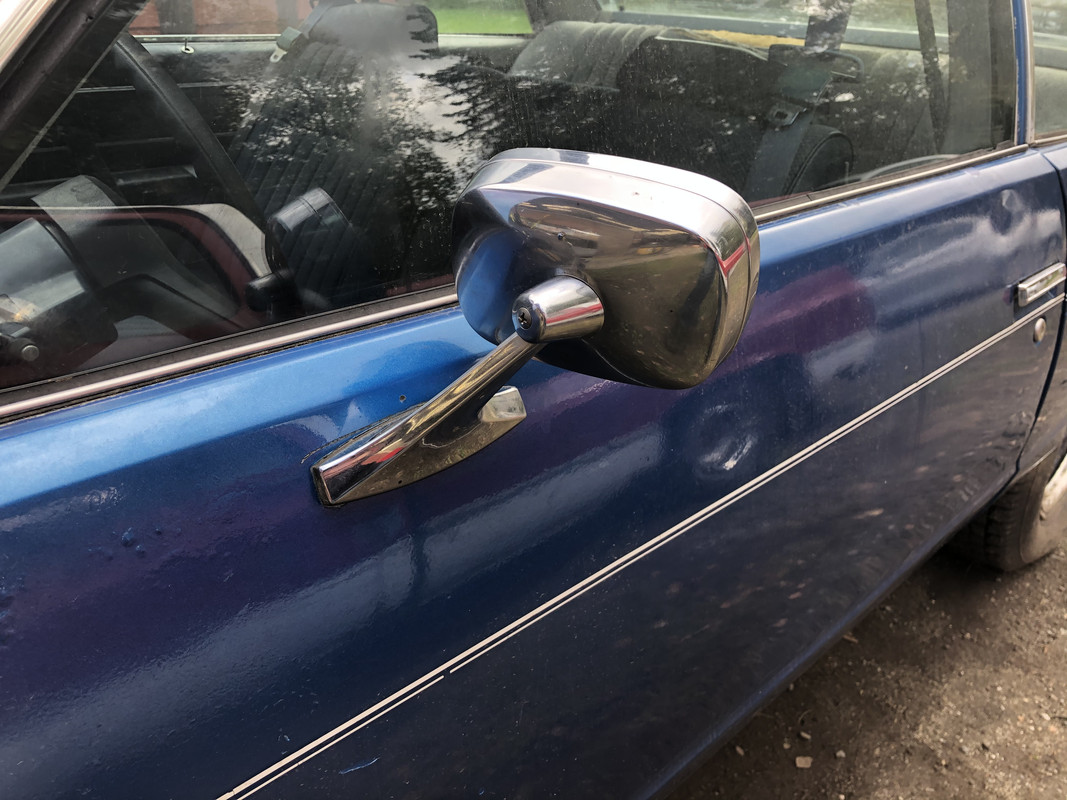
I took some time and swapped out the broken mirror.
Also picked up a set of chrome trim rings for the wheels.
I got the car registered and insured and took it out for a test drive. I still wasn�t impressed with the brakes, so i performed some tests on the brake booster and it gave me the big middle finger, so I swapped it out! New part:
Old booster removed!
They hung out together for a bit.
The new booster installed! The brakes work exactly like they�re supposed to now!
I took some time and swapped out the broken mirror.
Also picked up a set of chrome trim rings for the wheels.
Thank you! And yes, there�s a lot of little things to take care of, but they really make the biggest difference.
I got the car registered and insured and took it out for a test drive. I still wasn�t impressed with the brakes, so i performed some tests on the brake booster and it gave me the big middle finger, so I swapped it out! New part:
Old booster removed!
They hung out together for a bit.
The new booster installed! The brakes work exactly like they�re supposed to now!
I took some time and swapped out the broken mirror.
Also picked up a set of chrome trim rings for the wheels.
Andrew
Thread Starter
TECH Regular
Joined: Oct 2011
Posts: 453
Likes: 178
From: Alaska
Anything’s for sale at the right price! 
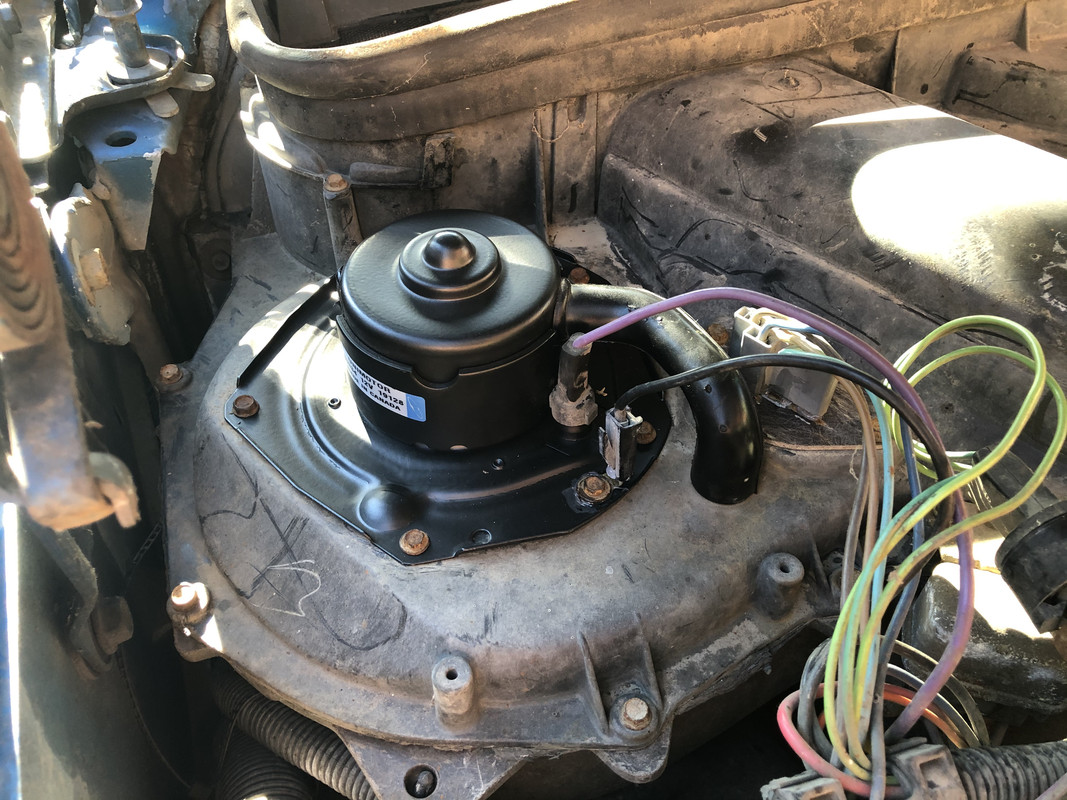
I’ve been checking over a few more things on the car and found that the blower motor wasn’t working. The resistor was fine after cleaning the contacts, but the blower motor was seized up solid! A brand new one took care of that issue.
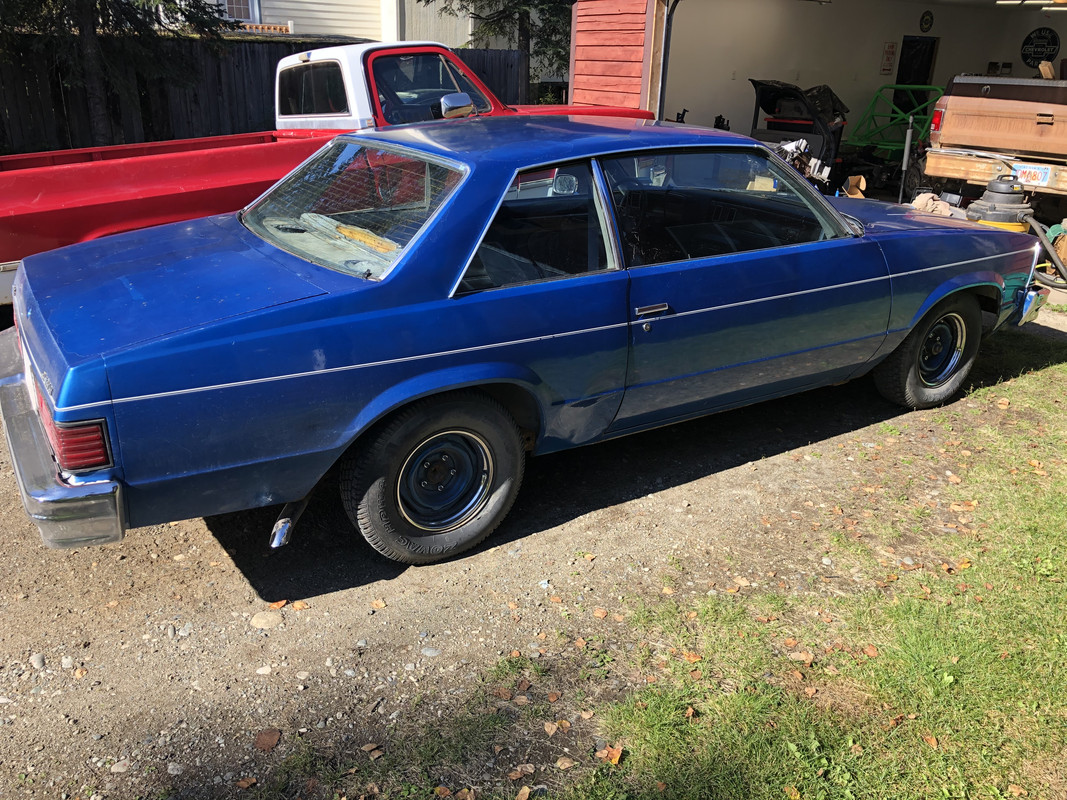
Aside from that, I’ve just been driving it! It’s been to town three times now, and I’ve put over 200 miles on it so far! Aside from a small idle issue that I think will be taken care of once the carb gets rebuilt, it’s been doing great!
I’ve been checking over a few more things on the car and found that the blower motor wasn’t working. The resistor was fine after cleaning the contacts, but the blower motor was seized up solid! A brand new one took care of that issue.
Aside from that, I’ve just been driving it! It’s been to town three times now, and I’ve put over 200 miles on it so far! Aside from a small idle issue that I think will be taken care of once the carb gets rebuilt, it’s been doing great!


Man, that car looks awesome for the money you've got invested!! Kinda jealous, I've had similar deals come across my lap I just don't have space to keep em at the house, and I can only "hide" so many things at my work haha. I bet when you pop that Q-Jet off you find some loose screws in the on the base and top plate. If you pop the air cleaner off and try to snug up everything on the top it might cure your idle issue.
Thread Starter
TECH Regular
Joined: Oct 2011
Posts: 453
Likes: 178
From: Alaska
Thank you! There’s quite a few more I’d like to pick up as well, but I quickly run out of room around here.
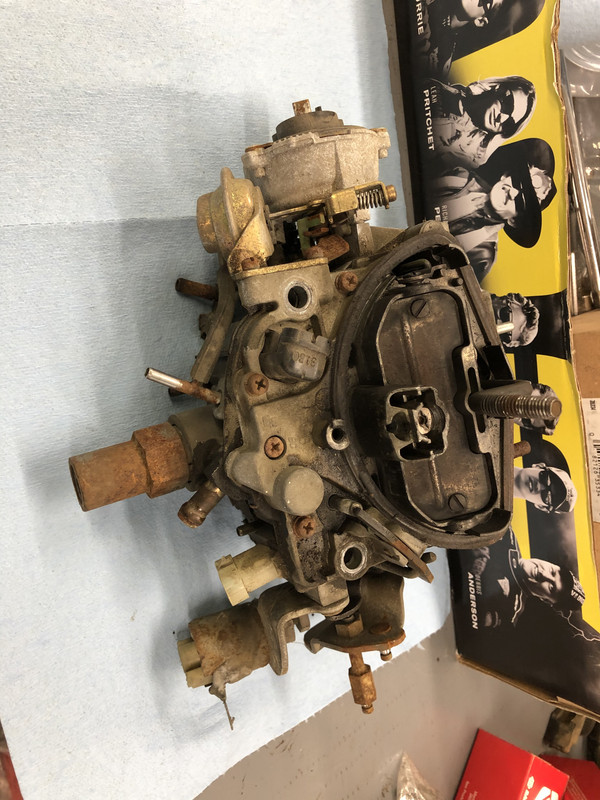
I ordered in a carb kit for the car, and I’m glad I did. There was a lot of residue from old gas and the O-rings and seals were all dry rotted.
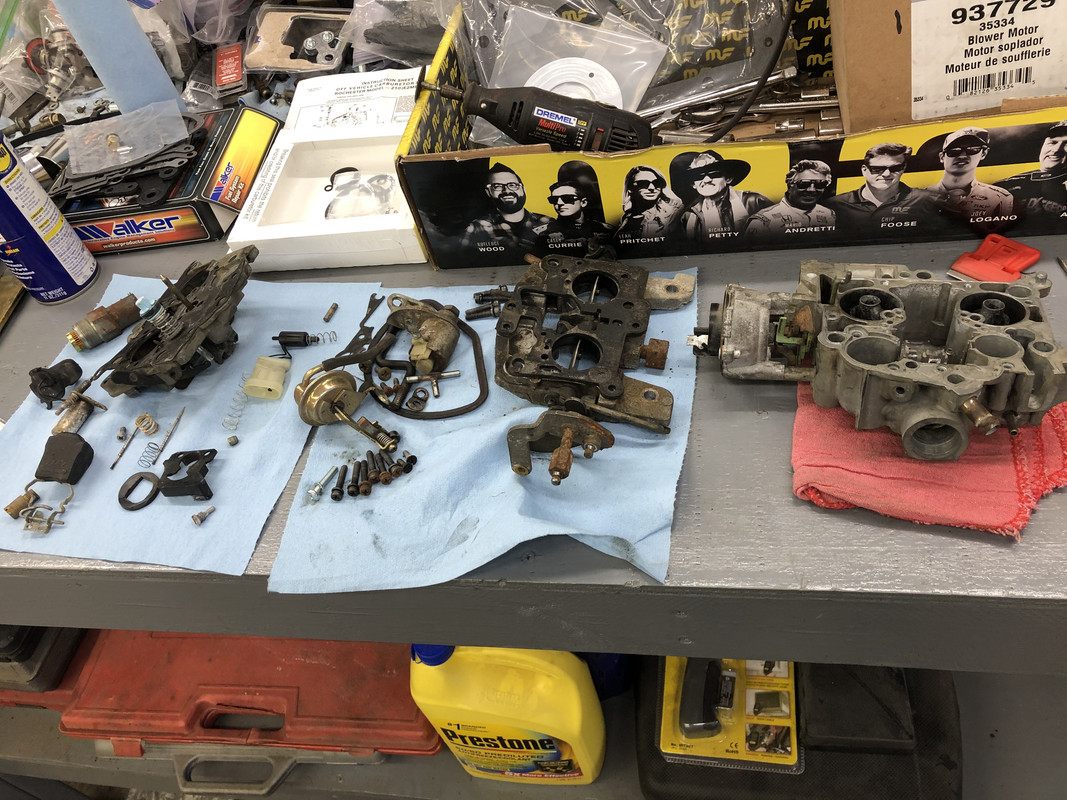
Torn down and being cleaned
All back together!

I also replaced a few vacuum lines that were on their way out, and ordered a new O2 sensor as the OEM ones can have a high failure rate. This definitely cured my idle issue though. The car ran great before, and does even better now. I did pick up a small hesitation issue right off of idle, but it only happens occasionally. I’m thinking that the accelerator pump shaft may be sticking in the seal sometimes, as the kit only provided one size unlike stock and it was a little tight. It seemed to be doing it less the more the car was driven, so after putting a few more miles on it, I’ll see how it does. It did great otherwise on a 80 mile drive into town and back!
I ordered in a carb kit for the car, and I’m glad I did. There was a lot of residue from old gas and the O-rings and seals were all dry rotted.
Torn down and being cleaned
All back together!
I also replaced a few vacuum lines that were on their way out, and ordered a new O2 sensor as the OEM ones can have a high failure rate. This definitely cured my idle issue though. The car ran great before, and does even better now. I did pick up a small hesitation issue right off of idle, but it only happens occasionally. I’m thinking that the accelerator pump shaft may be sticking in the seal sometimes, as the kit only provided one size unlike stock and it was a little tight. It seemed to be doing it less the more the car was driven, so after putting a few more miles on it, I’ll see how it does. It did great otherwise on a 80 mile drive into town and back!
Teching In
Joined: Jun 2020
Posts: 24
Likes: 2
From: Cincinnati, OH
Nice work getting it all back to running and normal working condition. It's nice to get it all running and driving before you do the engine and trans upgrades.
Noticed the rear gears stamped 21:48, or 2.29 ratio! Look out Bonneville, Nick from AK is on h is way, hahaha. I suppose acceleration is less than spectacular with the monstrous 267 power.
Noticed the rear gears stamped 21:48, or 2.29 ratio! Look out Bonneville, Nick from AK is on h is way, hahaha. I suppose acceleration is less than spectacular with the monstrous 267 power.