


1dirtyZ's conversion conversion :D
Wow, I can't believe all the set backs you have had! Many people would of given up by now, I hope you get to enjoy it soon! Bob
__________________
ATI ProCharger and Moser Sales 260 672-2076
PM's disabled, please e-mail me
E-mail: brutespeed@gmail.comob@brutespeed.com
https://brutespeed.com/ Link to website

ATI ProCharger and Moser Sales 260 672-2076
PM's disabled, please e-mail me
E-mail: brutespeed@gmail.comob@brutespeed.com
https://brutespeed.com/ Link to website
Thread Starter
8 Second Club
iTrader: (1)
Joined: Nov 2001
Posts: 3,697
Likes: 1
From: the not so stock tribe
well I think I just reached a turning point in this and other projects ,,,, after having tens of issues with the head units I have and having no help from procharger I think its about time to give up on trying to show procharger in a good light.
I just got word back from them that the F2 that just broke again ( yes it broke again after one pass and one burnout on the drag strip after spending $1800 in replacing almost everything supposedly with "All new" parts) will not be warrantied and that I have to spend $2500 to fix their mistake!!
and they also have the nerve to try to sell me an F1a head unit claiming they will get me a "special " deal at $3000 for it ,,,, when I can get it without even trying from a dealer for $2900 !! talk about adding insult to injury!
its a shame how such a once reputable company would just screw over a 14 year customer who stuck by them all this time!
I'v been having trouble with my head units on this car and the silver 5thgen's F3-136 since I got it ( I was sent back about 10 times so far) , anywhere from chipped impeller blades to destroyed transmissions and internals . all this seems to have started after a certain date and after I sent back the blowers in for a refresh .
I also noticed that everyone I know who is racing a procharged car has been having issues ( ghoste-vette from the vette forms destroyed his F1x during its first burnout!, Azooooz's F3-135 had his impeller touch down way under the max impeller rpm , just to name a few). there are many more examples of shitty parts and quality if you look around,,,, the sad part is procharger's response regarding the matter : its all the und user's fault!
I guess now would be the time to seriously start looking into alternatives such as turbos or into vortech head units. at least these units last longer than a few runs.
updates to follow soon I hope .
My friend had a similar experience with a F-2R ProCharger..... 383 LT1 that made 800rwhp with a 200hp nitrous shot on top..... His head unit failed... had it rebuilt.... next unit failed shortly thereafter.... no warranty coverage from them.
well he switched to a T6 88mm turbo and made 1020rwhp without nitrous, running the same cam!...and no belt slipping issues now, plus able to do boost by gear to actually use the power.
Turbo ftw!
well he switched to a T6 88mm turbo and made 1020rwhp without nitrous, running the same cam!...and no belt slipping issues now, plus able to do boost by gear to actually use the power.
Turbo ftw!
well I think I just reached a turning point in this and other projects ,,,, after having tens of issues with the head units I have and having no help from procharger I think its about time to give up on trying to show procharger in a good light.
I just got word back from them that the F2 that just broke again ( yes it broke again after one pass and one burnout on the drag strip after spending $1800 in replacing almost everything supposedly with "All new" parts) will not be warrantied and that I have to spend $2500 to fix their mistake!!
and they also have the nerve to try to sell me an F1a head unit claiming they will get me a "special " deal at $3000 for it ,,,, when I can get it without even trying from a dealer for $2900 !! talk about adding insult to injury!
its a shame how such a once reputable company would just screw over a 14 year customer who stuck by them all this time!
I'v been having trouble with my head units on this car and the silver 5thgen's F3-136 since I got it ( I was sent back about 10 times so far) , anywhere from chipped impeller blades to destroyed transmissions and internals . all this seems to have started after a certain date and after I sent back the blowers in for a refresh .
I also noticed that everyone I know who is racing a procharged car has been having issues ( ghoste-vette from the vette forms destroyed his F1x during its first burnout!, Azooooz's F3-135 had his impeller touch down way under the max impeller rpm , just to name a few). there are many more examples of shitty parts and quality if you look around,,,, the sad part is procharger's response regarding the matter : its all the und user's fault!
I guess now would be the time to seriously start looking into alternatives such as turbos or into vortech head units. at least these units last longer than a few runs.
updates to follow soon I hope .
I just got word back from them that the F2 that just broke again ( yes it broke again after one pass and one burnout on the drag strip after spending $1800 in replacing almost everything supposedly with "All new" parts) will not be warrantied and that I have to spend $2500 to fix their mistake!!
and they also have the nerve to try to sell me an F1a head unit claiming they will get me a "special " deal at $3000 for it ,,,, when I can get it without even trying from a dealer for $2900 !! talk about adding insult to injury!
its a shame how such a once reputable company would just screw over a 14 year customer who stuck by them all this time!
I'v been having trouble with my head units on this car and the silver 5thgen's F3-136 since I got it ( I was sent back about 10 times so far) , anywhere from chipped impeller blades to destroyed transmissions and internals . all this seems to have started after a certain date and after I sent back the blowers in for a refresh .
I also noticed that everyone I know who is racing a procharged car has been having issues ( ghoste-vette from the vette forms destroyed his F1x during its first burnout!, Azooooz's F3-135 had his impeller touch down way under the max impeller rpm , just to name a few). there are many more examples of shitty parts and quality if you look around,,,, the sad part is procharger's response regarding the matter : its all the und user's fault!
I guess now would be the time to seriously start looking into alternatives such as turbos or into vortech head units. at least these units last longer than a few runs.
updates to follow soon I hope .
This is exactly why I never even considered procharger as a FI option. Seems like there are soooo many threads with guys tearing them up its ridiculous, and the price is high initially, let alone consistently getting screwed on having them fixed time and time again.
Turbo for LYFE! lol
LS1 Tech Stories
The Best V8 Stories One Small Block at Time

Gas Monkey Built a 6-Wheel Ferrari Testarossa With a Corvette LT4 Engine
Verdad Gallardo
7 Most Reliable High-Performance Engines GM Has Ever Built
Verdad Gallardo
Amazing '71 Camaro Restomod Is Modern Muscle Car Under the Skin
Verdad Gallardo
6 Common C5 Corvette Failures and What's Involved In Repairing Them
Pouria Savadkouei
Retro Modern Bandit Pontiac Trans AM Comes With Burt Reynolds' Autograph
Verdad Gallardo
Top 10 Greatest Cadillac V Series Performance Models Ever, Ranked
Pouria Savadkouei
Top 10 Most Powerful Chevy Trucks Ever Made!

Hennessey's New Supercharged Silverado ZR2 Has 700 HP
Verdad Gallardo
Coachbuilt N2A Anteros Is an LS2-Powered C6 Corvette In Italian Clothes
Verdad Gallardo

Thread Starter
8 Second Club
iTrader: (1)
Joined: Nov 2001
Posts: 3,697
Likes: 1
From: the not so stock tribe
guess its time for an update !
this picture should give you an idea of how well procharger treats its customers
I've hit a dead end with them and decided its time to move on to better things.
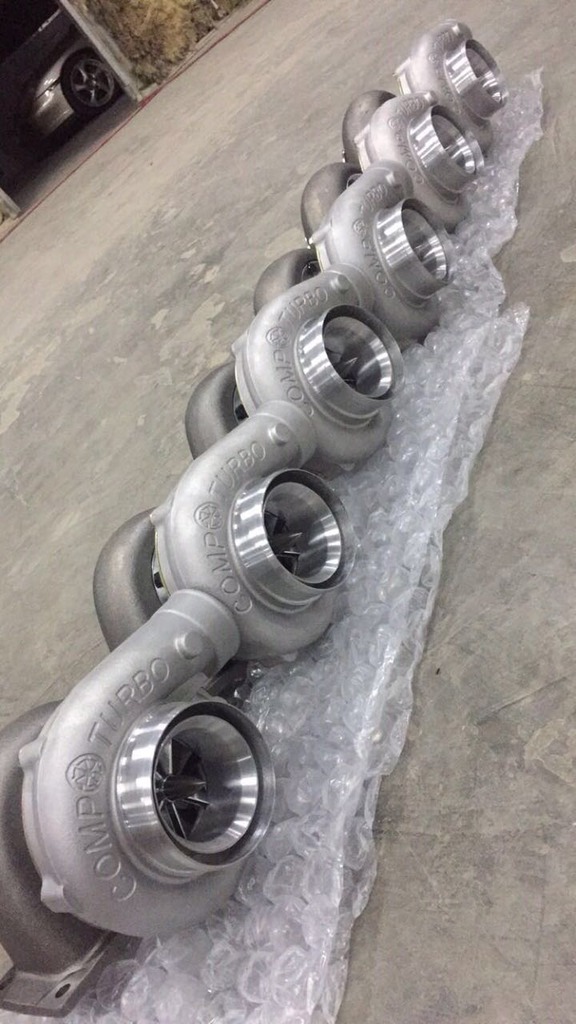
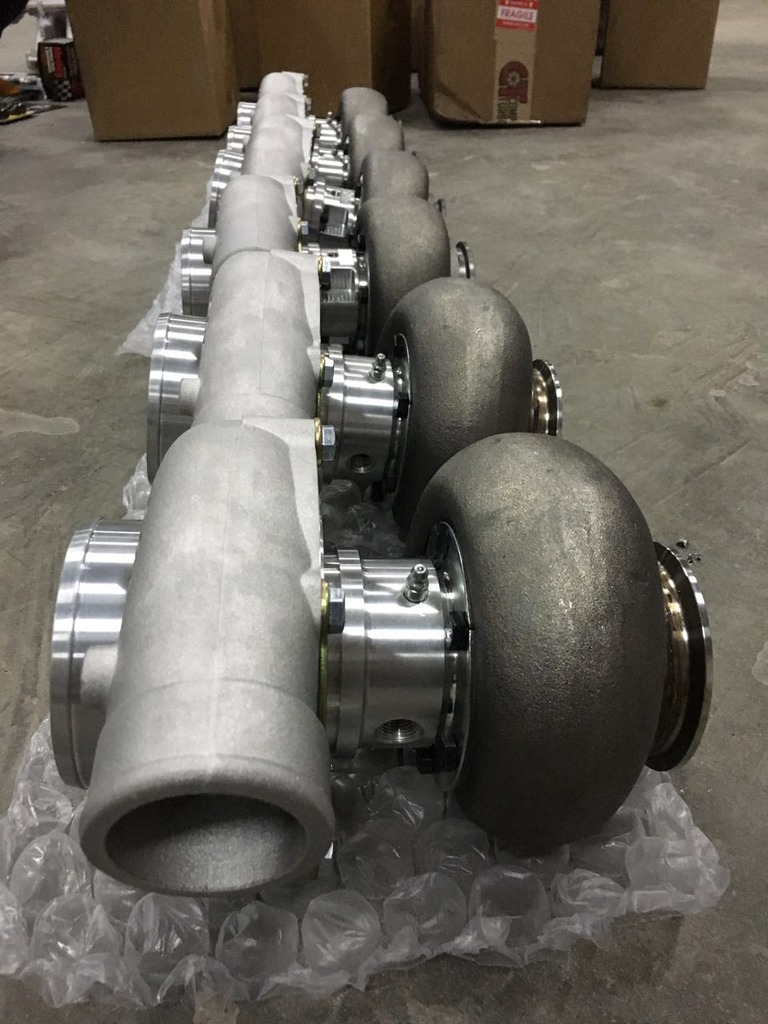
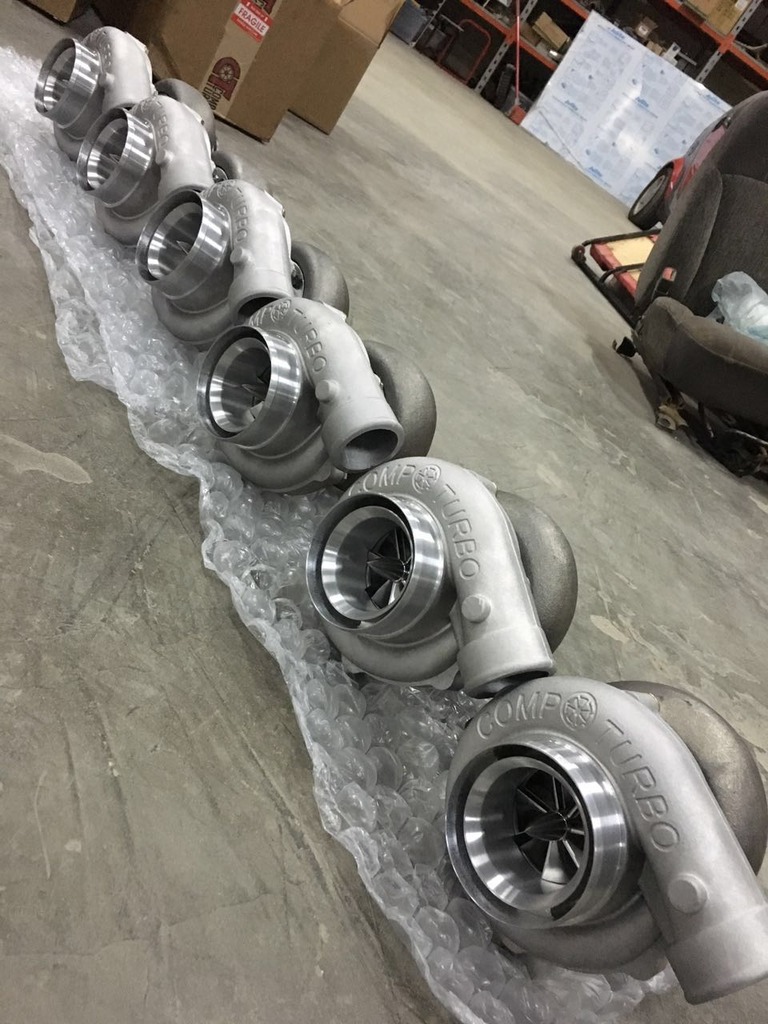
these are turbos for the mustang, my 1970 Camaro and a friends drag mustang. comp has given me a great deal and from dealing with them before ( through a friends shop) i have nothing but good things to say about them . plus i already have a set of their smaller ct3 on my Porsche and the results are great !
four of these are oil-less and the other two are traditional units for my friend's mustang.
i also got the front brakes in
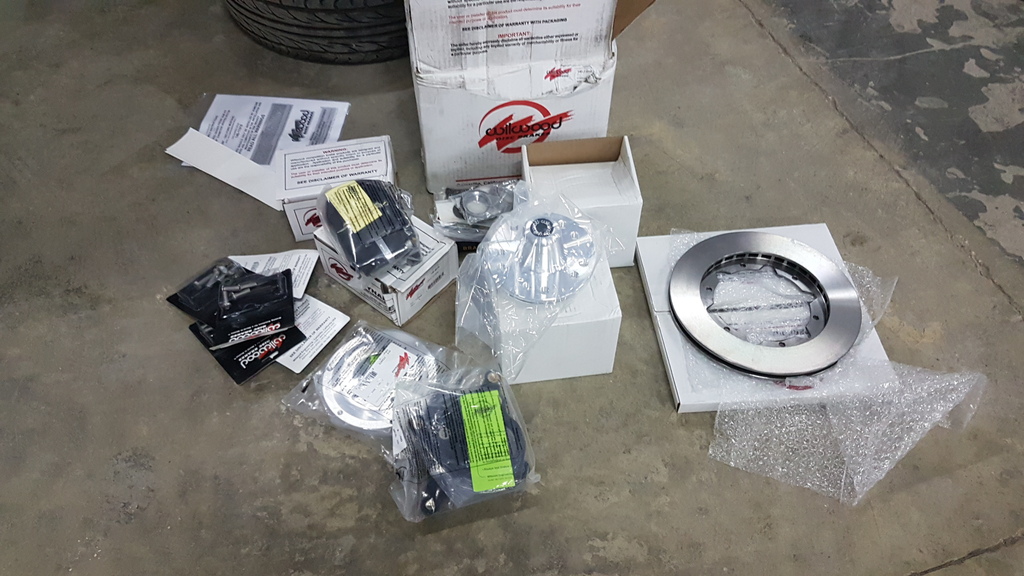
you can tell the stock brakes were put to good use
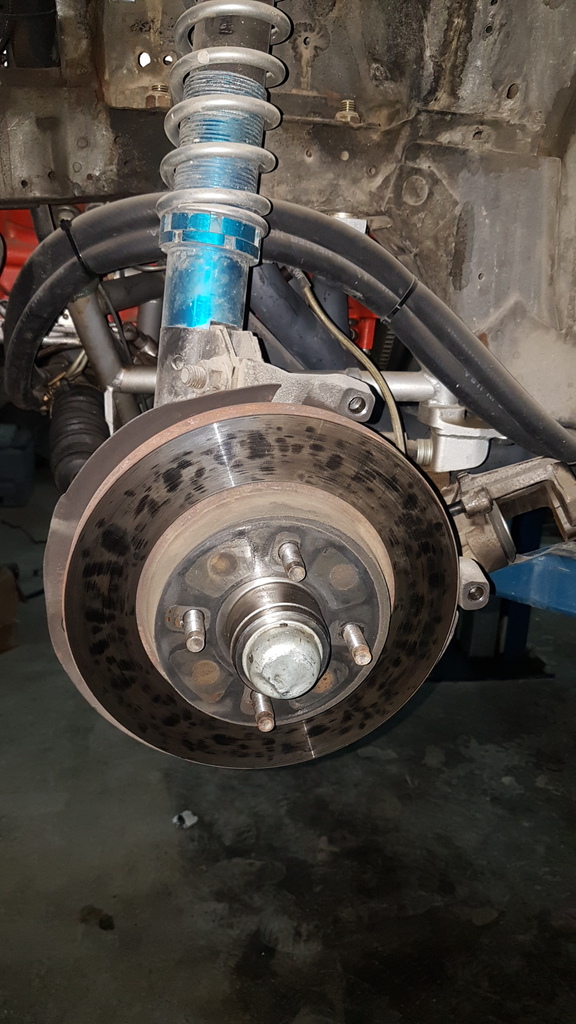
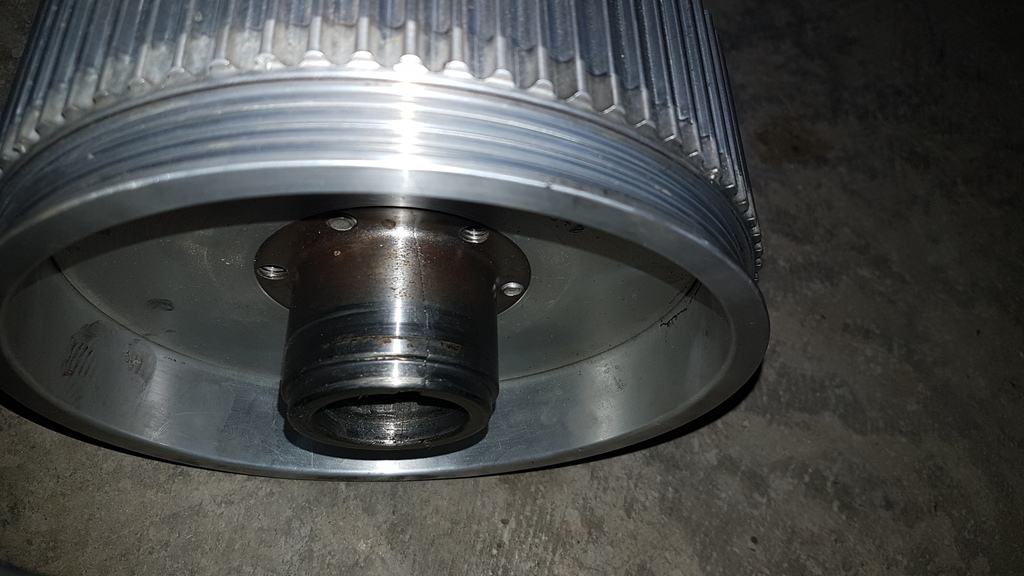
while putting the car back together i noticed something ; the balancer was cracked at the hub ,,,, so that was final nail in the coffin for me . the balancer would cost something like $600 to replace ( and about the same to send back and repair and send to me again), so i decided to move on and ditch the procharger setup.
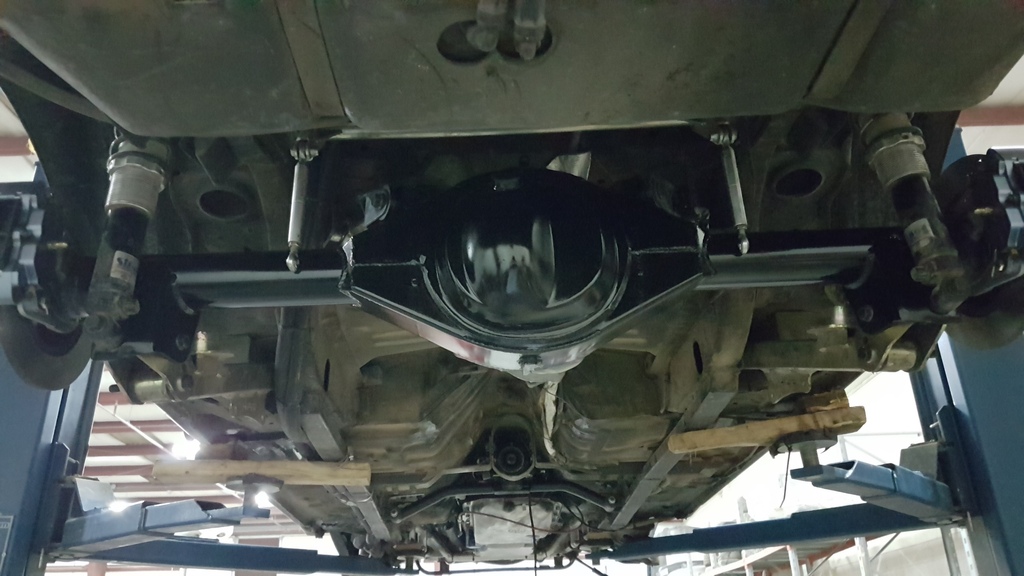
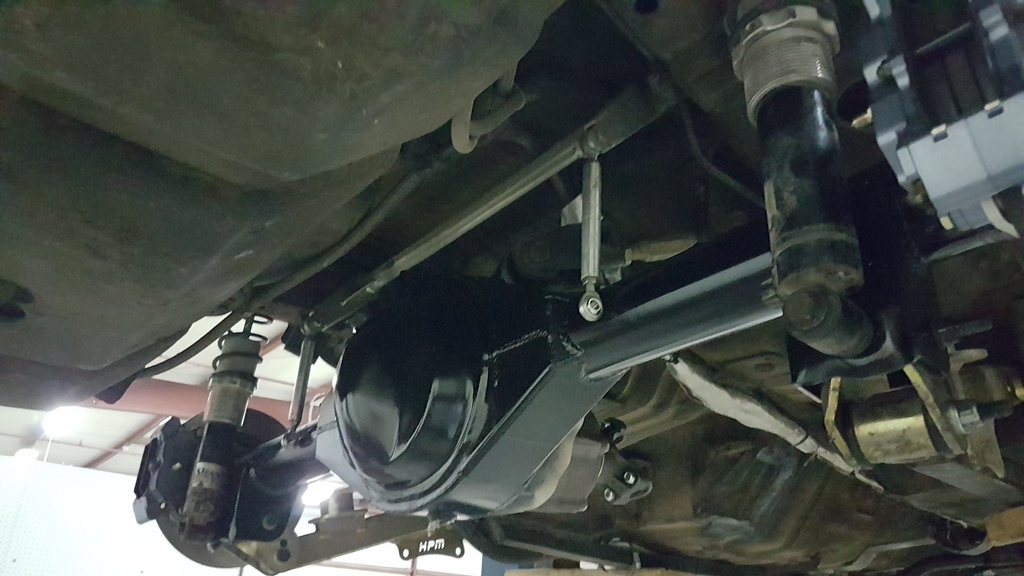
moving on , i also got the new rear end in a few weeks ago, its a strange 9" rear end narrowed 1.5" both sides , here it is after being painted and prepped for installation and having the new upper bushings installed:
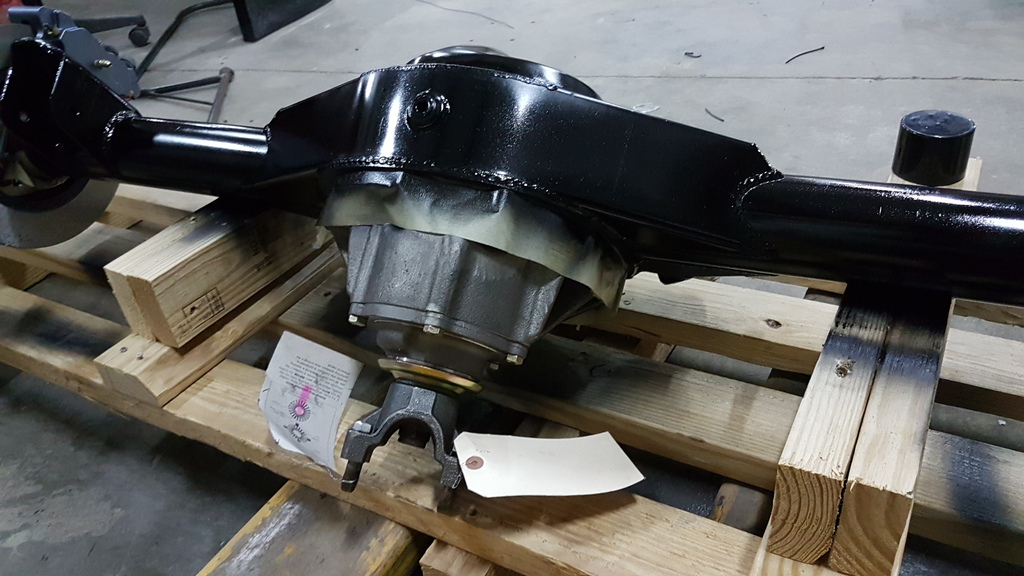
and i just finished ( well almost finished ) installing it in the car , i still need to fab the brake line connection , weld the sway bar link brackets and install the driveshaft.
i did also swap the old Lakewood lower control arms and brackets to a set of HPM lower arms and relocation brackets ( the lakewoods would not fit the bigger axle tube ).
this picture should give you an idea of how well procharger treats its customers
I've hit a dead end with them and decided its time to move on to better things.


these are turbos for the mustang, my 1970 Camaro and a friends drag mustang. comp has given me a great deal and from dealing with them before ( through a friends shop) i have nothing but good things to say about them . plus i already have a set of their smaller ct3 on my Porsche and the results are great !
four of these are oil-less and the other two are traditional units for my friend's mustang.
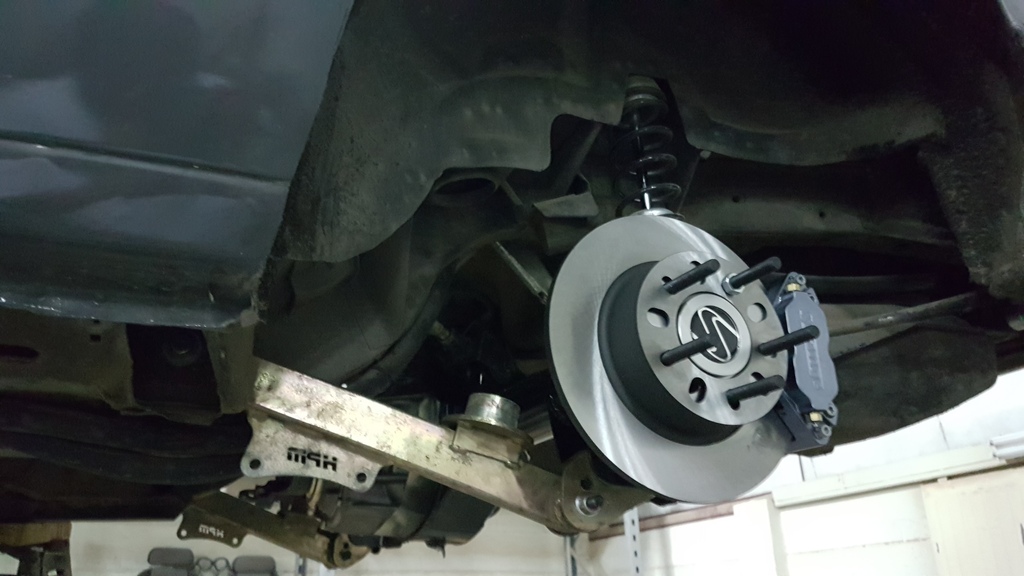
i also got the front brakes in

you can tell the stock brakes were put to good use

while putting the car back together i noticed something ; the balancer was cracked at the hub ,,,, so that was final nail in the coffin for me . the balancer would cost something like $600 to replace ( and about the same to send back and repair and send to me again), so i decided to move on and ditch the procharger setup.

moving on , i also got the new rear end in a few weeks ago, its a strange 9" rear end narrowed 1.5" both sides , here it is after being painted and prepped for installation and having the new upper bushings installed:

and i just finished ( well almost finished ) installing it in the car , i still need to fab the brake line connection , weld the sway bar link brackets and install the driveshaft.
i did also swap the old Lakewood lower control arms and brackets to a set of HPM lower arms and relocation brackets ( the lakewoods would not fit the bigger axle tube ).


Thread Starter
8 Second Club
iTrader: (1)
Joined: Nov 2001
Posts: 3,697
Likes: 1
From: the not so stock tribe
and with that being said , i went ahead and installed the new shoes 
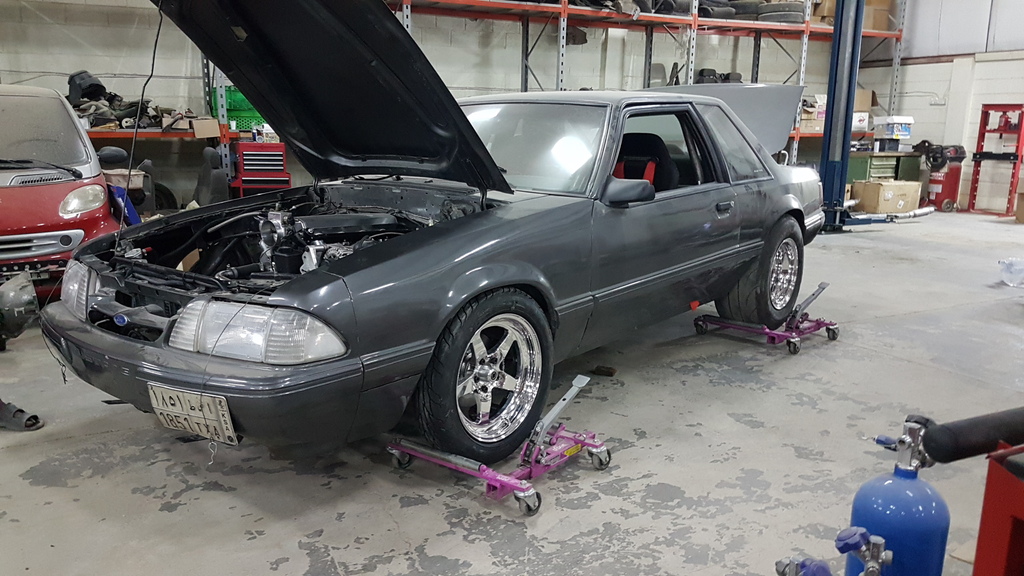
17" front welds :
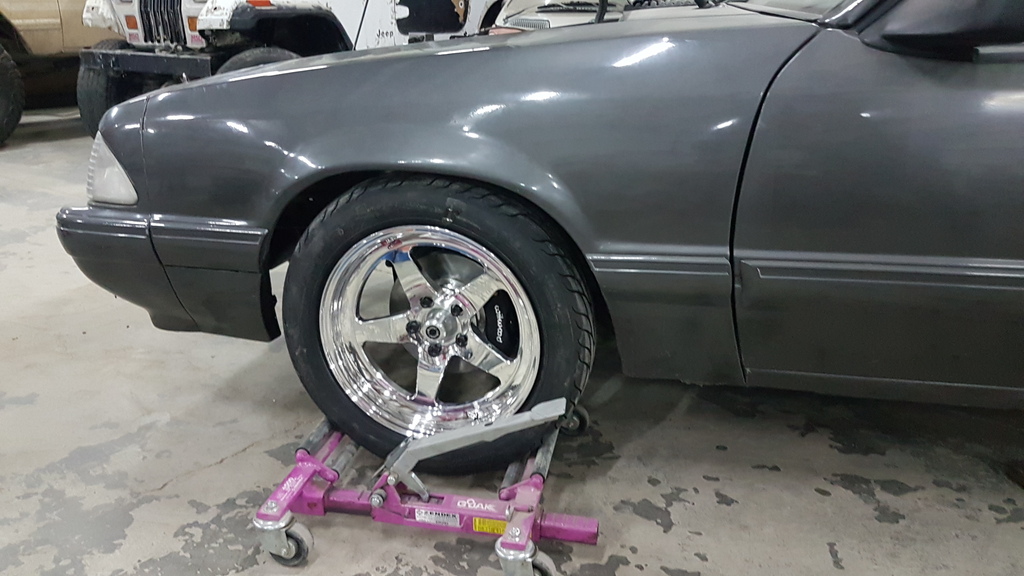
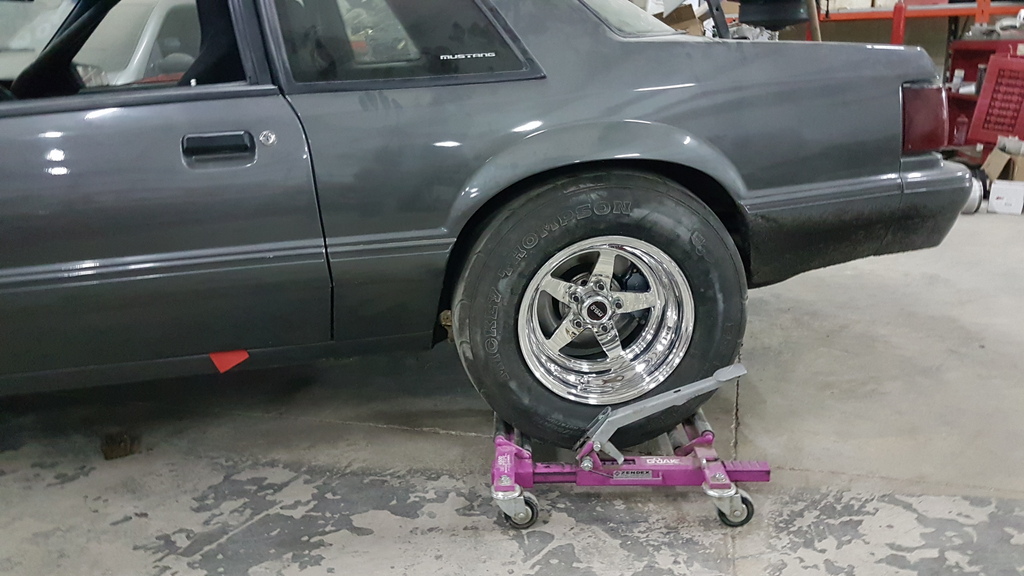
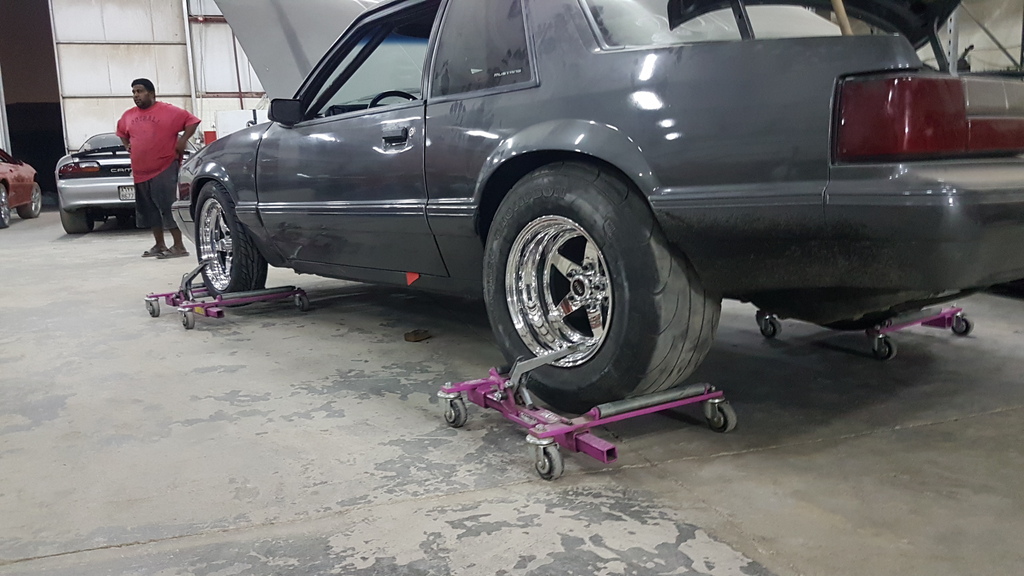
if you ask me i would order the wheels with about 1" less back space to have the wheel stick out a bit more since i have to use about a .5" spacer in the rear . here is how the rear tire sticks out :
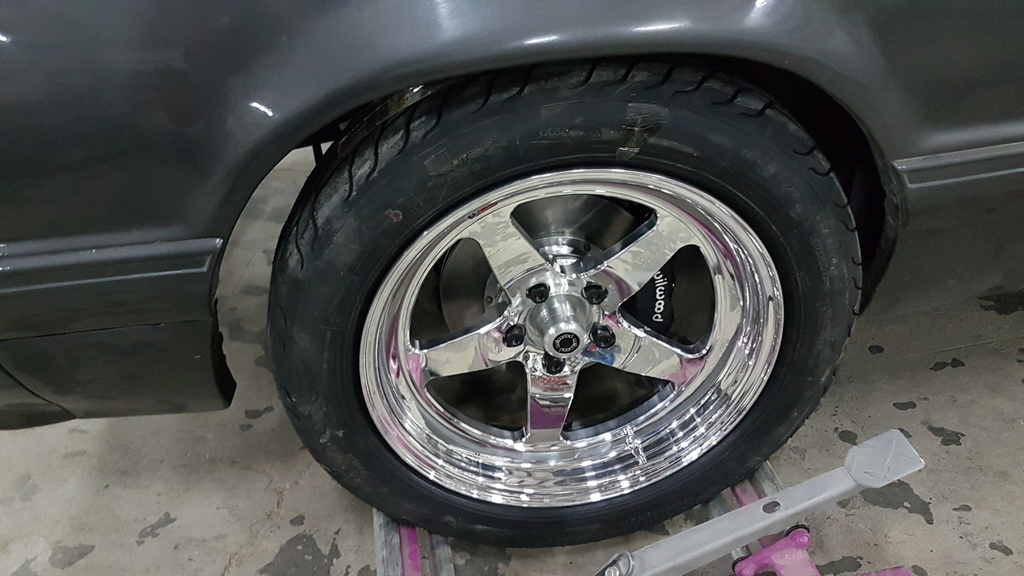
the fronts fit perfect without any spacers :
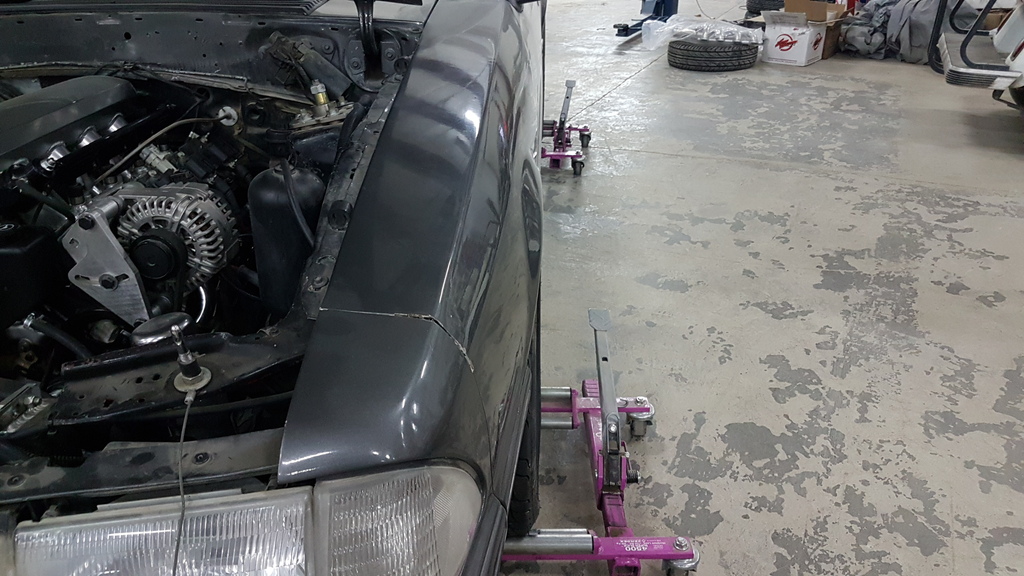
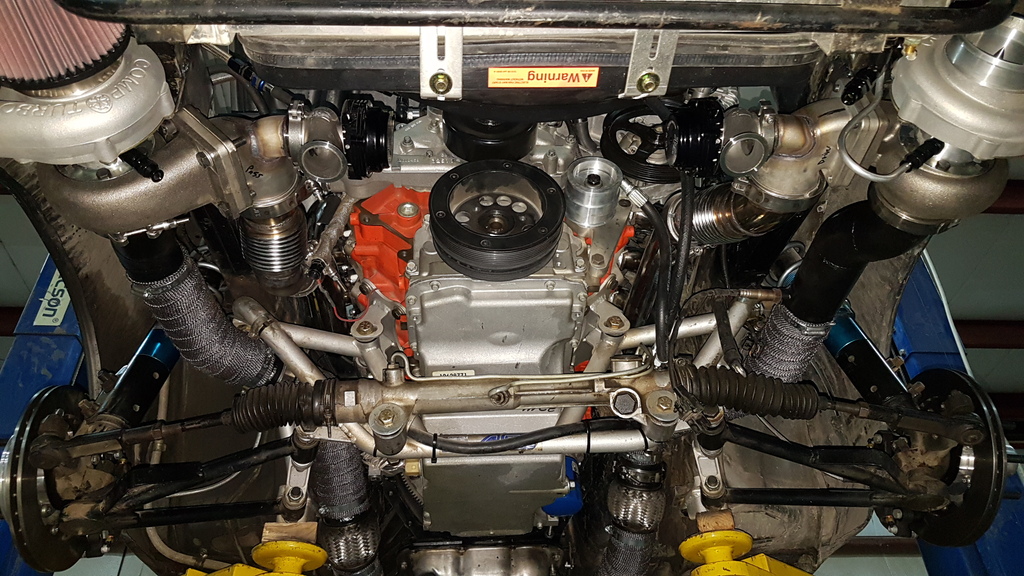
so after all of that it was time to get to the main attraction ; the turbo conversion . i decided to go with a set of CT4 ( i 'll get the exact size and post it later) oil-less units cause its easier to install them and plumb them. i decided to install them under the frame rails and inlet facing forwards makes it easier to package and will look cool if i install a regular mustang nose with fog light holes
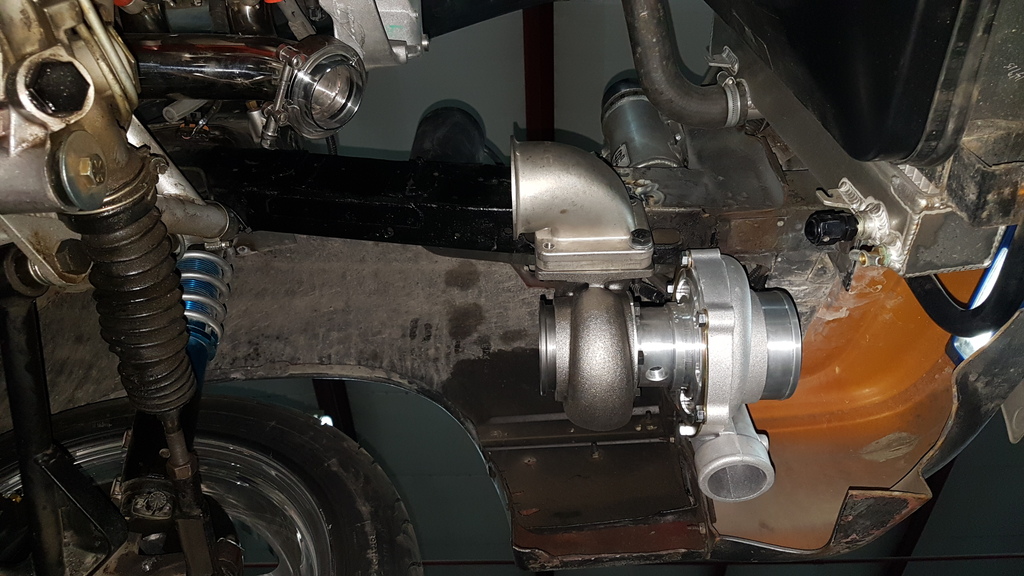
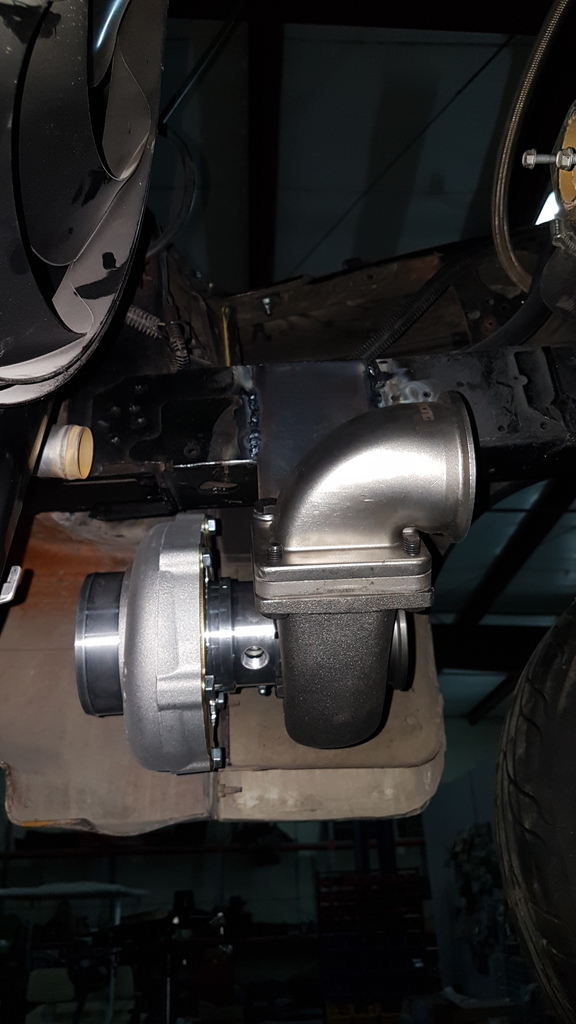
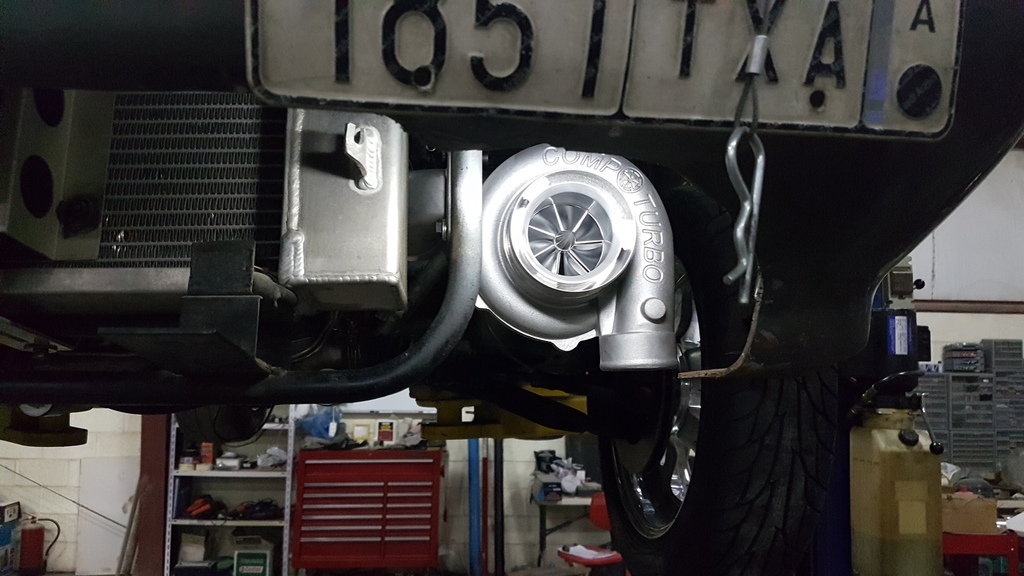
the plan is to have the exhaust pass from under the frame rail and goes through the k member and joins the original dual exhaust. as you can see i'm still at the " mount the turbos " phase , next up will be the sections from the turbo to the original exhaust , then when the flex bellows i ordered show up i can make the manifold to turbo pipes.
i forgot to add that i went with the ebay manifolds cause they fit my needs very well and require no modification ( to them ) to make them fit , and the come with 2.5 vbands already installed.
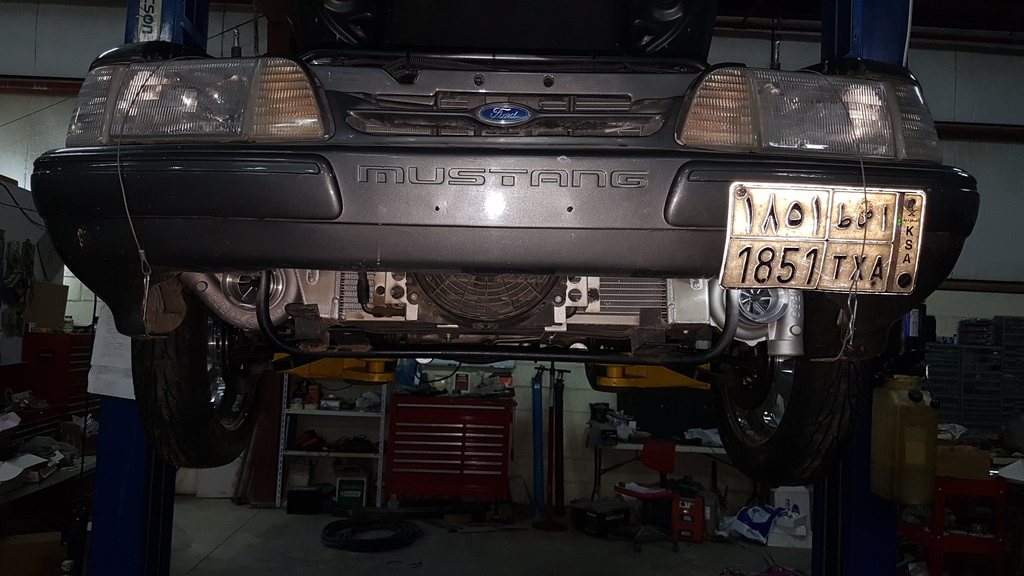
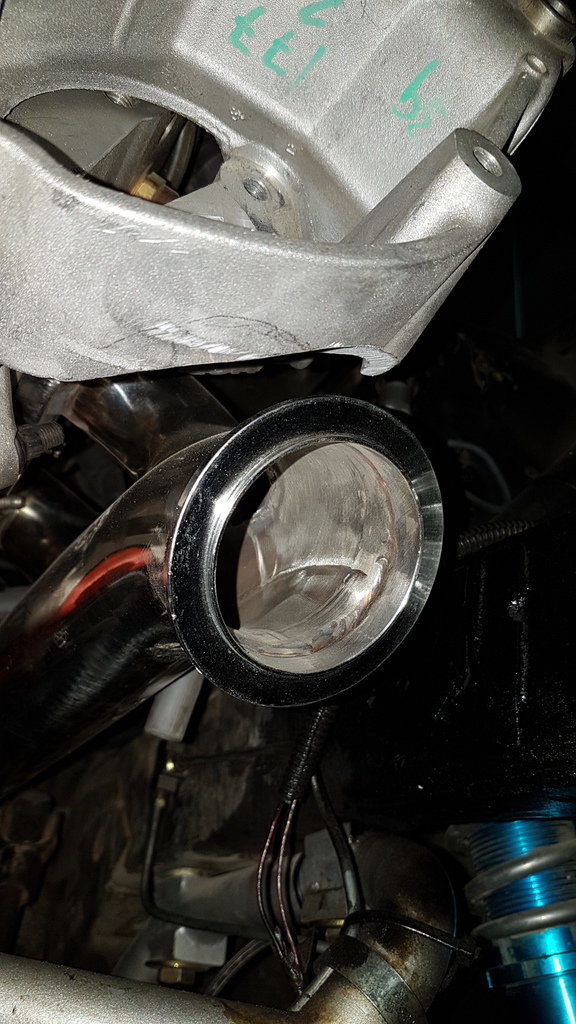
i did have to grind a bit off the vette alternator to give me enough room to remove the vband easier.
i also have to mention that i installed the 4l80 back in the car and removed the air to water intercooler and tank . the plan is to go back to using an air to air unit ( two inlets on the side bottom , one outlet on the side top) along with methanol injection . this should save some weight and simplify things for me.
so more updates as they come i guess wish me luck !

17" front welds :


if you ask me i would order the wheels with about 1" less back space to have the wheel stick out a bit more since i have to use about a .5" spacer in the rear . here is how the rear tire sticks out :

the fronts fit perfect without any spacers :


so after all of that it was time to get to the main attraction ; the turbo conversion . i decided to go with a set of CT4 ( i 'll get the exact size and post it later) oil-less units cause its easier to install them and plumb them. i decided to install them under the frame rails and inlet facing forwards makes it easier to package and will look cool if i install a regular mustang nose with fog light holes


the plan is to have the exhaust pass from under the frame rail and goes through the k member and joins the original dual exhaust. as you can see i'm still at the " mount the turbos " phase , next up will be the sections from the turbo to the original exhaust , then when the flex bellows i ordered show up i can make the manifold to turbo pipes.
i forgot to add that i went with the ebay manifolds cause they fit my needs very well and require no modification ( to them ) to make them fit , and the come with 2.5 vbands already installed.

i did have to grind a bit off the vette alternator to give me enough room to remove the vband easier.
i also have to mention that i installed the 4l80 back in the car and removed the air to water intercooler and tank . the plan is to go back to using an air to air unit ( two inlets on the side bottom , one outlet on the side top) along with methanol injection . this should save some weight and simplify things for me.
so more updates as they come i guess
wish me luck ! I wish you luck! The Mustang looks great. Bob
__________________
ATI ProCharger and Moser Sales 260 672-2076
PM's disabled, please e-mail me
E-mail: brutespeed@gmail.comob@brutespeed.com
https://brutespeed.com/ Link to website
ATI ProCharger and Moser Sales 260 672-2076
PM's disabled, please e-mail me
E-mail: brutespeed@gmail.comob@brutespeed.com
https://brutespeed.com/ Link to website
Thread Starter
8 Second Club
iTrader: (1)
Joined: Nov 2001
Posts: 3,697
Likes: 1
From: the not so stock tribe
thanks
you won't believe the amount of supercharger stuff I have laying around I probably can pay for a whole new project just by selling that stuff .
any how ,,, more progress to report :
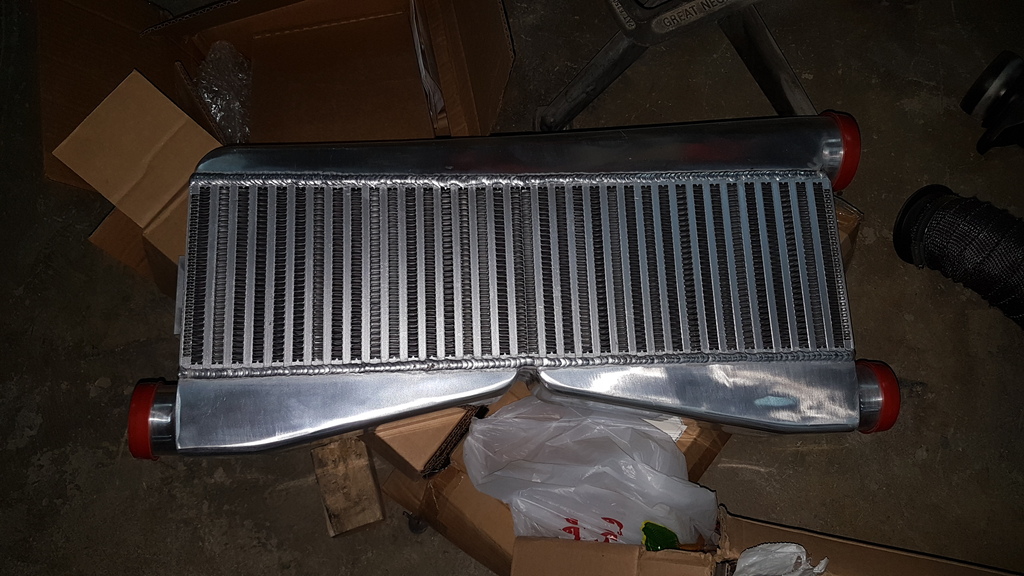
I got the new intercooler in today :
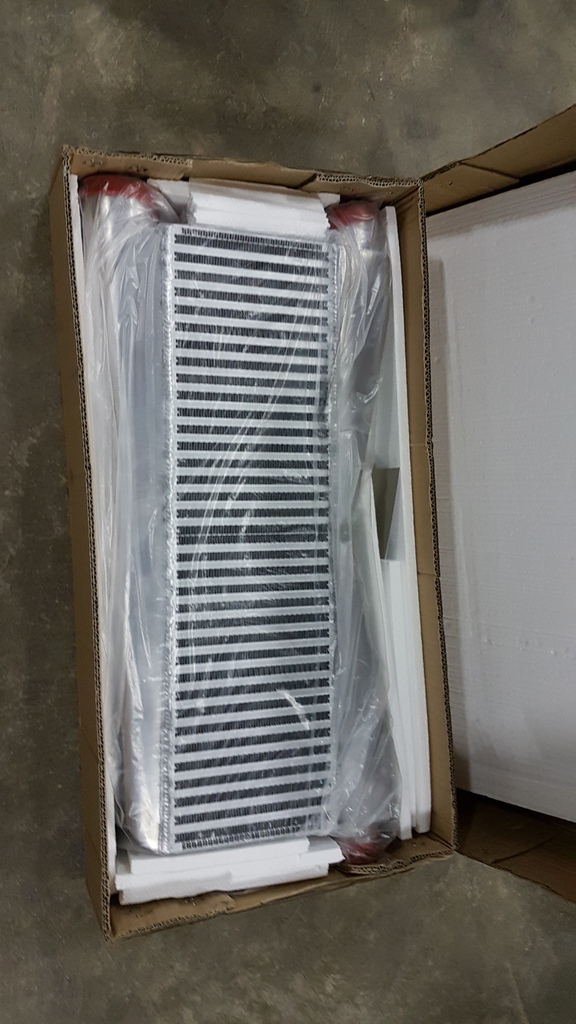
I'm 90% going to use this , but the 10% part of me says use the old air to water unit I had and have it mounted between the engine and radiator like I did before ,,,, but I keep thinking how much weight its going to add and heat soak its going to get from that location. but it sure would save some work ( relocating the transmission cooler and installing and plumbing the new intercooler).
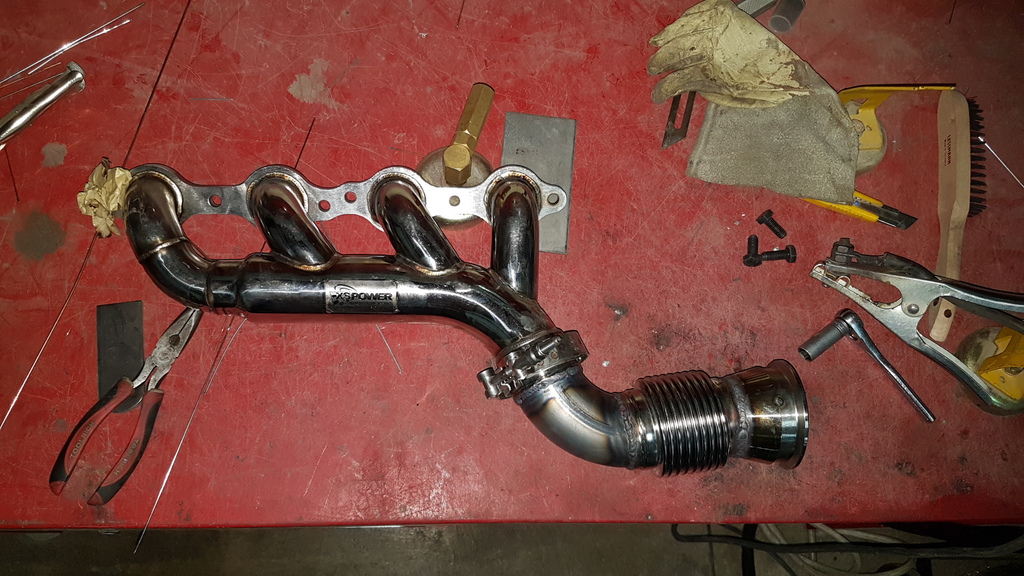
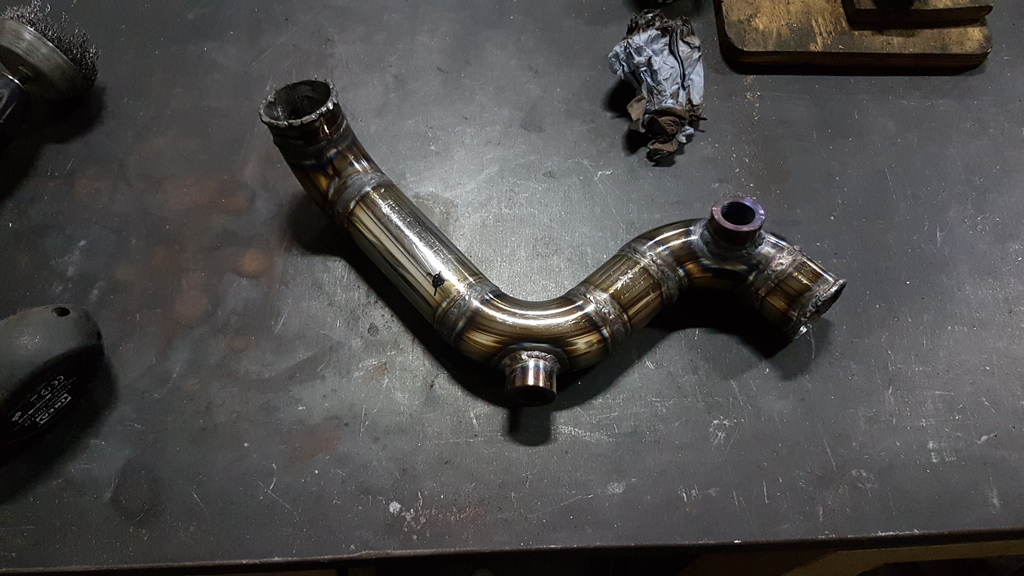
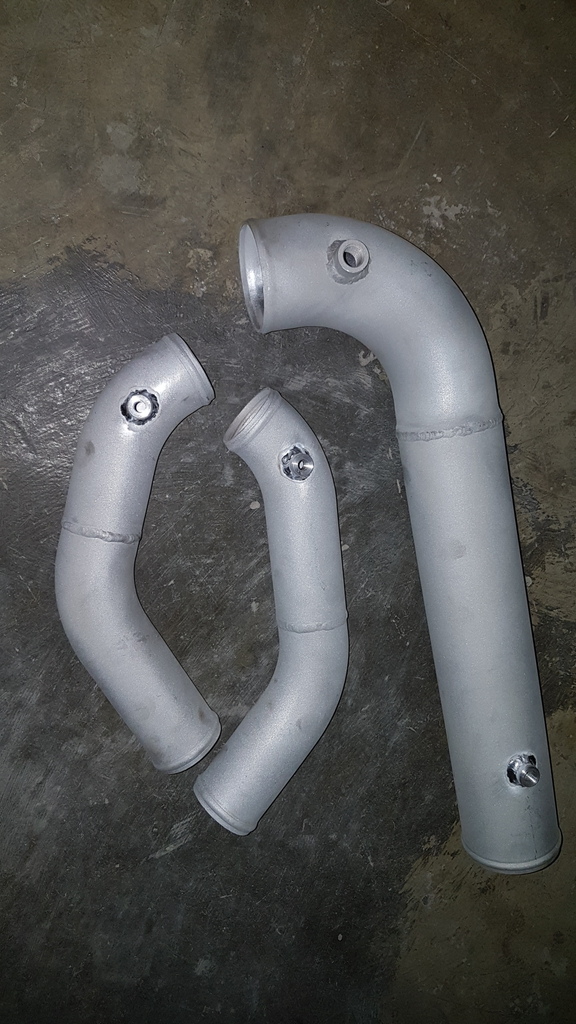
I finished welding the down tubes from the headers to the turbos :
and before I forget , here a few pics showing how much I took off the p/s bracket so I can have some space between the v band clamp and the bracket ( I could have taken less , but this much gave me ample room to put on and take off the clamp easily) :
so next up is fabbing up the pipes from the turbo to the old exhaust, then working on the WG placement and piping.
I also ordered a pair of 6" long bullet mufflers to see if I can fit them in behind the turbo outlet and before it goes into the k member just to keep things "quite-er" if I can .
more to come soon
you won't believe the amount of supercharger stuff I have laying around
I probably can pay for a whole new project just by selling that stuff .any how ,,, more progress to report :
I got the new intercooler in today :

I'm 90% going to use this , but the 10% part of me says use the old air to water unit I had and have it mounted between the engine and radiator like I did before ,,,, but I keep thinking how much weight its going to add and heat soak its going to get from that location. but it sure would save some work ( relocating the transmission cooler and installing and plumbing the new intercooler).
I finished welding the down tubes from the headers to the turbos :


and before I forget , here a few pics showing how much I took off the p/s bracket so I can have some space between the v band clamp and the bracket ( I could have taken less , but this much gave me ample room to put on and take off the clamp easily) :


so next up is fabbing up the pipes from the turbo to the old exhaust, then working on the WG placement and piping.
I also ordered a pair of 6" long bullet mufflers to see if I can fit them in behind the turbo outlet and before it goes into the k member just to keep things "quite-er" if I can .
more to come soon
Thread Starter
8 Second Club
iTrader: (1)
Joined: Nov 2001
Posts: 3,697
Likes: 1
From: the not so stock tribe
been slowly chugging along with this thing ,,,
after a fair bit of messing around with routing and getting clearances right , I managed to finally get the pipes to fit decently .
I then had them painted hi temp black and wrapped where they get close to important stuff like brake lines or my butt:
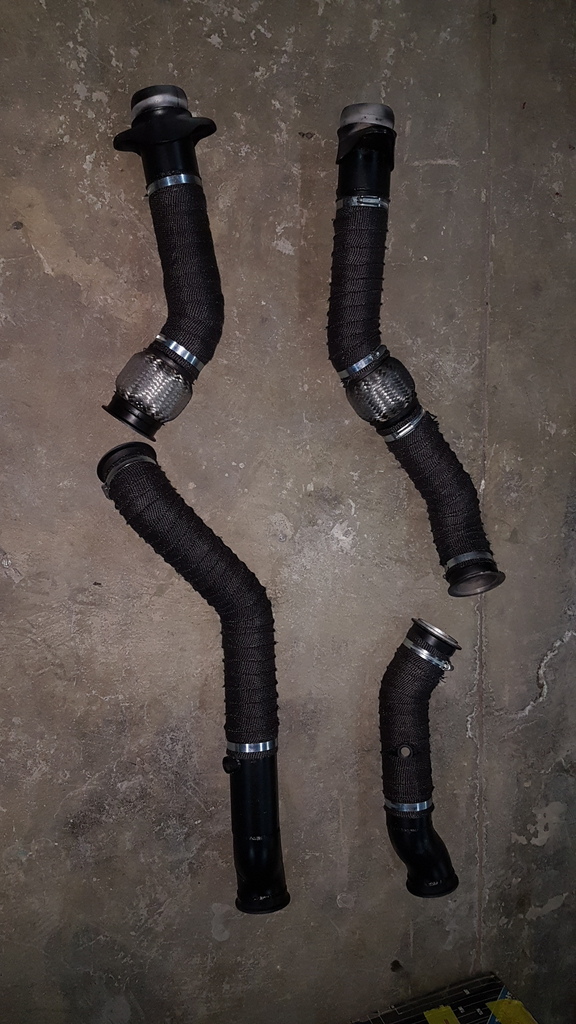
as you can see I had to split each side into two sections so I can fit it through the k-member and make servicing them easier. I also added a flex coupler ( the bellows kind) to account for any movement or misalignment .
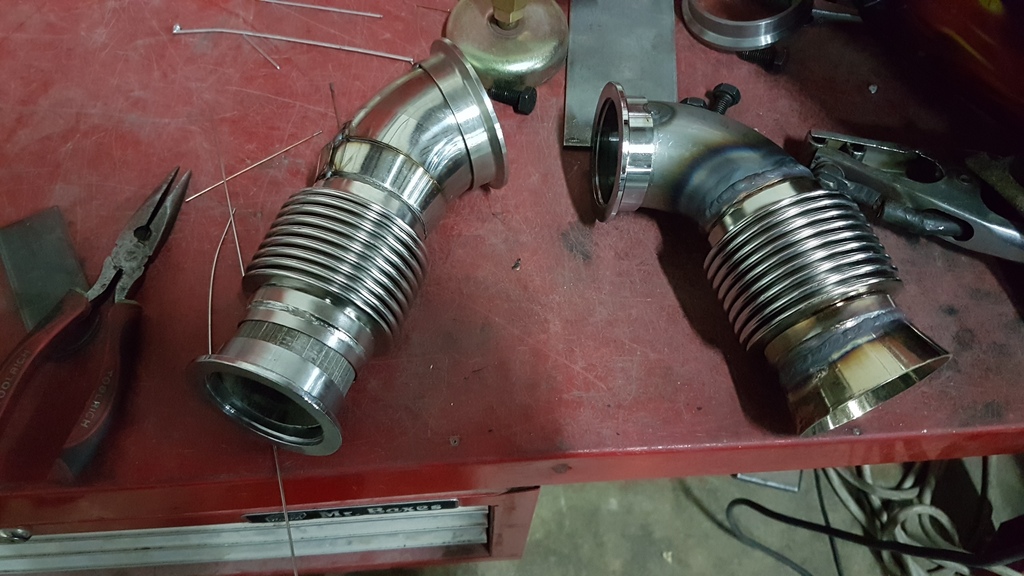
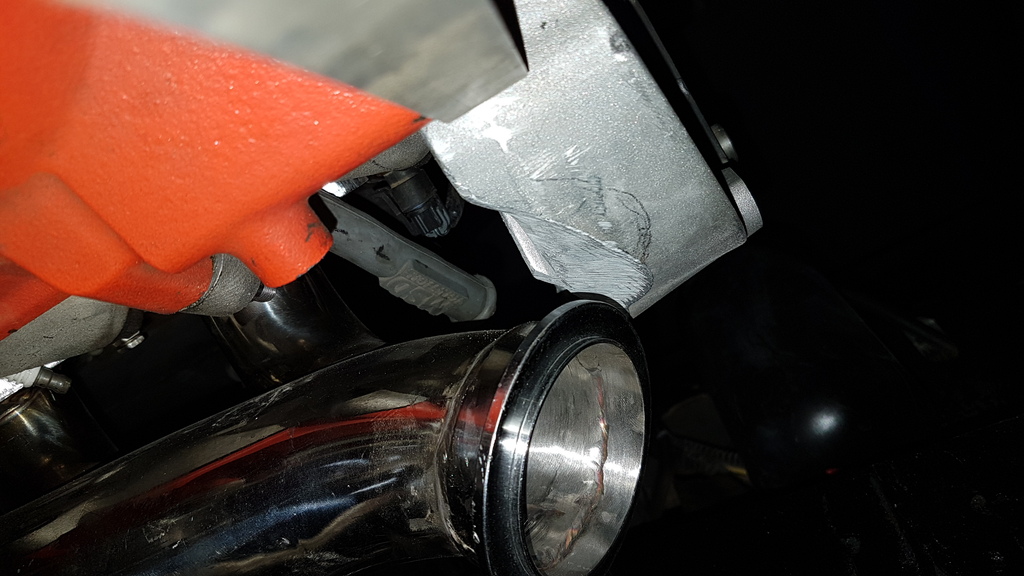
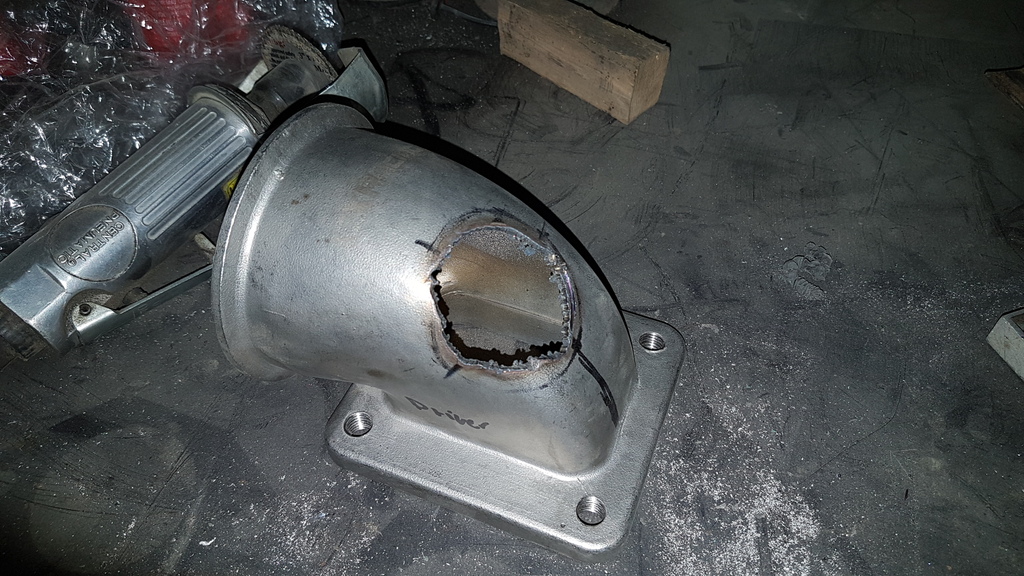
and now that we have that part done , we move further upstream towards the waste gates and their placement and plumbing . the plan is to have them come off the cast ss elbows and have them facing each other on opposites sides of the engine compartment. so I mocked where the holes should be drilled and got me a cast ss elbow and started trimming to fit in preparation to weld it :
so I now have both sides almost ready to weld , I just need to drill the hole in each of the elbows and then do dome sort of dump for the waste gate exhaust.
after that its basically minor stuff, I should start plumbing the coolant lines to the turbos , mount the intercooler , relocate the transmission cooler to the fender, and make the charge pipes to and from the cooler as well as a few odds and ends here and there.
after a fair bit of messing around with routing and getting clearances right , I managed to finally get the pipes to fit decently .
I then had them painted hi temp black and wrapped where they get close to important stuff like brake lines or my butt:

as you can see I had to split each side into two sections so I can fit it through the k-member and make servicing them easier. I also added a flex coupler ( the bellows kind) to account for any movement or misalignment .
and now that we have that part done , we move further upstream towards the waste gates and their placement and plumbing . the plan is to have them come off the cast ss elbows and have them facing each other on opposites sides of the engine compartment. so I mocked where the holes should be drilled and got me a cast ss elbow and started trimming to fit in preparation to weld it :

so I now have both sides almost ready to weld , I just need to drill the hole in each of the elbows and then do dome sort of dump for the waste gate exhaust.
after that its basically minor stuff, I should start plumbing the coolant lines to the turbos , mount the intercooler , relocate the transmission cooler to the fender, and make the charge pipes to and from the cooler as well as a few odds and ends here and there.
Thread Starter
8 Second Club
iTrader: (1)
Joined: Nov 2001
Posts: 3,697
Likes: 1
From: the not so stock tribe
been slowly chugging along with this thing
I first off managed to finish the waste gate install on the elbows, started with making the hole first using the plasma torch :
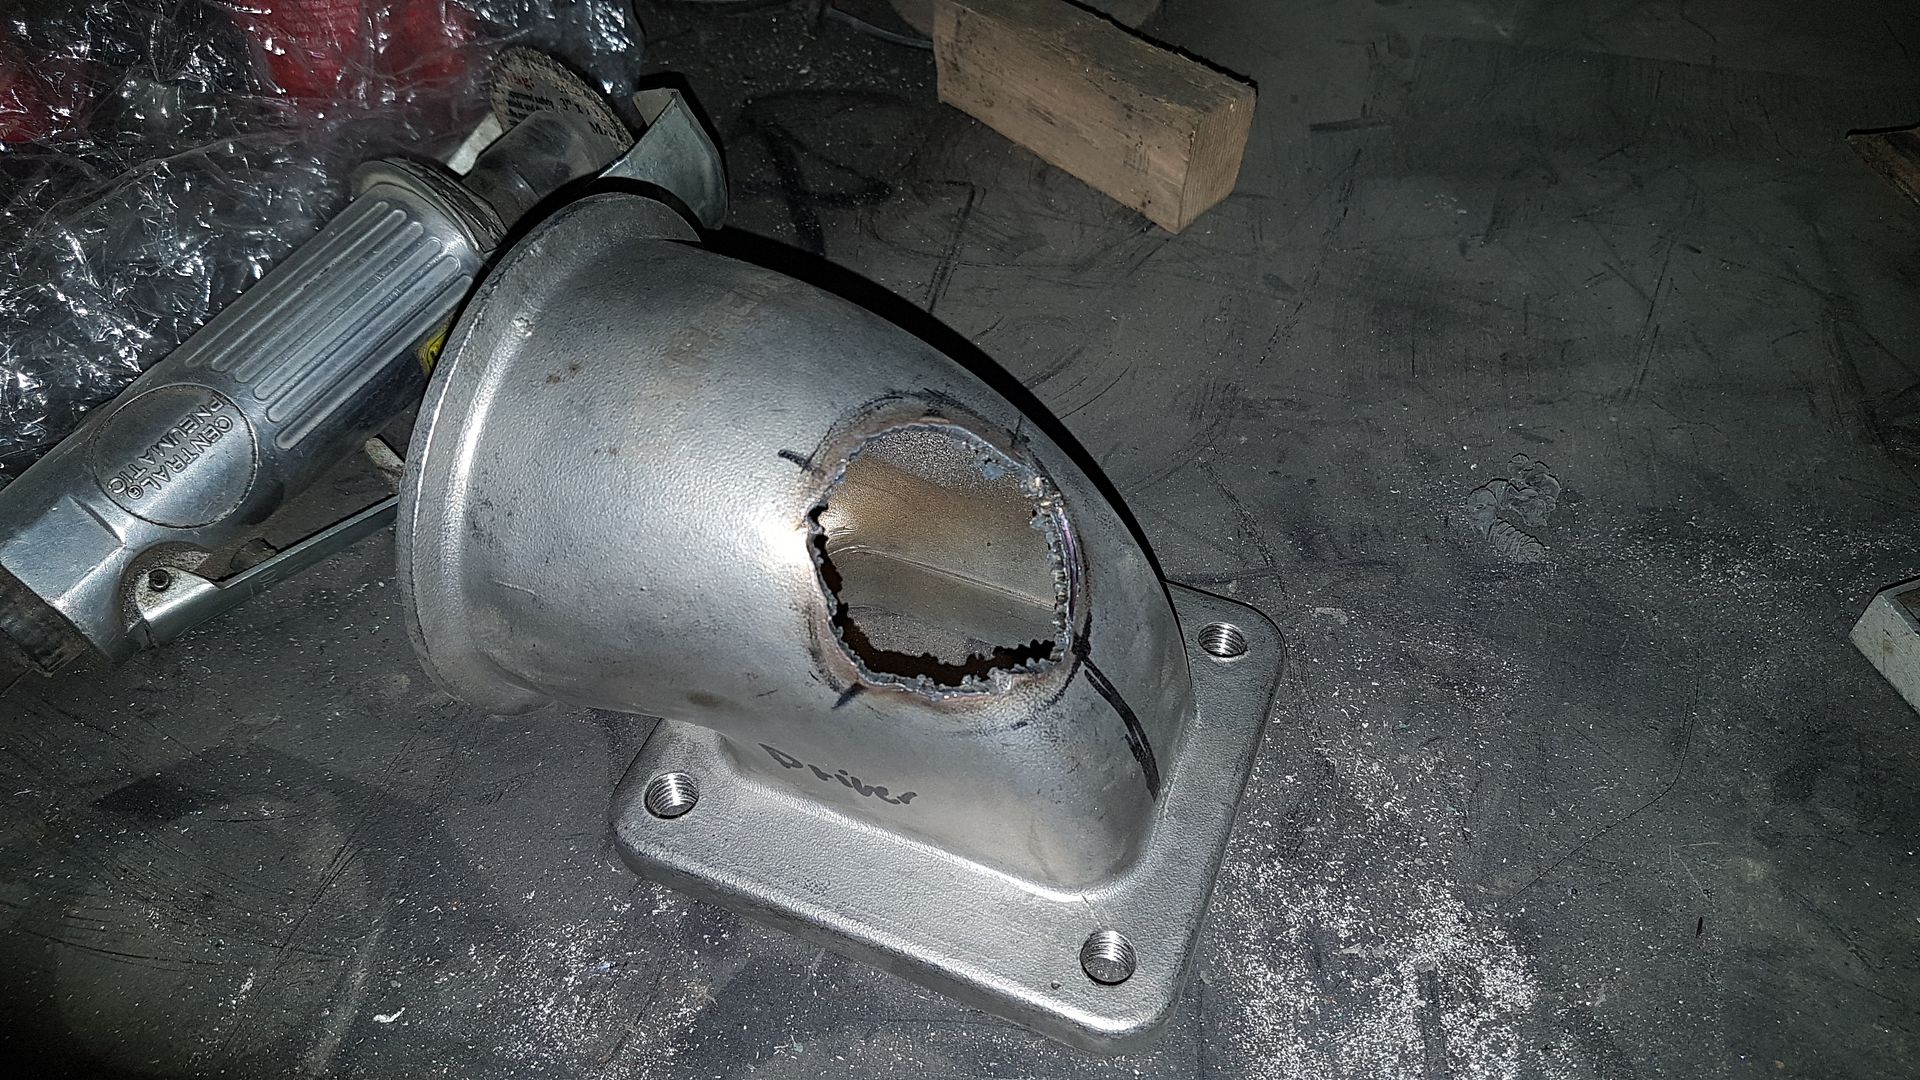
and after a few minutes with a carbide bit :

and after a few more grinds and welds we got to this :
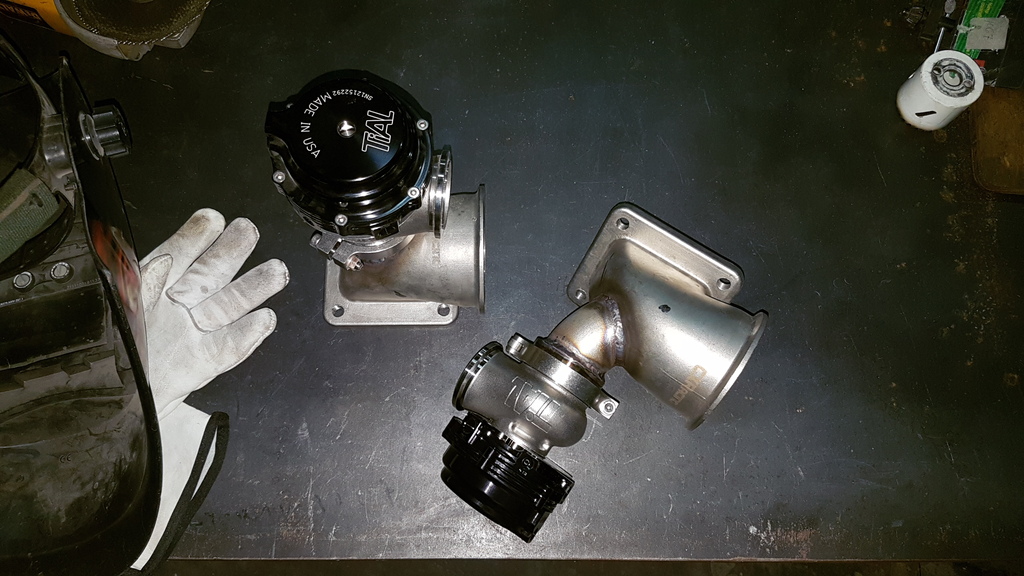
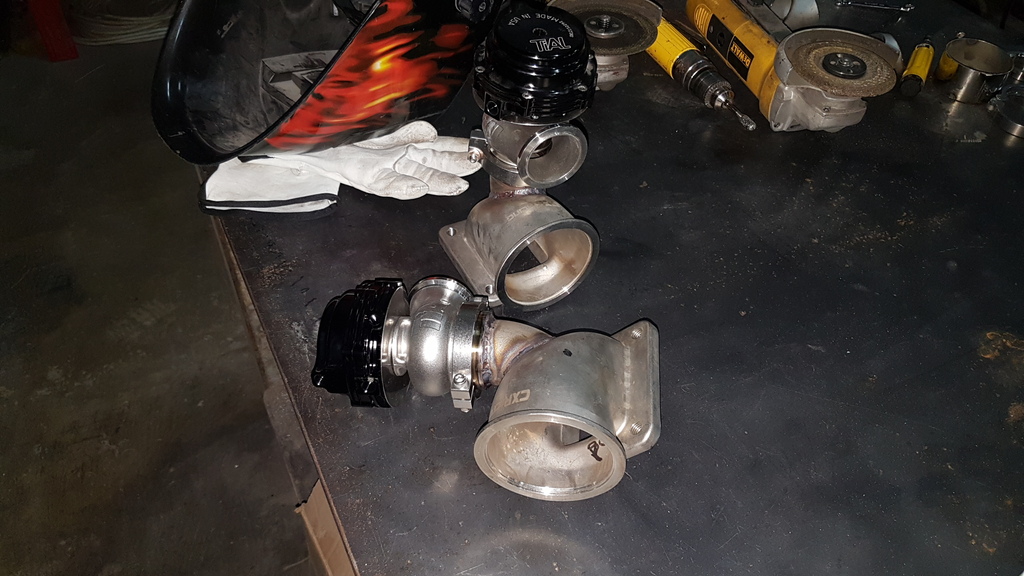
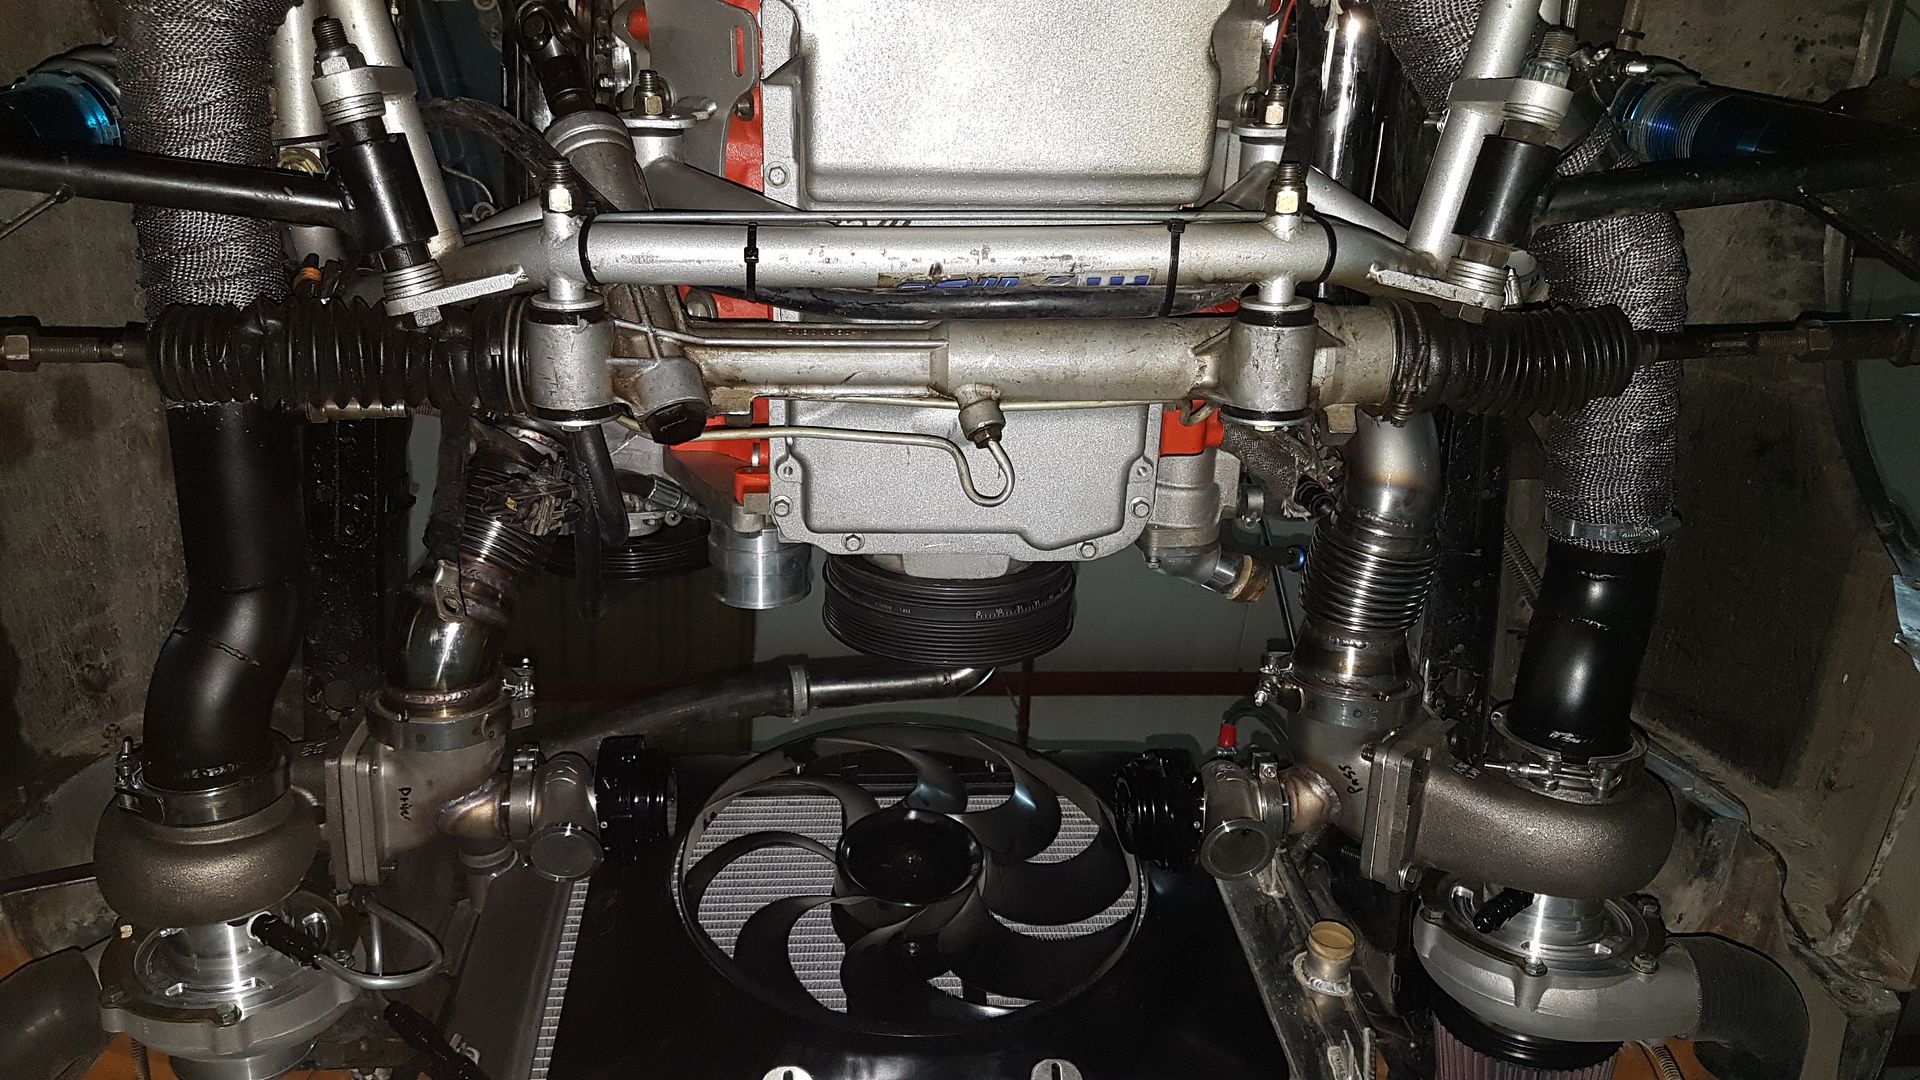
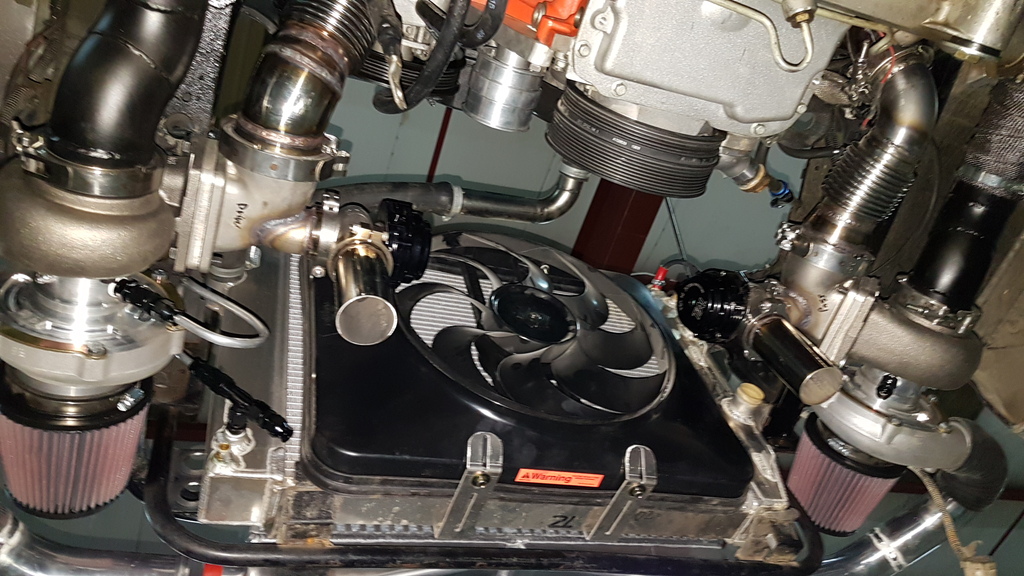
I then slapped everything back on ( turbos exhaust piping , and elbows) to see how it looked and I'm happy to say it looks good
the waste gates are in line with each other and facing each other , which gives the engine bay some symmetry :
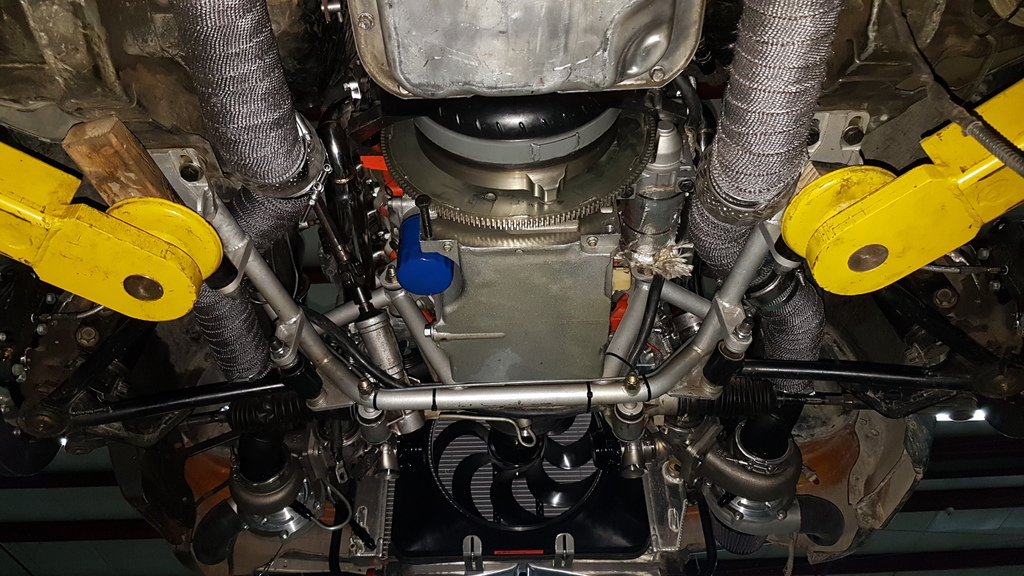

after that I started messing with how to route the coolant lines to the turbos and made up a new lower radiator hose/ tube made of stainless. the tube also has bungs for the coolant lines to and from the turbos:

I still need to get it sandblasted then powder coated.
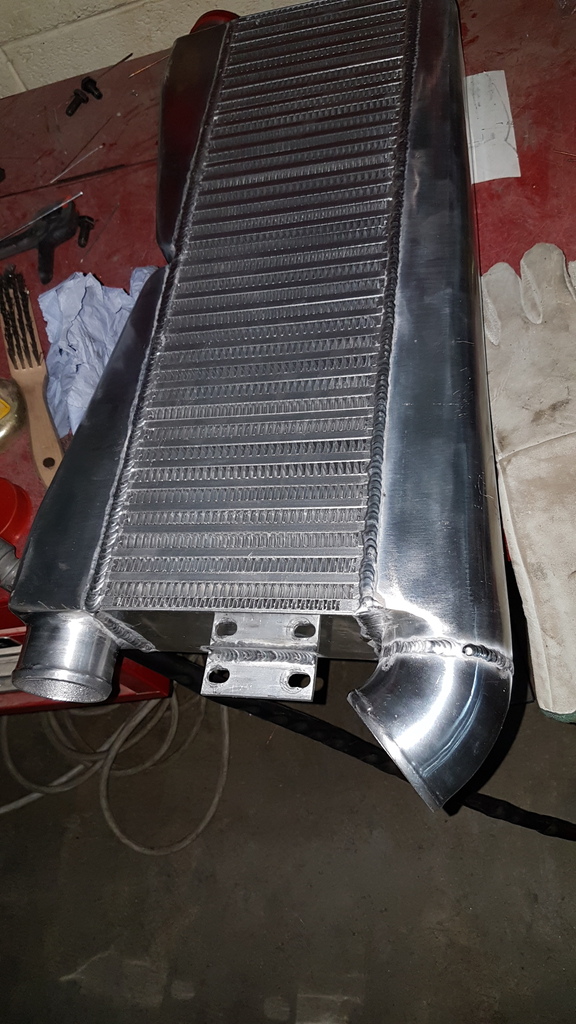
then it was time to remove the nose to see how to make the new intercooler fit :
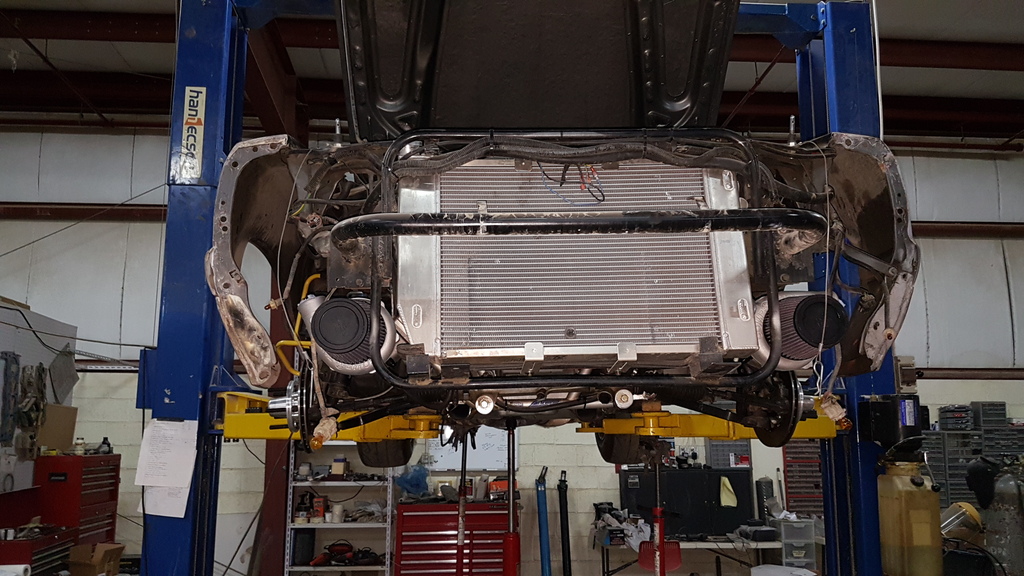
shiny intercooler out of the box:

said intercooler placed into position :
I still need to bend and fab a couple of brackets to hold it from the sides then weld them to the existing core support. I then have to weld and aluminum elbow to the outlet of the intercooler ( or just clamp a silicone elbow on there instead and see if it fits) then start fabricating the charge pipes from the turbo to the intercooler and from the intercooler to the intake.
I also managed to install the balancer , ps pump and new lines , a new set of header gaskets , and rear travel limiters ( so the diff doesn't droop too much and rip the exhaust out of its hangars.)
another thing i'll have to work on is the transmission cooler mount on the passenger side fender, and fabbing a set of waste gate down tubes .
so now the turbo hard work is mostly done ( I still need to get a set of turbo flange gaskets in ), I can start with the other little stuff like charge pipes , sensors, solenoids and wiring . I also need to stab in the drive shaft after a swap the u joint , after that I can put the car on the ground and test fire it .
later down the road I plan on installing a meth system on the thing to help keep things cooler.
I first off managed to finish the waste gate install on the elbows, started with making the hole first using the plasma torch :

and after a few minutes with a carbide bit :

and after a few more grinds and welds we got to this :


I then slapped everything back on ( turbos exhaust piping , and elbows) to see how it looked and I'm happy to say it looks good
the waste gates are in line with each other and facing each other , which gives the engine bay some symmetry :


after that I started messing with how to route the coolant lines to the turbos and made up a new lower radiator hose/ tube made of stainless. the tube also has bungs for the coolant lines to and from the turbos:

I still need to get it sandblasted then powder coated.
then it was time to remove the nose to see how to make the new intercooler fit :

shiny intercooler out of the box:

said intercooler placed into position :

I still need to bend and fab a couple of brackets to hold it from the sides then weld them to the existing core support. I then have to weld and aluminum elbow to the outlet of the intercooler ( or just clamp a silicone elbow on there instead and see if it fits) then start fabricating the charge pipes from the turbo to the intercooler and from the intercooler to the intake.
I also managed to install the balancer , ps pump and new lines , a new set of header gaskets , and rear travel limiters ( so the diff doesn't droop too much and rip the exhaust out of its hangars.)
another thing i'll have to work on is the transmission cooler mount on the passenger side fender, and fabbing a set of waste gate down tubes .
so now the turbo hard work is mostly done ( I still need to get a set of turbo flange gaskets in ), I can start with the other little stuff like charge pipes , sensors, solenoids and wiring . I also need to stab in the drive shaft after a swap the u joint , after that I can put the car on the ground and test fire it .
later down the road I plan on installing a meth system on the thing to help keep things cooler.
Thread Starter
8 Second Club
iTrader: (1)
Joined: Nov 2001
Posts: 3,697
Likes: 1
From: the not so stock tribe
been slowly chugging along with this thing
I first off managed to finish the waste gate install on the elbows, started with making the hole first using the plasma torch :
and after a few minutes with a carbide bit :

and after a few more grinds and welds we got to this :


I then slapped everything back on ( turbos exhaust piping , and elbows) to see how it looked and I'm happy to say it looks good
the waste gates are in line with each other and facing each other , which gives the engine bay some symmetry :


after that I started messing with how to route the coolant lines to the turbos and made up a new lower radiator hose/ tube made of stainless. the tube also has bungs for the coolant lines to and from the turbos:
I still need to get it sandblasted then powder coated.
then it was time to remove the nose to see how to make the new intercooler fit :

shiny intercooler out of the box:
said intercooler placed into position :

I still need to bend and fab a couple of brackets to hold it from the sides then weld them to the existing core support. I then have to weld and aluminum elbow to the outlet of the intercooler ( or just clamp a silicone elbow on there instead and see if it fits) then start fabricating the charge pipes from the turbo to the intercooler and from the intercooler to the intake.
I also managed to install the balancer , ps pump and new lines , a new set of header gaskets , and rear travel limiters ( so the diff doesn't droop too much and rip the exhaust out of its hangars.)
another thing i'll have to work on is the transmission cooler mount on the passenger side fender, and fabbing a set of waste gate down tubes .
so now the turbo hard work is mostly done ( I still need to get a set of turbo flange gaskets in ), I can start with the other little stuff like charge pipes , sensors, solenoids and wiring . I also need to stab in the drive shaft after a swap the u joint , after that I can put the car on the ground and test fire it .
later down the road I plan on installing a meth system on the thing to help keep things cooler.
I first off managed to finish the waste gate install on the elbows, started with making the hole first using the plasma torch :
and after a few minutes with a carbide bit :
and after a few more grinds and welds we got to this :
I then slapped everything back on ( turbos exhaust piping , and elbows) to see how it looked and I'm happy to say it looks good
the waste gates are in line with each other and facing each other , which gives the engine bay some symmetry :
after that I started messing with how to route the coolant lines to the turbos and made up a new lower radiator hose/ tube made of stainless. the tube also has bungs for the coolant lines to and from the turbos:
I still need to get it sandblasted then powder coated.
then it was time to remove the nose to see how to make the new intercooler fit :
shiny intercooler out of the box:
said intercooler placed into position :
I still need to bend and fab a couple of brackets to hold it from the sides then weld them to the existing core support. I then have to weld and aluminum elbow to the outlet of the intercooler ( or just clamp a silicone elbow on there instead and see if it fits) then start fabricating the charge pipes from the turbo to the intercooler and from the intercooler to the intake.
I also managed to install the balancer , ps pump and new lines , a new set of header gaskets , and rear travel limiters ( so the diff doesn't droop too much and rip the exhaust out of its hangars.)
another thing i'll have to work on is the transmission cooler mount on the passenger side fender, and fabbing a set of waste gate down tubes .
so now the turbo hard work is mostly done ( I still need to get a set of turbo flange gaskets in ), I can start with the other little stuff like charge pipes , sensors, solenoids and wiring . I also need to stab in the drive shaft after a swap the u joint , after that I can put the car on the ground and test fire it .
later down the road I plan on installing a meth system on the thing to help keep things cooler.
Thread Starter
8 Second Club
iTrader: (1)
Joined: Nov 2001
Posts: 3,697
Likes: 1
From: the not so stock tribe
more updates
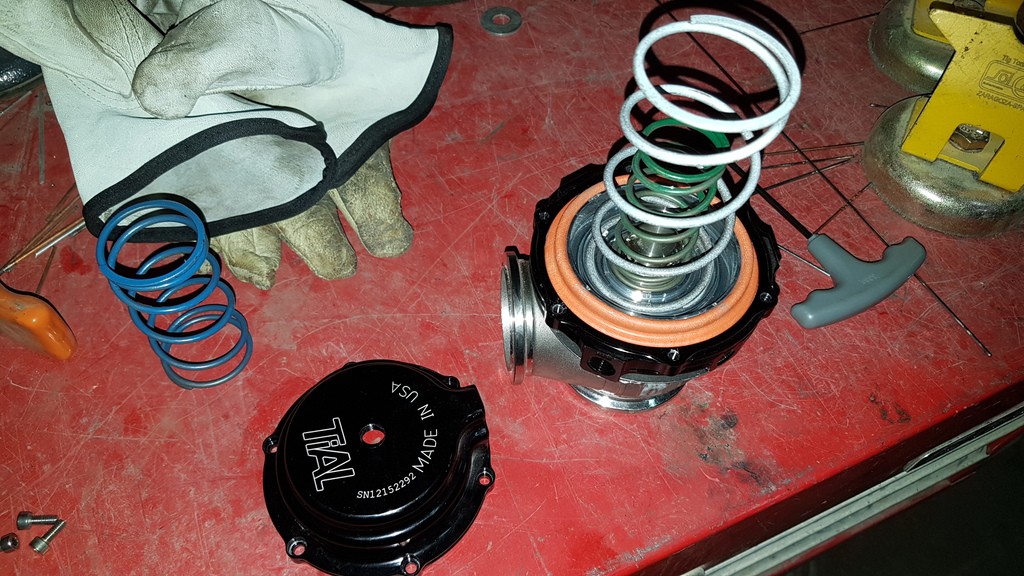
got the springs installed in the waste gates , If I recall correctly these are the 12 lb springs:
also got to make the waste gate dump tubes :
I also finished plumbing the coolant lines to the turbos ( sorry no pic) , I decided against using the fittings on the radiator hose , and instead had them take off from the radiator other tank ( used the coolant level sensor hole) . and I finally replaced the fuel lines on this thing. I replaced the feed hose and removed the old steel return line and replaced it with a new -6 hose.
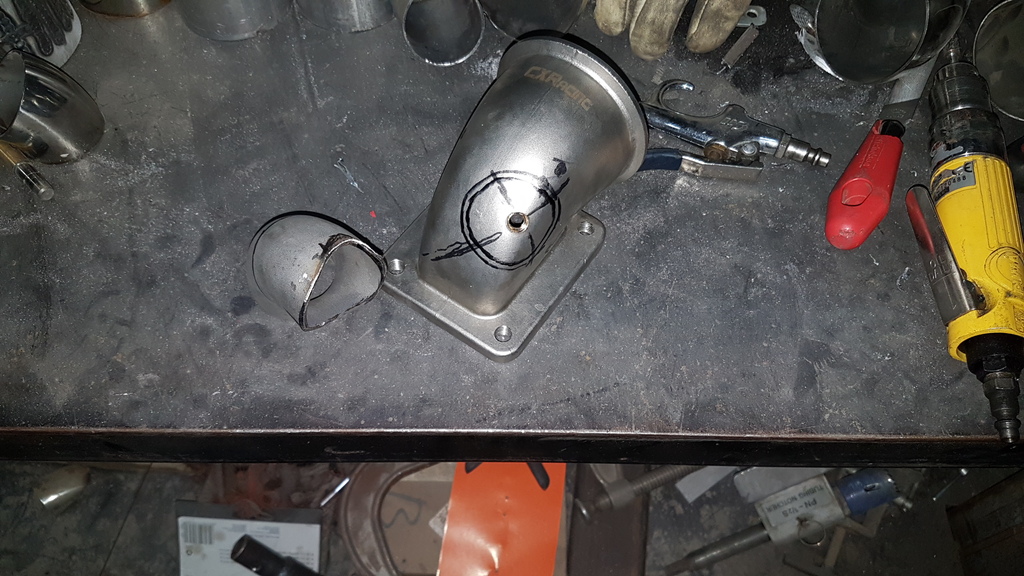
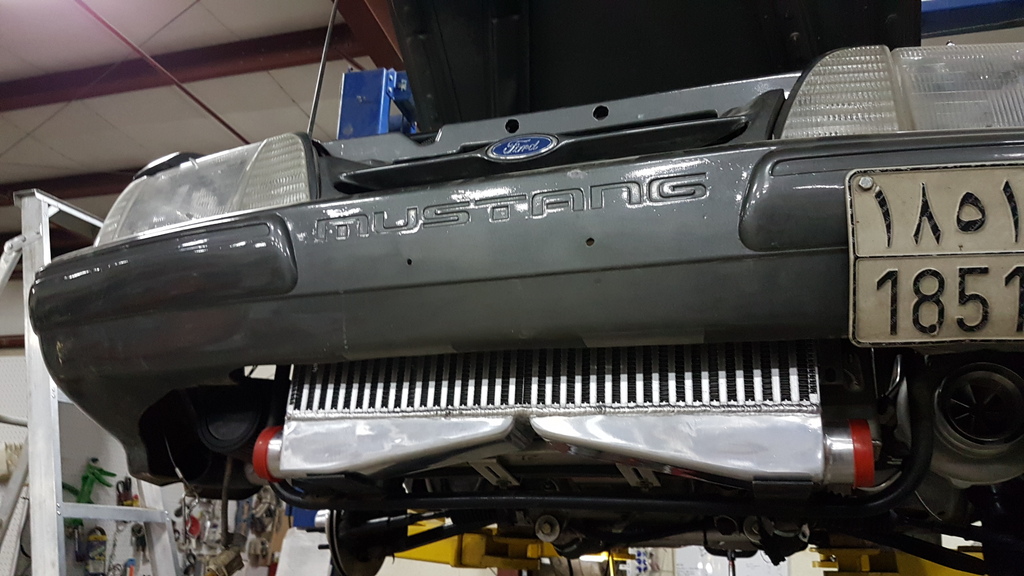
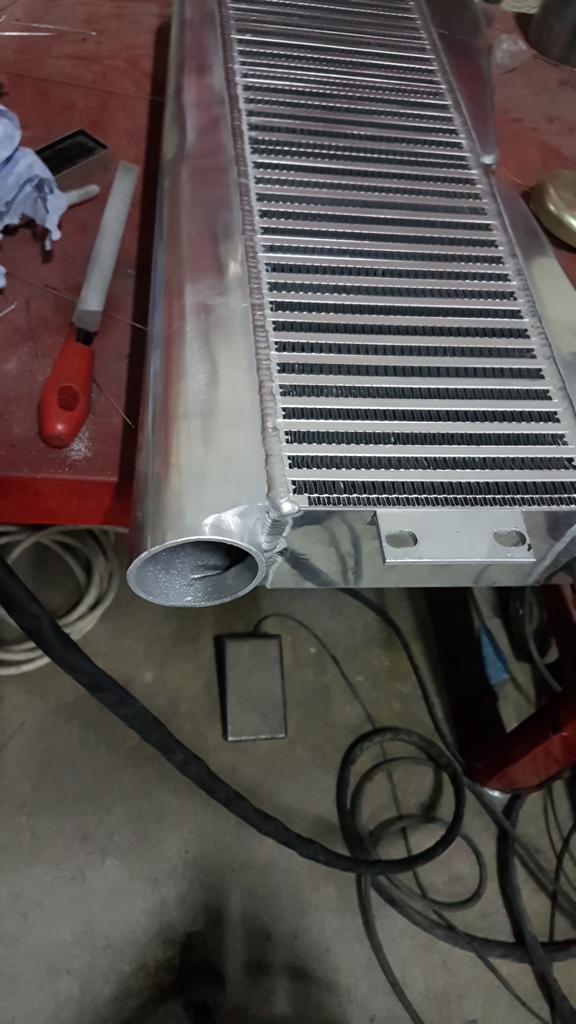
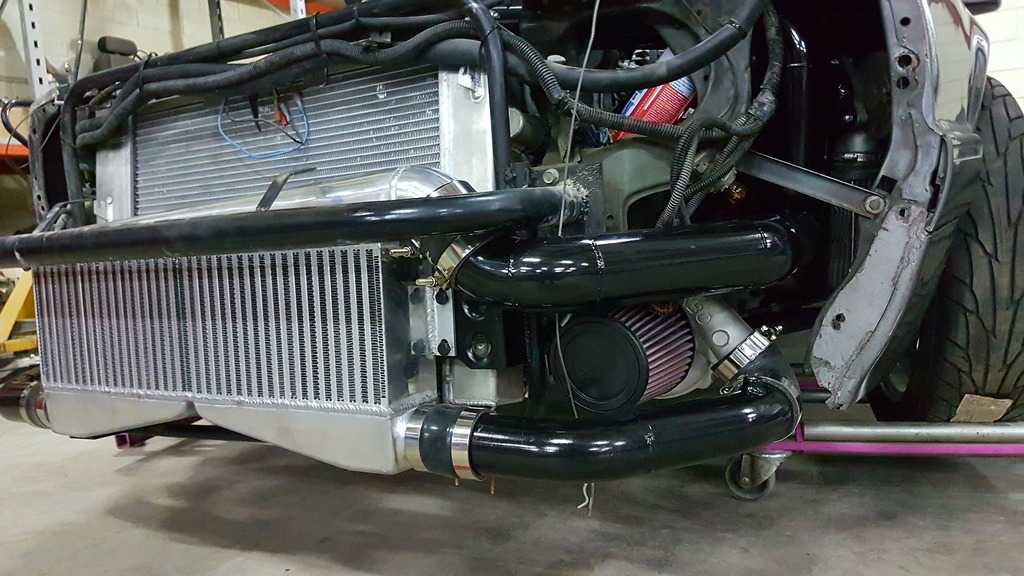
after that I turned my attention to the front of the car, first i had to address the intercooler discharge pipe position ; it wan no bueno
so it was time to lop it off and weld in a 45 deg. piece to make attaching the charge pipe easier :
then it was time to weld stuff up :
after I finished fabbing up all the charge pipes , I had them sand blasted in preparation to get them powder coated ,,, man sandblasting gets them looking nice :
but not as nice as when they get powder coated shiny black!
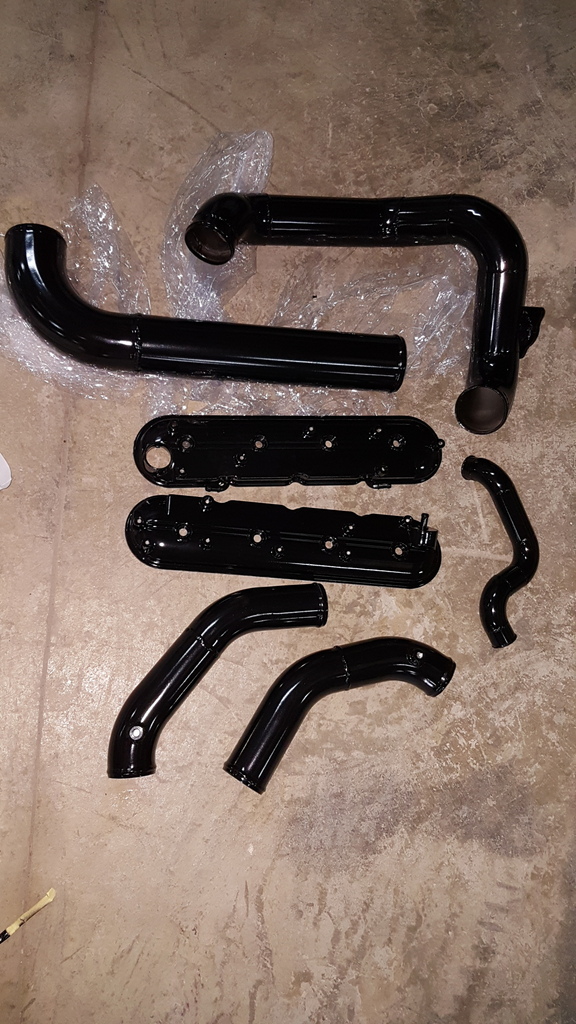
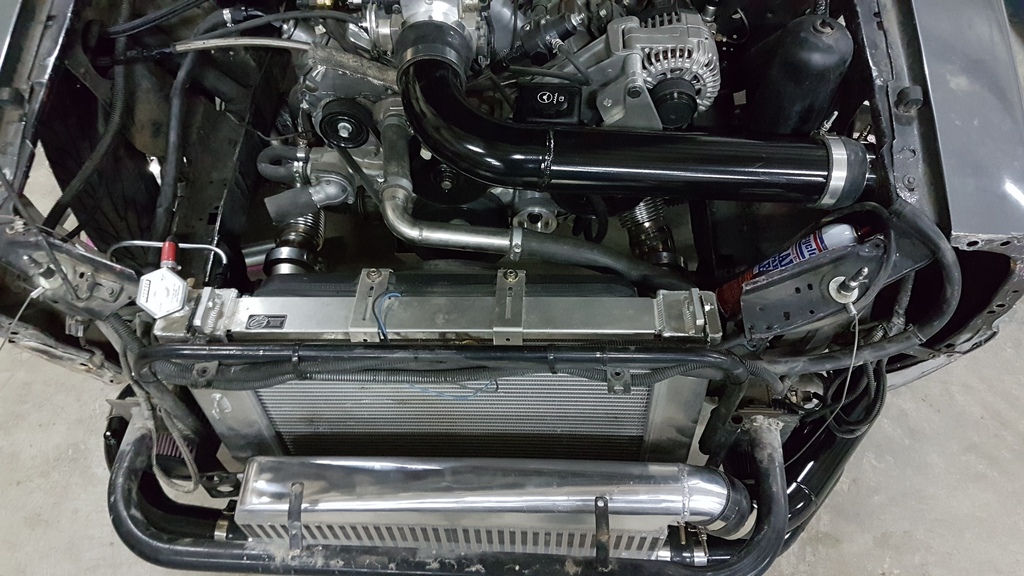
then it was time to install stuff :

so right now the boost side is done ( except for installing a alky nozzle ), and i should have the new trans cooler installed today and plumbed, as well as filling up the coolant system and checking for leaks . i also need to wire the dome sensor on the waste gate as well as plumb the various vacuume / boost lines ,,,,which means i can start this thing pretty soon and start breaking in the rear end and brakes.
got the springs installed in the waste gates , If I recall correctly these are the 12 lb springs:

also got to make the waste gate dump tubes :

I also finished plumbing the coolant lines to the turbos ( sorry no pic) , I decided against using the fittings on the radiator hose , and instead had them take off from the radiator other tank ( used the coolant level sensor hole) . and I finally replaced the fuel lines on this thing. I replaced the feed hose and removed the old steel return line and replaced it with a new -6 hose.
after that I turned my attention to the front of the car, first i had to address the intercooler discharge pipe position ; it wan no bueno
so it was time to lop it off and weld in a 45 deg. piece to make attaching the charge pipe easier :

then it was time to weld stuff up :

after I finished fabbing up all the charge pipes , I had them sand blasted in preparation to get them powder coated ,,, man sandblasting gets them looking nice :

but not as nice as when they get powder coated shiny black!

then it was time to install stuff :


so right now the boost side is done ( except for installing a alky nozzle ), and i should have the new trans cooler installed today and plumbed, as well as filling up the coolant system and checking for leaks . i also need to wire the dome sensor on the waste gate as well as plumb the various vacuume / boost lines ,,,,which means i can start this thing pretty soon and start breaking in the rear end and brakes.
