


How to: Wolfe Door Panel Install
Thread Starter
Joined: Aug 2007
Posts: 24,241
Likes: 89
From: Turnin' Wrenches Infractions: 005
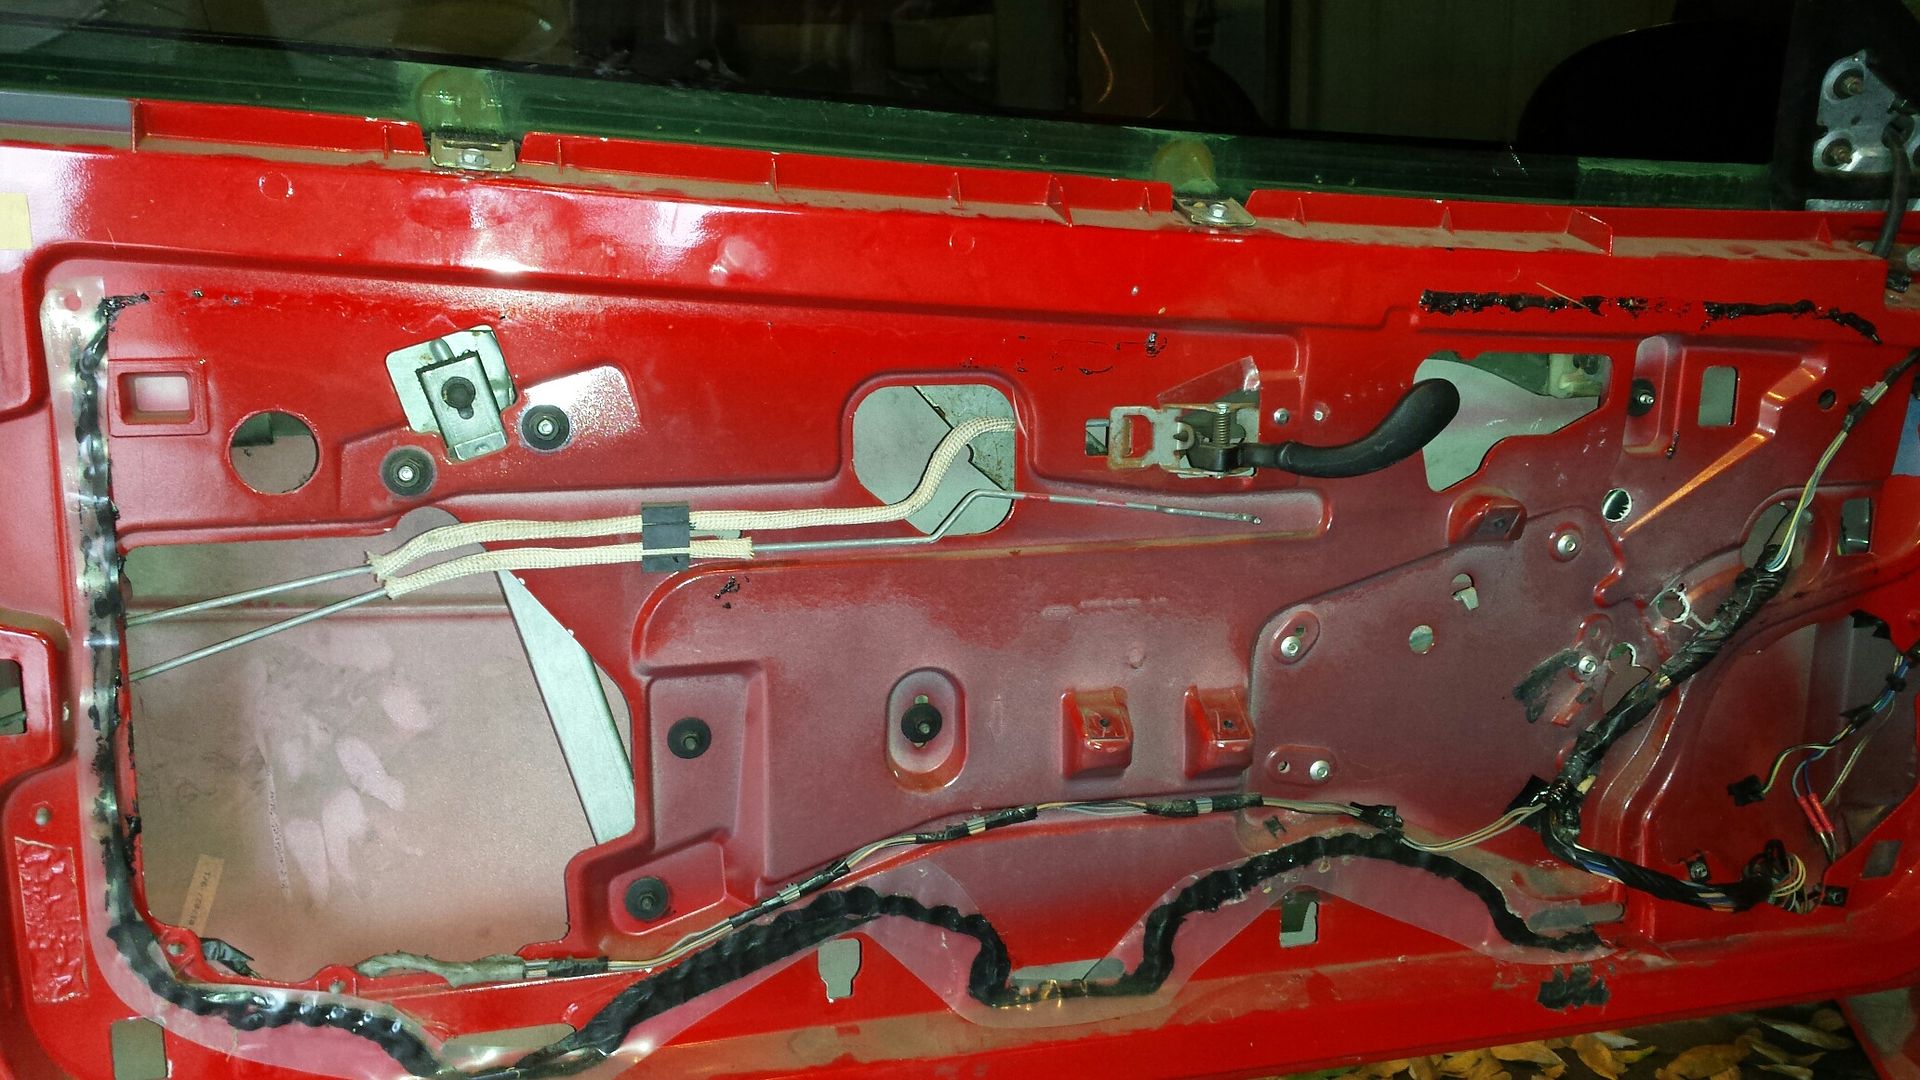
Basically started with this, a stock door minus panel and trim.....
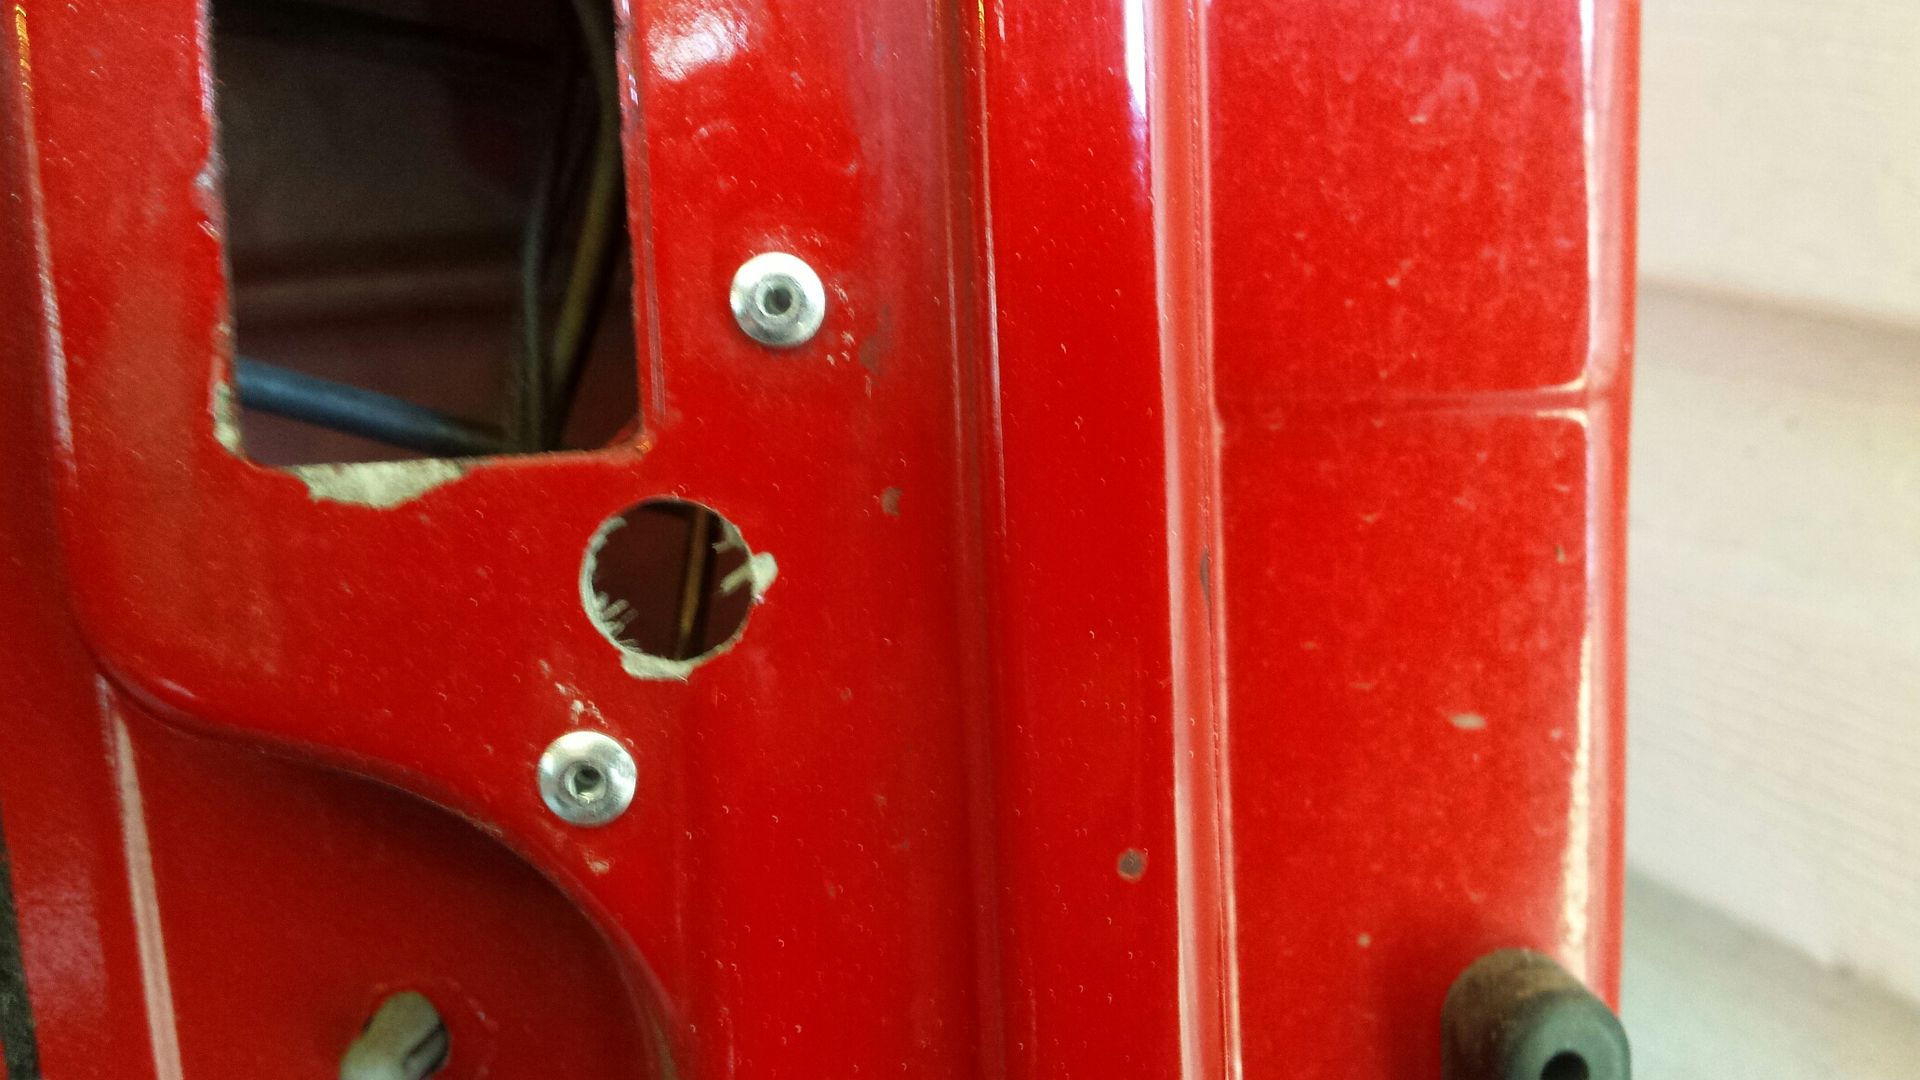
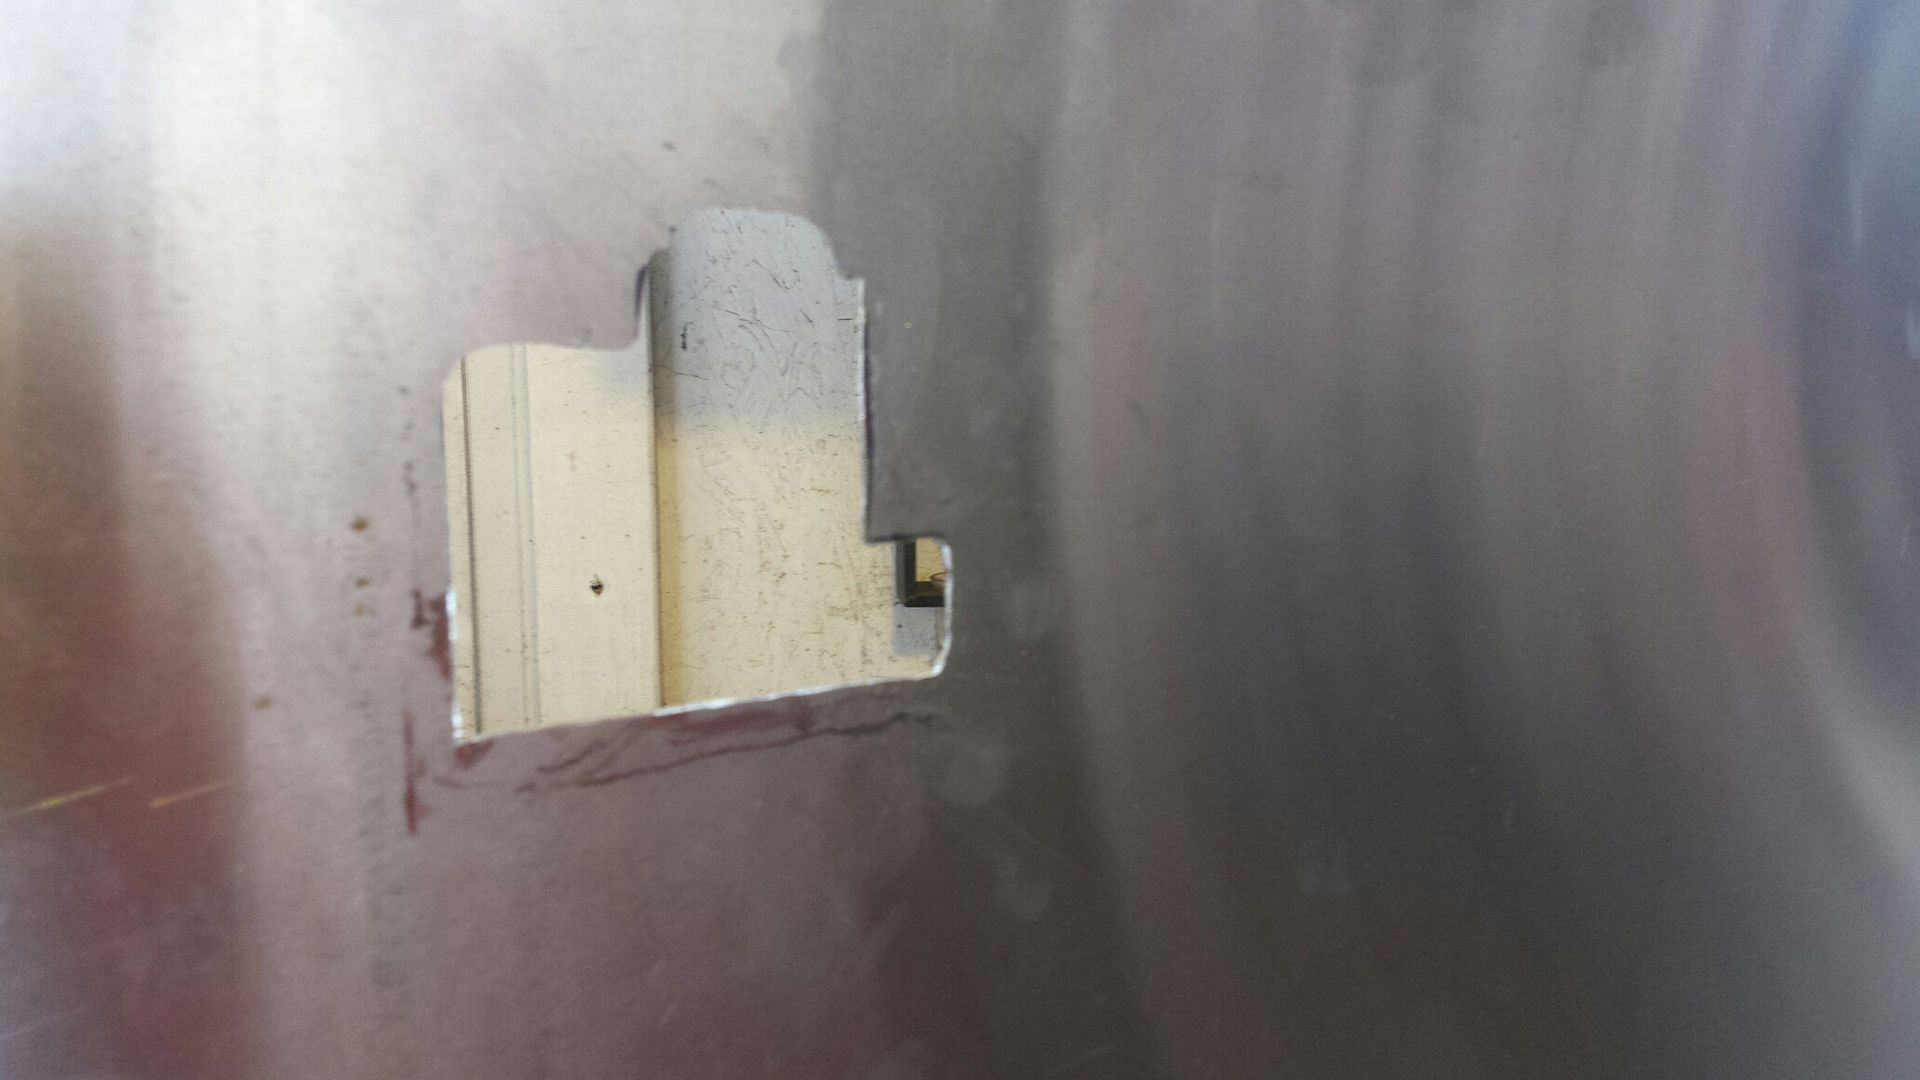
Realized right off the bat, the hole they cut for the door handle was a courtesy cut, and nowhere near correct for install.
This was my initial thinking, but ended up about doubling it due to me wanting the lock lever to be exposed.
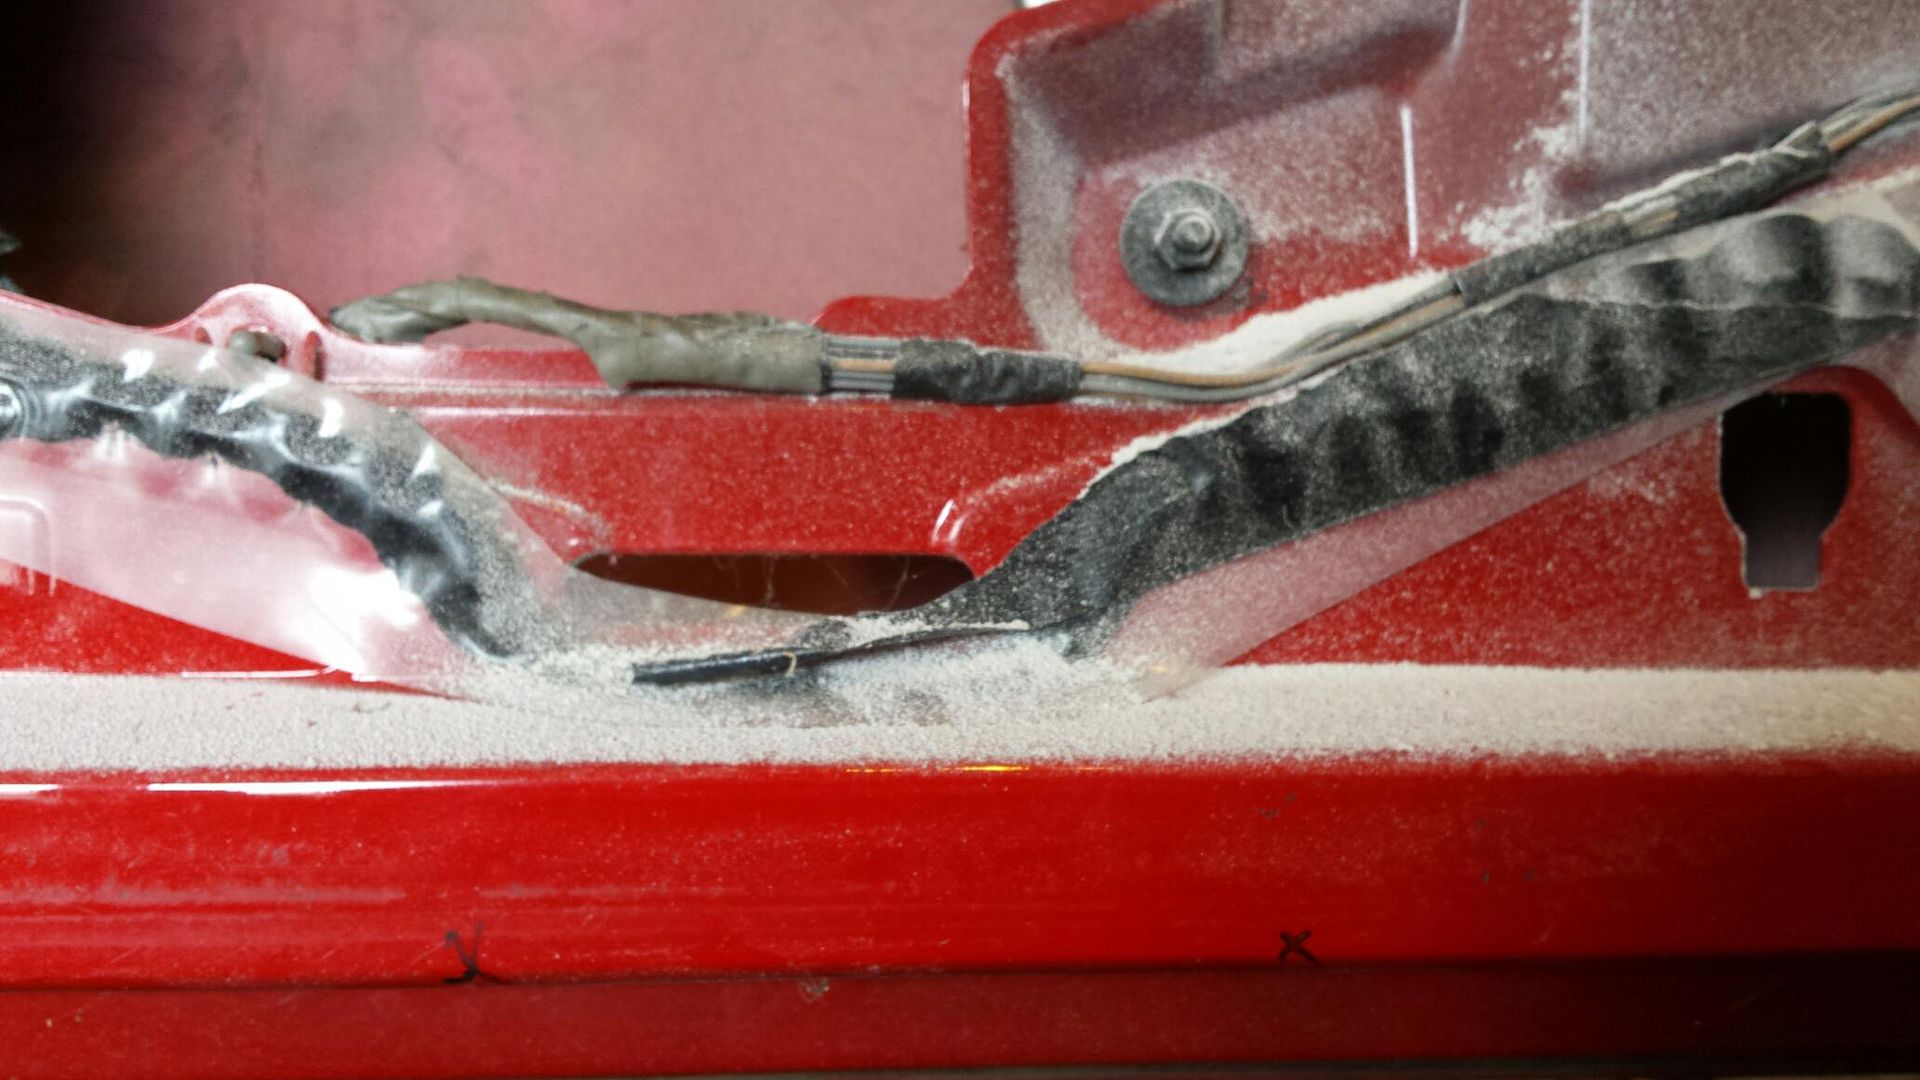
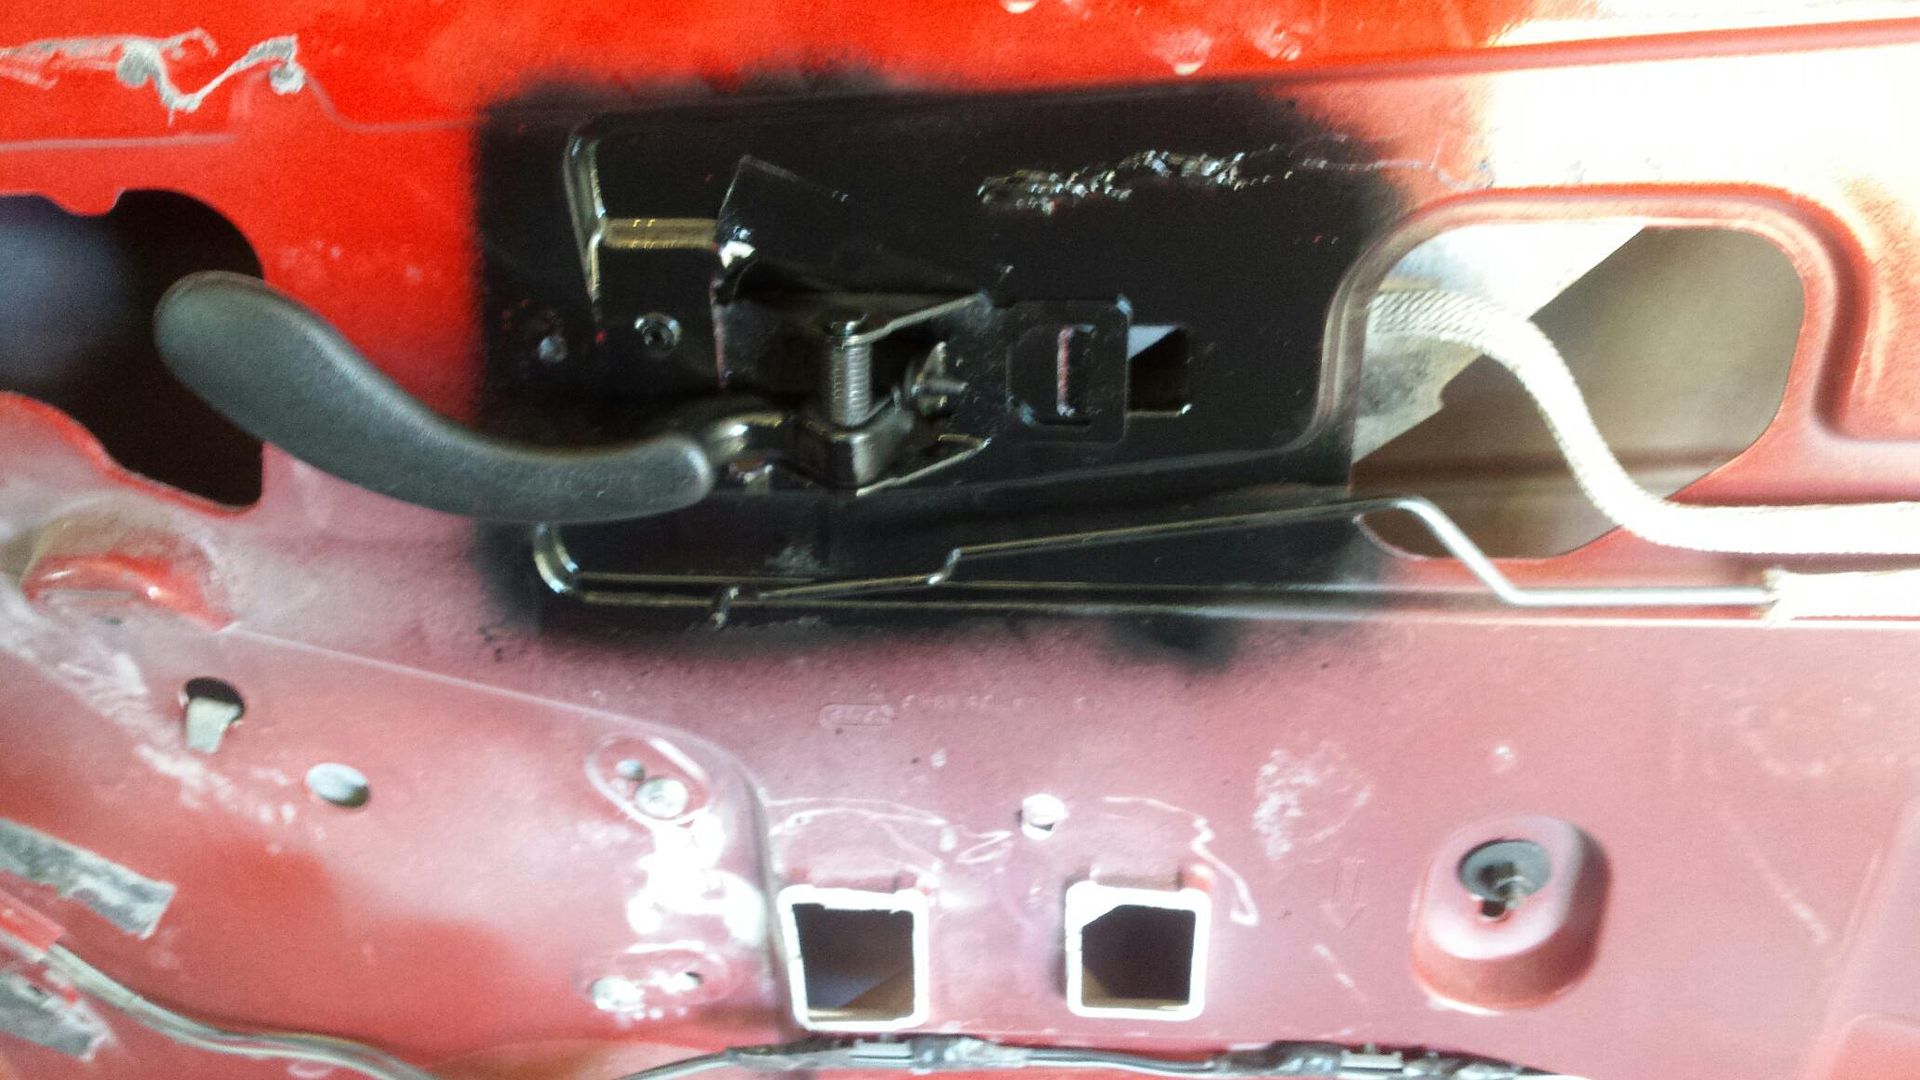
The original mounts for the stock door panel (armrest screws) need to go bye bye. Also, notice how the lock lever kinda looks like a limp noodle when not supported by anything?
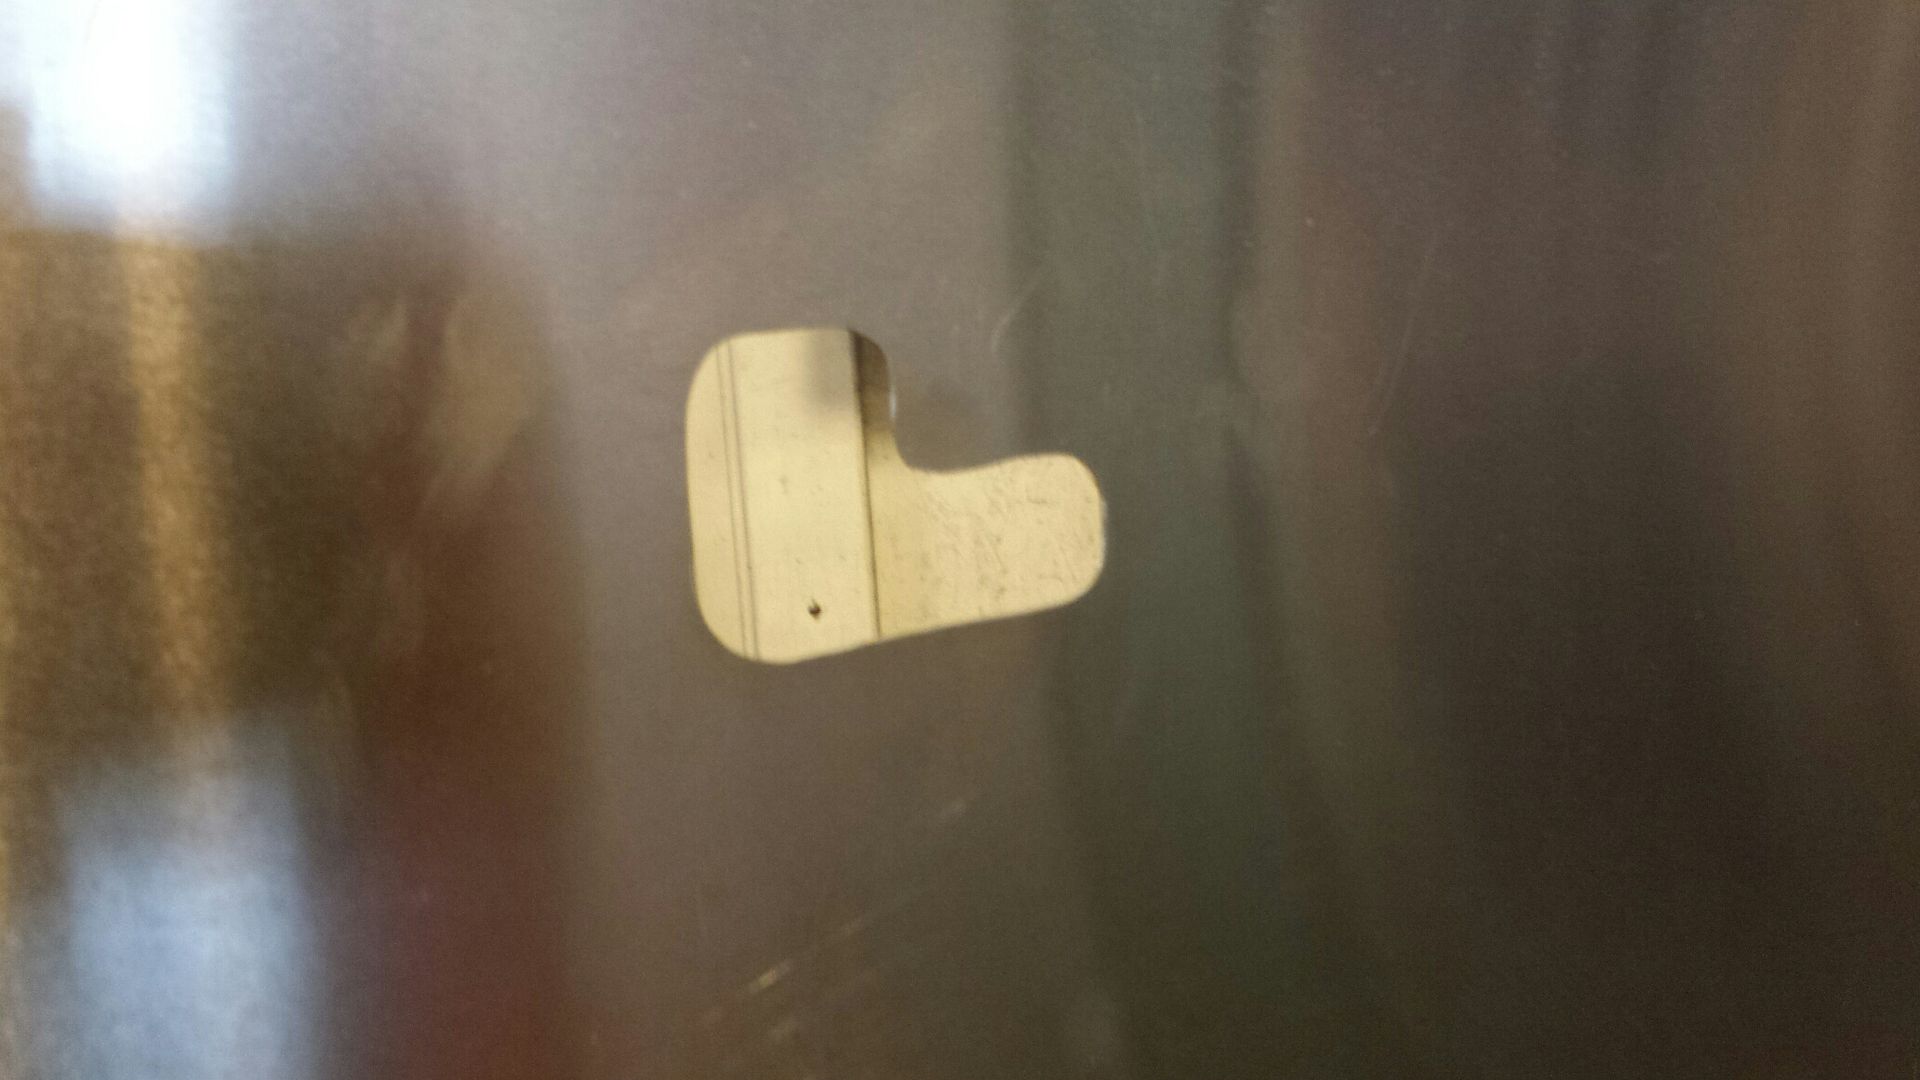
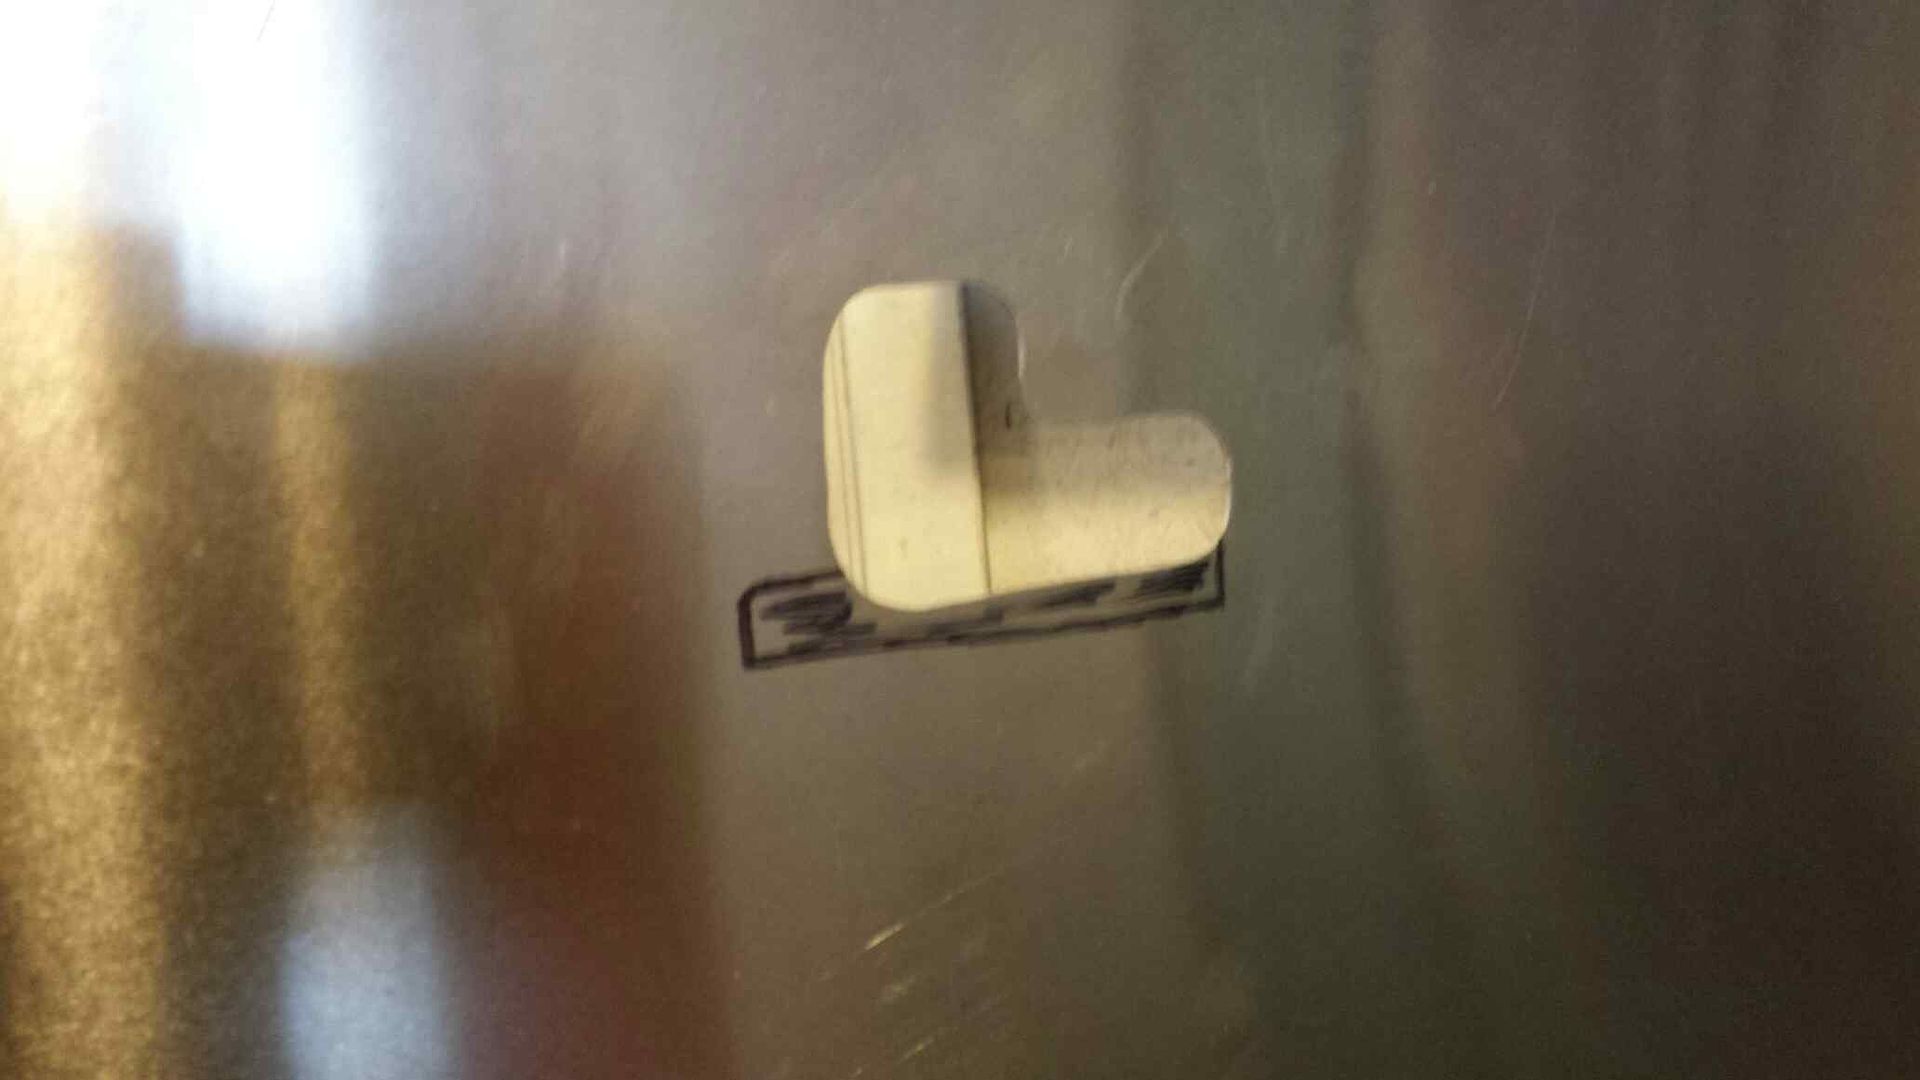
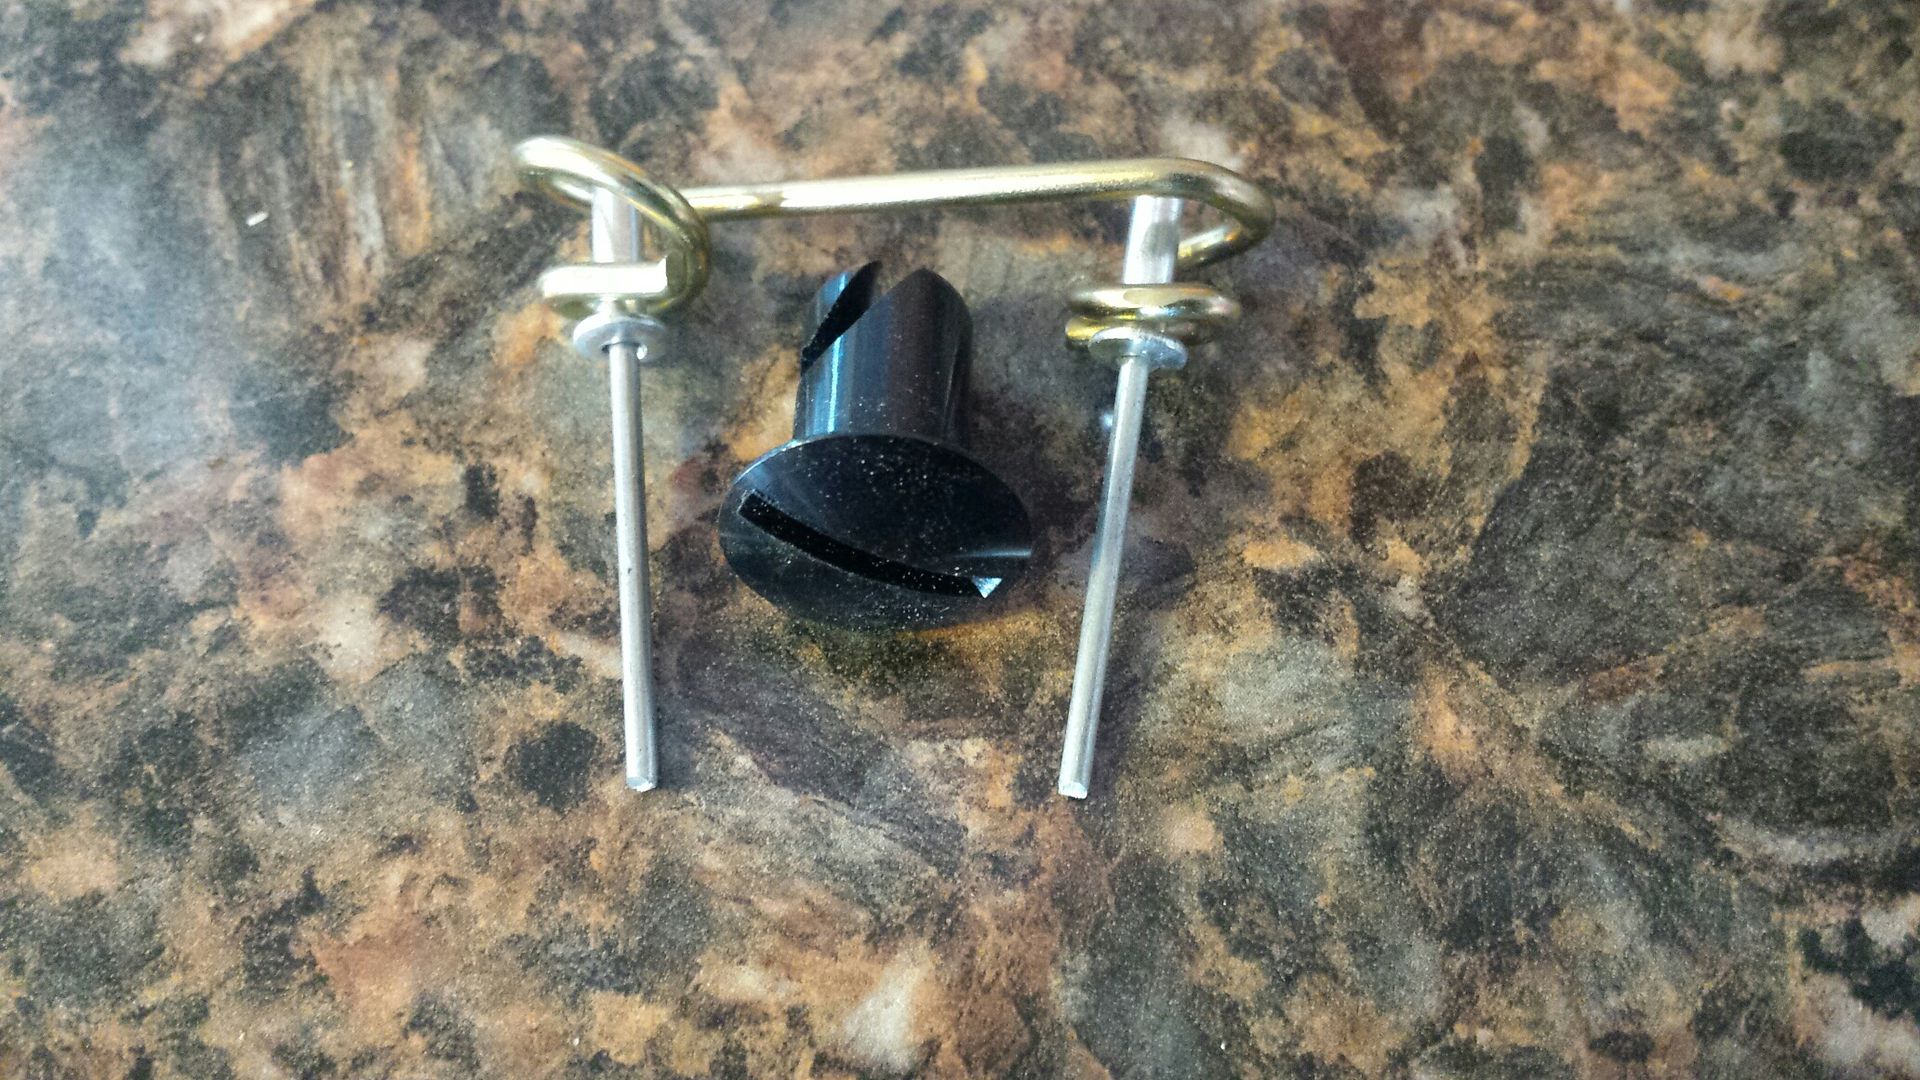
The plan is to use dsus or 1/4 turn fasteners, I want to be able to easily remove the panel if needed. Here's how they go together, the gold spring goes inside the door, riveted, and the black fastener is what you see on the outside of the door panel.
Here's one installed:
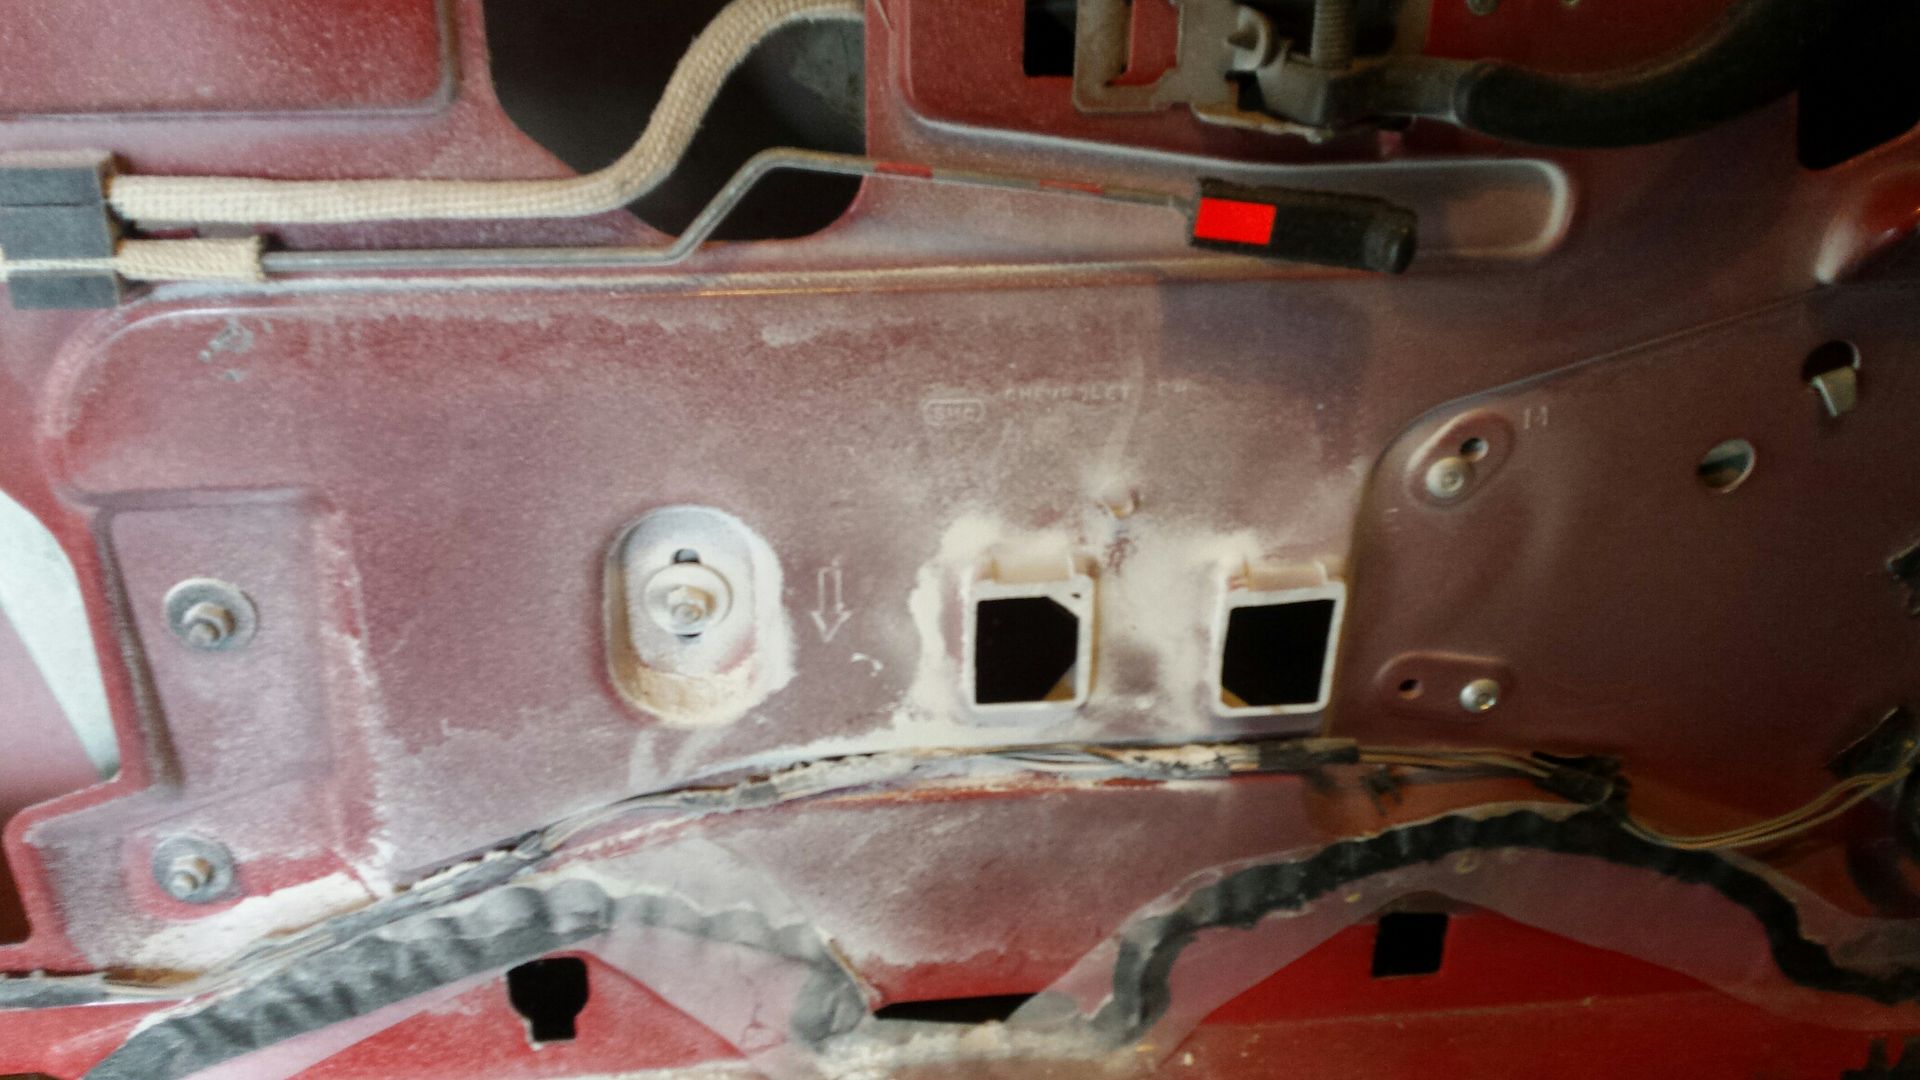
There are lots of things around the perimeter of the door that will obstruct placing your springs inside. I went around the door and marked Xs anywhere there was something in the way. Along the bottom of the door there is ribbing/reinforcement every few inches.
Here's where i selected the 5 could go with the least amount of issue, there is one more at the front corner that got cut out of the pic.
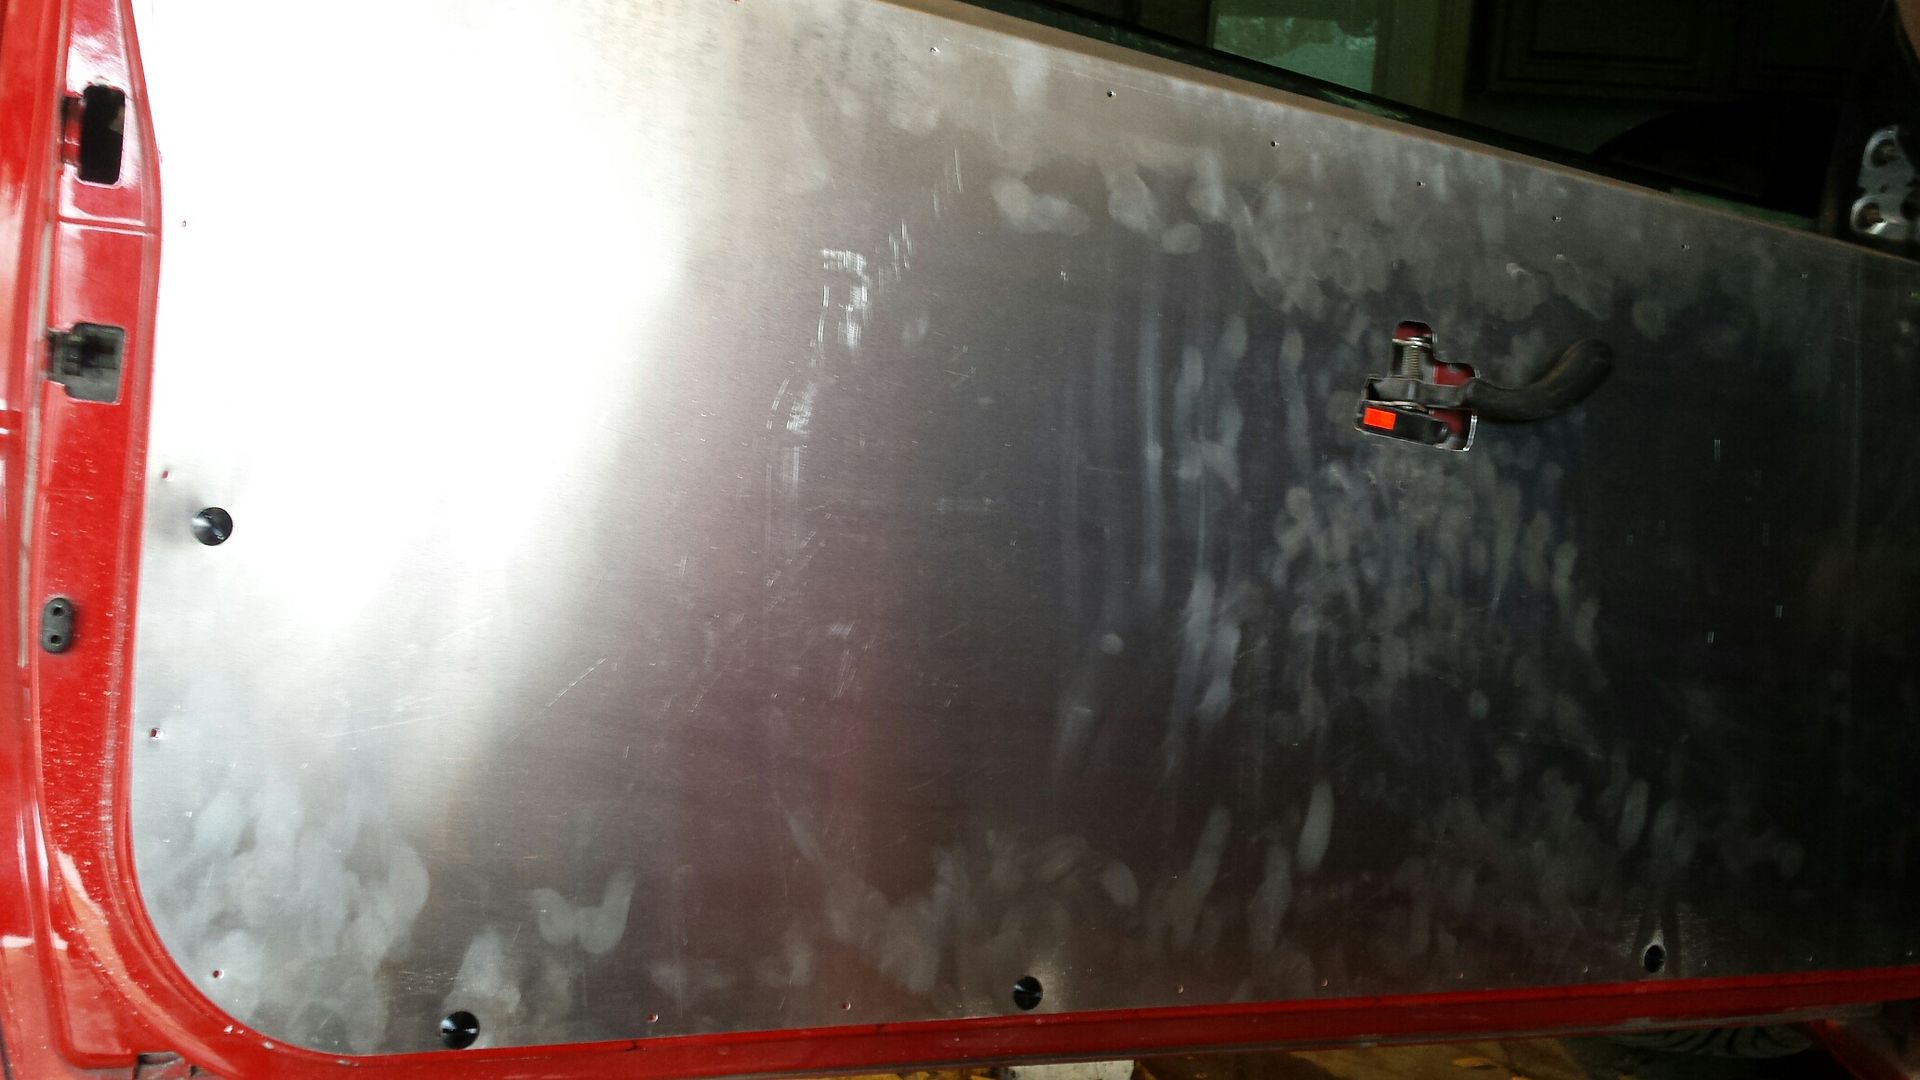
Here is my final passenger door cut for the handle and the lock lever:
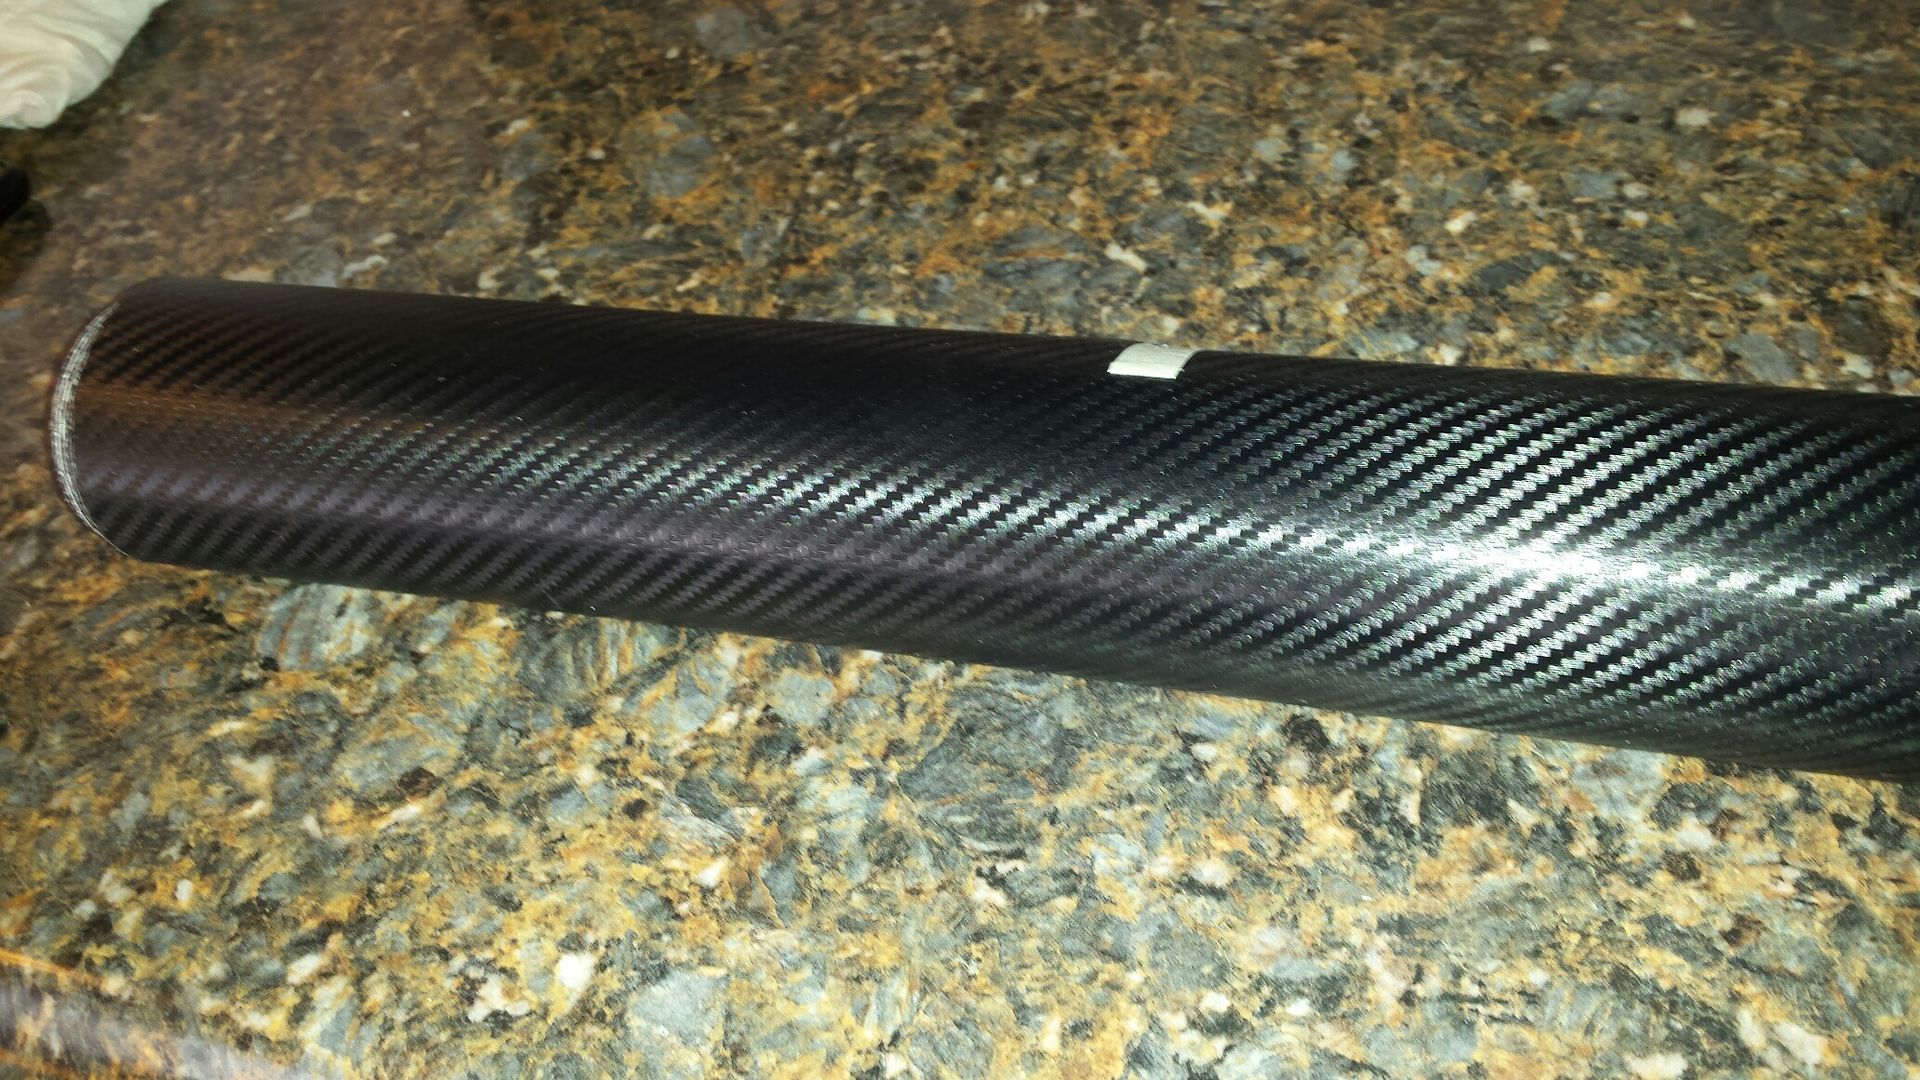
Up close of the carbon fiber wrap I selected. Chinesium brand.
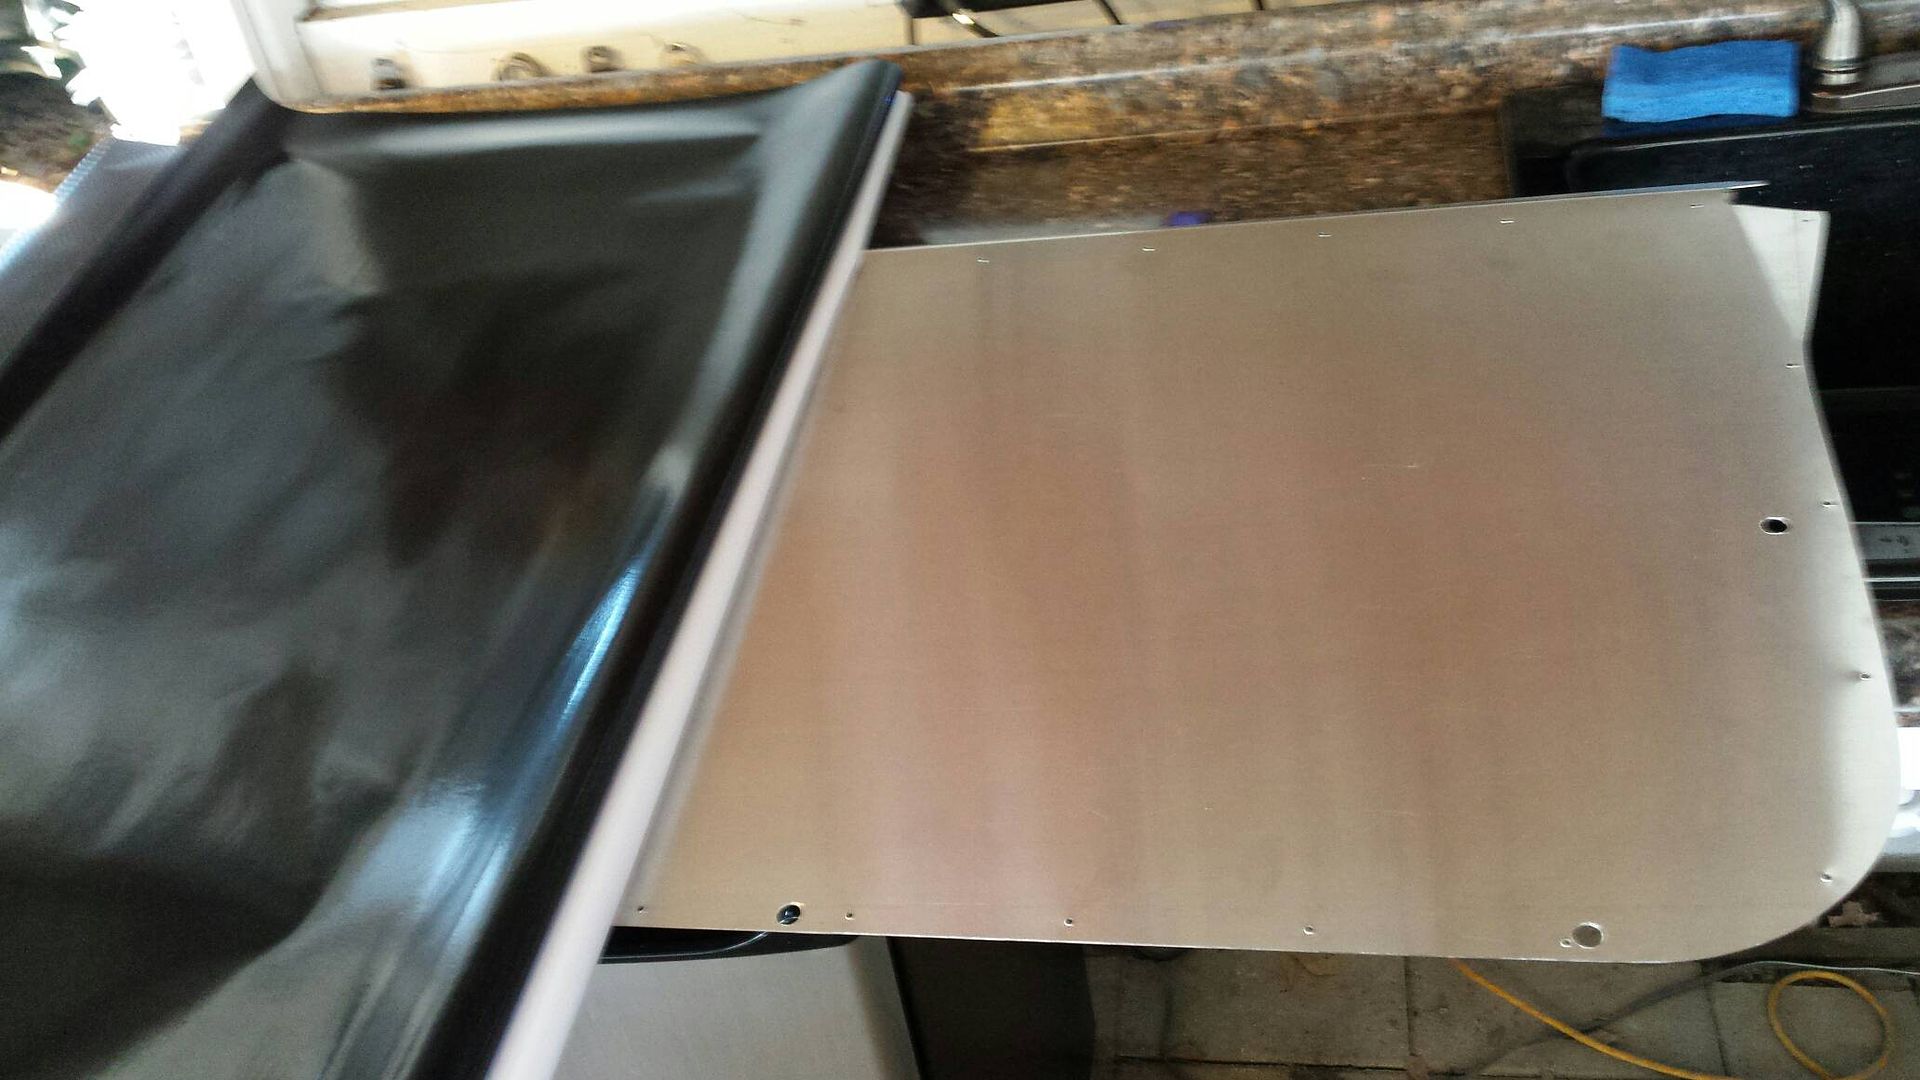
Lay out your wrap of choice. Once it was on i hit it very quickly with a heat gun on the low setting.
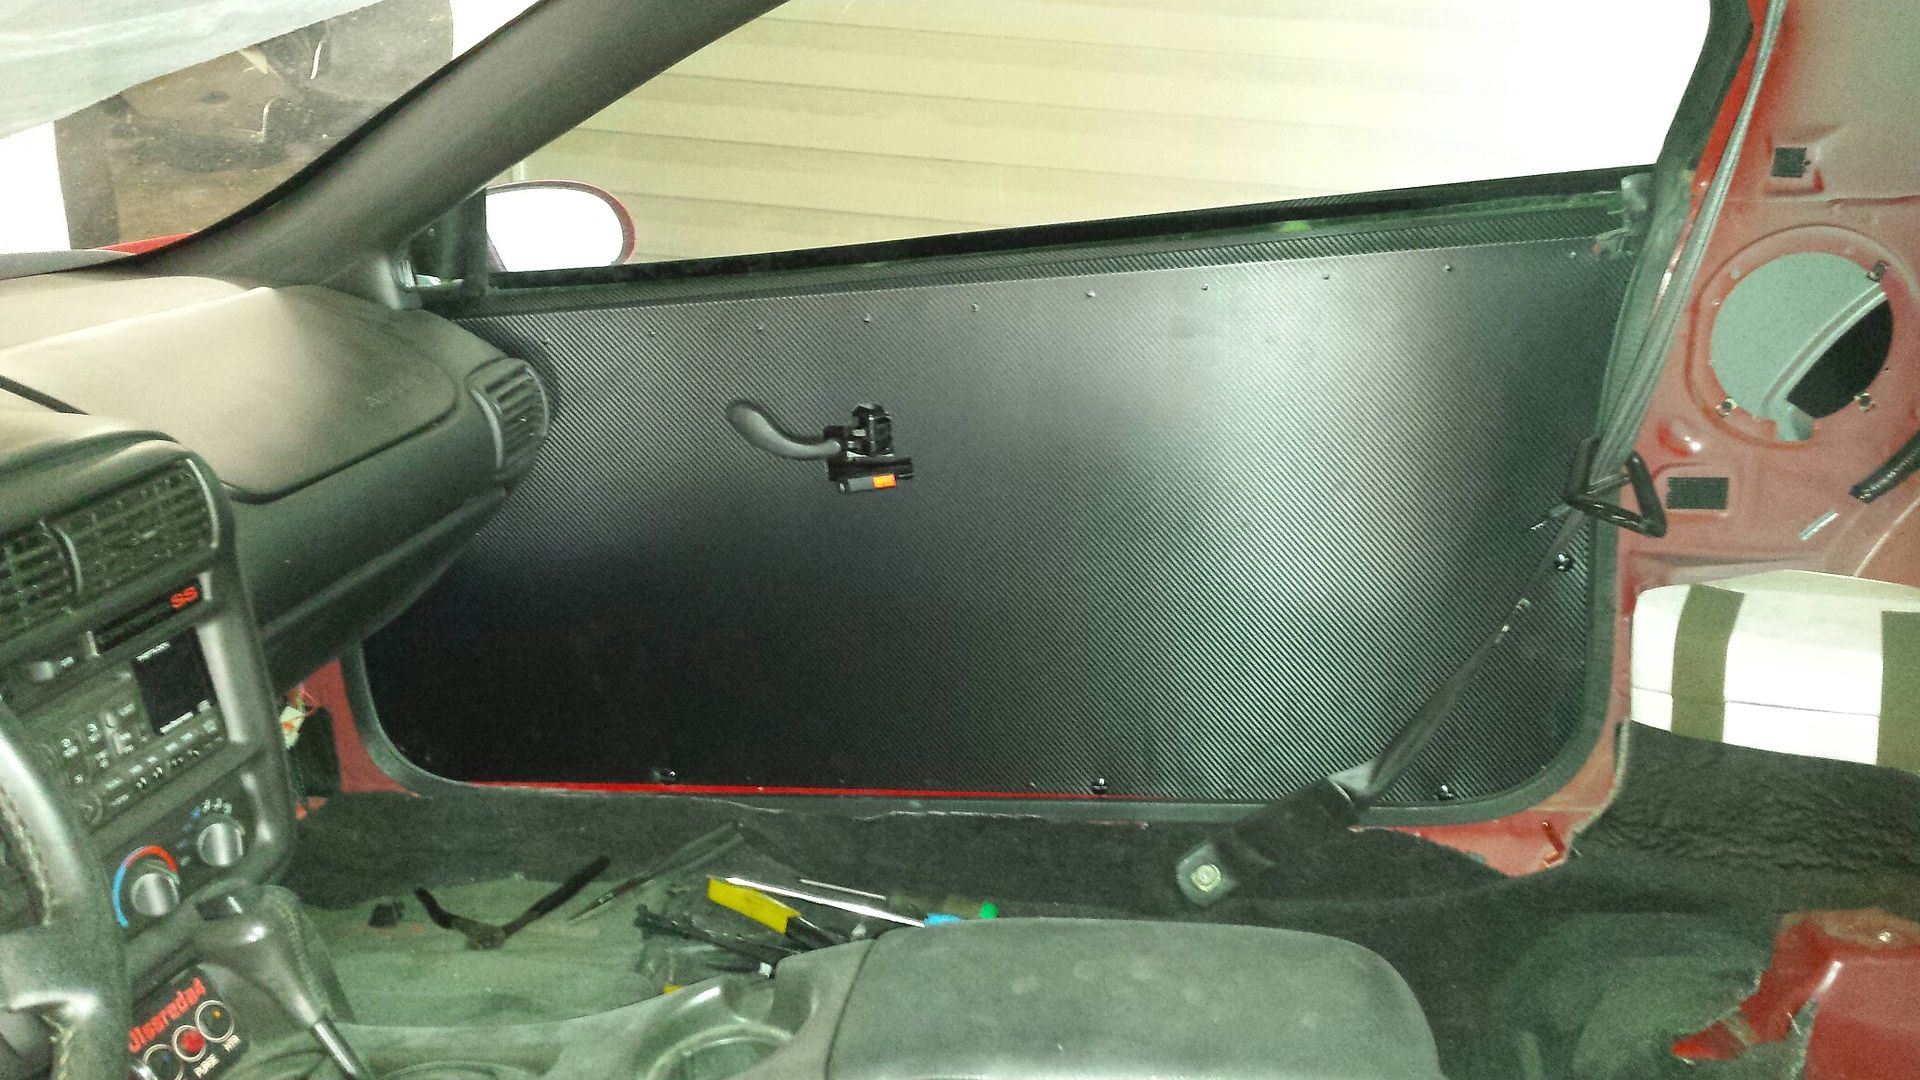
Driver door mock up, no trim, and need to put the switches somewhere, may extend them to the center console.
Add a little black paint around the handle:
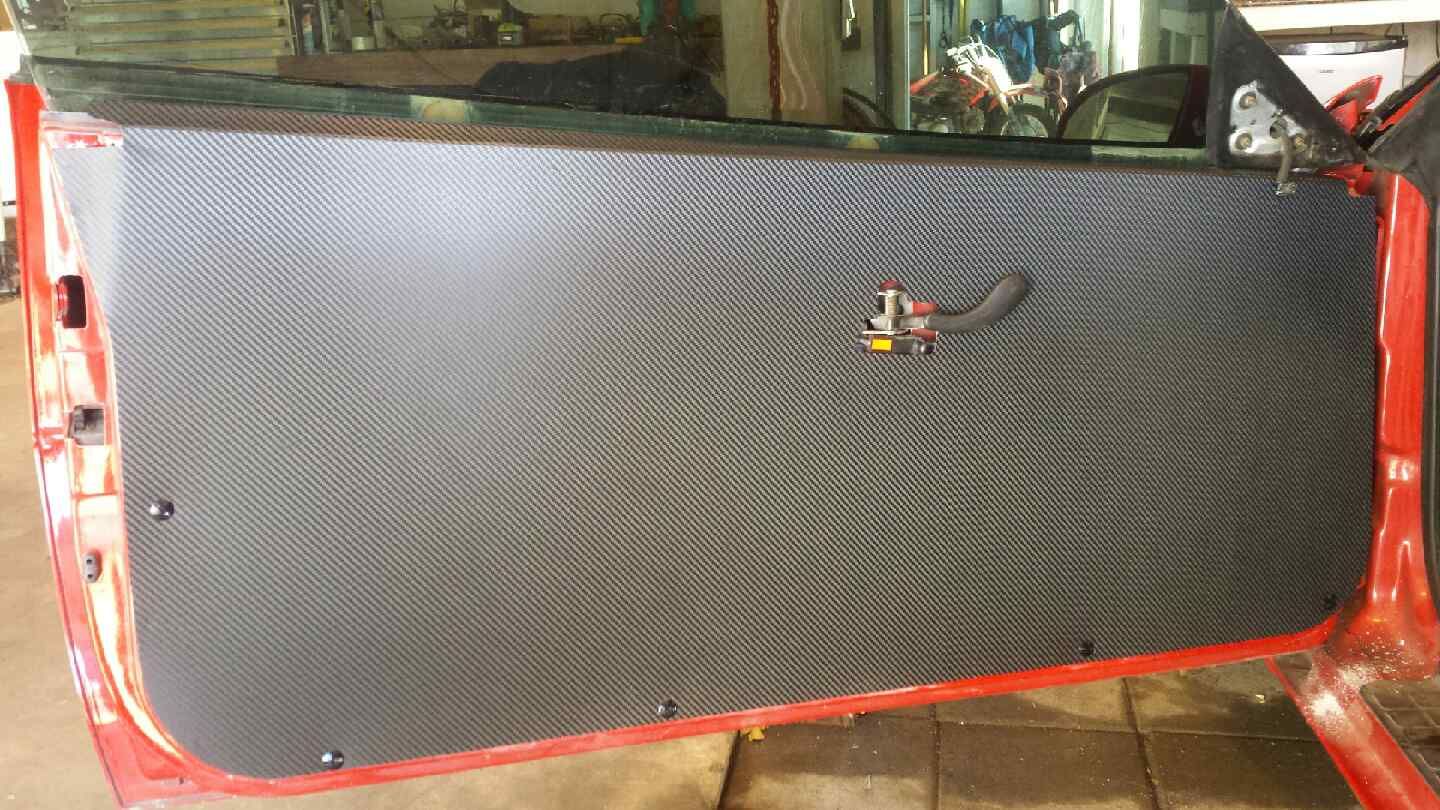
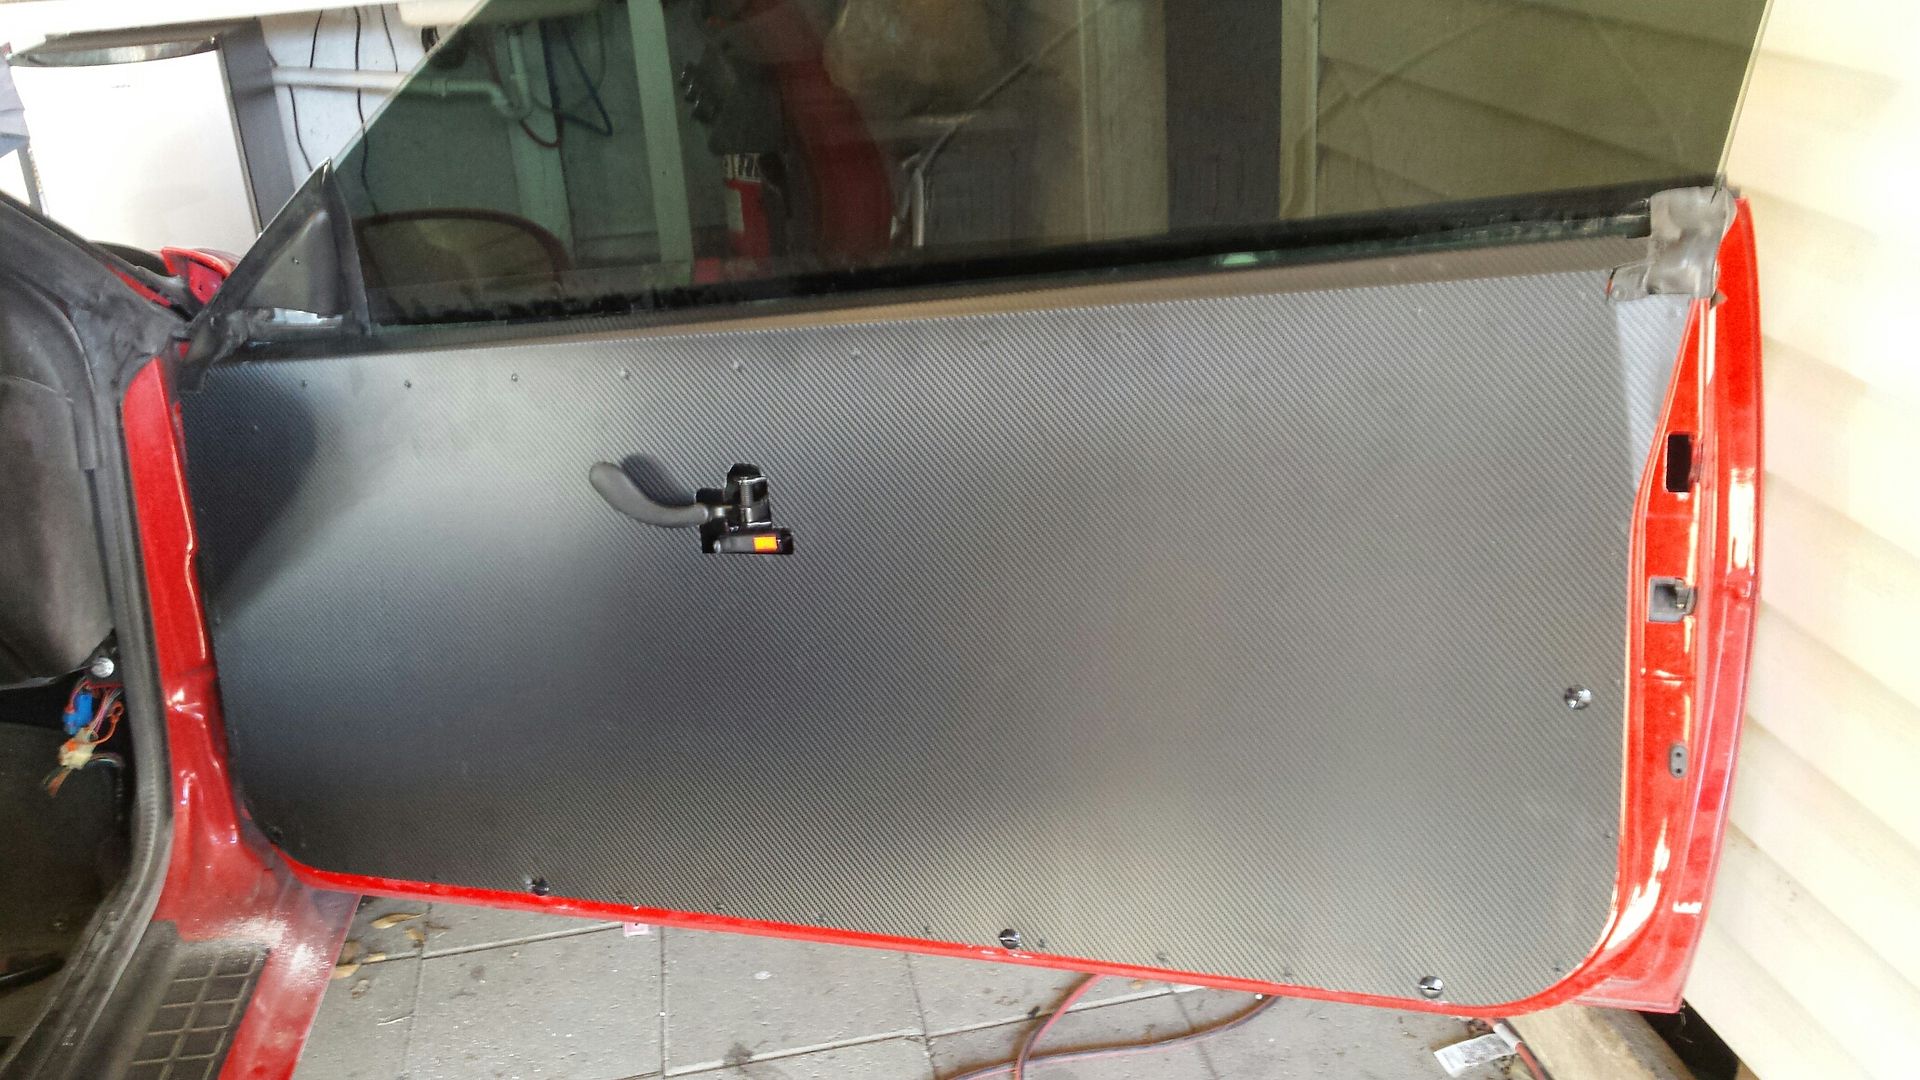
Passenger door with trim installed. The rubber at the upper front of the door requires minor trimming, the rubber at the rear of the door does not.
Pic looking from the inside...notice how when i shut the door the lock lever popped out a tad?
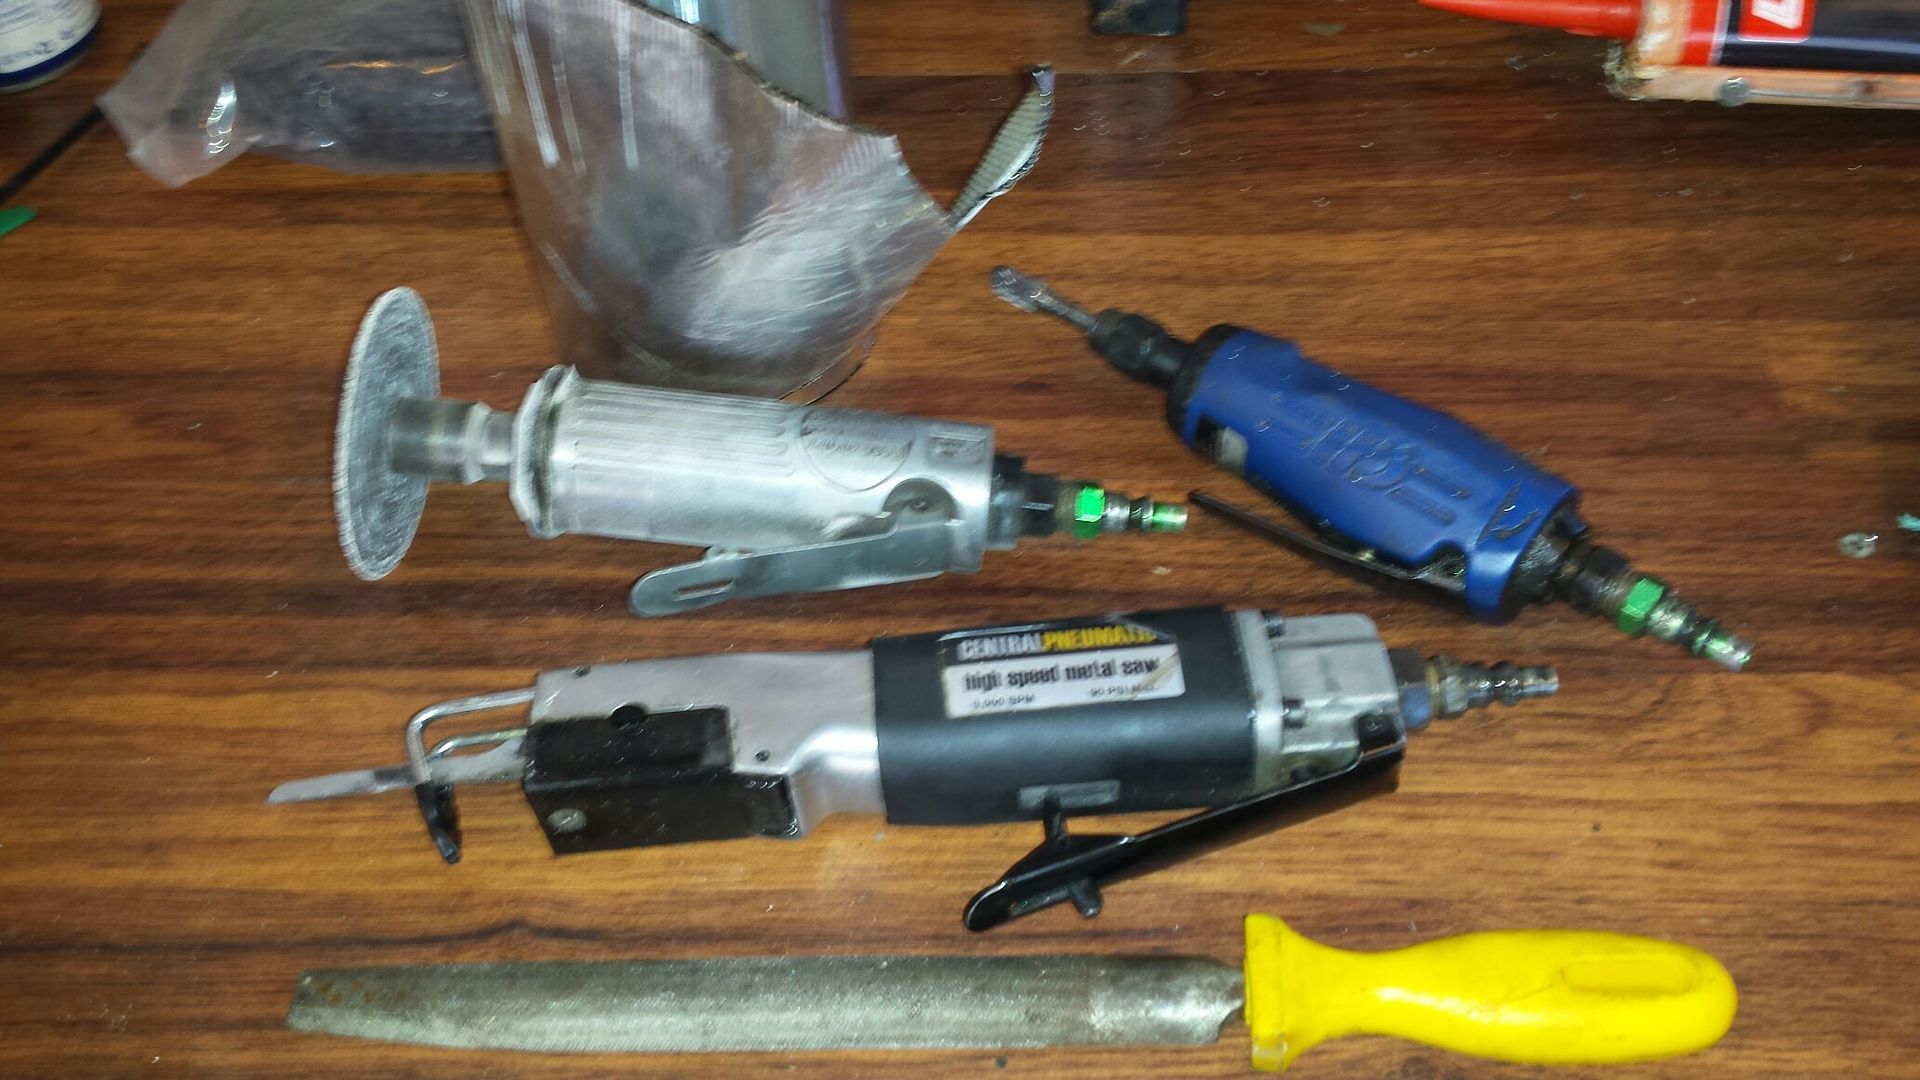
I used the cutoff wheel to cut off the mounts, the bodysaw to trim the handle holes, the carbide grinder to finish them out, the file to take the ridges off my cuts, and the silver tar tape (roof repair) on the rear of the panel to give it a little weight so it wont rattle against the door, this step optional.
Couple of observations. I chose to delete my power mirror wiring. The part that plugs in has to go through the metal panel, where it used to slip behind the stocker. You'll need to drill a hole in the panel to allow it to pass through if you choose to keep it. If you want to extend the full driver switch panel its something like 19 wires., about half being lock/windows, and other half being mirrors. Other then that the panels fit nice and tight, but due to sheer size they are probably gonna resonate and rattle some. Probably be advisable to put something between them and the fiberglass door. I also put a zip tie loosely around the lock rod near the handle cause it flops around some. Putting a tie on it keeps it held up and supported.

Realized right off the bat, the hole they cut for the door handle was a courtesy cut, and nowhere near correct for install.

This was my initial thinking, but ended up about doubling it due to me wanting the lock lever to be exposed.

The original mounts for the stock door panel (armrest screws) need to go bye bye. Also, notice how the lock lever kinda looks like a limp noodle when not supported by anything?

The plan is to use dsus or 1/4 turn fasteners, I want to be able to easily remove the panel if needed. Here's how they go together, the gold spring goes inside the door, riveted, and the black fastener is what you see on the outside of the door panel.

Here's one installed:

There are lots of things around the perimeter of the door that will obstruct placing your springs inside. I went around the door and marked Xs anywhere there was something in the way. Along the bottom of the door there is ribbing/reinforcement every few inches.

Here's where i selected the 5 could go with the least amount of issue, there is one more at the front corner that got cut out of the pic.

Here is my final passenger door cut for the handle and the lock lever:

Up close of the carbon fiber wrap I selected. Chinesium brand.

Lay out your wrap of choice. Once it was on i hit it very quickly with a heat gun on the low setting.

Driver door mock up, no trim, and need to put the switches somewhere, may extend them to the center console.

Add a little black paint around the handle:

Passenger door with trim installed. The rubber at the upper front of the door requires minor trimming, the rubber at the rear of the door does not.

Pic looking from the inside...notice how when i shut the door the lock lever popped out a tad?

I used the cutoff wheel to cut off the mounts, the bodysaw to trim the handle holes, the carbide grinder to finish them out, the file to take the ridges off my cuts, and the silver tar tape (roof repair) on the rear of the panel to give it a little weight so it wont rattle against the door, this step optional.

Couple of observations. I chose to delete my power mirror wiring. The part that plugs in has to go through the metal panel, where it used to slip behind the stocker. You'll need to drill a hole in the panel to allow it to pass through if you choose to keep it. If you want to extend the full driver switch panel its something like 19 wires., about half being lock/windows, and other half being mirrors. Other then that the panels fit nice and tight, but due to sheer size they are probably gonna resonate and rattle some. Probably be advisable to put something between them and the fiberglass door. I also put a zip tie loosely around the lock rod near the handle cause it flops around some. Putting a tie on it keeps it held up and supported.

Last edited by 01ssreda4; Mar 2, 2018 at 01:39 PM.

TECH Addict
Joined: Feb 2012
Posts: 2,103
Likes: 21
Interesting. I've been thinking to do the same. If I did this I'd like to keep the power window/lock switches so I'd need to figure out how to remount them.
Also, adding a puller strap would be nice to when wanting to shut the door.
How much weight do you think you saved doing this over the stock door panel?
Also, adding a puller strap would be nice to when wanting to shut the door.
How much weight do you think you saved doing this over the stock door panel?
Thread Starter
Joined: Aug 2007
Posts: 24,241
Likes: 89
From: Turnin' Wrenches Infractions: 005
I'm thinking the stock panels weigh 20. You can grab the top of the panel and pull it. It fits very tight to the door and wraps completely around the top fiberglass lip. The main reason I didn't cut a hole and mount the switches flat is bc where it would be easily accessible from the drivers seat the metal panel doesn't have the clearance behind it. Plus the stock trim panel that holds the switches isn't perfectly flat.
Last edited by 01ssreda4; Feb 5, 2018 at 07:52 PM.
TECH Addict
Joined: Feb 2012
Posts: 2,103
Likes: 21
I wonder if you could remove the individual switches from the cluster and mount them individually to the new panel. Cut a hole in the door itself for clearance for the wires.
OR just replace/redo all the switches with smaller ones. They are only simple toggle switches.
Hmmmm now I have some new ideas festering...
Just looked them up online...I see a $280 price tag...please tell me that is for both doors??
OR just replace/redo all the switches with smaller ones. They are only simple toggle switches.
Hmmmm now I have some new ideas festering...
Just looked them up online...I see a $280 price tag...please tell me that is for both doors??
Thread Starter
Joined: Aug 2007
Posts: 24,241
Likes: 89
From: Turnin' Wrenches Infractions: 005
Yeah that's for both. If you remove the switches you would have to turn around and make a new bezel. These are your typical factory switches, and they are bulky for a reason. They contain the high current contacts, meaning there are no relays in the wiring. If you want smaller switches you would likely need to add relays to make them live. Not a huge deal but something I'd rather avoid hence my idea of just extending the wiring to the center console. Whatever I decide I will update the thread when I do it. I believe the normally closed contacts have to be connected at all times, meaning even if you don't keep the passenger switch it has to remain plugged in, so I left it tied up inside the door.
Trending Topics
LS1 Tech Stories
The Best V8 Stories One Small Block at Time

Gas Monkey Built a 6-Wheel Ferrari Testarossa With a Corvette LT4 Engine
Verdad Gallardo
7 Most Reliable High-Performance Engines GM Has Ever Built
Verdad Gallardo
Amazing '71 Camaro Restomod Is Modern Muscle Car Under the Skin
Verdad Gallardo
6 Common C5 Corvette Failures and What's Involved In Repairing Them
Pouria Savadkouei
Retro Modern Bandit Pontiac Trans AM Comes With Burt Reynolds' Autograph
Verdad Gallardo
Top 10 Greatest Cadillac V Series Performance Models Ever, Ranked
Pouria Savadkouei
Top 10 Most Powerful Chevy Trucks Ever Made!

Hennessey's New Supercharged Silverado ZR2 Has 700 HP
Verdad Gallardo
Coachbuilt N2A Anteros Is an LS2-Powered C6 Corvette In Italian Clothes
Verdad Gallardo Thread Starter
Joined: Aug 2007
Posts: 24,241
Likes: 89
From: Turnin' Wrenches Infractions: 005
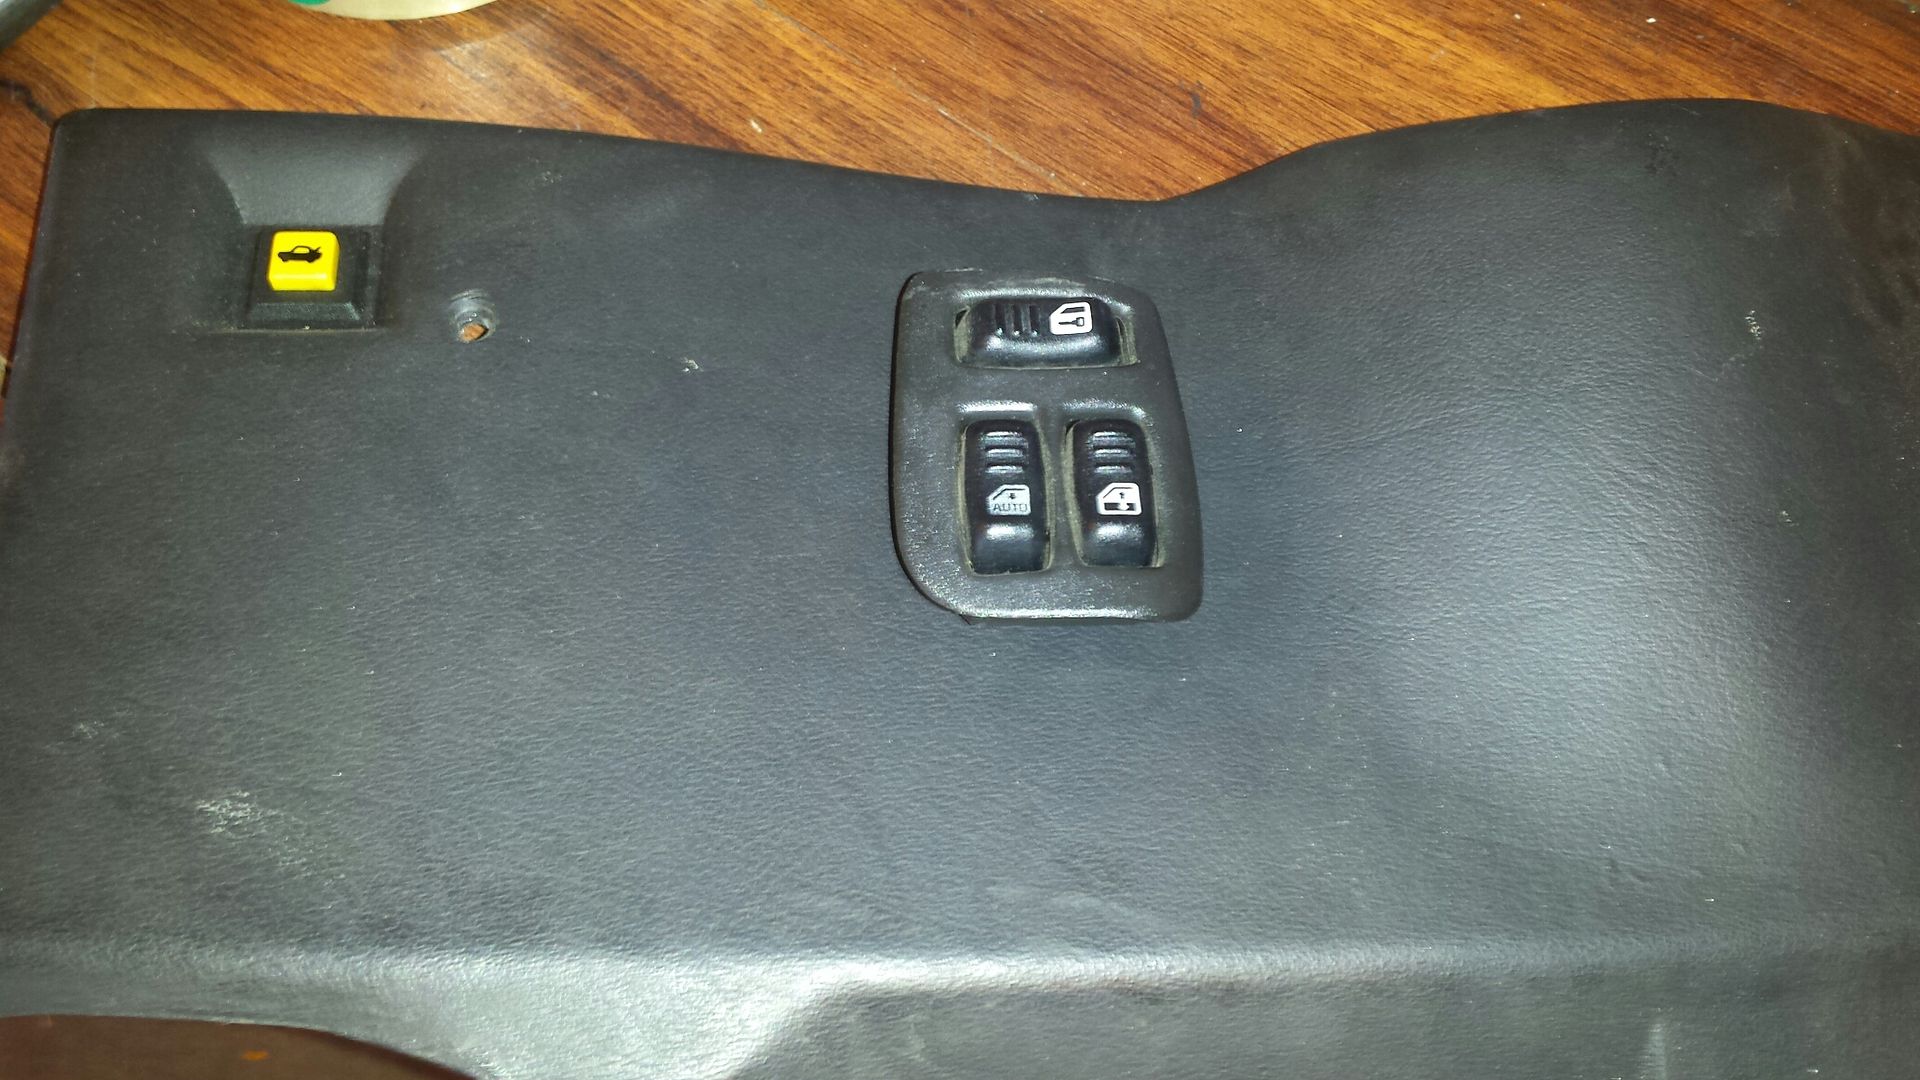
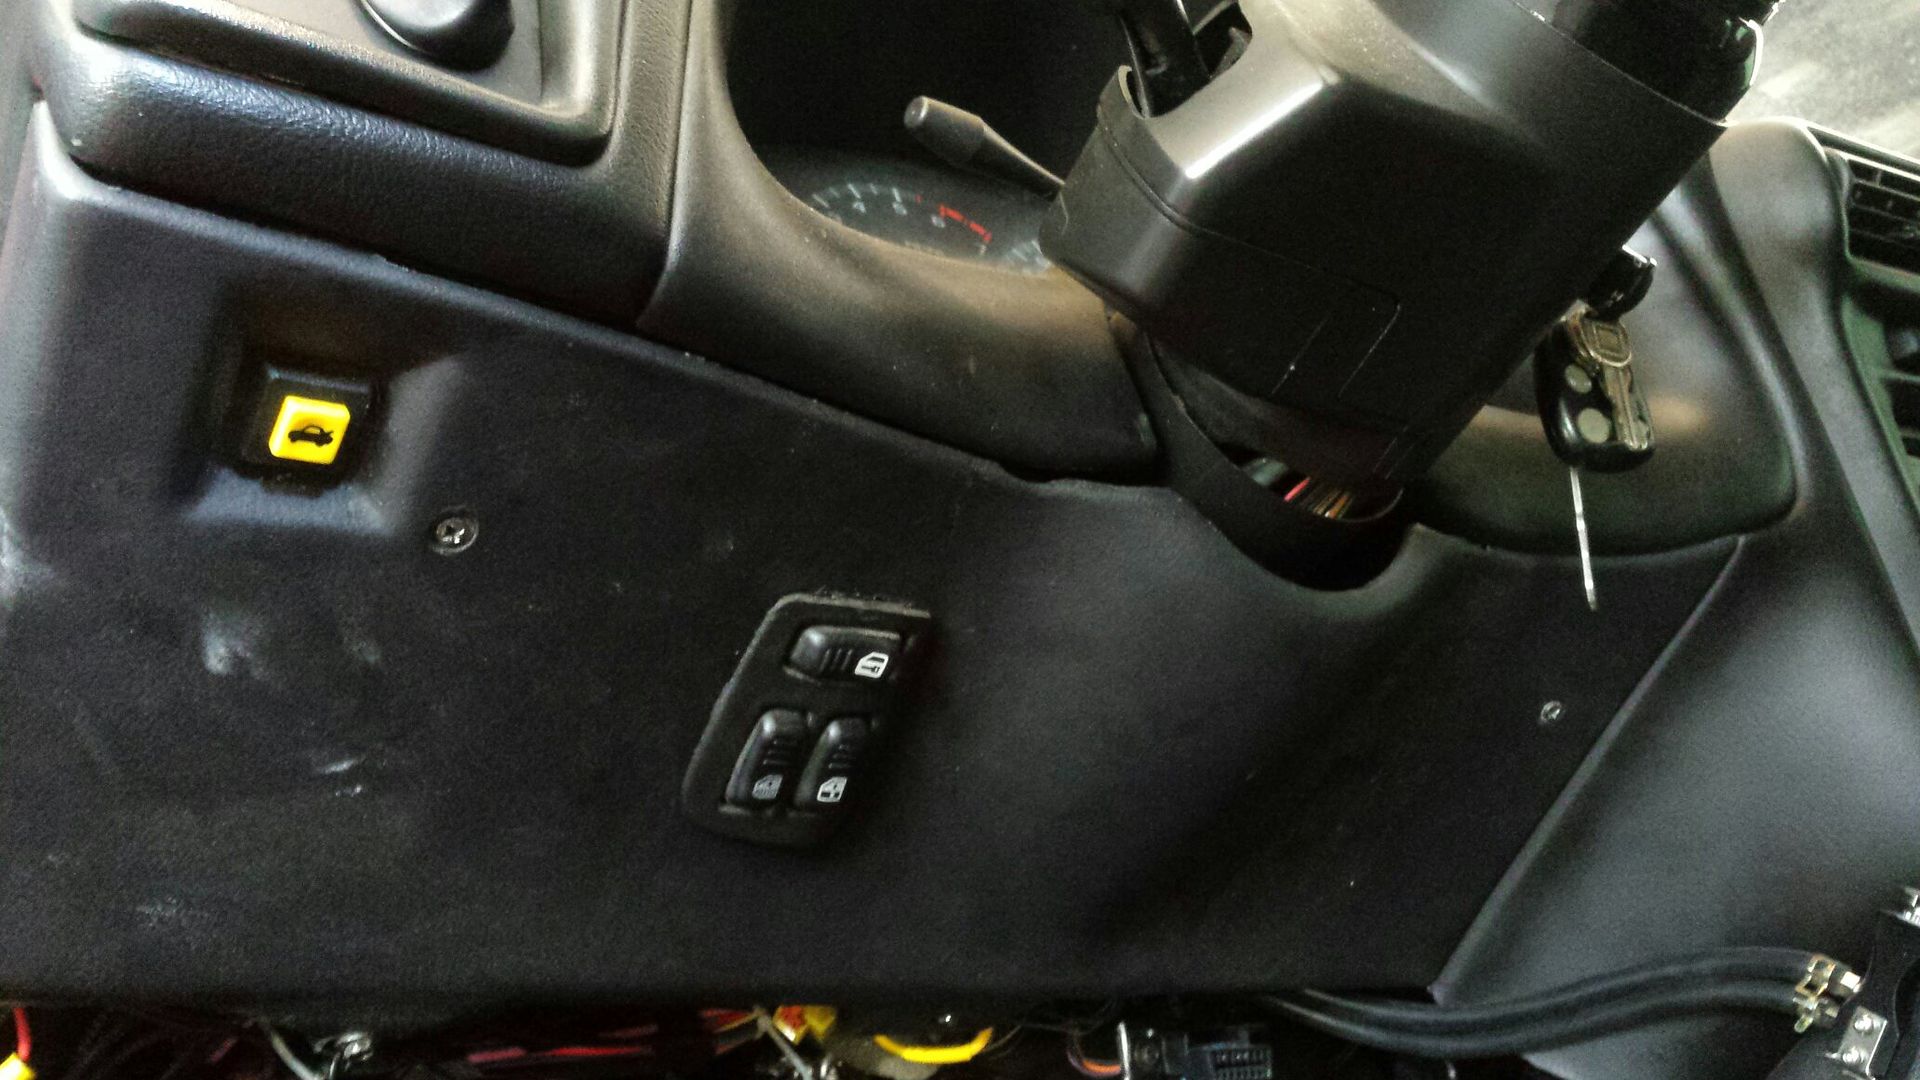
So, in conclusion to the switch portion of the thread.....I selected to lose power mirrors, and dash mount the switch. After careful consideration it seemed like the best choice for ease of installation and aesthetics. I carefully trimmed off the mirror control off the top of the master switch, no need for it anymore. I selected this spot on the underdash panel due to clearance in that area. Make a hole, insert, hot glue from the backside.
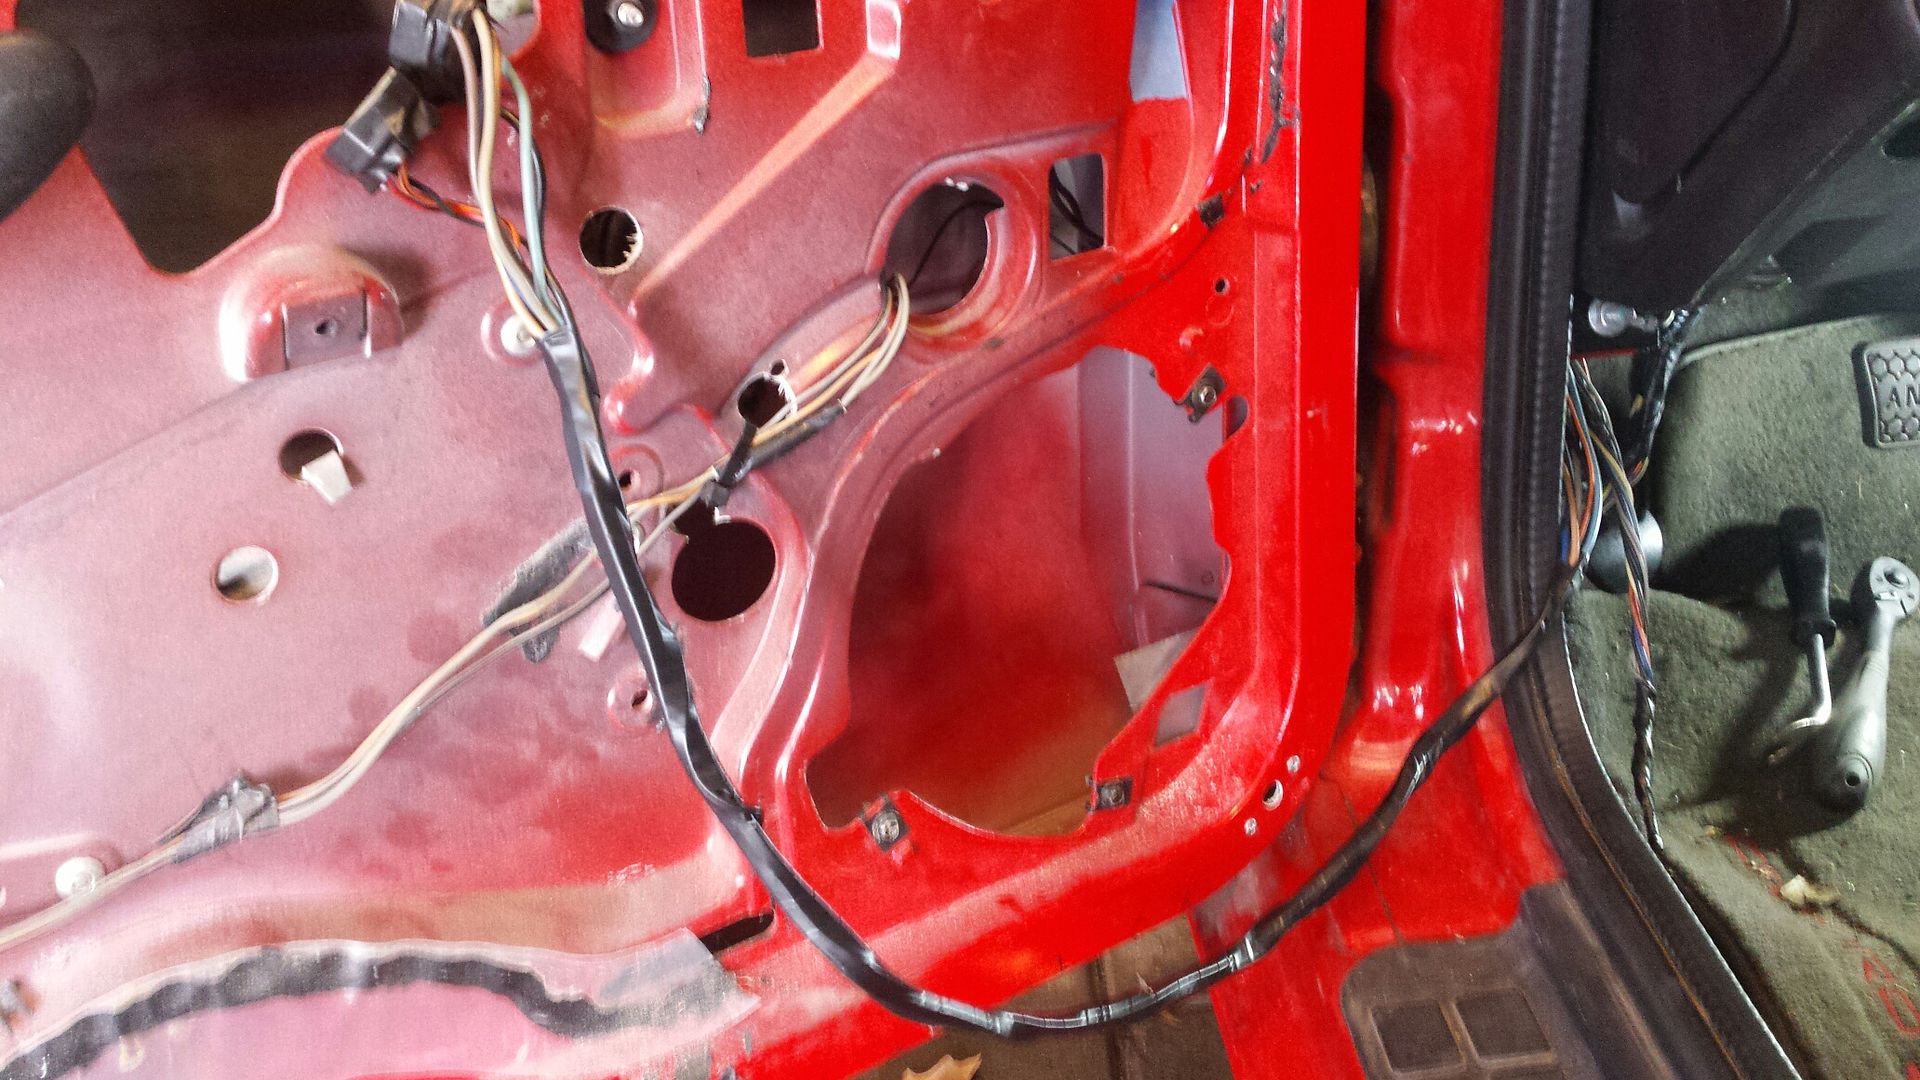
If you dont wanna cut/splice/extend, the stock harness will reach your new location. The issue is there are about 25 wires in the door, and about 5 need to stay. So you'll need to separate what goes to the switch, delete what you dont want, then pull it back through the boot. The long strand i have hung on the door is the plug in for the switch, separated and wrapped in tape and just propped up for the pic. The small strand coming out of the kickpanel next to it is power mirror and switch light wiring thats been cut and not needed.
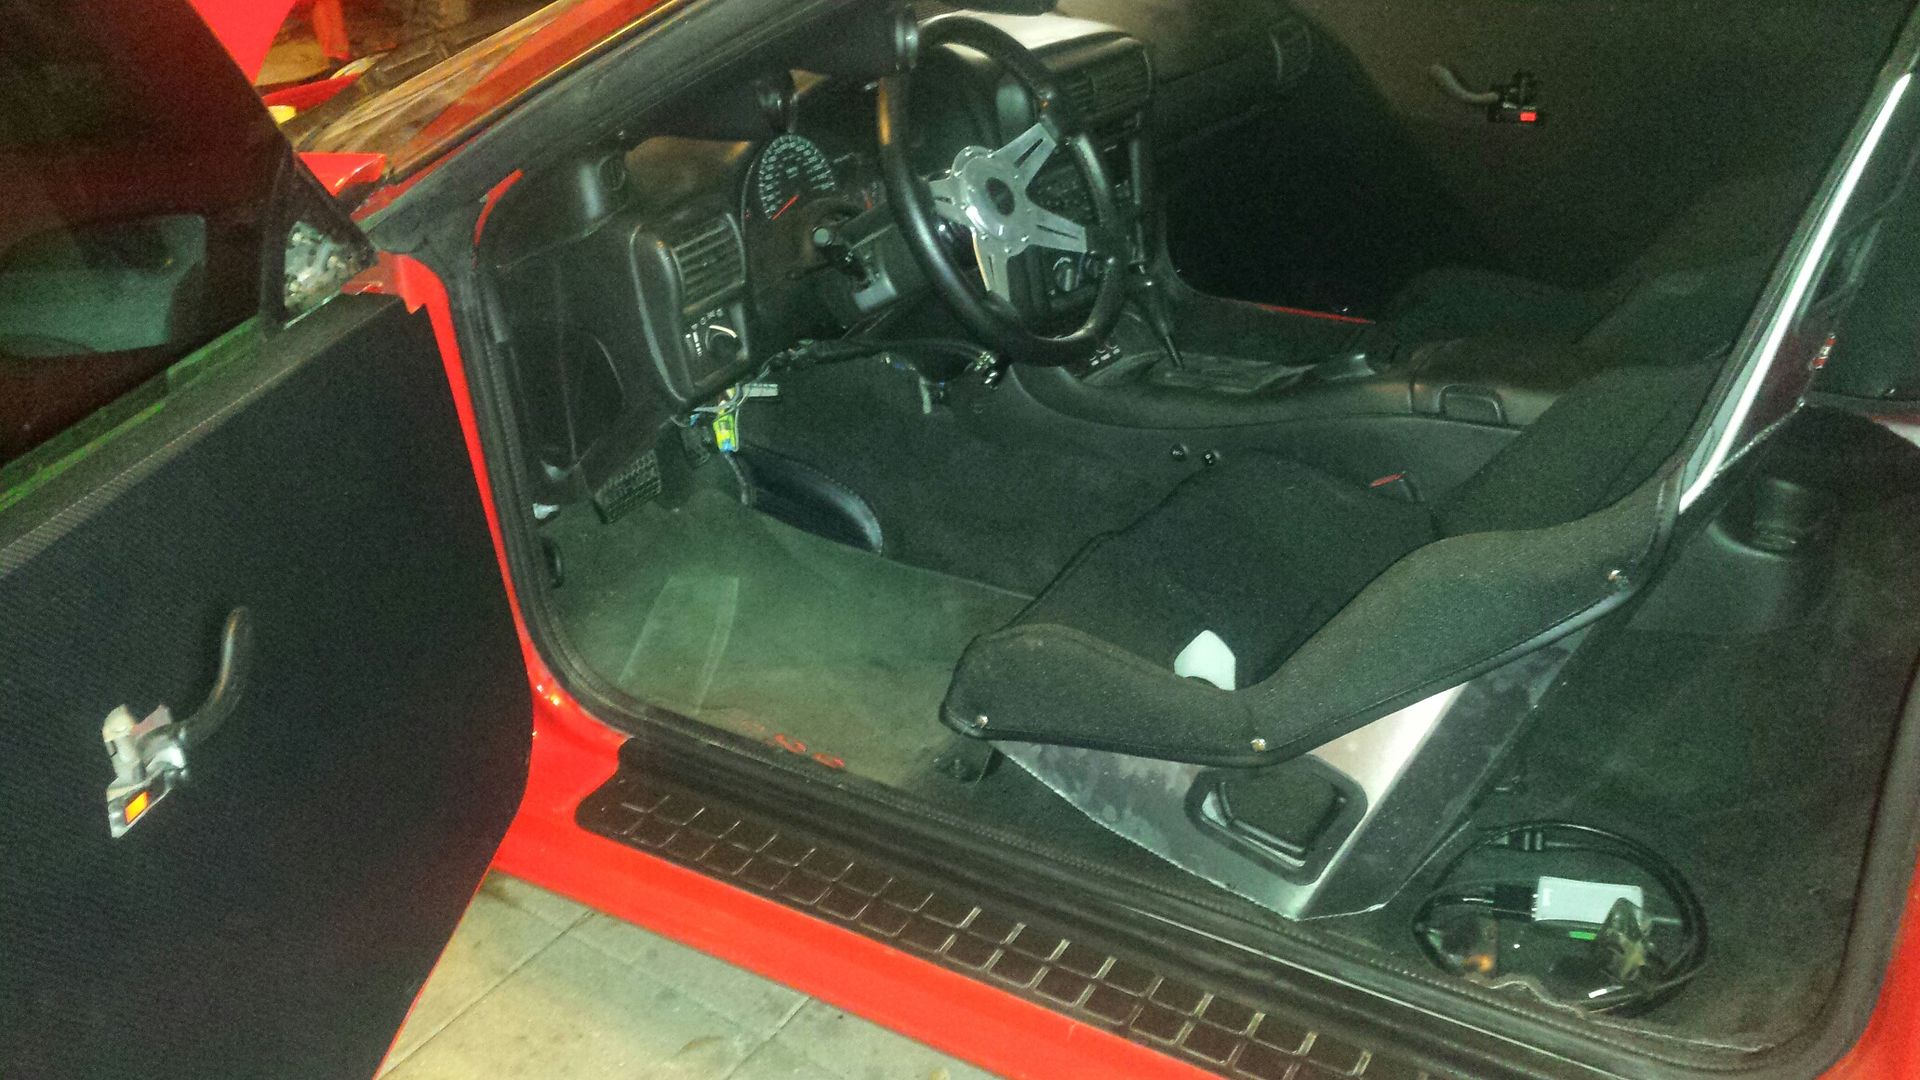
Here's final install. Panel has probably been in storage for a year so its a little dusty but you get the idea. Works great and i can almost reach it when i pretend I'm strapped into a 5 point harness.


Nice install thread. My door panels s will be here in a couple days.
I'm looking at trimming inside the door too for extra savings. Did you do any of this?
my stock panels are cracked so thats why swapping them out.
I'm looking at trimming inside the door too for extra savings. Did you do any of this?
my stock panels are cracked so thats why swapping them out.