1991 Nissan 240sx – T76 LQ4 with T56


 02-08-2013, 11:58 AM
#42
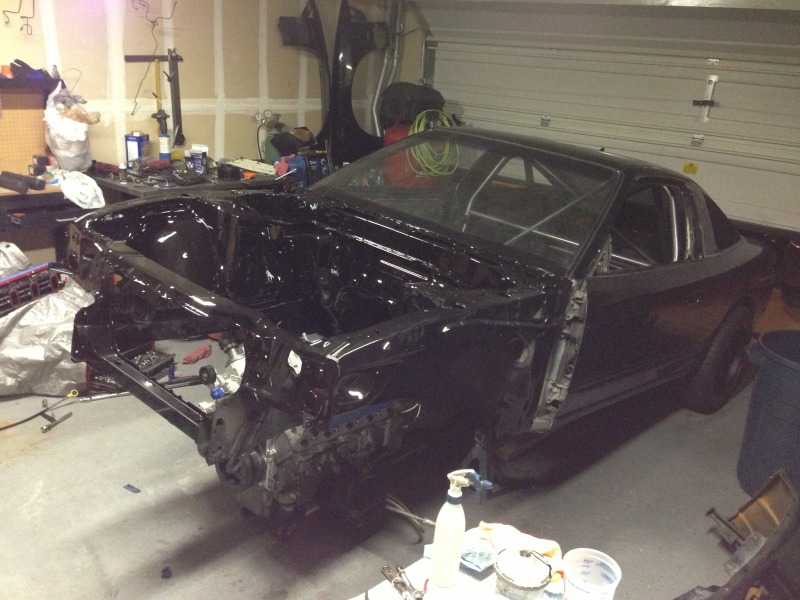
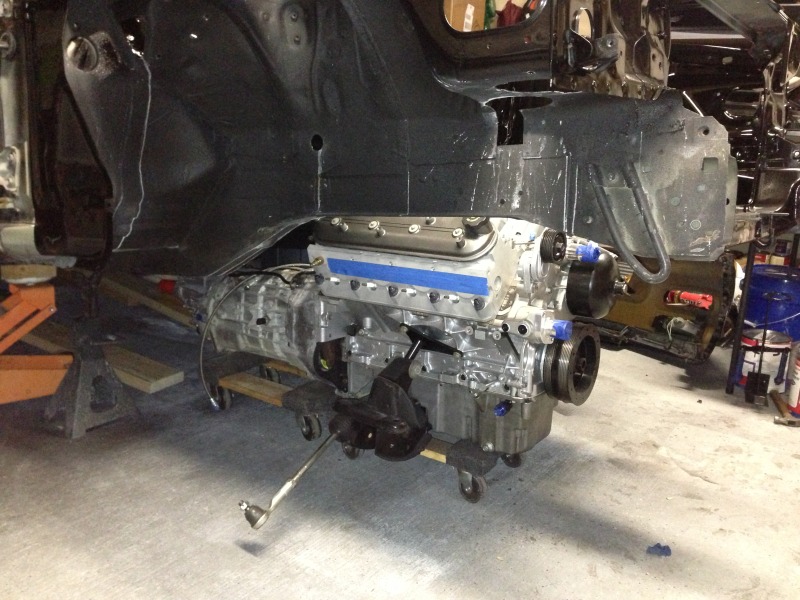
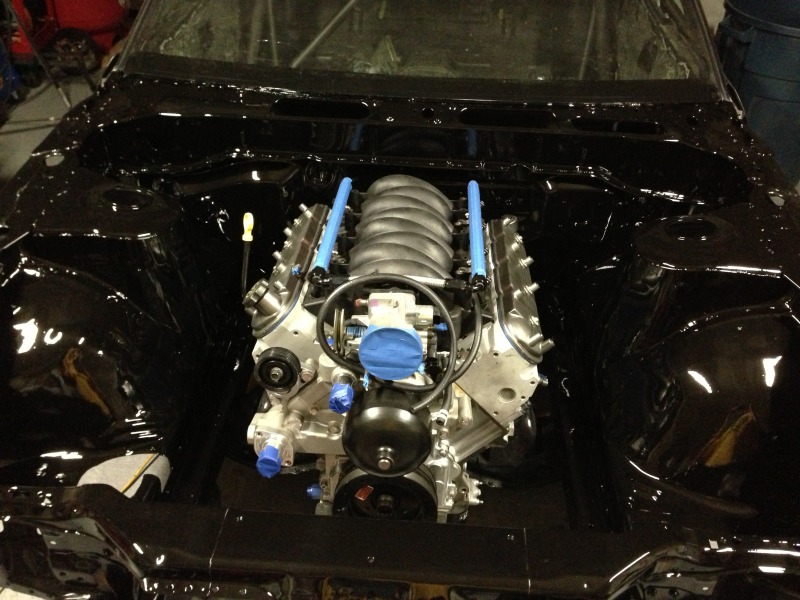
I got some work done over the last 2 weeks. I got my replacement parts for my compressor and was able to finish painting the engine bay. 2 more coats of base followed by 3 coats of clear. Then i was able to get the motor and tranny back in the car for the final time, hopefully. I plan to get the rest of the front suspension and front wheels back on over the weekend. it'll be so nice to have it back on the ground. Now i can start the fun process of putting everything back together. i think i can see the light at the end of the tunnel....faintly.
 03-22-2013, 03:25 PM
#45
Well, I have another bit of an update. I don’t have too many pics to go with this but a good amount of work went on behind the scenes.
Here’s a little bit that went on since the last update.
- Dropped differential to replace seals
- changed differential flange on driveshaft from Nissan to Infiniti to mate to Q45 differential
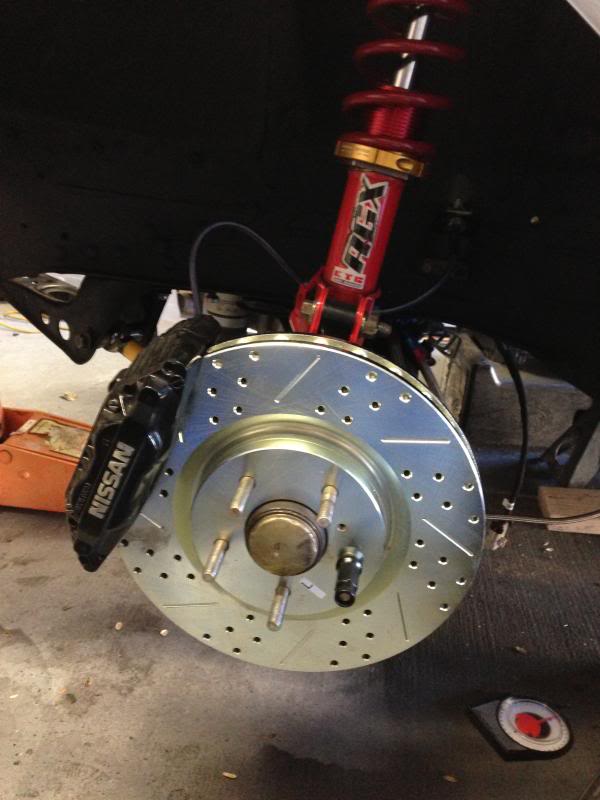
- assembled complete rear end (axles, hubs, ISIS adjustable suspension links, Suspension Techniques sway bar, 300zx ebrake, 300zx rear calipers and all lines)
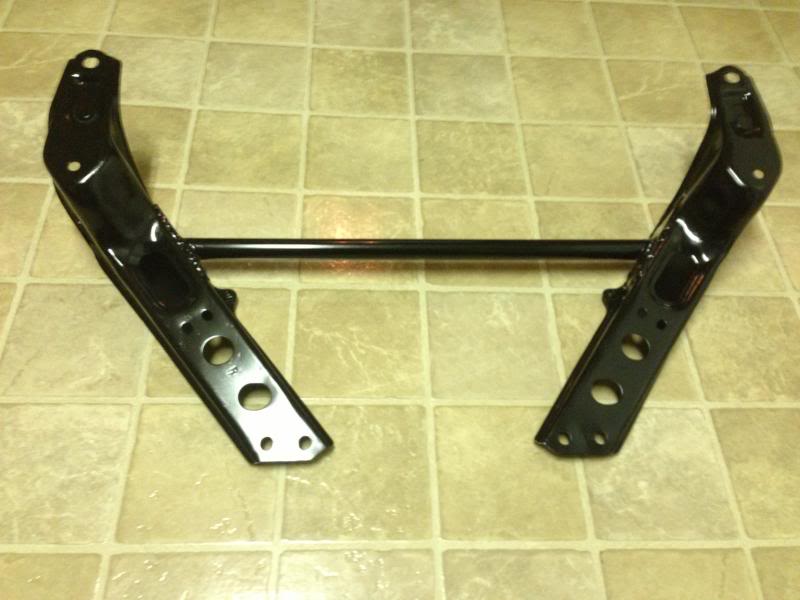
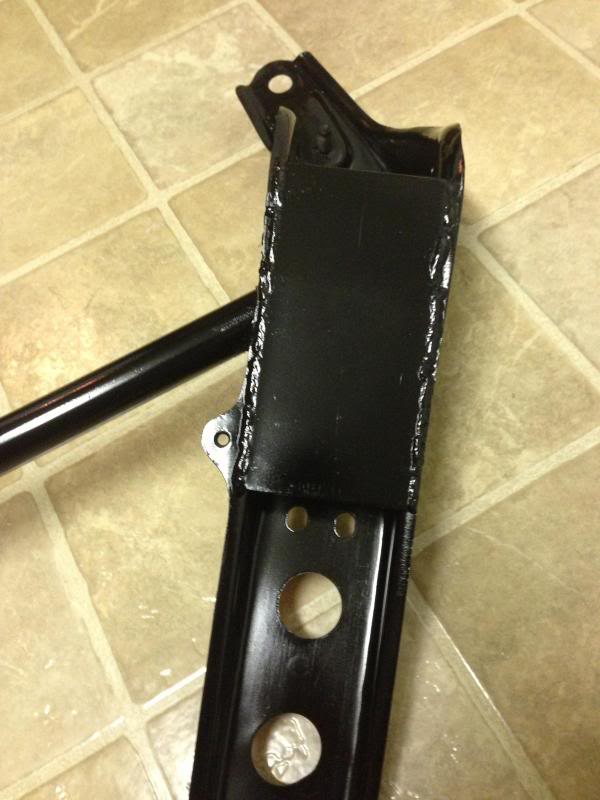
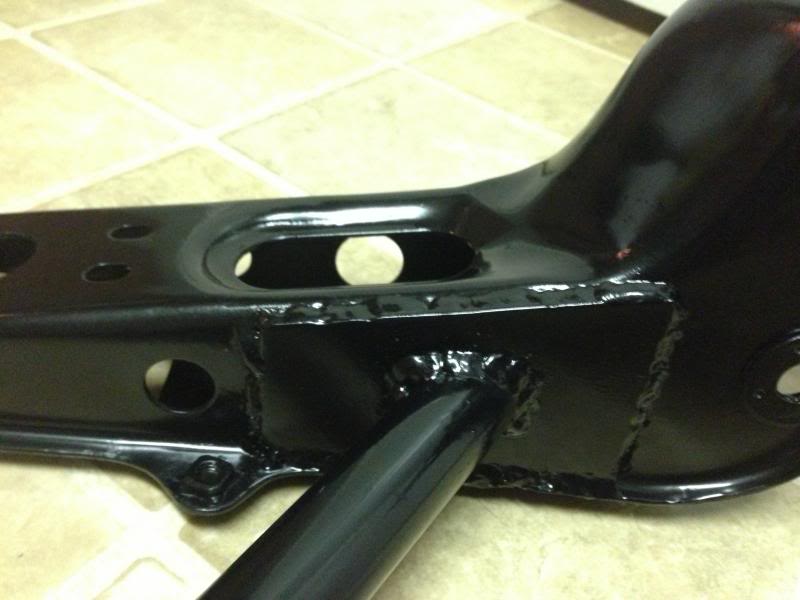
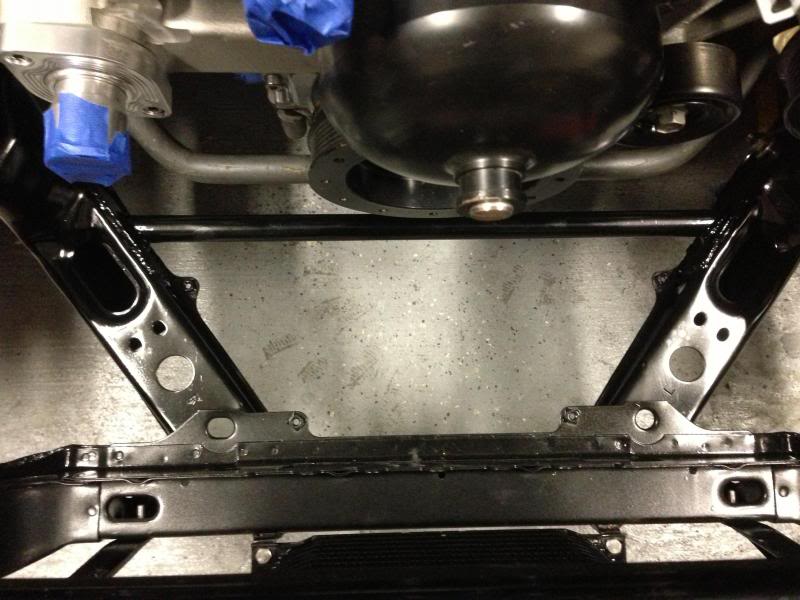
- fabbed front brace to stiffen front end and help locate tension rods and front lower control arms (essentially a home made Nismo Power Brace)
- assembled front suspension (Ground Control coilovers, Suspension Techniques sway bar, ISIS adjustable tension rods)
- assembled front brakes (300zx calipers with relocation brackets to accommodate 350z/G35 12.75” rotors)
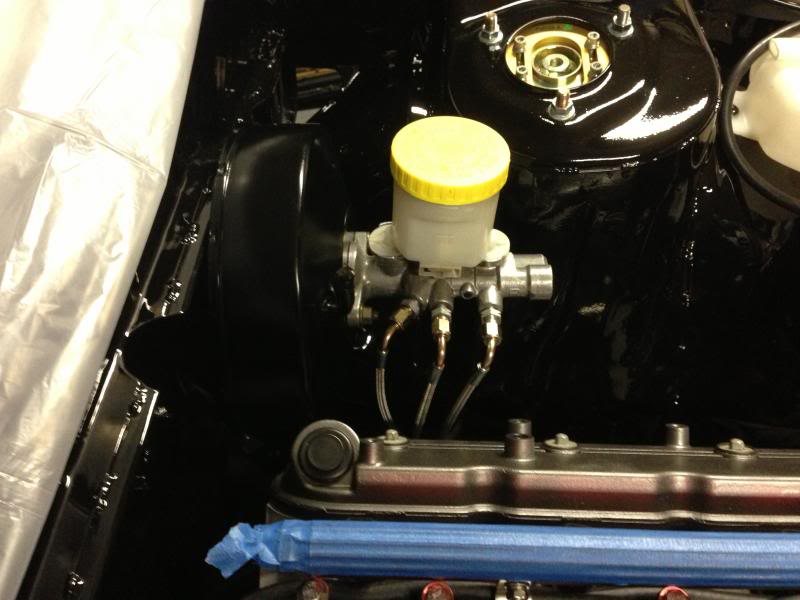
- prepped/painted brake booster
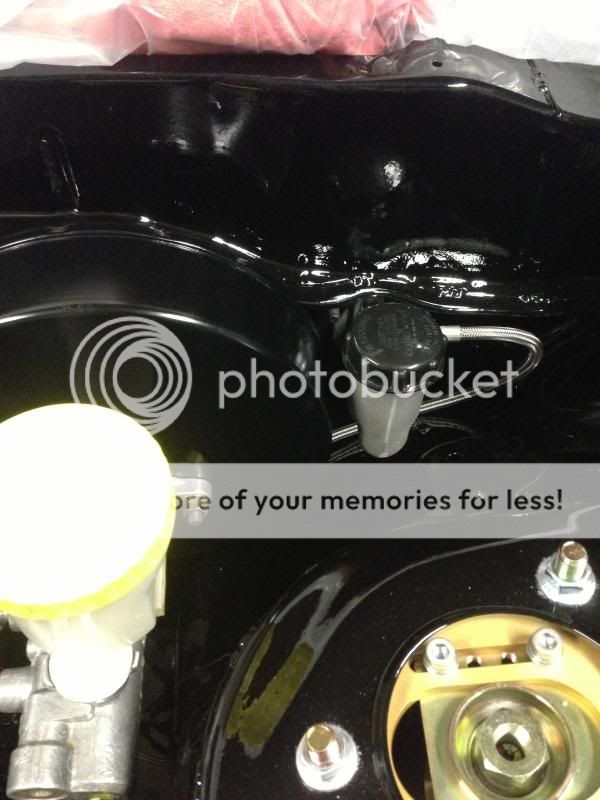
- installed 300zx master cylinder and custom braided lines to replace stock hard lines in engine bay
- moved radiator overflow tank from passenger to driver side
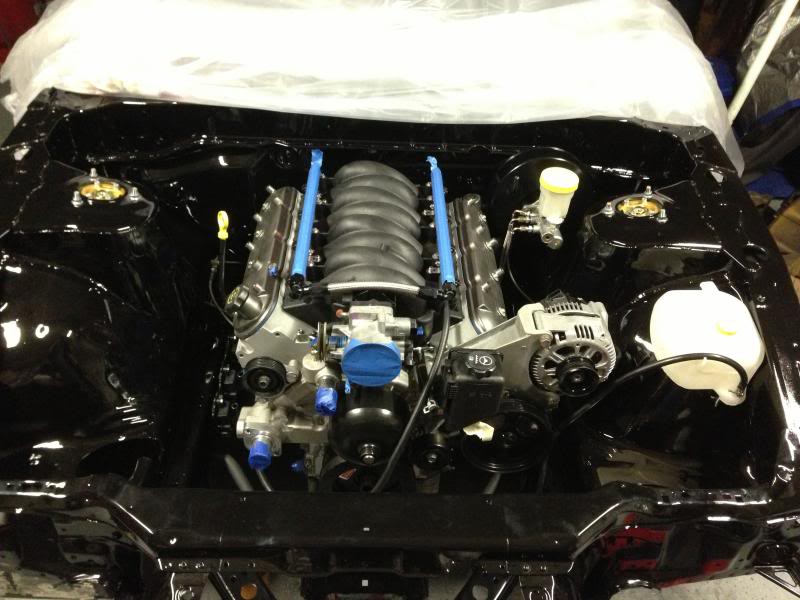
- started assembling engine accessories – C5 alternator and power steering
300zx twin turbo calipers with 350z/G35 rotors
Home made Nismo Power Brace
300zx master cylinder with custom braided lines
Engine bay slowing coming together
I hoping to make some more progress over the weekend with more pics to come.
Here’s a little bit that went on since the last update.
- Dropped differential to replace seals
- changed differential flange on driveshaft from Nissan to Infiniti to mate to Q45 differential
- assembled complete rear end (axles, hubs, ISIS adjustable suspension links, Suspension Techniques sway bar, 300zx ebrake, 300zx rear calipers and all lines)
- fabbed front brace to stiffen front end and help locate tension rods and front lower control arms (essentially a home made Nismo Power Brace)
- assembled front suspension (Ground Control coilovers, Suspension Techniques sway bar, ISIS adjustable tension rods)
- assembled front brakes (300zx calipers with relocation brackets to accommodate 350z/G35 12.75” rotors)
- prepped/painted brake booster
- installed 300zx master cylinder and custom braided lines to replace stock hard lines in engine bay
- moved radiator overflow tank from passenger to driver side
- started assembling engine accessories – C5 alternator and power steering
300zx twin turbo calipers with 350z/G35 rotors
Home made Nismo Power Brace
300zx master cylinder with custom braided lines
Engine bay slowing coming together
I hoping to make some more progress over the weekend with more pics to come.
03-26-2013, 12:22 PM
#47
Thanks
Thanks
I appreciate it
Thanks man. I've done this car 5 different times over the years, hopefully i'll be satisfied when it's finished (for a little while at least). I'm really only shooting for a driveable 600whp. I may turn it up just to make numbers, i'm guessing 700whp max with my current fuel and turbo setups. i'll take a look at your build. it's definitely been fun getting it to this point.
03-26-2013, 03:14 PM
#48
Thanks man! i just had to get creative and get it all to fit.
Thanks
Thanks
I appreciate it
yeah, it's taking longer than i hoped but that will make the payoff all the better
Thanks man. I've done this car 5 different times over the years, hopefully i'll be satisfied when it's finished (for a little while at least). I'm really only shooting for a driveable 600whp. I may turn it up just to make numbers, i'm guessing 700whp max with my current fuel and turbo setups. i'll take a look at your build. it's definitely been fun getting it to this point.
Thanks
Thanks
I appreciate it
yeah, it's taking longer than i hoped but that will make the payoff all the better
Thanks man. I've done this car 5 different times over the years, hopefully i'll be satisfied when it's finished (for a little while at least). I'm really only shooting for a driveable 600whp. I may turn it up just to make numbers, i'm guessing 700whp max with my current fuel and turbo setups. i'll take a look at your build. it's definitely been fun getting it to this point.
I'm wrapping up a GT45 crate LS1 S13 build right now. I just have tuning, interior and paint stuff to finish up. Even untuned, it still roasts tires right through third, and I'm probably only making 500 right now.
03-27-2013, 12:07 PM
#49
700 whp is going to be pushing well past crazy in this car.
I'm wrapping up a GT45 crate LS1 S13 build right now. I just have tuning, interior and paint stuff to finish up. Even untuned, it still roasts tires right through third, and I'm probably only making 500 right now.
I'm wrapping up a GT45 crate LS1 S13 build right now. I just have tuning, interior and paint stuff to finish up. Even untuned, it still roasts tires right through third, and I'm probably only making 500 right now.
 04-01-2013, 12:07 PM
#51
I got a little more done over the last week. Not huge progress, but taking care of a little odds and ends that i can mark off the "To Do" list.
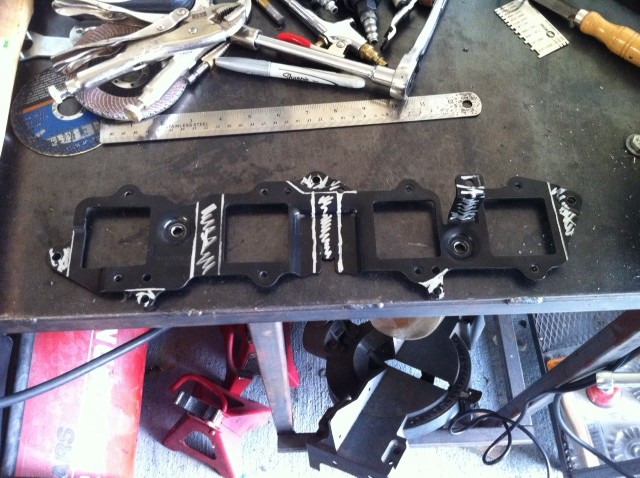
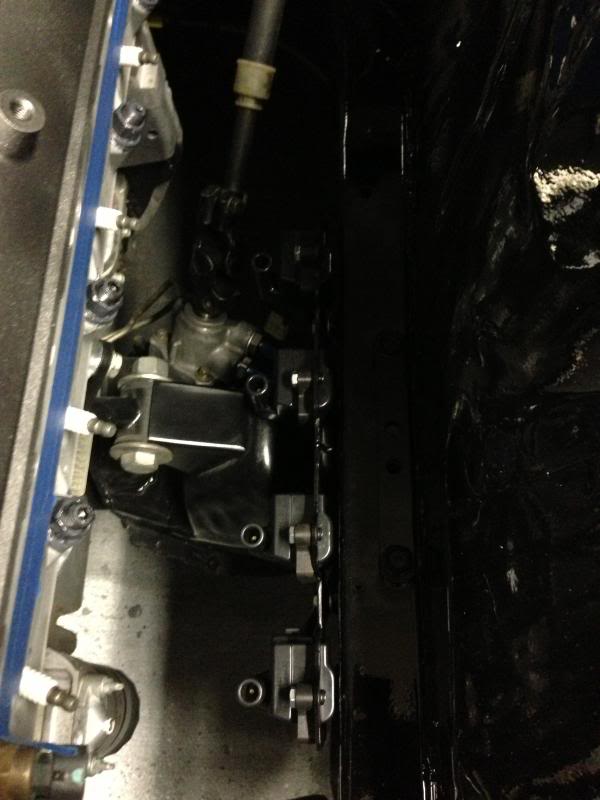
First thing is something i did a couple months ago, but just got around to getting pics. I wanted to relocate the coils to give a cleaner looking appearance. I modified the brackets and mounted them to the inner frame rails.
Here is the original bracket. Everything with the silver marker was cut off and welded back to one piece.
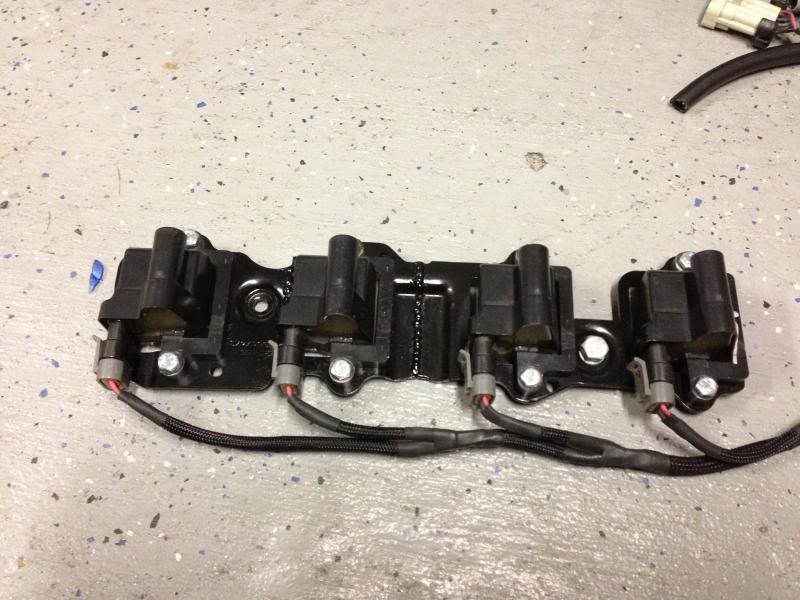
Here's the completed bracket with coils mounted.
Here are a couple shots of the brackets bolted to the frame rails. I welded a couple of bolts to the frame for the brackets to bolt to.

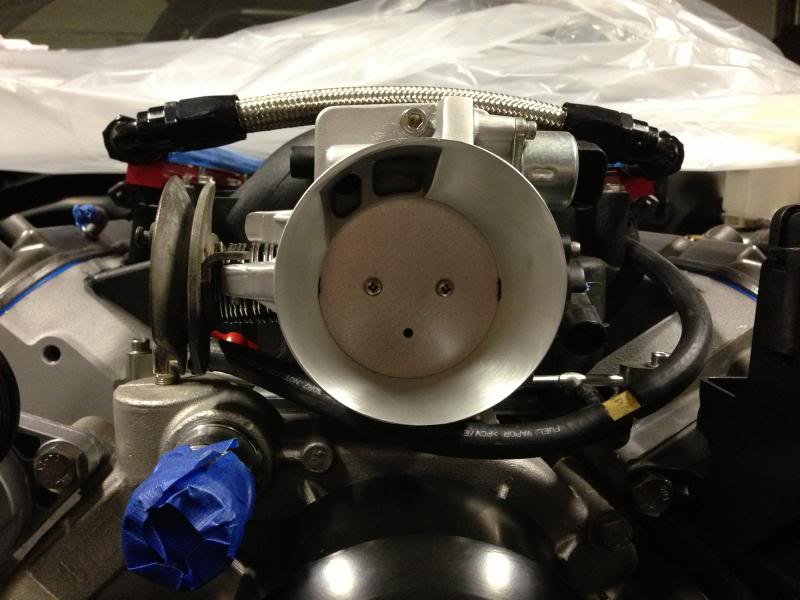
Next I added a ported throttle body to give a little bump in airflow and throttle response.
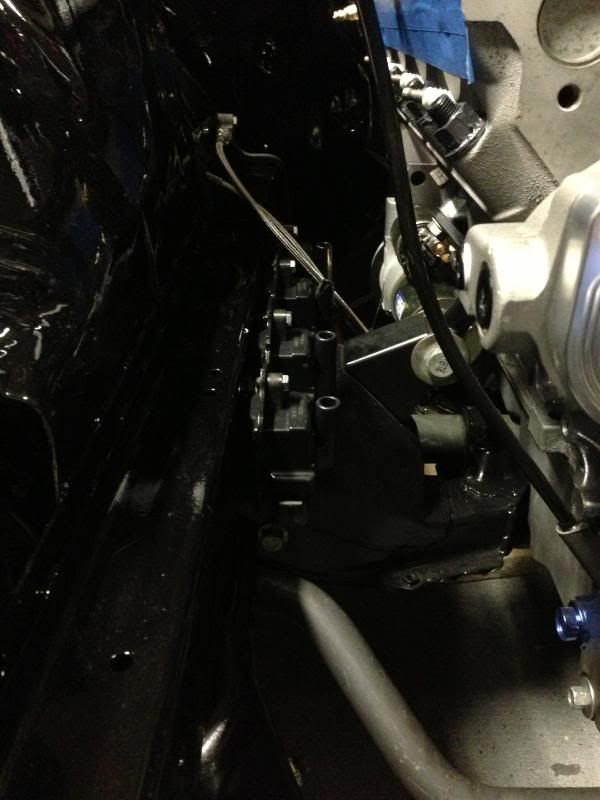
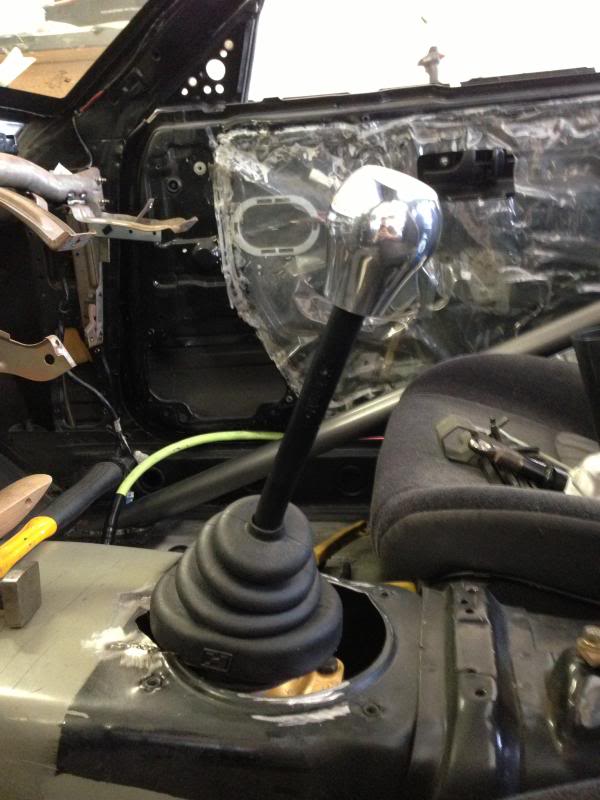
Then I added a Hurst Billet Plus short throw shifter. I had to notch the shifter hole a bit to clear the shifter stop bolt.

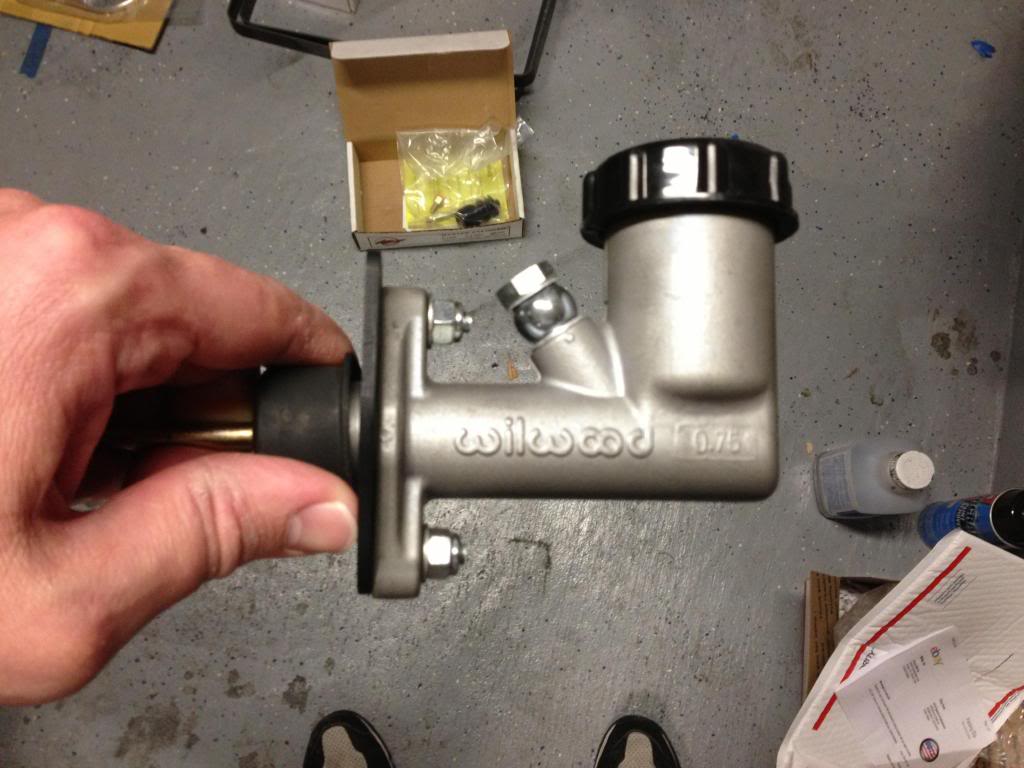
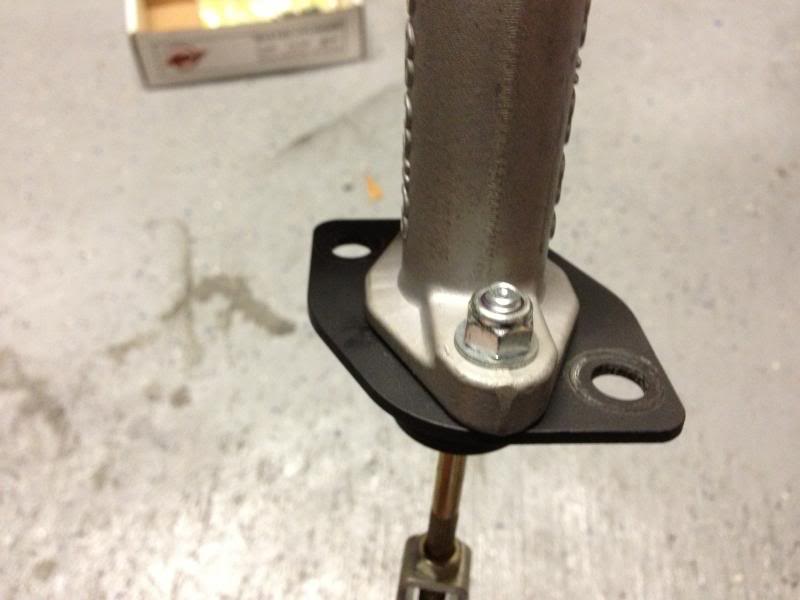
I installed a Willwood 3/4" clutch master cylinder with custom mounting bracket and hooked up the clutch line. First pic is upside down, cant get the damn thing to save correctly. oh well
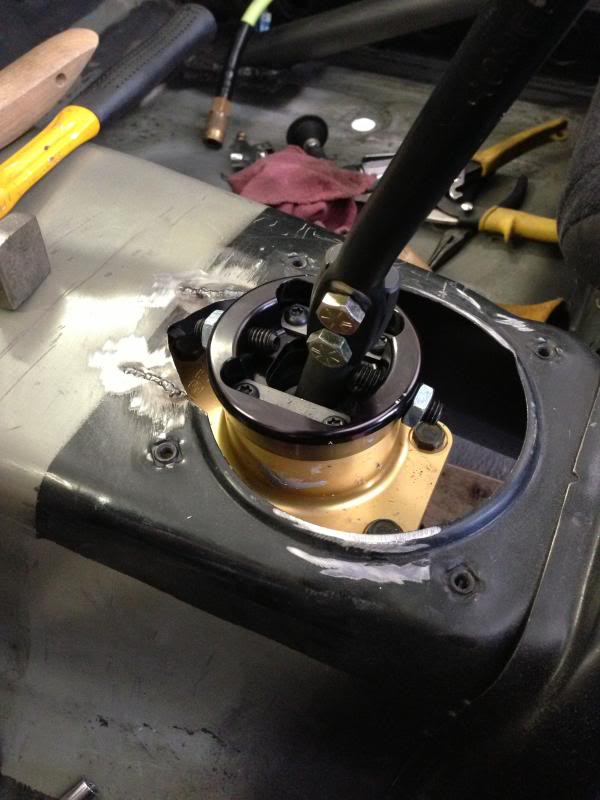
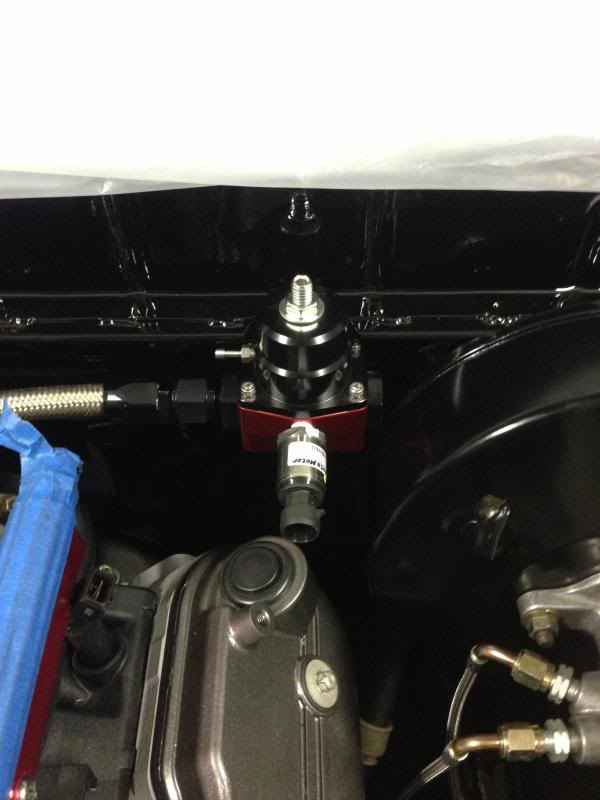
Finally, I mounted the Aeromotive fuel pressure regulator with Autometer electric fuel pressure gauge sending unit.
The next week or so i'm going to focus on getting the interior cleaned and prepped for paint. A lot of sanding and masking still to come.
Stay tuned!
First thing is something i did a couple months ago, but just got around to getting pics. I wanted to relocate the coils to give a cleaner looking appearance. I modified the brackets and mounted them to the inner frame rails.
Here is the original bracket. Everything with the silver marker was cut off and welded back to one piece.
Here's the completed bracket with coils mounted.
Here are a couple shots of the brackets bolted to the frame rails. I welded a couple of bolts to the frame for the brackets to bolt to.
Next I added a ported throttle body to give a little bump in airflow and throttle response.
Then I added a Hurst Billet Plus short throw shifter. I had to notch the shifter hole a bit to clear the shifter stop bolt.
I installed a Willwood 3/4" clutch master cylinder with custom mounting bracket and hooked up the clutch line. First pic is upside down, cant get the damn thing to save correctly. oh well
Finally, I mounted the Aeromotive fuel pressure regulator with Autometer electric fuel pressure gauge sending unit.
The next week or so i'm going to focus on getting the interior cleaned and prepped for paint. A lot of sanding and masking still to come.
Stay tuned!
04-01-2013, 09:06 PM
#52
yeah i'm fully aware. 700+ would be more for "bragging rights". i looked back through your thread (nice work by the way)....what 315's are you running? My friend has traction issues with BFG 315 drag radials on his LT1 S10, but they are over 5 years old so the type and condition of tires has a lot to do with it.
04-01-2013, 10:01 PM
#53
Sumitomo HTR ZIIIs if I remember correctly. The car is lowered a little so I probably have to take out some of the negative camber to get a little flatter contact patch. Still though, the car gets squirrely pulls ridiculously hard in 4th. I can imagine another 1-200 hp would probably spin 4th.
04-01-2013, 11:10 PM
#54


 04-16-2013, 10:57 AM
#58
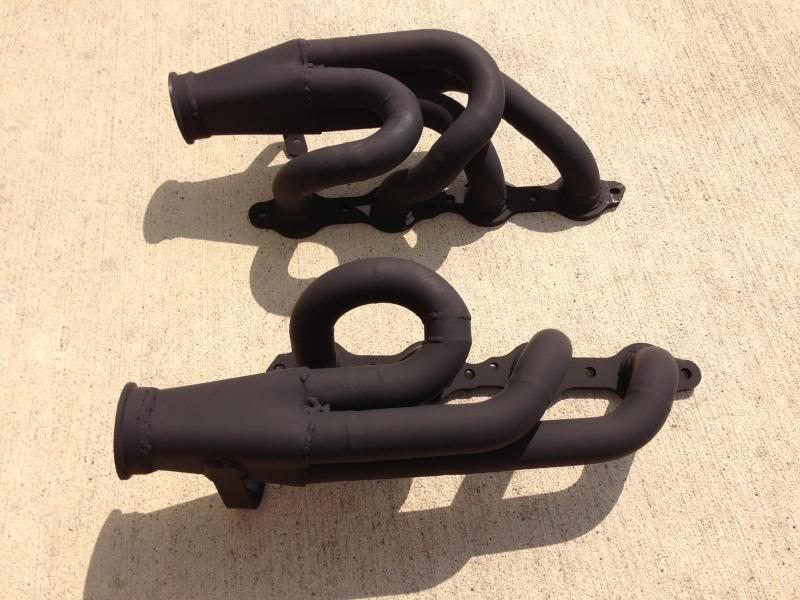
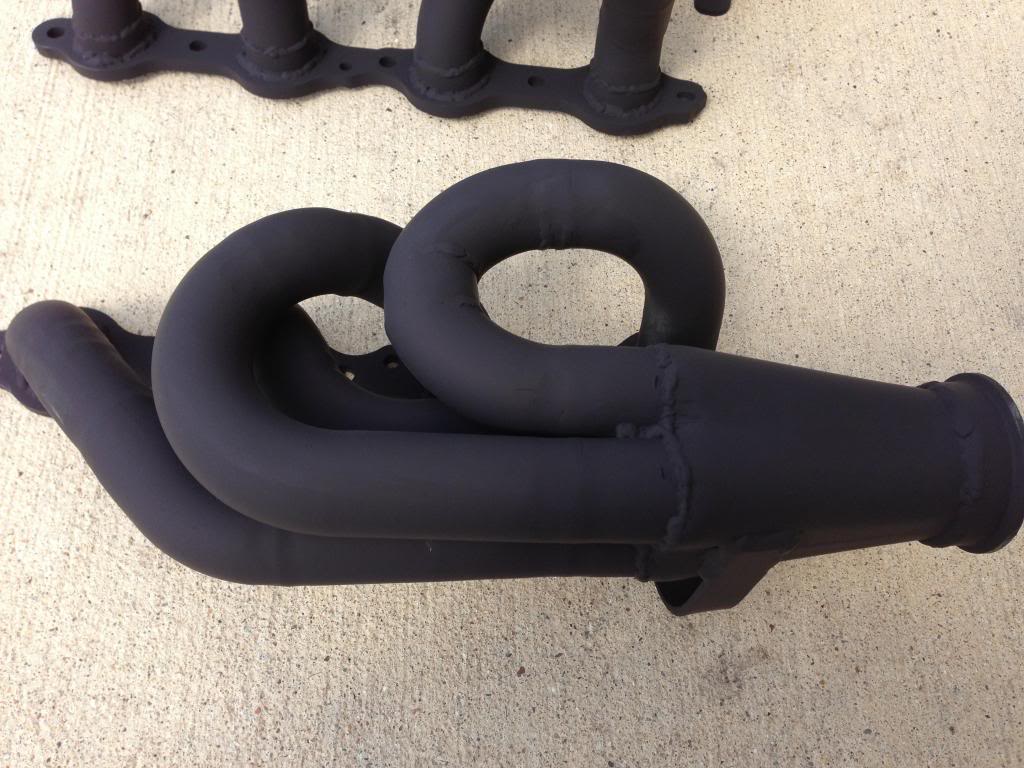
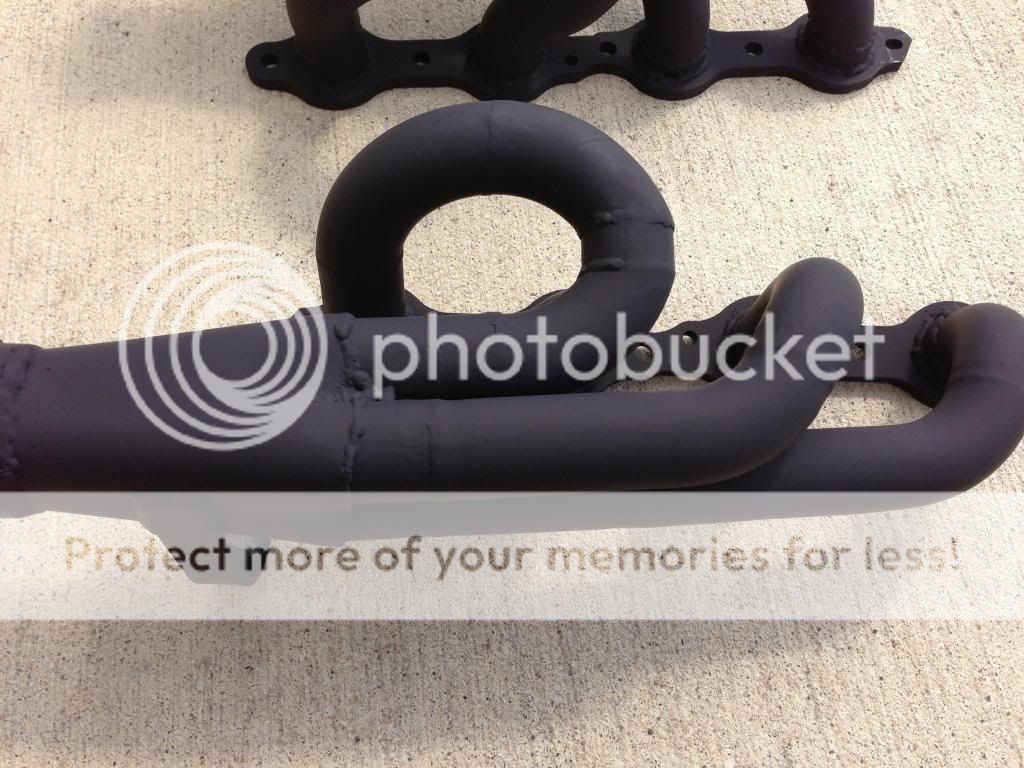
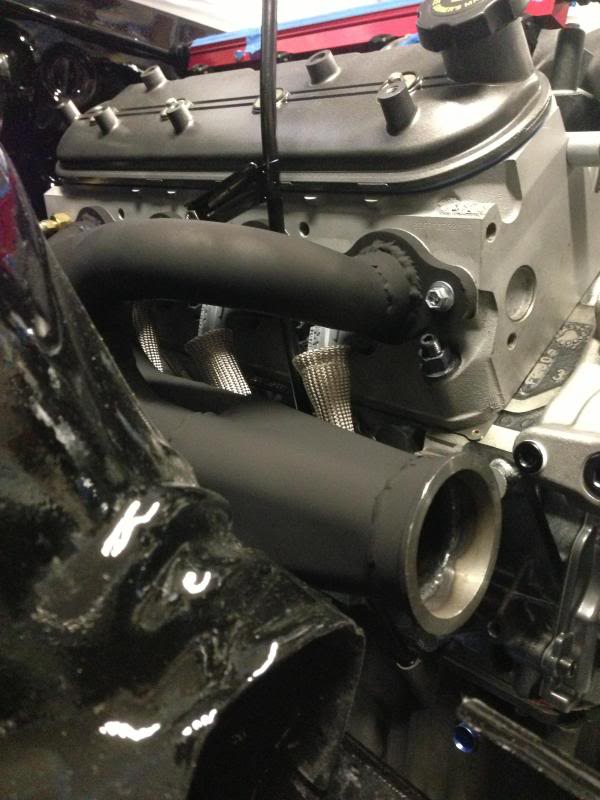
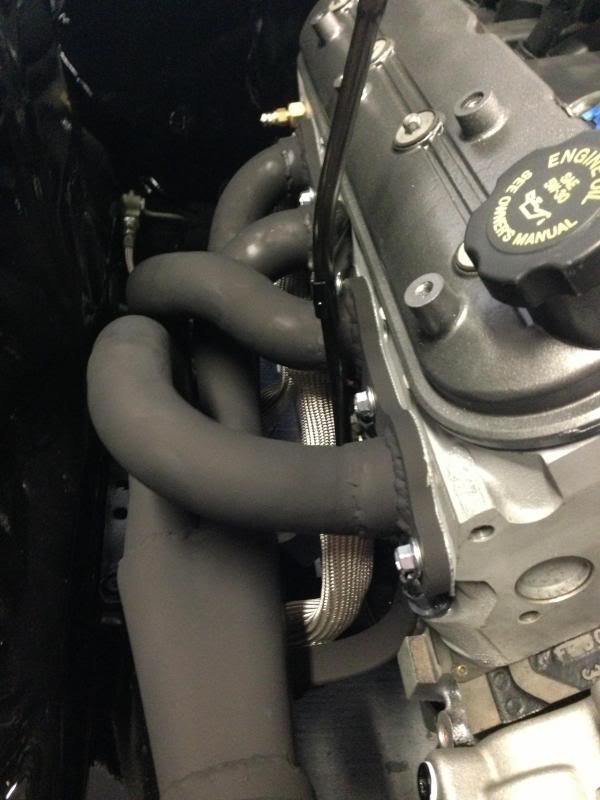
Before I could install my freshly coated manifolds, i needed to get the plug wires in place. The relocation of the coils runs the plug wires under the manifolds towards the block.
I started off with a MSD 8.5" kit for the LS truck motors (32823), i bought these before i decided to do the coil relocation. I cut the wires to length, removing the straight boot and replaced them with 90* boots from MSD. I sleeved the wires with a set of Accel plug wire sleeves (170081) as they'd be pretty close.
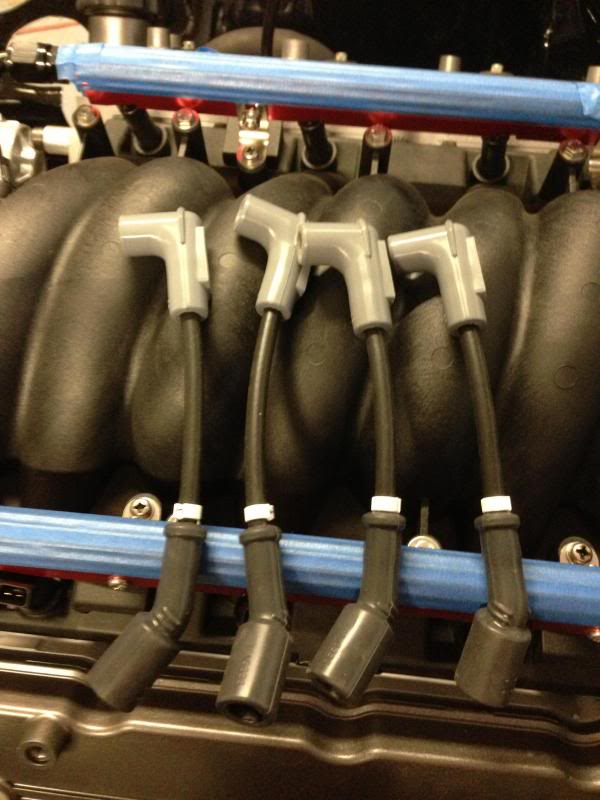
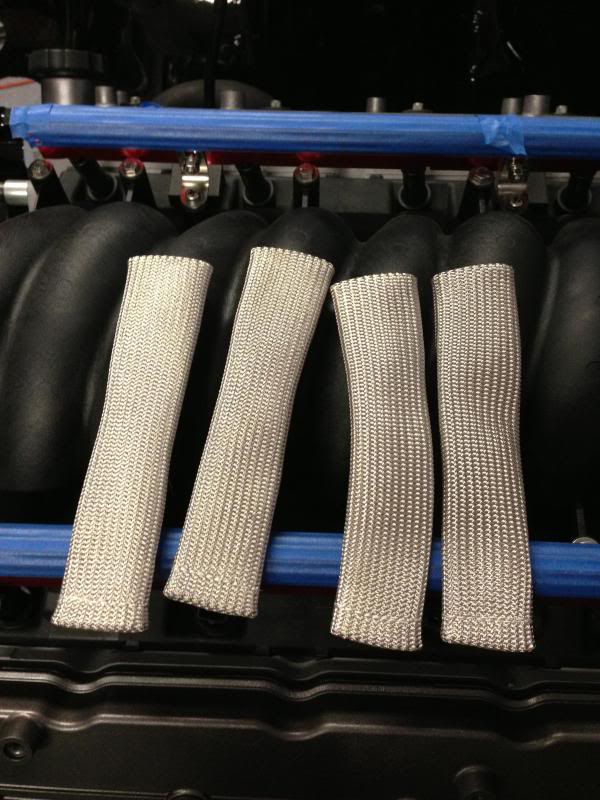
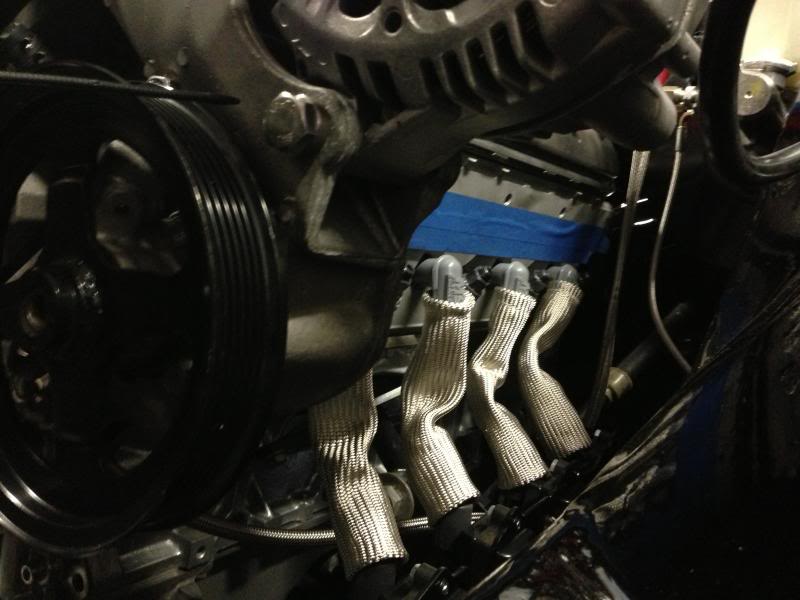
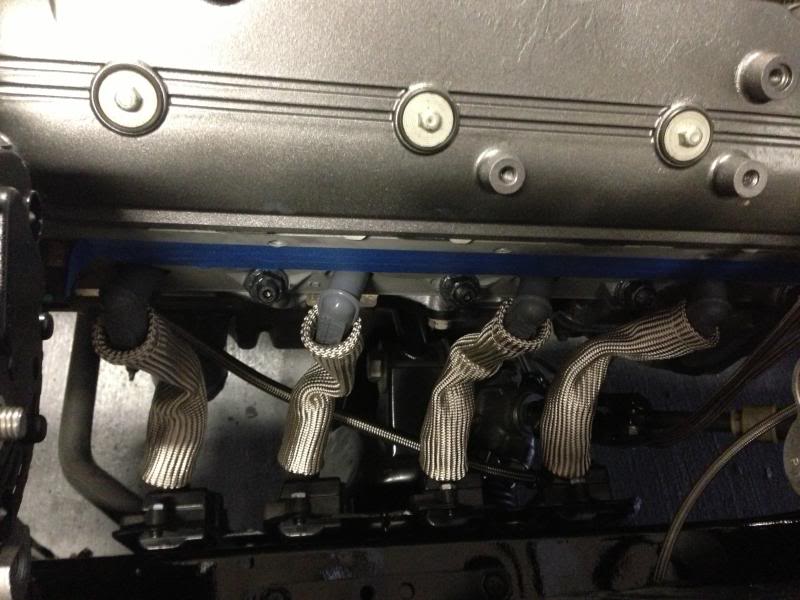
Here are a couple of shots installed. I still have to modify the power steering lines so i'm leaving the driver's manifold off for now for better access.
I started off with a MSD 8.5" kit for the LS truck motors (32823), i bought these before i decided to do the coil relocation. I cut the wires to length, removing the straight boot and replaced them with 90* boots from MSD. I sleeved the wires with a set of Accel plug wire sleeves (170081) as they'd be pretty close.


Here are a couple of shots installed. I still have to modify the power steering lines so i'm leaving the driver's manifold off for now for better access.


 04-16-2013, 01:40 PM
#60
TECH Enthusiast
iTrader: (17)

Join Date: Sep 2005
Location: Detroit, MI - Camp Pendleton, CA
Posts: 619
Likes: 0
Received 0 Likes
on
0 Posts

Looks good man. I've been building my S13 for years now, you'll be making closer to mid to high 600 at 12psi. I did 600whp on mine with a 70mm at 10psi. I'm in the process of buttoning up my GT4788 370 LSx right now and shooting for 1000whp. Good luck with the build!