

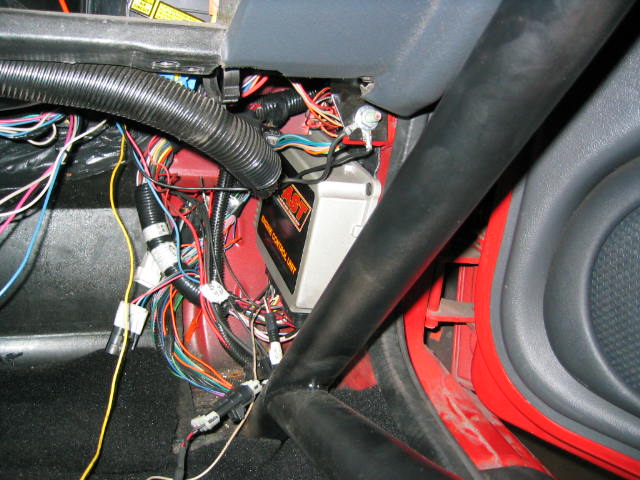


Going standalone FAST for the blower setup
IAC= A-red B-blue C-black D-yellow
TPS= A-red B-white C-black
CAM= A-yellow B-black C-pink
Kurt
TPS= A-red B-white C-black
CAM= A-yellow B-black C-pink
Kurt
Originally Posted by Pro Stock John
Whistler or Kurt, either of you have the breakdown for the following stuff?
FAST IAC
FAST TPS
FAST CAM
Which wires are which? Ie. the color = what?
FAST IAC
FAST TPS
FAST CAM
Which wires are which? Ie. the color = what?

TECH Fanatic
Joined: Sep 2002
Posts: 1,112
Likes: 0
From: BLOOMFIELD, NY
Wow , My fast system was alot easyer to install. I just cut the stock wires and crimped the fast wires directly to them. I installed crimps on each of the wire ends and then put them into a connector. Then just pluged everything together. Took me about 8 hours.(i was able to do most of it at work) But now if and when i need to remove the system i can just unplug it. 
LS1 Tech Stories
The Best V8 Stories One Small Block at Time

Topdon ONE vs. Artidiag 800 BT2: Which is the Diagnostic Tablet For You?
Pouria Savadkouei
Gas Monkey Built a 6-Wheel Ferrari Testarossa With a Corvette LT4 Engine
Verdad Gallardo
7 Most Reliable High-Performance Engines GM Has Ever Built
Verdad Gallardo
Amazing '71 Camaro Restomod Is Modern Muscle Car Under the Skin
Verdad Gallardo
6 Common C5 Corvette Failures and What's Involved In Repairing Them
Pouria Savadkouei
Retro Modern Bandit Pontiac Trans AM Comes With Burt Reynolds' Autograph
Verdad Gallardo
Top 10 Greatest Cadillac V Series Performance Models Ever, Ranked
Pouria Savadkouei
Top 10 Most Powerful Chevy Trucks Ever Made!

Hennessey's New Supercharged Silverado ZR2 Has 700 HP
Verdad Gallardo Thread Starter
Joined: Nov 2001
Posts: 45,364
Likes: 1,796
From: Chicago, IL
6/3/04 Update:
I'm only able to work on the car at night after work so I ran over to Lee Auto Parts and got some heat shrink tubing and then went over the abandoned meth lab.
First thing we did was we removed the connectors that I won't be using, which were the base crank connector and cam connector. The crank sensor for the LS1 setup has to go into the FAST crank decoder box (hereafter referred to the "crank box"). The crank sensor has 3 wires stock, and these three are three of the seven wires for the crank box. One wire is power (red), another is ground (black), and there are two other wires that go into the FAST.
We also removed the cam sensor connector. For the LS1 setup, the cam sensor is directly plumbed into the eDIST. The eDIST has either 30 or 32 pinouts on it. Off the top of my head the LS1 will use maybe 20 of those wires, maybe 24. The cam sensor wires go into the eDIST, as do the coil wires. Only one wire will go from the eDIST to the FAST.
Next step was to address the sensors in the back of the block, so I could put the intake back on. Behind the intake are:
-cam sensor, bolted into block, 10mm
-oil pressure sensor
-stock map sensor, attached to the back of the intake
-hvac hose, pushes onto nipple on back of the intake on the passenger side
Map: Since I went to a 3 bar map sensor, I have the GM 3 bar attached to the FAST connector and then the hose for that is on what was the intake pcv inlet. So the factory map sensor will not be reused and will stay there.
Oil Pressure: We stripped the connector out of the harness, and it's ready to be re-attached to the harness in the passenger side footwell.
Cam sensor: Stripped that out of the harness, it's very long and has a relay on it, a little surprise. We routed that, and plugged it in.
I then put the LS6 intake manifold back on and reattached most of the things like the pcv, map to brake booster, throttle cable, etc. I did not torque the intake because I can't remember the torque specs offhand, 22 or 25 inch lbs?
I then...
IAT: Z8's already spliced that, so I just plugged it back in
H20: Or as we like to call it, the coolant temp sensor. For the hybrid Cartek setup I ran two coolant temp sensors, Z8's added one to the back of the passenger side cylinder head. Needless to say it's hard to get to but I plugged it back in. I noticed that whatever sensor Z8's used is different from the factory one, perhaps the one he added is a 99+? Now I'm not sure how I will get the dash coolant temp gauge to work, I might either be able to see how it was run to the harnesses in the passenger side footwell, see if the FAST has an output, or use my empty one on the driver's side head.
Crank sensor: Stripped that out of the harness. Has three wires. I originally tried to run the crank wire behind the engine on the passenger side but after trying that I did not like how the crank (and starter wire) had to run to the back and then more than a foot towards the front and then over the starter... Seemed like it would be problematic if I ever had to troubleshoot or pull the wires. So I ran the wires towards the front alongside that big cluster of wires and then up before the #2 header primary like where the a/c compressor would be.
Starter Wire: We ran that wire alongside the crank wired, loomed it all up etc., see the crank sensor info above. The starter wire plugs into it's own connector on the passenger side where those wires run down the front towards the battery. I plugged it back in voila.
Alternator wire: alternator has a 4 way connector and I removed it from the harness and I have to research how to reattach it.
IAC: Just have to solder the wires and it can be plugged back in.
TPS: Just have to solder the wires and it can be plugged back in.
Tach: FAST has an spot on that for the eDIST so the 5" tach and shiftlite will work, and maybe we can figure out which pinout it is in the factory harness.
eDIST: Tonight is the night.
Only thing that was not clear to me was where the black and brown crank box wires go into the FAST main harness.
Thread Starter
Joined: Nov 2001
Posts: 45,364
Likes: 1,796
From: Chicago, IL
I debated cannibalizing the factory harness or buying new connectors. I think one could spend $100 to $200 buying new connectors for all the different stuff, maybe around $150. So in the end we just used the factory harness stuff. 90% of the solder points will be easily accessed so if there is ever a problem I can run new stuff in the future. But cutting the wires near the pcm gave us a lot of wire to use and in the case of the crank sensor it's very useful since I have 1.875 header primaries and there is no way I would run the starter or the crank wires in the factory location again.


Thread Starter
Joined: Nov 2001
Posts: 45,364
Likes: 1,796
From: Chicago, IL
Additional info:
Crank - should be a 4 way connector in there, near the w/b 4 way:
B is brown/white off of crank box
D is black/white off of crank box
J3 is brown/white on main harness if I cannot find the 4 way
J2 is black/white
Cam - 3 way sensor
A - eDIST
B - black/pink ground, use J2 or the crank 4 way it's a good ground
C - switched power
eDIST
-wire in coil harness wires
-wire in cam signal input
-wire out cam output to main harness connector called 'points'
Final checklist:
-change crank angle to 60
-change to ls1 firing order in FAST
-unplug injector harness and check/compare base timing against the FAST (not sure what value is good, 10 degrees?)

Thread Starter
Joined: Nov 2001
Posts: 45,364
Likes: 1,796
From: Chicago, IL
It runs!
We got the coil harness, eDIST, and main harness wiring done and then got the car running as a full standalone, no more factory pcm and engine control harness.
We had a delay due to the starter relay not getting a ground, so for now it's rigged up until we can drill down the problem a bit more. Also need to hook up the alternator and the fans. The alternator and fans should be pretty straightforward.
Last big project is syncing up the timing with the FAST timing. We worked on this for a while but we need to work on it next week. Have to sync up the actual timing with the FAST's timing. We will need to use a timing light for this.
Factory oil gauge is working, my Autometer tach is working. Should be able to get the factory tach, voltage and coolant gauges working too.
Huge ongoing thanks to:
Magnus (Keith from HP Tuners) - I suck at electrical stuff, and he excels at it. He has a ton of hours into the car, he is a great friend. Honestly, if Keith didn't know the LS1 harness inside and out, I would have trailered the car to W2W. Keith went thru his own harness a while back and removed the stuff he did not need. That knowledge has been invaluable.
Z8's - Did I call you four times today? Huge huge help. Talk about patient.
427 (Kurt from W2W) - Never would have gotten the car running without you.
Derty - Steve, you always have the answer.
Y2Khawk - Harlan helped us in 2-3 problem areas, and in the end helped Keith go thru the starter problem and helped us get the car started.
Still on track to make North vs. South!!!!!!!!!!!!!!!!!!!!!!!!!!!!!!!!!!!!!!!!!!!!! !!!!!
Thread Starter
Joined: Nov 2001
Posts: 45,364
Likes: 1,796
From: Chicago, IL
I'm running either -10 or -8 to the regulator, and -6 as the return.
UPDATE:
Well in fact we got the car running as a standalone over the weekend, but it's been running like ***. It was hard to keep the car idling and it was popping. Since we had not yet sync'd up the timing we thought that the timing was way off and that was causing it to backfire a lot. After doing some research, we decided to go over some stuff.
In the end we had the blue and blue/white wires crossed up in the eDIST. In the back of my mind I thought that it sounded like crossed up wires, but if the timing was super goofed up it could pop too. In any event I changed the plugs, and we also redid some of the grounds as well, and it fires right up without needing throttle input and idles great!!!!!!!!!!!!!!!!
Kurt, I am profoundly grateful for the help during the day in IM and email, and that you let us call you last night pretty late to trouble shoot. We still need to get the cold start IAC counts down like you suggested and we still need to address the TPS values at idle and at WOT, they were 18% and 90% respectively. Tonite we will sync up the timing first, address the IAC counts, the TPS values and then revise the part throttle tune. We will go with Kurt's approach of an open loop tune up to, or close to the flash point of the converter, we liked this and and last time it only took about an hour of street driving to tweak that tune up to 4000 rpms.
I could rent some load dyno time at a local Supra shop, but I think we'll hit the street again and then look towards using the Speed Inc. dyno again in the next seven days to go over the WOT tune.
Thread Starter
Joined: Nov 2001
Posts: 45,364
Likes: 1,796
From: Chicago, IL
Late night:
-Wired up fans to FAST, 175 on, 170 off
-Redid some our grounds just as a precaution
-Sync'd up engine and FAST base timing, 55 crank angle and 32 base timing ('tween 30 and 33 base timing I forget)
-Worked on idle and IAC counts, they were over 150 at the onset, now around 100, shooting for 35. FAST goes up to 180 for IAC counts. Getting surging at 1000.
Tonite:
-Wiring up alternator
-Working on IAC/idle
-Work on oil pressure gauge
-Street tuning if we have time and the roads are dry