

radiator swap DIY???


I don't know where any write-ups are, but its very easy.
Take the air box off, I think its 4 10mm bolts. Unhook the MAF and hoses that go to the TB. Disconnect the tranny lines, radiator hoses and fans, get them from underneath the car. The fans come out together through the top. Then the radiator will just be sitting there, I don't remember anything holding them in like screws or bolts. After you lift the fans out, the radiator will lift out. Just do the reverse with the new one.
I'm actually taking mine out tomorrow, but just to clean my condensor. You should do that too while you have the chance, you'll be shocked to find out how much **** and debris is stuck to the front and closing off alot of the cooling area that air is supposed to flow through. I can take pics tomorrow if you want me too, and also I'll have all the steps in order. But its the type of job you can figure out on your own if you've never done it.
Did it today. Man, it was harder than when I did it a few years ago. But not horrible. Took about 3 hours, but I took my condensor completely out to clean it and disconnected the A/C lines. You don't have to disconnect them to clean the condensor but it makes it alot easier to clean it 100%.
Got pictures that will get you started, then its all just wiggling and pulling to get the fan assembly out...then the radiator out....then you can get to the condensor if you want to do anything with that. Disconnecting everything takes longer then removing those 3 items. Its pretty straight forward. If you have a friend to hold the other side of the radiator and to hold lines and hoses out of your way while you're doing things, it helps greatly. I did it alone and it causes you to struggle a little more.
First thing I do is put the front end up on ramps. Then, remove the battery. Then the overflow hose which is attached to the radiator cap. Then I remove the overflow tank which is under the battery. Might as well clean it while your at it. Then from the top I remove the metal tranny line which is right under the radiator fill cap, unplug the low coolant sensor, disconnect the T-Stat only and leave that radiator hose attached to the radiator. Then from underneath the car I unplugged the two fans and let the wire hang. Then opened the valve to empty the coolant from the radiator.
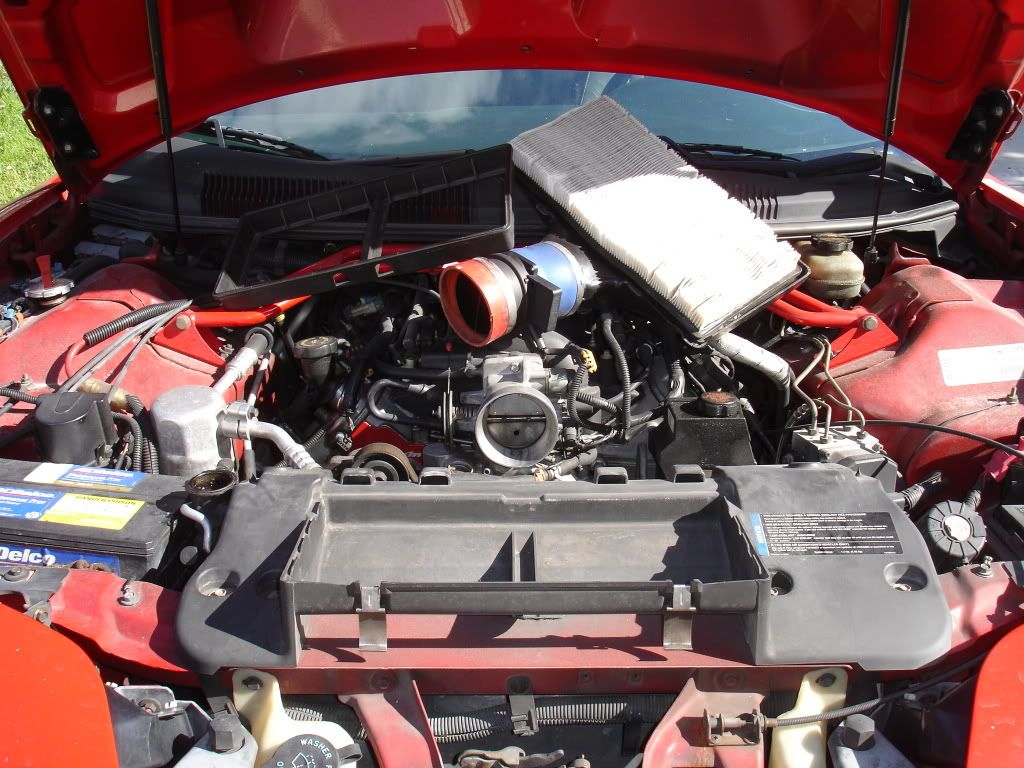
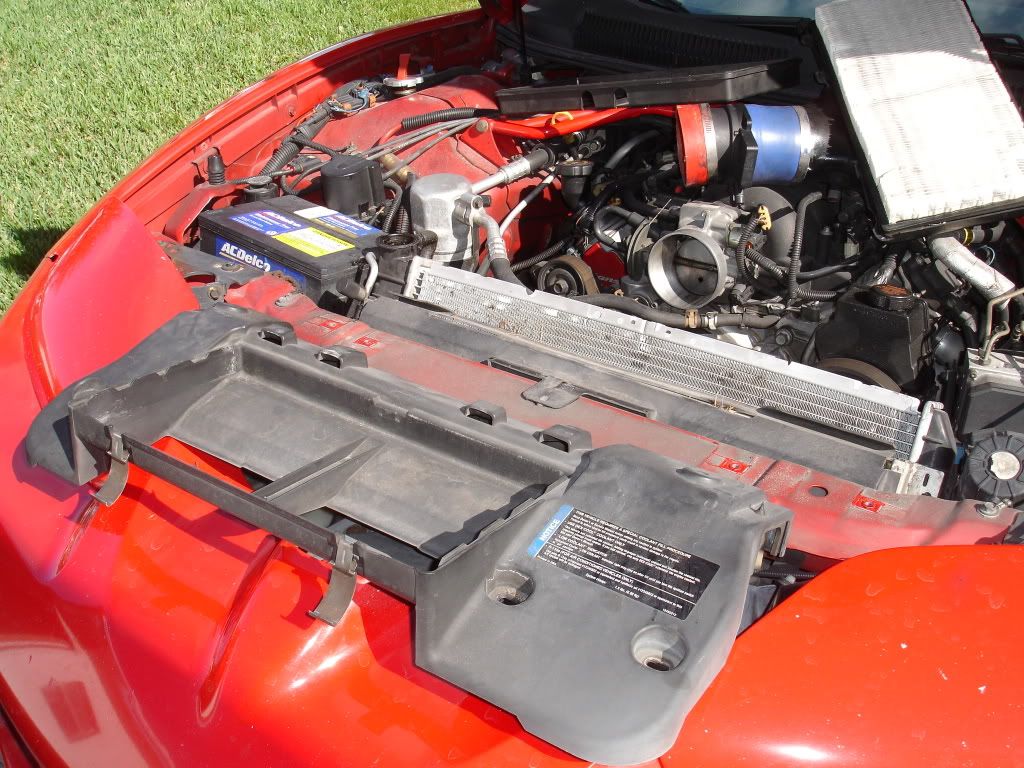
Take the lid and hoses going to the TB off, and just set them on top of the intake.
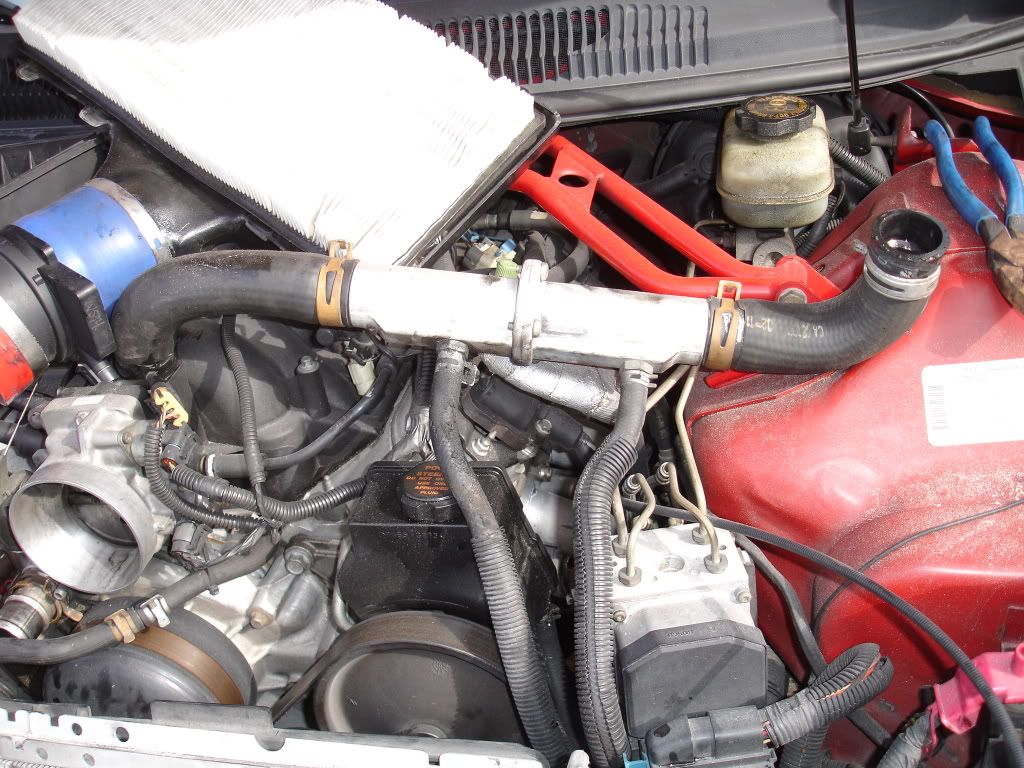
Then disconnect this hose and lay it on top, leaving the two power steering cooler lines attached.
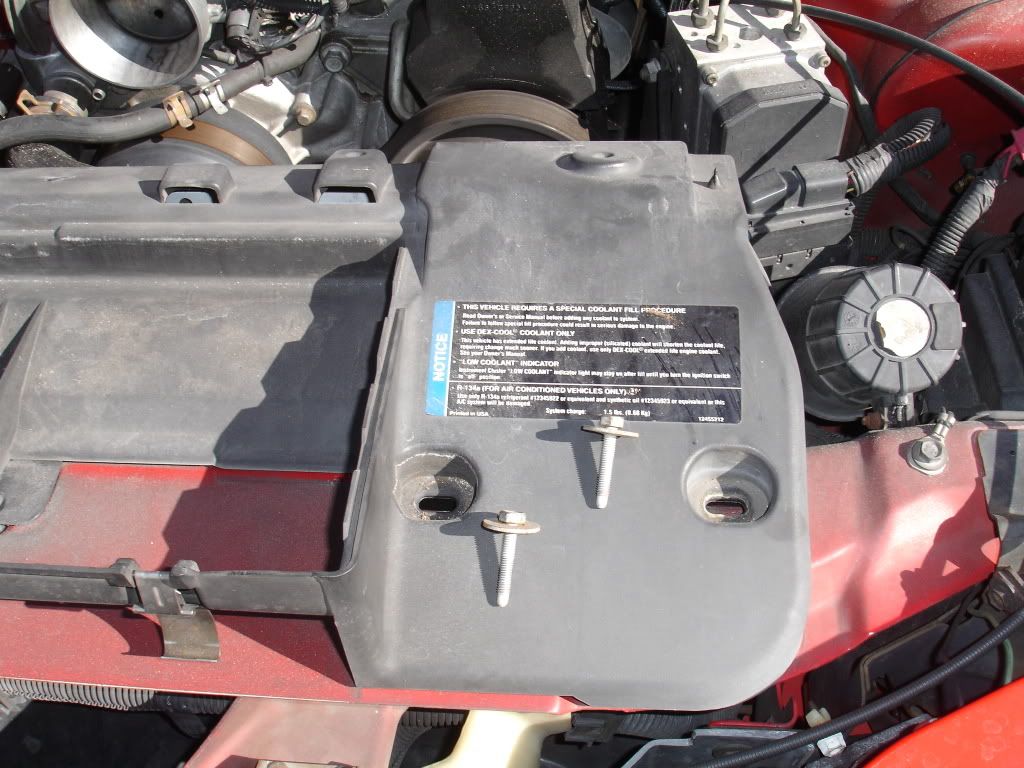
Then remove the four 10mm bolts holding the air box onto the frame. Two on each side.
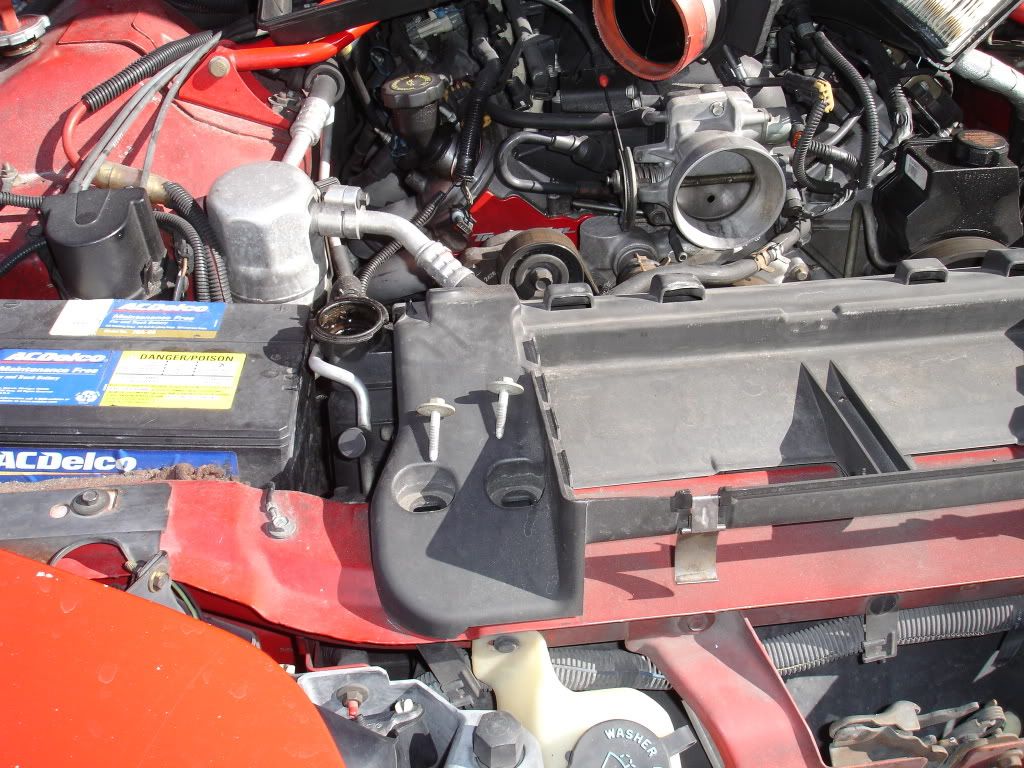
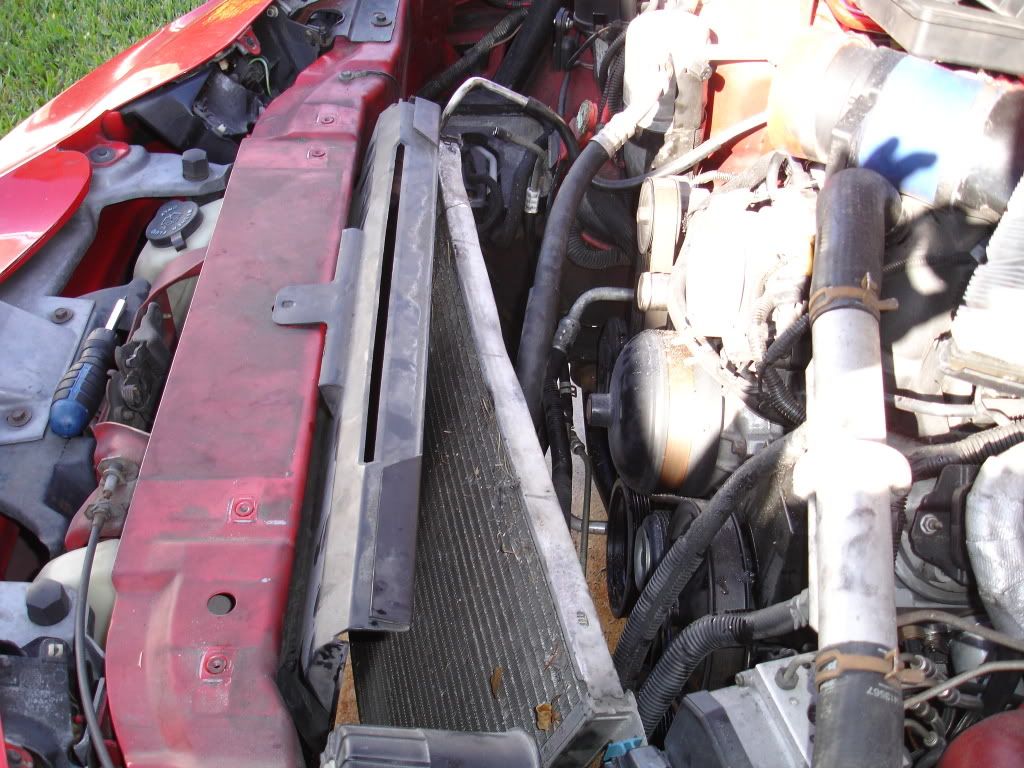
After you take the 4 bolts out and lift the air box off, there is nothing else holding the fan assembly, radiator and condensor in. They are literally just sitting there attached to each other by hooks.
The fans simply attach and sit on the radiator.
The radiator simply sits on the condensor.
The condensor just sits in place up front.
NOTHING bolts or fastens these in place, they sit sandwiched together on hooks.
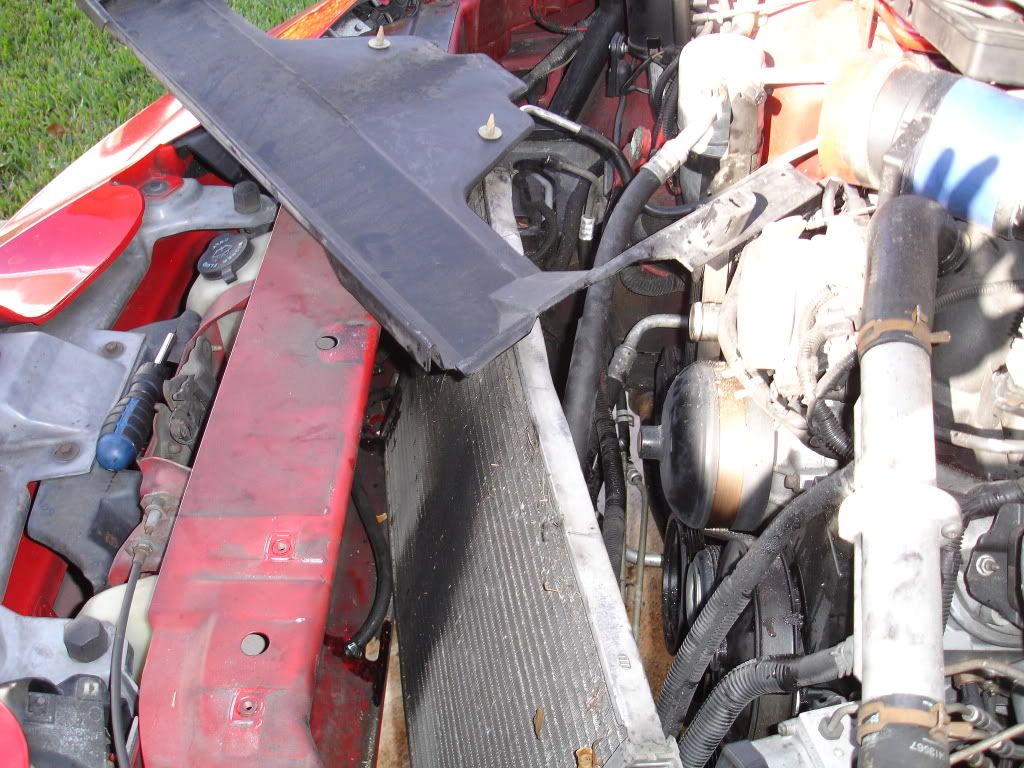
First, remove the fan assembly. I got under the car and just took the palm of my hand and hit each side on the bottom to break it free from the little 4 hooks it sits on that are attached to the back of the radiator. They are just little hooks in all 4 corners in the back of the radiator. The fan assembly has to go up about 1 inch and backwards to break free from the hooks on the radiator. This is when your friend should be standing in front of the car simply holding the radiator down and forward. Then you just work the fan assembly downward and out. Also, same with the radiator, you need to get it off the hooks that are mounted onto the condensor in the 4 corners. Lift up and backward and the radiator will break free from the condensor.
WARNING: Make sure as you pull the fans out you try like hell NOT to let any part of the fan housing touch the radiator. It will mash and crush the very thin cooling fins and that will hurt the cooling effectiveness of the radiator. They can be mashed with just your finger touching them, it doesn't take much. So don't touch, at all, the front and back surfaces of the radiator and condensor.
After the fans are out you should then lift the radiator straight up and out through the top. Just work it around everything and you'll get it out. Didn't get a pic of the rad and condensor sitting there. Just the condensor.
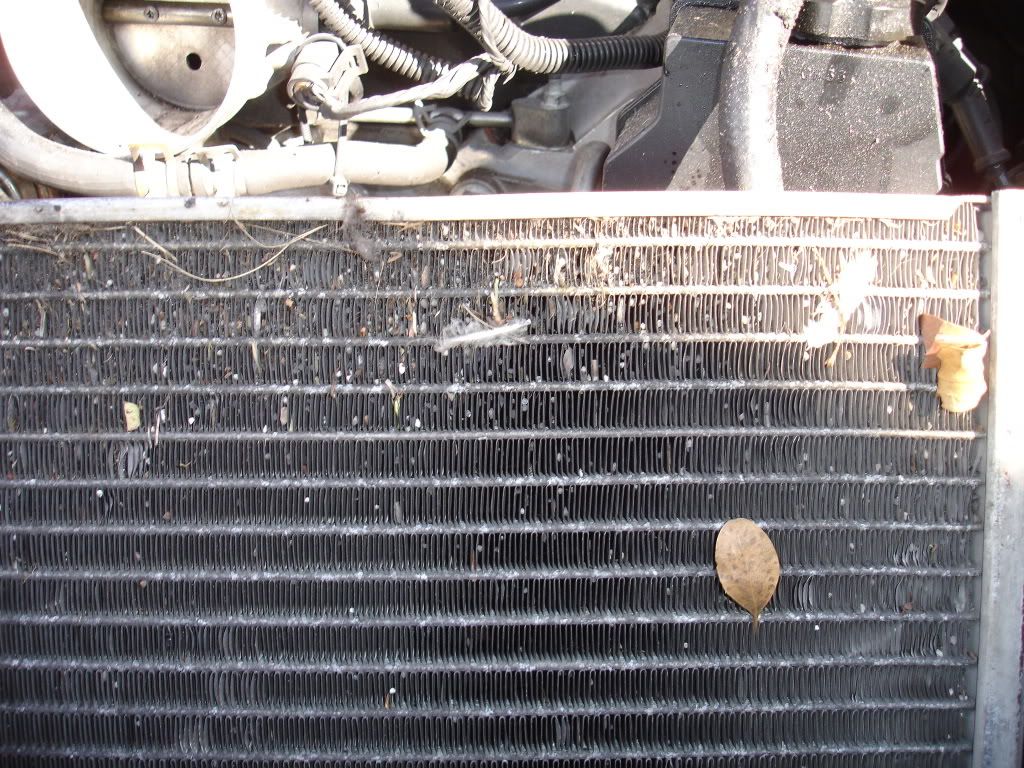
See the rubber piece in front of the condensor? You can take it off if you want to, its easier to work with things.
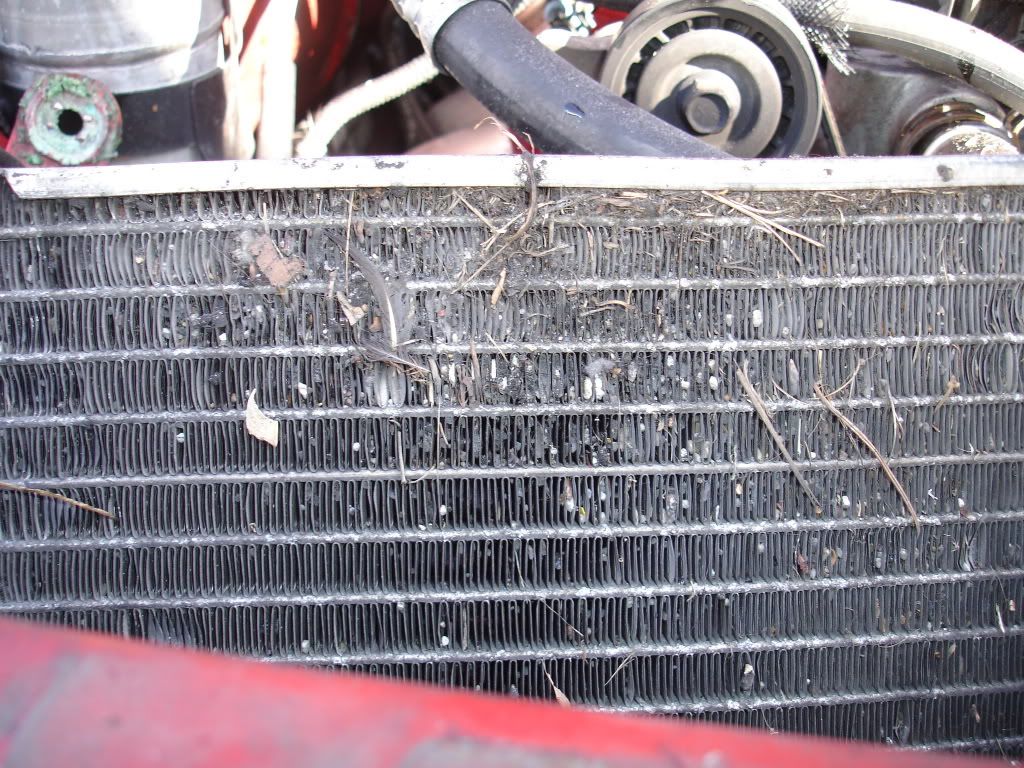
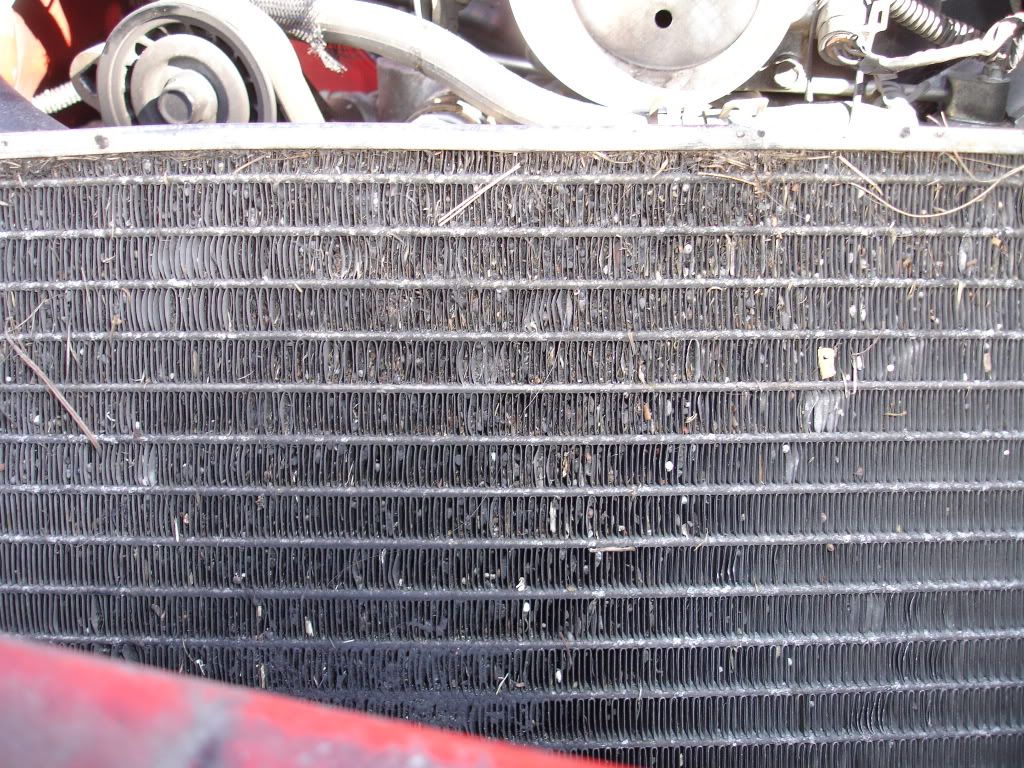
Here's why cleaning of the condensor every 2-3 years is so important. Everything from dead bugs, to bird feathers, rocks, sticks, etc.... gets caught in there and kills the airflow that needs to get to the radiator for the real cooling. Plus, it keeps the hot condensor from shedding its heat. The condensor then gets hot sends hot air to the hot radiator, it just starts a bad process and an engine will start to run hot over time.
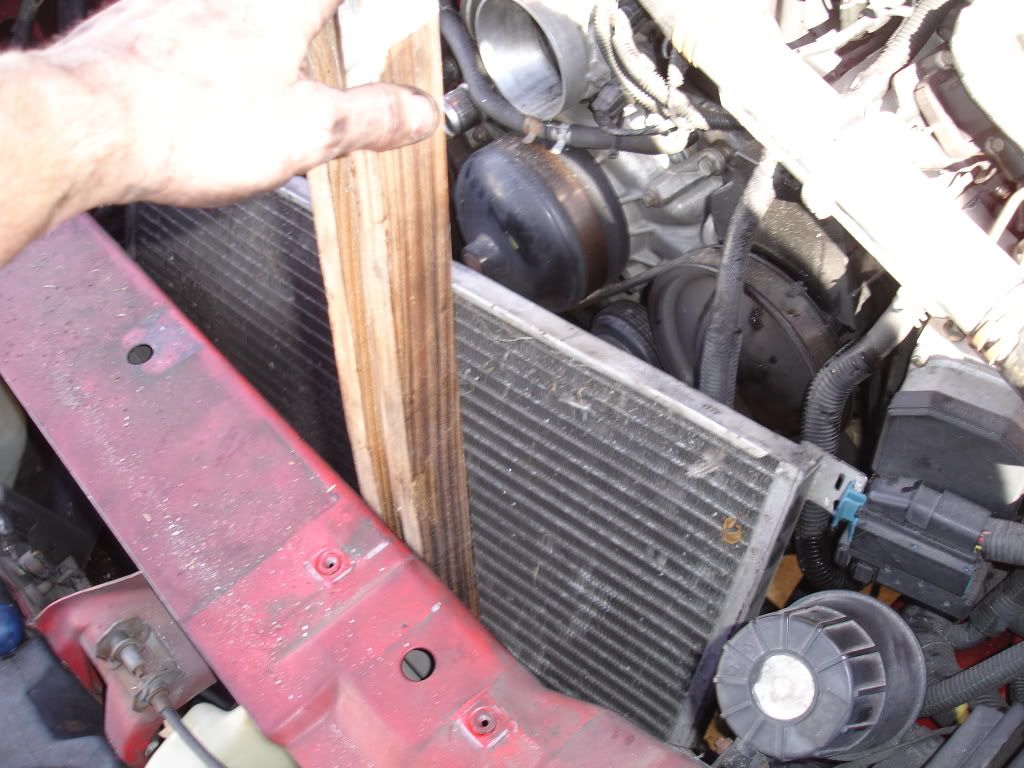
If you want to clean the condensor, use a piece of wood to bang the condensor up against. Now, the top A/C line is all metal, so it won't give much without splitting and then you'll need to buy a new $80.00 line from the dealer. The bottom A/C line is metal and rubber so it will give alot. Just be careful. ****And also know, it might break, so its your choice to do it this way.***** I just have no other way of cleaning it out.
Just take the condensor and wack the FRAME against the wood. I did it like 50 times and pretty much all the debris came out the first time I did it that way. This time I took it all the way out. Disconnecting the A/C lines. It was just way too dirty on the entire surface.
Then just put it all back together the opposite way.
If I had a friend to help out it may have taken me 2 hours and less hassle and struggle.
Good luck.
Got pictures that will get you started, then its all just wiggling and pulling to get the fan assembly out...then the radiator out....then you can get to the condensor if you want to do anything with that. Disconnecting everything takes longer then removing those 3 items. Its pretty straight forward. If you have a friend to hold the other side of the radiator and to hold lines and hoses out of your way while you're doing things, it helps greatly. I did it alone and it causes you to struggle a little more.
First thing I do is put the front end up on ramps. Then, remove the battery. Then the overflow hose which is attached to the radiator cap. Then I remove the overflow tank which is under the battery. Might as well clean it while your at it. Then from the top I remove the metal tranny line which is right under the radiator fill cap, unplug the low coolant sensor, disconnect the T-Stat only and leave that radiator hose attached to the radiator. Then from underneath the car I unplugged the two fans and let the wire hang. Then opened the valve to empty the coolant from the radiator.
Take the lid and hoses going to the TB off, and just set them on top of the intake.
Then disconnect this hose and lay it on top, leaving the two power steering cooler lines attached.
Then remove the four 10mm bolts holding the air box onto the frame. Two on each side.
After you take the 4 bolts out and lift the air box off, there is nothing else holding the fan assembly, radiator and condensor in. They are literally just sitting there attached to each other by hooks.
The fans simply attach and sit on the radiator.
The radiator simply sits on the condensor.
The condensor just sits in place up front.
NOTHING bolts or fastens these in place, they sit sandwiched together on hooks.
First, remove the fan assembly. I got under the car and just took the palm of my hand and hit each side on the bottom to break it free from the little 4 hooks it sits on that are attached to the back of the radiator. They are just little hooks in all 4 corners in the back of the radiator. The fan assembly has to go up about 1 inch and backwards to break free from the hooks on the radiator. This is when your friend should be standing in front of the car simply holding the radiator down and forward. Then you just work the fan assembly downward and out. Also, same with the radiator, you need to get it off the hooks that are mounted onto the condensor in the 4 corners. Lift up and backward and the radiator will break free from the condensor.
WARNING: Make sure as you pull the fans out you try like hell NOT to let any part of the fan housing touch the radiator. It will mash and crush the very thin cooling fins and that will hurt the cooling effectiveness of the radiator. They can be mashed with just your finger touching them, it doesn't take much. So don't touch, at all, the front and back surfaces of the radiator and condensor.
After the fans are out you should then lift the radiator straight up and out through the top. Just work it around everything and you'll get it out. Didn't get a pic of the rad and condensor sitting there. Just the condensor.
See the rubber piece in front of the condensor? You can take it off if you want to, its easier to work with things.
Here's why cleaning of the condensor every 2-3 years is so important. Everything from dead bugs, to bird feathers, rocks, sticks, etc.... gets caught in there and kills the airflow that needs to get to the radiator for the real cooling. Plus, it keeps the hot condensor from shedding its heat. The condensor then gets hot sends hot air to the hot radiator, it just starts a bad process and an engine will start to run hot over time.
If you want to clean the condensor, use a piece of wood to bang the condensor up against. Now, the top A/C line is all metal, so it won't give much without splitting and then you'll need to buy a new $80.00 line from the dealer. The bottom A/C line is metal and rubber so it will give alot. Just be careful. ****And also know, it might break, so its your choice to do it this way.***** I just have no other way of cleaning it out.
Just take the condensor and wack the FRAME against the wood. I did it like 50 times and pretty much all the debris came out the first time I did it that way. This time I took it all the way out. Disconnecting the A/C lines. It was just way too dirty on the entire surface.
Then just put it all back together the opposite way.
If I had a friend to help out it may have taken me 2 hours and less hassle and struggle.
Good luck.


