


LS2 MAP sensor in LS3 intake
My LS2 MAP sensor doesn't fit in my LS3 intake.
What's the best solution? In the mean time, I'm going to fabricate something that will seal it...but I know this is going to come up again.
Will the LS3 sensor work with the LS2 computer? If so, then it might just be a matter of buying the LS3 sensor and swapping out the connector.
Thanks,
Gerry
What's the best solution? In the mean time, I'm going to fabricate something that will seal it...but I know this is going to come up again.
Will the LS3 sensor work with the LS2 computer? If so, then it might just be a matter of buying the LS3 sensor and swapping out the connector.
Thanks,
Gerry
I used silicone to mount my LS2 sensor in the intake last night (the intake is not installed yet), clamped it down, and checked it this morning...seems to be secure.
Gerry
The sensors function the same. That is not the issue. If you get the LS3 sensor you will need connector PN 88988583 also. The wiring is different, refer to the correct schematics.
Both still use a 0-5 volt output to the PCM based on pressure readings. The pressure specs are the same.
The hole ID in the LS3 intake is 12 mm. The OD of the seal on the LS2 MAP is 11 mm. The LS2 seal PN is 16194007 is you want a new one. You could try wrapping the LS2 nipple with teflon tape and then stretch the seal over the tape so it increases the OD. 1 mm isn't a lot to close the gap on.
I believe the bolt down style and better (o-ring) seal design is because the LS3 MAP is also used on other engines including the LS9. If they used the snap on style it would probably get pushed out or potentially pushed out from the blower pressure.
The depth mounting cavity is what is likely to induce leaks. The LS3 intake is thin skinned in that area where as earlier versions had a walled cavity.
We make up a little L bracket to mount the older sensor but it is probably not worth it. I have connectors to put on your MAP wiring to accommodate the new sensor if you do not want to solder into the sensor.
We make up a little L bracket to mount the older sensor but it is probably not worth it. I have connectors to put on your MAP wiring to accommodate the new sensor if you do not want to solder into the sensor.
Trending Topics
Thanks for the information. Probably won't get to it before firing her up for the first time, but I'll snag the LS3 sensor and connector. I just purchased a soldering gun and soldered something for the frist time in two decades, so I'm on a roll 
Gerry
Gerry
LS1 Tech Stories
The Best V8 Stories One Small Block at Time

Gas Monkey Built a 6-Wheel Ferrari Testarossa With a Corvette LT4 Engine
Verdad Gallardo
7 Most Reliable High-Performance Engines GM Has Ever Built
Verdad Gallardo
Amazing '71 Camaro Restomod Is Modern Muscle Car Under the Skin
Verdad Gallardo
6 Common C5 Corvette Failures and What's Involved In Repairing Them
Pouria Savadkouei
Retro Modern Bandit Pontiac Trans AM Comes With Burt Reynolds' Autograph
Verdad Gallardo
Top 10 Greatest Cadillac V Series Performance Models Ever, Ranked
Pouria Savadkouei
Top 10 Most Powerful Chevy Trucks Ever Made!

Hennessey's New Supercharged Silverado ZR2 Has 700 HP
Verdad Gallardo
Coachbuilt N2A Anteros Is an LS2-Powered C6 Corvette In Italian Clothes
Verdad GallardoTeching In
Joined: Aug 2008
Posts: 3
Likes: 0
From: 78254
Do you know what the schematics are for the LS3 MAP sensor or where I can get that information?
The sensors function the same. That is not the issue. If you get the LS3 sensor you will need connector PN 88988583 also. The wiring is different, refer to the correct schematics.
Both still use a 0-5 volt output to the PCM based on pressure readings. The pressure specs are the same.
The hole ID in the LS3 intake is 12 mm. The OD of the seal on the LS2 MAP is 11 mm. The LS2 seal PN is 16194007 is you want a new one. You could try wrapping the LS2 nipple with teflon tape and then stretch the seal over the tape so it increases the OD. 1 mm isn't a lot to close the gap on.
Both still use a 0-5 volt output to the PCM based on pressure readings. The pressure specs are the same.
The hole ID in the LS3 intake is 12 mm. The OD of the seal on the LS2 MAP is 11 mm. The LS2 seal PN is 16194007 is you want a new one. You could try wrapping the LS2 nipple with teflon tape and then stretch the seal over the tape so it increases the OD. 1 mm isn't a lot to close the gap on.


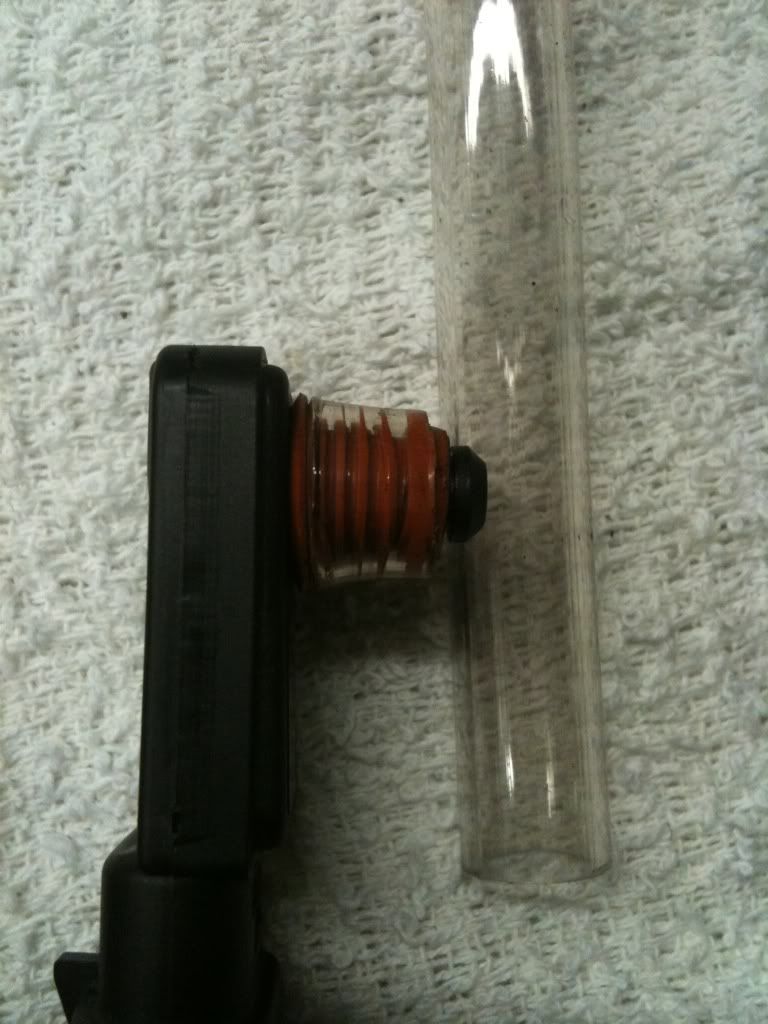
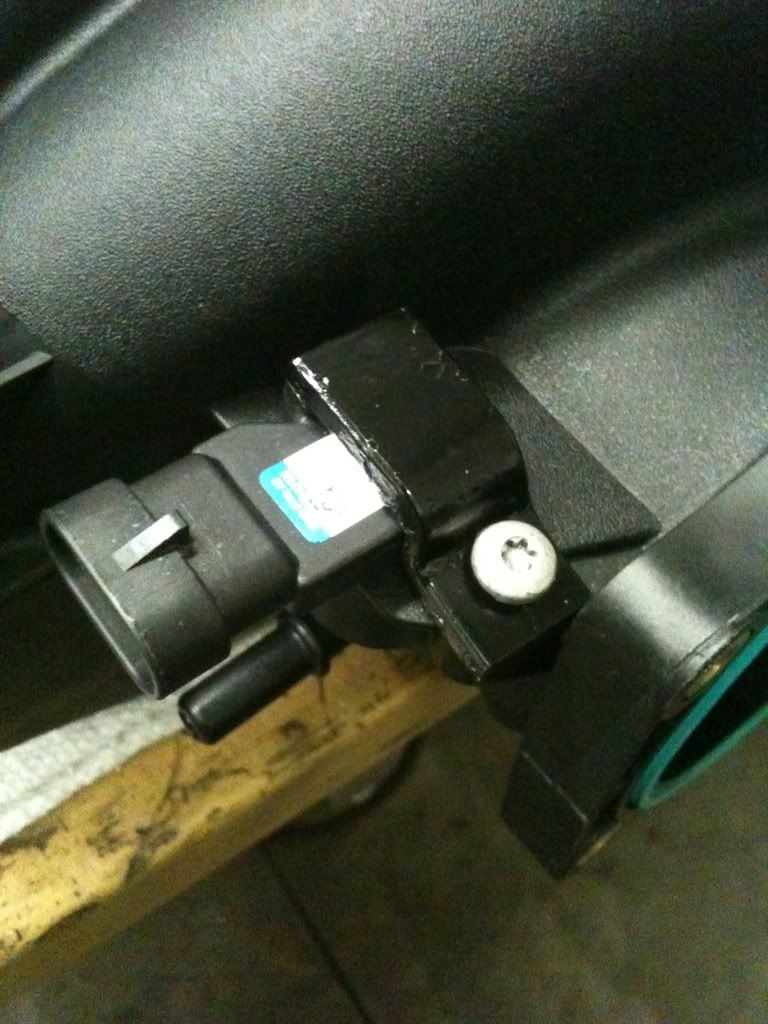
I know this is an old thread, but it comes up when searching this issue so I'll post my results. Maybe they will help someone else down the road. I used some 3/8" ID thin wall tubing to 'enlarge' the seal and fabbed up a hold down bracket. Here are some pics.

thats an awsome idea i think i might have to steal that
Never followed up, but I ended up using the LS2 sensor with the stock gasket. I cleaned the hell out of everything with MEK, and used grey Permatex RTV to mount the sensor with the stock gasket...no hold down. Clamped it in, and let it set overnight.
Three years later, and it still is in place and not leaking.
Three years later, and it still is in place and not leaking.


