


How to create a sig pic tutorial
Thread Starter
TECH Resident
iTrader: (3)
Joined: Dec 2002
Posts: 863
Likes: 0
From: Showing Italians the power of LS1
Originally Posted by FireSilverLullaby
Great tutorial. I Made a few sig pics, any suggestions?
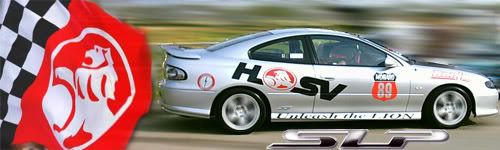
My first one, maybe add some text or something.
I like this one alot.
OR i could do this and put something out to the left?
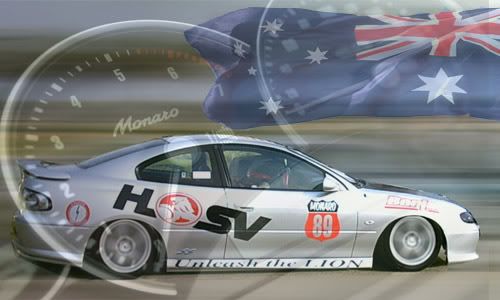
My first one, maybe add some text or something.
I like this one alot.
OR i could do this and put something out to the left?
1- Choose your font style/bevel/color wisely. Even though you might like a particular font, it may look like crap on a sig with a certain background.
2- When inserting a car into a particular background, the car might seem to stick out. This is probably because the reflection on the object is different than the background's color. For example, if you have a pic of your sweet Camaro which was taken in Virginia on a January morning, and stick it into a background of the desert highway in Nevada in the late afternoon, the car will have a bright, maybe bluish cast to it, while the desert background will have a yellow, orangish cast to it. The fix is simple; Go to Image>Adjustments>Photo Filter. Here you can add a 20-30% warm filter to the Camaro, and it will blend in better with the desert background.
3- Borders- Sometimes a border can help with a sig looking "plain". Simply create a new layer by selecting Layer>New layer. Then select the entire layer by going to Select>All. Next create the border by selecting Image>Stroke. Set the thickness of the border stroke, (usually I use 6-8 pixels) then choose the color. Hit "OK" then Select>Deselect to remove the selected border. Sometimes the border can be blurred by adding a Gaussian Blur to the border's layer.

12 Second Club
iTrader: (5)
Joined: Aug 2005
Posts: 1,231
Likes: 0
From: Chesapeake,va and Charlotte,NC
Thanks alot snootch those were some good tips. I couldnt find the photo filter, but i used the color balance and made the windows a little more transparent.
And i added a border, and got a new font and location, but im still not real sure on what font to use or where to put it.
And i added a border, and got a new font and location, but im still not real sure on what font to use or where to put it.
Last edited by FireSilverLullaby; Jul 8, 2007 at 10:20 PM.
Thread Starter
TECH Resident
iTrader: (3)
Joined: Dec 2002
Posts: 863
Likes: 0
From: Showing Italians the power of LS1
Originally Posted by FireSilverLullaby
Thanks alot snootch those were some good tips. I couldnt find the photo filter, but i used the color balance and made the windows a little more transparent.
And i added a border, and got a new font and location, but im still not real sure on what font to use or where to put it.
And i added a border, and got a new font and location, but im still not real sure on what font to use or where to put it.

Really all you need to do is play around in PS for a while, seeing what all the options do for you. BTW, the photo filter isn't in the "Filters" section, its under Image, then Adjustments- near the bottom. Youv'e got a hell of a good start, and what you've done looks great. Just play around with settings, and find a few things that can really make your art "pop". Good luck....

12 Second Club
iTrader: (5)
Joined: Aug 2005
Posts: 1,231
Likes: 0
From: Chesapeake,va and Charlotte,NC
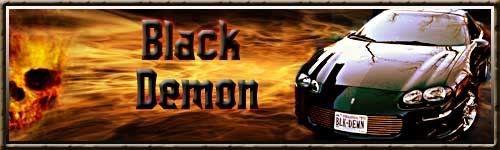
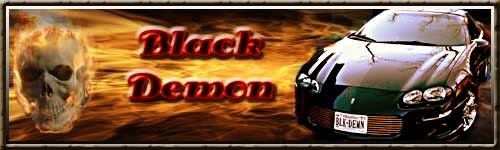
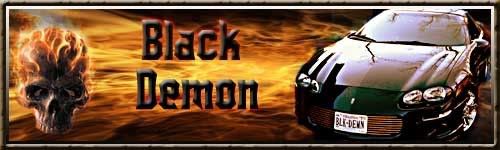
Wow that looks amazing snootch. I just took some of your ideas and made a few more with ghost rider in it.
And i have an old version of photoshop i think its the 7.0 one thats almos 5 years old, so i dont think mine has the photo filter
And i have an old version of photoshop i think its the 7.0 one thats almos 5 years old, so i dont think mine has the photo filter
LS1 Tech Stories
The Best V8 Stories One Small Block at Time

Gas Monkey Built a 6-Wheel Ferrari Testarossa With a Corvette LT4 Engine
Verdad Gallardo
7 Most Reliable High-Performance Engines GM Has Ever Built
Verdad Gallardo
Amazing '71 Camaro Restomod Is Modern Muscle Car Under the Skin
Verdad Gallardo
6 Common C5 Corvette Failures and What's Involved In Repairing Them
Pouria Savadkouei
Retro Modern Bandit Pontiac Trans AM Comes With Burt Reynolds' Autograph
Verdad Gallardo
Top 10 Greatest Cadillac V Series Performance Models Ever, Ranked
Pouria Savadkouei
Top 10 Most Powerful Chevy Trucks Ever Made!

Hennessey's New Supercharged Silverado ZR2 Has 700 HP
Verdad Gallardo
Coachbuilt N2A Anteros Is an LS2-Powered C6 Corvette In Italian Clothes
Verdad Gallardo

TECH Addict
iTrader: (5)
Joined: Jan 2004
Posts: 2,458
Likes: 0
From: Miami, Fl. - Hurricane Highway
My problem is in the beginning everytime i click to apply the transition nothing happens, and even when i hold the shift the photo doesn't stay in proportion. It sucks because i can't even get a pic of my car to transition into a 500x150
-Joel
-Joel


