Forced Induction Superchargers | Turbochargers | Intercoolers

1978 Volvo 245 Wagon Build: 5.3, 7875, TH400, Etc.

Thread Tools
 
Search this Thread
 
Old 09-28-2016, 01:09 PM
  #21  
Teching In
 
16vgti's Avatar
 
Join Date: Sep 2016
Location: Lewisville, Tx
Posts: 9
Likes: 0
Received 0 Likes on 0 Posts
Default

http://forums.turbobricks.com/showthread.php?t=222596
Old 09-28-2016, 11:18 PM
  #22  
12 Second Club
Thread Starter
iTrader: (97)
 
Funkster's Avatar
 
Join Date: Jul 2006
Location: Urbandale, Iowa
Posts: 990
Received 0 Likes on 0 Posts

Default

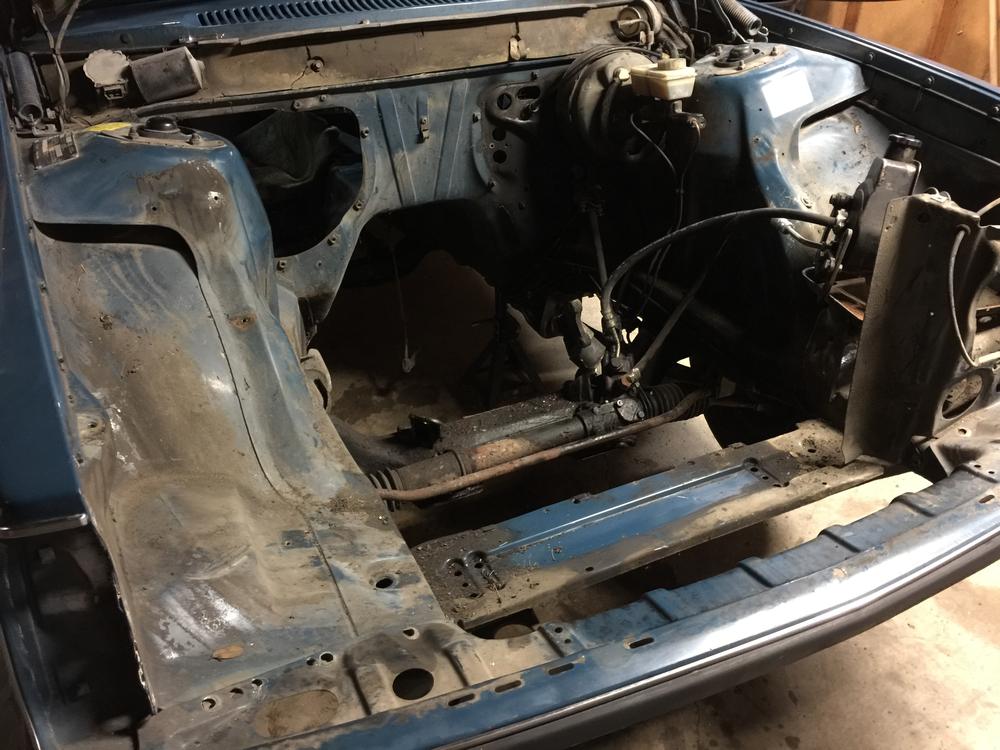
I ended up being able to get some work done tonight so I moved to the interior that way I could finish cleaning up the engine bay. I got the dash pulled out, removed the HVAC system, also pulled the HVAC plate. Along with it I pulled all the wiring in the engine bay. I had a couple discoveries tonight as well.

#1 I found one of the previous owners had installed a CB Radio. They screwed the receiver portion to the firewall plate. I removed it along with the massive pile of wiring along with it.
Name:  DrtbKMJ.jpg
Views: 32
Size:  120.7 KB

I also started removing the backing on the carpet in the passenger's footwell and discovered a lot of moisture there. It hasn't caused any body issues, but there is a plate used to flatten the footwell under the carpet that is badly rusted. I plan to take this piece to work tomorrow as well as the HVAC plate. Will weld up the holes in the plate and repaint it. I will either grind down the rust, etc. on the leveling piece then repaint it or I will remake it.

Anywhere, here is the interior and engine bay at the end of the night.
Name:  VySJpkU.jpg
Views: 32
Size:  79.1 KB

Name:  y8aBzrN.jpg
Views: 40
Size:  107.6 KB
Old 09-28-2016, 11:19 PM
  #23  
On The Tree
iTrader: (5)
 
55superbeetle's Avatar
 
Join Date: Dec 2010
Location: Modesto, Ca
Posts: 150
Likes: 0
Received 1 Like on 1 Post
Default

Never got any impressive track times, local track wouldn't let me back after my first ten second run with no cage. Mostly just dicking around on the street, it did go from useless tire spinning to being able to leave on boost on a small 26x8.5 slick though.
Old 10-05-2016, 10:25 PM
  #24  
12 Second Club
Thread Starter
iTrader: (97)
 
Funkster's Avatar
 
Join Date: Jul 2006
Location: Urbandale, Iowa
Posts: 990
Received 0 Likes on 0 Posts

Default

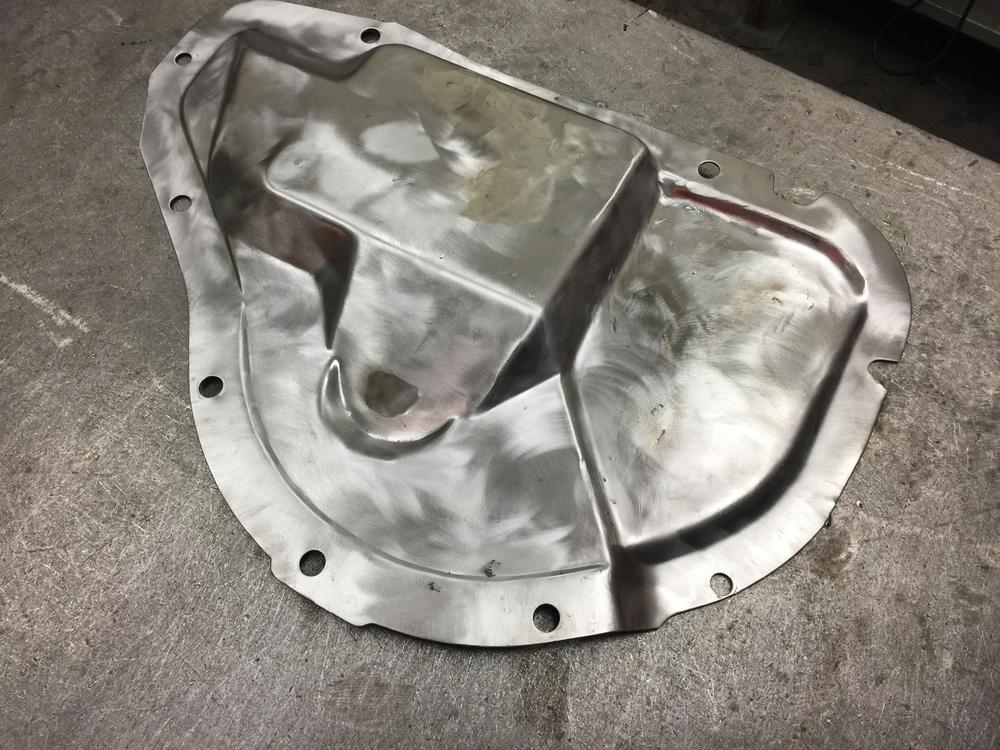
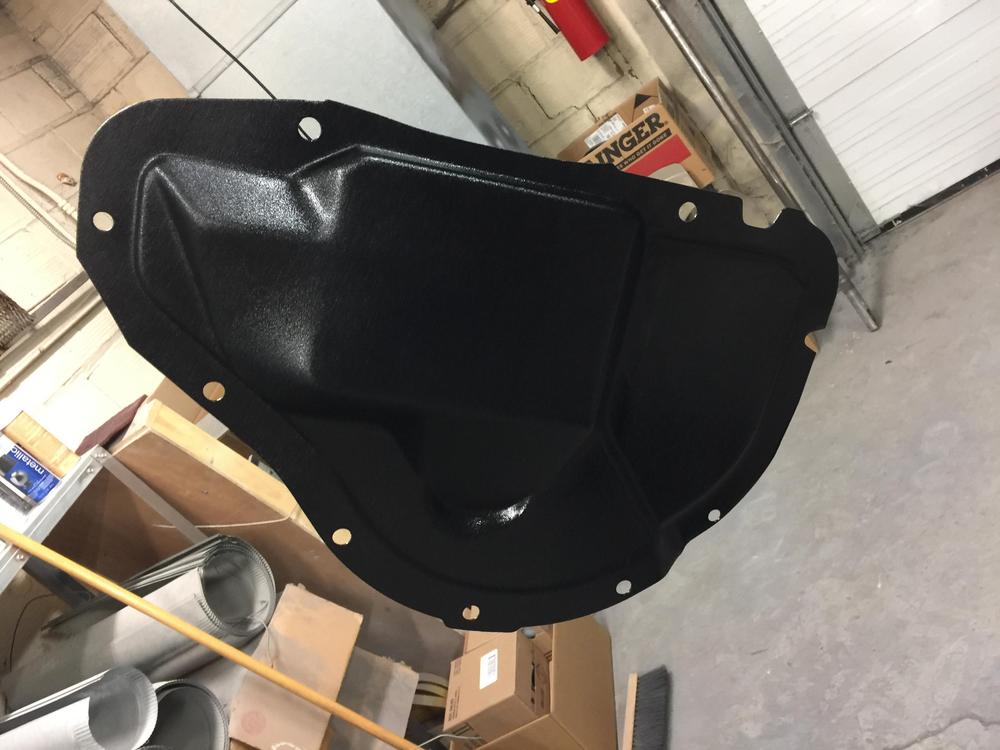
Been a busy couple days, a few small updates. I welded the holes up on the HVAC plate, drilled out some spot welds for tabs and welded the holes closed, then welded some studs on the backside so I can mount a relay panel on it level later on. After this I coated it with some bedliner. Wanted to use this to add some abrasion resistance to the panel.

Plate welded up and smoothed a little.
Name:  qO3YjMq.jpg
Views: 32
Size:  130.2 KB

Front of plate coated.
Name:  COiPiGS.jpg
Views: 32
Size:  75.1 KB

Back of plate coated. (I didn't bother smoothing the welds on the interior side.
Name:  t6TuWBX.jpg
Views: 31
Size:  116.3 KB

I also cleaned up the floor plate and coated it as well.

Before:
Name:  GYhxetl.jpg
Views: 32
Size:  130.2 KB

After:
Name:  OLWKAzA.jpg
Views: 32
Size:  98.6 KB
Old 10-06-2016, 11:51 AM
  #25  
TECH Resident
 
Bad Apache's Avatar
 
Join Date: Sep 2013
Location: Mechanicsburg, PA
Posts: 977
Received 117 Likes on 98 Posts

Default

Moving right along! It's the little stuff that eats up the time.
Old 10-08-2016, 10:43 PM
  #26  
12 Second Club
Thread Starter
iTrader: (97)
 
Funkster's Avatar
 
Join Date: Jul 2006
Location: Urbandale, Iowa
Posts: 990
Received 0 Likes on 0 Posts

Default

Tonight I messed with getting the engine and trans in rough position. I don't have an oil pan yet, so trying to mock with approximate clearance to the pan. I'd like to get the engine as far back as possible, but noticed by the time the LS mount bosses are centered on the factory crossmember the firewall would need to be clearanced a lot.

I can solve the firewall problem by moving the whole setup forward about an inch and a half. However, the mounts no longer lineup. Nothing too big to handle either way, but for the couple guys reading this who have done similar swaps I am wondering which route you guys took in regards to these clearance issues?

Anyway, here is a quick picture of the engine in rough position.


Old 10-09-2016, 05:41 AM
  #27  
TECH Veteran
iTrader: (7)
 
forcd ind's Avatar
 
Join Date: Sep 2007
Location: woodbine, md
Posts: 4,132
Received 240 Likes on 167 Posts

Default

You don't need the mount bosses to line up, just buy/make adapter plates that can reach the x member and make the mounts from there
Old 10-09-2016, 09:46 AM
  #28  
12 Second Club
Thread Starter
iTrader: (97)
 
Funkster's Avatar
 
Join Date: Jul 2006
Location: Urbandale, Iowa
Posts: 990
Received 0 Likes on 0 Posts

Default

Originally Posted by forcd ind
You don't need the mount bosses to line up, just buy/make adapter plates that can reach the x member and make the mounts from there
I know that they don't have to line up, I was just curious what guys had done when faced with the same decision. Obviously there is also benefit to moving the engine back farther as far as weight transfer goes.
Old 10-10-2016, 09:23 AM
  #29  
Teching In
 
16vgti's Avatar
 
Join Date: Sep 2016
Location: Lewisville, Tx
Posts: 9
Likes: 0
Received 0 Likes on 0 Posts
Default

Have you looked into the sts machining mount kit? Bolts that motor right up to the volvo subframe. That's who i got mine from, made very well
Old 10-10-2016, 09:49 AM
  #30  
12 Second Club
Thread Starter
iTrader: (97)
 
Funkster's Avatar
 
Join Date: Jul 2006
Location: Urbandale, Iowa
Posts: 990
Received 0 Likes on 0 Posts

Default

Originally Posted by 16vgti
Have you looked into the sts machining mount kit? Bolts that motor right up to the volvo subframe. That's who i got mine from, made very well
i have seen them, but I want to run solids and can't justify the price for something I can make. They do look very nice, if my situation was a little different I would consider them for sure.
Old 10-10-2016, 12:28 PM
  #31  
Teching In
 
16vgti's Avatar
 
Join Date: Sep 2016
Location: Lewisville, Tx
Posts: 9
Likes: 0
Received 0 Likes on 0 Posts
Default

Originally Posted by Funkster
i have seen them, but I want to run solids and can't justify the price for something I can make. They do look very nice, if my situation was a little different I would consider them for sure.
very true, i'm limited in tools, so this way worked for me, bolt in and go
Old 10-10-2016, 12:34 PM
  #32  
TECH Addict
iTrader: (17)
 
AnotherWs6's Avatar
 
Join Date: Sep 2012
Location: Westchester, NY
Posts: 2,672
Likes: 0
Received 36 Likes on 30 Posts

Default

Is that an open air cleaner duct taped on the original motor? lol.
Old 10-10-2016, 12:41 PM
  #33  
7 Second Club
iTrader: (4)
 
Rich Halsey's Avatar
 
Join Date: Sep 2013
Location: Maryland
Posts: 104
Likes: 0
Received 0 Likes on 0 Posts
Default


These are the mounts I made for my 94 Volvo
Old 10-10-2016, 02:38 PM
  #34  
12 Second Club
Thread Starter
iTrader: (97)
 
Funkster's Avatar
 
Join Date: Jul 2006
Location: Urbandale, Iowa
Posts: 990
Received 0 Likes on 0 Posts

Default

Originally Posted by AnotherWs6
Is that an open air cleaner duct taped on the original motor? lol.
lol I believe so.

Originally Posted by Rich Halsey


These are the mounts I made for my 94 Volvo
Your engine seems like it's so far back. Is that just the angle or are your mount bosses behind the crossmember?
Old 10-17-2016, 07:33 PM
  #35  
12 Second Club
Thread Starter
iTrader: (97)
 
Funkster's Avatar
 
Join Date: Jul 2006
Location: Urbandale, Iowa
Posts: 990
Received 0 Likes on 0 Posts

Default

Finally got some real progress. Engine dropped in, trans tunnel is going to need some modifying, but I expected that. I mocked up the heads and intake to see what needed to be done to get them to clear the hood.

I ended up cutting down a stud and a no longer used boss for the engine cover. The hood now shuts past where it needs to. The next steps will be to figure out exactly how much to modify the tunnel as well as stripping out what is left of the interior and removing the remaining sound dampening.

Engine mocked in:
Old 10-17-2016, 08:04 PM
  #36  
Teching In
 
ridecats's Avatar
 
Join Date: Nov 2011
Posts: 21
Likes: 0
Received 0 Likes on 0 Posts
Default

I'm about same progress as you. Can't believe how much wire was behind the dash I'm scrapping it all and going to fab up something
Old 10-17-2016, 08:24 PM
  #37  
12 Second Club
Thread Starter
iTrader: (97)
 
Funkster's Avatar
 
Join Date: Jul 2006
Location: Urbandale, Iowa
Posts: 990
Received 0 Likes on 0 Posts

Default

Originally Posted by ridecats
I'm about same progress as you. Can't believe how much wire was behind the dash I'm scrapping it all and going to fab up something
That there is, a lot of mine was melted together. I will be rewiring my car as well.
Old 10-24-2016, 08:12 PM
  #38  
12 Second Club
Thread Starter
iTrader: (97)
 
Funkster's Avatar
 
Join Date: Jul 2006
Location: Urbandale, Iowa
Posts: 990
Received 0 Likes on 0 Posts

Default

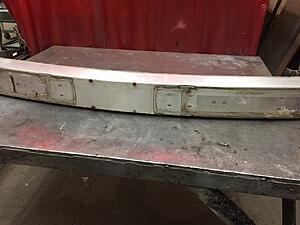
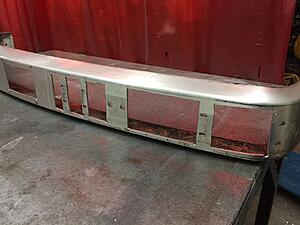
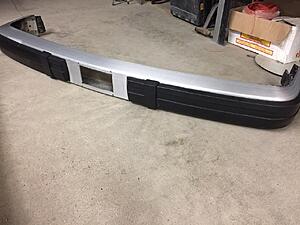
A few more updates, this last weekend I removed all the asphalt based sound dampening I could, this removed about 20 pounds from the car. I also removed about 8 pounds out of the front bumper by cutting a lot of the stuff that will covered by the bumper guard out and redesigning some of the hardware stuff.

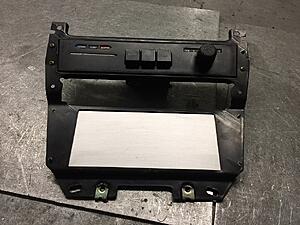
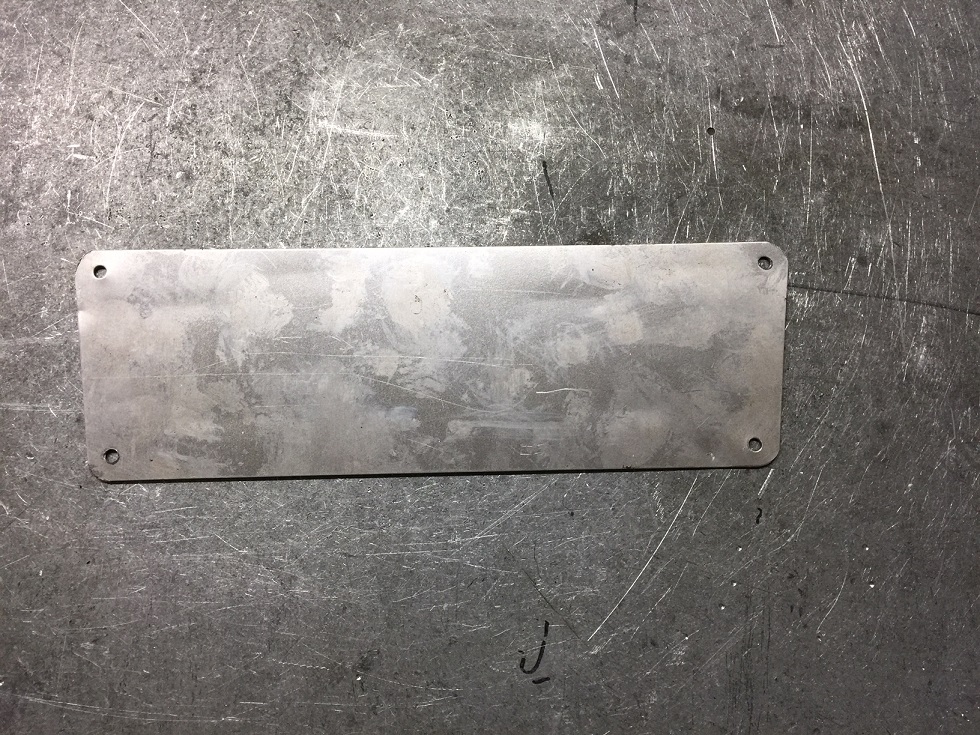
Lastly, made myself a small radio delete panel out of .040 Aluminum.

Sound Dampening in car:


Dampening removed:


1978 Volvo 245 Wagon Build: 5.3, 7875, TH400, Etc.-i7ueu3b.jpg

Here is the bumper with the guards removed and the outline of them marked:
1978 Volvo 245 Wagon Build: 5.3, 7875, TH400, Etc.-7katjcx.jpg

Cuts made:
1978 Volvo 245 Wagon Build: 5.3, 7875, TH400, Etc.-5exbrou.jpg

Guards back on. (Center hole will be covered by license plate)
1978 Volvo 245 Wagon Build: 5.3, 7875, TH400, Etc.-bmidx7t.jpg

Center dash with radio plate that came with car.
1978 Volvo 245 Wagon Build: 5.3, 7875, TH400, Etc.-emzgjlt.jpg

Blockoff Plate made.
1978 Volvo 245 Wagon Build: 5.3, 7875, TH400, Etc.-ujvsgub.jpg

Radio delete plate installed.
1978 Volvo 245 Wagon Build: 5.3, 7875, TH400, Etc.-p6hegao.jpg
Old 10-25-2016, 06:13 AM
  #39  
TECH Resident
 
Bad Apache's Avatar
 
Join Date: Sep 2013
Location: Mechanicsburg, PA
Posts: 977
Received 117 Likes on 98 Posts

Default

On the Slimfast diet, huh? Great idea on the bumper lightening.
Old 10-25-2016, 07:35 AM
  #40  
Teching In
 
16vgti's Avatar
 
Join Date: Sep 2016
Location: Lewisville, Tx
Posts: 9
Likes: 0
Received 0 Likes on 0 Posts
Default

why not just switch to the newer plastic bumpers?


Quick Reply: 1978 Volvo 245 Wagon Build: 5.3, 7875, TH400, Etc.


All times are GMT -5. The time now is 03:44 AM.