When you click on links to various merchants on this site and make a purchase, this can result in this site earning a commission. Affiliate programs and affiliations include, but are not limited to, the eBay Partner Network.
I'm using a plate I made up to fit the solid 4.6 mounts from CJ Pony Parts. Very similar to the kit that UPR sells for $129.99.
I looked at the mounts last night and it surely looks like I can modify the mount or just make my own with what I've already got. I didn't measure it, but it looks like the face of the mount on the K-Member is about 4" away from the mounting face on the engine block. There also looks to be plenty of room on the slots of the OEM K-Member that I could probably lower them quite a bit.
I've pulled the chassis wiring harness out so I can eliminate the things I'm not using, so I've got plenty of time to think about my next steps and see what I can do with the current setup.
I took a trip over CJponyparts' website and confirmed that the plates they supply in that kit possess the same attachment hole geometry as the UPR plates, which means they move the engine/transmission mating plane 1" further reward in the car than the stock 4.6L engine/transmission mating plane. That positioning scenario is going to greatly complicate your efforts to install the 4L80 in your car and provide you with more grief than what it's worth in my opinion.
I noticed that they also carry the new Hooker SN95 LS swap engine adapter plates on their site, which you may want to look at the image of to see the difference used for the attachment hole layout.
The Hooker plates divorce the engine mount hole pattern from the engine block hole pattern to position the LS engine block enginge/transmission mating plane in the stock 4.6L mating plane position (an inch forward from where yours is now).
The crankshaft height and inclination angle provided by this geometry replicates the stock 4.6L crankshaft geometry, including with the 4L80 transmission, so the need to massage the tunnel is greatly reduced. I hope you find this information helpful.
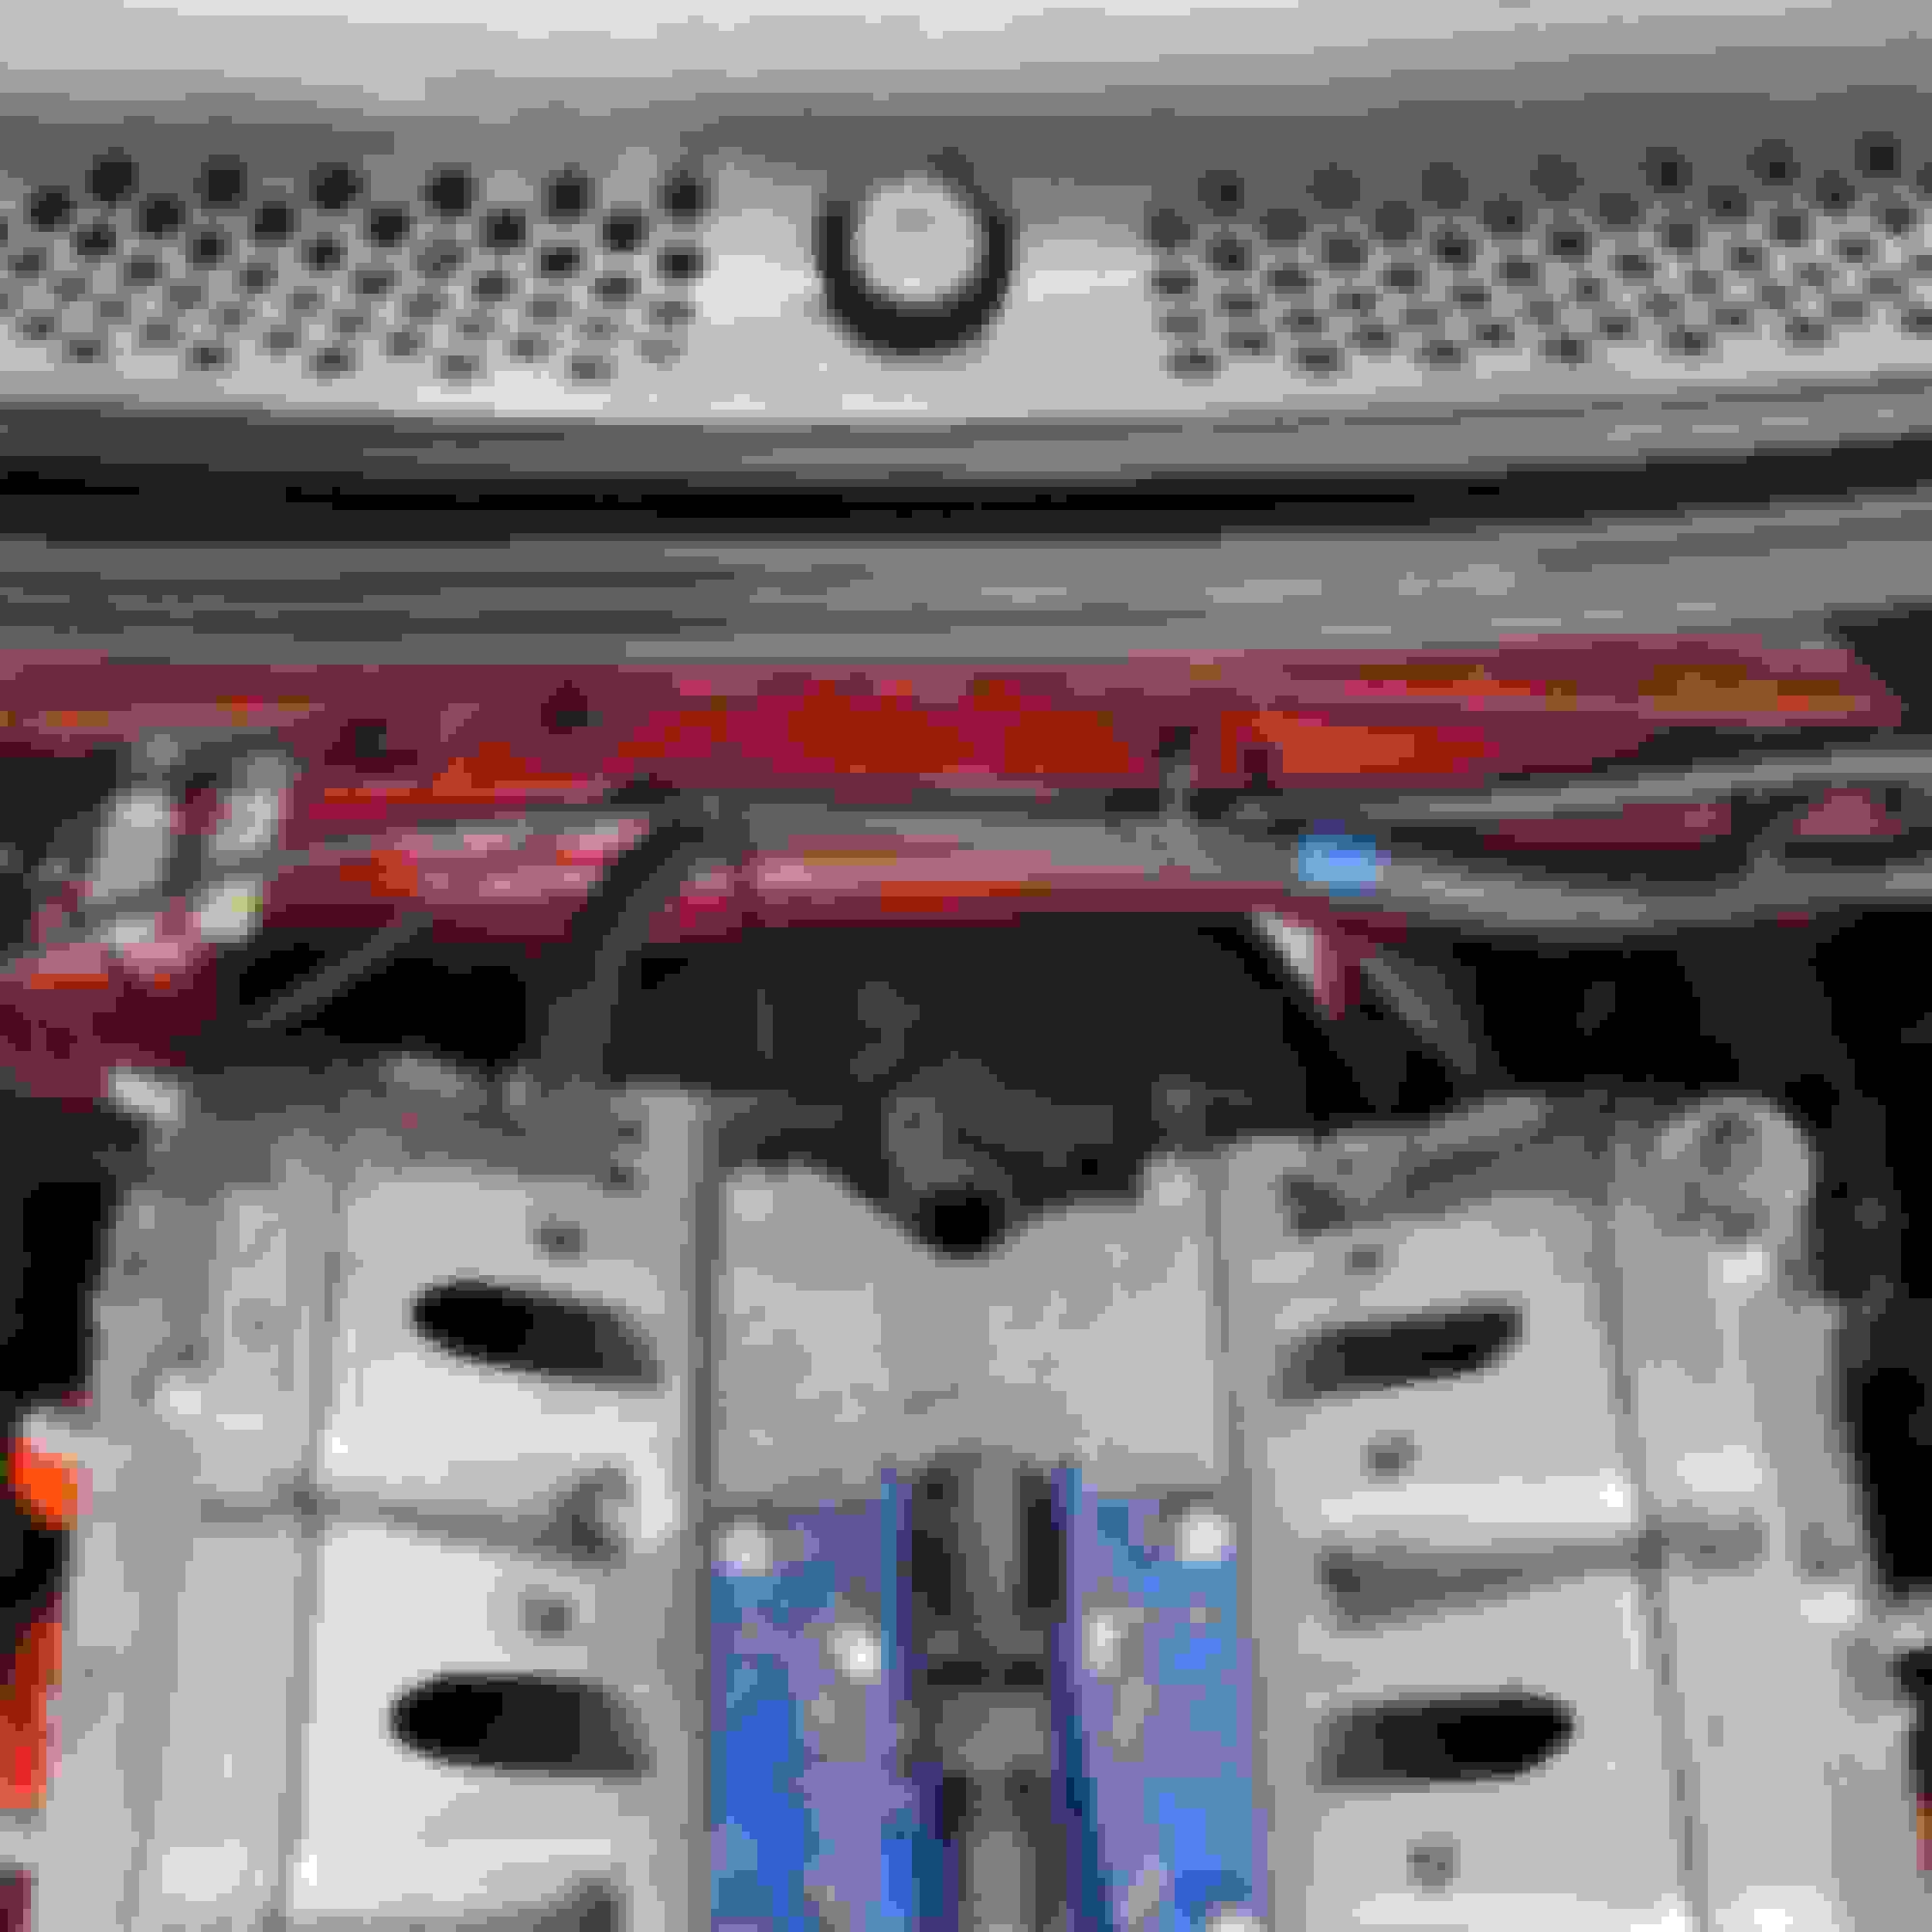
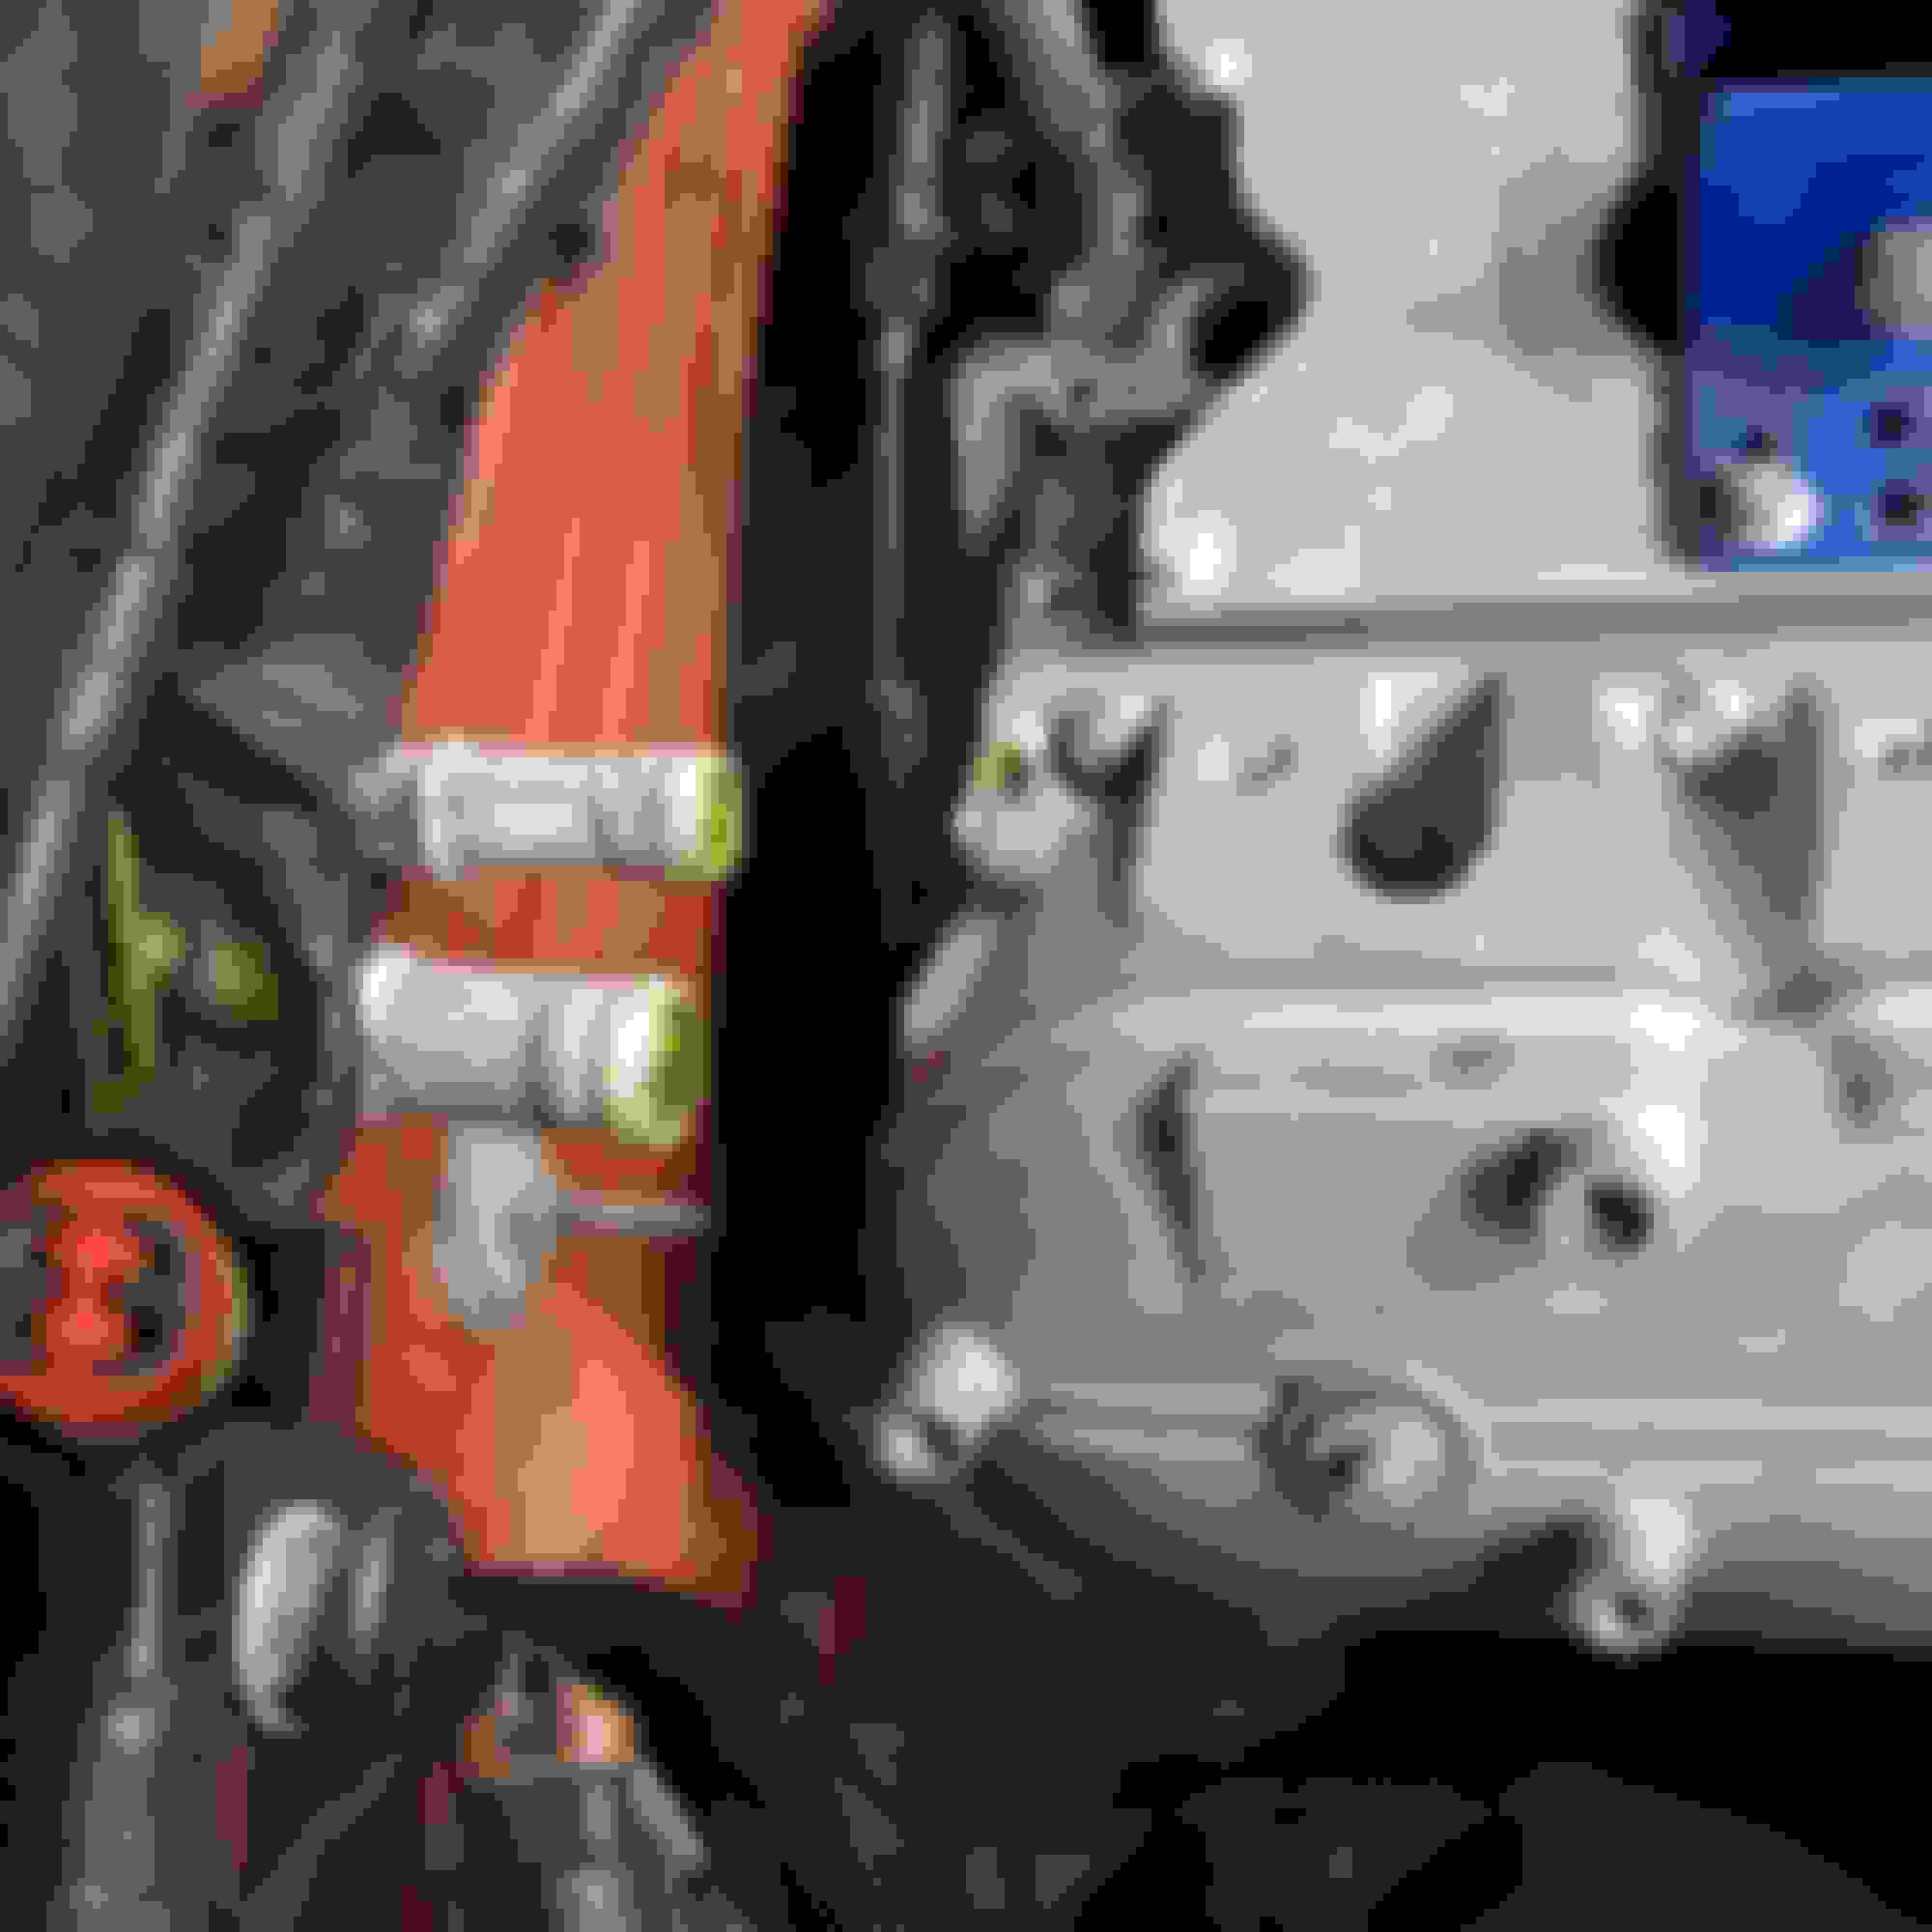
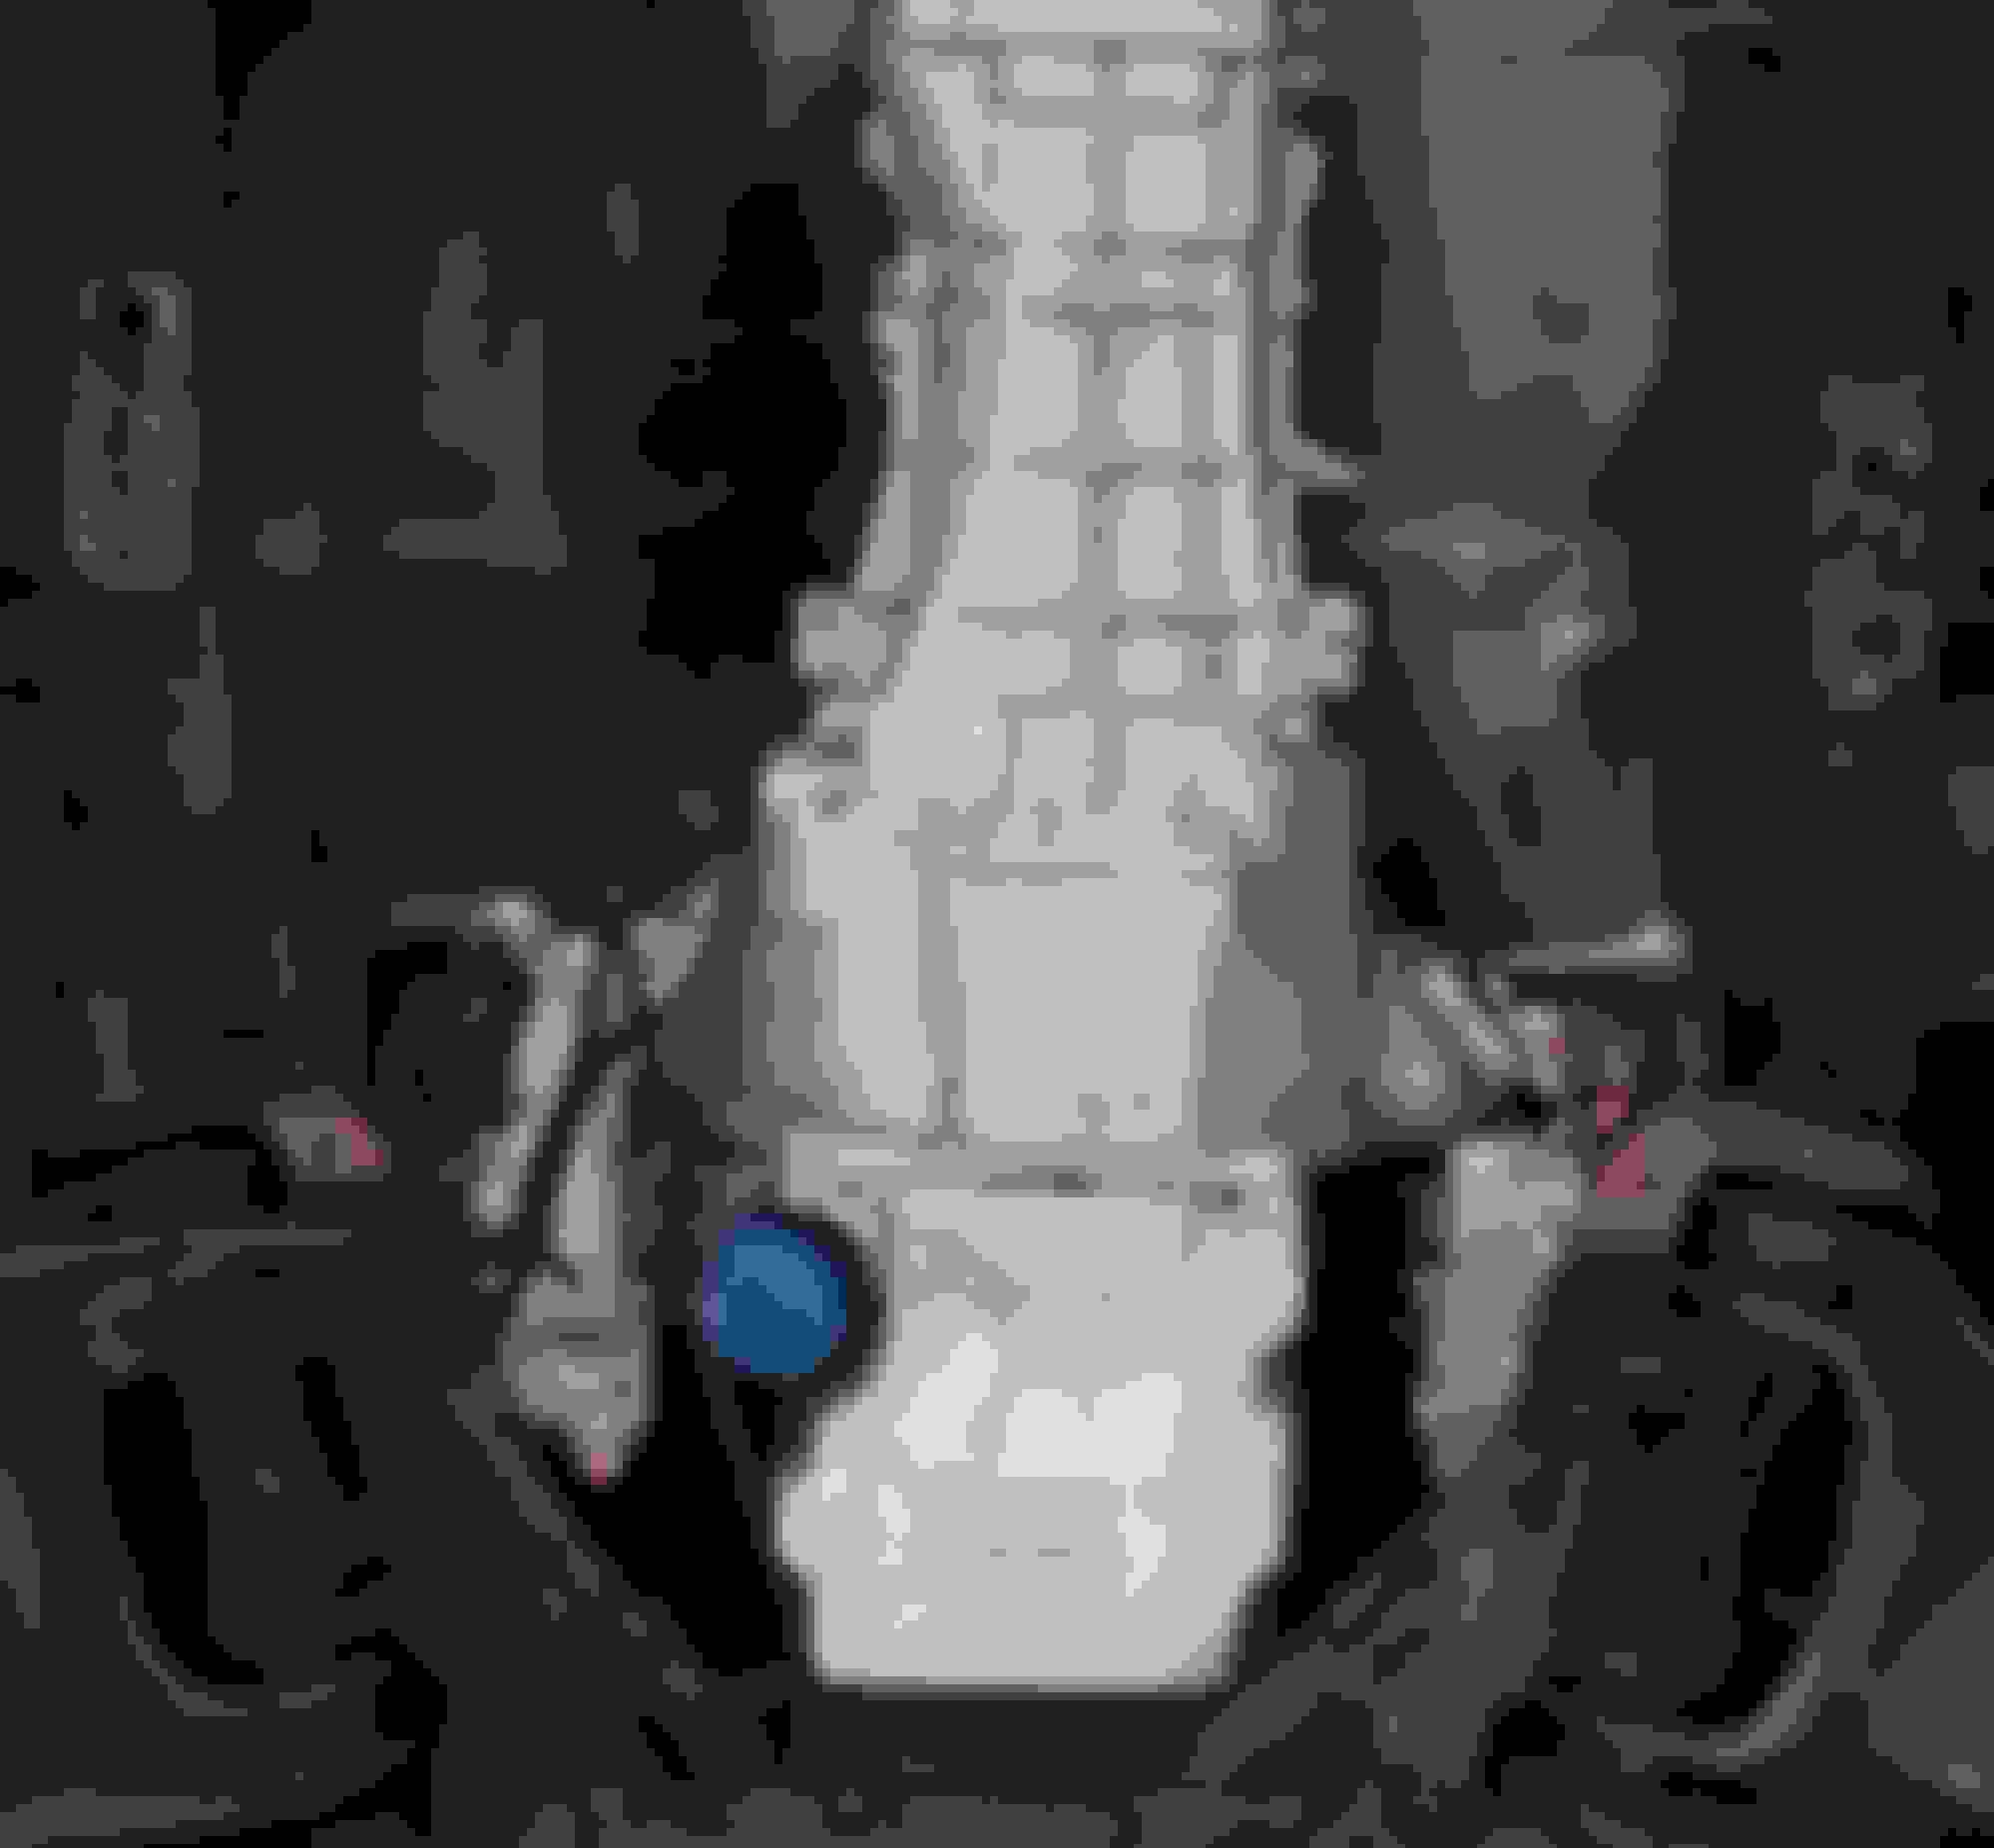
I dug up some fitment reference photos for you regarding the install of a 4L80 behind and LS engine in a 98' SN95 Mustang using the Hooker engine brackets I mentioned...the only difference between this car and yours will be the transmission crossmember since yours bolts to the bottom of the floor...
I took a trip over CJponyparts' website and confirmed that the plates they supply in that kit possess the same attachment hole geometry as the UPR plates, which means they move the engine/transmission mating plane 1" further reward in the car than the stock 4.6L engine/transmission mating plane. That positioning scenario is going to greatly complicate your efforts to install the 4L80 in your car and provide you with more grief than what it's worth in my opinion.
I noticed that they also carry the new Hooker SN95 LS swap engine adapter plates on their site, which you may want to look at the image of to see the difference used for the attachment hole layout.
The Hooker plates divorce the engine mount hole pattern from the engine block hole pattern to position the LS engine block enginge/transmission mating plane in the stock 4.6L mating plane position (an inch forward from where yours is now).
The crankshaft height and inclination angle provided by this geometry replicates the stock 4.6L crankshaft geometry, including with the 4L80 transmission, so the need to massage the tunnel is greatly reduced. I hope you find this information helpful.
I took a look at the Hooker Plates that they have now and yeah it does look like it re-adjusts the engine within the engine bay up and forward.
I'm going to see if I can't make mounts that lower the engine a little further than it is now. I know if I move the engine forward too much, i'll have to notch the K-Member for the truck pan. Which needs to be changed anyway if I'm lowering the engine further.
I cut the OEM trans mounts out as they were what I initially believed to be causing me issues, but I plan on adding subframe connectors from MM or Stifflers and making a mount similar to yours to mount a custom made cross member.
The Hooker plates move the engine forward, but not up. The engine height is dictated by the thickness of the adapter plate itself, which is 1/4" in the case of the Hooker plates.
What they do however is move the mount itself closer towards the oil pan, along the surface of the mount, to allow the anti-rotation nub on the bottom of the stock
mod-motor mounts to properly engage the openings for them in the K-member. All the plates that marry the mount attachment and block attachment holes together require you to grind off the anti-rotation nub from the mounts, which defeats their purpose.
As I mentioned, the crankshaft height/inclination angle is the same as the stock 4.6L crank, and you don't need any lower than that to be able to get the 4L80 nicely installed into your car...as long as your bellhousing mating plane is moved back to the stock 4.6L location.
You are right about the oil pan constraints...I didn't have to make any compromises in that regard when designing the Hooker SN95 swap system components as I had the use of the Holley 302-2 oil pan to work with. Here's a few more reference shots that may me useful for you.
Yeah I'll definitely be fiddling around with the engine mounts here soon to see if I can get the drivetrain to sit more forward at least. No matter what, I'll have to grab a new oil pan, so I may pick up the Holley one since it also looks like yours sits flush with the bottom of the K-Member.
I did a ton of tape and corrugated tubing removal from the OEM chassis harness and have started to remove some connectors and circuits that I will not be using.
Things that I am removing:
-ABS Wheel Speed Sensors
-Fuel Pump Driver Module
-Inertia Switch
-EVAP System
-ABS Pump
-OEM PCM
-GEM
-PATS
-CCRM
-Fuel Tank Pressure Sensor
So far, I've removed both rear ABS wheel speed sensors as they were fairly easy to find and remove. I traced the passenger side ABS sensor to a Gray connector on the passenger side kick panel, and the Driver side went to a different connector on the driver side kick panel. I removed the wires and connectors entirely so that I can reuse them if I want to re-wire them for something else.
I bypassed the Fuel Pump Driver Module (FPDM) and Inertia switch fairly easily. The FPDM consists of 6 wires, 2 of which go to the fuel pump. 1 is from the Inertia switch, 1 is ground, then 2 go to the PCM.
Red/Black and Brown/Pink are what powers the Fuel Pump
Light Blue/Orange and White/Red come from the PCM
Black is Ground
Pink/Black comes from the Inertia Switch
Dark Green/Yellow is power from CCRM to the Inertia Switch
To bypass the inertia switch, I cut the Dark Green/Yellow wire going to the inertia switch, I also cut the Red/Black wire going to the Fuel pump and spliced those 2 together. The Dark Green/Yellow wire will now need to be cut at the CCRM and it will be used on Fuel Pump Relay switch pin 87 to turn the pump on from the PCM switch.
For the fuel pump ground, I cut the ground wire going to the FPDM and cut the Brown/Pink wire going to the fuel pump and spliced those together to supply ground to the fuel pump.
At this time, the FPDM wires that are unused (Light Blue/Green, White/Red) can be removed from the chassis harness. They will all go back to the gray connector at the passenger side kick panel in the front floorboard.
The fuel pump connector also has 3 wires that can be removed. Brown/White, Gray/Red and Red/Pink.
Red/Pink goes to the PCM
Brown/White and Gray/Red come from another source, unknown at this time.
I cut those wires at the grommet that goes through the trunk floor and pulled them from the chassis harness. They also go to the Gray connector in the passenger side kick panel.
So far, this is as far as I've gotten on that stuff for the rear portion of the harness. I started peeling back layers of tape to start the removal and bypassing of the GEM, and I can already tell it will be a pain in the ***. But I will be doing a small write up on how I bypassed it as well.
This is a extremely informative article, I will be using this for reference as I am in the process of swapping a 6.0 & 4l80e into an 01 V6 mustang. With the 4l80e I'm still unsure what I will do with fitting the transmission. I personally was going to shave the trans tunnel down the best I could until I could get a nice fit. I will be looking forward to seeing how it turns out for you. Keep up with the updates, it was a great read to reflect on while I attempt essentially the same swap.
I know wiring isn't everyone's strongest skill, but it's definitely not mine either. I'm just hoping to put something together similar to what is on LT1Swap.com. I plan on completing the chassis harness by Sunday as long as I don't have to order any extras.
I use excel daily, so I'll put something together in that in conjunction with colorful wiring diagrams from the paint program. I already made one that shows what I'll be doing for my wiring panel and starting circuit.
No problem, I'm a blind sheep when it comes to wiring, I am still a rookie at it to say the least lol. Do you have a link to the Lt1swap.com that you are using? I liked the way of using a sheet to show all the money into the build. I picked up a 6.0 and 4l80e out of a wrecked truck for $1,200, Took it to the scrapyard and got paid 300. So in all I managed to pay little to nothing for a 109k mile 6.0 and 4l80e that worked great while in the truck. I think I got a great deal getting it all for 1,200 but that may be because I got the truck from a relative. I'm currently in the process of cleaning up the block and repainting the valve colors etc. Just trying to make everything look good while it's out of the car and easy to do so. I am running the ls6 intake but It sits way too high and the original v6 hood will get in the way so I'm looking into a cowl hood to have one that has enough clearance for the intake, if not if not I suppose I'll just have to find another intake lol. I am just now starting to also tear apart the mustang to get ready to pull the engine, so I'm still a couple of months out from being done as it is a learning process for me and I'm sure I'll run into more than a few issues lol.
So I actually used multiple pages on LT1Swap to help with wiring things up. The most helpful things I was able to take away from it I will attach. I combined the PCM Pinout data into the excel sheet, but I also listed all the things needed to configure the 4l60e connector wiring to the 4l80e transmission off to the right side of the main table.
I am a data nut, so I tend to keep records of everything I do or purchase somewhere. I am in Workforce Management so I tend to analyze everything anyway. I also used to have to write instruction manuals that any joe schmo off the street can follow just in case someone has to fix something I built out in excel. It turns out that it actually comes in handy lol
All 4 bolts in my hood broke on disassembly so I will be ordering a 4" cowl hood anyway.
I took a trip over CJponyparts' website and confirmed that the plates they supply in that kit possess the same attachment hole geometry as the UPR plates, which means they move the engine/transmission mating plane 1" further reward in the car than the stock 4.6L engine/transmission mating plane. That positioning scenario is going to greatly complicate your efforts to install the 4L80 in your car and provide you with more grief than what it's worth in my opinion.
I noticed that they also carry the new Hooker SN95 LS swap engine adapter plates on their site, which you may want to look at the image of to see the difference used for the attachment hole layout.
The Hooker plates divorce the engine mount hole pattern from the engine block hole pattern to position the LS engine block enginge/transmission mating plane in the stock 4.6L mating plane position (an inch forward from where yours is now).
The crankshaft height and inclination angle provided by this geometry replicates the stock 4.6L crankshaft geometry, including with the 4L80 transmission, so the need to massage the tunnel is greatly reduced. I hope you find this information helpful.
thank you for this information. i am likely going to order the hooker plates to replace the UPR ones that i have already bought. i was measuring last night and it looked like i was going to have to beat the hell from the tunnel.
thank you for this information. i am likely going to order the hooker plates to replace the UPR ones that i have already bought. i was measuring last night and it looked like i was going to have to beat the hell from the tunnel.
I'm glad you saw the info. The design of the Hooker plates was arrived at from me coming up against the same fitment issues you guys experience putting your cars together. Whereas guys using universal type components have to suffer with the compromises that come with using such parts, my job is to design application-specific parts that overcome them by using all the fabrication, digitization and CAD tools at my disposal.
Any updates? Just now finishing up the wiring harness, and fuse block. All my pinouts are almost done. My main issue I've ran into now is the stock exhaust manifolds don't have clearance on the passenger side. Starting to irritate me lol. I'm starting to just think about running front exhaust as I do want to turbo the car down the road. I'd still have the exhaust dump before the rear end but just getting impatient lol.
The only update I have lately is that I grabbed an AJE K-Member and motor mounts. I gave up on the stock K-Member, and i'm just going to grab a set of speed engineering headers.
I had to move my wiring and stuff out to the garage before christmas, so it's been too cold in my garage to do anything. It's finally starting to be a consistent 50 degrees, which is manageable. Now I can start doing more stuff. But there's quite a few things I have to address before I can get there.
My garage needs a serious cleaning. I have too much "Stuff" in there so I'm going to take a few weekends soon to clear it out. Got a couple credit cards that I need to pay off especially since me and my wife both got decent raises. That'll open up a lot about 1k per month to put towards the car.
Some plans have changed, I think I'm going to stray away from the 4L80e and get a CD009 6-speed from a G35/350z. I can get the trans, adapter and associated stuff for about the cost of a used T56. I was going to slowly build everything and do it right the first time like new LCA's, new rear suspension, coilovers etc. But that all takes alot of money and time. I'm also getting rid of a lot within the electrical system. I may get rid of the amps, factory radio and speakers as well as A/C/Heater box. Being in Ohio, I don't know if that's a great idea since the weather changes so often and it can get pretty damn hot or cold, but I'm still not 100% positive if I'll delete it or keep it.
Hey been following your build looks great. I know this comes a little late but I just wanted to add my 2 cents about the motor mounts and stock K member. I finished my lq4/4l80e in an 01 v6 in November and I used stock 4.6 mounts on plates I made that look just like the upr ones. I cut the stock trans mounts off the body and did have to hammer the trans tunnel a bit but not much. Particular areas were for the shifter bracket and electrical plug. My cooler lines fit perfect with 90 degree an fittings. I then rewelded the stock trans mounts with a stock tr3650 mount, which I re-drilled to fit the 4l80, back to the body (maybe 8 or so inches back from original). Not sure of my driveline angle but it looked pretty much stock. I even used the stock driveshaft with a new slip yoke on it. Only place I had some clearance issue was my pan hit one corner of my crossmember a bit so I hammered in the crossmember. If I did it again I would've just cut it. Sorry so long winded but I hope that helps a bit. Everything on mine looks almost like it was meant to be there. Close to the firewall but not too close. Any questions I hope I can help.
Hey been following your build looks great. I know this comes a little late but I just wanted to add my 2 cents about the motor mounts and stock K member. I finished my lq4/4l80e in an 01 v6 in November and I used stock 4.6 mounts on plates I made that look just like the upr ones. I cut the stock trans mounts off the body and did have to hammer the trans tunnel a bit but not much. Particular areas were for the shifter bracket and electrical plug. My cooler lines fit perfect with 90 degree an fittings. I then rewelded the stock trans mounts with a stock tr3650 mount, which I re-drilled to fit the 4l80, back to the body (maybe 8 or so inches back from original). Not sure of my driveline angle but it looked pretty much stock. I even used the stock driveshaft with a new slip yoke on it. Only place I had some clearance issue was my pan hit one corner of my crossmember a bit so I hammered in the crossmember. If I did it again I would've just cut it. Sorry so long winded but I hope that helps a bit. Everything on mine looks almost like it was meant to be there. Close to the firewall but not too close. Any questions I hope I can help.
Thanks SwapStang. I already cut out the trans cross member mounts because I came into all of the same issues that you did. I really just decided to make it easier on myself and use the AJE kmember that others have used.
I will build crossmember mounts on the inner SFC's that I plan on getting from Stifflers with their fit system. I figure I'll set it up very similar to the OEM fox trans mount to make it simple and easily removable. I wasn't able to save my trans mounts from the body as I didn't cut them off quite as cleanly as I had hoped.
I got lucky I had cut them so close they were still in good shape. Another thing to mention is whatever is left on the body I did grind off to avoid any other interference. I wanted to get a new K-member but it wasn't in my budget so I had to use what I had laying around. I'm curious as to why you removed so much of the mustang body harness. Are you just trying to lighten the car up?


 11-28-2017, 06:56 AM