i say go for it. to me its the best looking option out there. and it just so happens that its the cheapest.
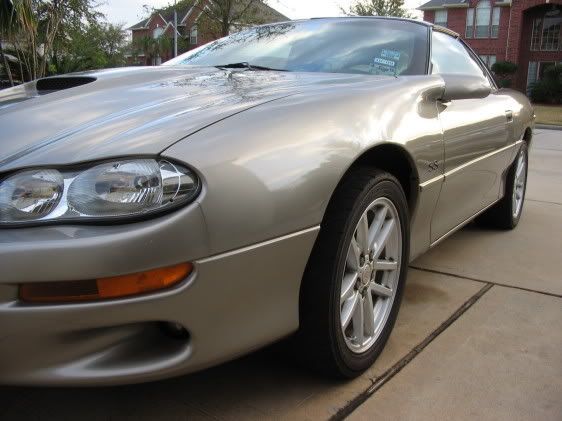

whistler cam out perfect(pics!)
Thread Starter
TECH Addict
Joined: Mar 2009
Posts: 2,099
Likes: 3
From: Texas/Afghanistan
ok so yesterday was like perfect weather for painting. dry, medium temp, low humidity etc etc. which means i HAD to do the headlights. sooo already had all the materials ready to go. my materials list was:
1x krylon fusion black paint
1x heat gun
1x oven(lol duh)
1x butter knife...yes butter knife is the best ill explain later
2x 1000 grit wet/dry sand paper sheets
1x pair of work gloves
1x roll of medium adhesive 3m masking tape
4x sheets of computer paper
1x scotch brite pad(i hear steel wool works too)
1x clear silicon RTV
1x 1/4" drive ratchet and 10mm socket
1x pair of *********
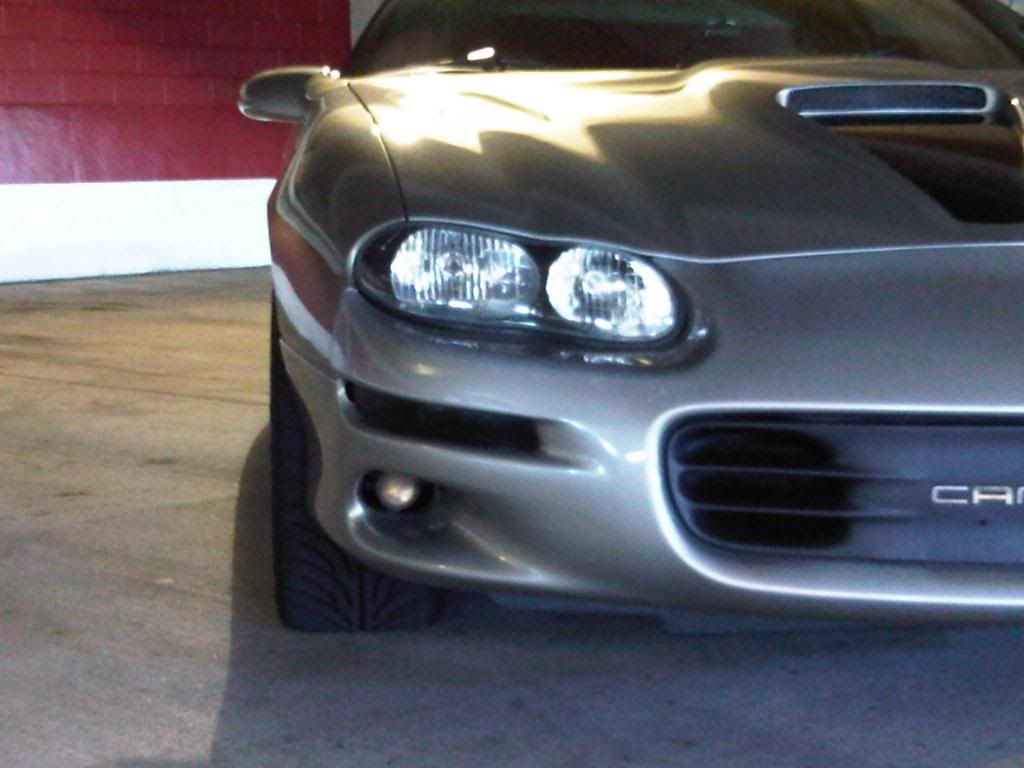
ok i started by removing the 10mm bolt that holds each headlight on and removed the connectors to each light bulb. once the light is off u can set aside the bulbs in a safe place making sure not to touch the glass with your skin. then i removed each of the 4 clips that secure the lense. next i tried using a heat gun to soften the glue but found it took way too long this way so i went ahead and stuck the first one in the oven for 20 min @ 200. worked perfectly for me. once the headlight was done i pulled it out and used a butter knife to separate the lense from the housing. i found the butter knife worked the best becuase the round edges dont scratch up the plastic so bad. then while the 2nd light was in the oven i started masking the first. heres what it looked like:
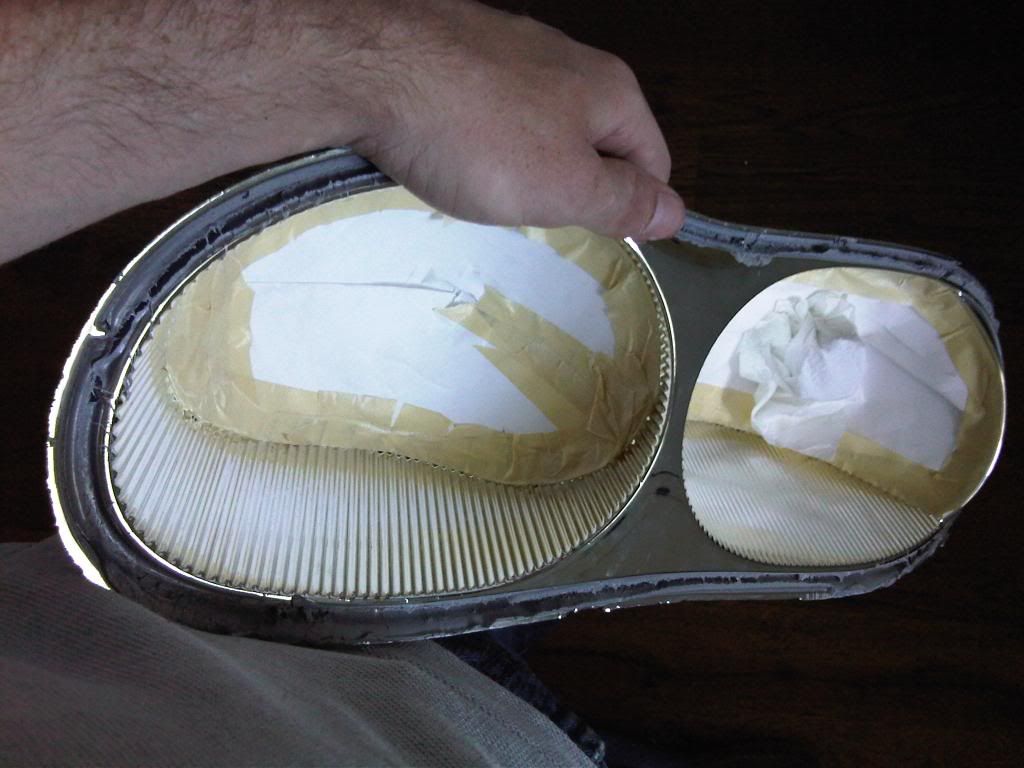
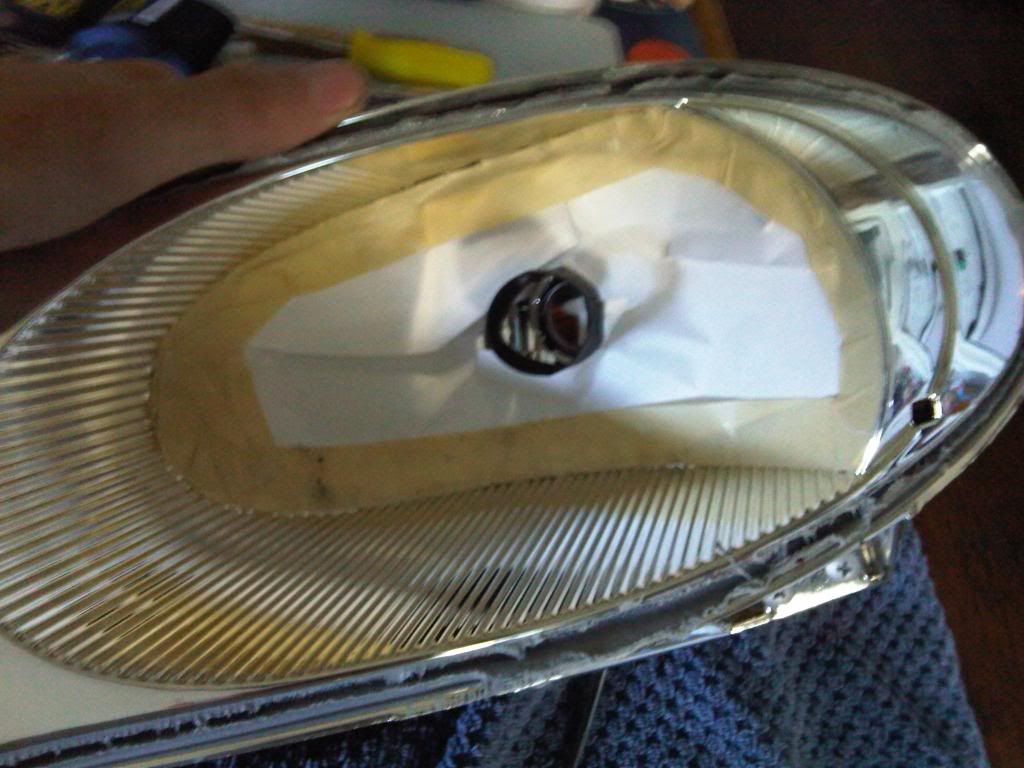
i used printer paper to make a cut out to lay inside the concave part of the light which reduces the contact patch of the adheisve. which reduces your chances of pulling up reflective material when removing the masking.
once both lights had the inner parts masked i grabbed my 1000 grit paper and scotch brite pads and began scuffing up the painting surfaces. even though krylon fusion technically requires no sanding i decided it would be a good idea anyway. once everything was gently wet sanded i finished masking the outer edge of the lights. here is a pic just after i applied the first coat:
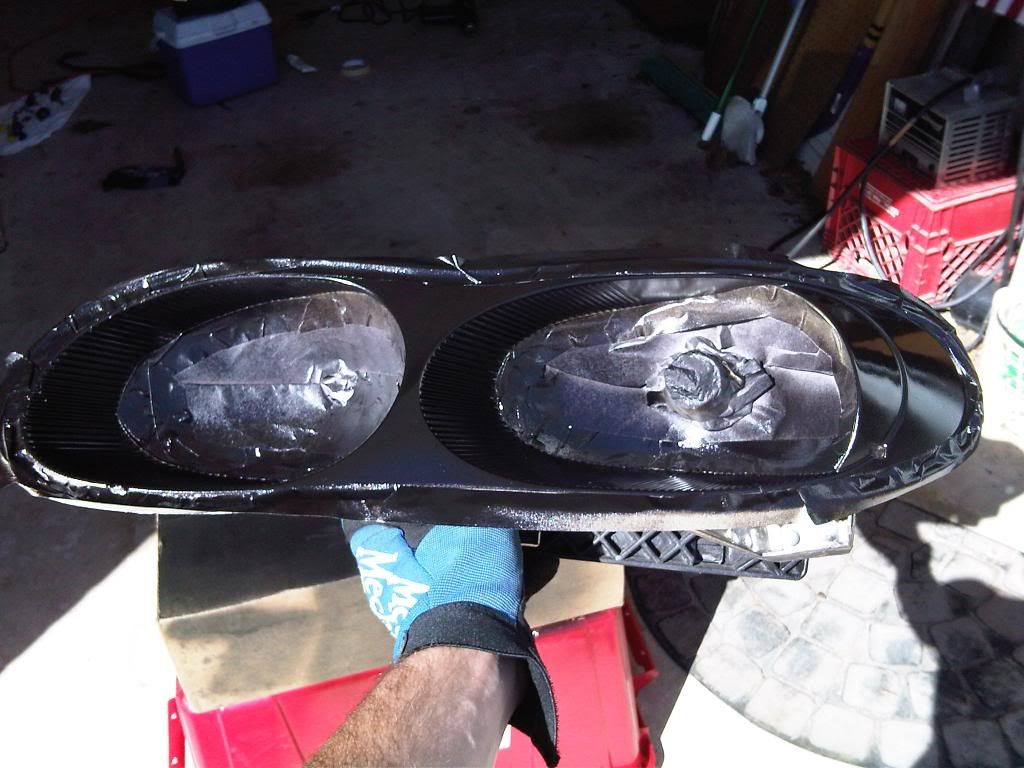
krylon fusion. made the job nice and easy:
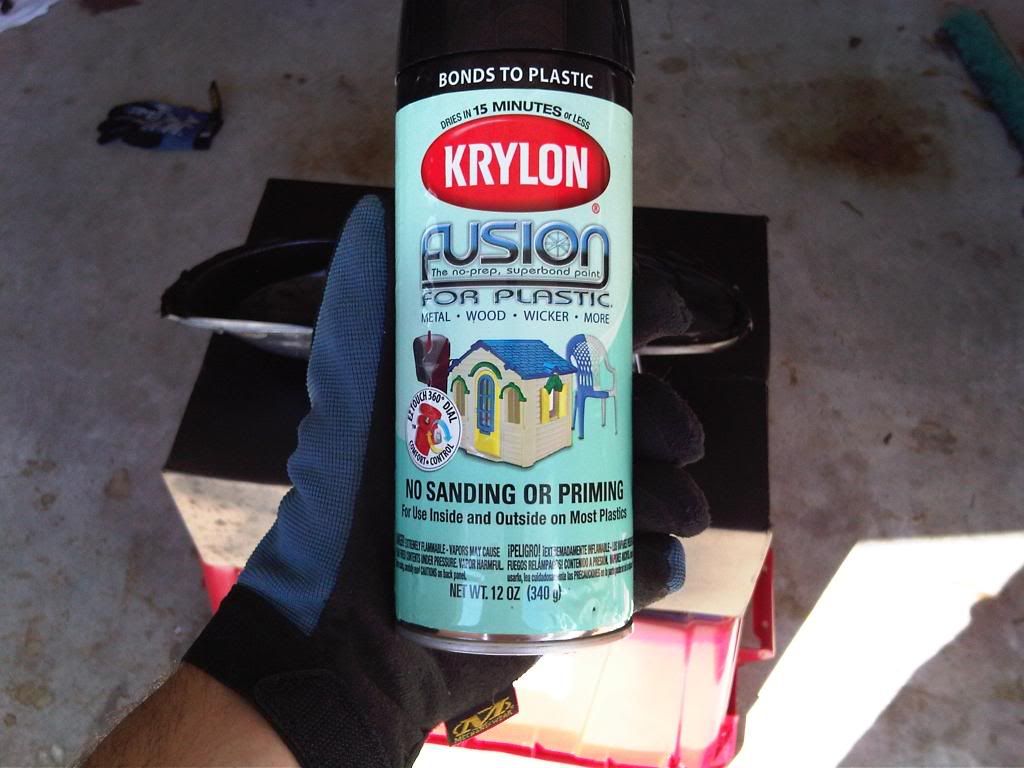
i applied 2 even, generous coats allowing 15 min of dry time between each. then i let each light sit for an additional 20 min before pulling the tape. when putting the lenses back on i used a clear silicon RTV. on one of my lights the glue was very sloppy after i pulled the two pieces apart. but thankfully i had a heat gun handy and warmed up the old glue slightly and cleaned it up enough to get a good seal. here is a picture of the first light freshly put back together:

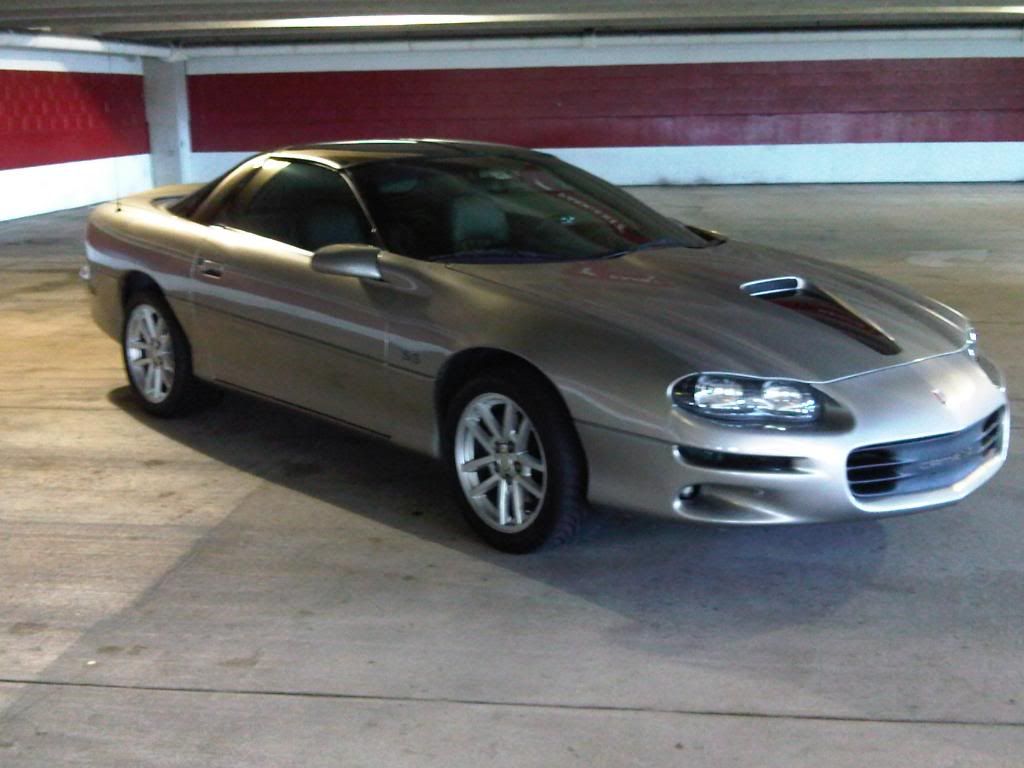
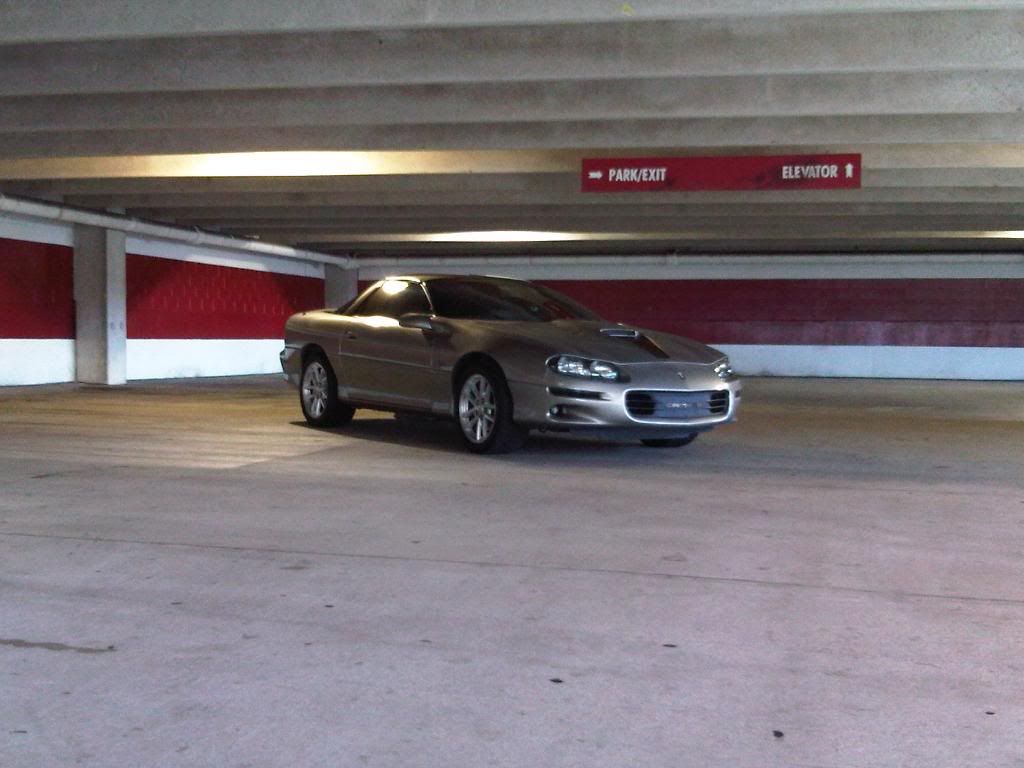
and here is the finished product installed on the car:
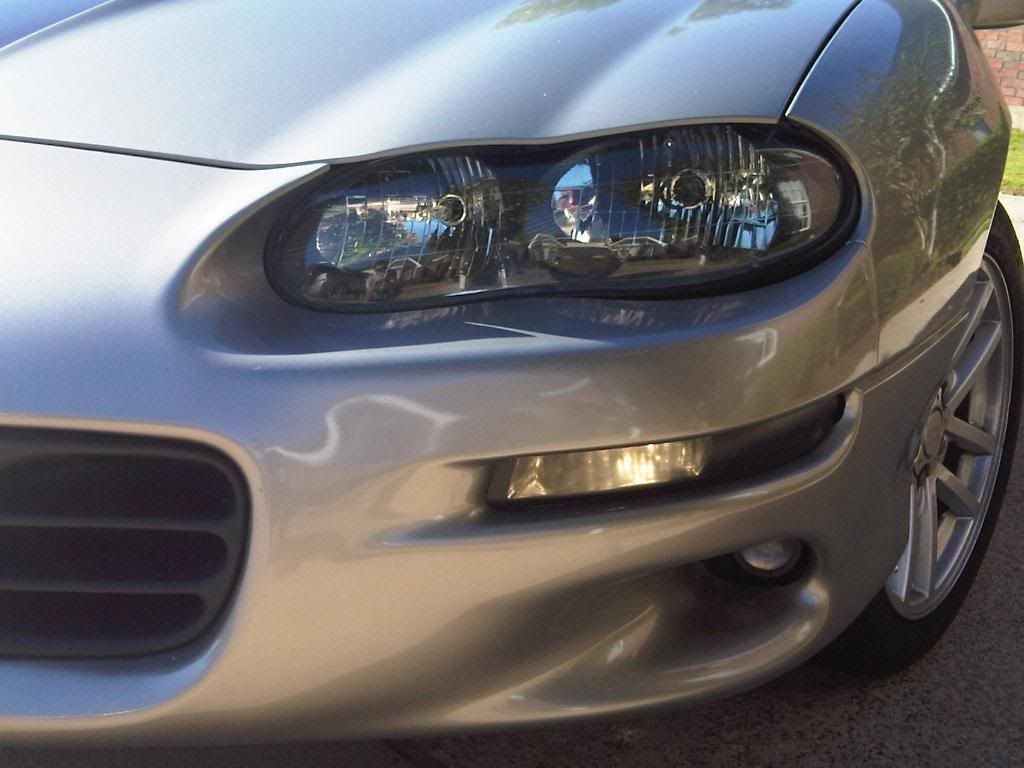
also i found the best thing to have during this job was a pair of healthy *********. if u r afraid of ******* your lights up then this job is going to take forever. i found that when working with these things they are a whole lot stronger than i had originally thought. at first i was afraid of breaking something till i actually got the first light apart and looked at everything, and its all really well made and not brittle at all.
1x krylon fusion black paint
1x heat gun
1x oven(lol duh)
1x butter knife...yes butter knife is the best ill explain later
2x 1000 grit wet/dry sand paper sheets
1x pair of work gloves
1x roll of medium adhesive 3m masking tape
4x sheets of computer paper
1x scotch brite pad(i hear steel wool works too)
1x clear silicon RTV
1x 1/4" drive ratchet and 10mm socket
1x pair of *********
ok i started by removing the 10mm bolt that holds each headlight on and removed the connectors to each light bulb. once the light is off u can set aside the bulbs in a safe place making sure not to touch the glass with your skin. then i removed each of the 4 clips that secure the lense. next i tried using a heat gun to soften the glue but found it took way too long this way so i went ahead and stuck the first one in the oven for 20 min @ 200. worked perfectly for me. once the headlight was done i pulled it out and used a butter knife to separate the lense from the housing. i found the butter knife worked the best becuase the round edges dont scratch up the plastic so bad. then while the 2nd light was in the oven i started masking the first. heres what it looked like:
i used printer paper to make a cut out to lay inside the concave part of the light which reduces the contact patch of the adheisve. which reduces your chances of pulling up reflective material when removing the masking.
once both lights had the inner parts masked i grabbed my 1000 grit paper and scotch brite pads and began scuffing up the painting surfaces. even though krylon fusion technically requires no sanding i decided it would be a good idea anyway. once everything was gently wet sanded i finished masking the outer edge of the lights. here is a pic just after i applied the first coat:
krylon fusion. made the job nice and easy:
i applied 2 even, generous coats allowing 15 min of dry time between each. then i let each light sit for an additional 20 min before pulling the tape. when putting the lenses back on i used a clear silicon RTV. on one of my lights the glue was very sloppy after i pulled the two pieces apart. but thankfully i had a heat gun handy and warmed up the old glue slightly and cleaned it up enough to get a good seal. here is a picture of the first light freshly put back together:
and here is the finished product installed on the car:
also i found the best thing to have during this job was a pair of healthy *********. if u r afraid of ******* your lights up then this job is going to take forever. i found that when working with these things they are a whole lot stronger than i had originally thought. at first i was afraid of breaking something till i actually got the first light apart and looked at everything, and its all really well made and not brittle at all.
Trending Topics
LS1 Tech Stories
The Best V8 Stories One Small Block at Time

Gas Monkey Built a 6-Wheel Ferrari Testarossa With a Corvette LT4 Engine
Verdad Gallardo
7 Most Reliable High-Performance Engines GM Has Ever Built
Verdad Gallardo
Amazing '71 Camaro Restomod Is Modern Muscle Car Under the Skin
Verdad Gallardo
6 Common C5 Corvette Failures and What's Involved In Repairing Them
Pouria Savadkouei
Retro Modern Bandit Pontiac Trans AM Comes With Burt Reynolds' Autograph
Verdad Gallardo
Top 10 Greatest Cadillac V Series Performance Models Ever, Ranked
Pouria Savadkouei
Top 10 Most Powerful Chevy Trucks Ever Made!

Hennessey's New Supercharged Silverado ZR2 Has 700 HP
Verdad Gallardo
Coachbuilt N2A Anteros Is an LS2-Powered C6 Corvette In Italian Clothes
Verdad Gallardo Thread Starter
TECH Addict
Joined: Mar 2009
Posts: 2,099
Likes: 3
From: Texas/Afghanistan
ok so ive been wanting to run a different bulb for a while now. especially now the whistler mod has been done. but i don't really see the logic in paying for HID's. the stock ones are ok but i really don't like the yellow tint they have to them. i was thinking sylvania silverstars but honestly i can't make up my mind. anybody got .02 they can through my way? pics?
TECH Junkie
Joined: Oct 2009
Posts: 3,551
Likes: 2
From: Rutherford, North Carolina
'99 Camaro, Moser Drag Axles, Projector Headlights, 17" SS's, Corvette Strips, K&N Everything, Zoom Stage II, Eibach Lowerin Springs, Nitto NT555, Berger Panel
looks good, wtf is it called the "whistler mod" for? Im a little new to the F-bodys.
Any way, I would just drop the $60 bux or so for the HIDs dude, its 1000 times difference. May not be that important to cars, but GSXR headlights suck as it is, a buddy of mine did HIDs on his same model GSXR and its night and day. For as little the cost is just do it and run them yourself so you dont pay the 2hrs of labor. Just my opinion
Any way, I would just drop the $60 bux or so for the HIDs dude, its 1000 times difference. May not be that important to cars, but GSXR headlights suck as it is, a buddy of mine did HIDs on his same model GSXR and its night and day. For as little the cost is just do it and run them yourself so you dont pay the 2hrs of labor. Just my opinion

I'm glad they came out for you man. They look good. I let a guy do my whistlers for me and they looked that good to me at first. After the lights were on for a little while his fingerprints (that I didn't know were on the inside of the lense's) turned brown and visible. It looked cloudy when you were close to them. I found a guy with a 98 V6 that wanted to trade me his stockers, so I just got done cleaning those up.