


Datsun 260Z LSA Swap
Thread Starter
On The Tree


Joined: Nov 2023
Posts: 109
Likes: 139
From: South of sweden
Hello,
I made a thread about my LSA swap in my Datsun 260z on a more Nissan dedicated forum but it seems a bit "sleepy".
As builds goes on i need some advice but they are readers no writers so.... is it ok to post here?
I'm half way thru the swap so a lot is already made but i had an idea of copy the tread here(text and pics) if its ok with moderators.
Thanks
Christian
Gothenburg
Sweden
Thread Starter
On The Tree
Joined: Nov 2023
Posts: 109
Likes: 139
From: South of sweden
"Hello everyone,
I was thinking of starting a thread about my LSA swap but i know there are several but if you are interested i'll post😀.
I have a 260Z bought three years ago, drove it with the Inline 6 for two years.
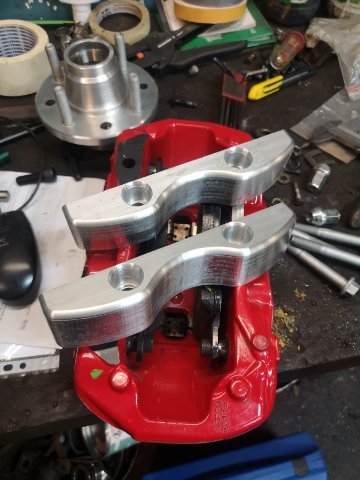
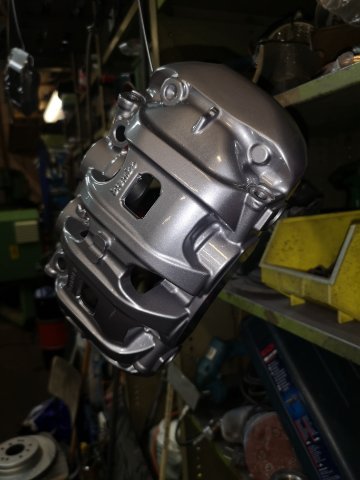
I started with the brakes as they were not so good so to speak.....
I bought Porsche boxter S calipers from a 2016 and discs from a BMW F30 335i made new brackets and twin master cylinders.
At first i made new hubs in aluminium but have now changed to hubs from a S13 as i had some flex that made my brakes a bit unpredictable 😱.


I was thinking of starting a thread about my LSA swap but i know there are several but if you are interested i'll post😀.
I have a 260Z bought three years ago, drove it with the Inline 6 for two years.
I started with the brakes as they were not so good so to speak.....
I bought Porsche boxter S calipers from a 2016 and discs from a BMW F30 335i made new brackets and twin master cylinders.
At first i made new hubs in aluminium but have now changed to hubs from a S13 as i had some flex that made my brakes a bit unpredictable 😱.
Thread Starter
On The Tree
Joined: Nov 2023
Posts: 109
Likes: 139
From: South of sweden
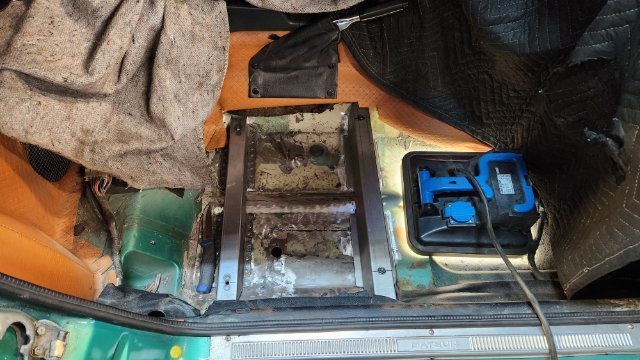
"As i'm half way in in this swap things that i post is mods that i already have done  .
.
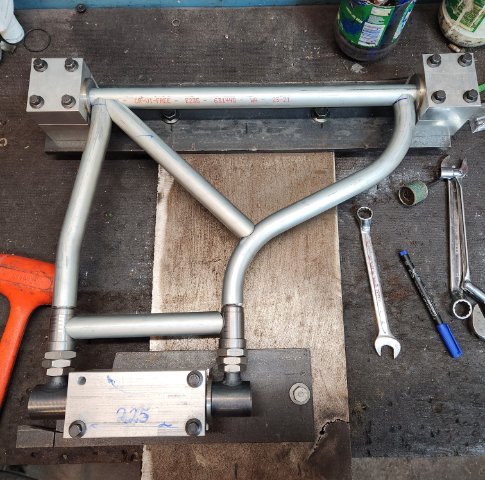
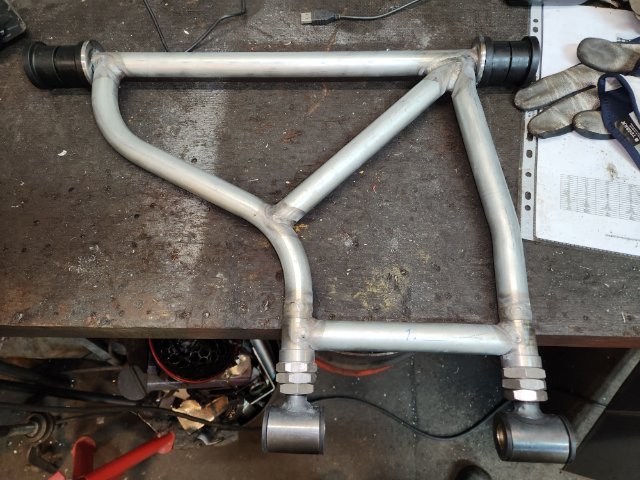
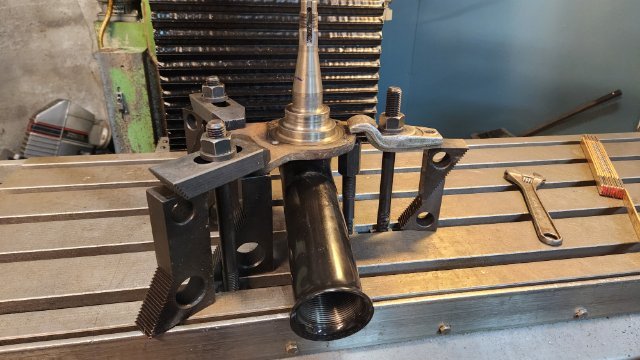
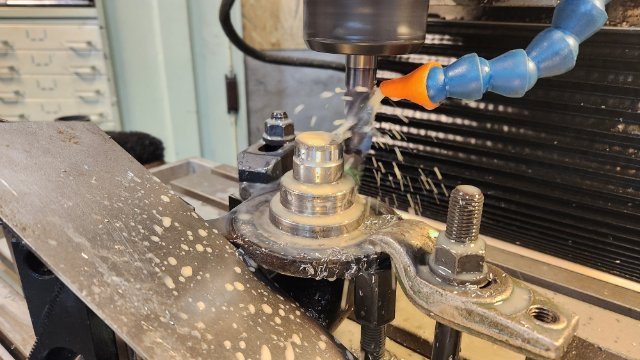
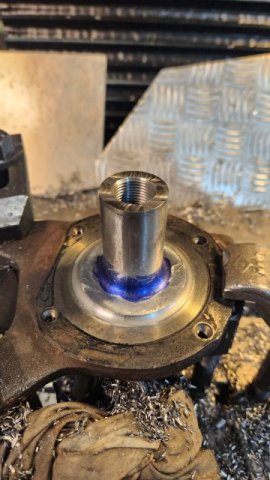
Another thing i did when i did the brakes was building new rear control arms, narrowed down track with with 16mm/5/8" to accommodate modified Rota wheels.
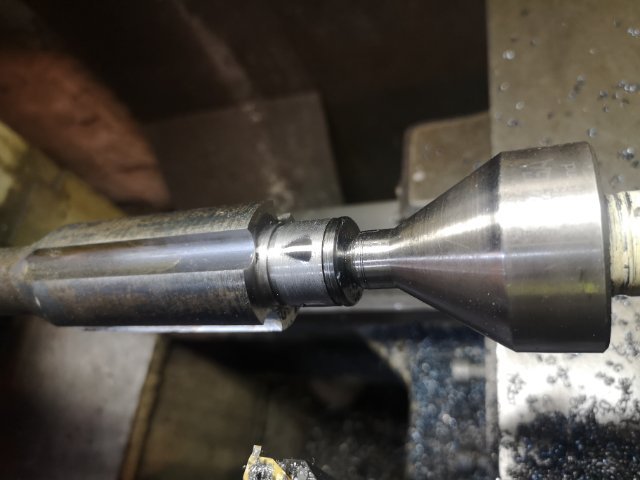
That included shorter half shafts, narrowed in my lathe, they were hard so i have to buy some expensive inserts/tools.
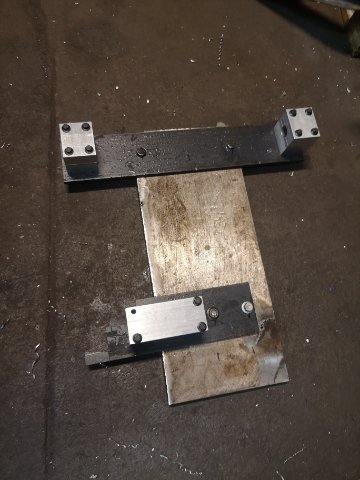
I also made a jigg to get angles correct when welding.
They are now adjustable.
I'm going polyurethane bushings as i want this to be a fast road car and not a track car only.
With them i could go with the R180 for last summer to sort out the brakes.
With the now mounted R200 i have to make new ones again🤣.
/Christian
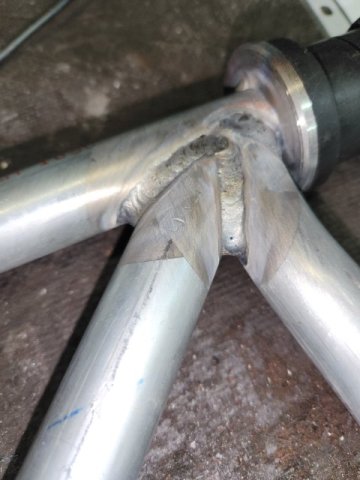
.Another thing i did when i did the brakes was building new rear control arms, narrowed down track with with 16mm/5/8" to accommodate modified Rota wheels.
That included shorter half shafts, narrowed in my lathe, they were hard so i have to buy some expensive inserts/tools.
I also made a jigg to get angles correct when welding.
They are now adjustable.
I'm going polyurethane bushings as i want this to be a fast road car and not a track car only.
With them i could go with the R180 for last summer to sort out the brakes.
With the now mounted R200 i have to make new ones again🤣.
/Christian
Thread Starter
On The Tree
Joined: Nov 2023
Posts: 109
Likes: 139
From: South of sweden
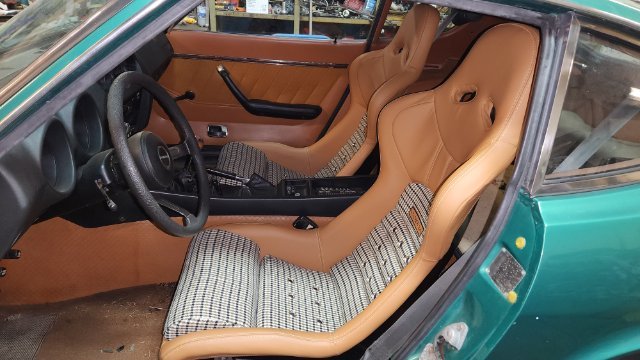
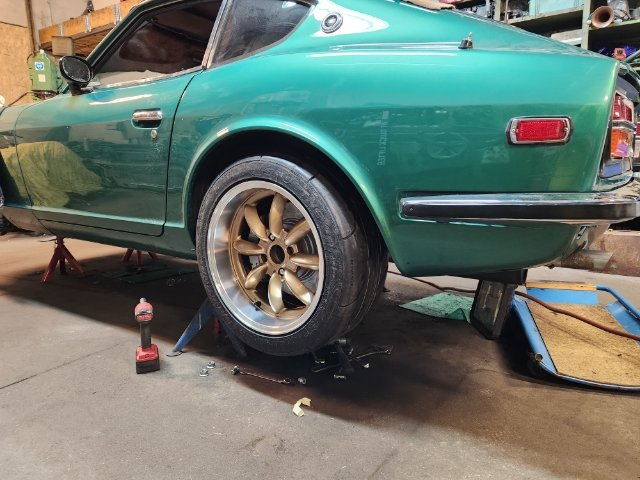
"With new tires and shocks (BC) i decided to swap out the seats as i was all over the inside 😁.
Wheels were Rota RBs that i widened rear 3/4 and front is going to be a tad narrower to get a proper scrub radius.
Tires are Nankang 255/40-17 and front is 225/45-17.
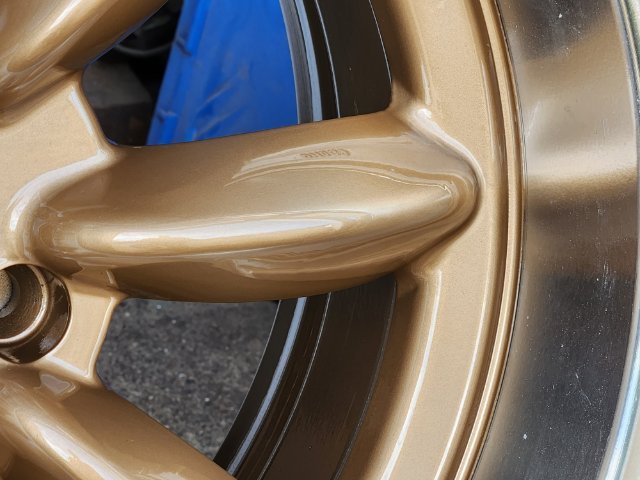
Painted gold for that 70ies look😎
Rear are 9.5 wide and front will be 7.5.
Front hubs are Nissan S13 (modified struts) as i got some not so nice feel in my break pedal, had some flex in the old set up that made the travel in the pedal is a bit longer after a hard turn.
The seats are Cobra Nogaro, super help from these guys.
Comments are welcome good or bad.
Have a nice weekend👍
Christian

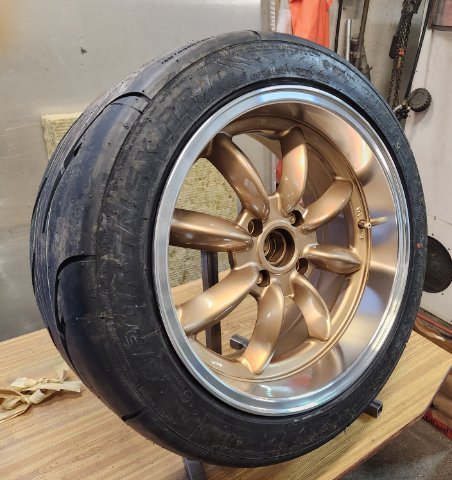

Wheels were Rota RBs that i widened rear 3/4 and front is going to be a tad narrower to get a proper scrub radius.
Tires are Nankang 255/40-17 and front is 225/45-17.
Painted gold for that 70ies look😎
Rear are 9.5 wide and front will be 7.5.
Front hubs are Nissan S13 (modified struts) as i got some not so nice feel in my break pedal, had some flex in the old set up that made the travel in the pedal is a bit longer after a hard turn.
The seats are Cobra Nogaro, super help from these guys.
Comments are welcome good or bad.
Have a nice weekend👍
Christian
Thread Starter
On The Tree
Joined: Nov 2023
Posts: 109
Likes: 139
From: South of sweden
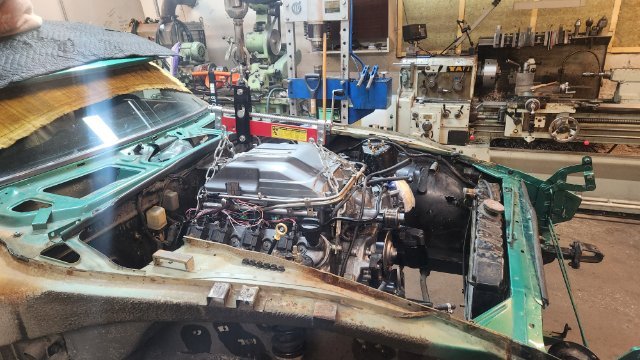
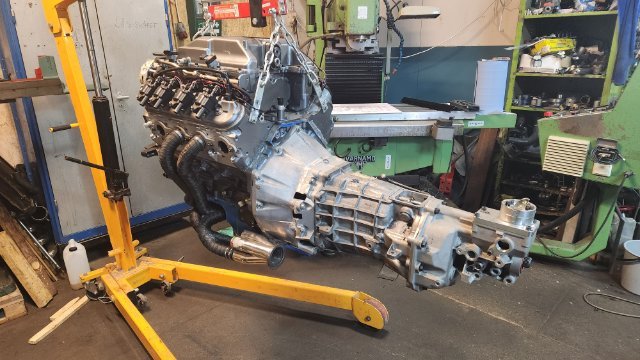
"i drove the 260 in to my garage in October and decided to do the swap😎
Old engine out and the new in, nope....
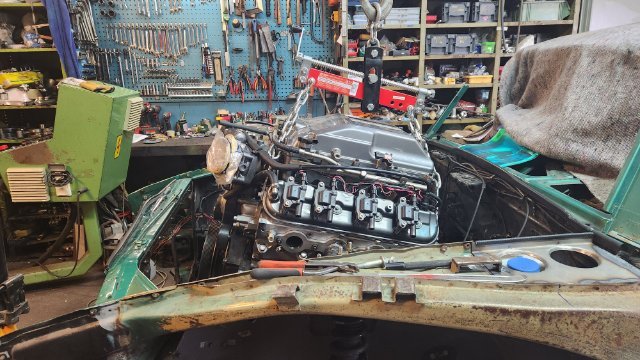
The LSA has been started on a pallet to see that everything works ok.
ECU is a E67 from a 2012 Camaro ZL1 and i added a FPCM to PWM control fuel pumps.
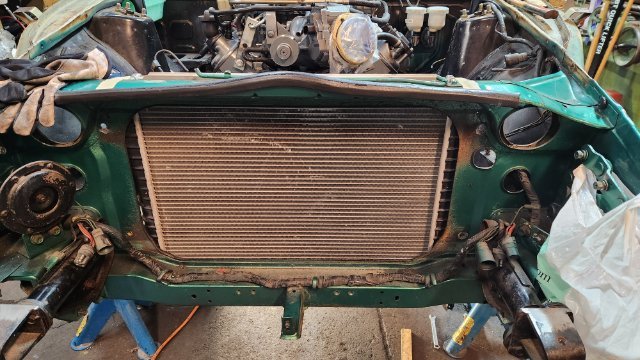
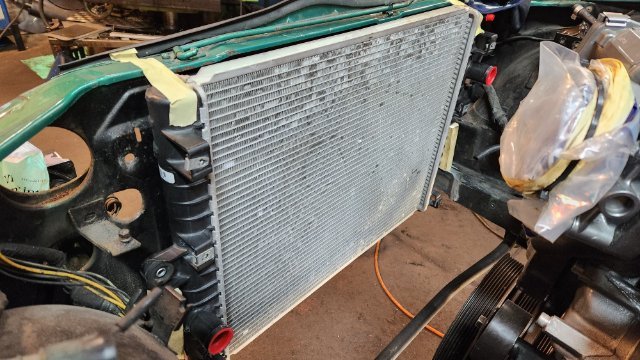
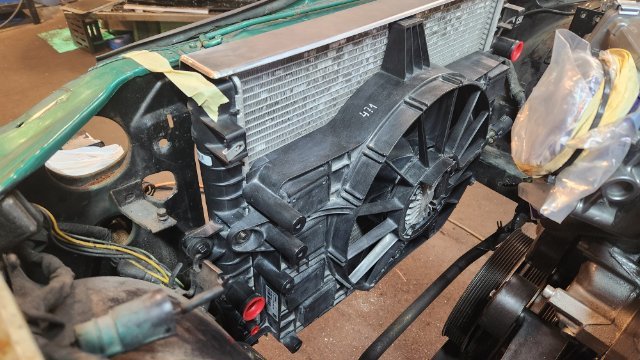
The radiator and fan is from a Corvette C7, also PWM controlled.
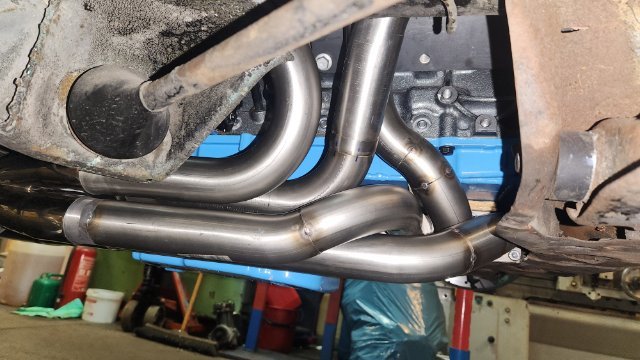
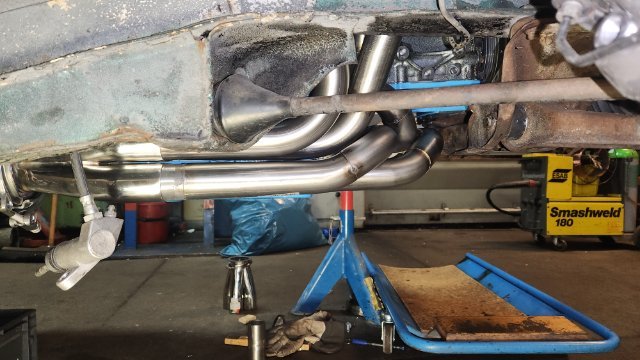
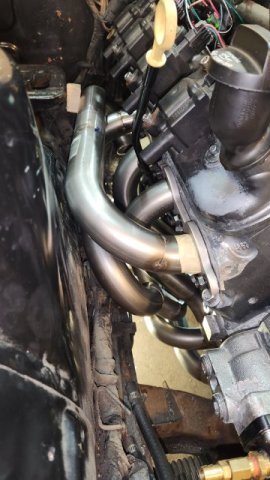
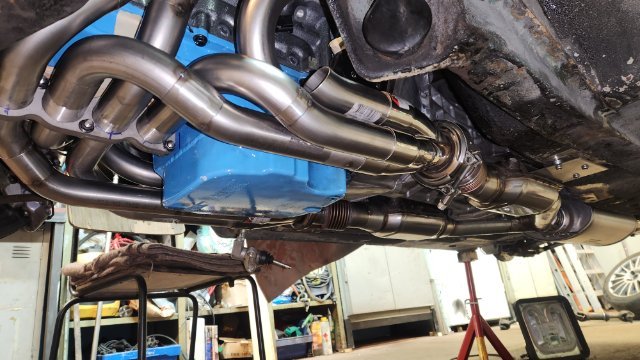
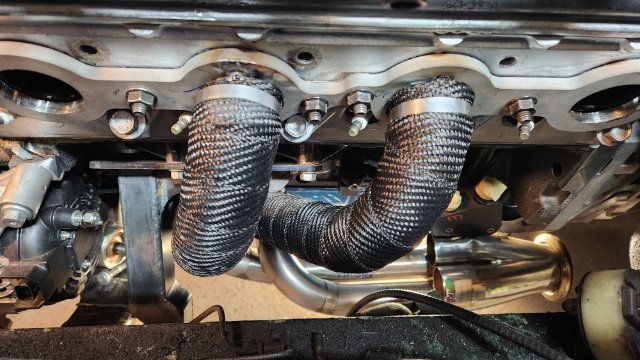
Homemade 180� headers.
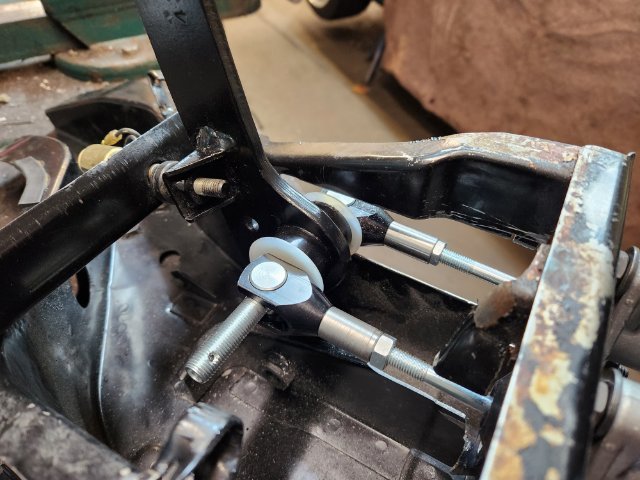
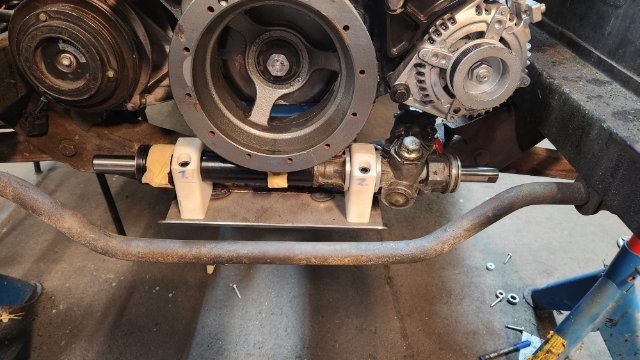
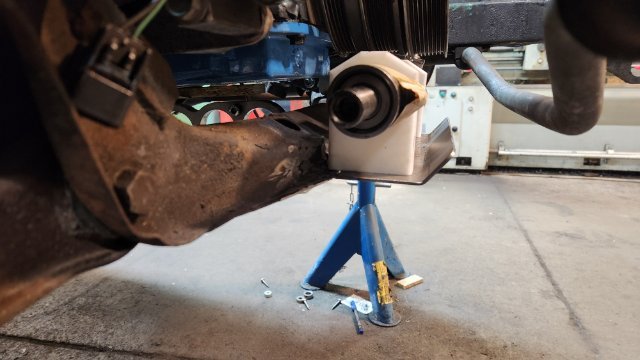
As the steering rack had some play in the bushings i decided to get a power steering rack, i went with a Vauxhall Corsa rack, flipped upside down and mounted in front of the cross member with homemade brackets, seems to work😀
Brackets on the pic is temporary plastic ones, needed to put the rack in the lathe for small adjustments.
Have a nice evening
Christian
Old engine out and the new in
, nope....The LSA has been started on a pallet to see that everything works ok.
ECU is a E67 from a 2012 Camaro ZL1 and i added a FPCM to PWM control fuel pumps.
The radiator and fan is from a Corvette C7, also PWM controlled.
Homemade 180� headers.
As the steering rack had some play in the bushings i decided to get a power steering rack, i went with a Vauxhall Corsa rack, flipped upside down and mounted in front of the cross member with homemade brackets, seems to work😀
Brackets on the pic is temporary plastic ones, needed to put the rack in the lathe for small adjustments.
Have a nice evening
Christian
Trending Topics
Thread Starter
On The Tree
Joined: Nov 2023
Posts: 109
Likes: 139
From: South of sweden
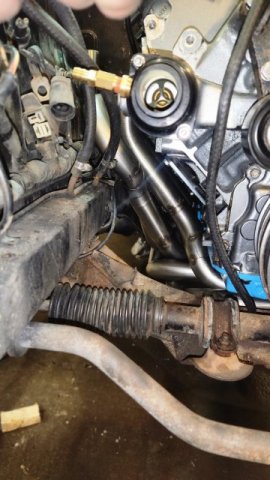
"Happy Easter to you all ,
,
Steering rack was moved to the left 5mm to make more room for the primary tubes, new extension made to the right side.
Most of the primary tubes are now welded, stainless is a pain as they tend to bend in their own way....😐.
Some reinforcements are made around the hatches in the fender.
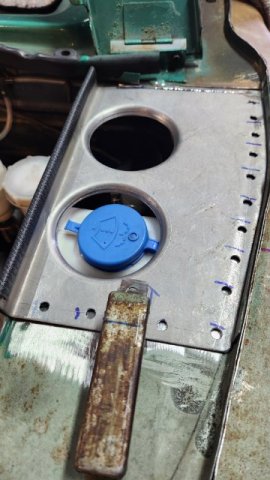
As battery is moved to the rear i'm using this place for expansion bowl and fuse box for the engine plus coils.
on the left side there will be clutch master cylinder and coils and maybe washer fluid bowl.
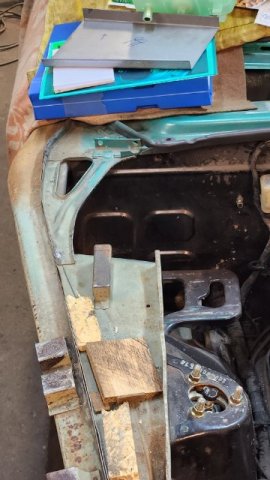
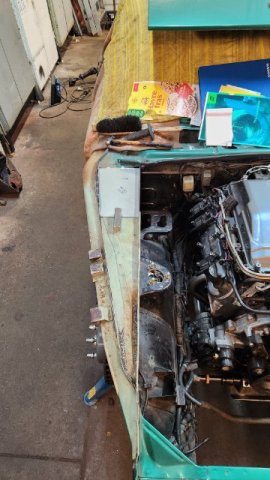
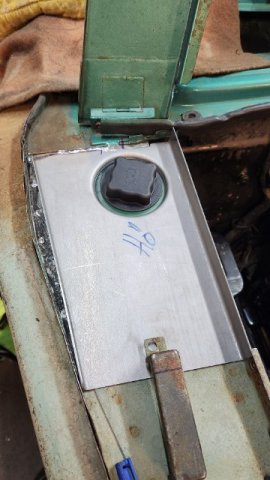
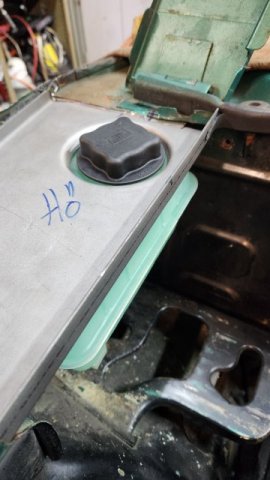
,Steering rack was moved to the left 5mm to make more room for the primary tubes, new extension made to the right side.
Most of the primary tubes are now welded, stainless is a pain as they tend to bend in their own way....😐.
Some reinforcements are made around the hatches in the fender.
As battery is moved to the rear i'm using this place for expansion bowl and fuse box for the engine plus coils.
on the left side there will be clutch master cylinder and coils and maybe washer fluid bowl.
LS1 Tech Stories
The Best V8 Stories One Small Block at Time

Amazing '71 Camaro Restomod Is Modern Muscle Car Under the Skin
Verdad Gallardo
6 Common C5 Corvette Failures and What's Involved In Repairing Them
Pouria Savadkouei
Retro Modern Bandit Pontiac Trans AM Comes With Burt Reynolds' Autograph
Verdad Gallardo
Top 10 Greatest Cadillac V Series Performance Models Ever, Ranked
Pouria Savadkouei
Top 10 Most Powerful Chevy Trucks Ever Made!

Hennessey's New Supercharged Silverado ZR2 Has 700 HP
Verdad Gallardo
Coachbuilt N2A Anteros Is an LS2-Powered C6 Corvette In Italian Clothes
Verdad Gallardo
Awesome K5 Blazer Restomod Comes With C7 Corvette Power
Verdad Gallardo
10 Camaros You Should Never Buy
Thread Starter
On The Tree
Joined: Nov 2023
Posts: 109
Likes: 139
From: South of sweden
"Hello,
Slow progress this week............
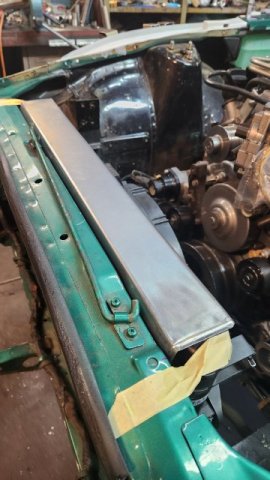
Got the Corvette radiator and fan and ordered som sheet metal to make some brackets.
Also started to wrap the primary tubes on the headers, not fun the stainless zip ties are hard to get tight enough even with a proper tool.

Slow progress this week............
Got the Corvette radiator and fan and ordered som sheet metal to make some brackets.
Also started to wrap the primary tubes on the headers, not fun the stainless zip ties are hard to get tight enough even with a proper tool.
Thread Starter
On The Tree
Joined: Nov 2023
Posts: 109
Likes: 139
From: South of sweden
"good evening gents !
Small parts that takes time has happens, washer fluid bottle bracket, lower radiator hose, radiator sitts were it should, homemade thermostat housing.
As we have holiday in Sweden tomorrow i'm going to take the engine out tomorrow for further work in the engine bay, ac lines, heater lines,weld old holes that is not in use, electrics(wire loom) and so on😴.
Have a nice evening
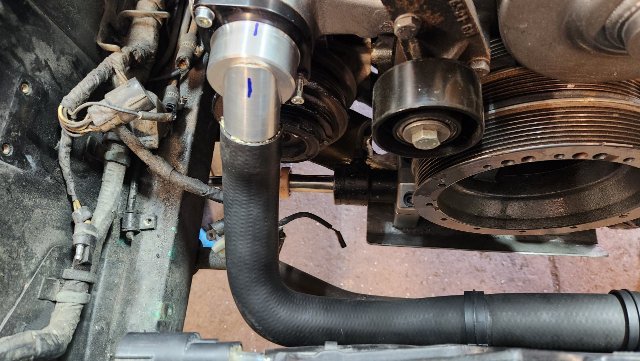
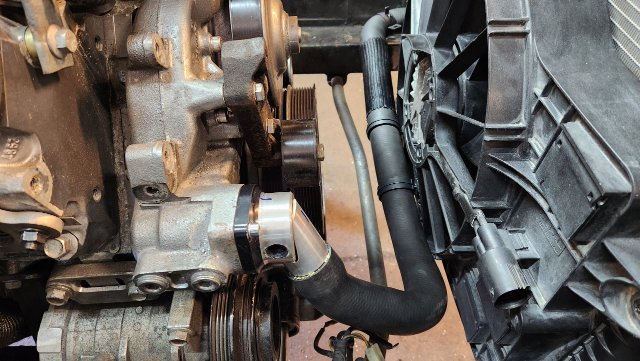
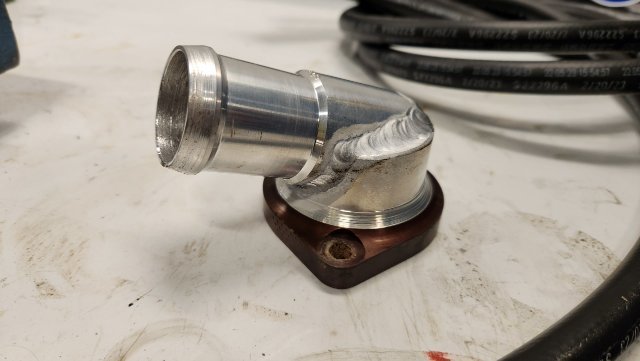
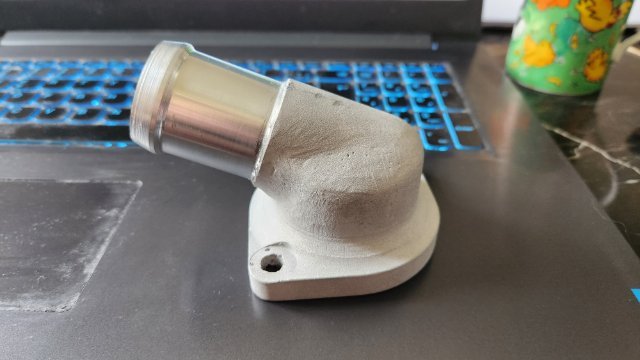
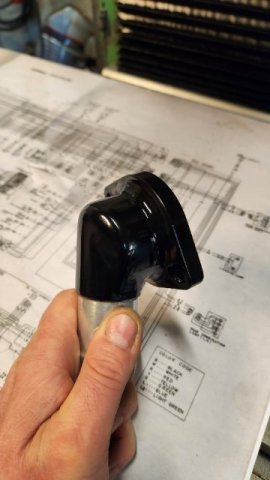
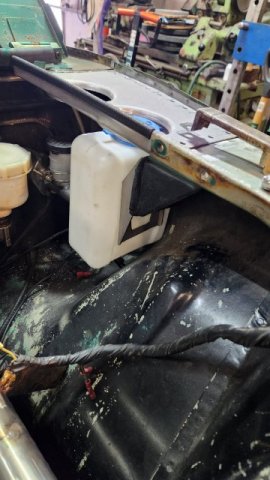
!Small parts that takes time has happens, washer fluid bottle bracket, lower radiator hose, radiator sitts were it should, homemade thermostat housing.
As we have holiday in Sweden tomorrow i'm going to take the engine out tomorrow for further work in the engine bay, ac lines, heater lines,weld old holes that is not in use, electrics(wire loom) and so on😴.
Have a nice evening
Thread Starter
On The Tree
Joined: Nov 2023
Posts: 109
Likes: 139
From: South of sweden
"Hello,
Yes it will be serviceable.
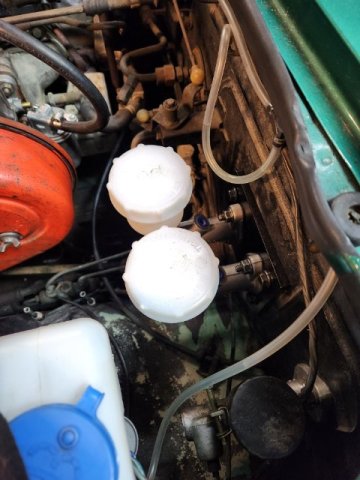
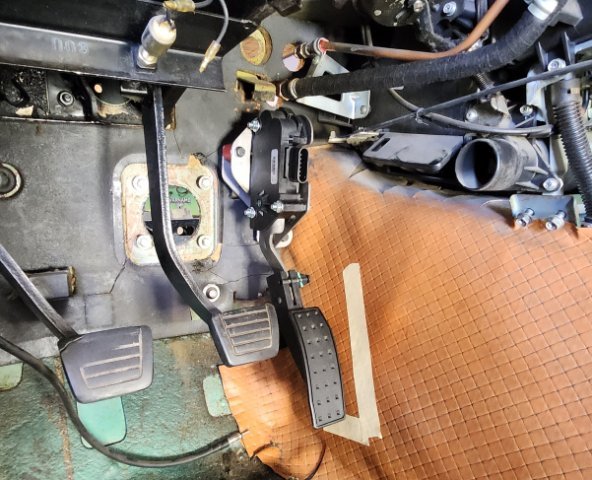
I dont have any brake booster as i have two master cylinders, one front and one rear so they sit flush to the fire wall.
on the inside there are a pivot rod between the cylinders were the pedal connects, it is possible to alter the point were the pedal press on the pivot rod(front/rear).
I'm sure there is a English word for this but ......i dont know.
Did not take the engine out today, maybe tomorrow.
There was a lot of cables though that went to cable heaven🤣.


Yes it will be serviceable.
I dont have any brake booster as i have two master cylinders, one front and one rear so they sit flush to the fire wall.
on the inside there are a pivot rod between the cylinders were the pedal connects, it is possible to alter the point were the pedal press on the pivot rod(front/rear).
I'm sure there is a English word for this but ......i dont know.
Did not take the engine out today, maybe tomorrow.
There was a lot of cables though that went to cable heaven🤣.
Thread Starter
On The Tree
Joined: Nov 2023
Posts: 109
Likes: 139
From: South of sweden
"Hello,
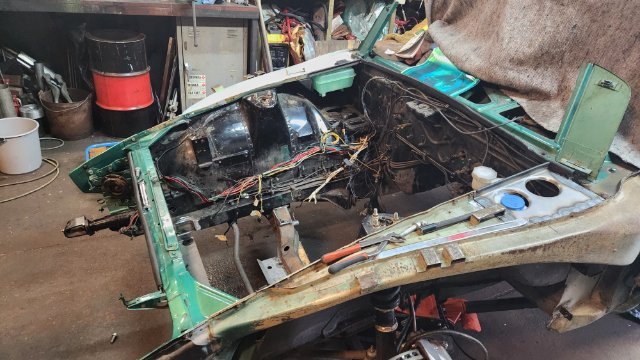
Engine went out today, time for the engine bay, old brackets has to go and some new goes in.
Welding some holes that not going to be used, routing AC and heater lines,
Engine went out today, time for the engine bay, old brackets has to go and some new goes in.
Welding some holes that not going to be used, routing AC and heater lines,
Thread Starter
On The Tree
Joined: Nov 2023
Posts: 109
Likes: 139
From: South of sweden
"Good evening ,
Today's work was finishing engine room harness, take the dash board iut and start with the heater and Ac lines.
I cut my record of taking the dash out by 15 minutes so i'm down to 30 minutes🤣🤣
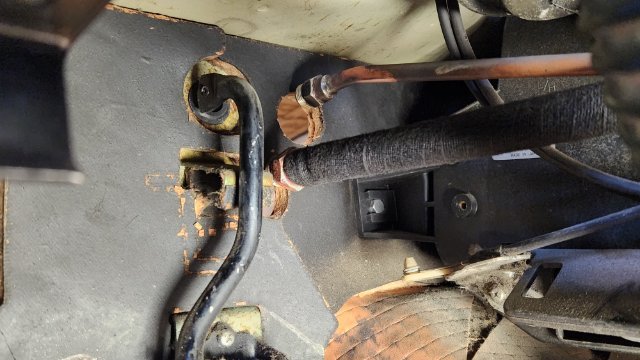
AC lines were easy, just shortens 2.5 inches so the joint went inside the car, heater lines need some more work.
I need to have the joint inside the car as the pipes hit the cylinder head so a 90� bend is needed at inlet/outlet in the firewall.
Shorten the vacuum ting and move the water valve will probably do the trick(we will see tomorrow🤣 .
.
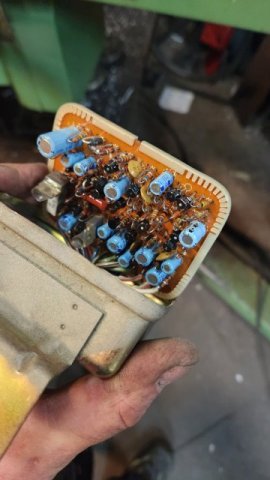
I also open up the "Interlock" unit, lot of ancient komponents.
All of it's funktions are deleted as they are not needed anymore.
/🍻Saturday
Christian
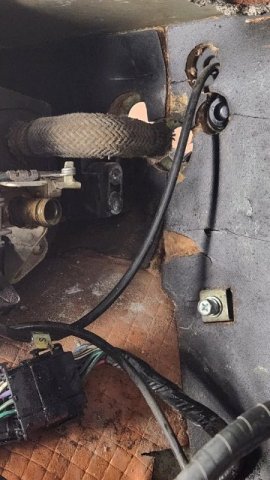


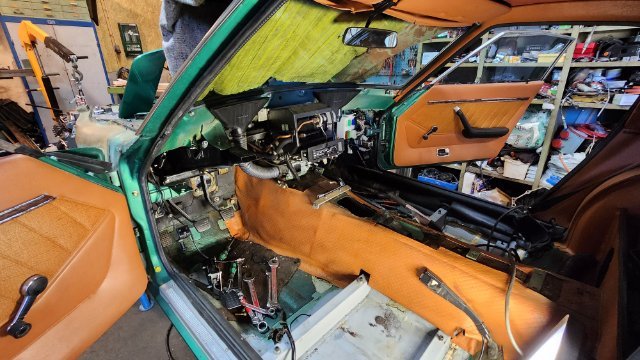
,Today's work was finishing engine room harness, take the dash board iut and start with the heater and Ac lines.
I cut my record of taking the dash out by 15 minutes so i'm down to 30 minutes🤣🤣
AC lines were easy, just shortens 2.5 inches so the joint went inside the car, heater lines need some more work.
I need to have the joint inside the car as the pipes hit the cylinder head so a 90� bend is needed at inlet/outlet in the firewall.
Shorten the vacuum ting and move the water valve will probably do the trick(we will see tomorrow🤣
.I also open up the "Interlock" unit, lot of ancient komponents.
All of it's funktions are deleted as they are not needed anymore.
/🍻Saturday
Christian
Thread Starter
On The Tree
Joined: Nov 2023
Posts: 109
Likes: 139
From: South of sweden
"Today i created a milestone, i mounted the throttle pedal😱😁😎.
I also welded some old bolt holes and took some not wanted brackets away from the engine bay.
There were also time for some thinking of the water lines, i think i have a solution, move the vacuum/water thing closer to the heater valve and i have deleted the short pipe that goes thru the fire wall.
What is the actual purpose of the vacuum/water valve?
i'm well aware that it shut the water of but the heater valve does the same?!?!?
When i look in the FSM for Air condition i see that is open in every mode of operation (AC/Heater) or am i missing something?
🍻
Edit: been reading some more......it seems like the vacuum valve blocks hot water in AC and Vent positions and the HOT/COLD lever don't do anything in these positions,...................i think
so if i keep the heater valve closed in these positions i might be able to delete the vacuum valve, or?
It will help a lot when plumbing.
I also welded some old bolt holes and took some not wanted brackets away from the engine bay.
There were also time for some thinking of the water lines, i think i have a solution, move the vacuum/water thing closer to the heater valve and i have deleted the short pipe that goes thru the fire wall.
What is the actual purpose of the vacuum/water valve?
i'm well aware that it shut the water of but the heater valve does the same?!?!?
When i look in the FSM for Air condition i see that is open in every mode of operation (AC/Heater) or am i missing something?
🍻
Edit: been reading some more......it seems like the vacuum valve blocks hot water in AC and Vent positions and the HOT/COLD lever don't do anything in these positions,...................i think
so if i keep the heater valve closed in these positions i might be able to delete the vacuum valve, or?
It will help a lot when plumbing
. Thread Starter
On The Tree
Joined: Nov 2023
Posts: 109
Likes: 139
From: South of sweden
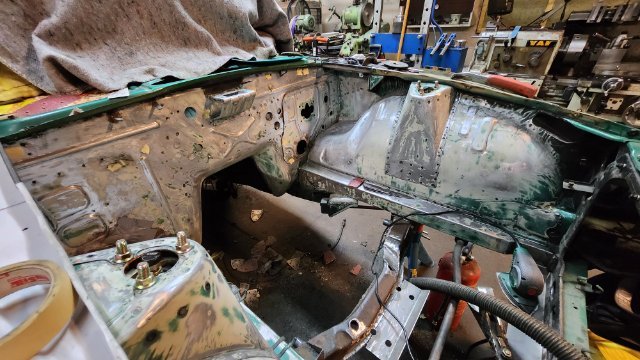
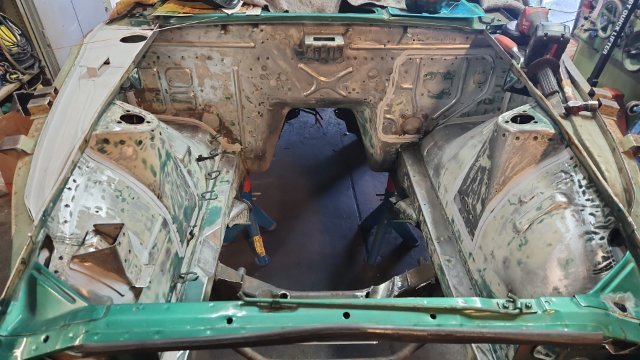
"I have now started the NOT so fun job with removing old paint from the engine bay, it has been painted with some black paint that sticks in the paper of the sanding machine so a knife, elbow grease and hours................but need to be done😴.
I read Toolmans post about the media blaster from Auto Zone, could be usable for the surface rust under the former battery tray.
Heater has also been solved, new bracket and hoses
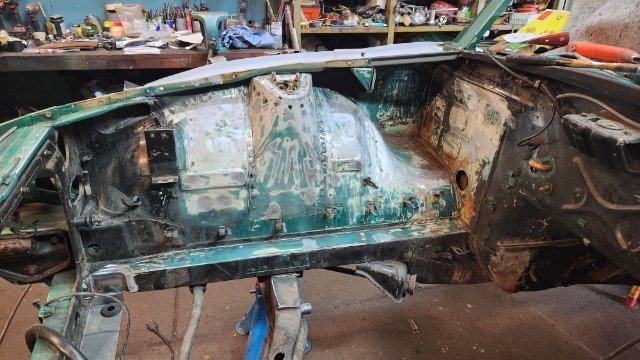
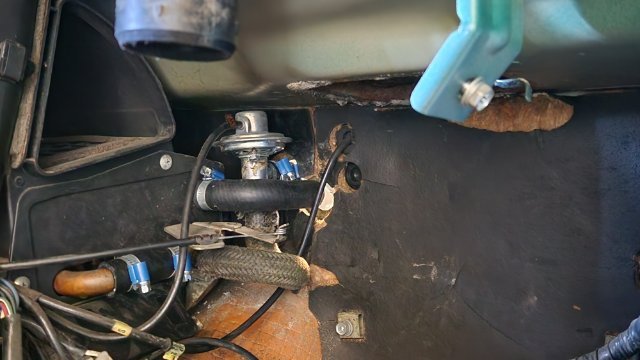
I read Toolmans post about the media blaster from Auto Zone, could be usable for the surface rust under the former battery tray.
Heater has also been solved, new bracket and hoses
Thread Starter
On The Tree
Joined: Nov 2023
Posts: 109
Likes: 139
From: South of sweden
"Hello,
Almost, there😊.
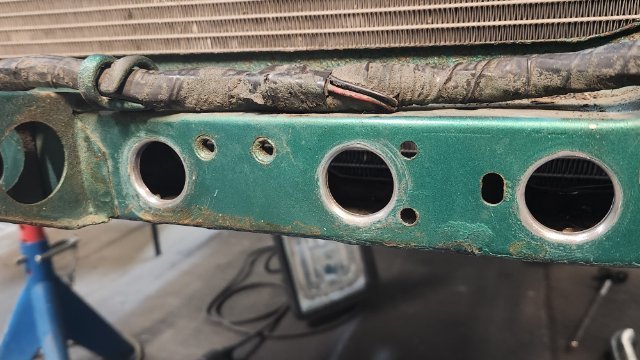
a small bracket were the steering column enters the engine bay to remove and the radiator frame and then ready to paint.
A couple of layers with Epoxi and three layers of filler and then Emerald green.
After the Epoxy i'm going to seal of some places around the firewall and inner fender, potential water intrusion.
A bigger hole in the radiator frame left side for air filter in front of engine bay.


Almost, there😊.
a small bracket were the steering column enters the engine bay to remove and the radiator frame and then ready to paint.
A couple of layers with Epoxi and three layers of filler and then Emerald green.
After the Epoxy i'm going to seal of some places around the firewall and inner fender, potential water intrusion.
A bigger hole in the radiator frame left side for air filter in front of engine bay.
Thread Starter
On The Tree
Joined: Nov 2023
Posts: 109
Likes: 139
From: South of sweden
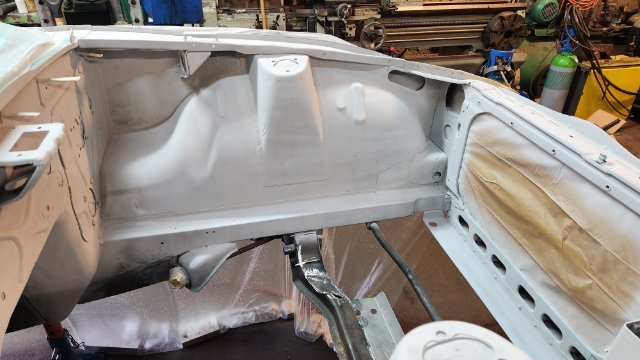
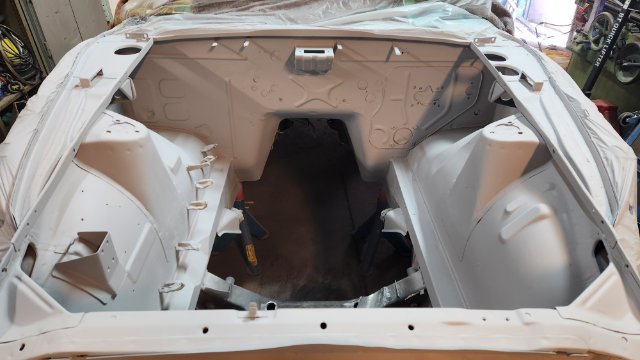
"Evening
I have just sprayed the first layer of Epoxi paint and that feels good as it feels that i'm moving forward.
I need to buy a new spray gun as the nozzle is to small and there are no bigger to get(cheap one for fillers and epoxi so no harm).
When the new one arrives it's time for some filler.
I have just sprayed the first layer of Epoxi paint and that feels good as it feels that i'm moving forward.
I need to buy a new spray gun as the nozzle is to small and there are no bigger to get(cheap one for fillers and epoxi so no harm).
When the new one arrives it's time for some filler.
Thread Starter
On The Tree
Joined: Nov 2023
Posts: 109
Likes: 139
From: South of sweden
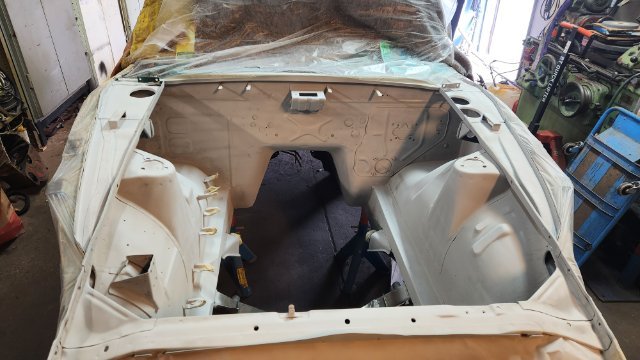
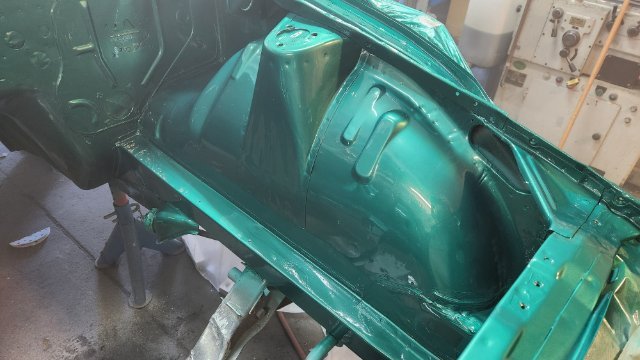
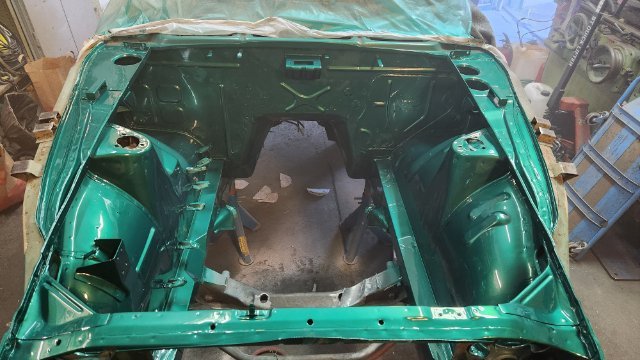
"hello 🍻,
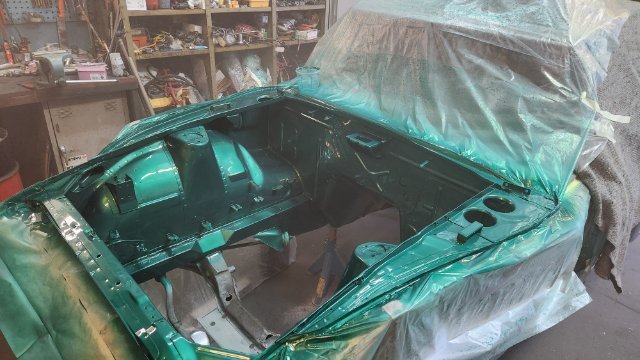
Now the engine bay is emerald green again😀.
After three layers of filler and some more sanding it was time for the green paint, three layers plus four of clear coat.
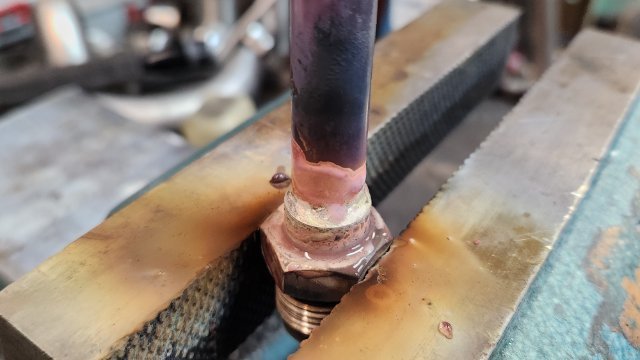
Time to finish the headers and start making a flywheel for the Sachs clutch
Now the engine bay is emerald green again😀.
After three layers of filler and some more sanding it was time for the green paint, three layers plus four of clear coat.
Time to finish the headers and start making a flywheel for the Sachs clutch
Thread Starter
On The Tree
Joined: Nov 2023
Posts: 109
Likes: 139
From: South of sweden
"Hello,
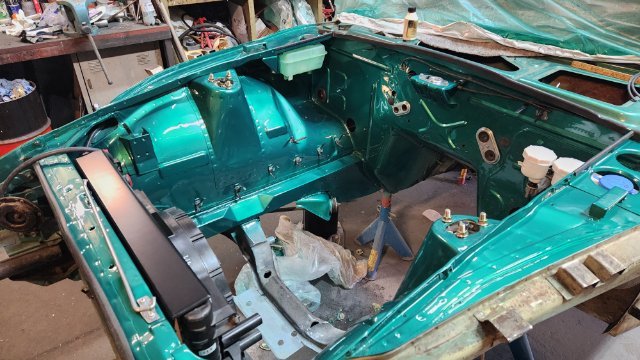
I have started to mount things back, feels good 😀.
I have also picked up my old(very) chemistry book and have zink plated some of the part's , not gold but it will do.
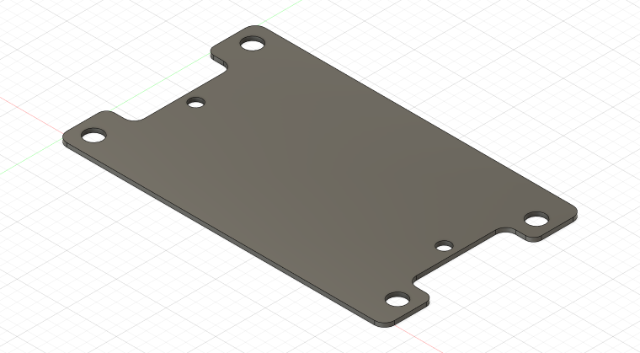
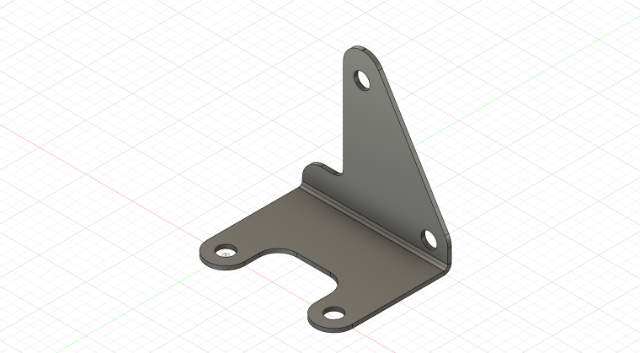
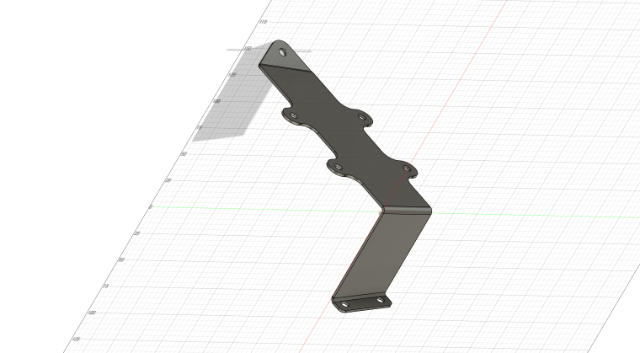
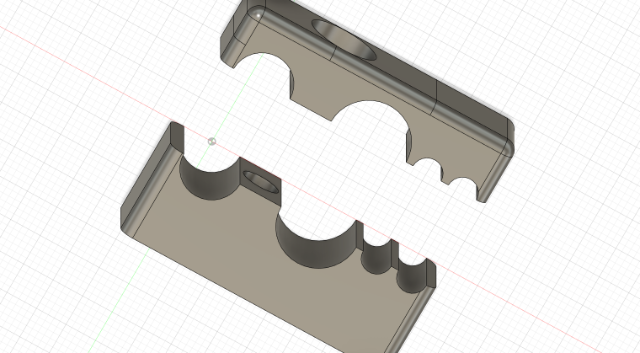
There is also some time behind the computer to draw some new brackets for vacuum canister, drier for air condition,ECU and ignition coils.
ECU will sit were the old electronics for the ignition were.
Coils will be relocated were the battery once lived on passenger side and driver side just under the clutch master.
Bracket for the valve for the rear brakes will have it's new life just next to the front master cylinder.
Some brackets for the AC lines and heater pipes is also in the pipeline.
I don't have a 3D printer yet so i will get help from a friend in that matter.
Cheers
Christian


I have started to mount things back, feels good 😀.
I have also picked up my old(very) chemistry book and have zink plated some of the part's , not gold but it will do.
There is also some time behind the computer to draw some new brackets for vacuum canister, drier for air condition,ECU and ignition coils.
ECU will sit were the old electronics for the ignition were.
Coils will be relocated were the battery once lived on passenger side and driver side just under the clutch master.
Bracket for the valve for the rear brakes will have it's new life just next to the front master cylinder.
Some brackets for the AC lines and heater pipes is also in the pipeline.
I don't have a 3D printer yet so i will get help from a friend in that matter.
Cheers
Christian