


My Z130BT install (pic heavy)
So here's some pics from the install, double din bezel came from Dennis @ Double D mods.. did the bypass and steering wheel control interface while I was there.
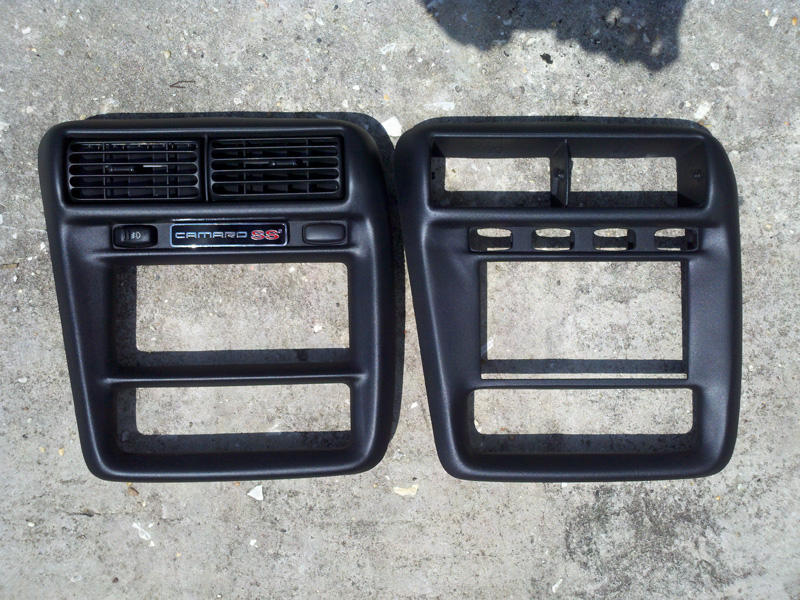
Factory bezel on the left, double din on the right:
Double din bezel with vents/switches/dash plaque:

Z130 in the box:

contents of the box:

almost everything plugged in the back:

the head unit itself:

brackets to mount the head unit:

wiring harness:

closer up

To install the PAC SWI-PS, you have to tap the green wire into the dark blue wire on the factory harness. Since I'm not running an external amp right now, I de-pinned the remote power wire, and re-pinned it to match the dark blue factory wire (so I didn't have to modify the factory wire in any way)

Now, with most of the wiring out of the way, time to mount those brackets to get an idea what I'm working with..

Unfortunately, the brackets were too wide, so I had to cut them on the lines shown here:

cut brackets:

and, I re-installed them on the head unit:

Time to clean up some things inside the dash. With the USB and aux wires, GPS, traffic tuner, antenna, factory and aftermarket harness, along with all the numerous inputs on the Z130, there were a lot of wires to tuck away..
I also moved, IIRC, the retained accessory power module while I was there for some extra room. I may be completely wrong, I honestly don't remember what it is, but I'm talking about the plastic box with the white sticker on it.
Before:

After:

Here's where I ran the USB/aux wires:

And finally, the head unit shoved in there, screwed into the dash. I decided to use the factory screws and holes:

Almost done...
In the next two pictures, excuse the crappy looking dash plaque. I accidentally pried my LE dash plaque off in this process, so it took some of the original silver off with it. Don't worry though, it's all good now
Bezel installed:

Booting up!

Factory bezel on the left, double din on the right:
Double din bezel with vents/switches/dash plaque:
Z130 in the box:
contents of the box:
almost everything plugged in the back:
the head unit itself:
brackets to mount the head unit:
wiring harness:
closer up
To install the PAC SWI-PS, you have to tap the green wire into the dark blue wire on the factory harness. Since I'm not running an external amp right now, I de-pinned the remote power wire, and re-pinned it to match the dark blue factory wire (so I didn't have to modify the factory wire in any way)
Now, with most of the wiring out of the way, time to mount those brackets to get an idea what I'm working with..
Unfortunately, the brackets were too wide, so I had to cut them on the lines shown here:
cut brackets:
and, I re-installed them on the head unit:
Time to clean up some things inside the dash. With the USB and aux wires, GPS, traffic tuner, antenna, factory and aftermarket harness, along with all the numerous inputs on the Z130, there were a lot of wires to tuck away..
I also moved, IIRC, the retained accessory power module while I was there for some extra room. I may be completely wrong, I honestly don't remember what it is, but I'm talking about the plastic box with the white sticker on it.
Before:
After:
Here's where I ran the USB/aux wires:
And finally, the head unit shoved in there, screwed into the dash. I decided to use the factory screws and holes:
Almost done...
In the next two pictures, excuse the crappy looking dash plaque. I accidentally pried my LE dash plaque off in this process, so it took some of the original silver off with it. Don't worry though, it's all good now
Bezel installed:
Booting up!
Formally Simplɘ Jack
Joined: Mar 2011
Posts: 1,452
Likes: 2
From: Chicago
That is SICK!!!! I was gonna go single din cause I was trying to avoid taking apart the vents, switches, plaque for the DD bezel but I that just looks awesome, I have to go DD myself. I'm just scared of taking off my plaque. And are the vents and switches easy to take off?
Last edited by BoricuaHec01; Sep 20, 2011 at 12:47 PM.
Trending Topics
LS1 Tech Stories
The Best V8 Stories One Small Block at Time

Gas Monkey Built a 6-Wheel Ferrari Testarossa With a Corvette LT4 Engine
Verdad Gallardo
7 Most Reliable High-Performance Engines GM Has Ever Built
Verdad Gallardo
Amazing '71 Camaro Restomod Is Modern Muscle Car Under the Skin
Verdad Gallardo
6 Common C5 Corvette Failures and What's Involved In Repairing Them
Pouria Savadkouei
Retro Modern Bandit Pontiac Trans AM Comes With Burt Reynolds' Autograph
Verdad Gallardo
Top 10 Greatest Cadillac V Series Performance Models Ever, Ranked
Pouria Savadkouei
Top 10 Most Powerful Chevy Trucks Ever Made!

Hennessey's New Supercharged Silverado ZR2 Has 700 HP
Verdad Gallardo
Coachbuilt N2A Anteros Is an LS2-Powered C6 Corvette In Italian Clothes
Verdad GallardoClosed ex-Sponsor Account
iTrader: (3)
Joined: Nov 2008
Posts: 720
Likes: 0
From: Dickeyville Wisconsin

That is SICK!!!! I was gonna go single din cause I was trying to avoid taking apart the vents, switches, plaque for the DD bezel but I that just looks awesome, I have to go DD myself. I'm just scared of taking off my plaque. And are the vents and switches easy to take off?

when I mean my plaque came off, it came un-taped from the original plaque (the piece that clips in)
thanks to you too sir

the brackets weren't a problem at all, i just used a 4" grinder with a cutoff wheel and then a die grinder to clean it up

That looks awesome. I am waiting on a pioneer x930bt kit from Double D and I just have a couple of quick questions. Can you explain the re-pinning of the blue wire you did, I am not using an external amp either and I would rather do this than splice the harness. Any problems with the PAC unit programming/functioning? Lastly, how difficult is the install (this will be my first car stereo install) and anything I need to know?
Thanks alot
Thanks alot
here's where the blue wire is located originally (keep in mind this is the aftermarket pigtail, i got mine with the install kit from Dennis)

All I did was kinda wiggle it out, it wasnt terribly hard to remove.
Then, just push it back into this spot (circled in green, in this pic I was one hole off) It should click back into place.

If you do that, it should match the dark blue wire on the factory side, ready to be connected to the green wire on the PAC.
The PAC isnt hard to program, as long as everything is connected right. Being that I had it pinned incorrectly, I had problems at first, fixed it and it was no problem. To me, the hardest part honestly, was getting the head unit mounted in just the right spot, so that it fit into the bezel just right, and still used the factory mounting holes/screws. It wasn't bad though, just took my time with it.
Closed ex-Sponsor Account
iTrader: (3)
Joined: Nov 2008
Posts: 720
Likes: 0
From: Dickeyville Wisconsin
That looks awesome. I am waiting on a pioneer x930bt kit from Double D and I just have a couple of quick questions. Can you explain the re-pinning of the blue wire you did, I am not using an external amp either and I would rather do this than splice the harness. Any problems with the PAC unit programming/functioning? Lastly, how difficult is the install (this will be my first car stereo install) and anything I need to know?
Thanks alot
Thanks alot
We are starting 27 Camaro orders and 18 Firebird orders this morning


Closed ex-Sponsor Account
iTrader: (3)
Joined: Nov 2008
Posts: 720
Likes: 0
From: Dickeyville Wisconsin
12.99 to add install kit of brackets, harness and antenna adapter
12.99 for shipping
total 165.97
Link to order and also the link shows complete radio packages
http://shop.doubledmods.com/Camaro-D...97-02_c603.htm
As always for best deals on some radios call me direct to order

608 568 3011
Dennis