Camaro and Firebird: How to Flush Radiator Coolant
Flushing the coolant system is relatively easy. It just takes a little time and patience. Since the task is easy, taking it to a shop to have it done is a waste of money and time. Do it yourself and save on both.
This article applies to the Camaro Z28/SS (1998-2002) and Pontiac Formula/Trans Am (1998-2002).
Your vehicle originally came with the orange sauce known as Dex-Cool. Maybe it's been changed to the green stuff? Your car won't mind either color. What it does mind is when the coolant becomes worn out. Dex-Cool is rated for five years or 150,000 miles, which ever comes first. The green stuff is good for two years or 30,000. In either case, if your coolant hasn't been flushed in a while, it could well be time to remedy the situation. It doesn't matter which coolant you use, the process is still the same. Read on to find out how to properly flush your cooling system and replace your tired, worn out coolant with new.

Materials Needed
- Hydraulic jack and jack stands
- 3/8" or 1/2" drive ratchet with matching 13mm socket and 10" extension
- Pliers
- Drain pan
- Two (2) gallons of coolant
- Eight (8) gallons of distilled water
Warning
Please dispose of used radiator fluid properly. Do not let the old fluid drain into the street, gutters or your yard. It is a hazard to the environment and deadly to animals. Drain it into an appropriate catch pan and pour into containers to take to a recycling center for proper disposal.
Before you purchase your needed supplies, you should consider which coolant to use. Your vehicle came equipped with Dex-Cool, but ethylene/propylene glycol (the "green stuff") can be ran without consequence. Make your decision on what to run and go for it. Things to consider are Dex-Cool will cost a bit more to change, but will last much longer. The green stuff won't cost as much, but has a much shorter lifespan. Either way, you'll need about two (2) gallons of concentrate antifreeze and around eight (8) gallons of distilled water to complete the job.
Step 1 – Jack car up and suspend on jack stands
Before you jack, ensure you've put your tire chocks in place to the front and rear of at least one rear tire. Set the e-brake and put it in 1st gear if it's a manual transmission.
Step 2 – Drain the coolant
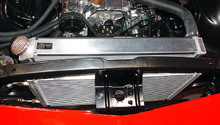
As long as the engine is cool, remove the radiator cap and set it aside. Place your drain pan under the radiator on the passenger side. On the bottom of the radiator you'll find the drain petcock (Figure 1). Open this and let the coolant drain out. This can take around 10 minutes or so. Expect about eight (8) quarts of fluid to drain, so ensure your drain pan is large enough to accept the liquid. Once the coolant drain slows to a trickle, close the petcock.

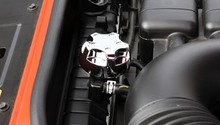
While you're waiting for the radiator to drain, pull the overflow tank and drain it as well. Pull the hose clamp from the small hose going to the radiator filler neck (Figure 3), then pull the hose from the connector. Remove the 13mm bolt that attaches the battery hold down (Figure 2), disconnect your ground, then positive leads, and remove the battery. There is a second 13mm bolt which holds the tank in place (Figure 3). Remove this bolt and the tank should pull right out. Reinstall the tank and battery after draining and cleaning.
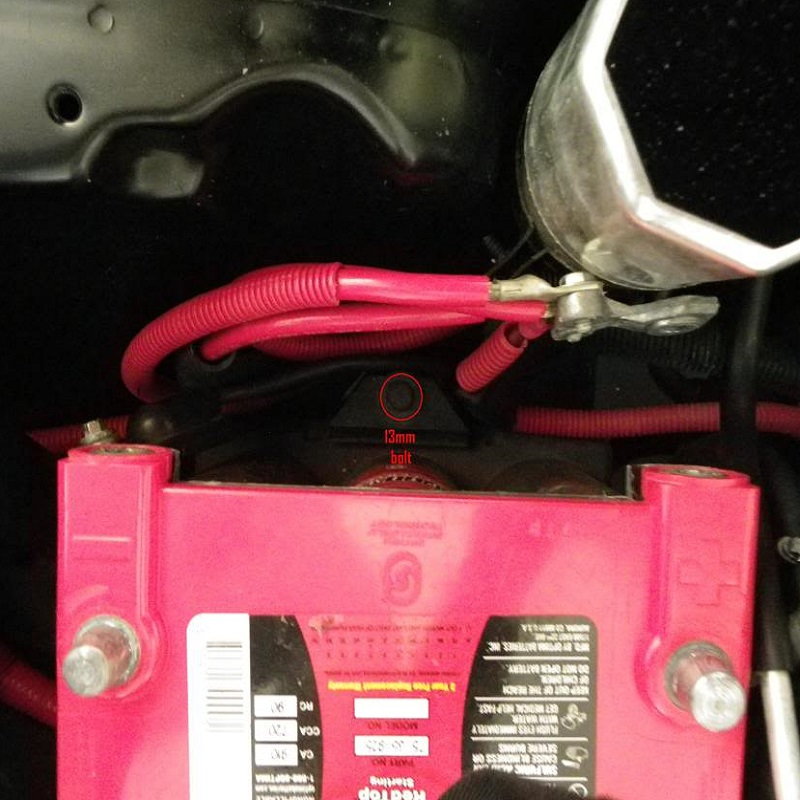
Figure 2. LS1 battery hold down location. 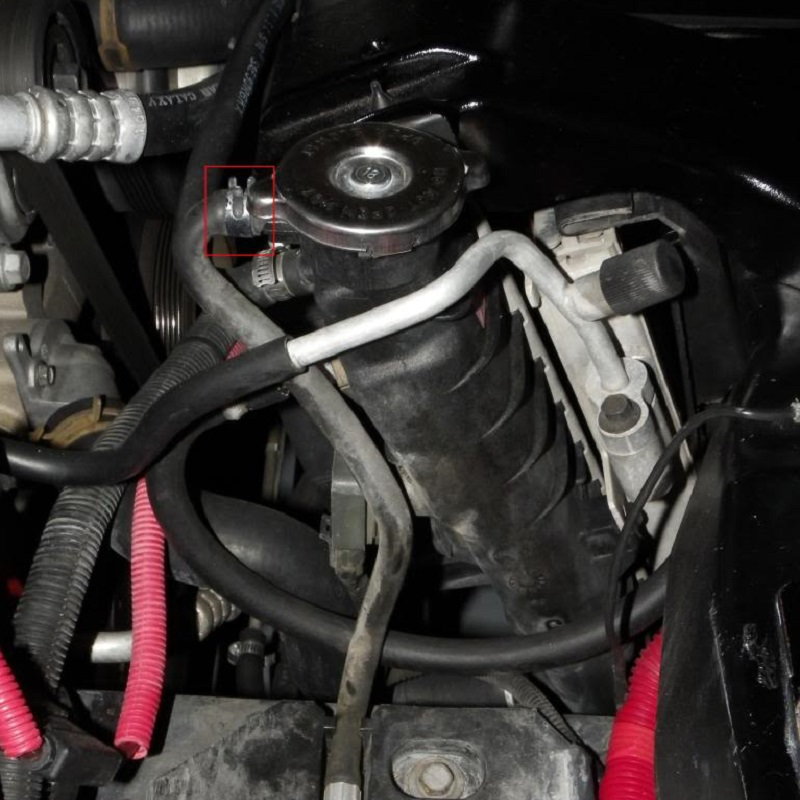
Figure 3. Coolant overflow tank bolt location and hose removal.
Step 3 – Fill the radiator with distilled water
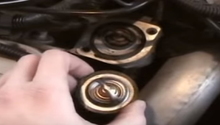
Fill your radiator with distilled water, which should take about two gallons. Leave the radiator cap off for now. Once you get the radiator filled with distilled water, get into the driver's seat, turn your heater knob all the way over to hot, then start your car. You'll want to run your car until the thermostat opens and then a few minutes longer. This will ensure the old coolant that is left in the block and heater core will have mixed thoroughly with the clean distilled water you've just poured in. It will probably take 10 to 15 minutes for it to get thoroughly mixed. Once there, shut down the engine and leave it to sit for about 15 minutes to cool.
Pro Tip
Distilled water is not absolutely necessary here, but tap water does have impurities in it which can combine with the aluminum in the engine block and create sediment in your cooling system. The whole purpose of this endeavor is to clean out the cooling system, not create issues for it down the road. Distilled water is about $.88/gallon, so is cheap insurance against this preventable condition.
Step 4 – Drain the coolant
Once the engine has cooled down, drain the radiator again by opening the petcock. Once you get the eight (8) quarts out of the system again, you'll want to refill it with distilled water. You'll need to repeat the fill/run/drain sequence three to four times until the coolant runs clean. Systems with really old coolant in it could possibly take more iterations to get through the process. When it does run out as clear water, ensure the petcock is completely closed.
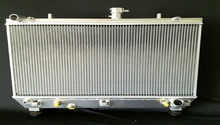
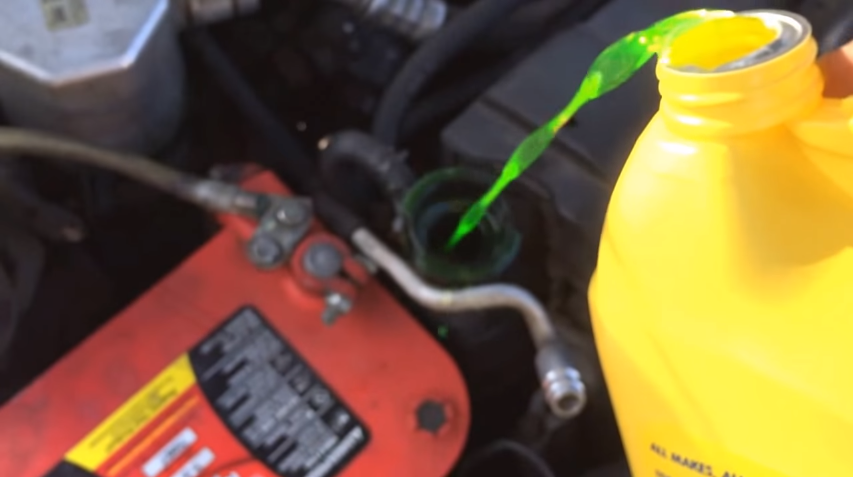
Step 5 – Refill radiator with coolant
Take the car down off of the jack stands so it sits level. Use straight antifreeze to begin the refill process (Figure 4). If your car is a '98, you'll want to put about seven and a half (7.5) quarts in the radiator. If you have a '99 to '02, you'll only want to put six (6) quarts in. Top the rest off with distilled water if there is any room left. With the radiator cap still off, start and run the engine until the thermostat opens. You'll know it has opened when the coolant level in the radiator drops. Keep the coolant level up to the radiator neck, filling as necessary with distilled water.
When the engine is warm and the radiator does not appear to be able to take any more coolant, put the radiator cap back on, closing the system. Remember to put some 50/50 mix into the overflow so it is back up to the hot level. Take your car out for a short drive, watching the temperature gauge to ensure it does not overheat. When you get back, let the vehicle cool down and recheck the coolant levels to ensure it is where it should be. Top off as necessary. Over the next week, check daily to ensure the coolant level and fill as necessary.
Note
If you are continuing to use Dex-Cool, it is important the system remain as full as possible throughout its lifespan. If there are pockets of air in the cooling system, the coolant has a tendency to turn brown and become grainy. While GM says this does not affect how the system cools, it's supposedly the reason why GM gave consumers a large kickback in the mid 2000's due to a class action lawsuit.
Featured Video: LS1 Bleeding Cooling System
Related Discussions
- Best Way to Flush the Coolant? - LS1Tech.com
- Best Way to Do a Complete Coolant Flush? - LS1Tech.com
- Doing a Radiator Flush? - LS1Tech.com
- Coolant Flush, Different Take/Method - LS1Tech.com
- DIY Cooling System Flush - LS1.com