
LED Gauge Cluster Lights
 11-22-2009, 11:21 PM
#141

That is awesome.I was wondering if that color could be sanded off or removed with some kind of chemical.I really didnt want to spend $ on an overlay.You say it cannot be done with hvac and headlight overlays.What grit sandpaper did you use?Your guages nice.Also I read on here you can change the color of your needles by sanding off the color and painting the back of it?
You can sand the color coat off . ITs just a transparent paint , toped with a translucent white coat . The numerals and icons and black background are applied from the front of the face . ***This does not apply to the hvac and headlight overlays , all color is applied the back ***
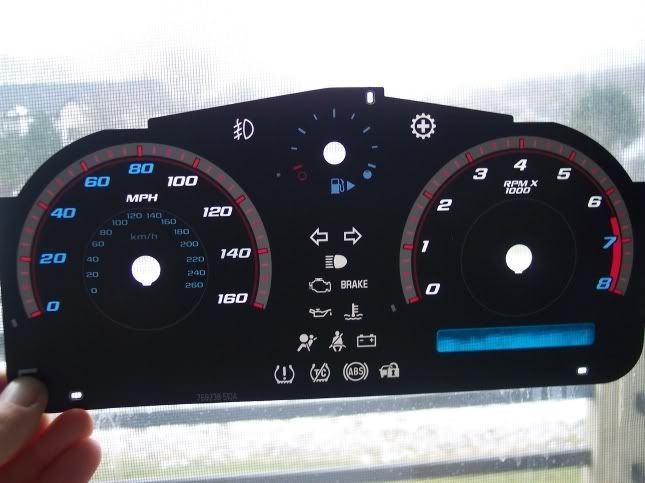
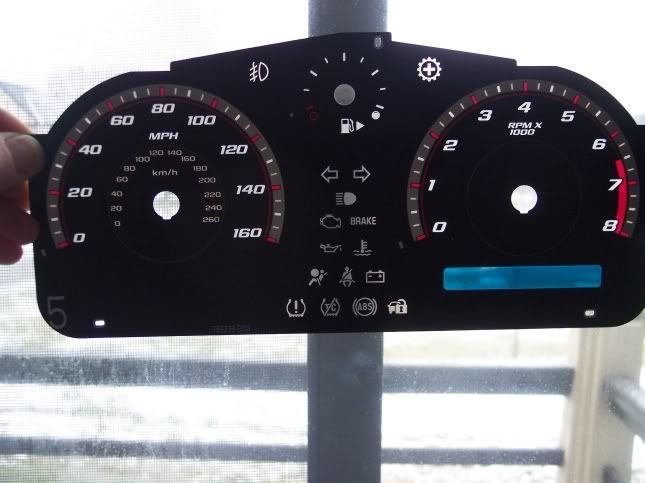
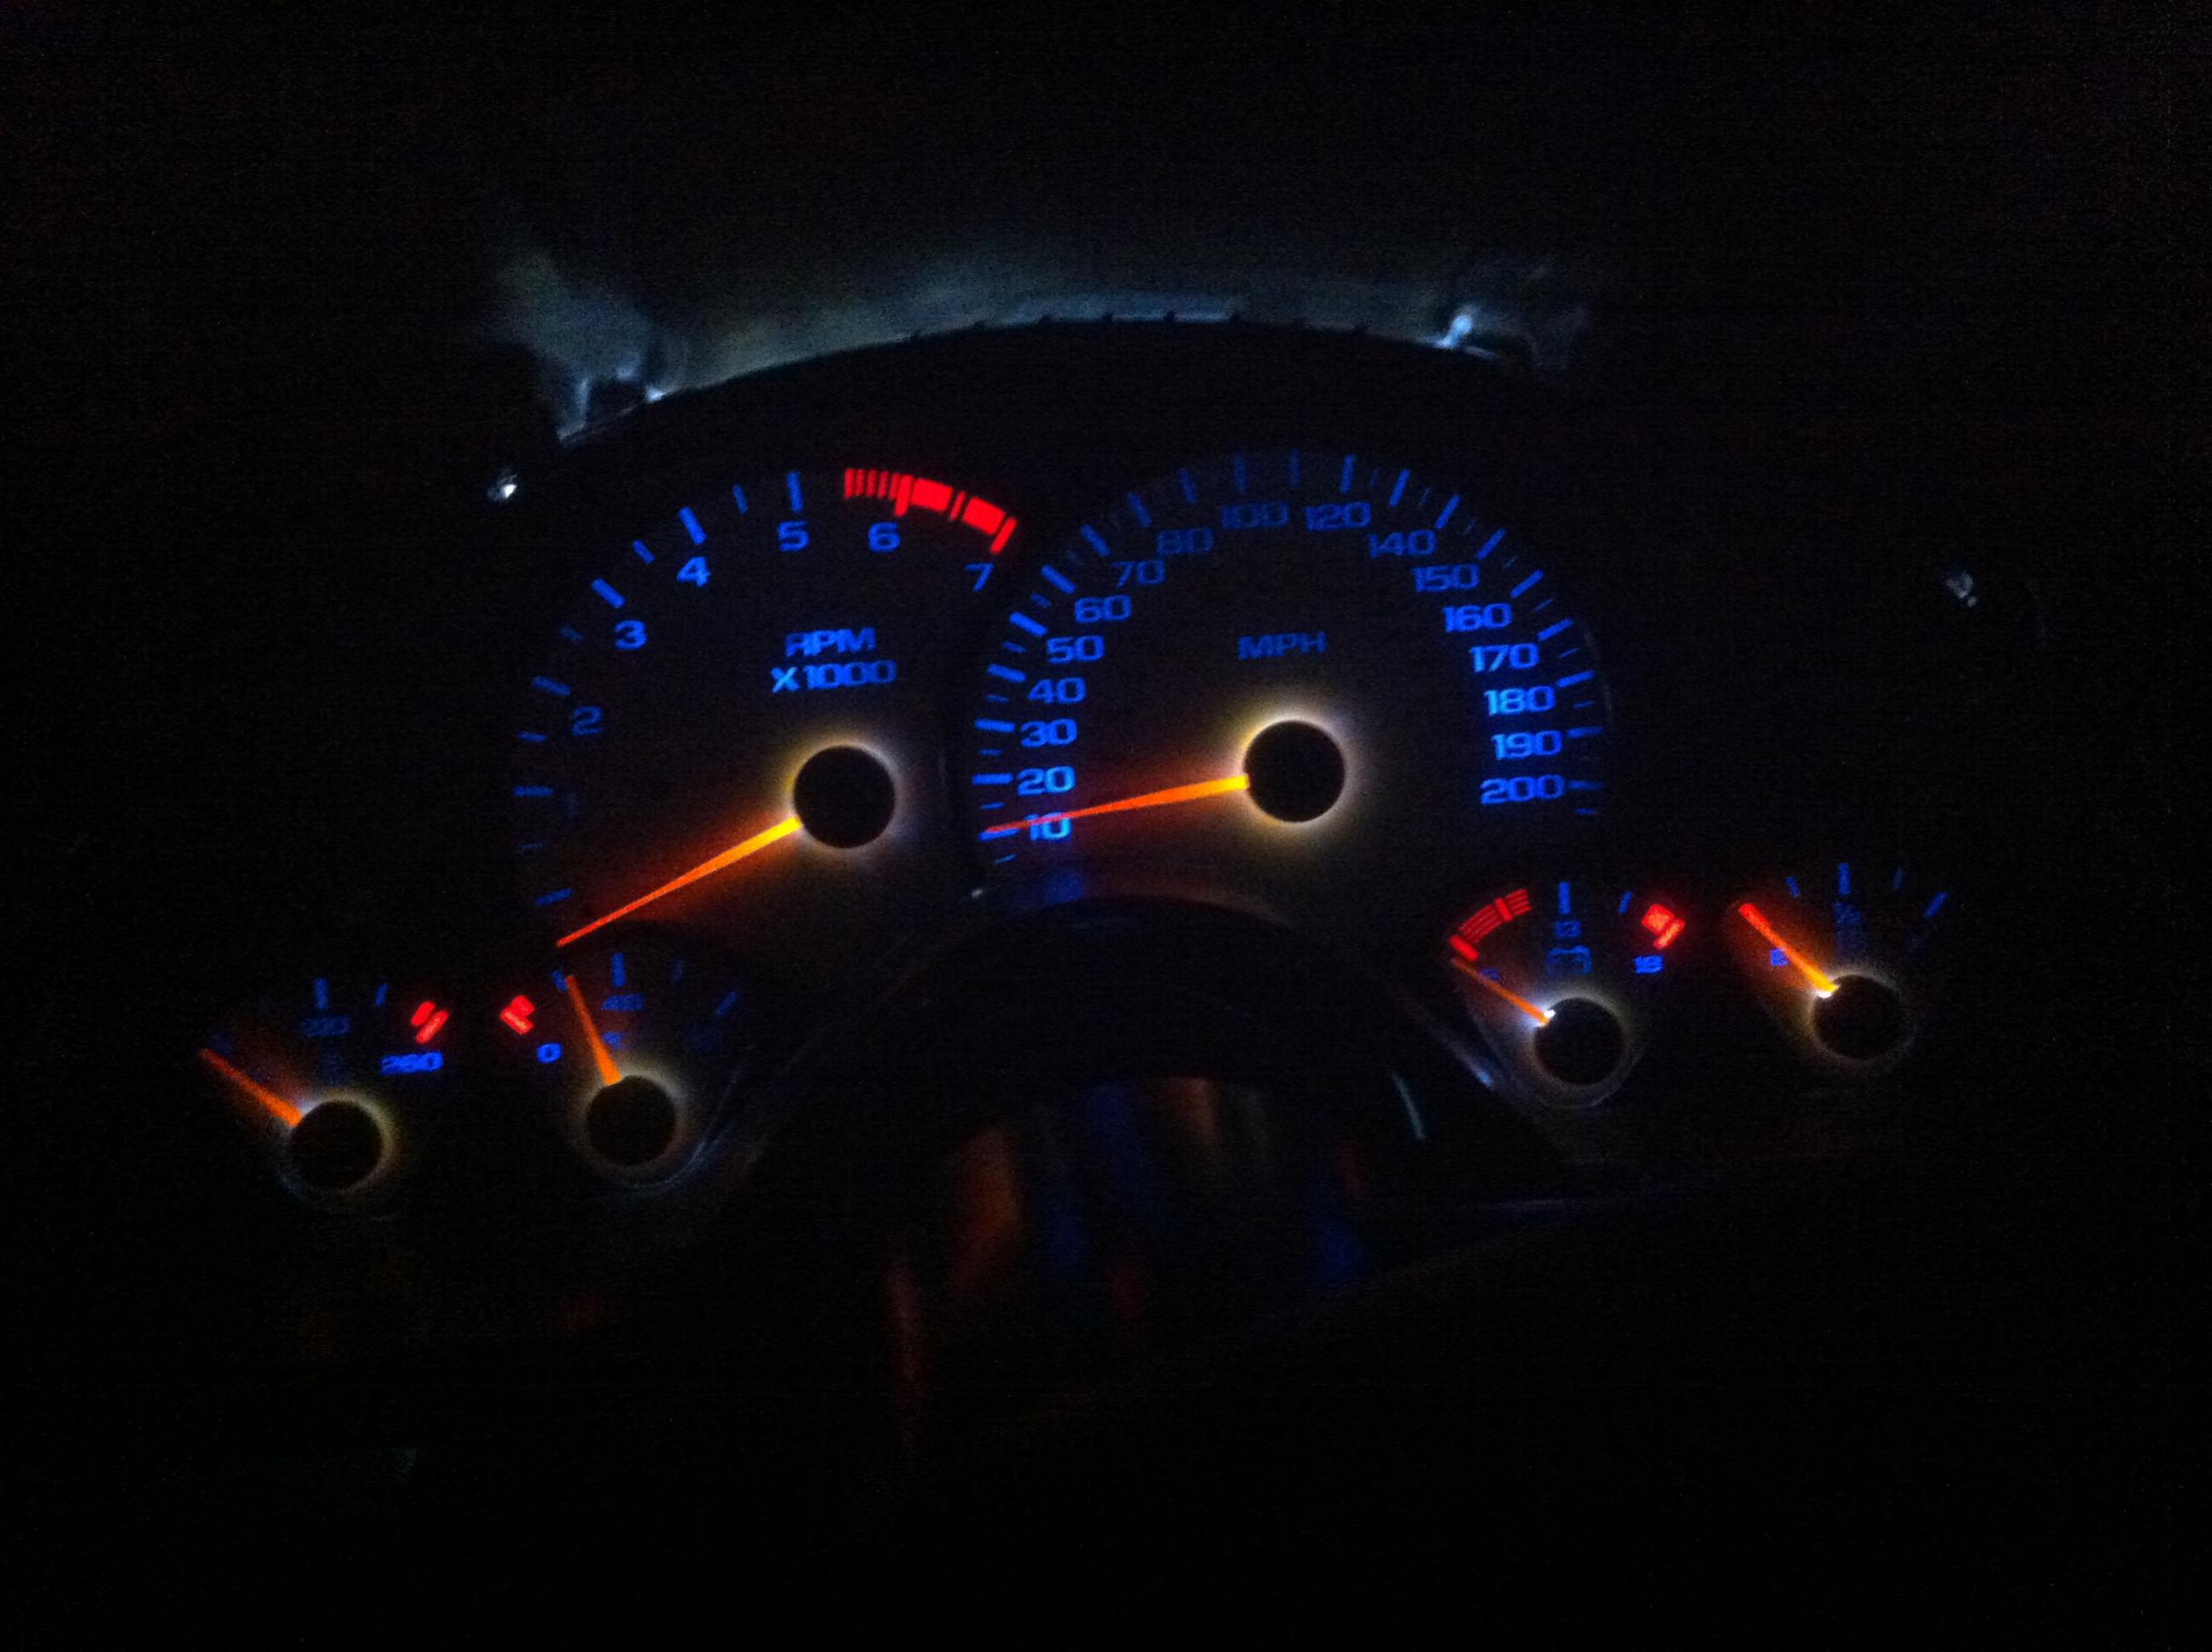
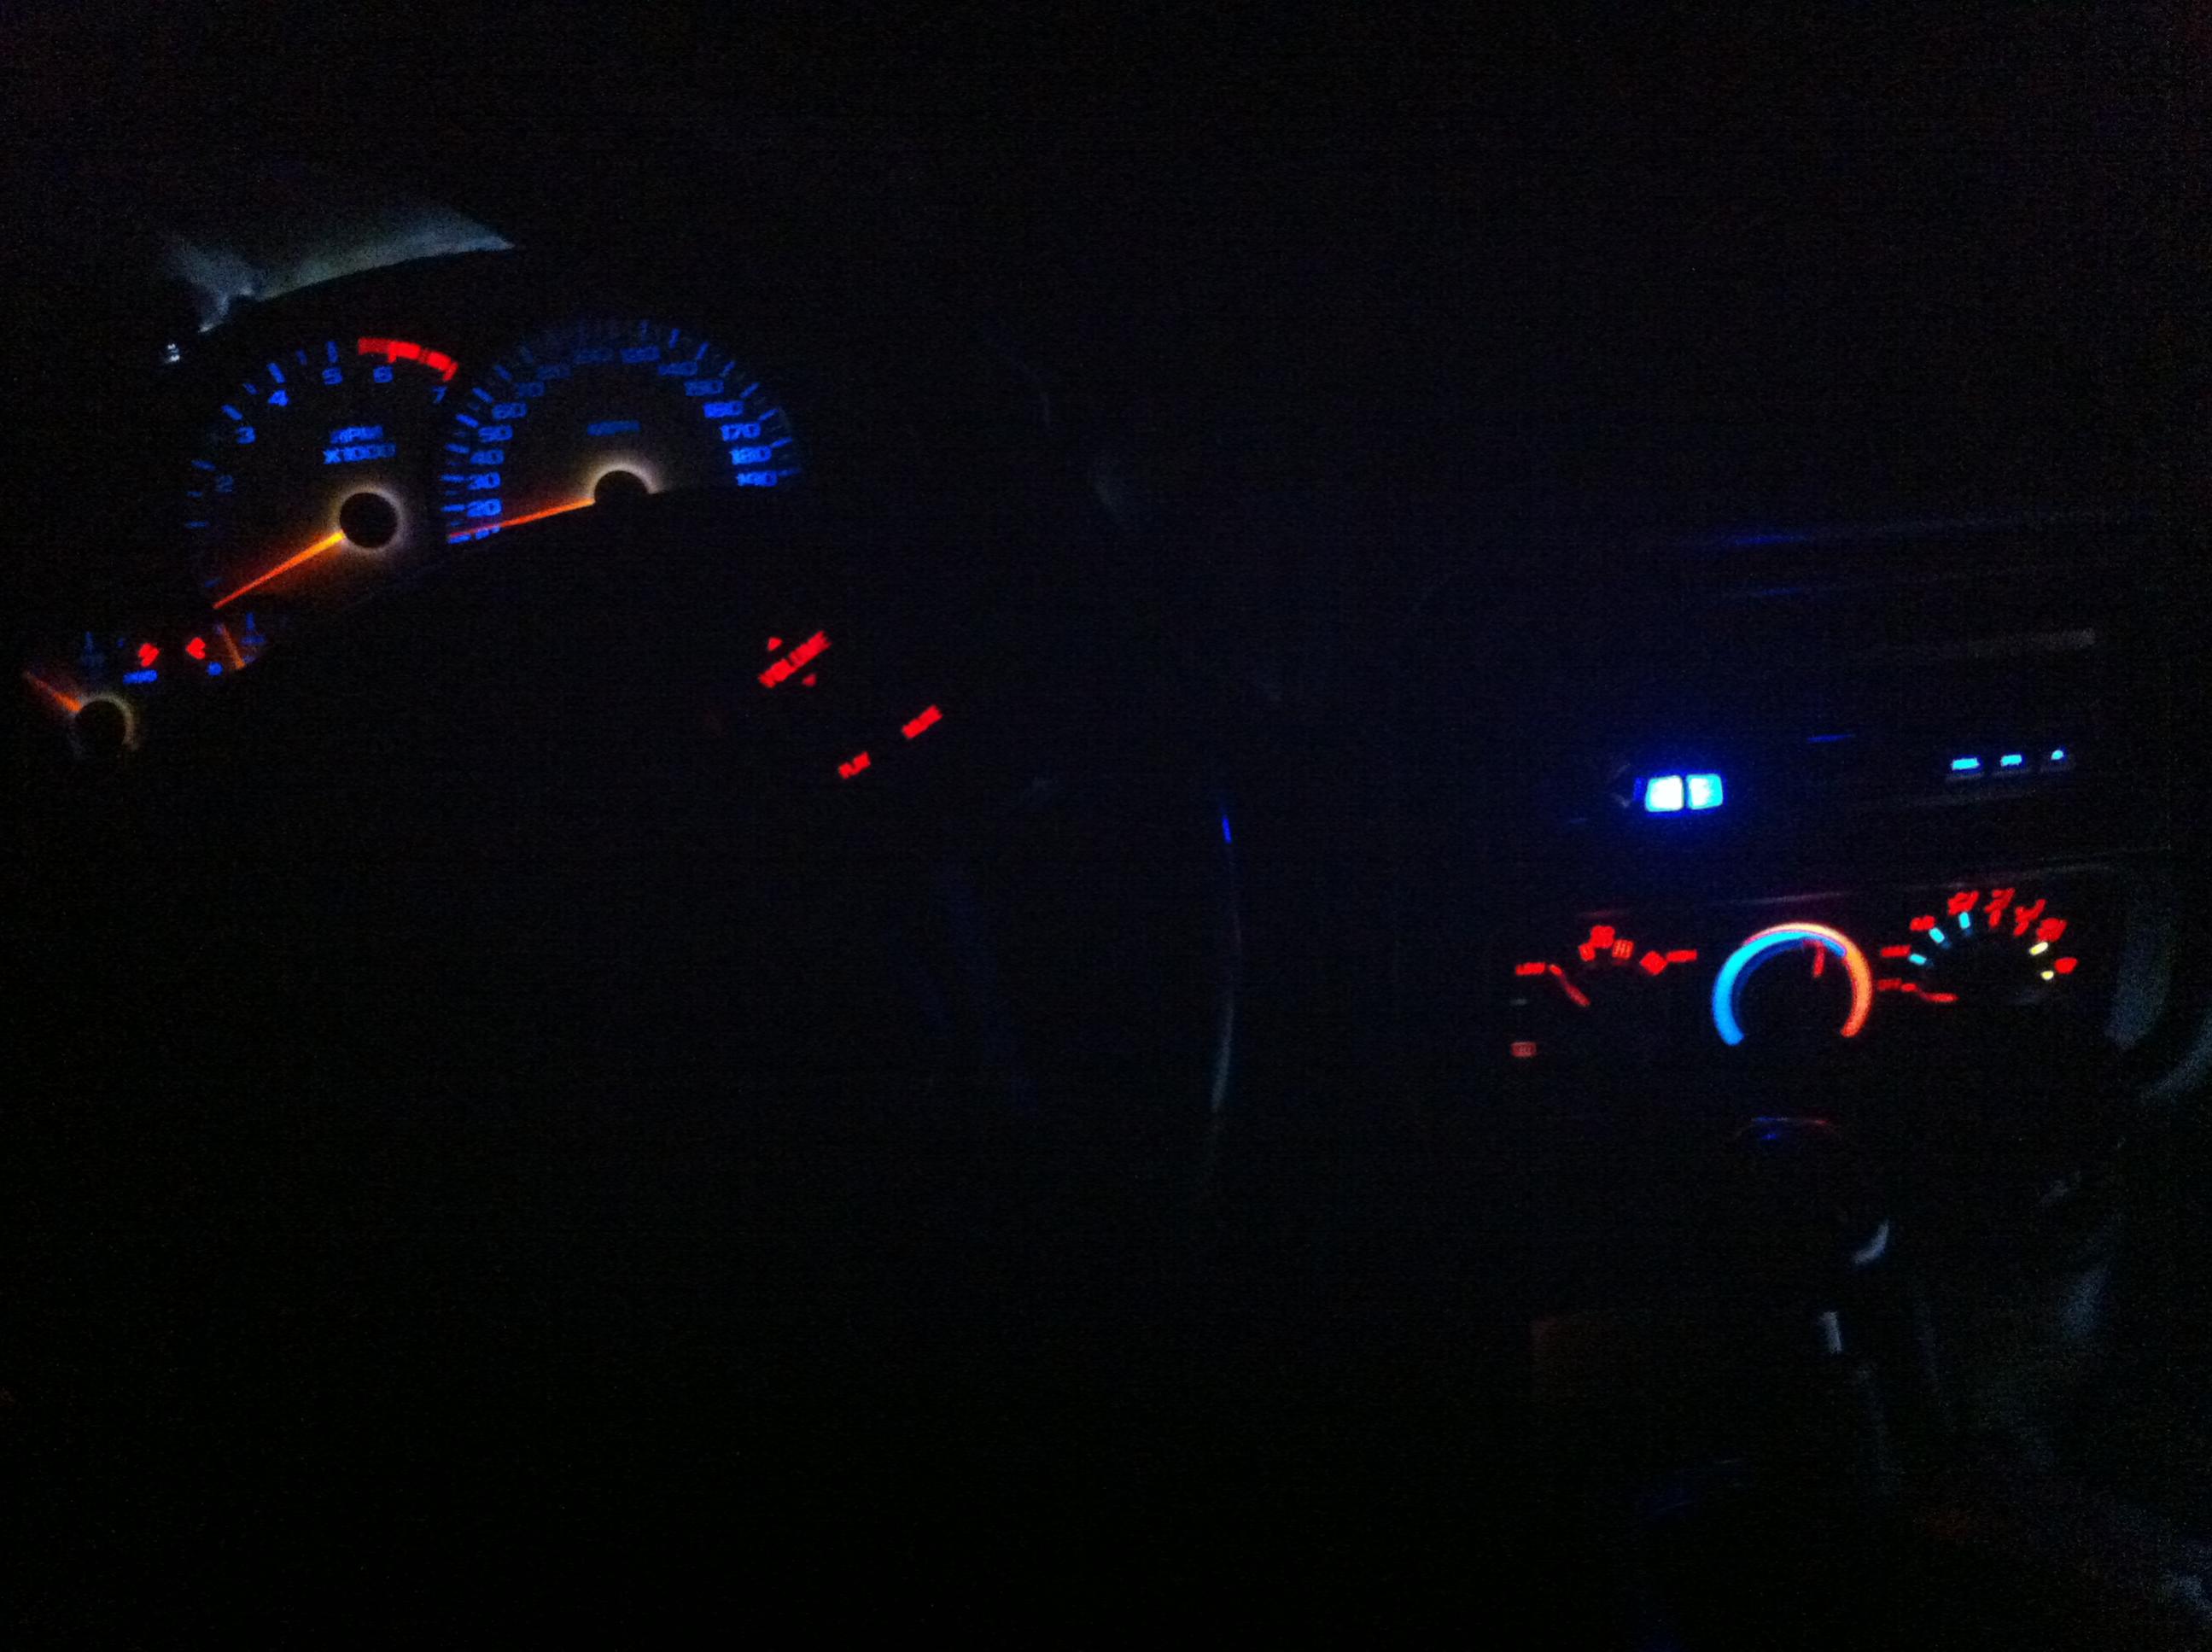
Heres and example of what Im talking about . This is on my Cobalt SS , same concept applies to the f-car gauges .
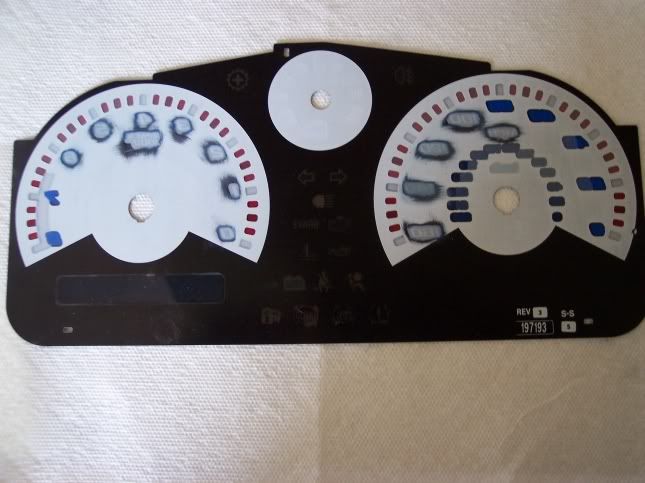
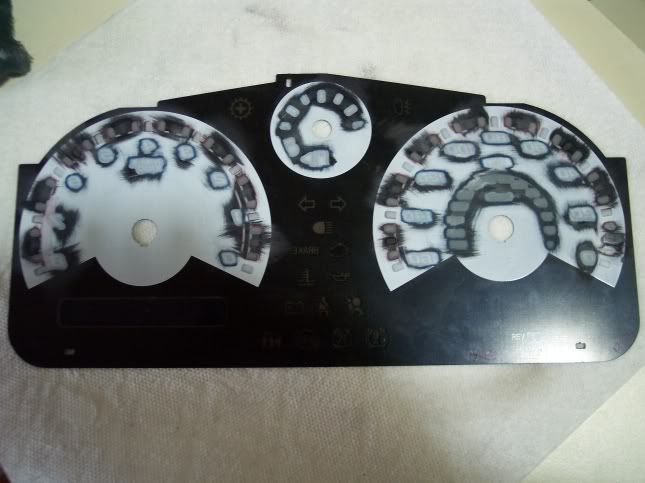
Before
After with white LEDS , no needles in the first pic.

Same concept applies to the F-cars . I did a Camaro cluster too , but cant find its pics .
Heres and example of what Im talking about . This is on my Cobalt SS , same concept applies to the f-car gauges .
Before
After with white LEDS , no needles in the first pic.
Same concept applies to the F-cars . I did a Camaro cluster too , but cant find its pics .
 11-23-2009, 08:19 AM
#142

That is awesome.I was wondering if that color could be sanded off or removed with some kind of chemical.I really didnt want to spend $ on an overlay.You say it cannot be done with hvac and headlight overlays.What grit sandpaper did you use?Your guages nice.Also I read on here you can change the color of your needles by sanding off the color and painting the back of it?
11-24-2009, 06:49 PM
#143
What did you use to remove the adhesive in the back.Damn,i just ruined my factory overlays. I was trying to remove it with lacuer thinner and it ruined them.I should have known better.That is potent ****.Now i got to look for some guages in the junk yard.Also did you use 3M adhesive to put them back together?Thanks for your help<
I used 400 grit and just sanded lightly . It doesnt come like right off , but it doesnt take to much effort either . You cant do it to the HVAC and headlight overlay because the ALL the color is applied from the backside , black included . You will sand the incons off . The gauge face applies the black color to the front of the face , so when u sand the color off the back , your just left with a transparent clear icon . The needles arent as easy as just sanding off the color and appling new . Most paints will not uniformly reflect the light passing thru the needle . The factory uses a reflective red , with an opaque white topcoat . You also get into the issue of weight . The needles are calibrated to the air cores and when u make them heavier or lighter , both of which can happen when you painting , it does throw off the calibration .
 07-26-2012, 04:20 PM
#146
On The Tree
iTrader: (5)
Join Date: Feb 2006
Location: huntington beach CA
Posts: 142
Likes: 0
Received 0 Likes
on
0 Posts

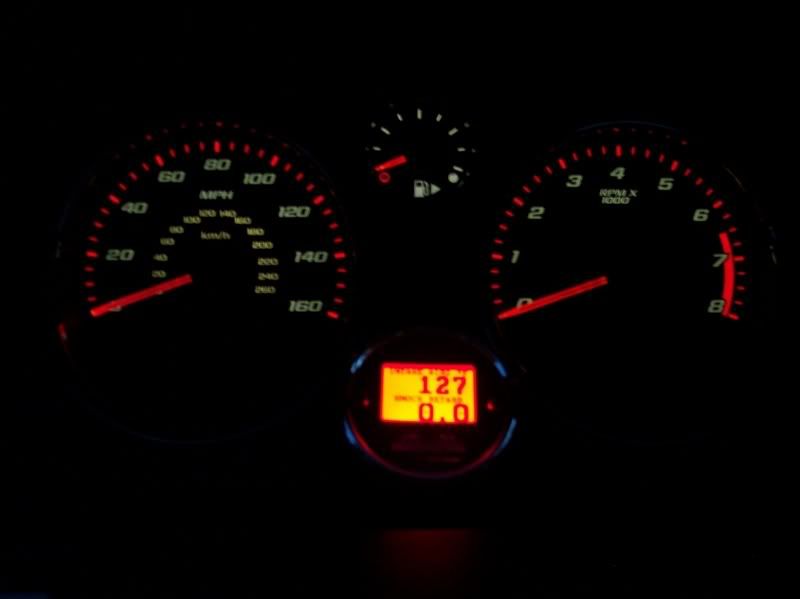
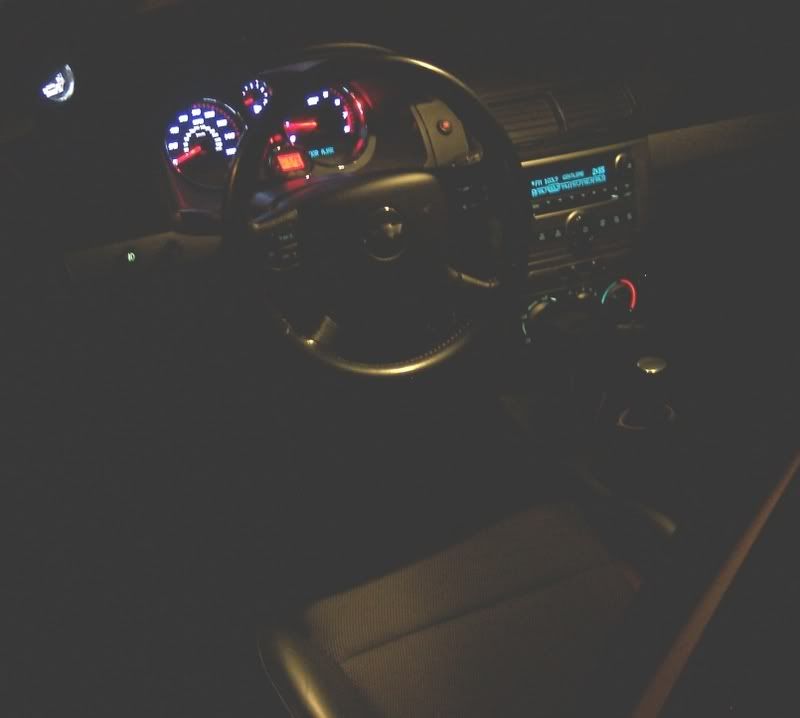
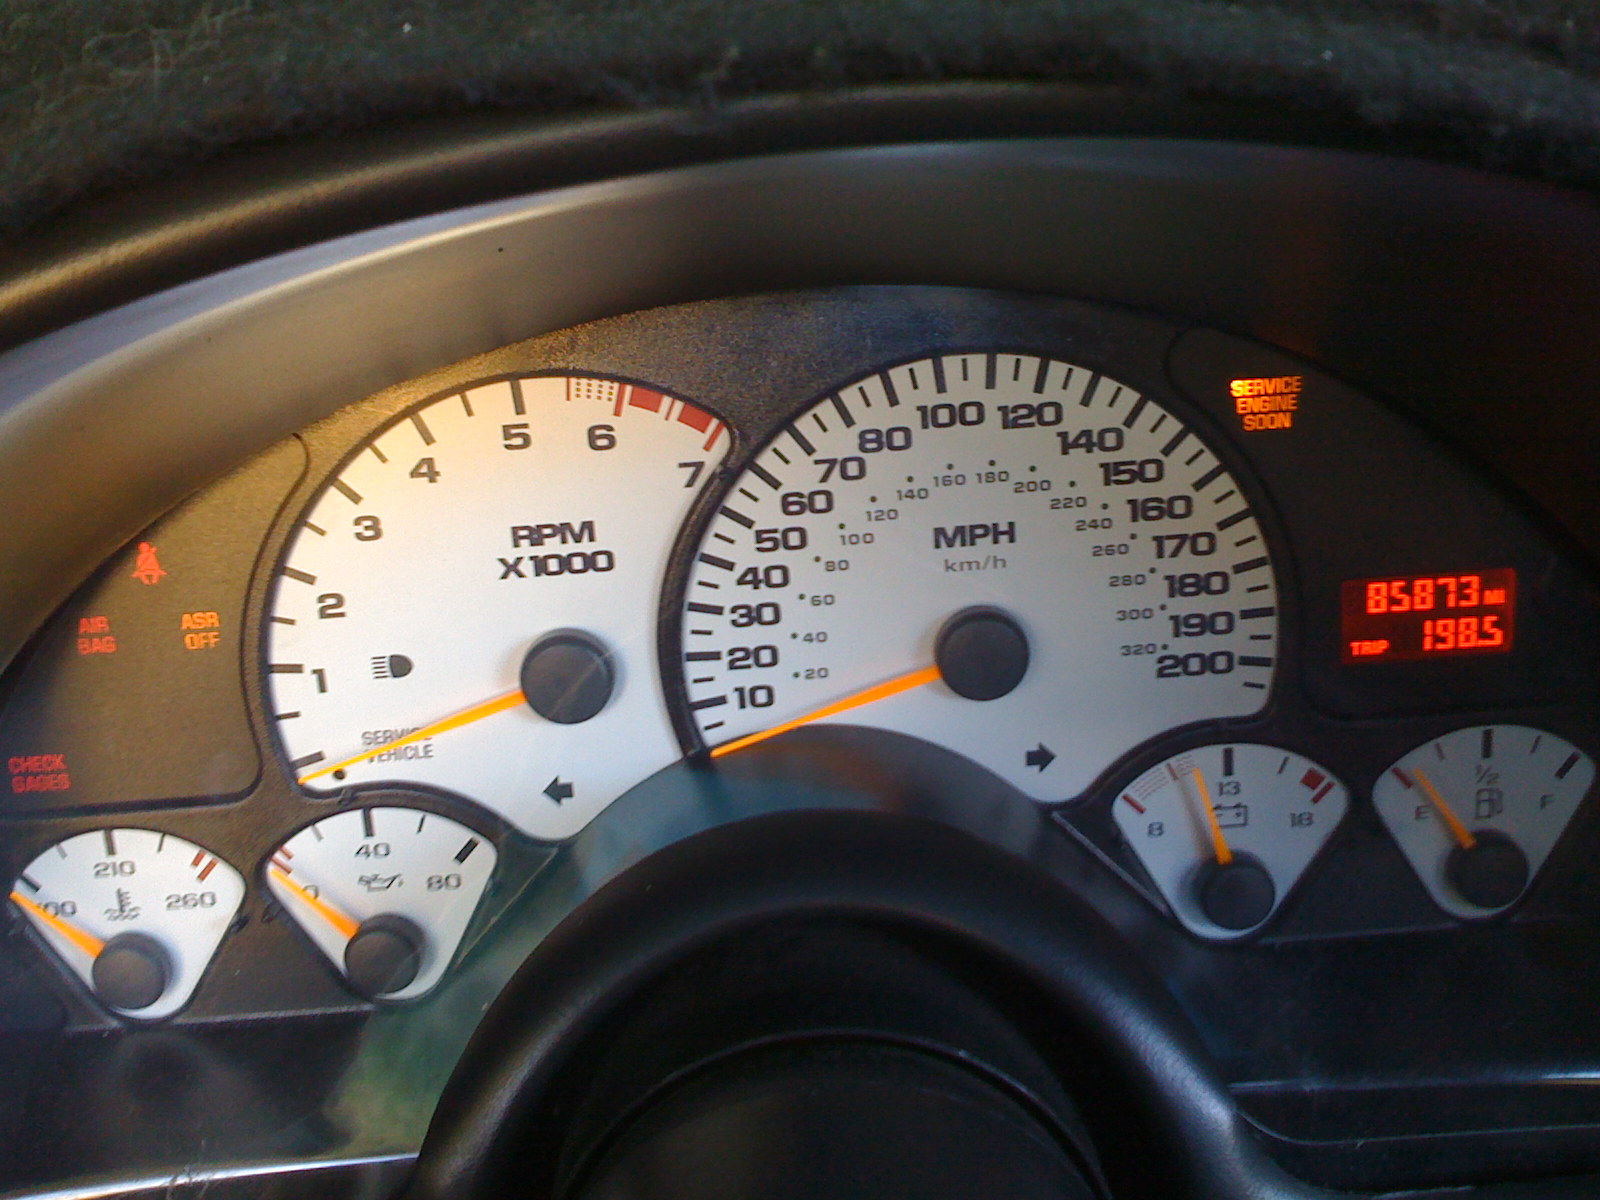
Here's what mine look like. I got mine done from the guy at the WS6 store Im pretty sure but he said he wasn't gonna do the 200 MPH gauges anymore so I lucked out. I used the cool white bulbs not being sure if the blue in the gauges was a film or not and it turns out it was so it's dark blue as you can see. There's a couple places where the light is kinda dim but it was worse before I changed them so I am very happy with the way it came out. I used the WLED-CW5's as was suggested by a couple guys on here and as usual they didn't steer me wrong. I also did the HVAC lights since they burned out and that was as simple as could be but I had to bust the bulb and reem it out since the bulbs in there refused to budge. I'll post the pics befroe and after with a shot of the car as well. Thanks guys for all the help and paving the way for the rest of us!!

 06-14-2013, 05:04 PM
#149
Staging Lane

Join Date: Jan 2013
Location: South Texas
Posts: 81
Likes: 0
Received 0 Likes
on
0 Posts
I have done my map lights, dome light, and transmission indicator so far and love the results. How hard is it to get the dash out to do this?
I am looking at the different prices and light intensity this is what I am going to do with but the intensity only has a 1, anyone have thesse installed how bright are they and do I go with 120 0r 90 degree beem angle?
Part Number: WLED-R-120 | UPC: 847781008487
Also what do you guys think red or blue?
 03-18-2016, 06:51 PM
#154
Staging Lane
I realize this is an old thread, but I am changing over to LEDs and have something to share. I have found a way to pull the #74 Light bulbs (Doors, HVAC, Gear Selector) out without busting them.
Use a small piece of Gorilla Tape, wrap it around the bulb really tight a couple times, making sure you use a piece big enough so that is covers the bulb and gives you room above the bulb to pull. You don't even have to squeeze the bulb this way, and it will come out pretty easily.
Update: The HVAC lights were too small to get a good grip on, so same theory... Use a little sandpaper on both bulbs, then, use a VERY SMALL amount of superglue - right on the tip of the bulb (DON'T GLUE THE BULB to the connector or you just made it worse!) then put the tape on tightly, hold for 30 seconds, I gave it 20 more minutes to set up, and they pulled right out.
Last edited by rgCarGuy; 03-18-2016 at 08:07 PM.
The following users liked this post:
wannafbody (05-25-2021)
01-28-2017, 03:21 AM
#155
Teching In

Join Date: Jan 2016
Posts: 1
Likes: 0
Received 0 Likes
on
0 Posts
Hi,
I just changed my camaro cluster bulbs with new LED but i can see no change than the original one even still very dim. could you please help if there is somthing need to be done other than this.
Thanks
I just changed my camaro cluster bulbs with new LED but i can see no change than the original one even still very dim. could you please help if there is somthing need to be done other than this.
Thanks
 02-19-2018, 10:18 PM
#158

(1) 74-RHP3 - Lights up the auto shift bezel
(4) 74-RHP - HVAC and doors
(1) NEO3-RHP - Headlight switch
(5) 194-RHP5-PC - Gauge cluster.
4410-R9 - Dome light, not sure how many bulbs are in there.
There are a total of 8 bulbs in the gauge cluster, but 3 of them are used for the turn signal bulbs and high beams. If you aren't sanding the back of your overlay, then you can just use the 3 factory bulbs and buy 5 LEDS.
What color are you wanting? The 194-xHP5 distribute the light the best, but they are expensive. I have some red and white 5LED Wedge bulbs left over that I can sell you that are not the xHP5's that did a decent job. I think I have a blue 5 LED wedge bulb also for the high beam if needed.
For the steering wheel, I think you can just just use window film tint over the buttons to make it be the desired color. That's what I did for the factory radio and it turned out perfect as seen here:
https://ls1tech.com/forums/appearanc...l#post19837851
I will say that the McNord overlays are the ones to get because the vinyl film overlays that I have don't allow the light to come through very well. I talked to Mark at 6LE and they are going to be making the overlays again soon. They are currently not in production.
02-21-2018, 02:31 AM
#159
The neo wedge I got from super bright led's and the dome light I got from diode dynamics to test out and it's not a perfect fit but it is not bad.
05-19-2021, 10:09 AM
#160
No, if they don't light up....take them out and flip 180� and plug back in.