
Black 06' Denail, full correction, pic heavy, you might want to bring a snack
 03-17-2013, 01:47 AM
#1
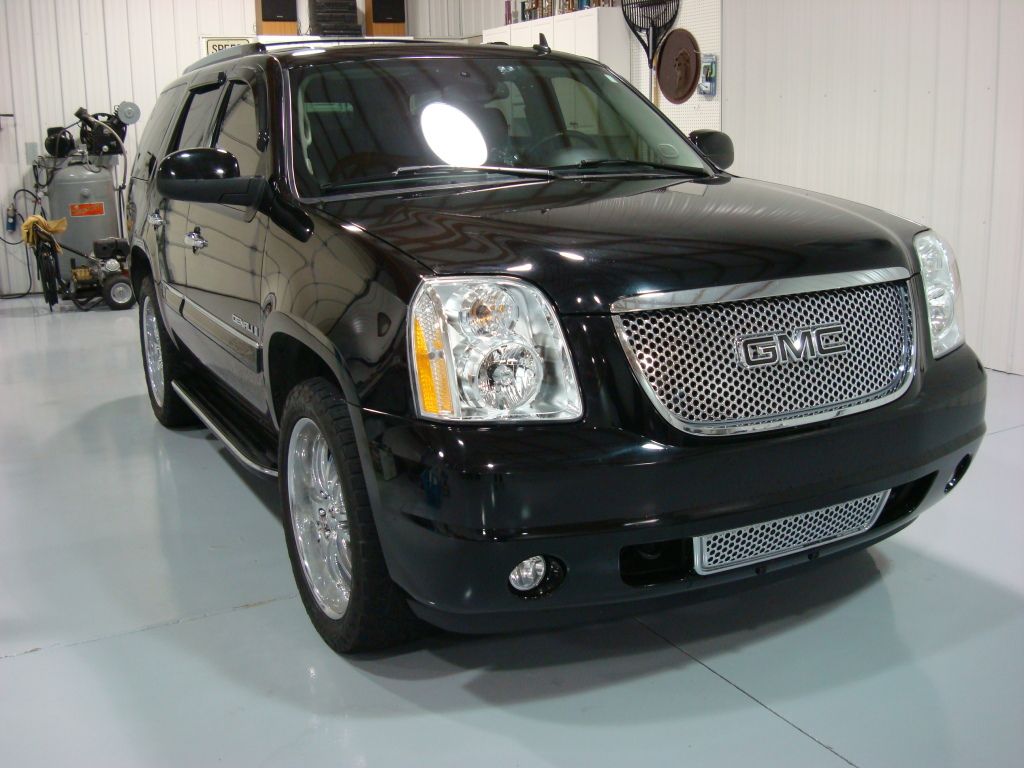
This by far is the biggest/worst job I've done so far. A friend of a friend saw some of my recent corrections and wanted me to look at his cars. After a long conversation we decided to do his wife's daily driven 06' Denali first. This poor thing has seen years of poor washing/drying practices as well as automatic car washes. 
It wasn't until I washed/stripped any waxes/LSP's from the paint I realized exactly how bad it was. The owner was fantastic to deal with and was very understanding in why it took longer than what I had originally thought.
Products used:
Dawn liquid soap
Meg's APC
Adam's Car Shampoo
Iron-X
Eraser
Sonax
Adam's Detail Spray
Meg's medium grade blue clay
Meg's M100, M105, M205 and D300
Meg's MF cutting/finishing discs, 3in, 5in and 6inch
LC flat 6' grey pad and LC CCS 4' grey pad
LC Orange HydroTech 4' pad
Gilmour Foam Master II foam gun
Varies brushes
Grout sponge
Boars hair brushes
Daytona Speed brushes
Adam's wash mitt(love this thing!)
3M blue and green tape(hated both, will never use again, I was out of Meg's tape)
On with the pics!
I don't have any before outside pics as it was raining the day I started the correction. I also don't have any after outside pics for the same reason. I will get some as soon as I can.
Rims/tires/wheel wells were done first. Then foamed using dawn/Meg's APC/Adam's Car Shampoo.
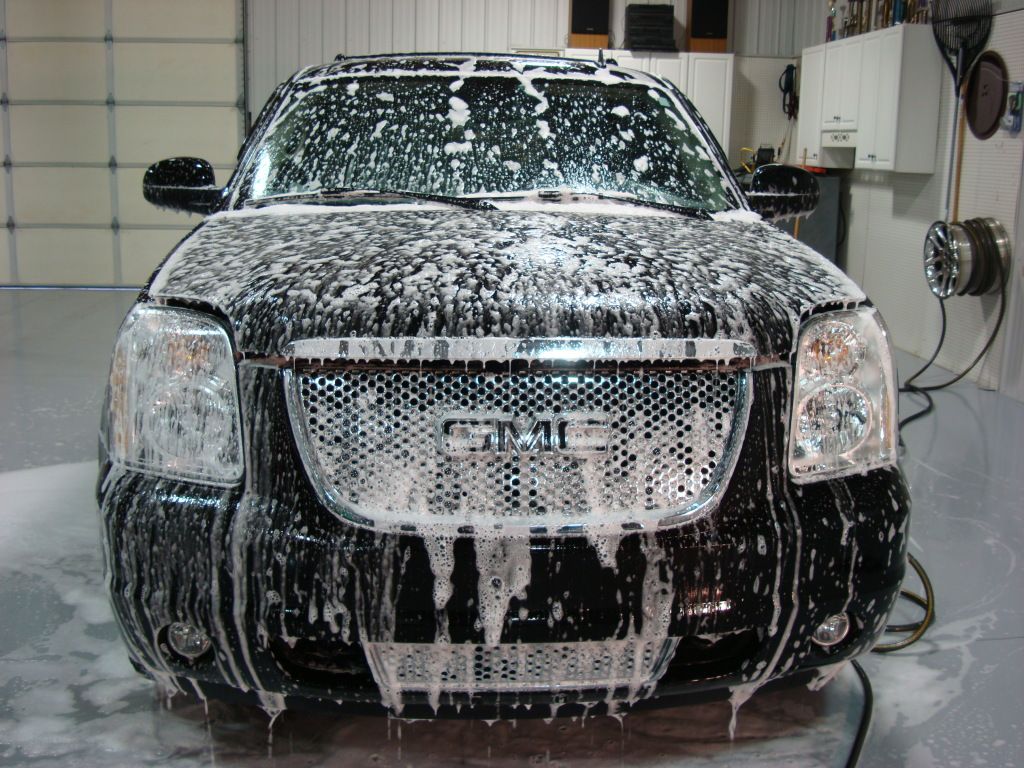
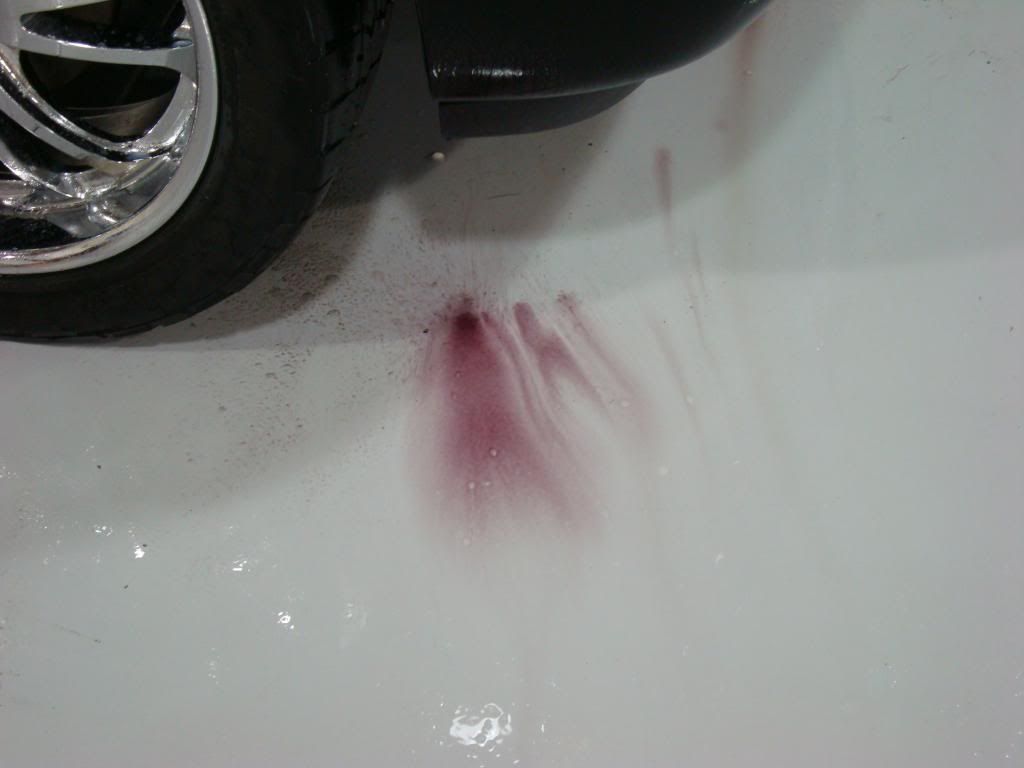
Used Iron X for ferrous metal decontamination and Meg's medium grade clay w/ Adam's Detail Spray
Iron X starting to work. I don't have any pic's when I was rinsing it off but the entire floor was purple.
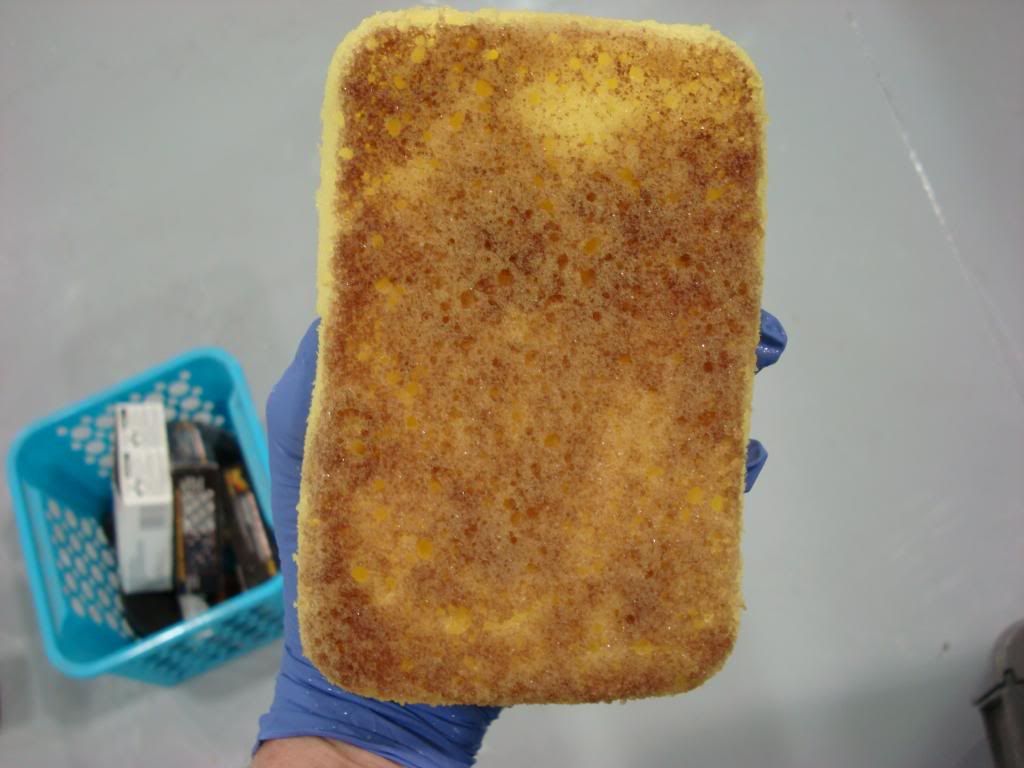
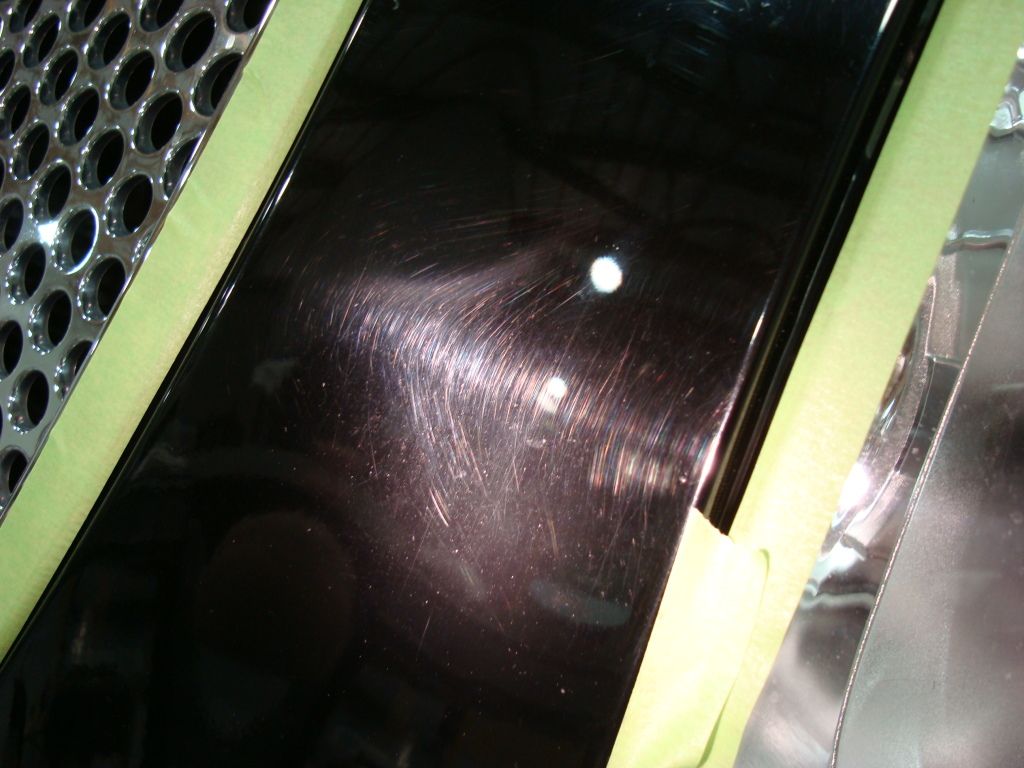
This is from a 1x1 foot section on the hood. I had to clay some parts of the vehicle twice because it was so bad. I didn't do a very good job of flattening the clay out did I?
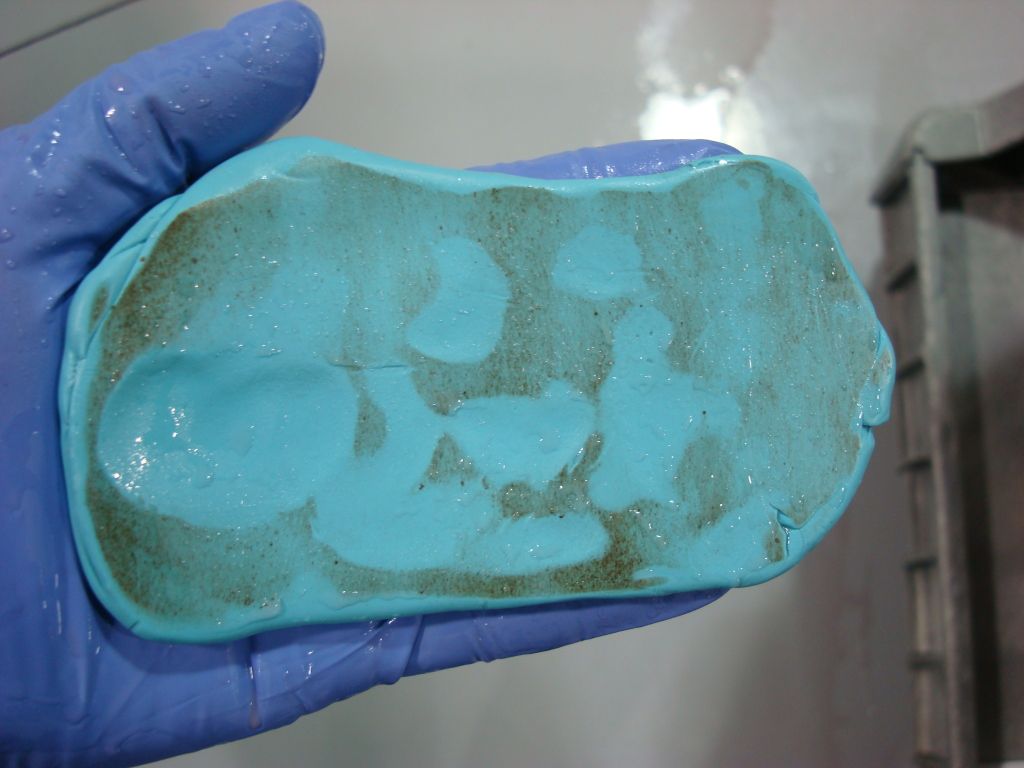
After that it was wiped down and time for inspection. I have well over 200 pics of this thing before and all of them look like this.
It wasn't until I washed/stripped any waxes/LSP's from the paint I realized exactly how bad it was. The owner was fantastic to deal with and was very understanding in why it took longer than what I had originally thought.
Products used:
Dawn liquid soap
Meg's APC
Adam's Car Shampoo
Iron-X
Eraser
Sonax
Adam's Detail Spray
Meg's medium grade blue clay
Meg's M100, M105, M205 and D300
Meg's MF cutting/finishing discs, 3in, 5in and 6inch
LC flat 6' grey pad and LC CCS 4' grey pad
LC Orange HydroTech 4' pad
Gilmour Foam Master II foam gun
Varies brushes
Grout sponge
Boars hair brushes
Daytona Speed brushes
Adam's wash mitt(love this thing!)
3M blue and green tape(hated both, will never use again, I was out of Meg's tape)
On with the pics!
I don't have any before outside pics as it was raining the day I started the correction. I also don't have any after outside pics for the same reason. I will get some as soon as I can.
Rims/tires/wheel wells were done first. Then foamed using dawn/Meg's APC/Adam's Car Shampoo.
Used Iron X for ferrous metal decontamination and Meg's medium grade clay w/ Adam's Detail Spray
Iron X starting to work. I don't have any pic's when I was rinsing it off but the entire floor was purple.
This is from a 1x1 foot section on the hood. I had to clay some parts of the vehicle twice because it was so bad. I didn't do a very good job of flattening the clay out did I?
After that it was wiped down and time for inspection. I have well over 200 pics of this thing before and all of them look like this.
Last edited by LilJayV10; 03-17-2013 at 03:12 AM.
 03-17-2013, 02:10 AM
#2
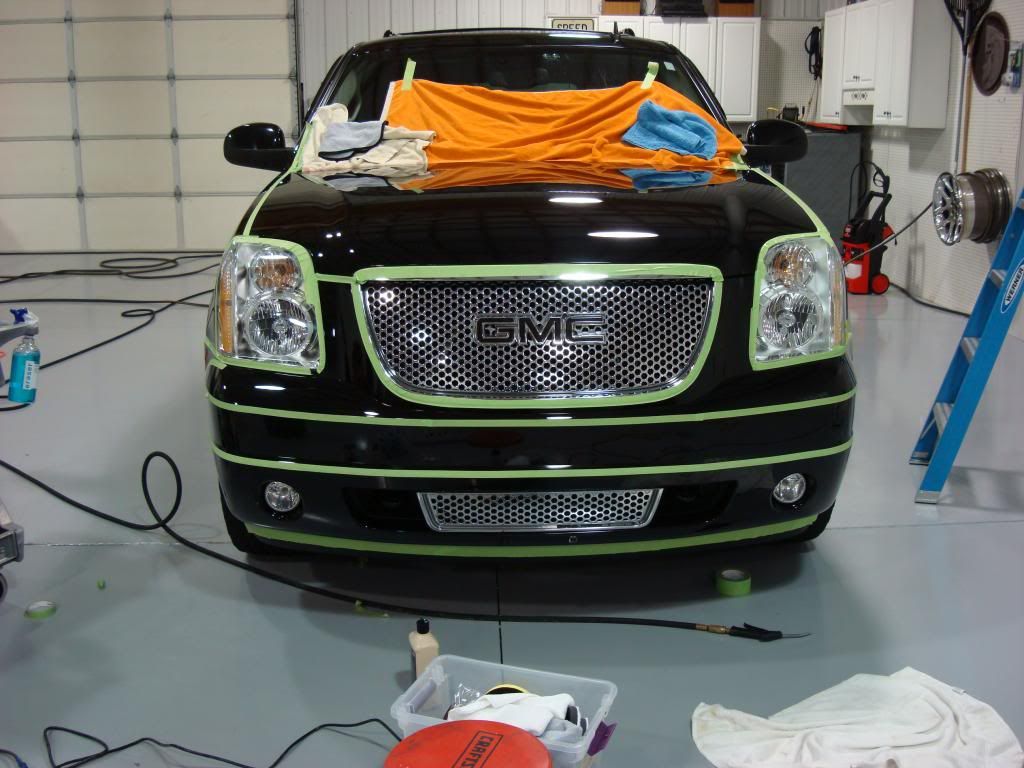
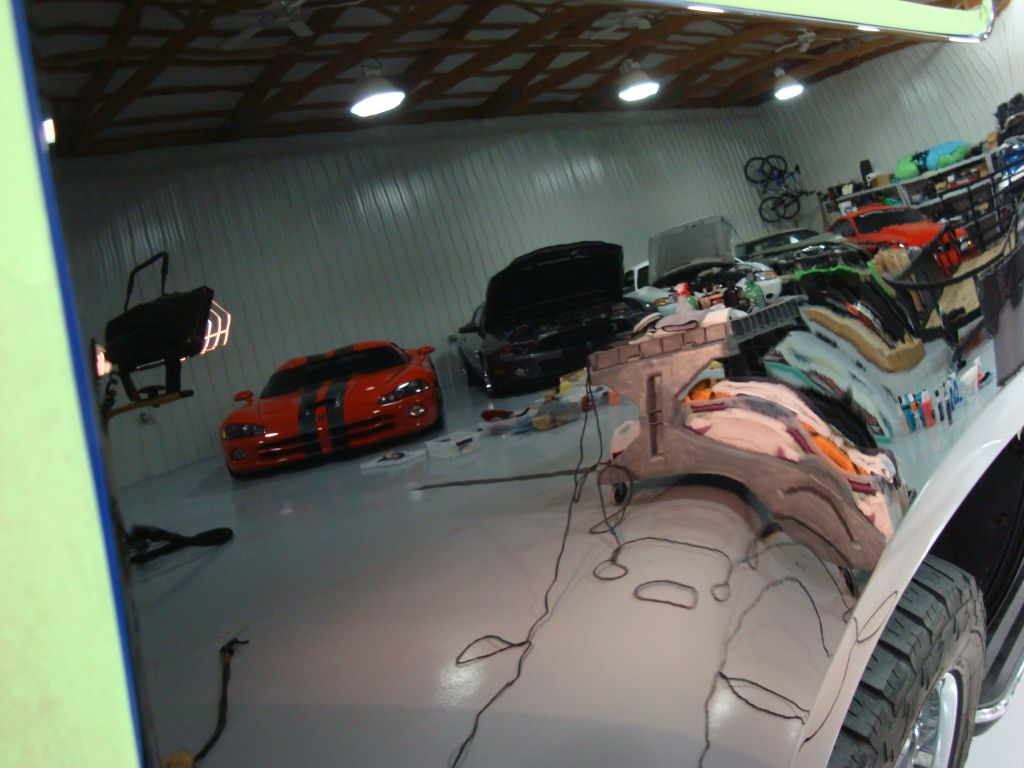
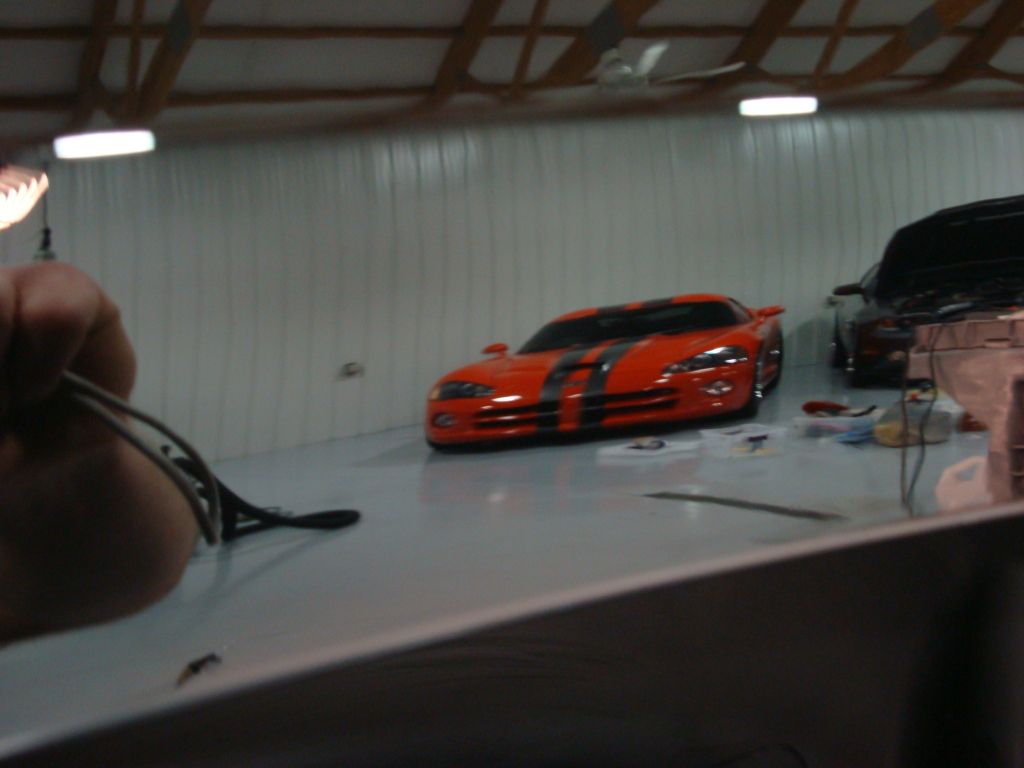
What you can't see in this last pic is there is a gorgeous Tangerine Orange Viper looking at you. More on that later.
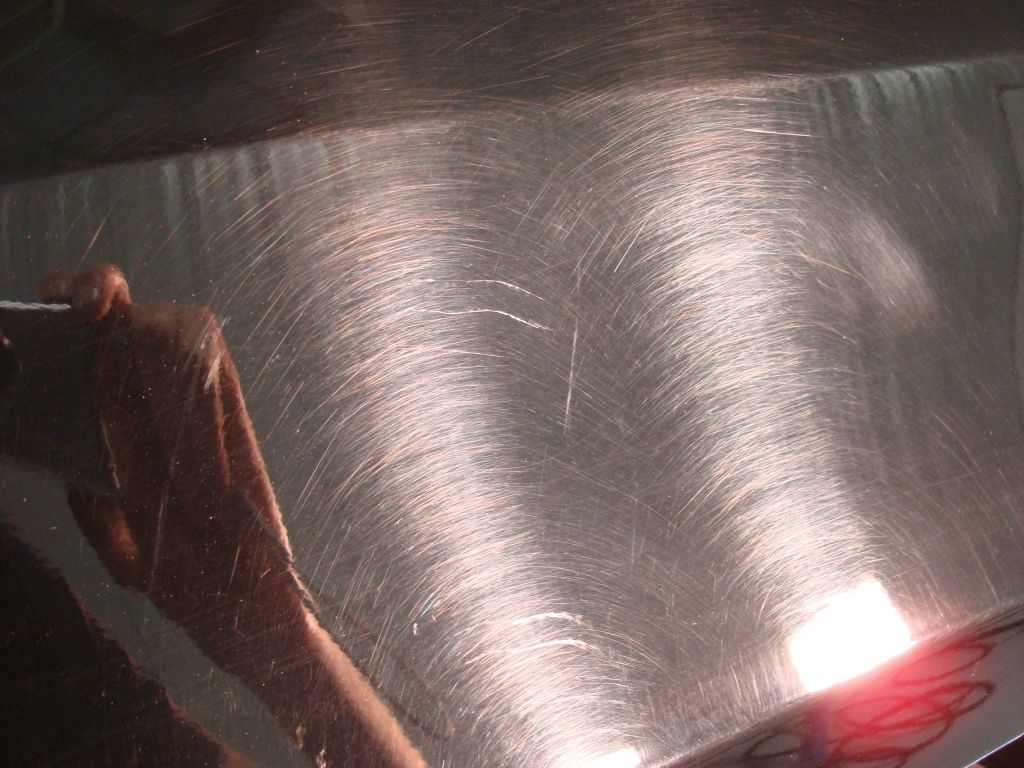
I could go on and on but I think you get the idea. This thing was a train wreck.
Luckily I had ordered the Rupes 21, some 6inch Meg's cutting/finishing discs and some M100 the week before. I had planned on getting all of those things later this spring but after looking at the Denali a few weeks prior I felt this was the time to do it. I honestly don't know what I would have done without the Rupes. It's by far the best $400 dollars I have spent since I started doing this.
This paint is HARD. The hardest I've ran across as of yet. After trying M105 and getting laughed at by the horrific swirls/RIDS I knew it was time to try the MF/M100 combo. To say that I was amazed at this combo on the Rupes is an understatement. The amount of cut the M100 has is insane but it's ability to finish down almost to LSP quality is even more impressive.
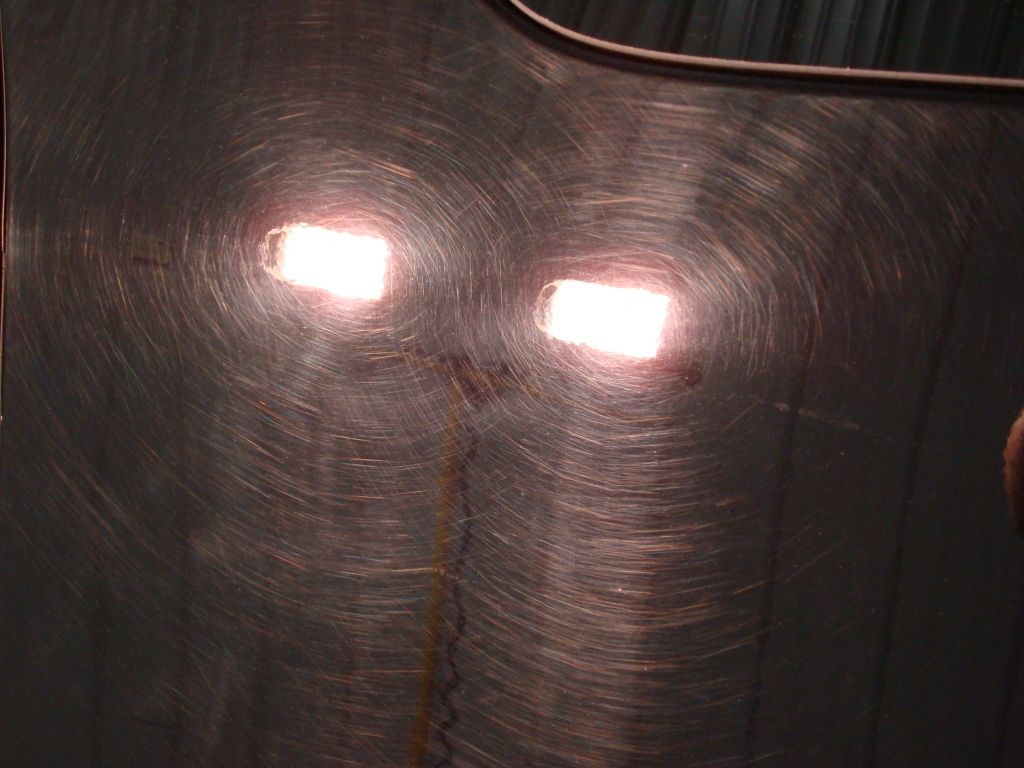
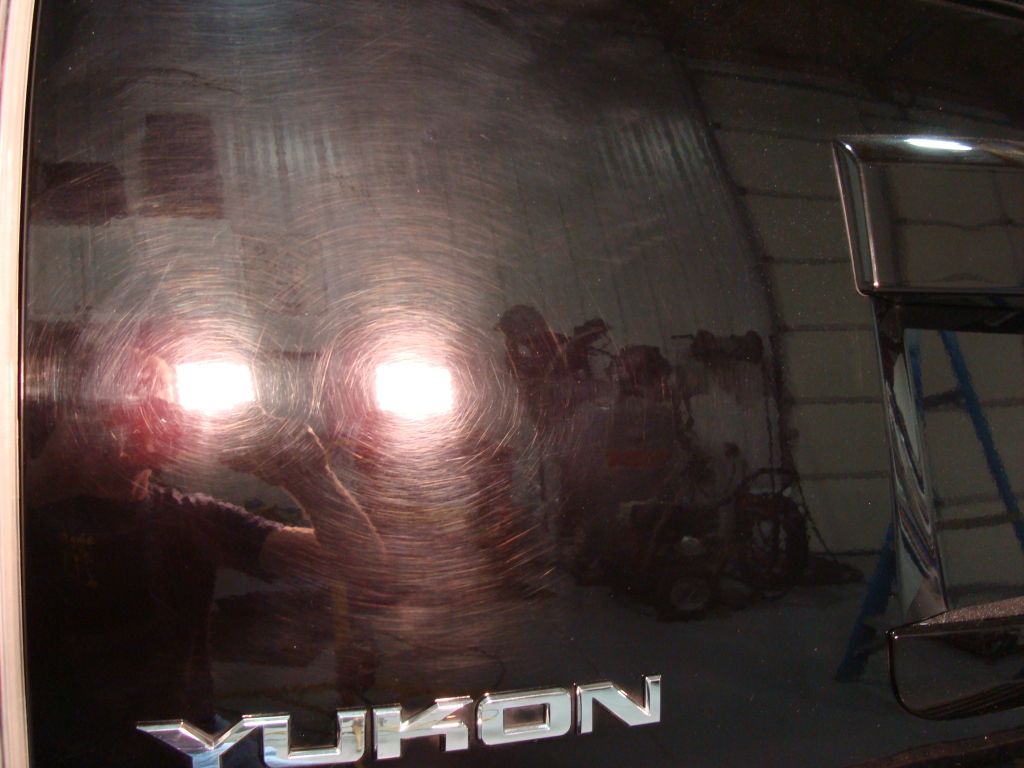
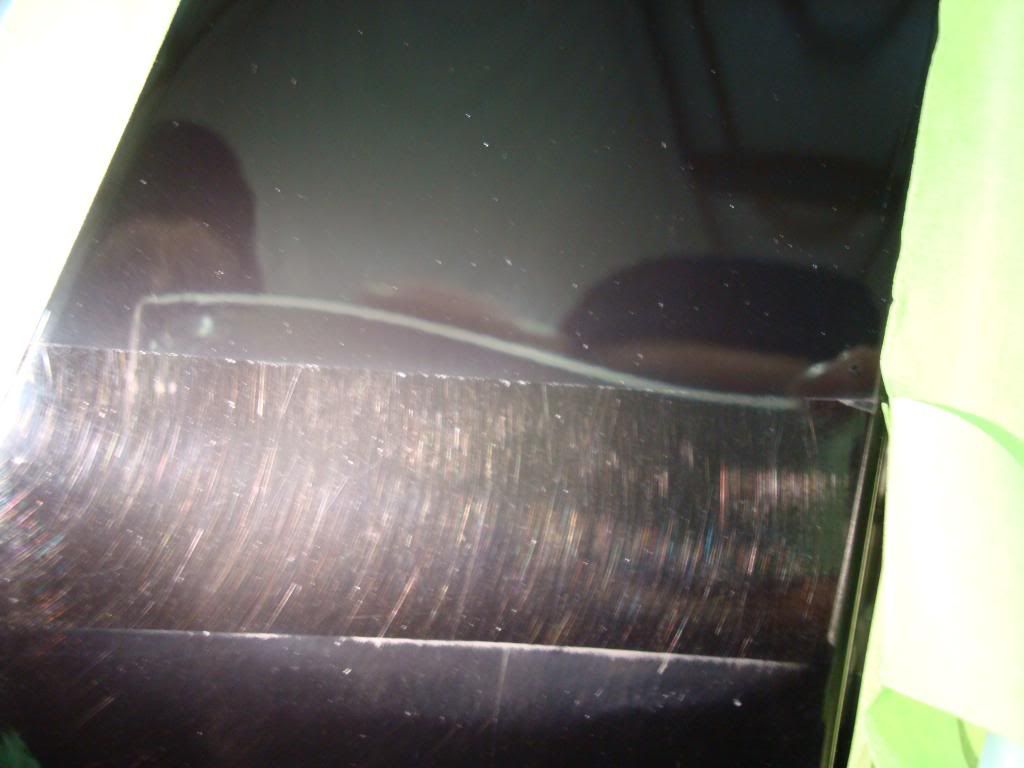
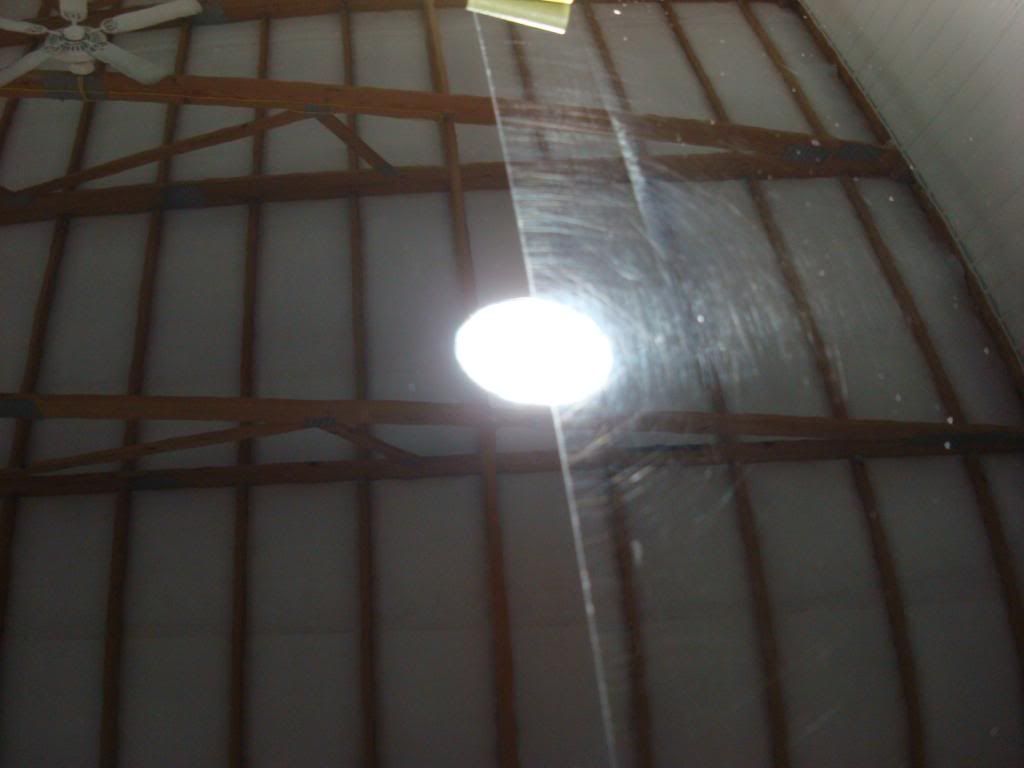
Here's a good example. I went from this
To this in two passes(one horizontal/one vertical)
I found speed setting 4 to work the best. It provided the most cut and the least amount of marring. Please keep in mind that this aggressive of a combo was used because of 1. How hard the clear is 2. The severe amount of defects. A softer paint would have not needed this level of cutting. For example I'm currently doing a full correction on a black '06 Escalade. This paint is the exact opposite of the Denali. It doesn't have as many defects but the paint is soft. I had to comprimise on the amount of correction I was getting/time involved/marring introduced. IMO softer paint is more of a challenge than hard paint. I would rather work on hard paint any day of the week.
Proper pad priming via the KBM was paramount on this thing. Anyone that uses Meg's SMAT should read up on the Kevin Brown Method. Shoot me a PM if you have any questions.
Last edited by LilJayV10; 03-17-2013 at 11:34 PM.
03-17-2013, 02:37 AM
#3
Onto some correcting.
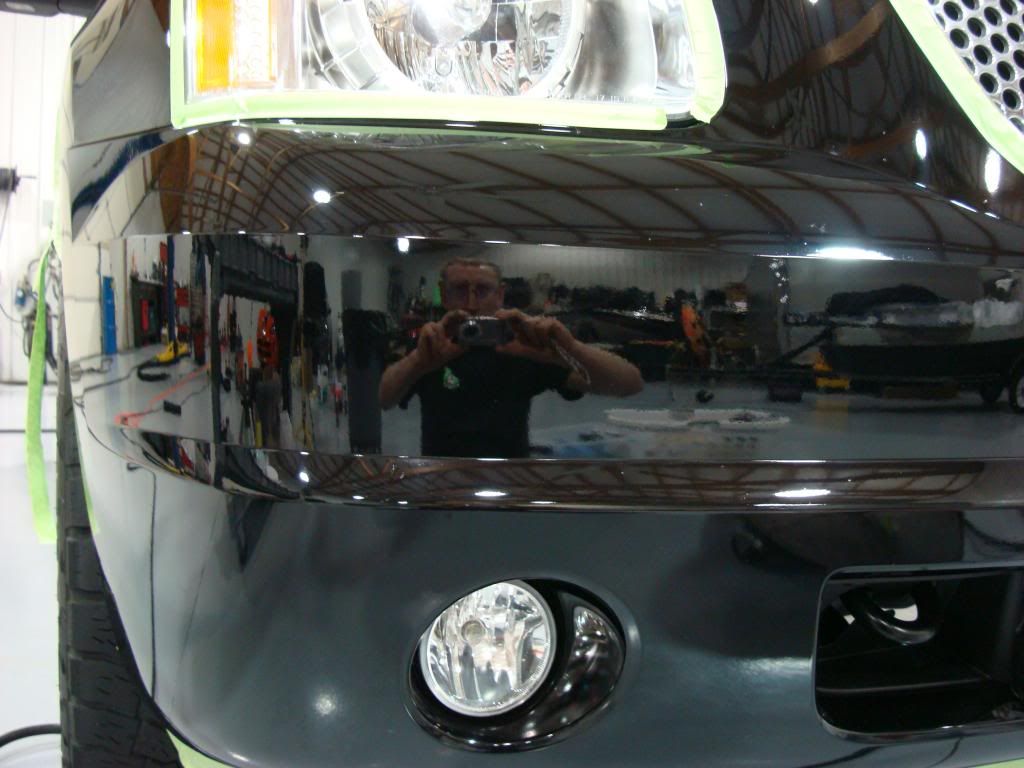
I admit, I was overly cautious when doing the front bumper. Using M100 and MF pads for the first time I wanted to air on the side of caution when correcting a bumper with so many curves. I would rather do that than tell the customer his bumper needs repainting because I can see primer.
Correcting parts only squirrels and rabbits are going to see.
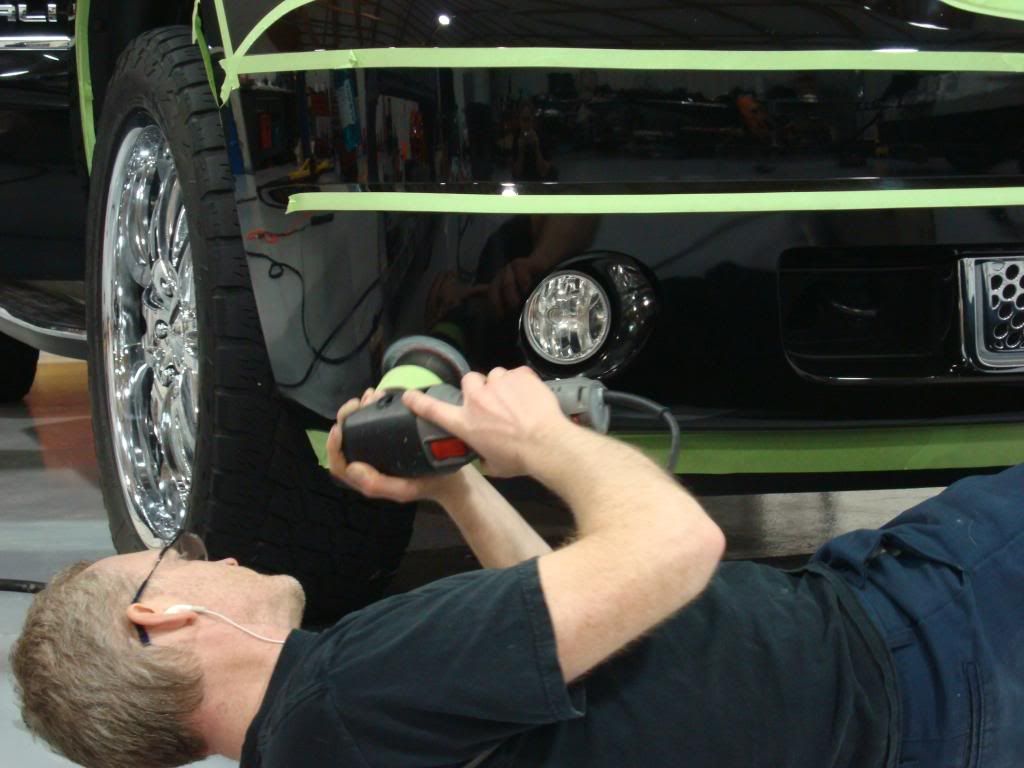
50/50 on the front bumper
After on the front bumper(compound only, no polish yet)

I admit, I was overly cautious when doing the front bumper. Using M100 and MF pads for the first time I wanted to air on the side of caution when correcting a bumper with so many curves. I would rather do that than tell the customer his bumper needs repainting because I can see primer.
Correcting parts only squirrels and rabbits are going to see.
50/50 on the front bumper
After on the front bumper(compound only, no polish yet)
03-17-2013, 03:06 AM
#4
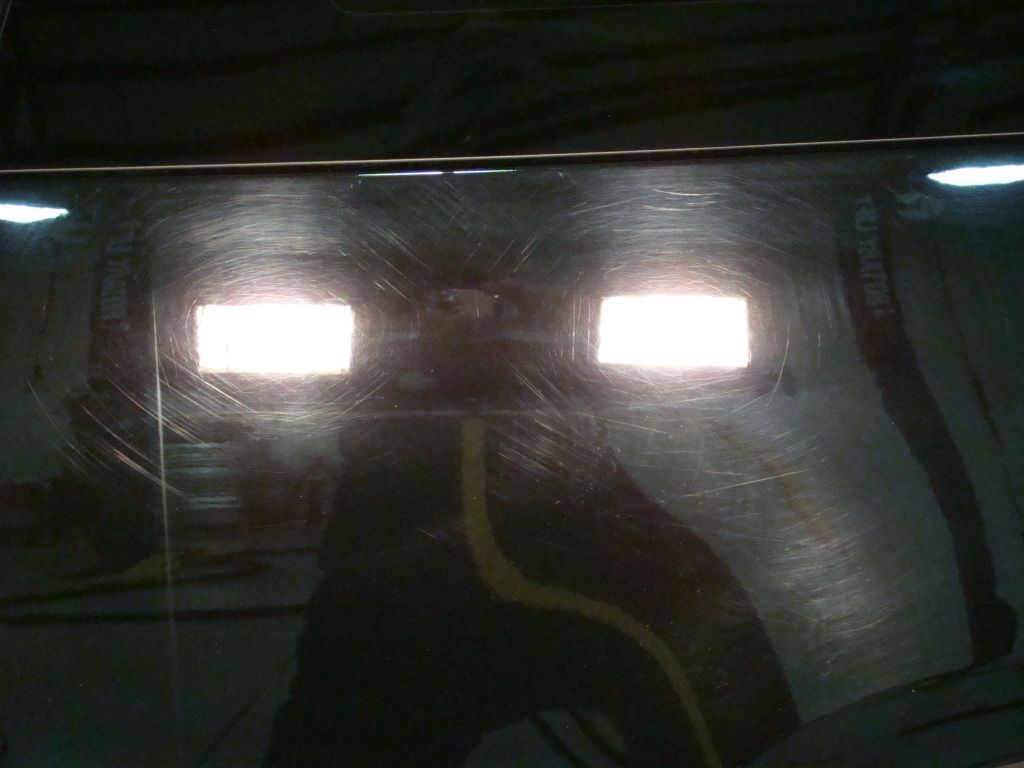
50/50 after compounding on the hood.
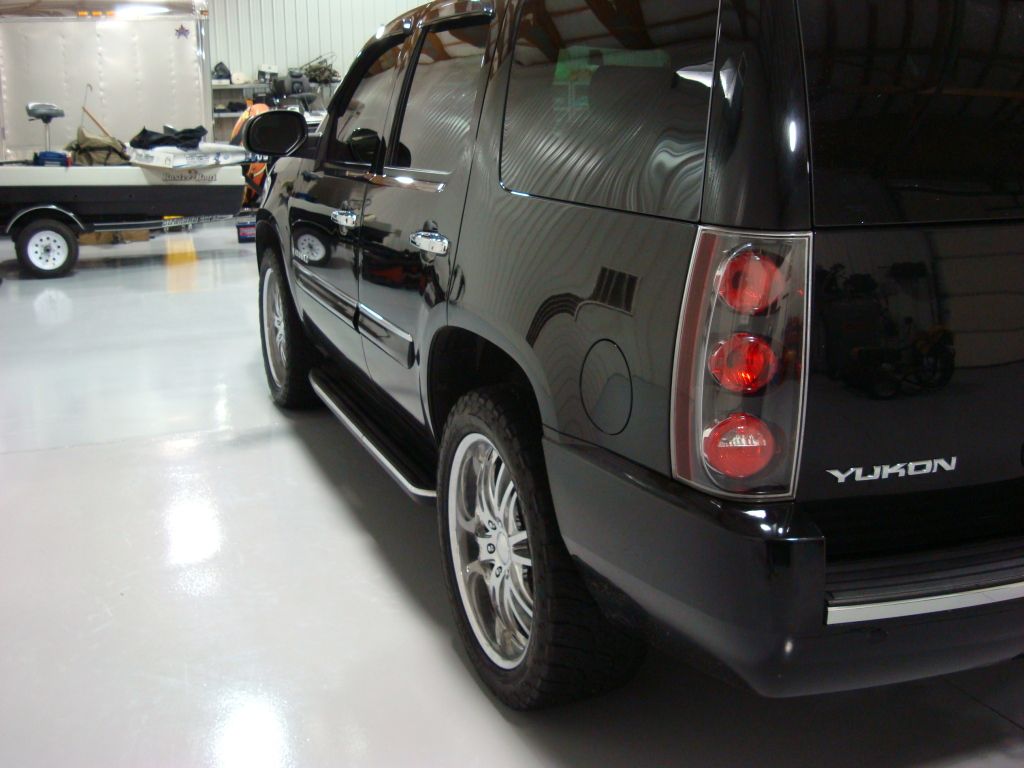
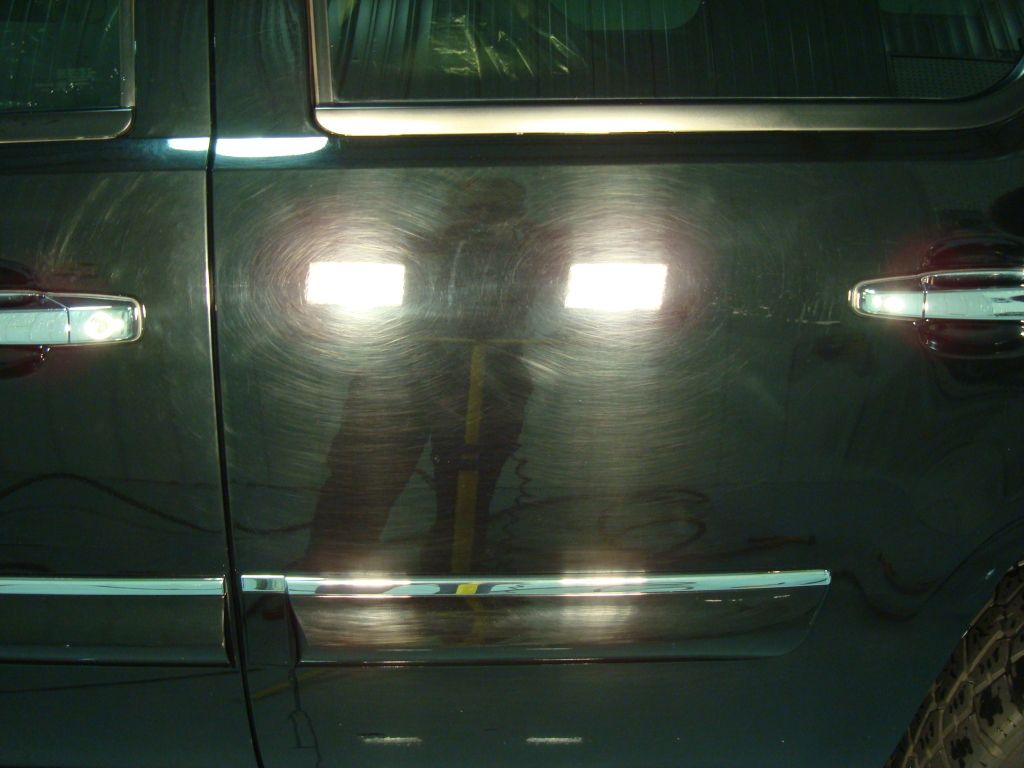
50/50 on right rear quarter/door
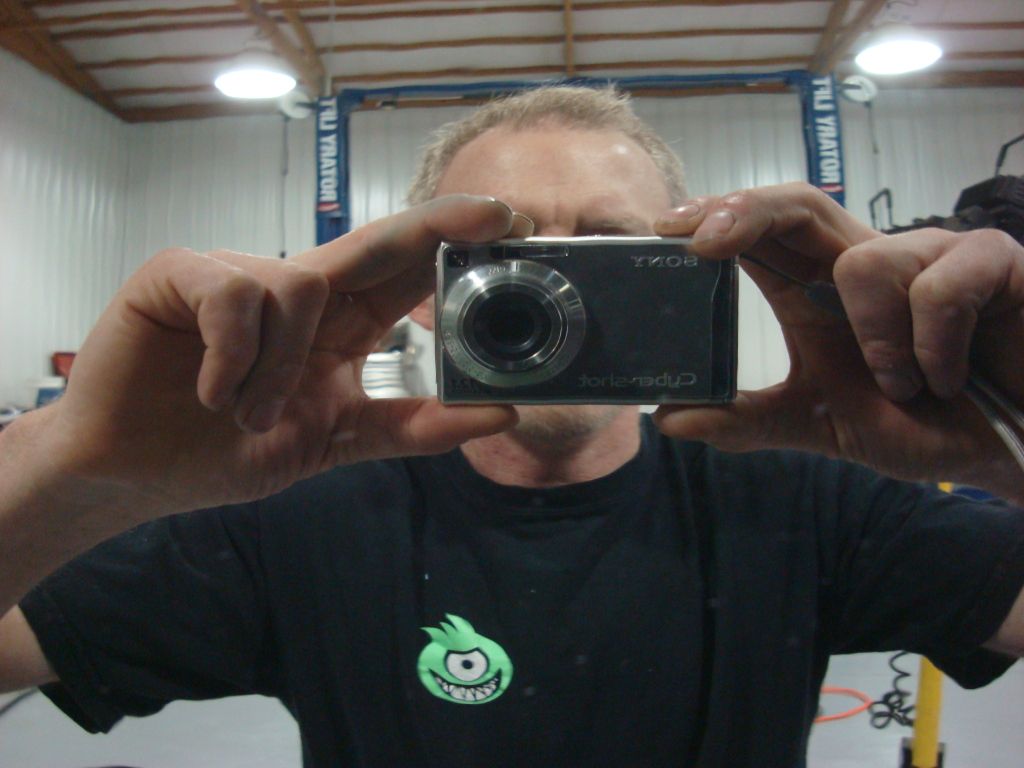
I am going to have to get a better camera or learn how to use it better. There is a lot of detail lost in the picture. I know the camera can take good pics, it's probably me. Here's a random pic from the Orchid Show my wife and I went to last month.

It's late and I'm tired, which is obvious I am posting flower pictures.
To get back on track before I leave here is the the Viper I mentioned earlier.
I will try and post some more pics later tonight.
50/50 on right rear quarter/door
I am going to have to get a better camera or learn how to use it better. There is a lot of detail lost in the picture. I know the camera can take good pics, it's probably me. Here's a random pic from the Orchid Show my wife and I went to last month.
It's late and I'm tired, which is obvious I am posting flower pictures.
To get back on track before I leave here is the the Viper I mentioned earlier.
I will try and post some more pics later tonight.

Trending Topics

 03-18-2013, 11:10 AM
#10
Damn that thing was truly trashed. Very nice results. M100 is awesome and cuts ridiculously fast! Have you tried FG400 with your rupes yet? It's another awesome combo.
Car came out great. Be sure to post pics of that Viper correction!!!
Car came out great. Be sure to post pics of that Viper correction!!!
 03-19-2013, 02:02 AM
#12
The Rupes is awesome!
Thanks Rare, I always appreciate when you post in my threads. 
I haven't tried the FG yet. I've heard great things about it. I've bought so much stuff this past month I keep forgetting about that. The Rupes and the M100 both are new to me and I'm trying to fine tune that combo. I want to make sure I get it spot on before I try something else. I've never used diminishing abrasives, I need to learn about how to use them effectively first.
The Viper isn't too bad. For being sprayed from the factory it looks pretty damn good. Hardly any orange peel. The first time I saw it I asked him who painted it because I didn't know it was a factory color. It shouldn't need much to correct it. I'm doing his new Jeep Rubicon next week. Light polish then opti coated.
Thanks!
 03-19-2013, 03:06 AM
#14
I don't have a lot of pictures during the polishing step. I needed to get it done but I snapped a few.
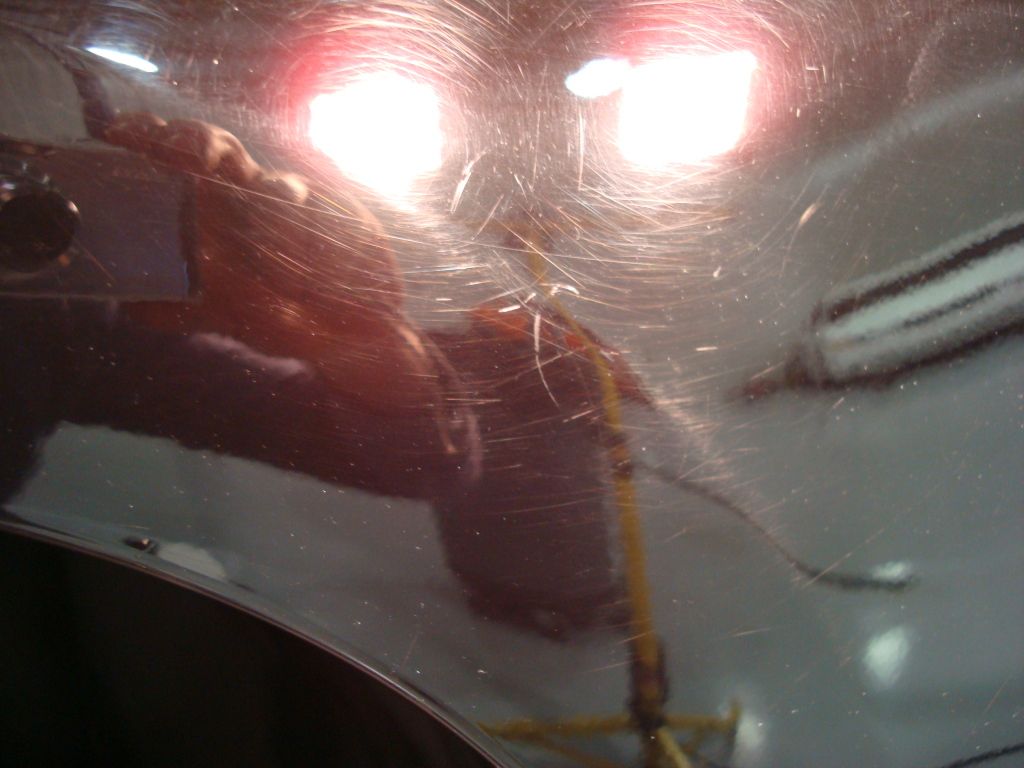
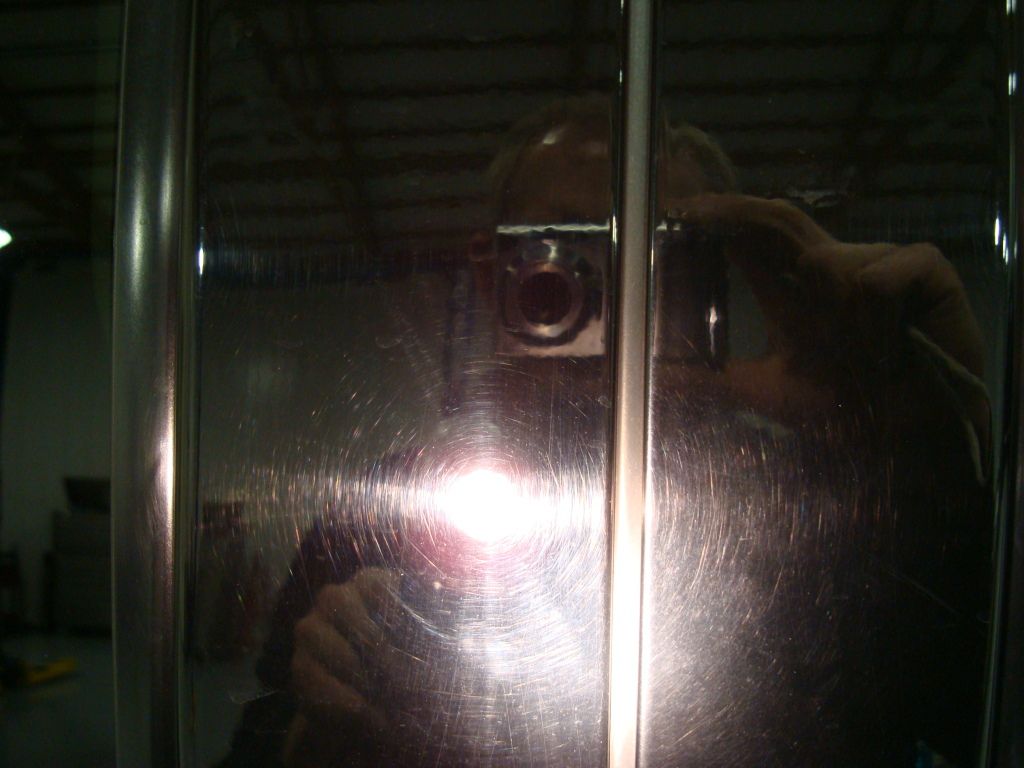
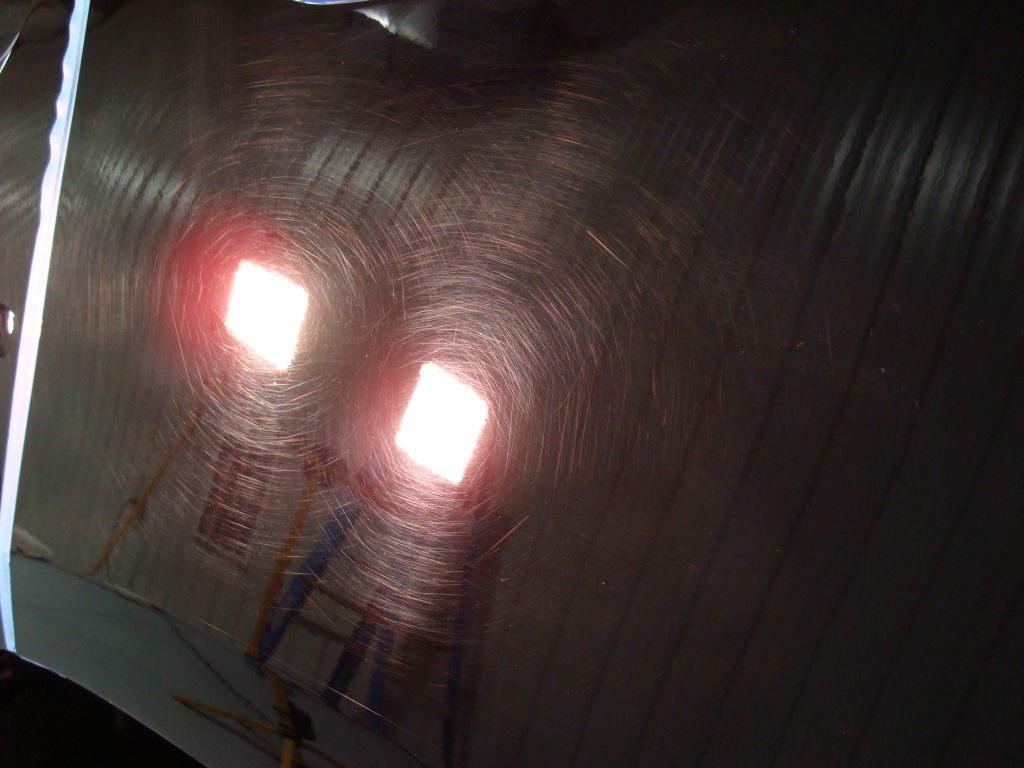
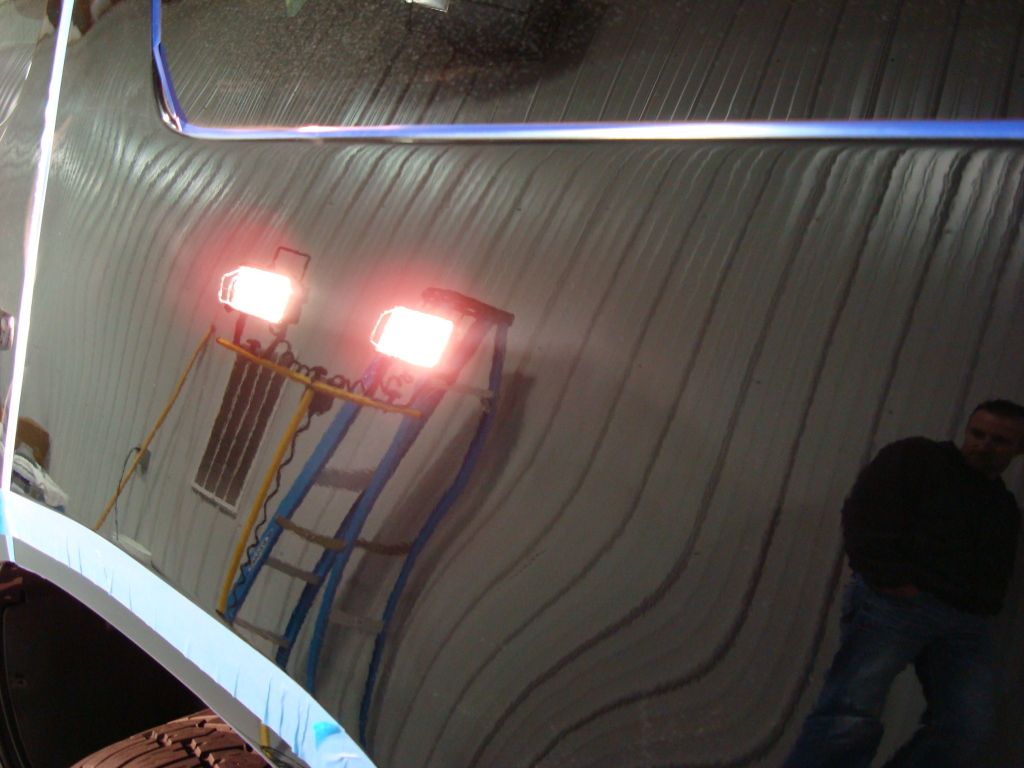
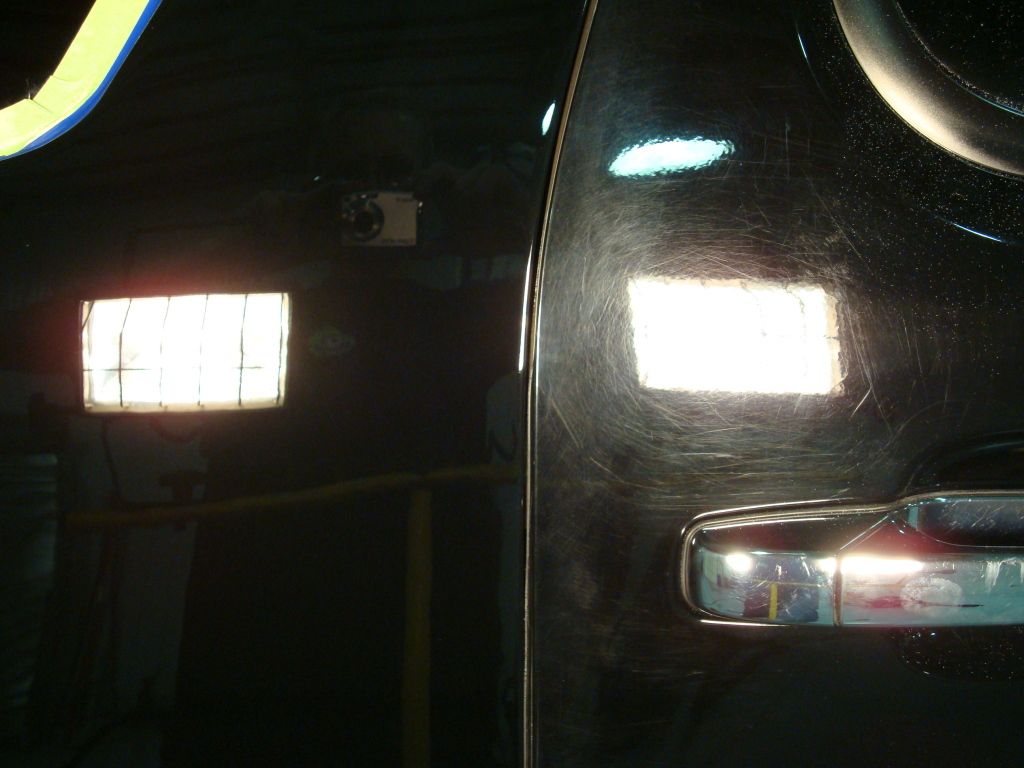
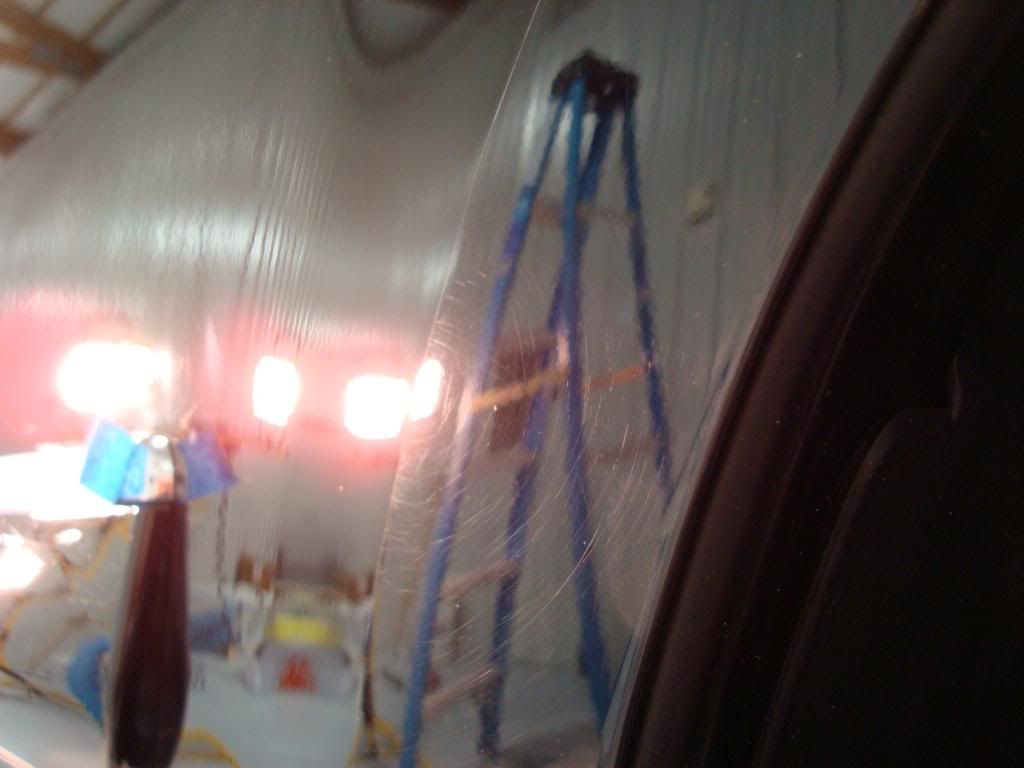
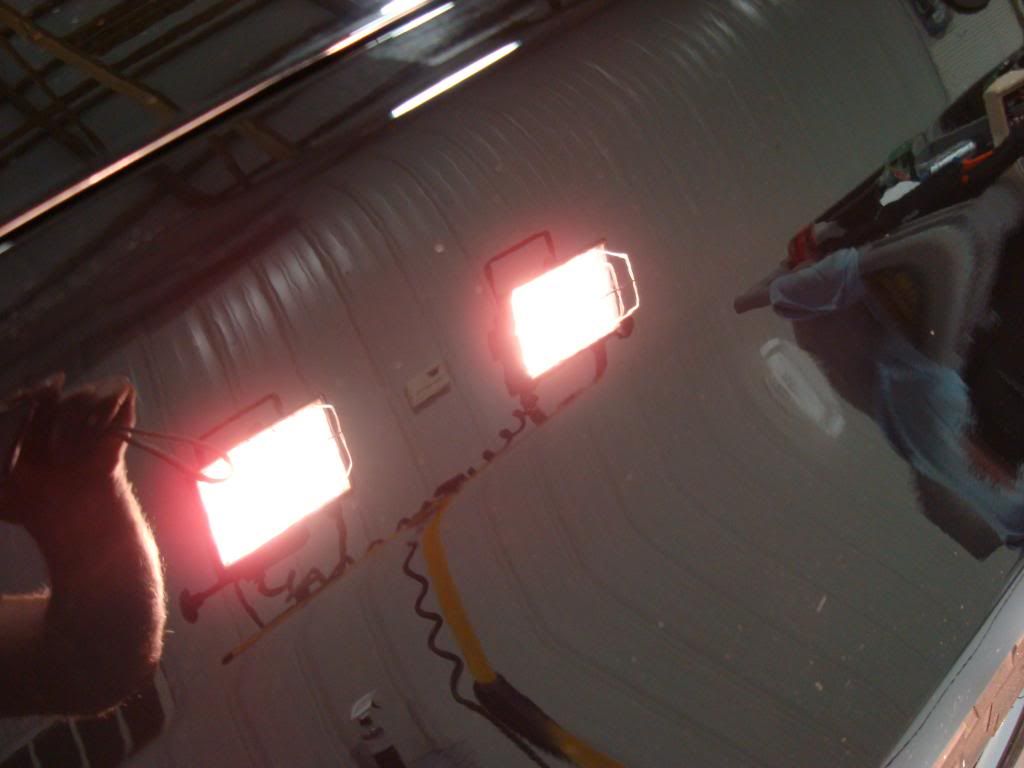
Here's are two good pics of why its so important to polish after compounding. It seems that some people stop after compounding because of the dramatic improvement in overall appearance. Yes the panel is reflective now but there thousands of little circular scratches(micro marring)that can't be seen unless you put the right light on the panel at almost a right angle.
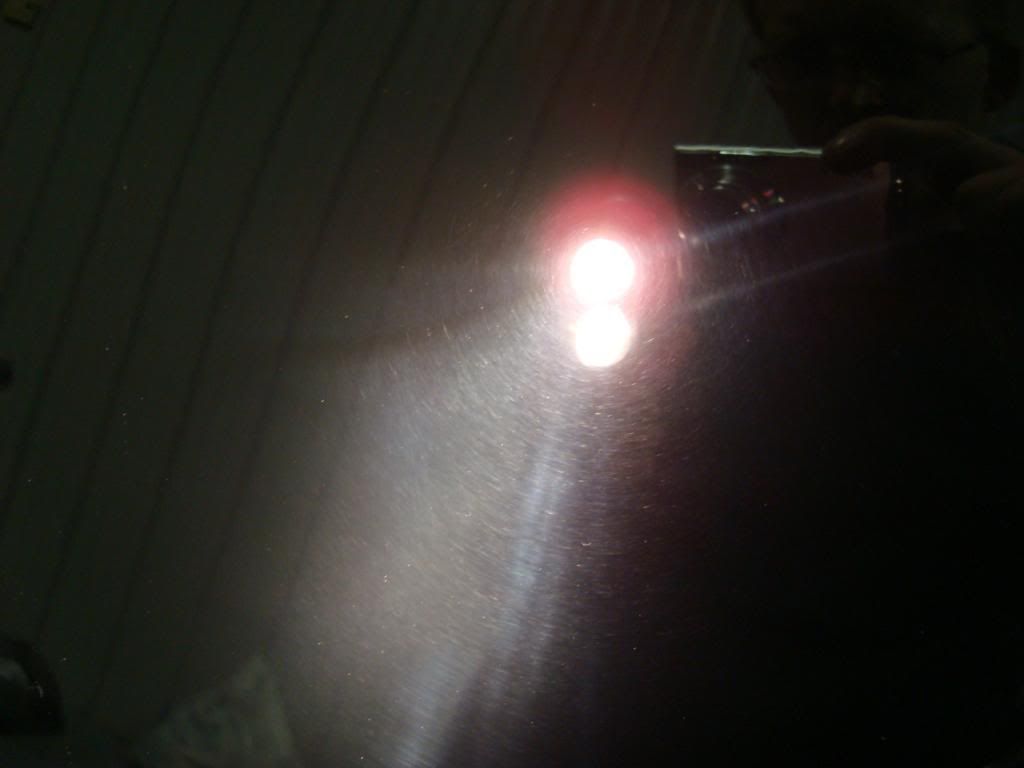
after polish

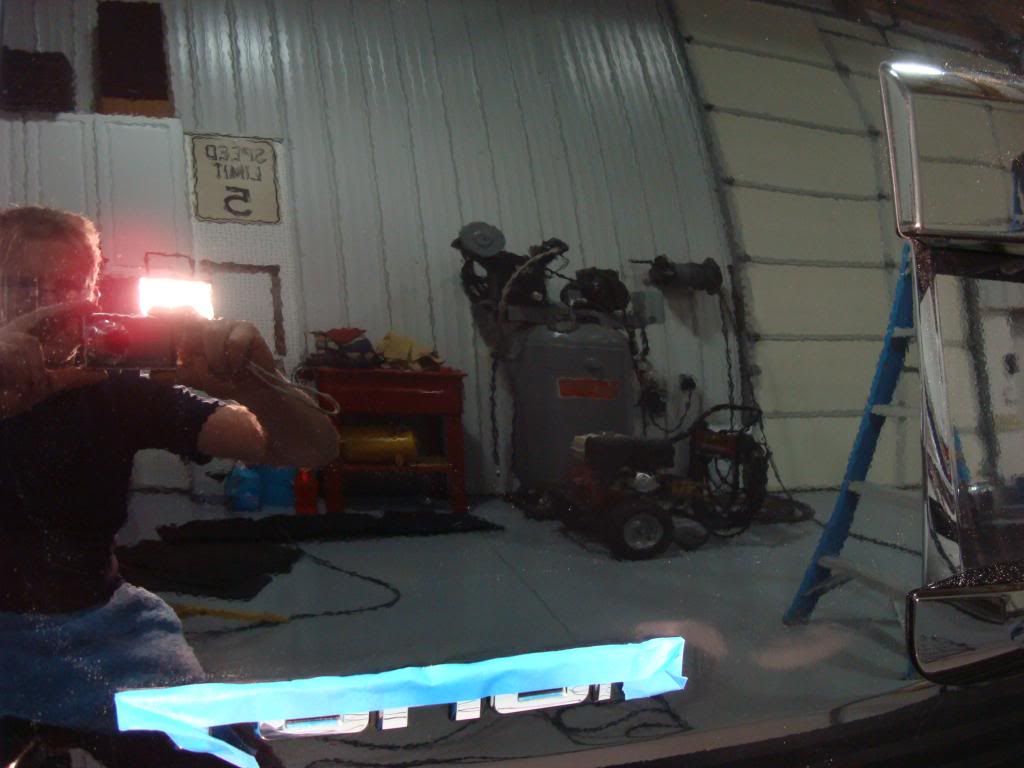
one of my favorites

Thanks again to everyone for looking. It's 3am and I have to be at work at 8.
Here's are two good pics of why its so important to polish after compounding. It seems that some people stop after compounding because of the dramatic improvement in overall appearance. Yes the panel is reflective now but there thousands of little circular scratches(micro marring)that can't be seen unless you put the right light on the panel at almost a right angle.
after polish
one of my favorites
Thanks again to everyone for looking. It's 3am and I have to be at work at 8.
03-28-2013, 06:53 PM
#17
TECH Addict
Join Date: Jun 2004
Location: S. Walpole, MA
Posts: 2,049
Likes: 0
Received 0 Likes
on
0 Posts
 03-28-2013, 06:54 PM
#18
TECH Addict
Join Date: Jun 2004
Location: S. Walpole, MA
Posts: 2,049
Likes: 0
Received 0 Likes
on
0 Posts

 03-28-2013, 08:24 PM
#20
Thanks Jeff. As always I appreciate your input and compliments.
That's one of my favorite pics too. I've never heard of Dodo Juice, maybe someone else has some experience with them in this thread.
Thanks! There was a guy I use to work with who thinks I repaint them not and not correct them. LOL.
Thanks! There was a guy I use to work with who thinks I repaint them not and not correct them. LOL.