
Pro-Touring 68 Acadian (Nova) with L92
 04-11-2014, 01:53 PM
#201

Steam vents are absolutely NECESSARY. And I live in PHX! Next time give me a buzz and we can bullshit and have a couple beers over my '71. Nice to see you actually getting somewhere with her - better at a glacial pace than nothing. Besides, you, Clint, and Joe will no doubt have 3 of the nicest builds on here when you guys finally finish.
Edit: I believe that's the front vent based on the nipple, which connects to a high point in the cooling system. The rear I don't believe has on of those. It's been a while though, so I could be wrong.
Edit: I believe that's the front vent based on the nipple, which connects to a high point in the cooling system. The rear I don't believe has on of those. It's been a while though, so I could be wrong.
 04-11-2014, 03:46 PM
#202

You will definitely need the front vent tube. It connects the two heads on the front corners. The other end of the heads can be blocked off. Different vehicles had different nipple locations in case the one you already have doesn't work for you aesthetically. I had an interference issue so opted for the 08 Express van 6.0 vent tube.
04-16-2014, 06:20 PM
#203
On The Tree
Thread Starter
iTrader: (4)

Join Date: Mar 2009
Location: British Columbia, Canada
Posts: 132
Likes: 0
Received 0 Likes
on
0 Posts
Steam vents are absolutely NECESSARY. And I live in PHX! Next time give me a buzz and we can bullshit and have a couple beers over my '71. Nice to see you actually getting somewhere with her - better at a glacial pace than nothing. Besides, you, Clint, and Joe will no doubt have 3 of the nicest builds on here when you guys finally finish.
Edit: I believe that's the front vent based on the nipple, which connects to a high point in the cooling system. The rear I don't believe has on of those. It's been a while though, so I could be wrong.
Edit: I believe that's the front vent based on the nipple, which connects to a high point in the cooling system. The rear I don't believe has on of those. It's been a while though, so I could be wrong.
You will definitely need the front vent tube. It connects the two heads on the front corners. The other end of the heads can be blocked off. Different vehicles had different nipple locations in case the one you already have doesn't work for you aesthetically. I had an interference issue so opted for the 08 Express van 6.0 vent tube.
http://www.kurturbanperformance.com/...or-system.html
Quick update....got the connectors tacked into place. Just need to finish welding them in. Will weld the underside once it's back on the rotisserie.
 06-17-2014, 07:09 PM
#204
On The Tree
Thread Starter
iTrader: (4)
Join Date: Mar 2009
Location: British Columbia, Canada
Posts: 132
Likes: 0
Received 0 Likes
on
0 Posts
Time for another update. Like most lately, not a huge update, but it's still progress. Decided to install the Fesler trunk hinges. Thought I'd be better off with the hinges that I'm actually going to use when trying to get everything aligned.
Out with the old ones
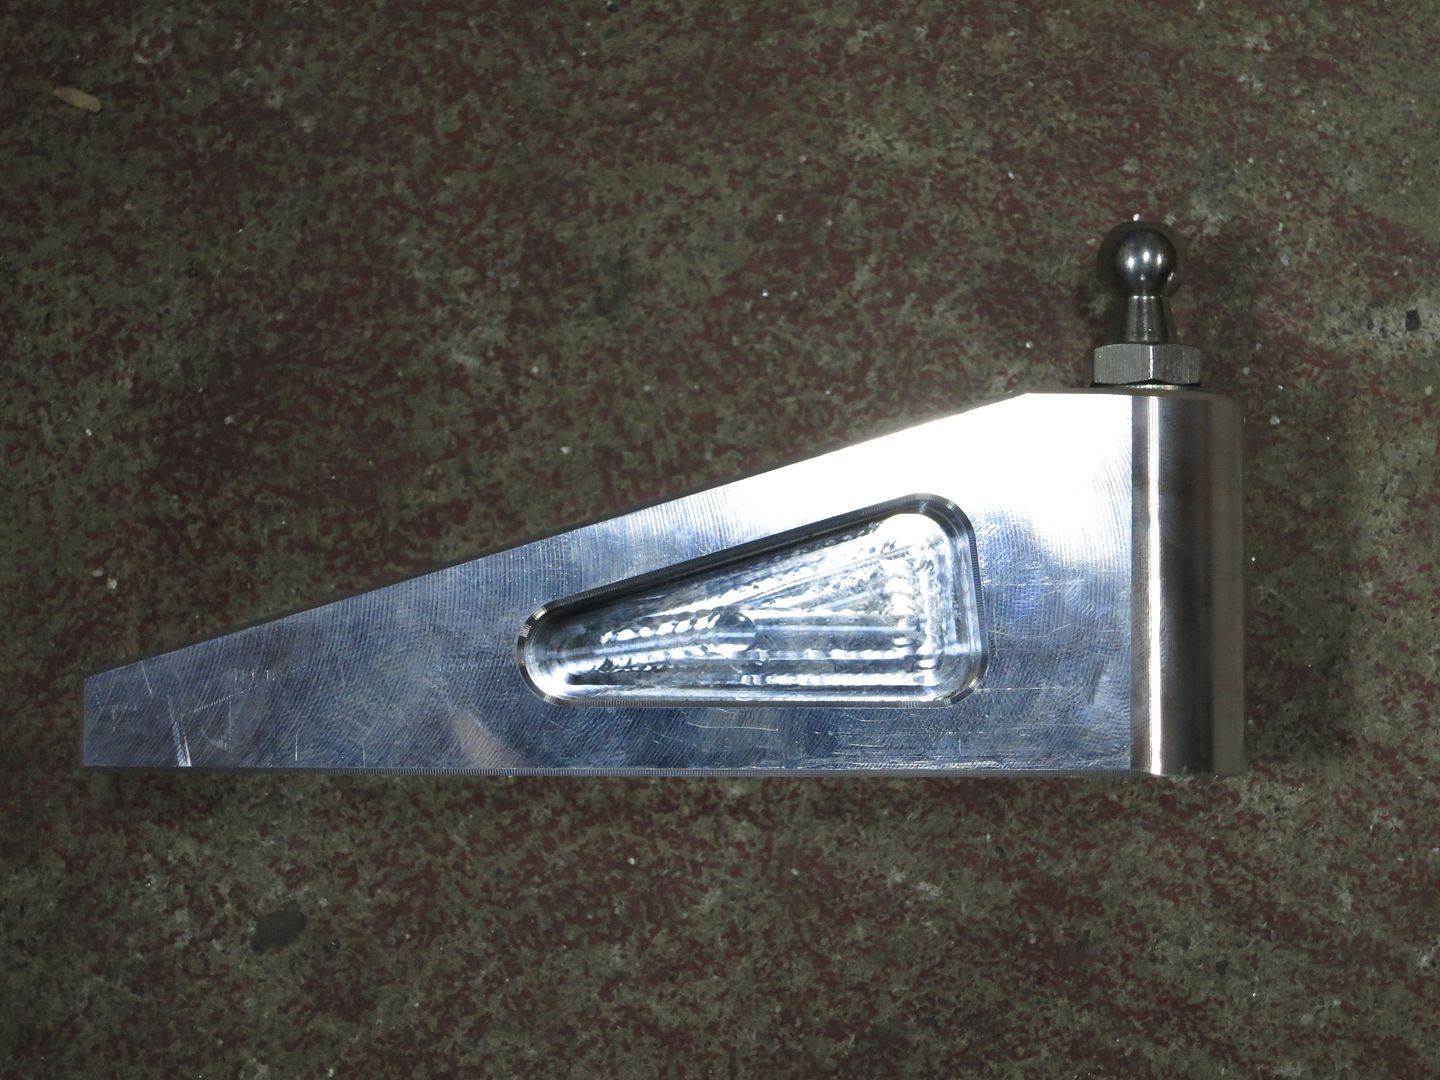
Putting the new ones in
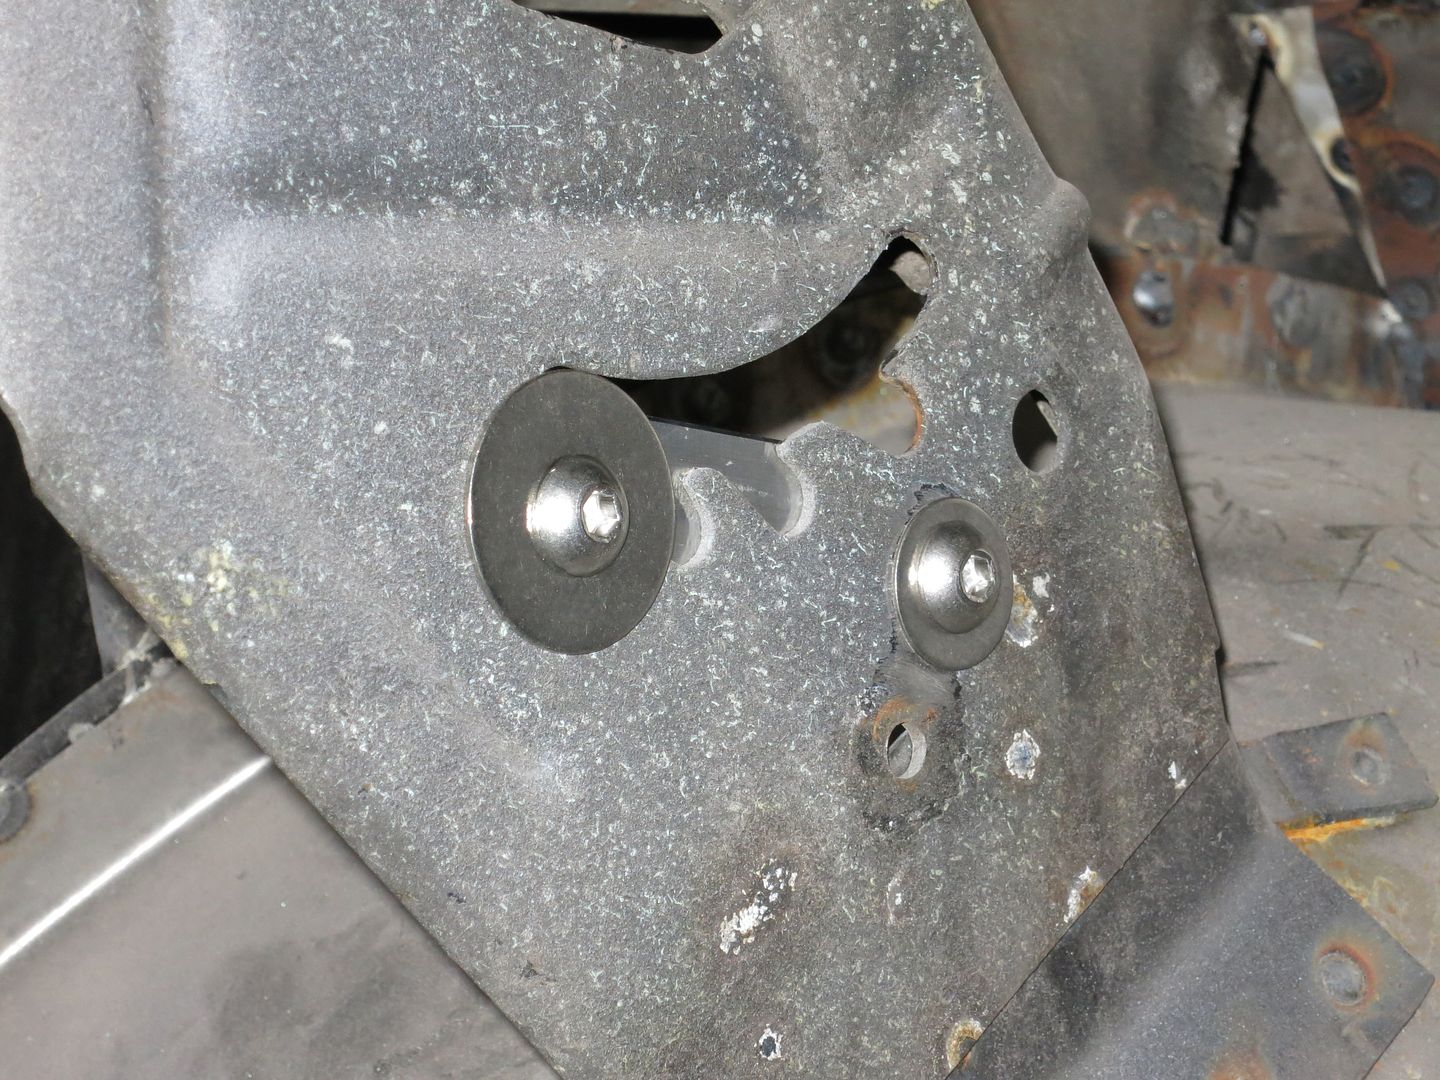
Using a supplied template, had to drill a new hole
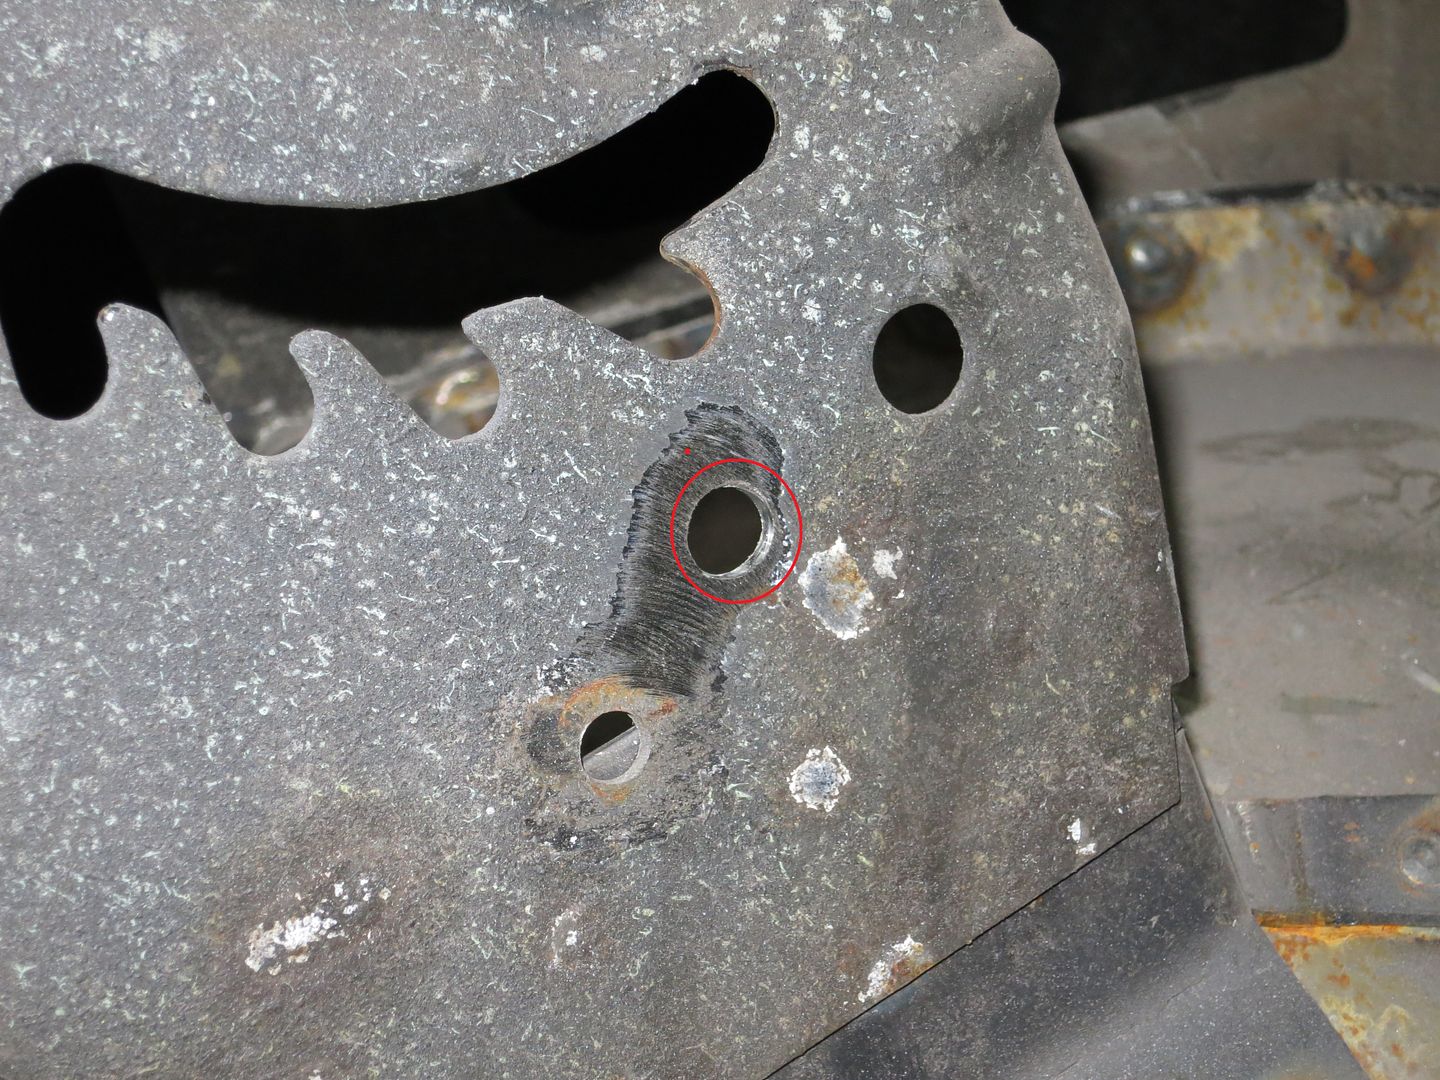
To mount this
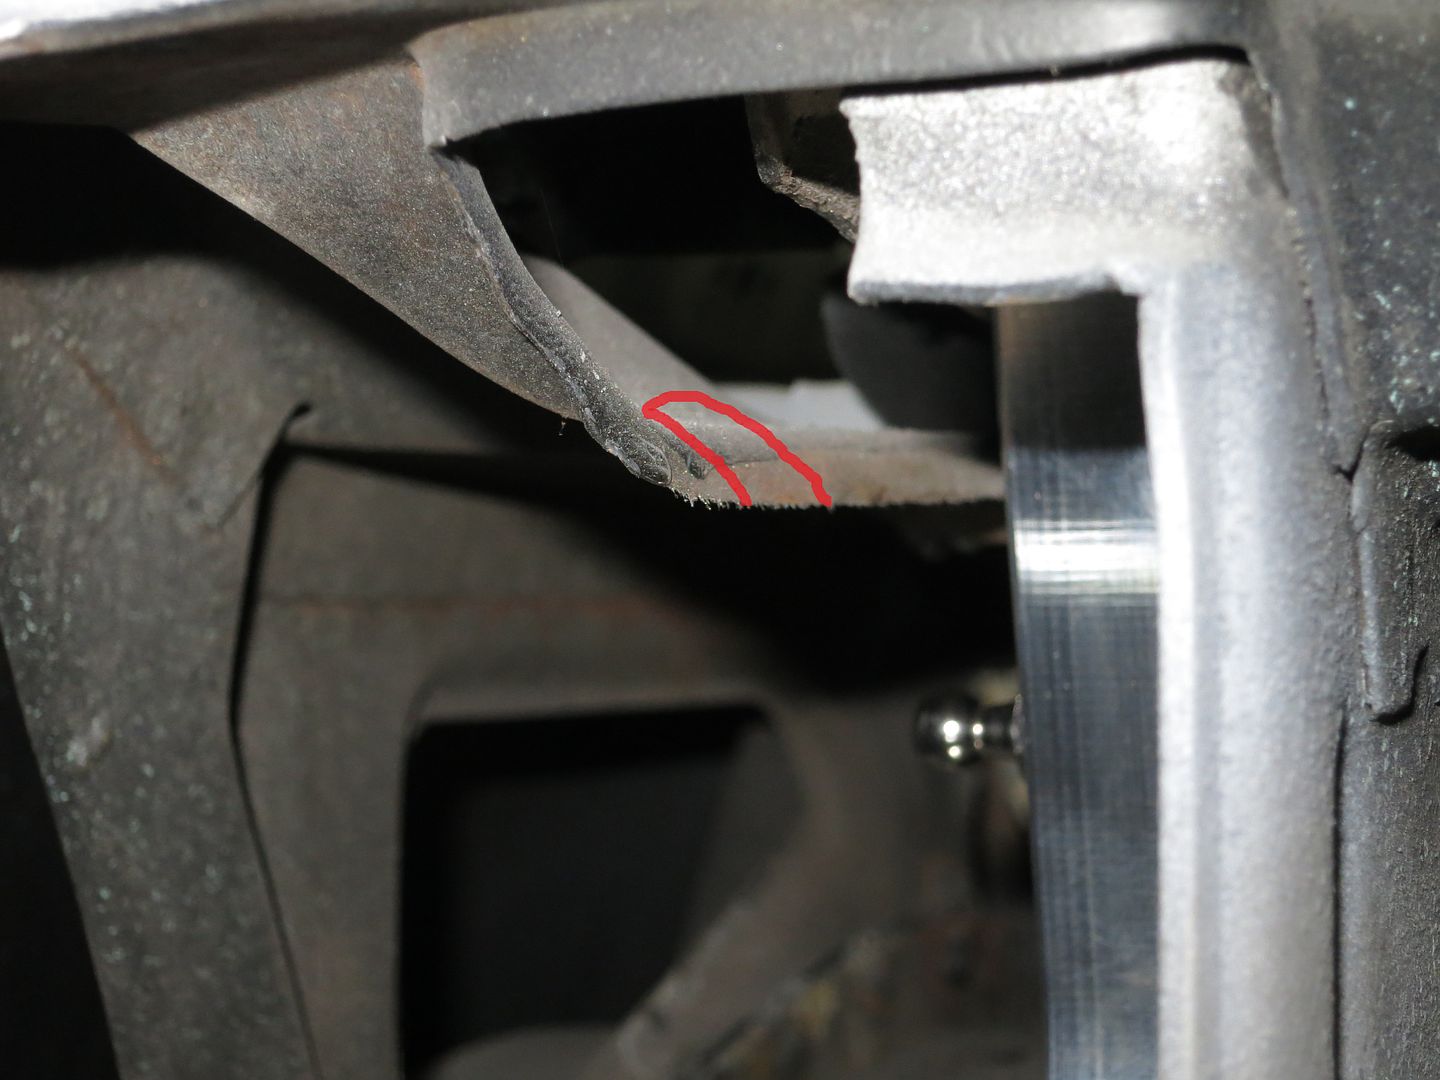
Then I had to trim the area in red
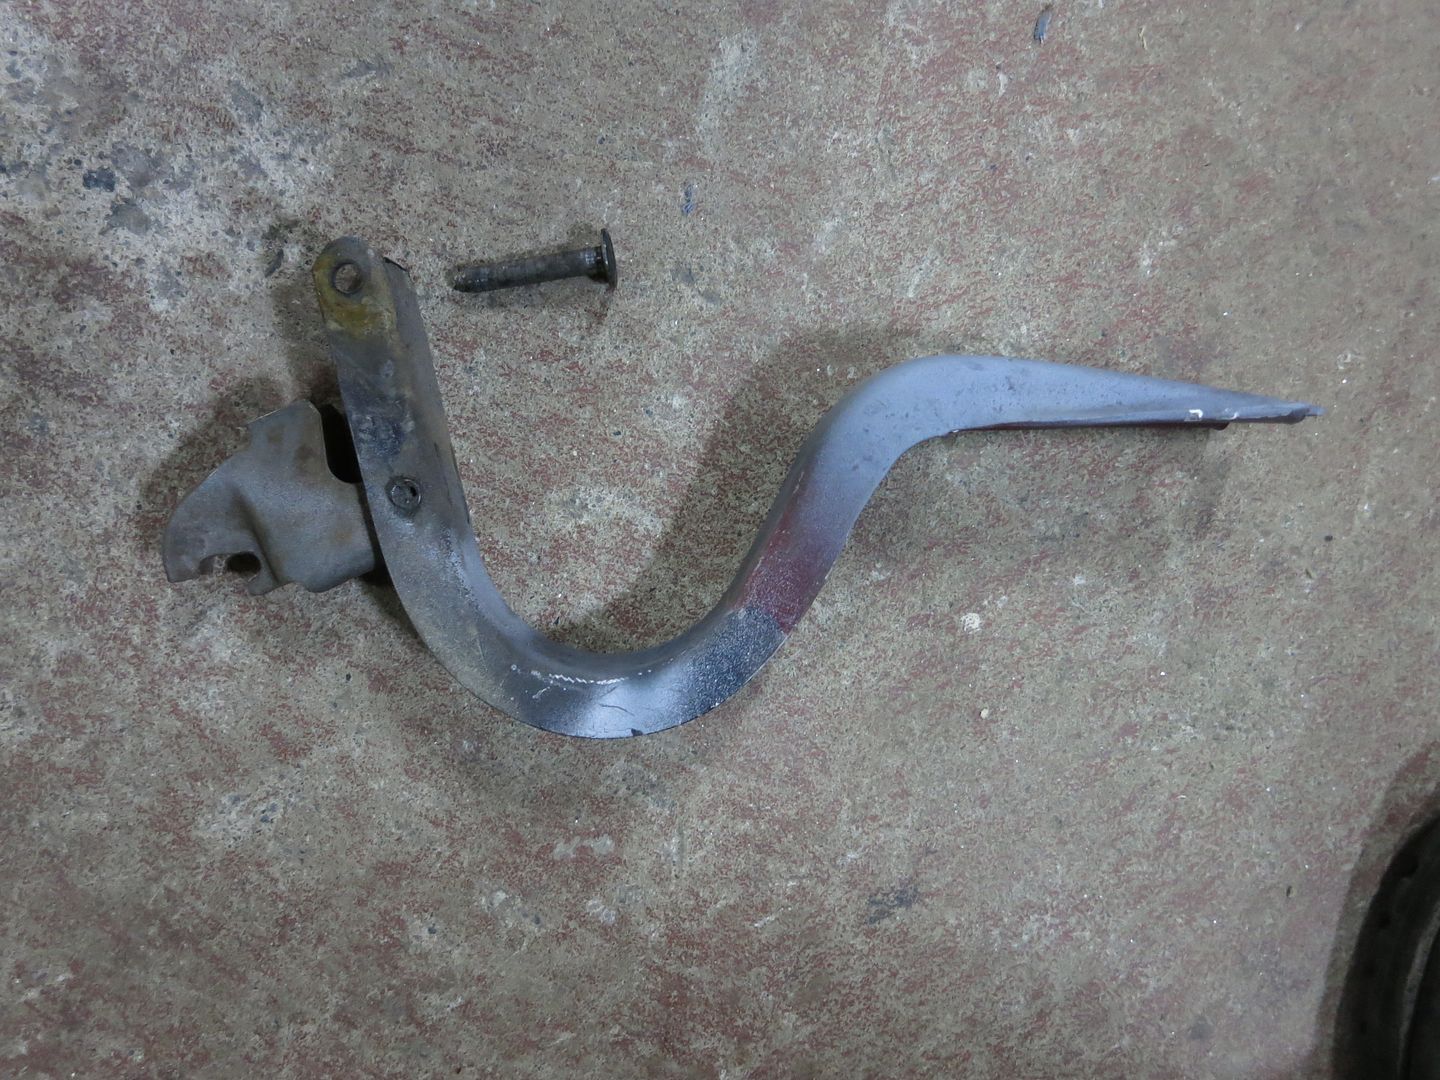
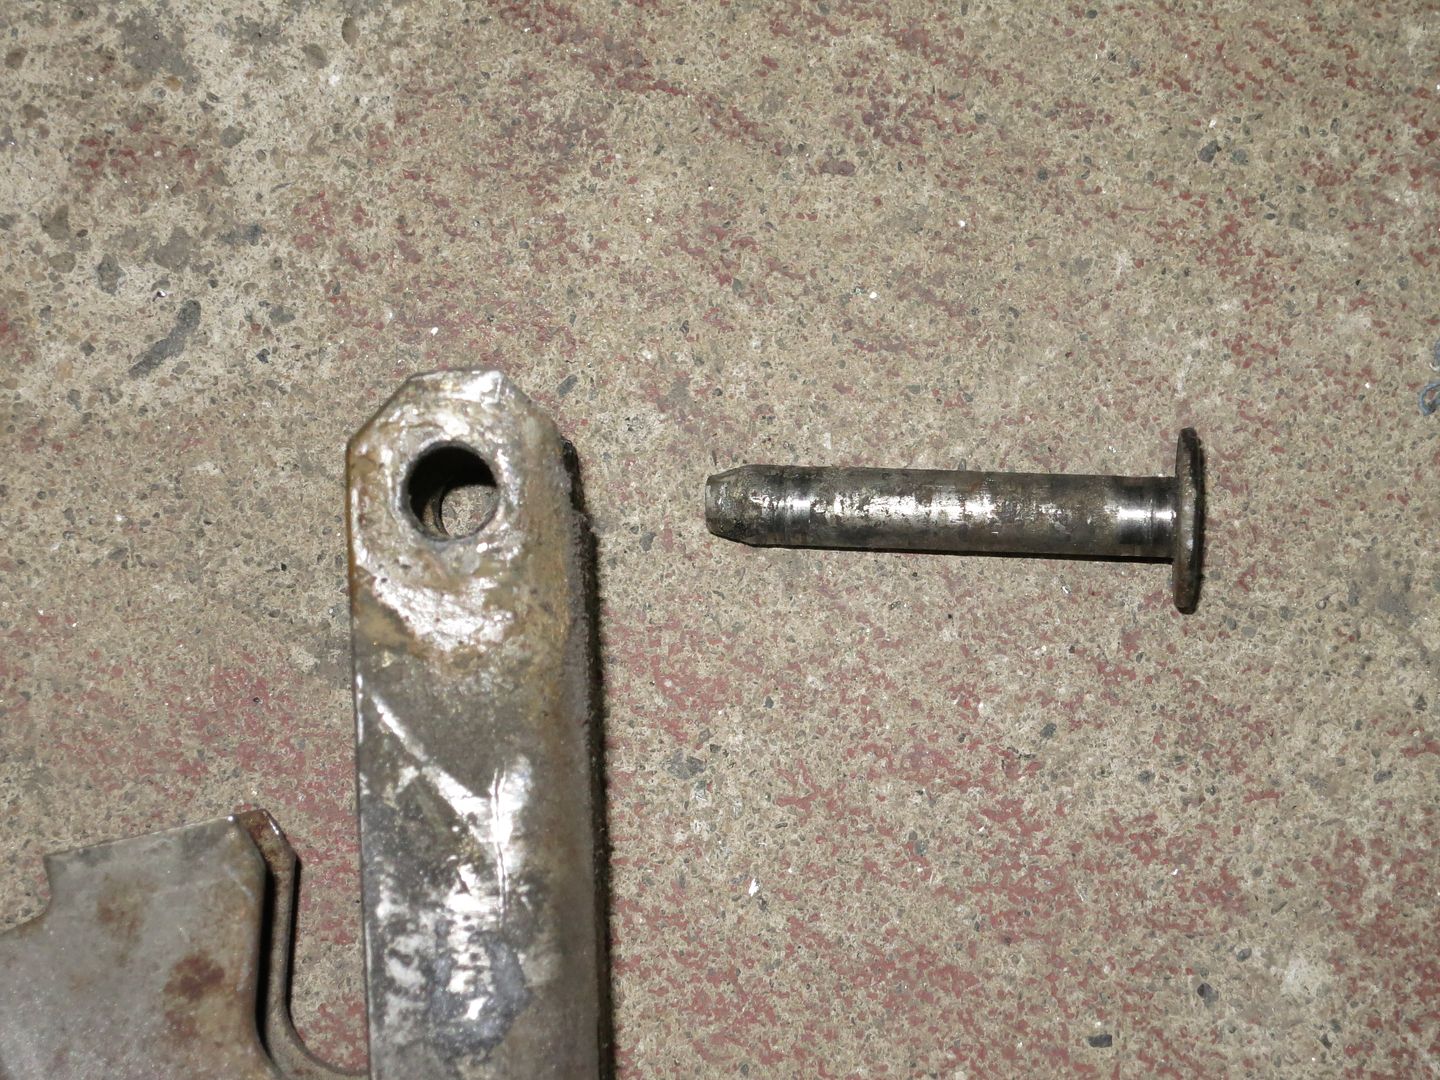
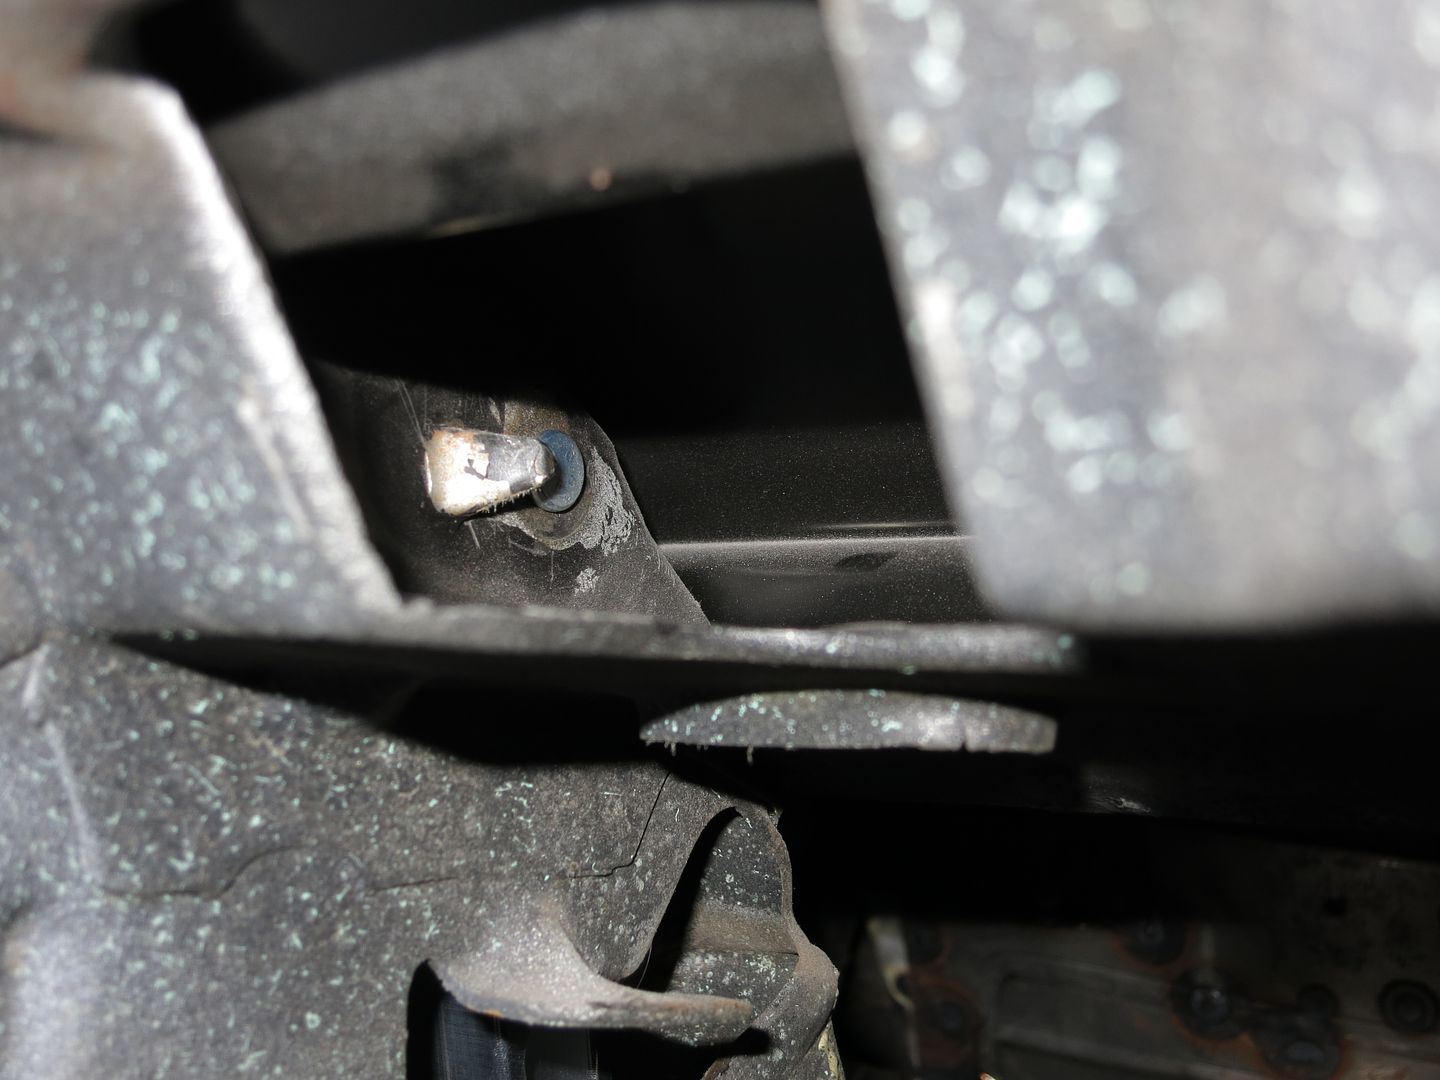
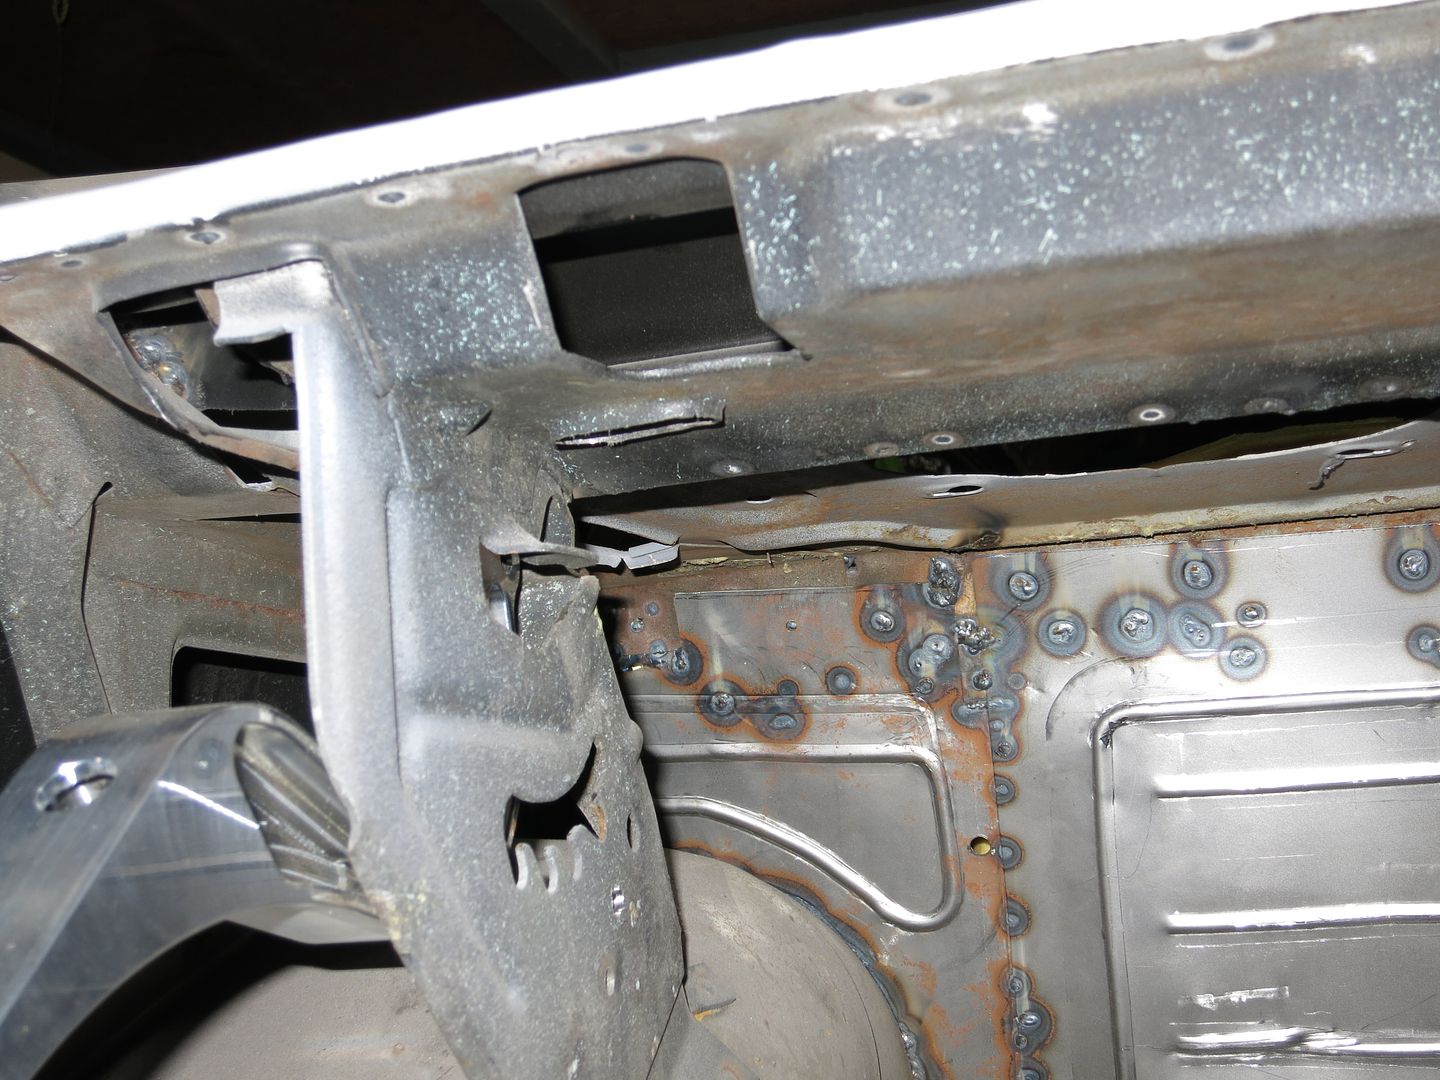
I forgot to take a pic of the original pin in place, but this is where you get the old pin out. You need to bend the tab out to get the old pin out
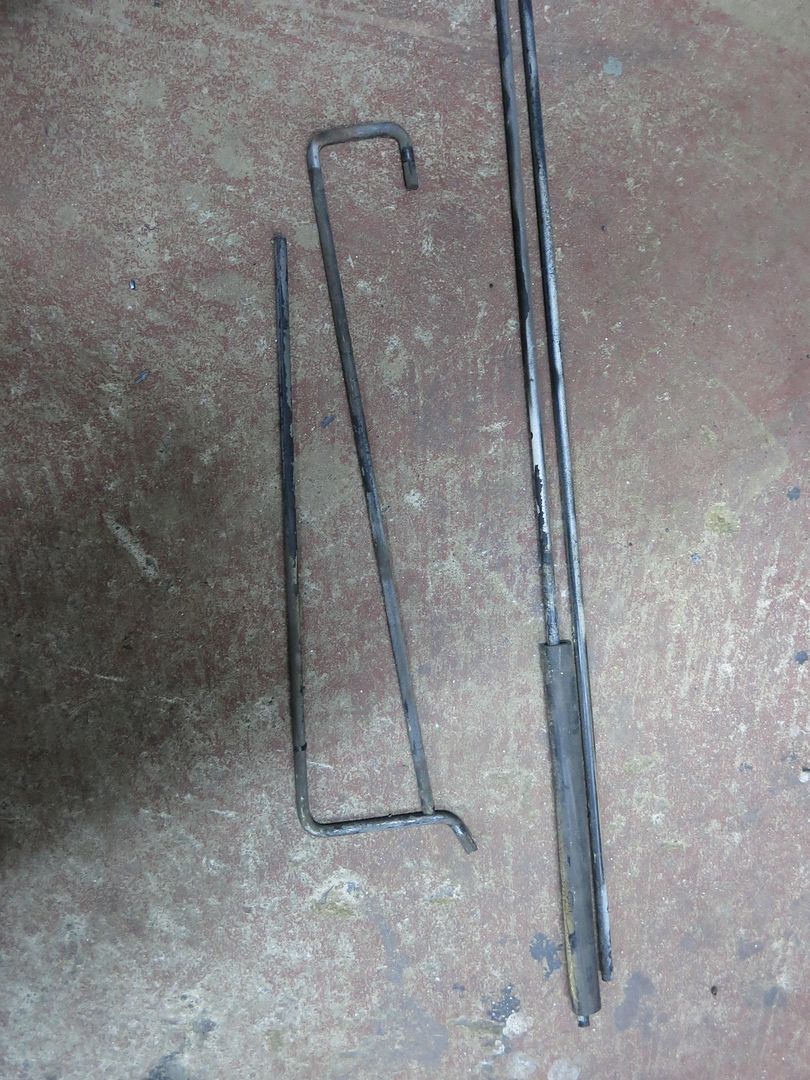
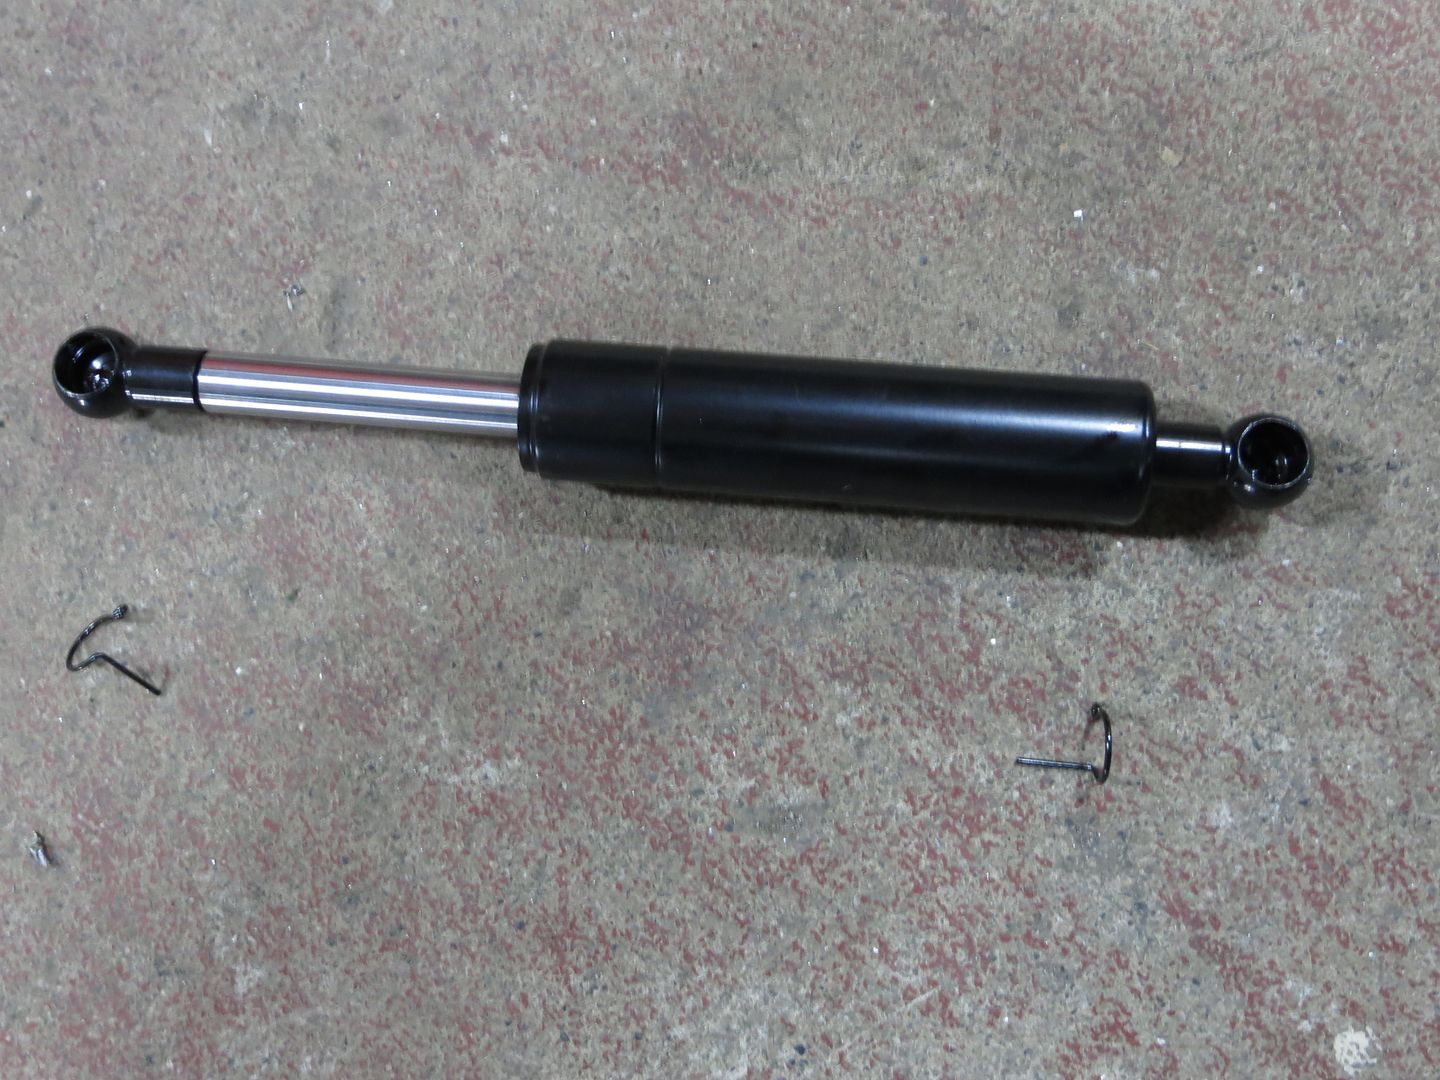
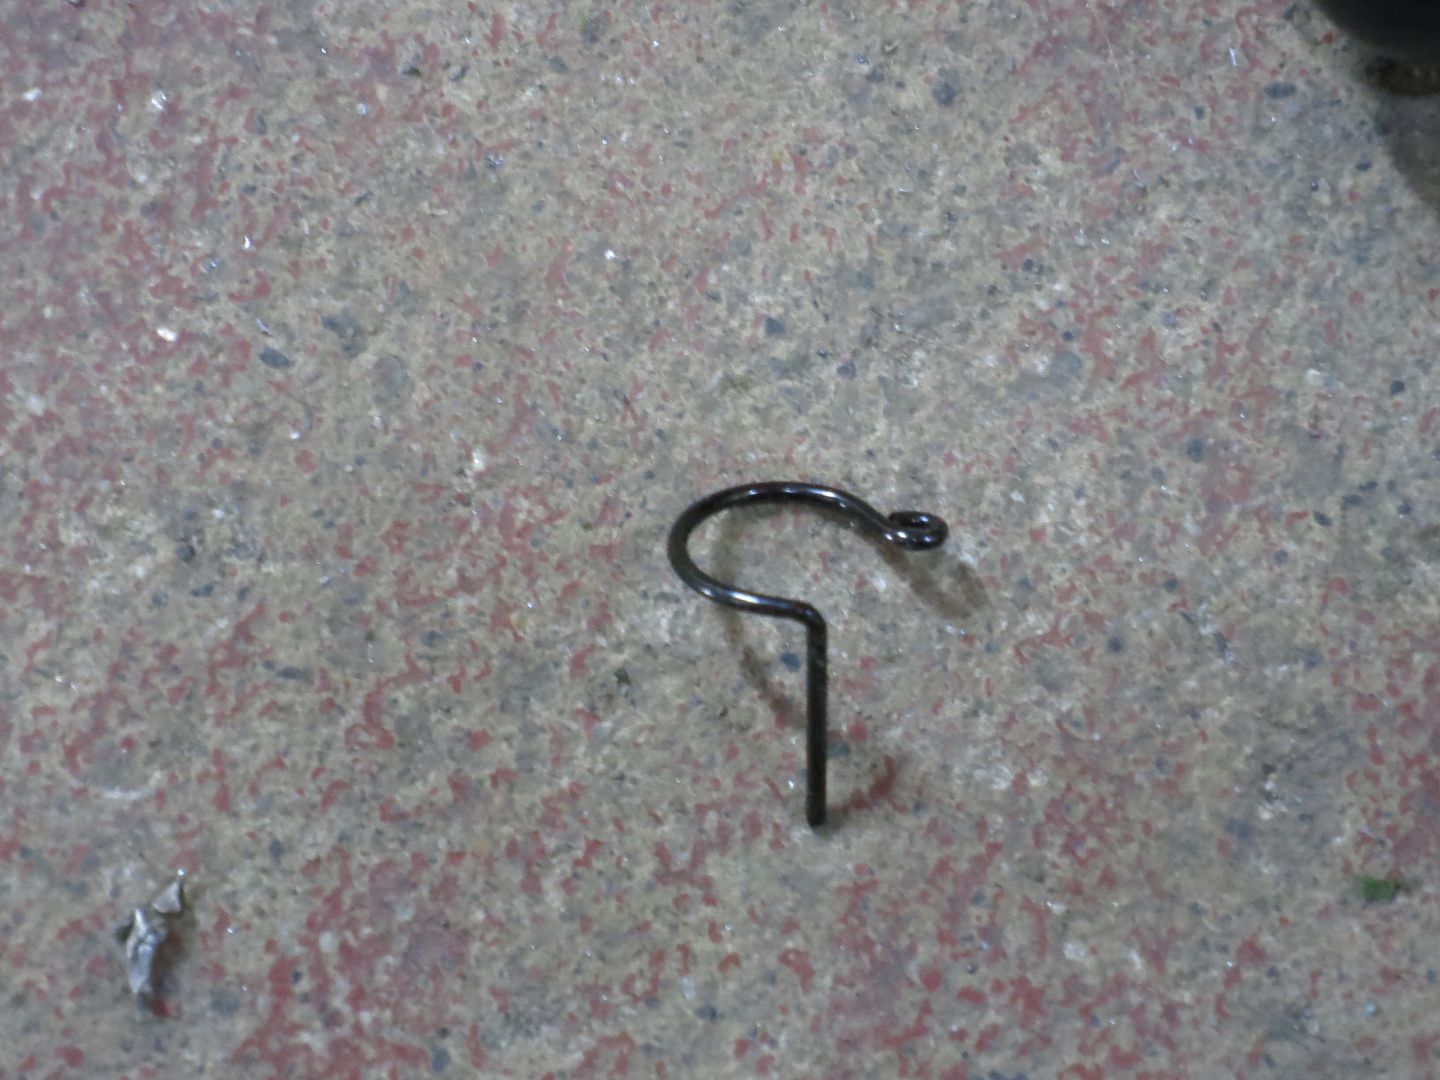
The shock that the hinge uses and the weird little pins
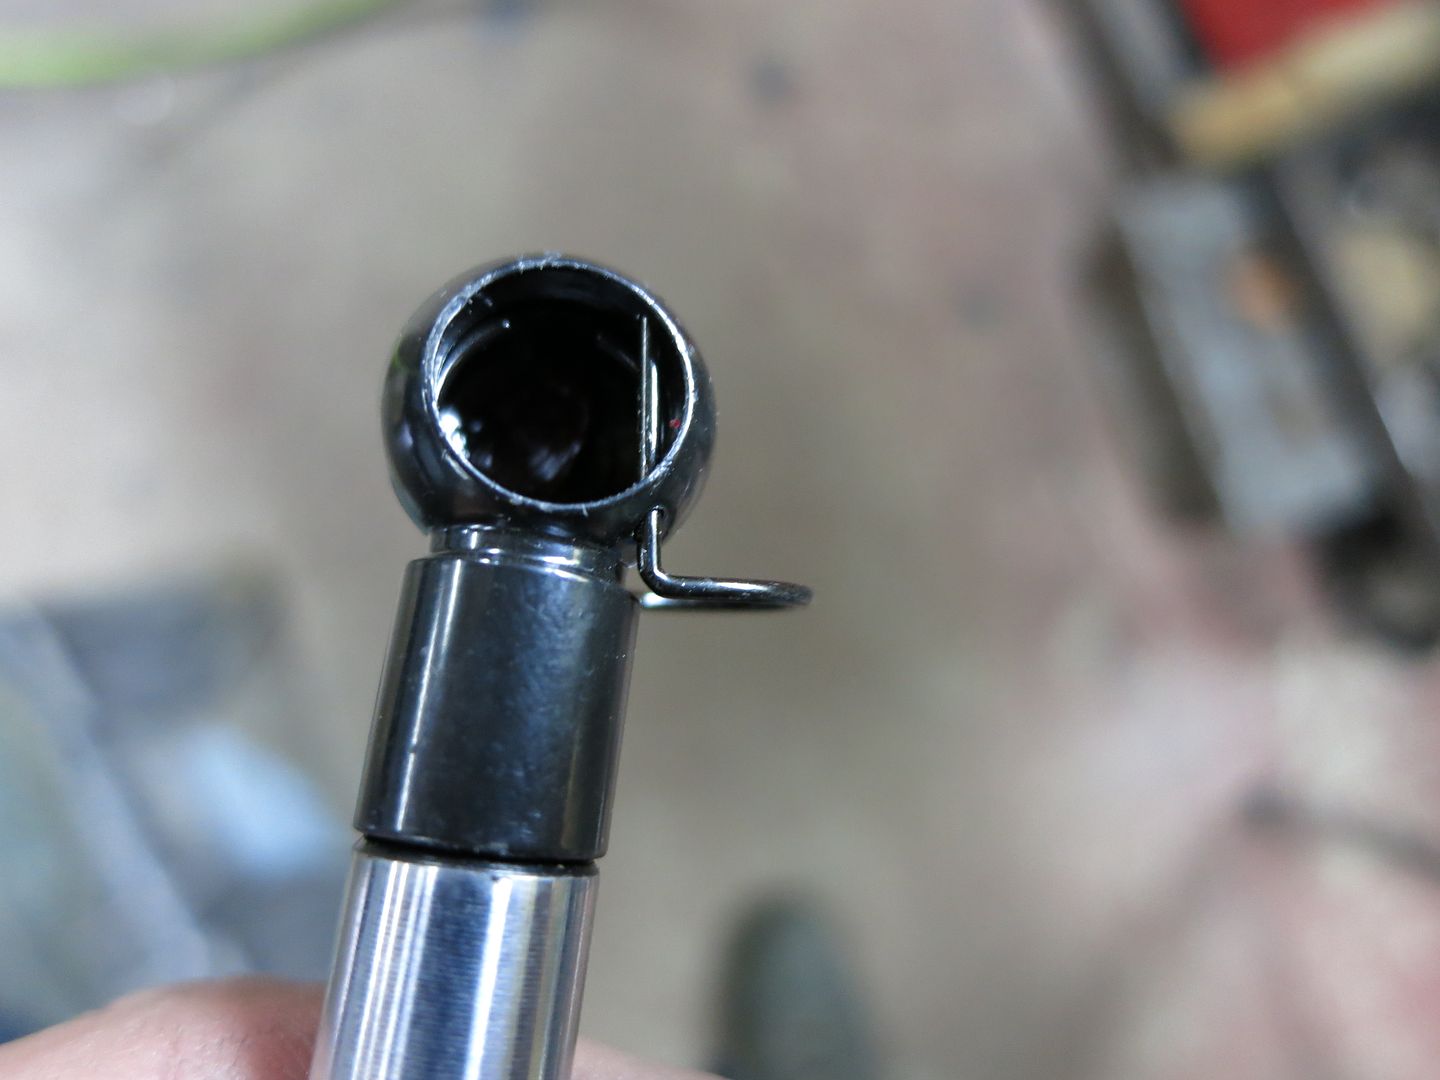
Where the shock connects
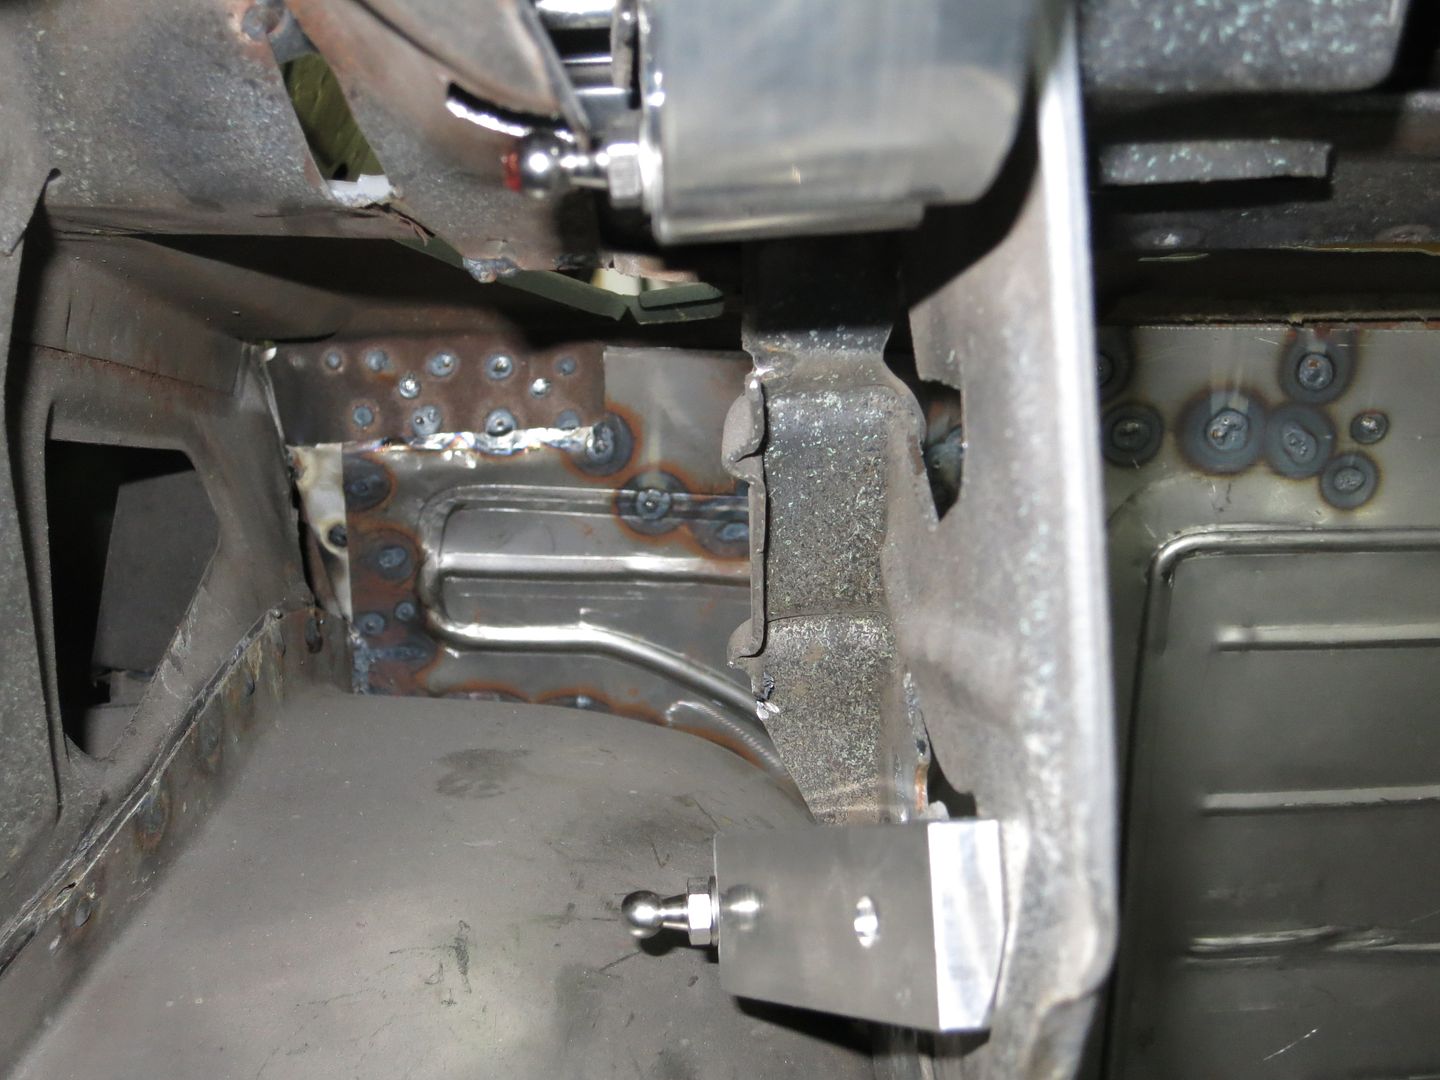
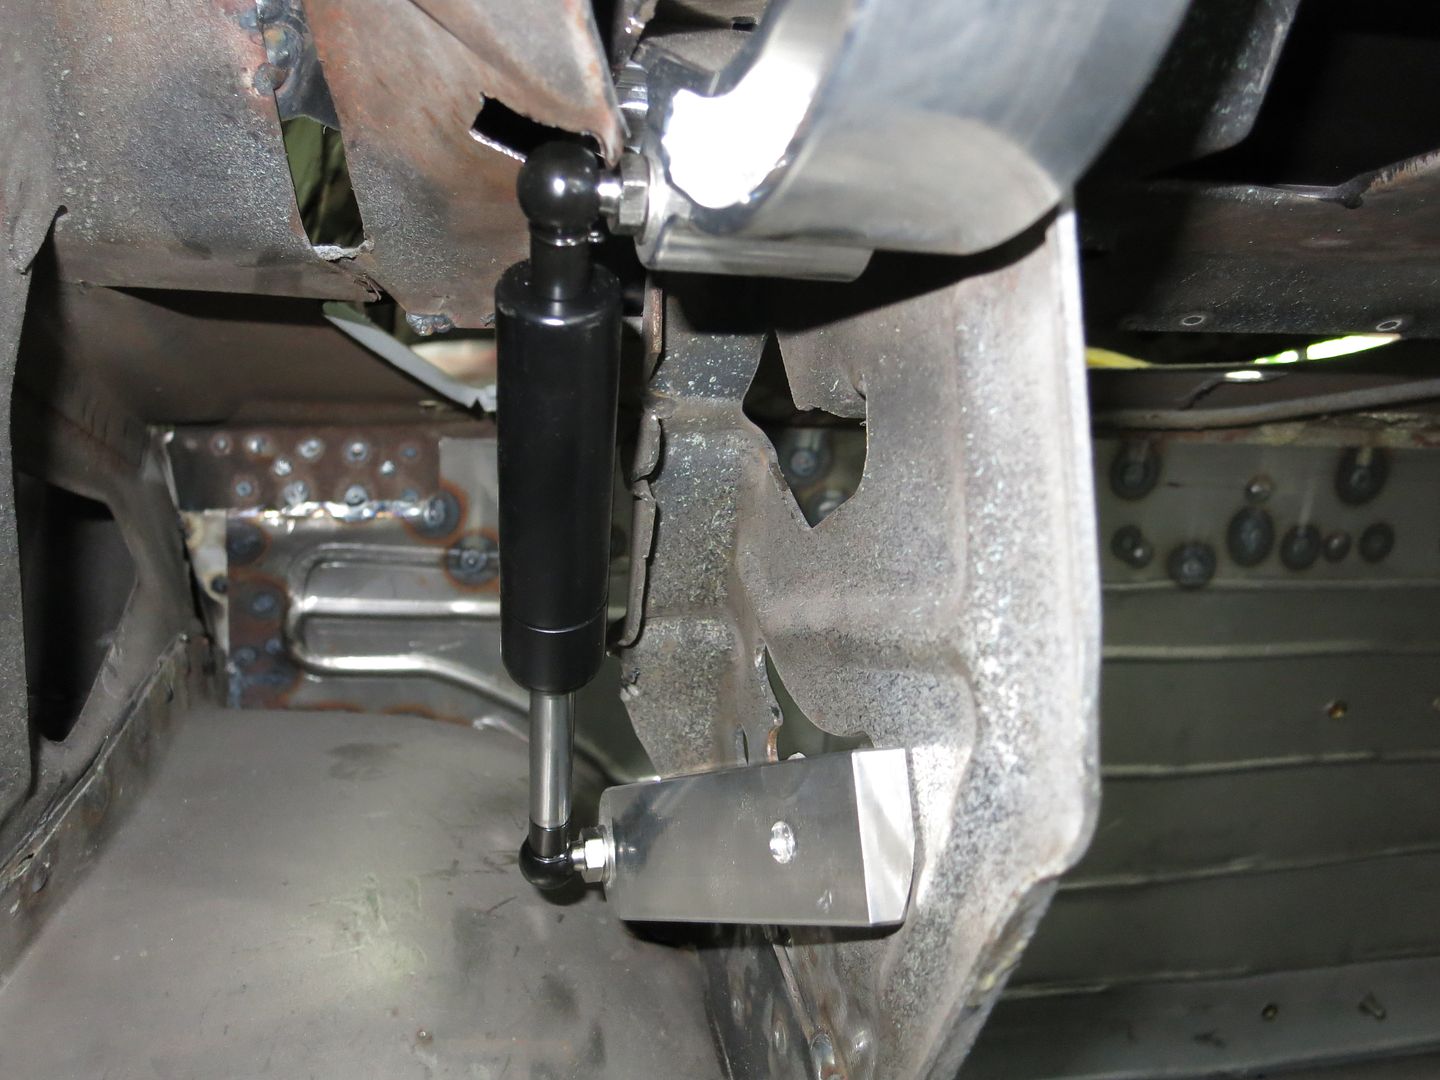
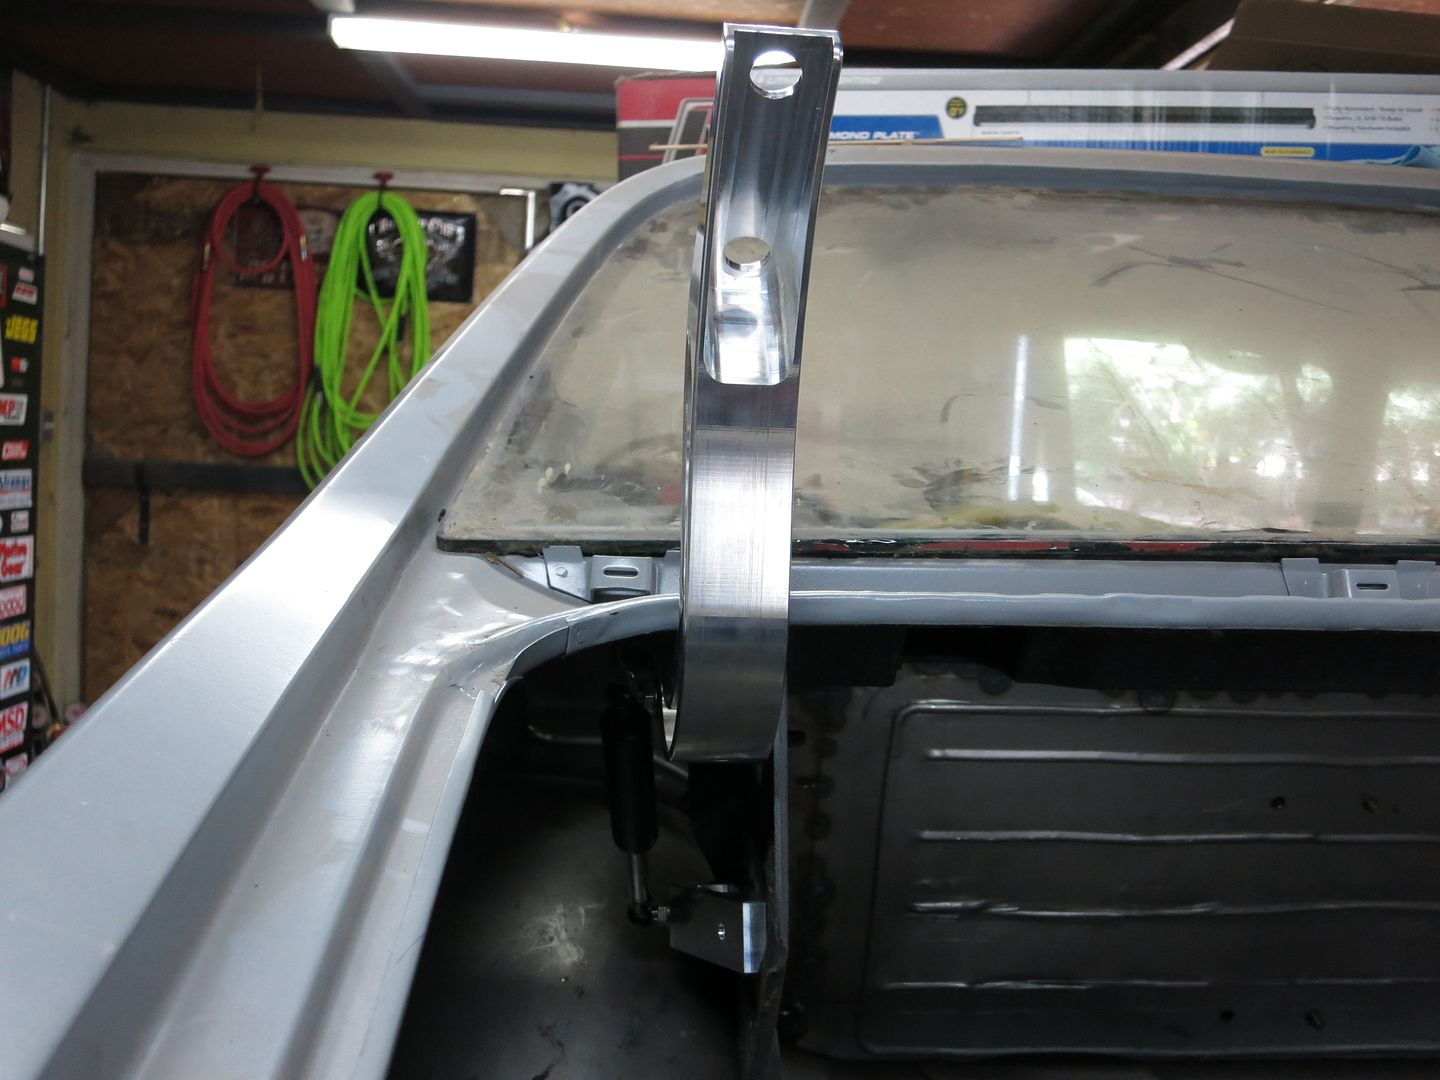
In place
Out with the old ones


Putting the new ones in
Using a supplied template, had to drill a new hole

To mount this


Then I had to trim the area in red

I forgot to take a pic of the original pin in place, but this is where you get the old pin out. You need to bend the tab out to get the old pin out


The shock that the hinge uses and the weird little pins


Where the shock connects


In place
 06-17-2014, 07:10 PM
#205
On The Tree
Thread Starter
iTrader: (4)
Join Date: Mar 2009
Location: British Columbia, Canada
Posts: 132
Likes: 0
Received 0 Likes
on
0 Posts
Time for another update. Like most lately, not a huge update, but it's still progress. Decided to install the Fesler trunk hinges. Thought I'd be better off with the hinges that I'm actually going to use when trying to get everything aligned.
Out with the old ones
Putting the new ones in
Using a supplied template, had to drill a new hole
To mount this
Then I had to trim the area in red
I forgot to take a pic of the original pin in place, but this is where you get the old pin out. You need to bend the tab out to get the old pin out
The shock that the hinge uses and the weird little pins
Where the shock connects
In place
06-17-2014, 07:10 PM
#206
On The Tree
Thread Starter
iTrader: (4)
Join Date: Mar 2009
Location: British Columbia, Canada
Posts: 132
Likes: 0
Received 0 Likes
on
0 Posts


I decided to install the hinges as I've been fighting with getting the trunk and tail light panel aligned properly. I might end up having to make a couple relief cuts in the quarter panels to make it all fit.


I've been able to get the gaps along the sides really nice, but I can not get the rear gap to fit. I may just end up having to weld in a piece of round rod onto the trunk. Any suggestions??


Here's what I'll be working on over the next while. Been wanting to do this for a while now. We have 3 cars, a utility trailer and a boat trailer and it's like a game of tetris organizing them. I'm widening the driveway at the top by 20 feet. It will come straight back 25 feet then start to angle toward the bottom of the driveway. At the top we should be able to put 3 cars wide plus both my trailers.


So between working on the retaining wall and driveway and yet another trip to Vegas next weekend, won't get back into the shop for a while.
06-18-2014, 03:14 AM
#207

Glad to see you still plugging away! Have a safe trip !
 06-18-2014, 09:28 AM
#209
TECH Fanatic
Instead of round rod, how about some 90 degree stock or small square tube? This is always a bear to make parts fit like you think they should. By the way, awesome build.
06-19-2014, 03:48 AM
#211
How is the gap between the trunk lid and the tail panel where the weatherstrip resides? If it is even around the perimeter I would fill in the gap but if not I would work on the tail panel and try to move it up. It is weird, I did a search on Google images for Nova tail panels and some have a tight gap and others are similar to yours. The ones similar to yours seem to be old pics from back in the day. What was the gap like before you swapped out tail panels?
 11-27-2014, 10:03 PM
#213
On The Tree
Thread Starter
iTrader: (4)
Join Date: Mar 2009
Location: British Columbia, Canada
Posts: 132
Likes: 0
Received 0 Likes
on
0 Posts
Thanks guys. Unfortunately nothing to update. I have out the car on hold while I redo my wife's 1974 Bronco. It's been parked 18 years and we finally decided to bring it back to life. So will be working in that all winter and into the spring/summer trying to get it done.
01-25-2017, 01:22 PM
#215
On The Tree
Thread Starter
iTrader: (4)
Join Date: Mar 2009
Location: British Columbia, Canada
Posts: 132
Likes: 0
Received 0 Likes
on
0 Posts
I wish I could say there was, but no. However....I will be able to update it soon. Part of the reason I haven't done anything is I've been working on the Bronco, the other part is I'm at a point with the body work that I don't know what to do next and as a result, I really haven't wanted to do anything as I knew I wouldn't get anywhere. So I've decided that I'm going to pay someone to get all my panels hung and to finish fitting the trunk tail light panel. Once this is done, I'll be able to get back to work and hopefully get the damn thing finished. I might have to wait a bit as he has a couple other projects that he's working on now, but I hope to get the car to him sometime in the near future.
01-26-2017, 01:30 PM
#216
After dragging my feet for many years, I found making a high level checklist helped me chunk the project into manageable pieces and knock things out one by one until suddenly I had a running car. If there are a few jobs you don't want to do yourself that will get the car back on track, you just need to pick up the phone and make it happen!
01-27-2017, 11:28 AM
#217
On The Tree
Thread Starter
iTrader: (4)
Join Date: Mar 2009
Location: British Columbia, Canada
Posts: 132
Likes: 0
Received 0 Likes
on
0 Posts
Thanks. Yeah definitely going to be making small goals and finishing each one before moving on. Getting this stuff done will really help me make some progress on the car.
So here's the update that I posted on my other threads. Thought I'd post it here also:
Hey guys remember me. Unfortunately I don't have any pictures to update. Since my last update, life, work and finances have gotten in the way of me doing much on the car. Also have been working on the wife's Bronco and have the body back on it and hope to have it running by summer time. One of the big reasons I didn't get much done on my car is I got to a point where I was stuck and didn't know what to do next or how to do it. I usually don't like to ask for help and wanted to try and do as much of the car by myself as I could. Well life isn't getting in the way as much anymore, finances are better and I'm at a point where I want to get back to work on the car.
I got off the phone a short while ago with a guy who is interested in doing some work on my car for me. I'm likely going to get him to finish up the trunk work, get all the panels hung to make it look like a car again and maybe a few other custom things that I want done. I've seen some of the work this guy has done and it is very nice. He also does this as a side job as his main job is he owns a towing company. Makes it even easier to get the car to his shop lol. We will be getting together in the next week or two so he can look over the car and make a plan as to what I want done and when to take it to his shop. I may even get him to paint it when it's ready. I can actually say I'm getting excited again :yes:
:yes:
So here's the update that I posted on my other threads. Thought I'd post it here also:
Hey guys remember me. Unfortunately I don't have any pictures to update. Since my last update, life, work and finances have gotten in the way of me doing much on the car. Also have been working on the wife's Bronco and have the body back on it and hope to have it running by summer time. One of the big reasons I didn't get much done on my car is I got to a point where I was stuck and didn't know what to do next or how to do it. I usually don't like to ask for help and wanted to try and do as much of the car by myself as I could. Well life isn't getting in the way as much anymore, finances are better and I'm at a point where I want to get back to work on the car.
I got off the phone a short while ago with a guy who is interested in doing some work on my car for me. I'm likely going to get him to finish up the trunk work, get all the panels hung to make it look like a car again and maybe a few other custom things that I want done. I've seen some of the work this guy has done and it is very nice. He also does this as a side job as his main job is he owns a towing company. Makes it even easier to get the car to his shop lol. We will be getting together in the next week or two so he can look over the car and make a plan as to what I want done and when to take it to his shop. I may even get him to paint it when it's ready. I can actually say I'm getting excited again
:yes:
01-29-2017, 10:30 PM
#220
On The Tree
Thread Starter
iTrader: (4)
Join Date: Mar 2009
Location: British Columbia, Canada
Posts: 132
Likes: 0
Received 0 Likes
on
0 Posts
Thanks. You could try getting in touch with him on Facebook. Mascoll Designs is the name. Right now I believe he has a picture of a viper on his page.