

Pro-Touring 68 Acadian (Nova) with L92
 02-08-2013, 02:06 PM
#181
On The Tree
Thread Starter
iTrader: (4)

Join Date: Mar 2009
Location: British Columbia, Canada
Posts: 132
Likes: 0
Received 0 Likes
on
0 Posts
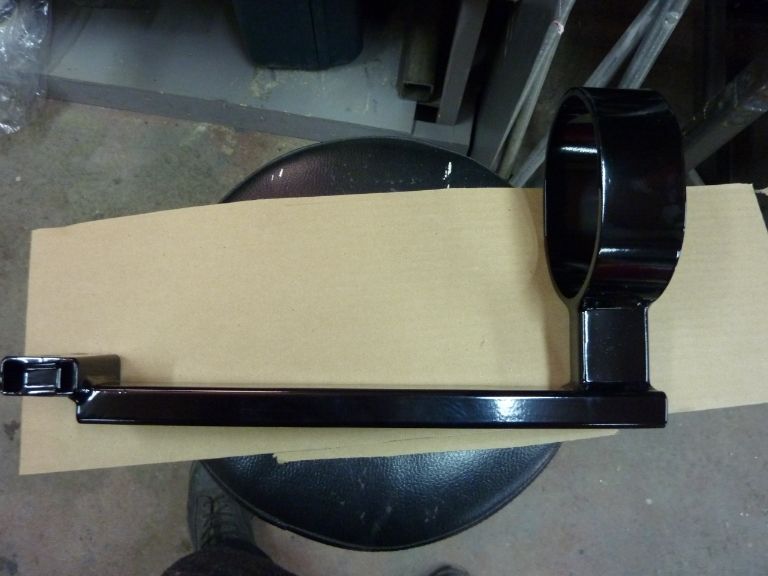
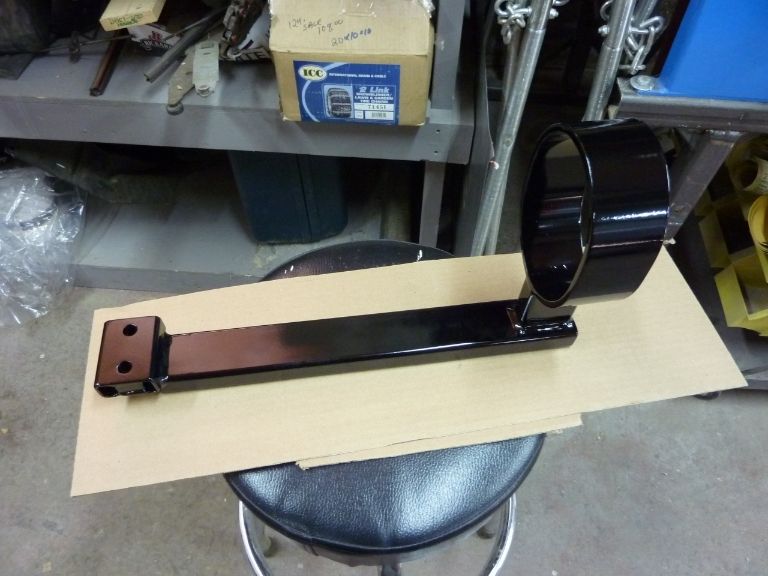
From Spohn I got a driveshaft safety loop. This one is for a newer model Camaro, but I've seen this one used on a Nova before and it fit nicely
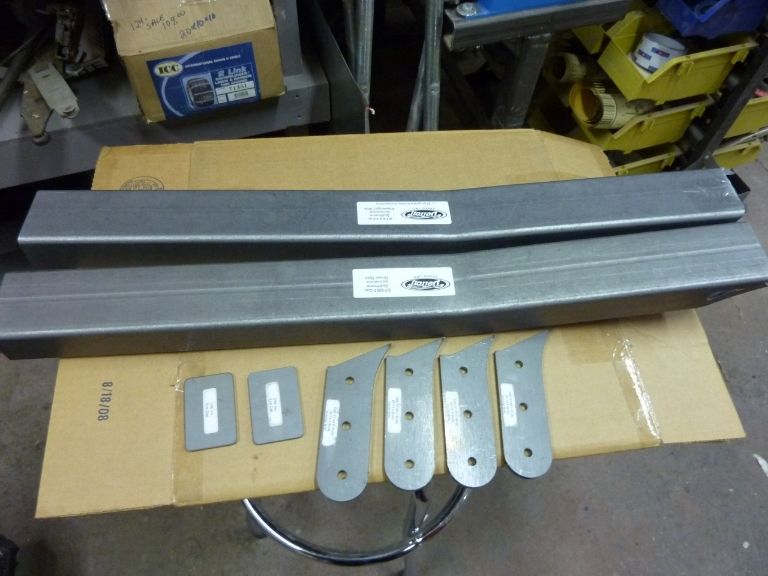
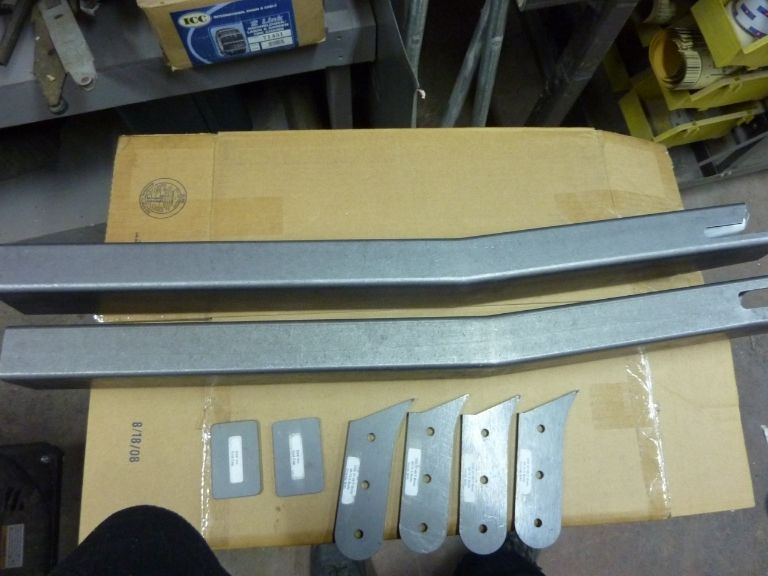
And finally through Matt's Classic Bowties, I got this stuff
DSE subframe connectors. I sold my Hotchkis ones and thought I'd get these. I originally wanted to get these ones, but already had the under side of my floor done and didn't want to wreck it so I got the Hotchkis ones. I've since done so much welding on the floor that I'm going to have to redo the under side anyways, so thought it was a good time to get these.
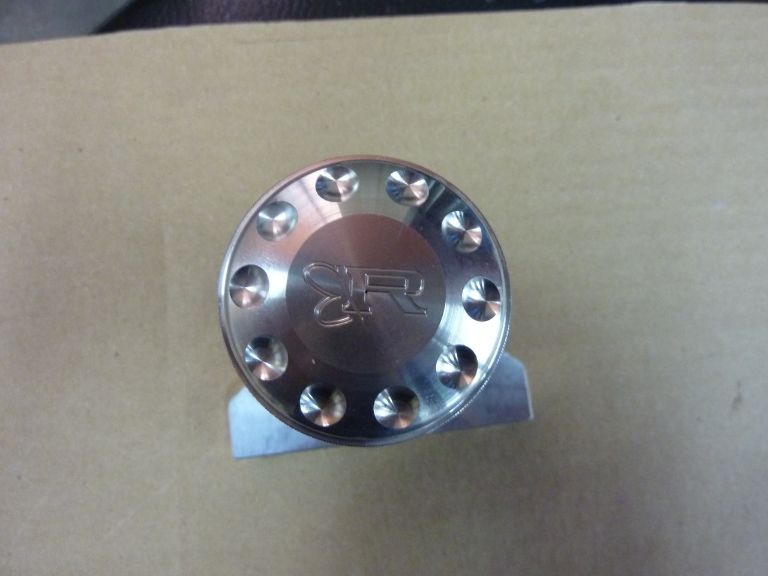
Also through Matt, I picked up some Ring Bros's stuff
Clutch reservoir
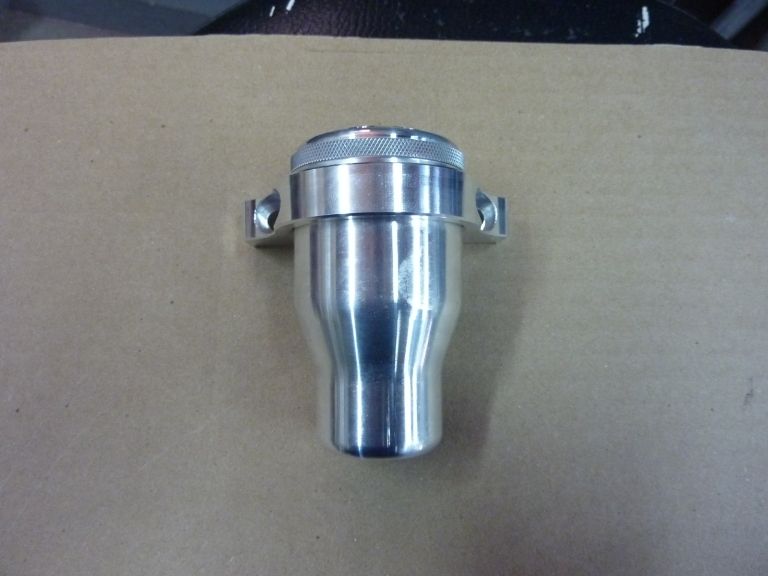
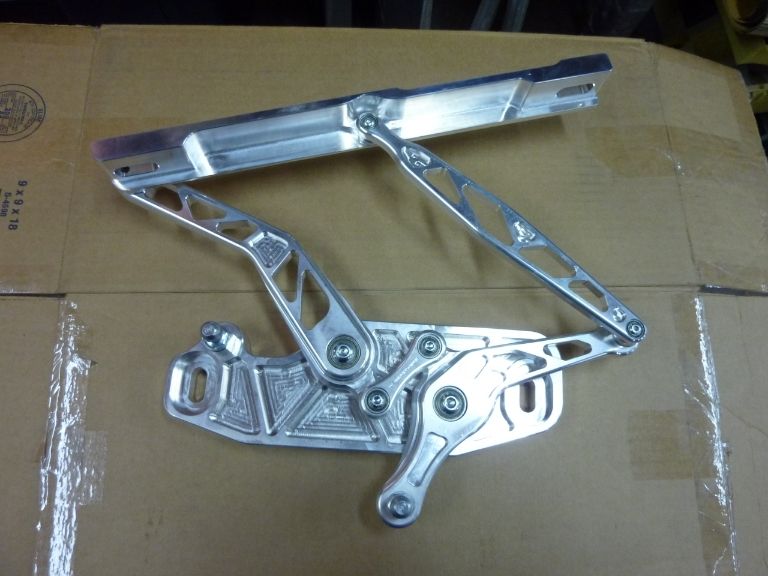
and finally, Ring Bros hood hinges
I will post the progress on the car as the week goes on.
And finally through Matt's Classic Bowties, I got this stuff
DSE subframe connectors. I sold my Hotchkis ones and thought I'd get these. I originally wanted to get these ones, but already had the under side of my floor done and didn't want to wreck it so I got the Hotchkis ones. I've since done so much welding on the floor that I'm going to have to redo the under side anyways, so thought it was a good time to get these.
Also through Matt, I picked up some Ring Bros's stuff
Clutch reservoir
and finally, Ring Bros hood hinges
I will post the progress on the car as the week goes on.
 02-08-2013, 02:07 PM
#182
On The Tree
Thread Starter
iTrader: (4)
Join Date: Mar 2009
Location: British Columbia, Canada
Posts: 132
Likes: 0
Received 0 Likes
on
0 Posts
I made some decent progress on getting the rear seats mounted. It may not seem like much, but it's been time consuming and they are alot closer to being mounted. Well one side anyways. Yes it's been a major PITA, but for some reason I've found it quite enjoyable. I've actually been able to use some of my new tools.
On a side note before I post the pics, for those that are using the new Photobucket and don't like the fact that they took away the easy links, if you go into your settings there is a box you can check off to get the easy links back. I just found it this morning. Now it's like the old one where you can just click on the IMG link and not have to go into each photo to get it.
Onto the updates:
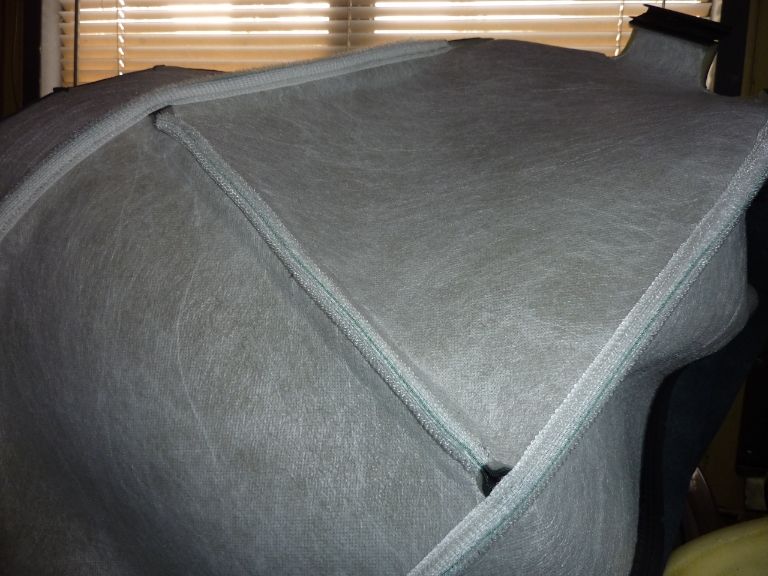
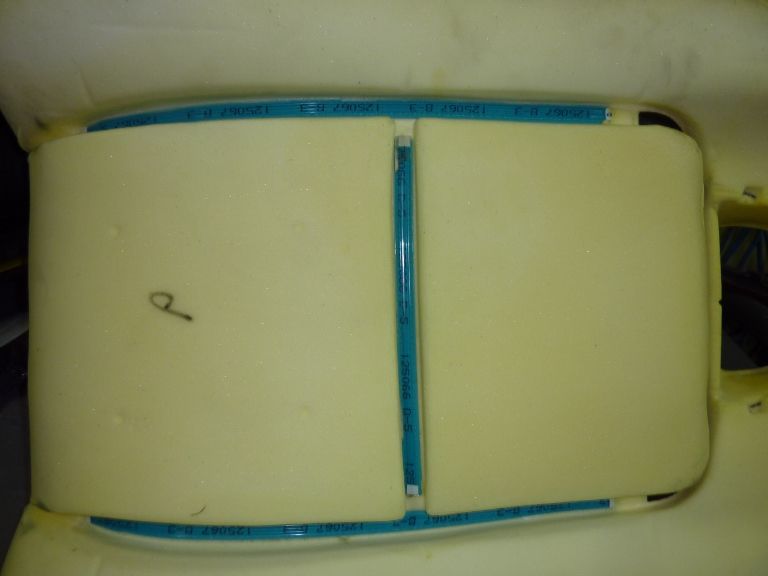
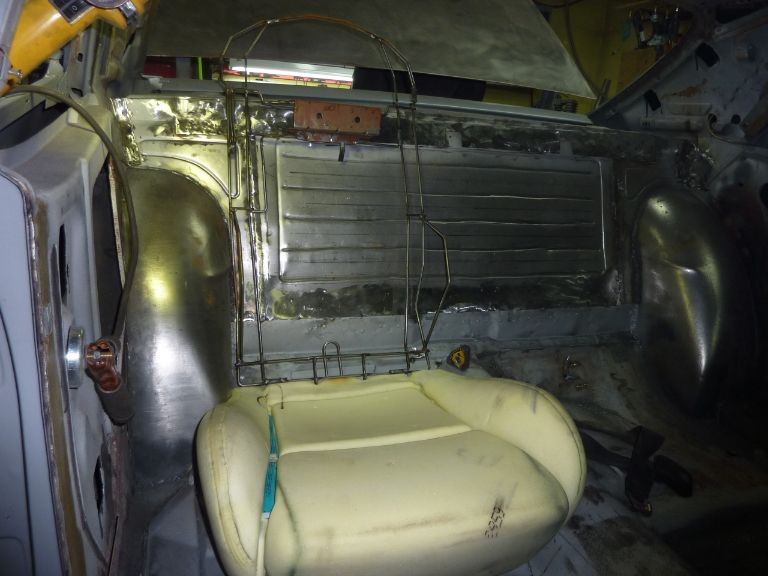
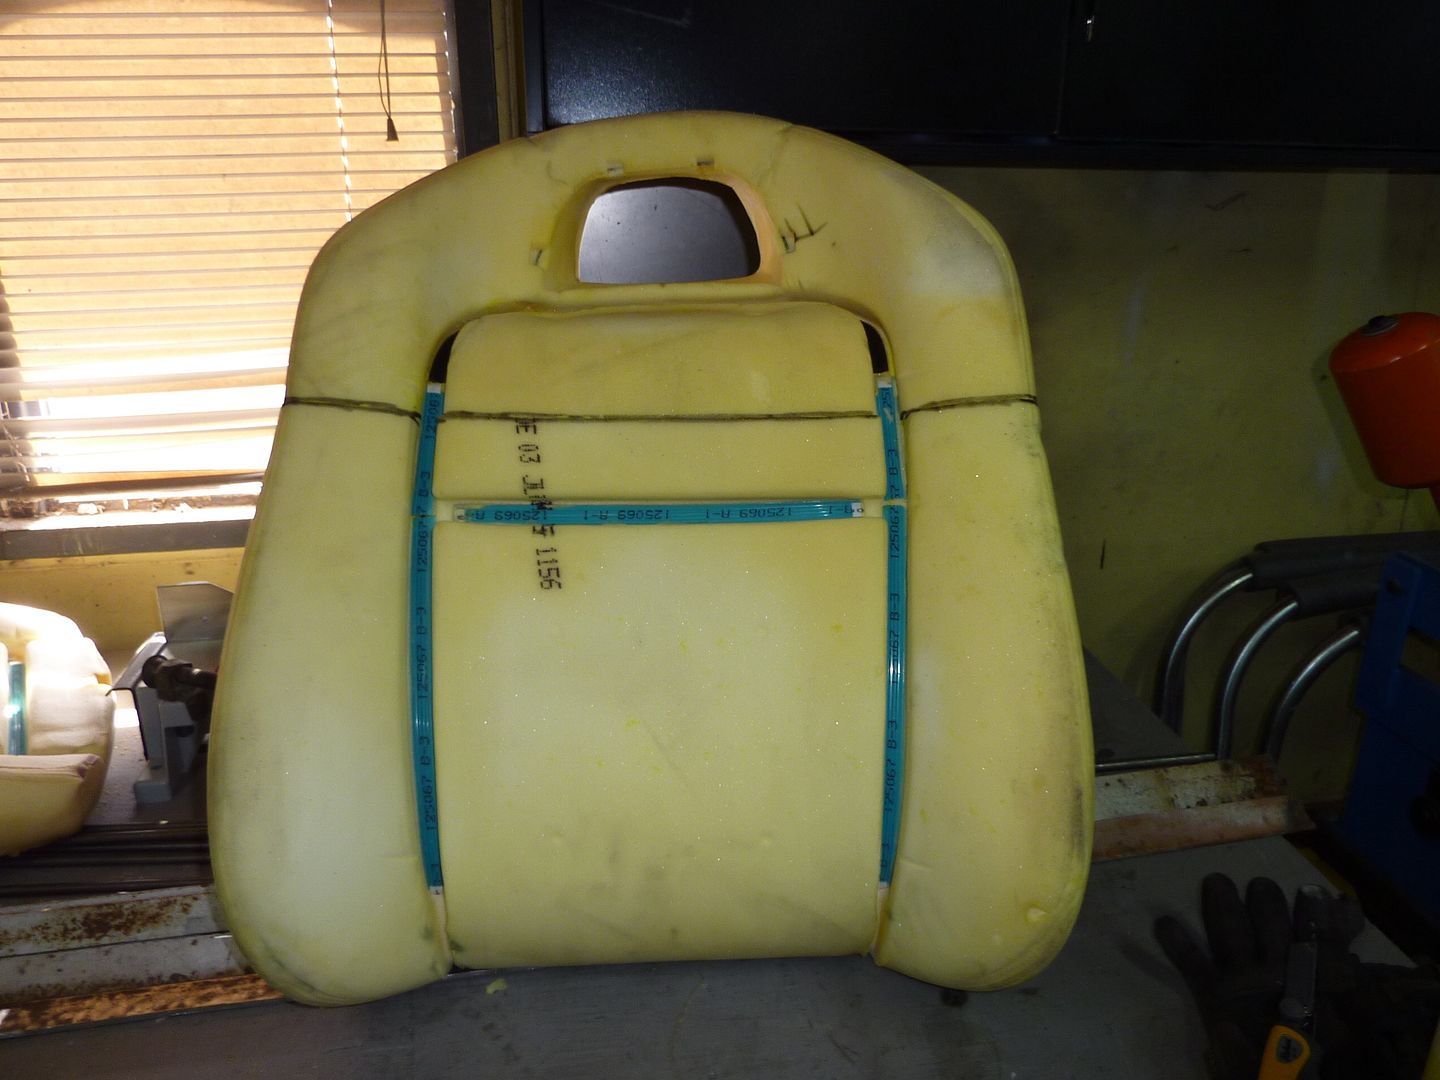
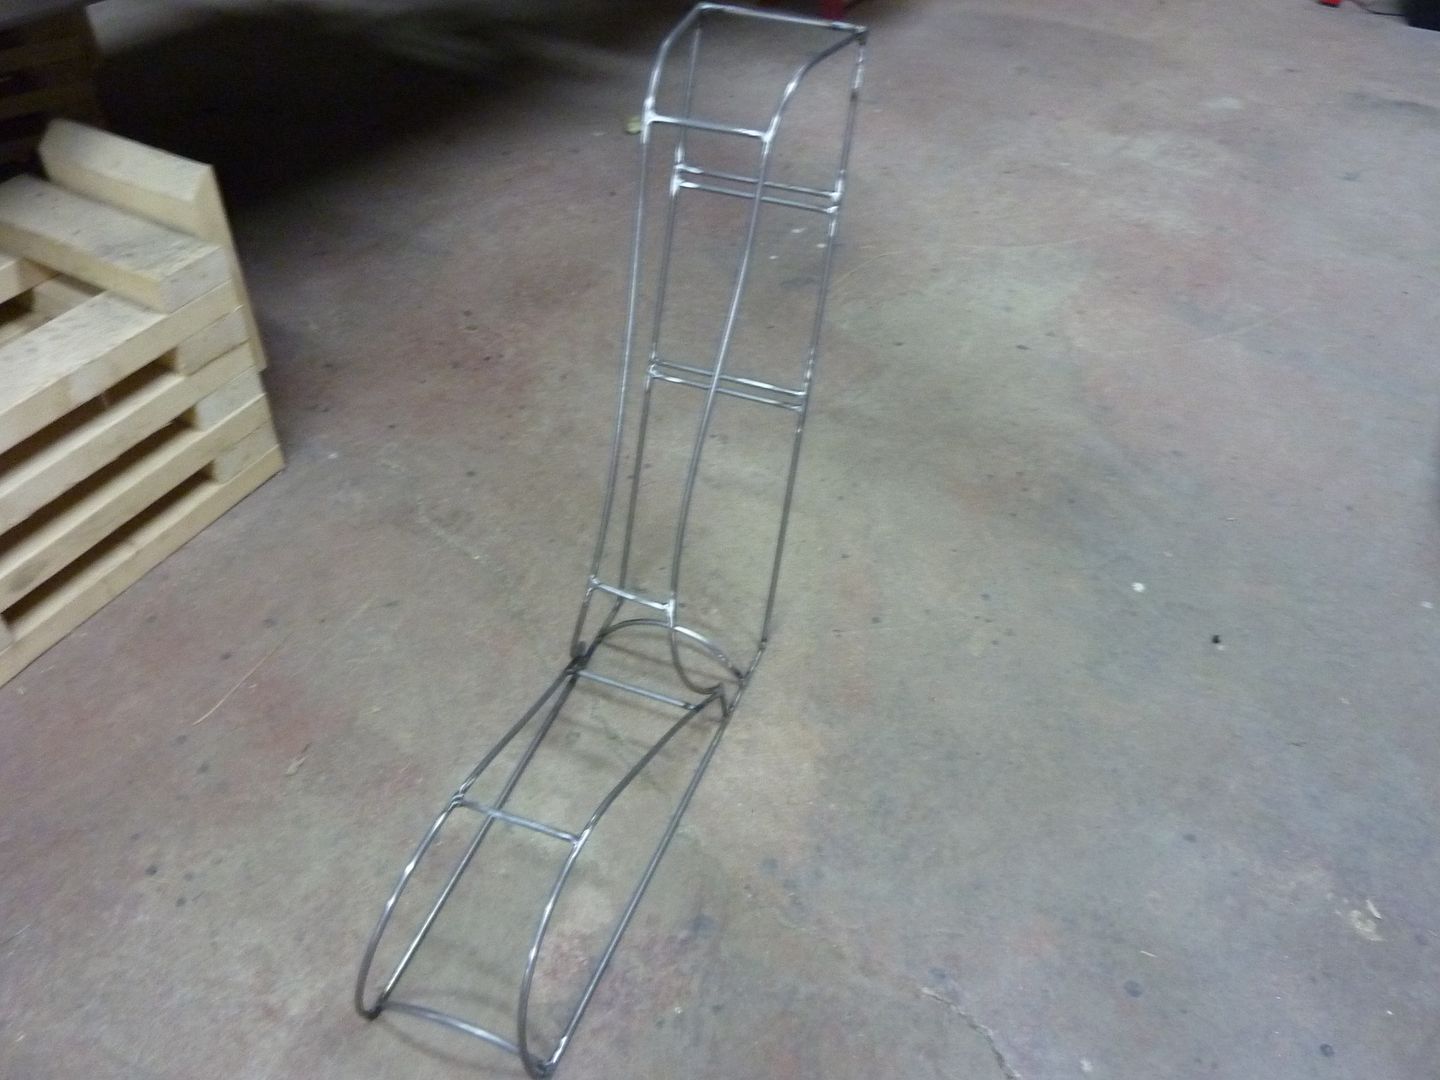
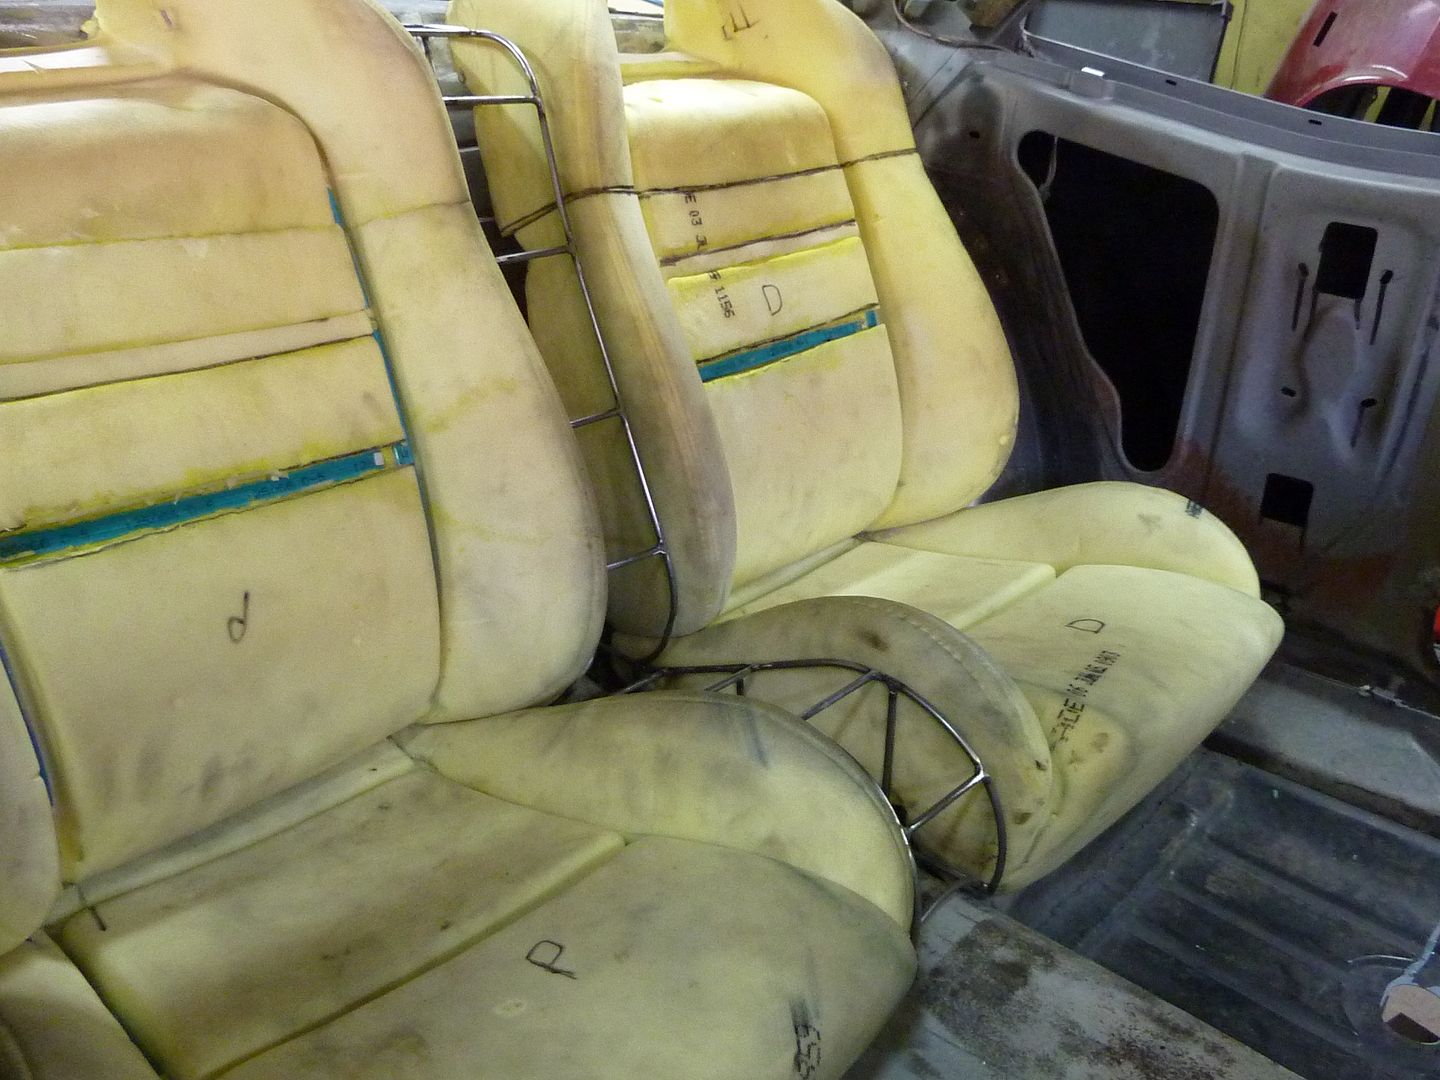
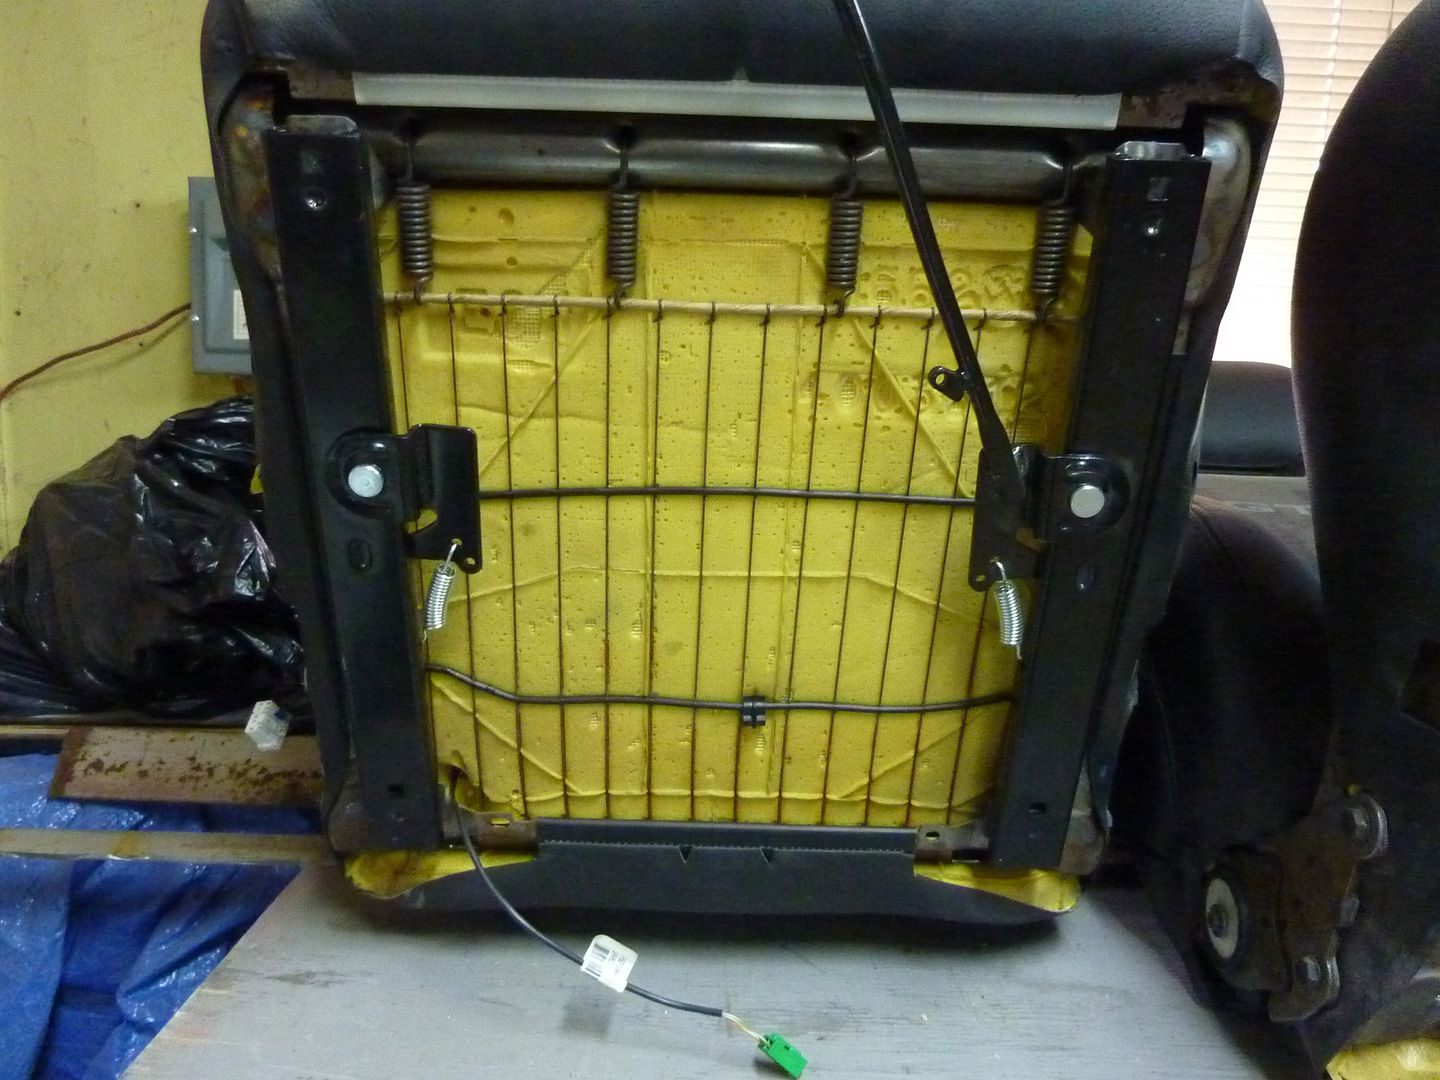
I found my leather was getting quite dirty, so I decided to take it off the seats. It came off very easily. As shown before, the bottom is held on with plastic clips that snap over the round bar. Once all the clips are off, the leather is held on with velcro
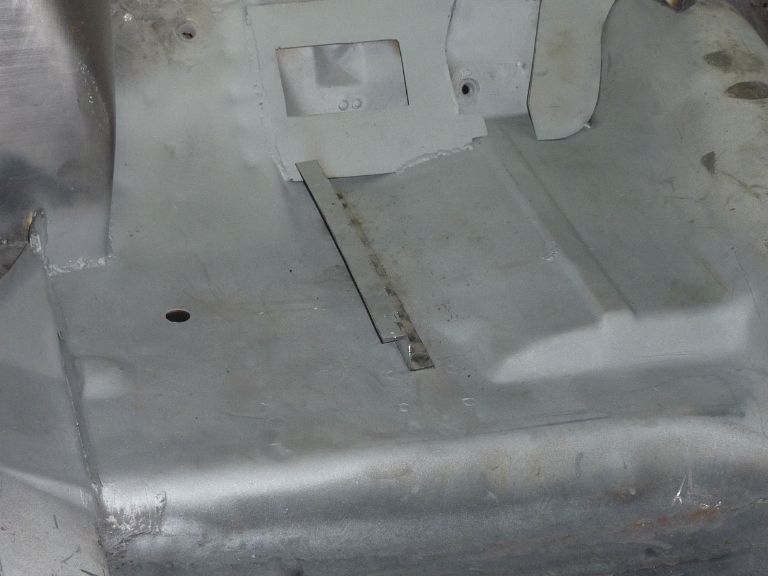
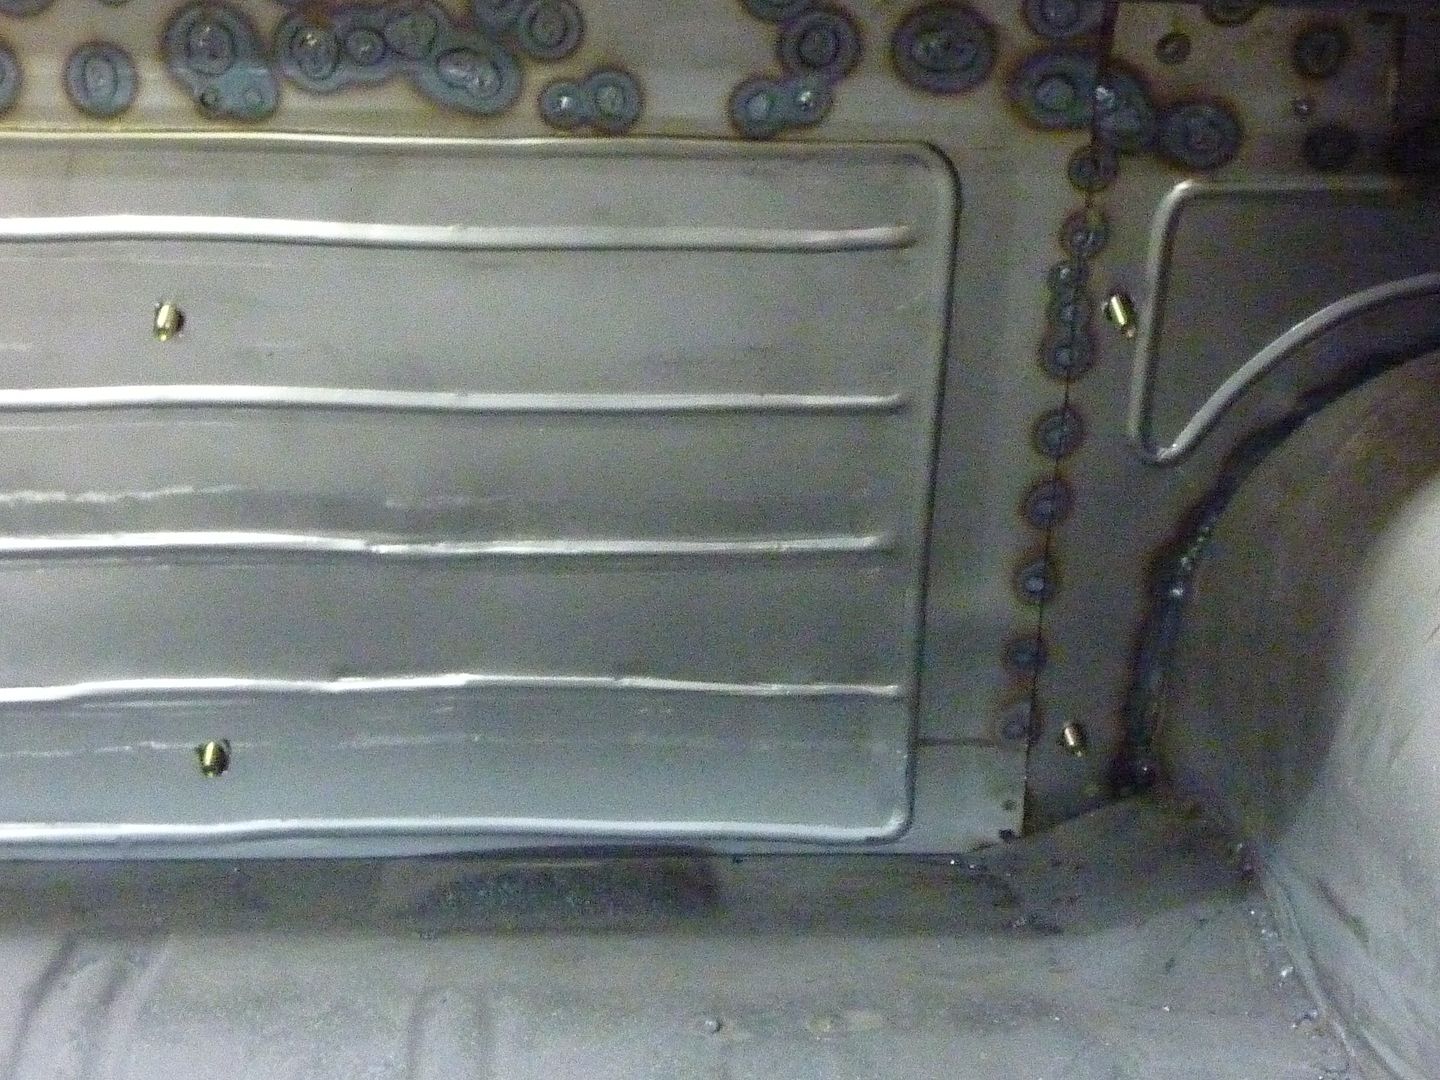
First thing I did was add some sheet metal to where the back of the seat will rest. This will give it some more support

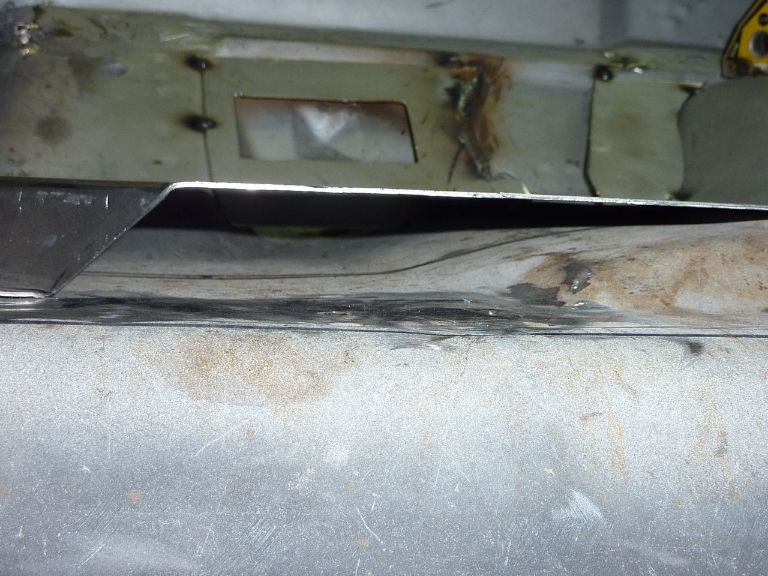
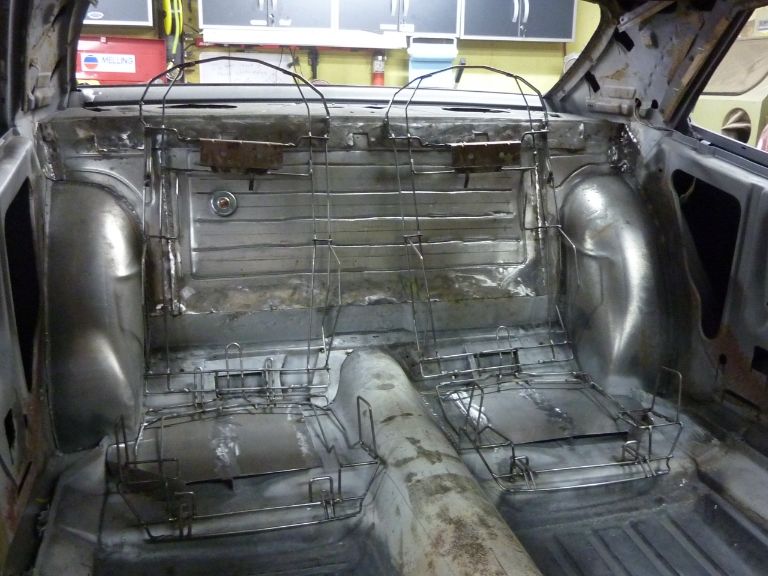
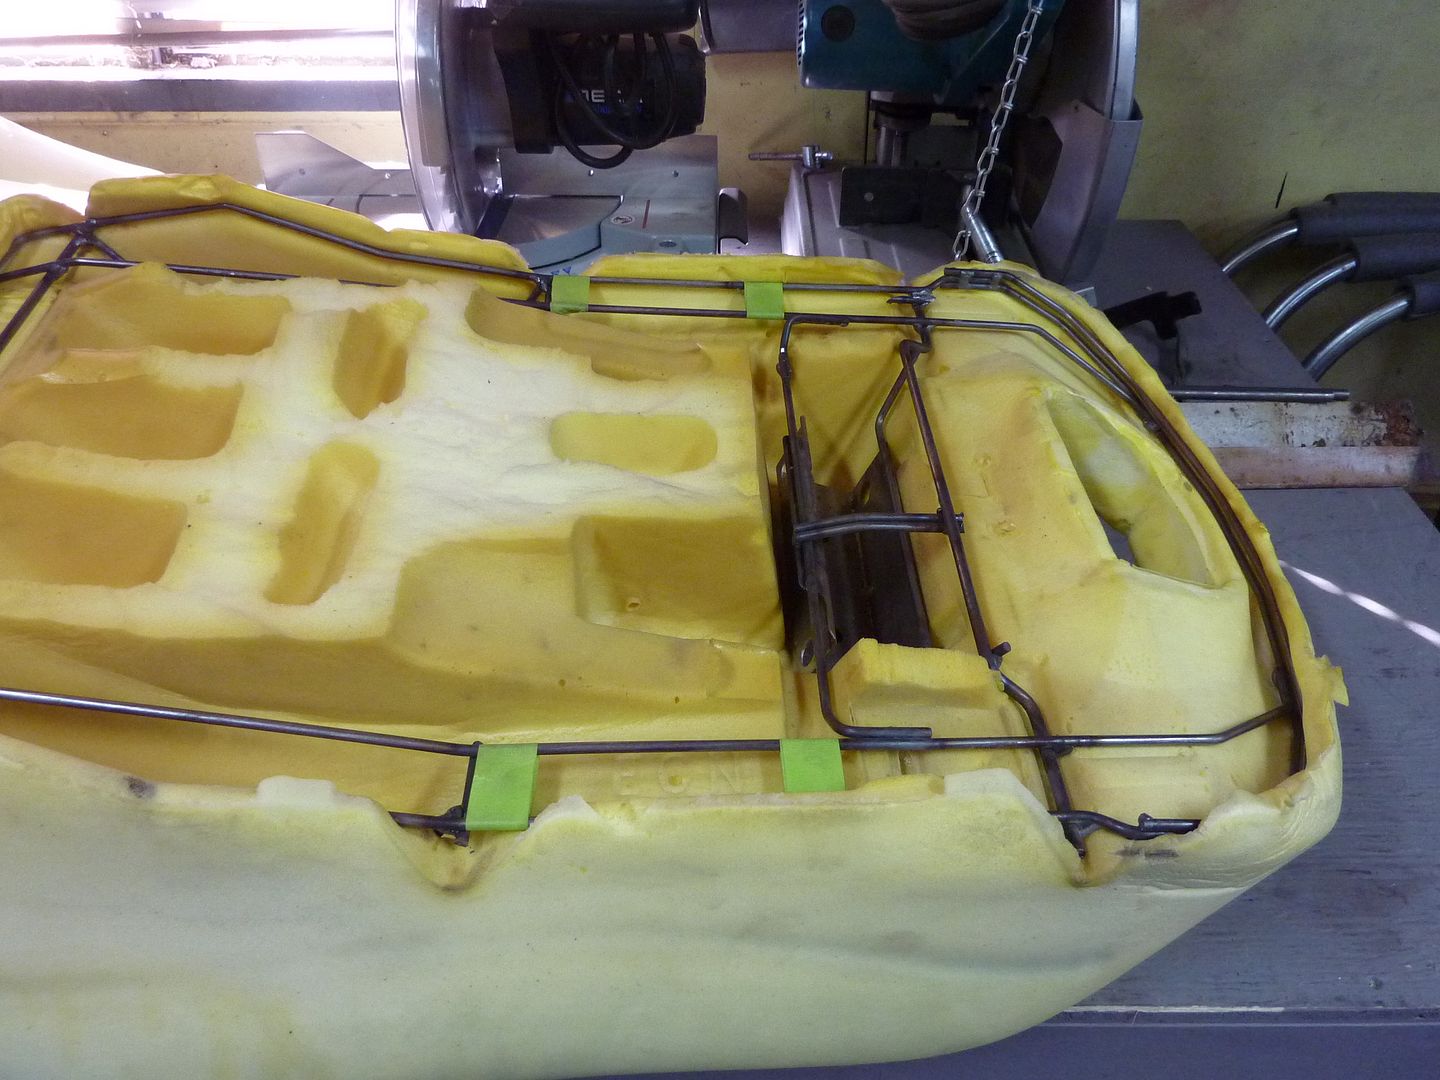
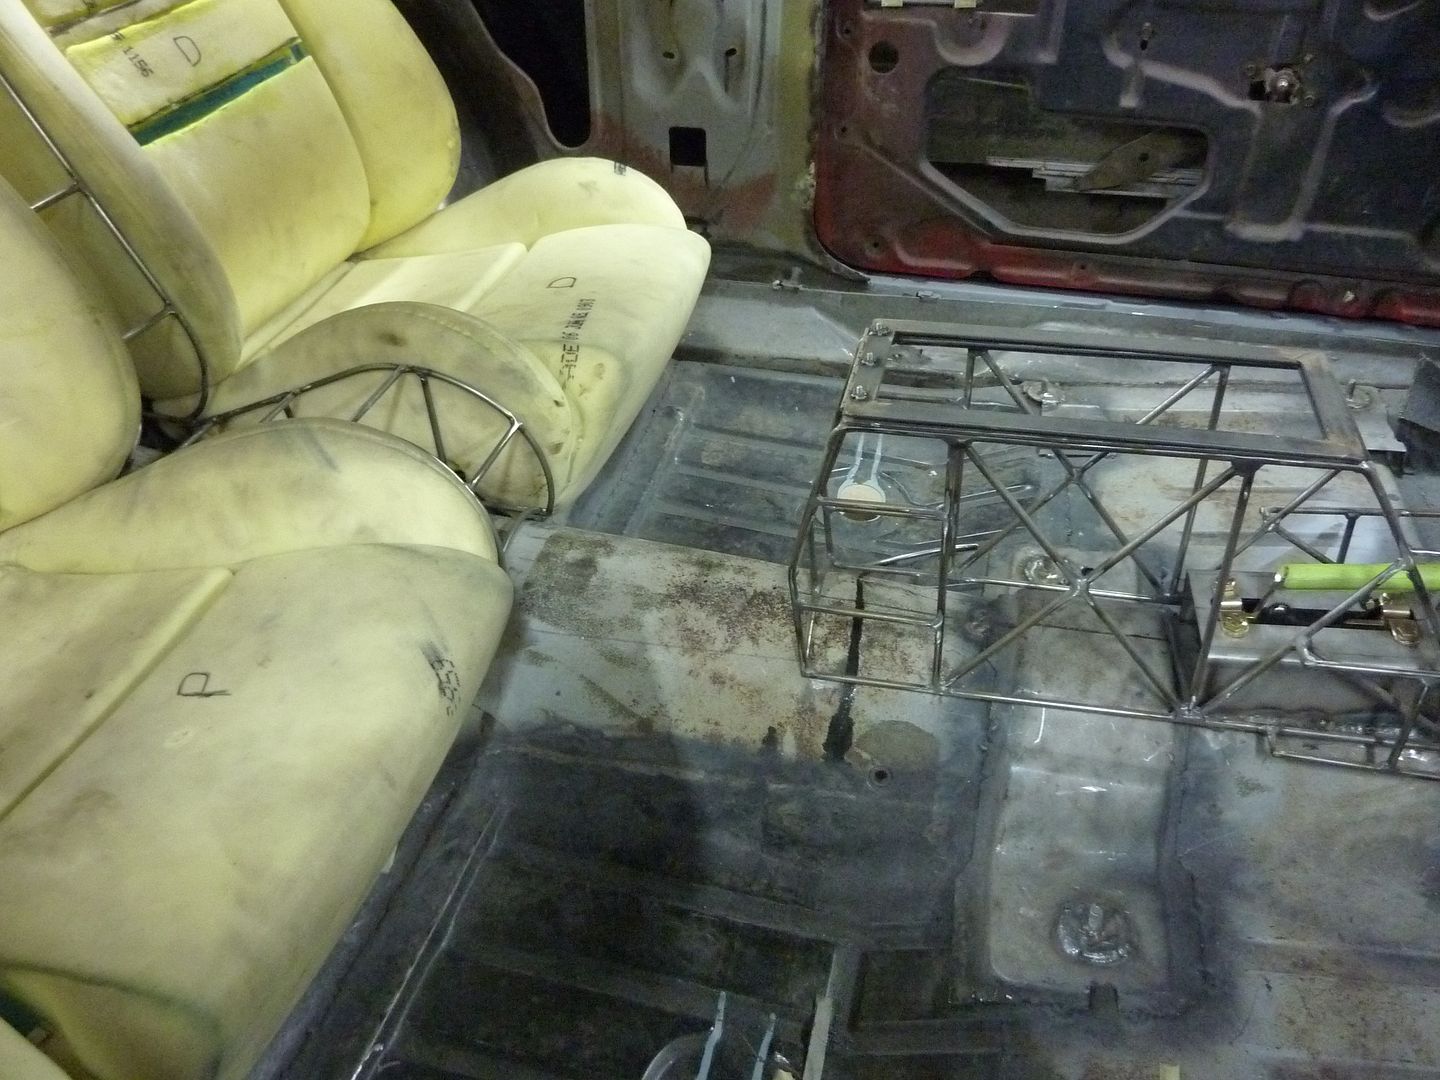
Next I realized that when the seat was sitting on the floor, there was a large part of it that had no support underneath it at all. This is due to the way the floor is. You can see under the left side of the skeleton that most of it is sitting in the air

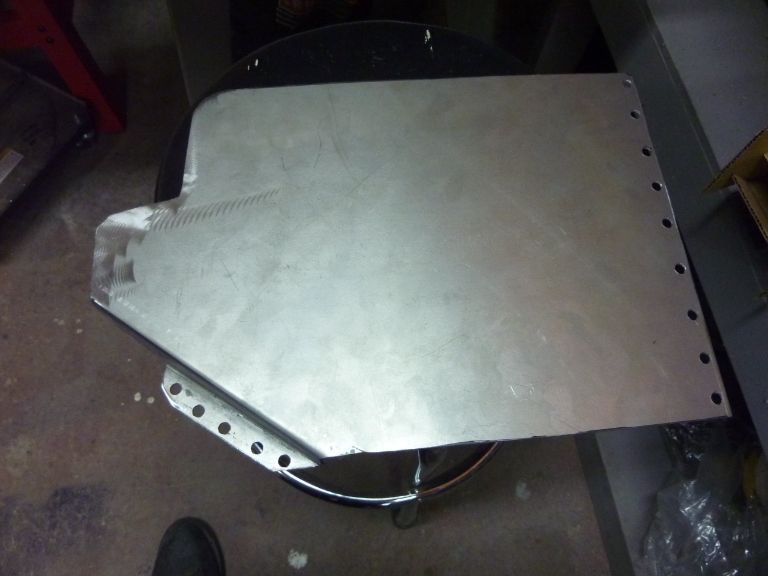
With this, I decided to make the floor more level. I built a new section to raise the floor out of 16 gauge sheet metal. I also found out that an Ingersol Rand air sheer is not designed to cut 16 gauge.....gotta buy a new one now
Here's the new section
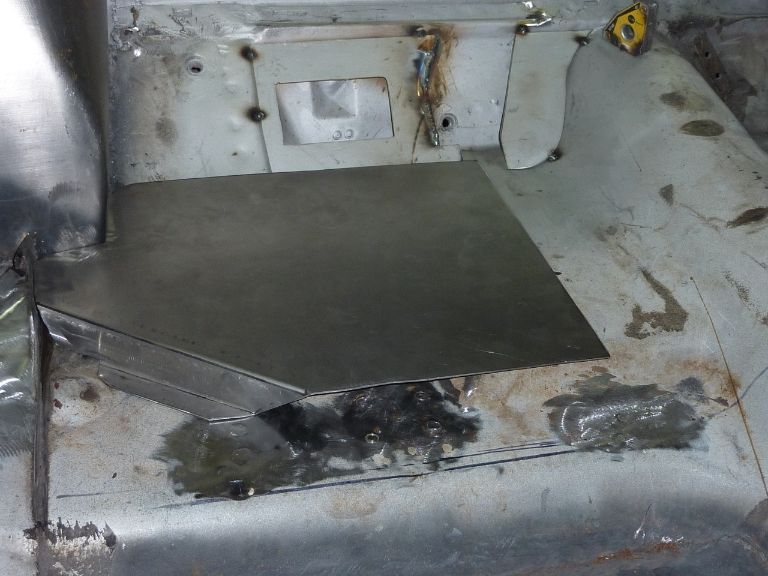
This pic gives a good idea as to what I was talking about with the floor being unlevel
I also added a brace in the center of the new section
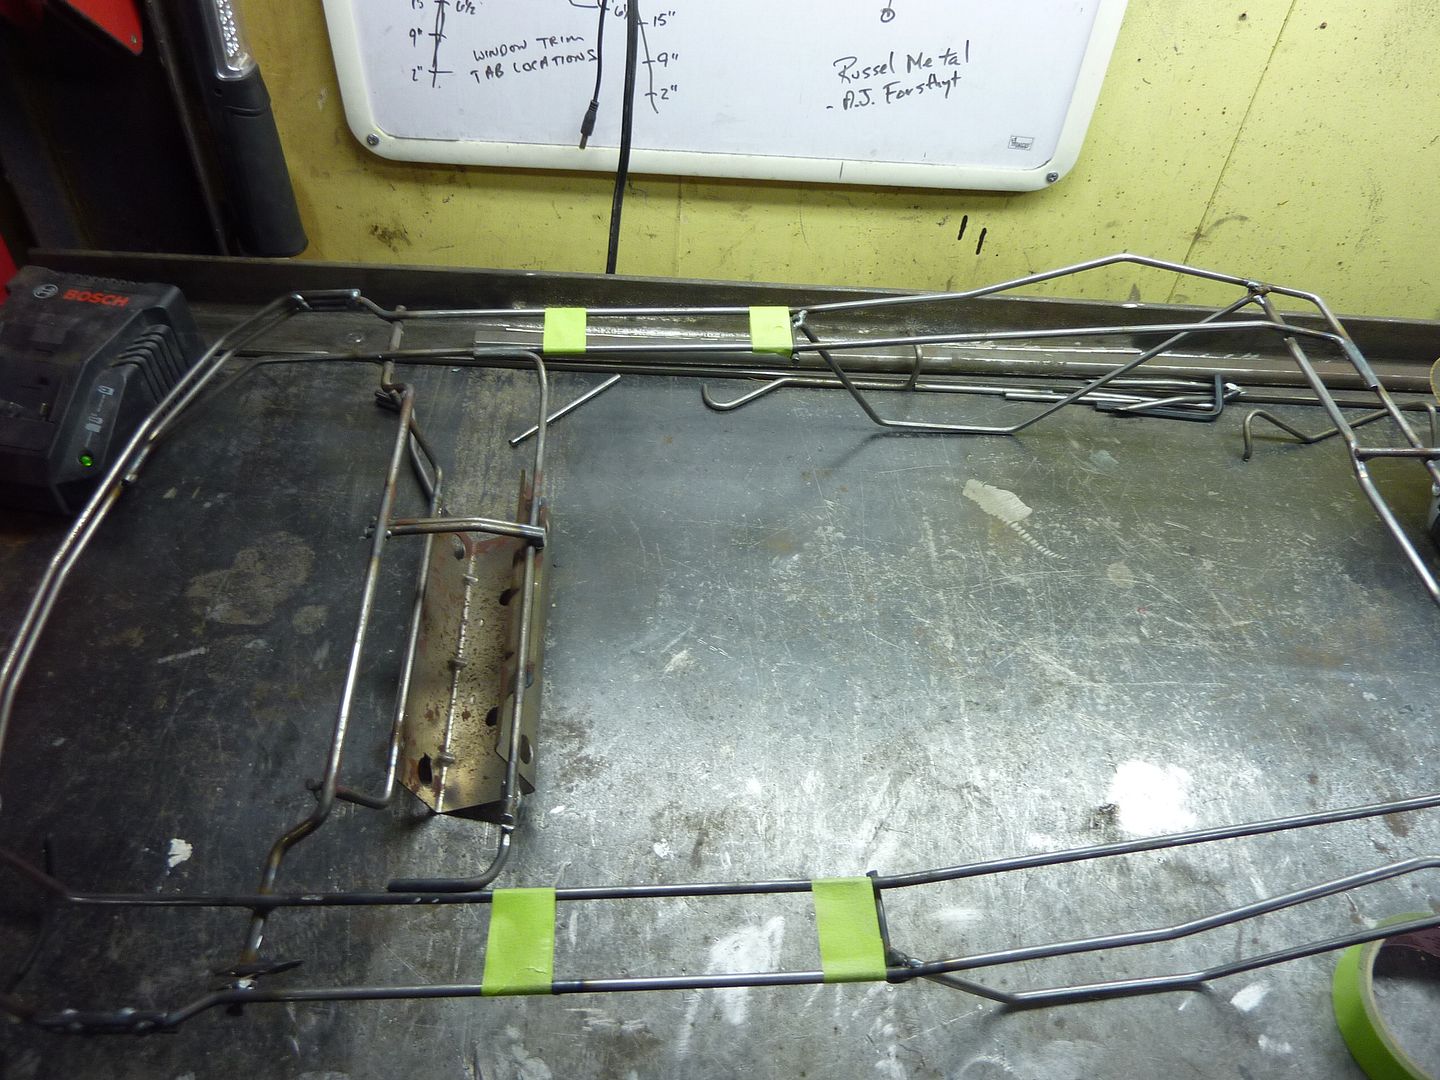
It sits on the floor a lot better now. I've also had to modify a few sections of the skeleton to make it sit better. I didn't take pics of all the modifications as it would be different from car to car.
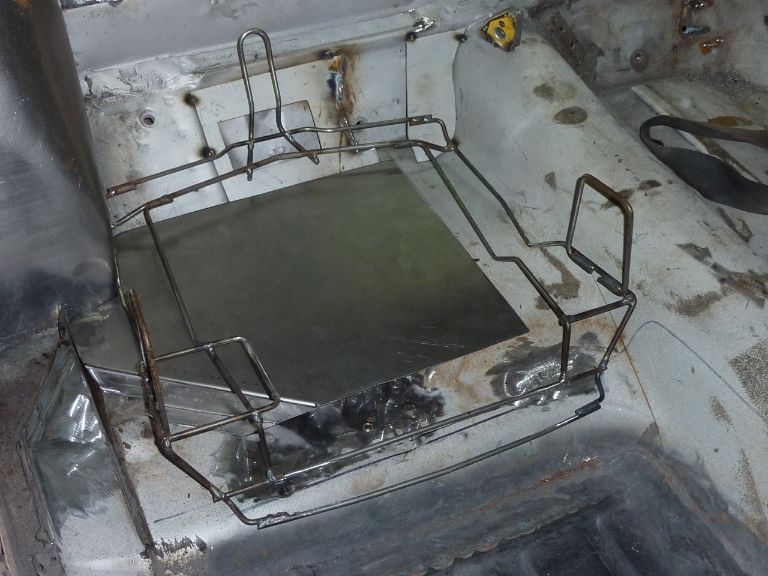
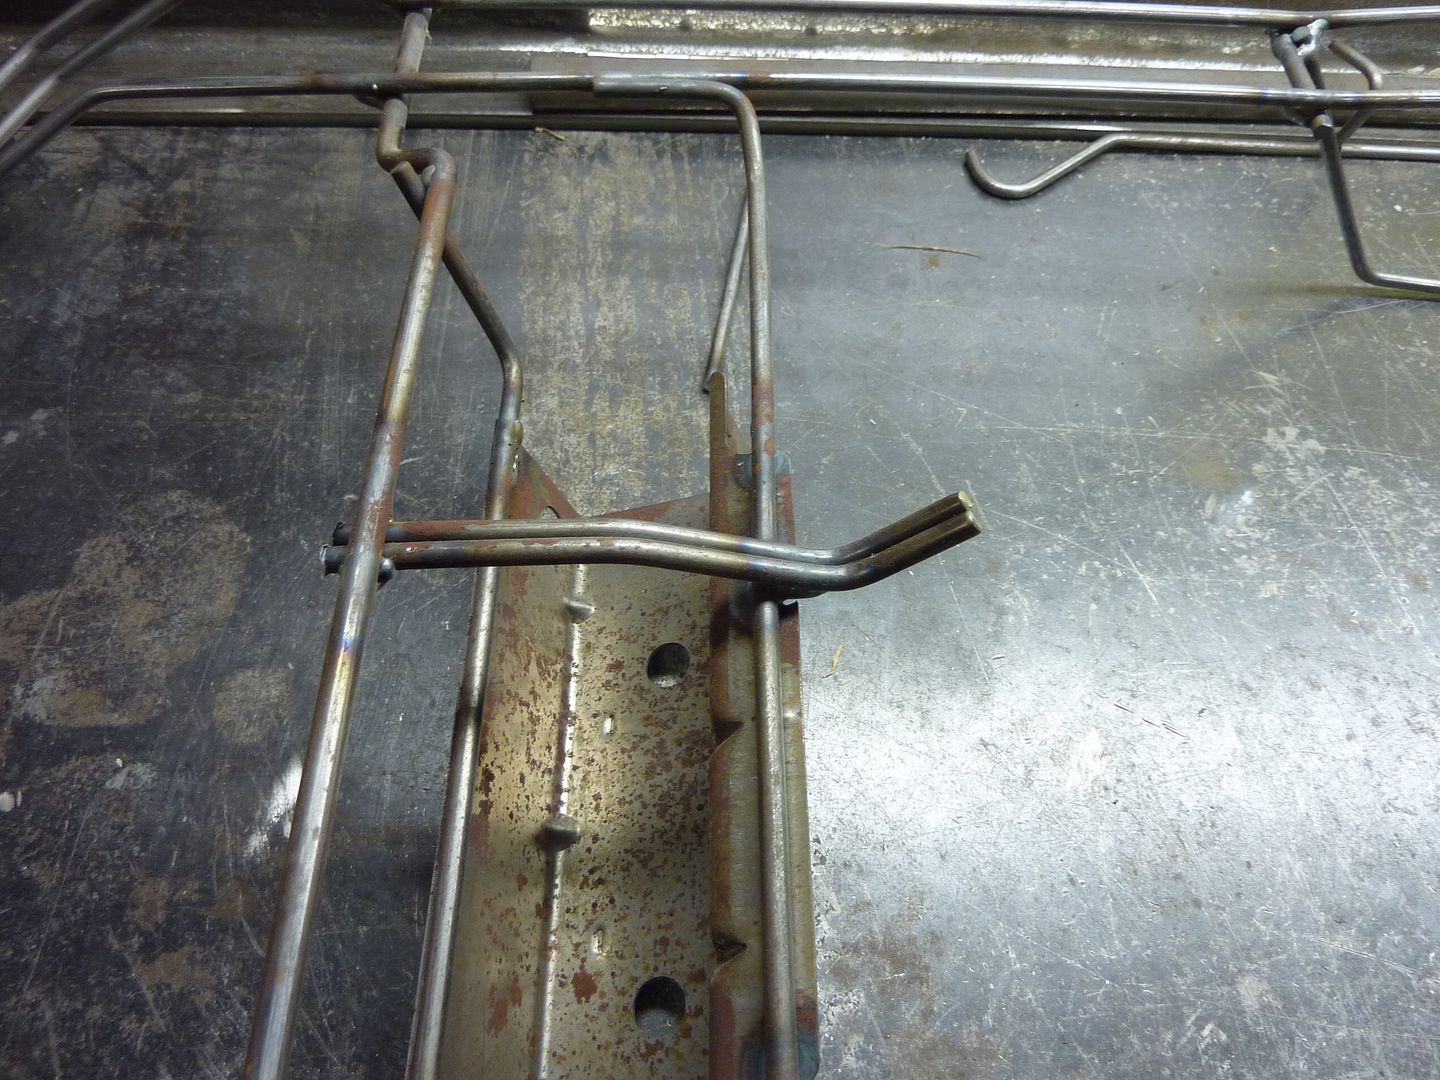
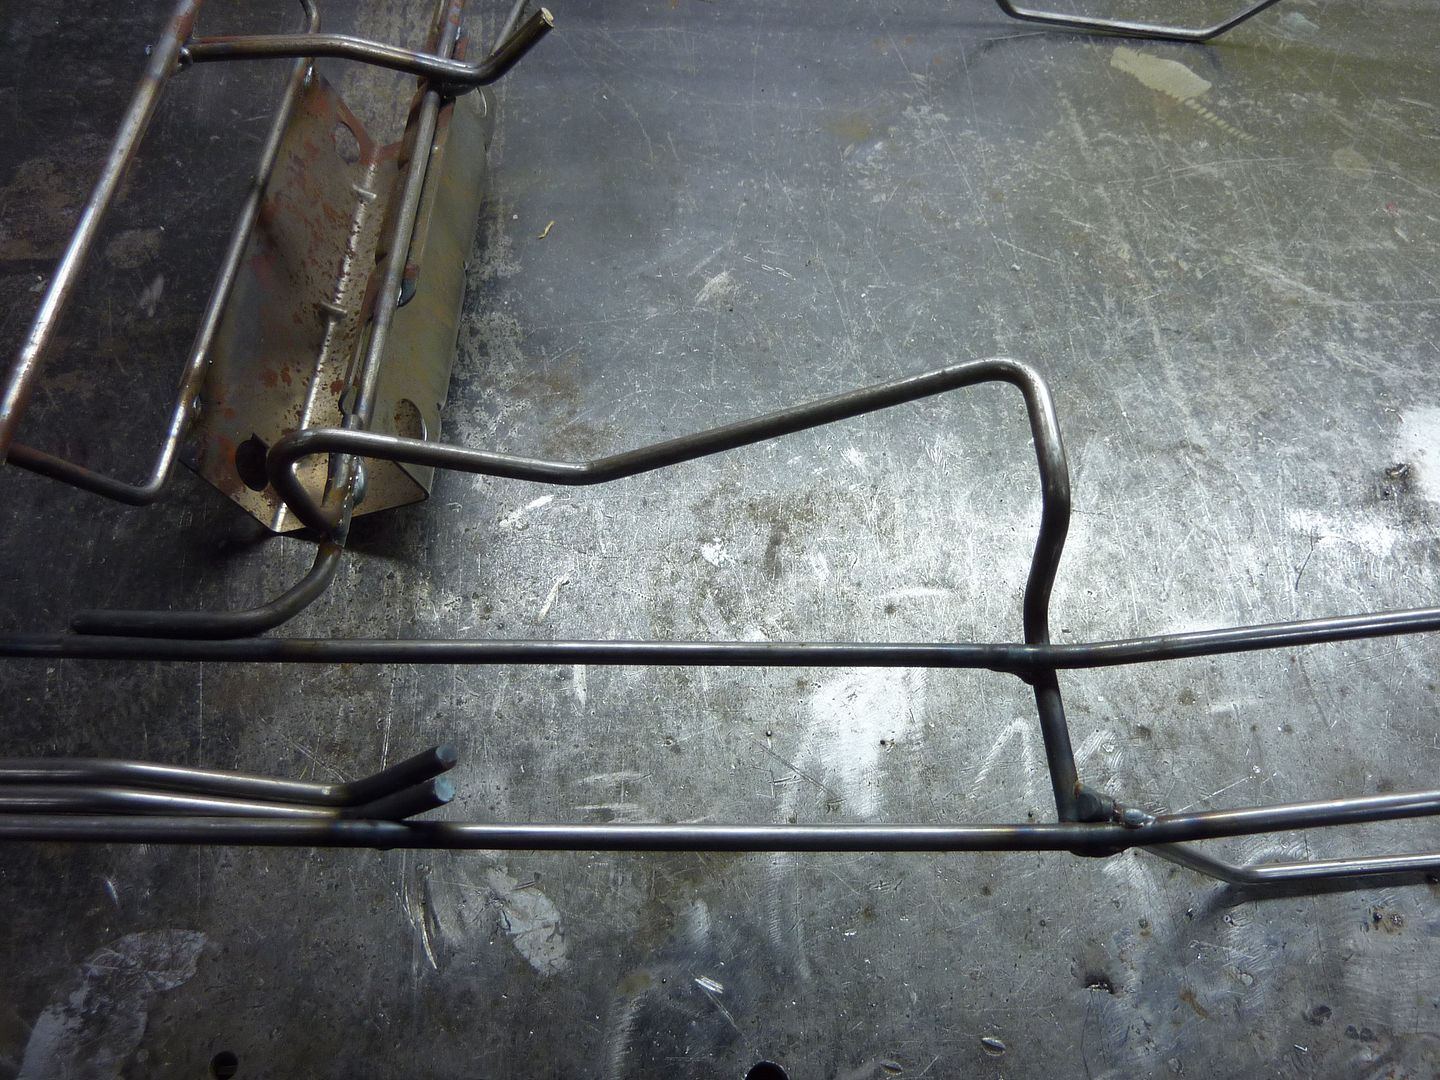
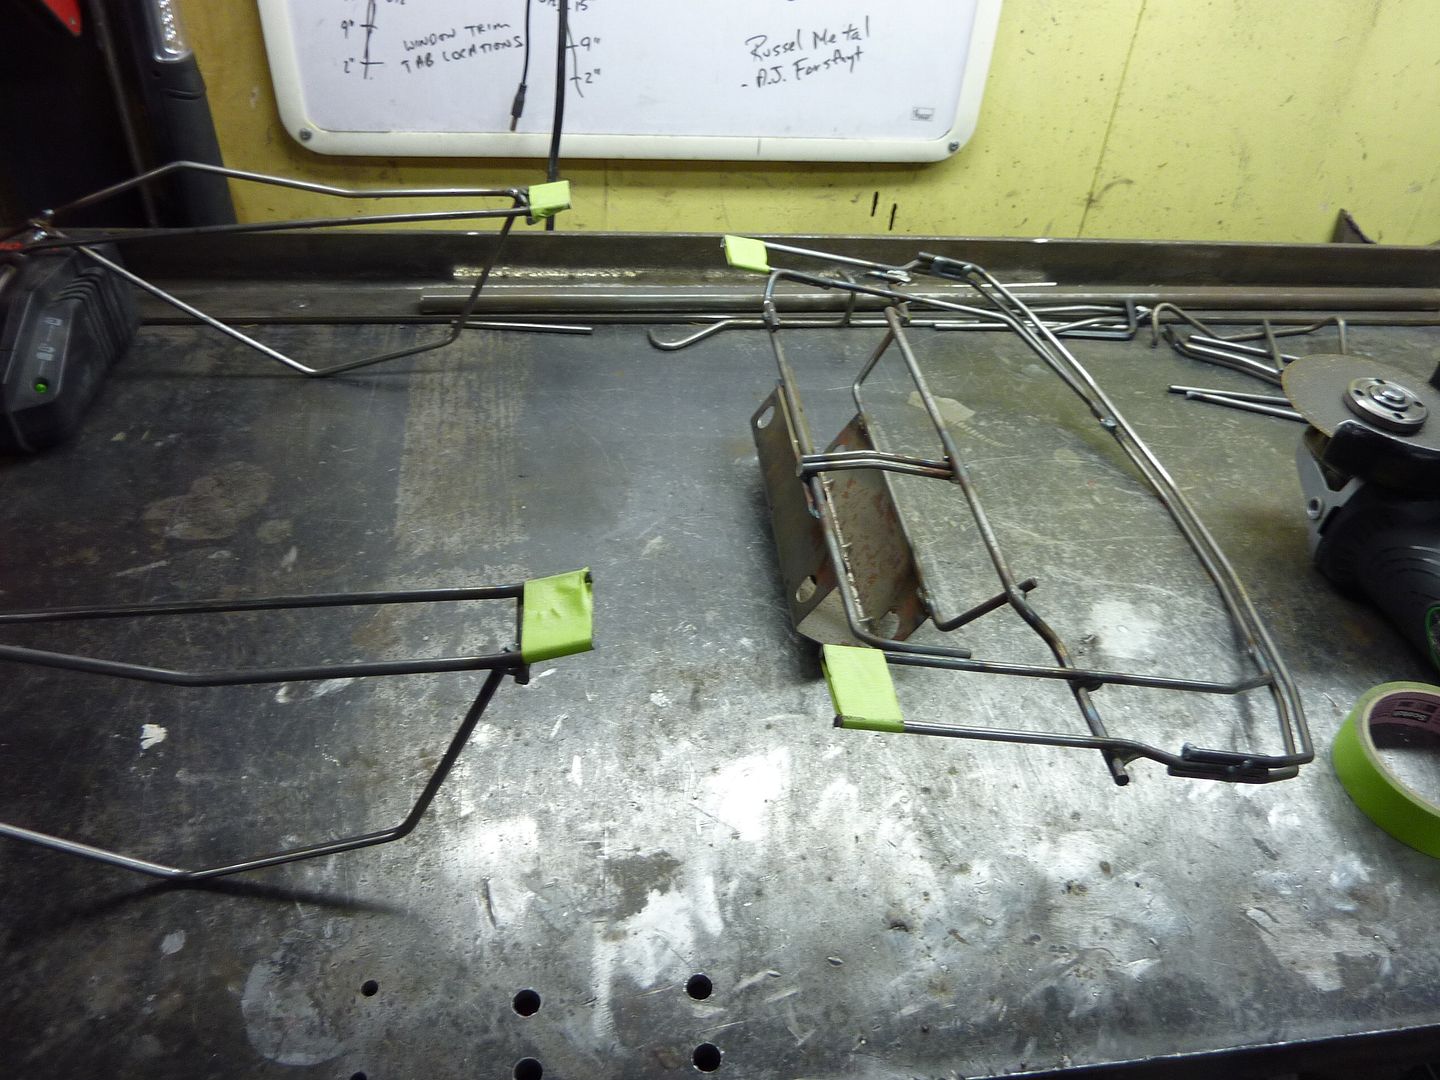
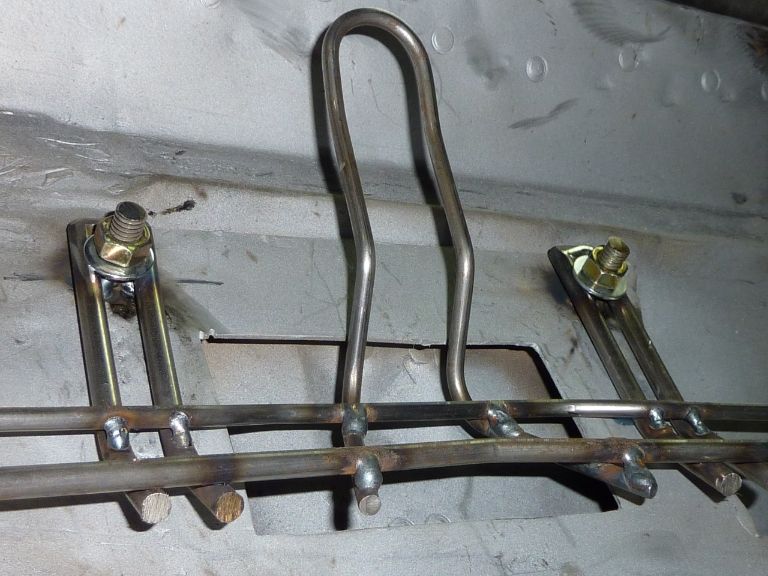
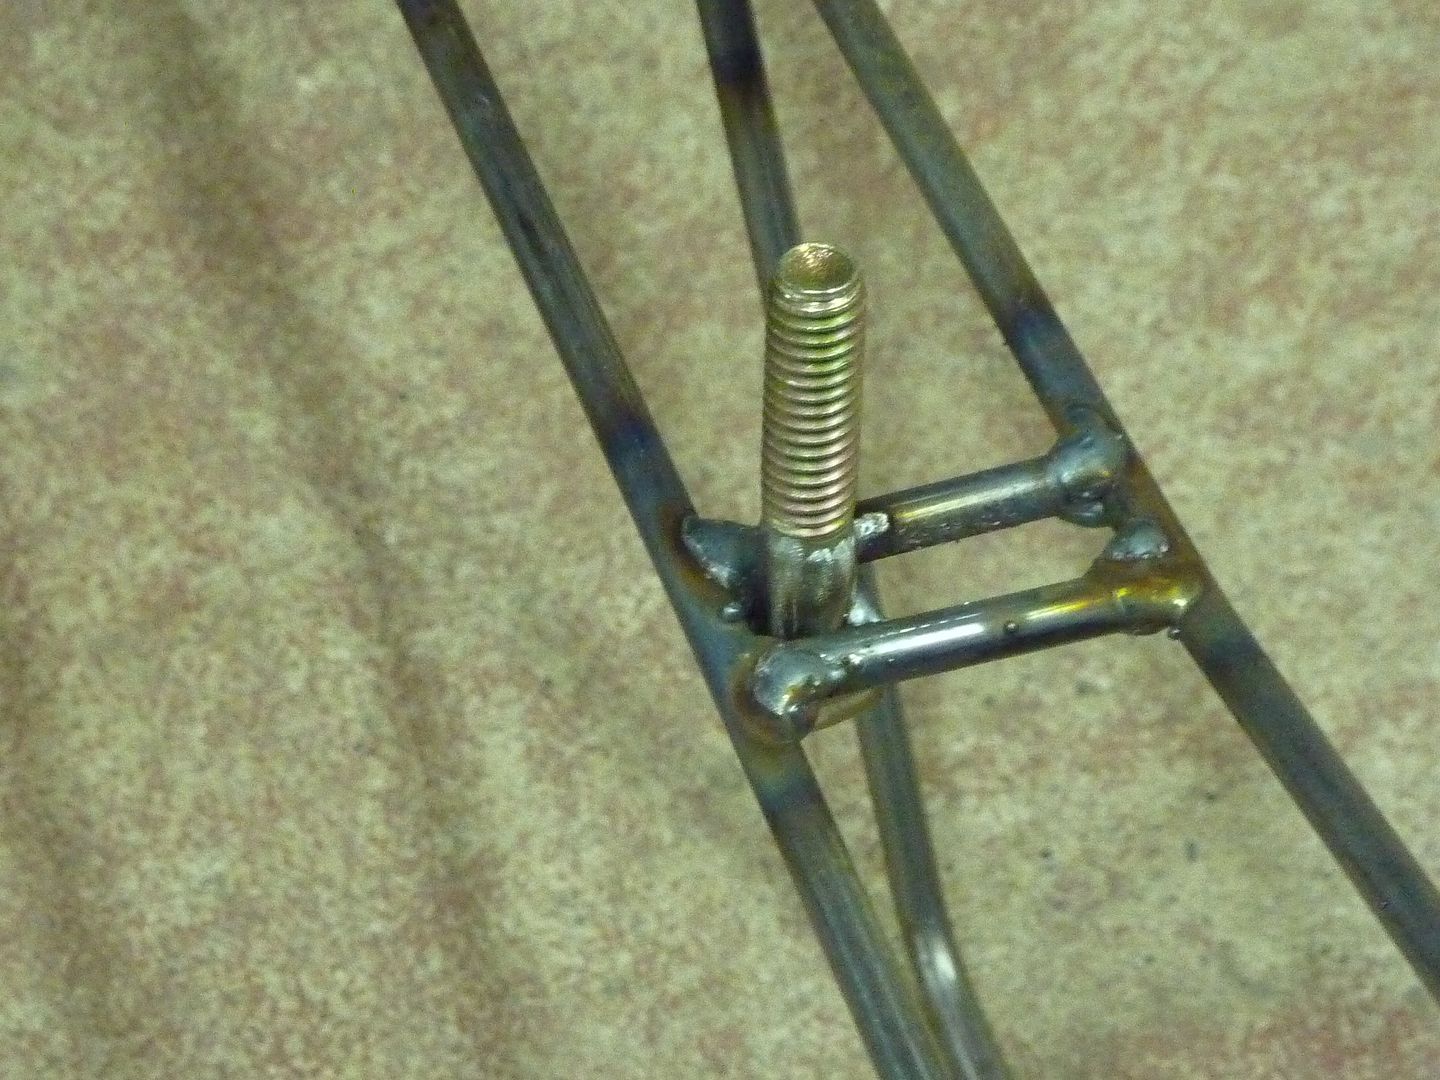
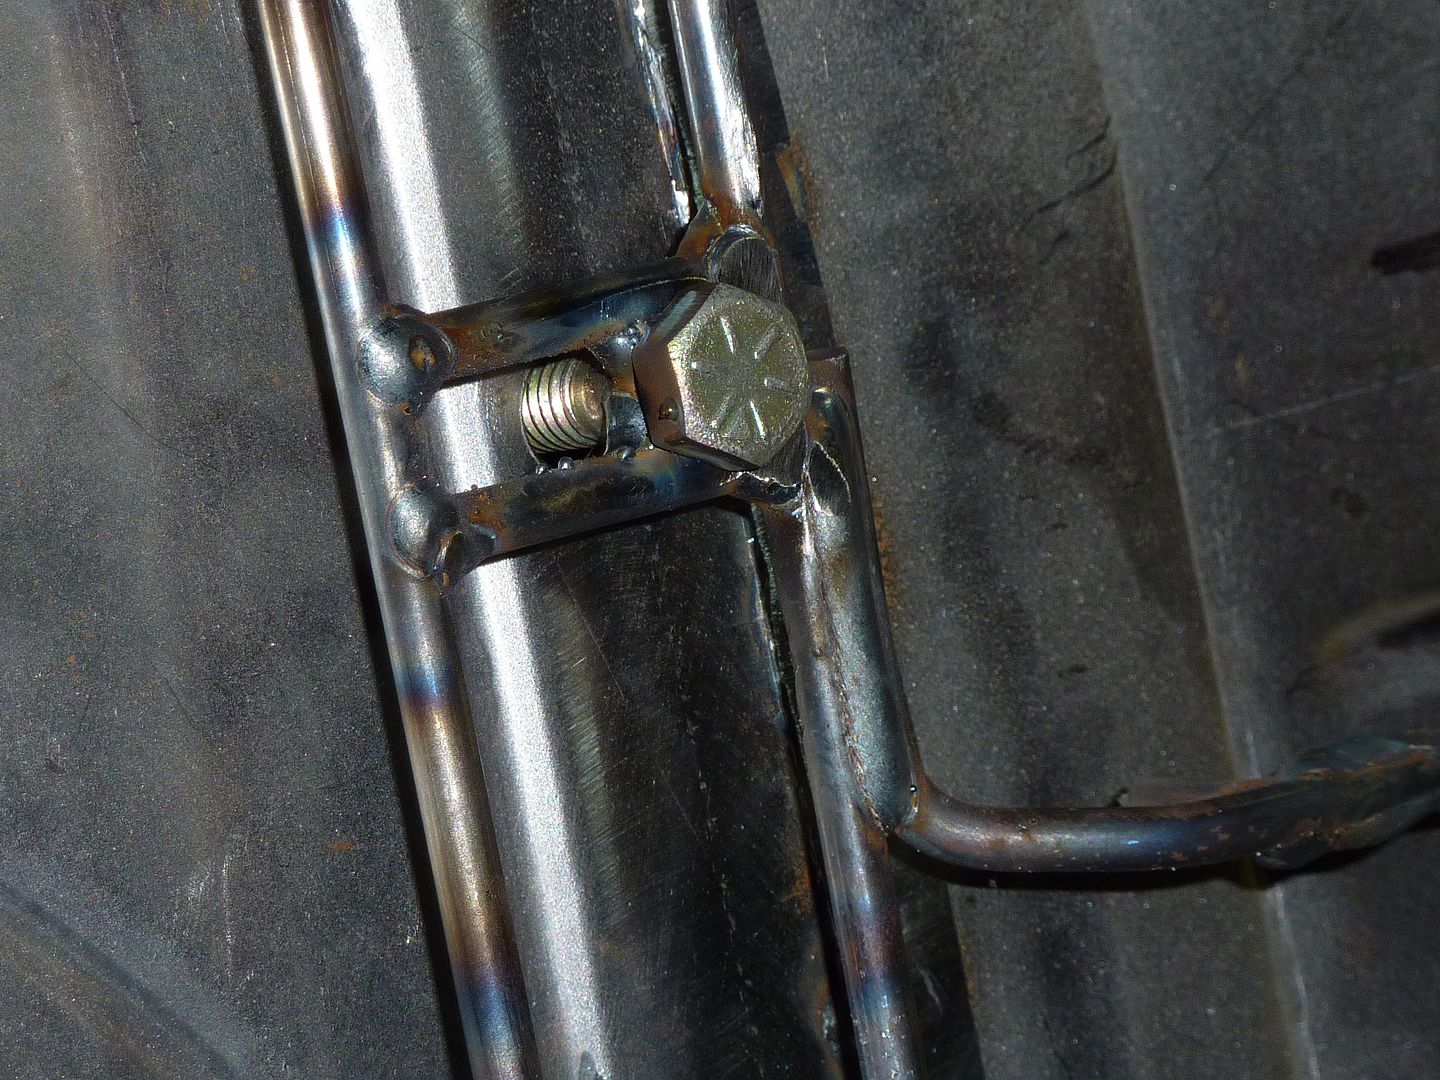
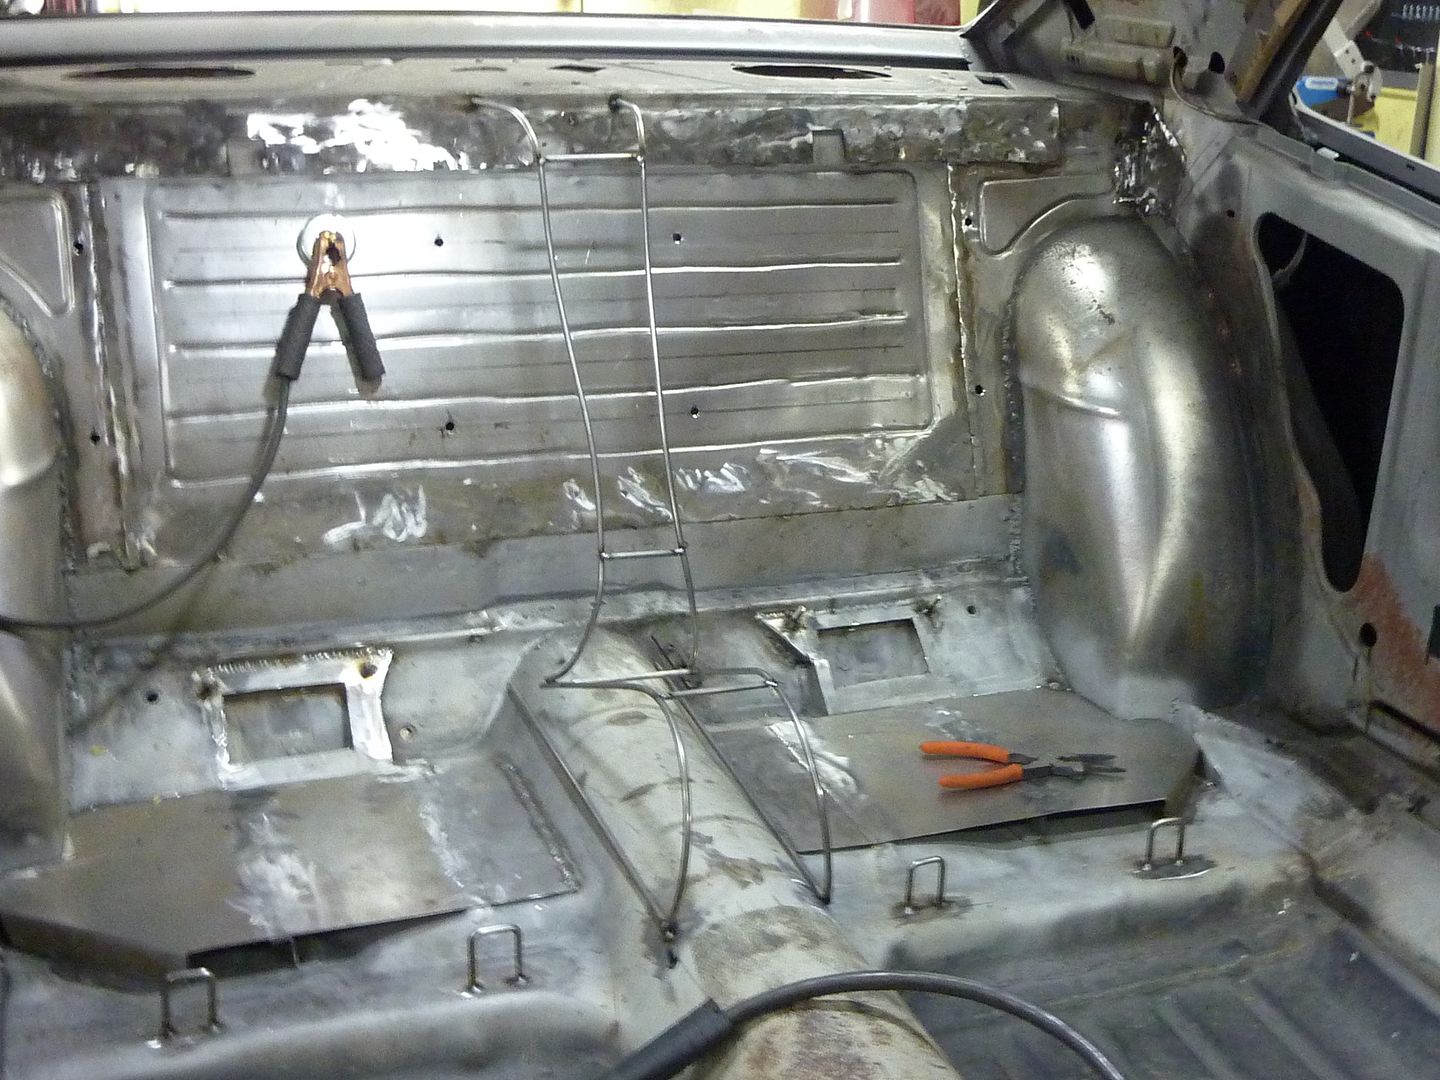
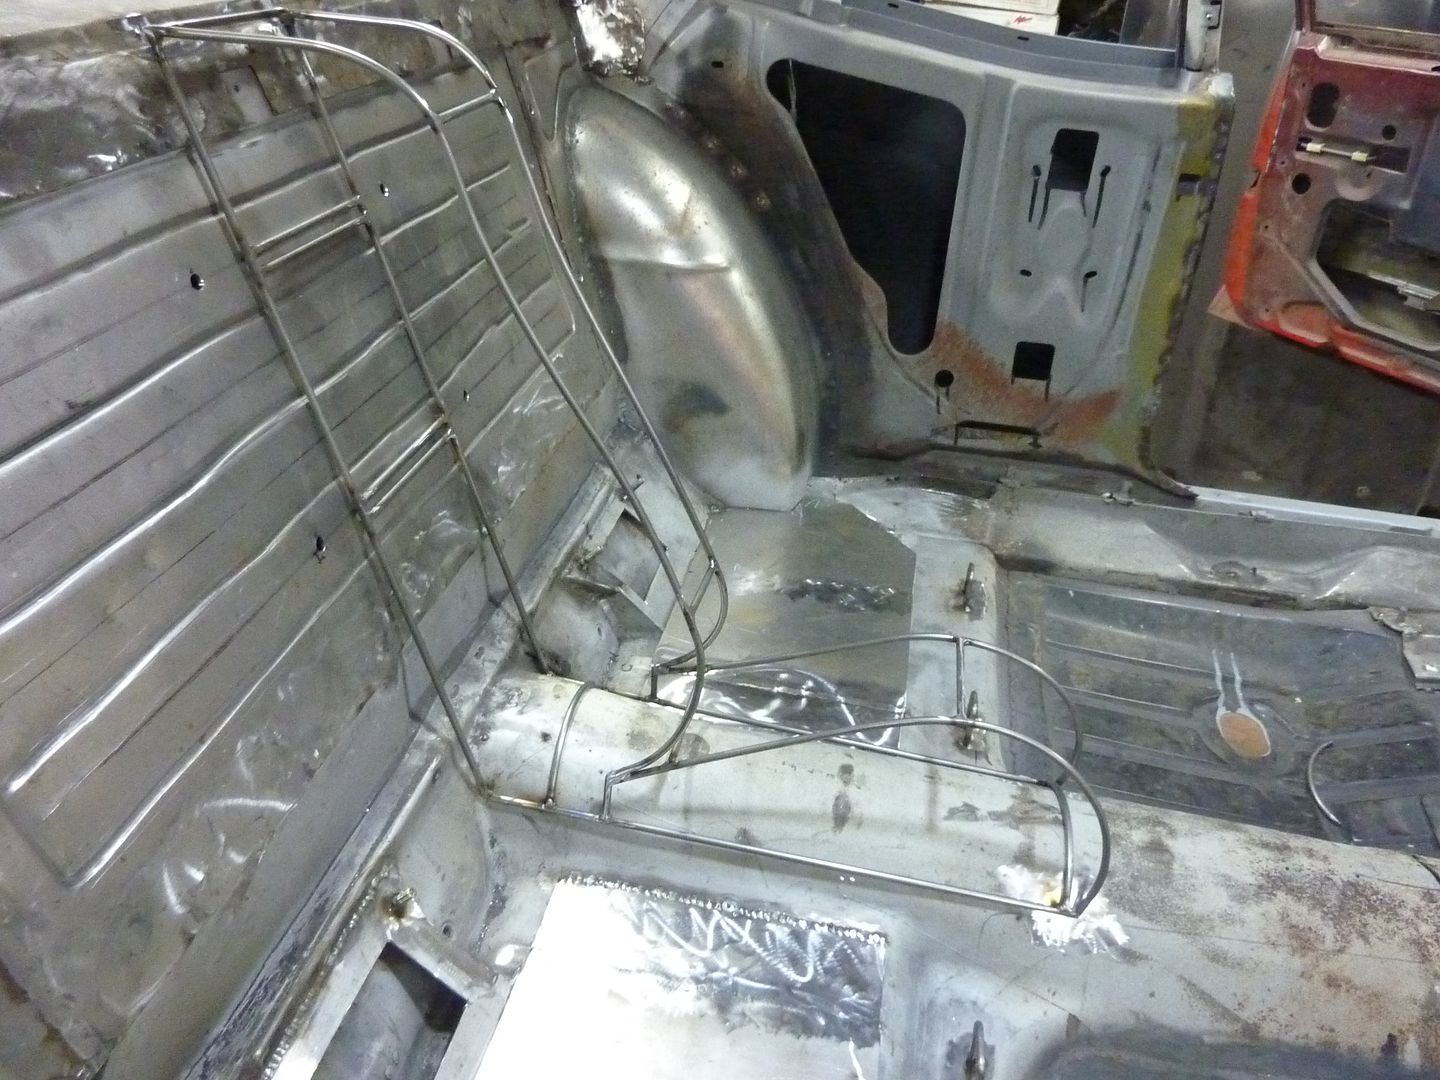
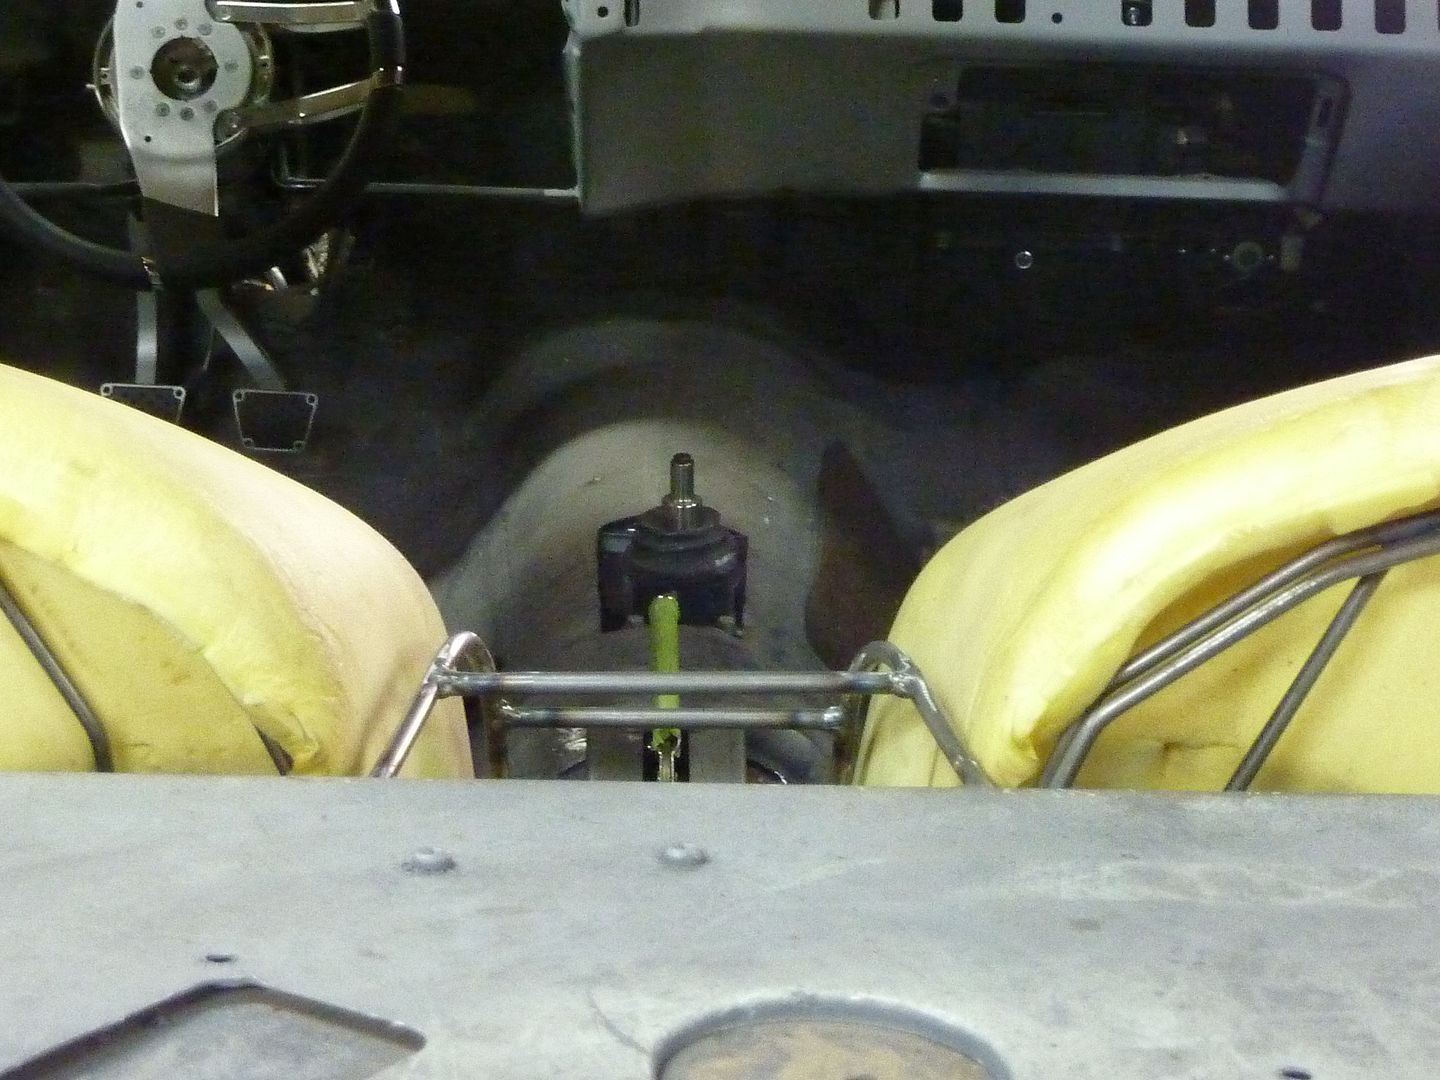
I decided to use round bar to make front mounts instead of the sheetmetal ones that I had made. I will add some rear support bars to these later.
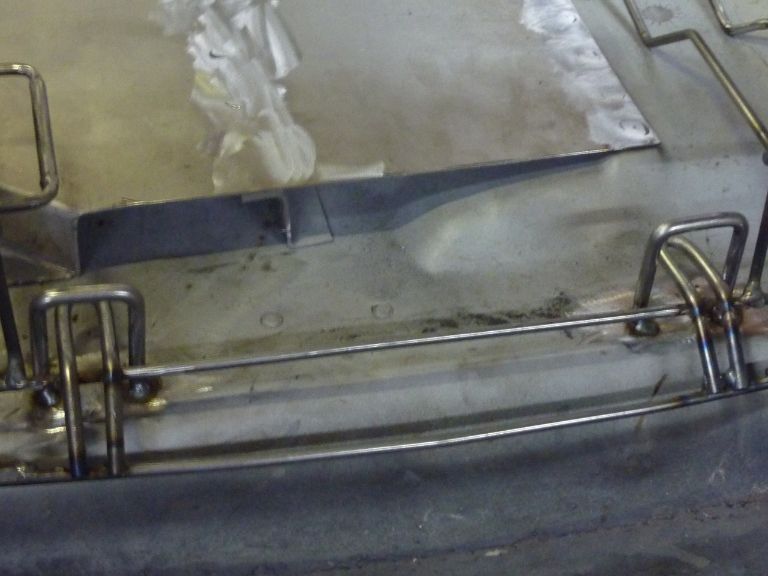
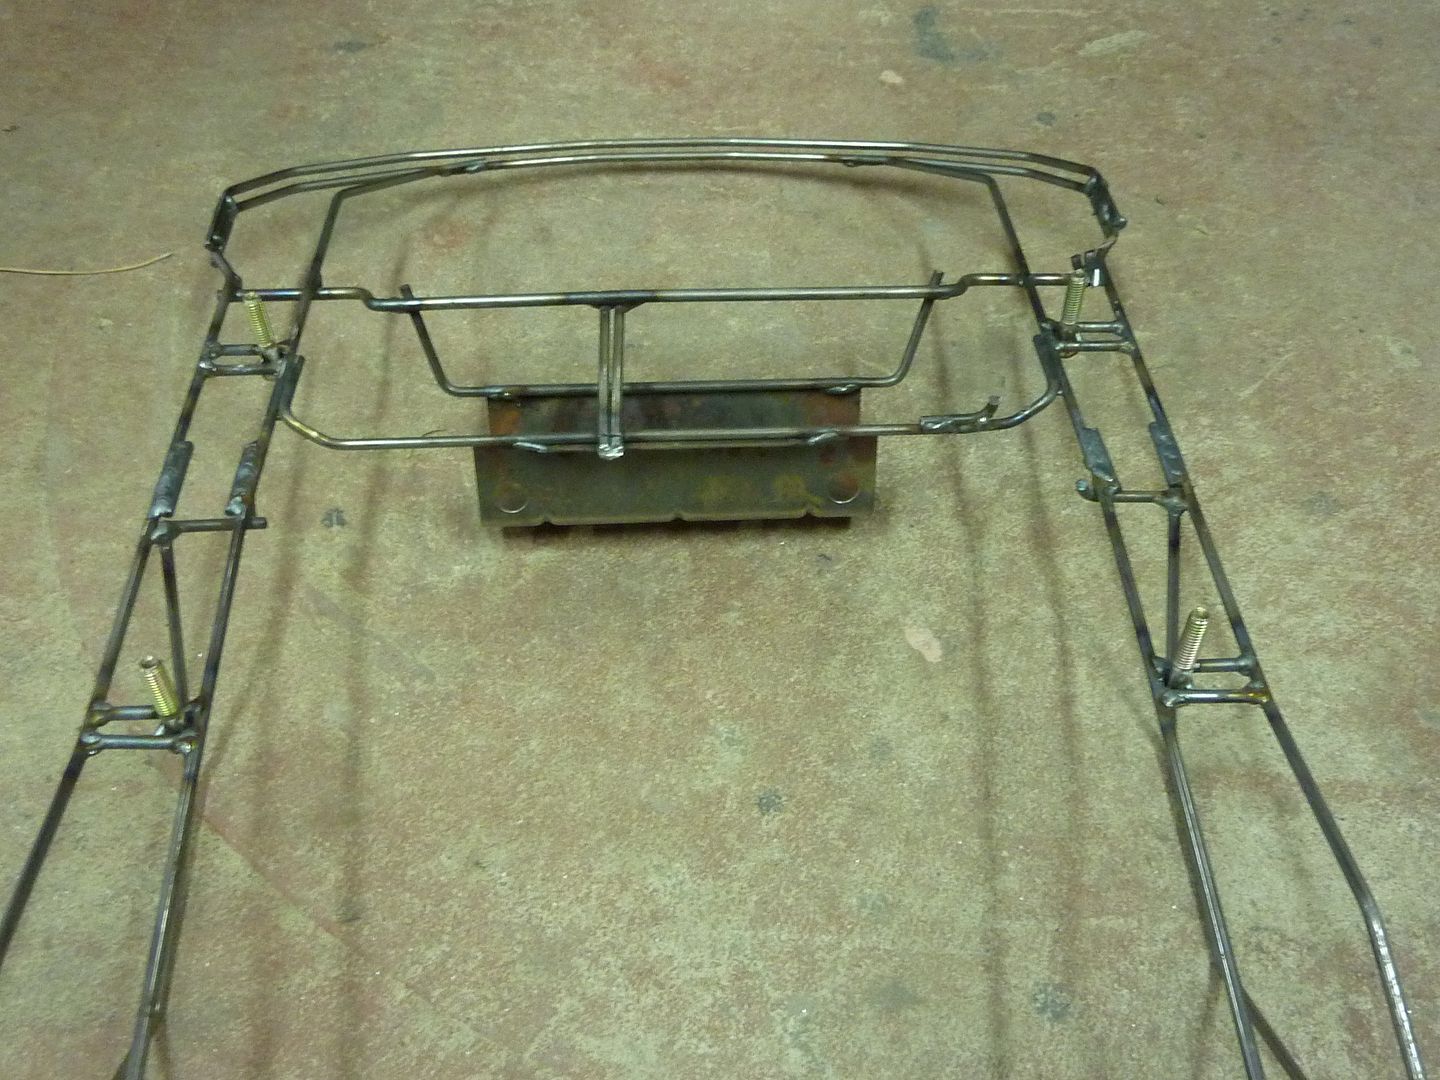
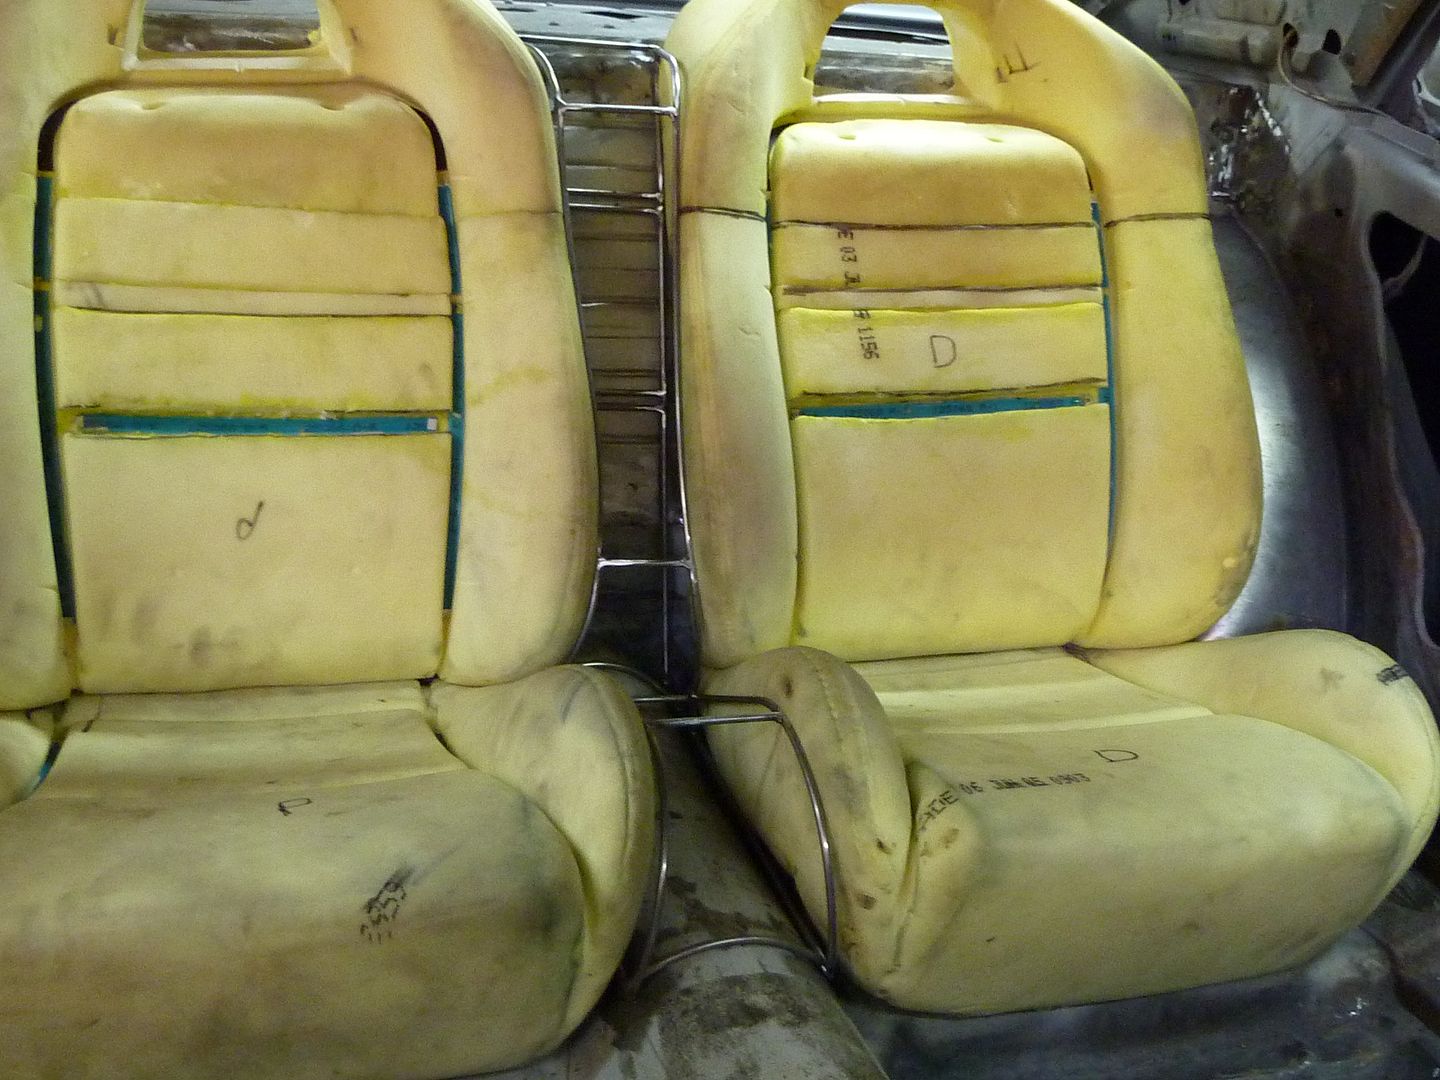
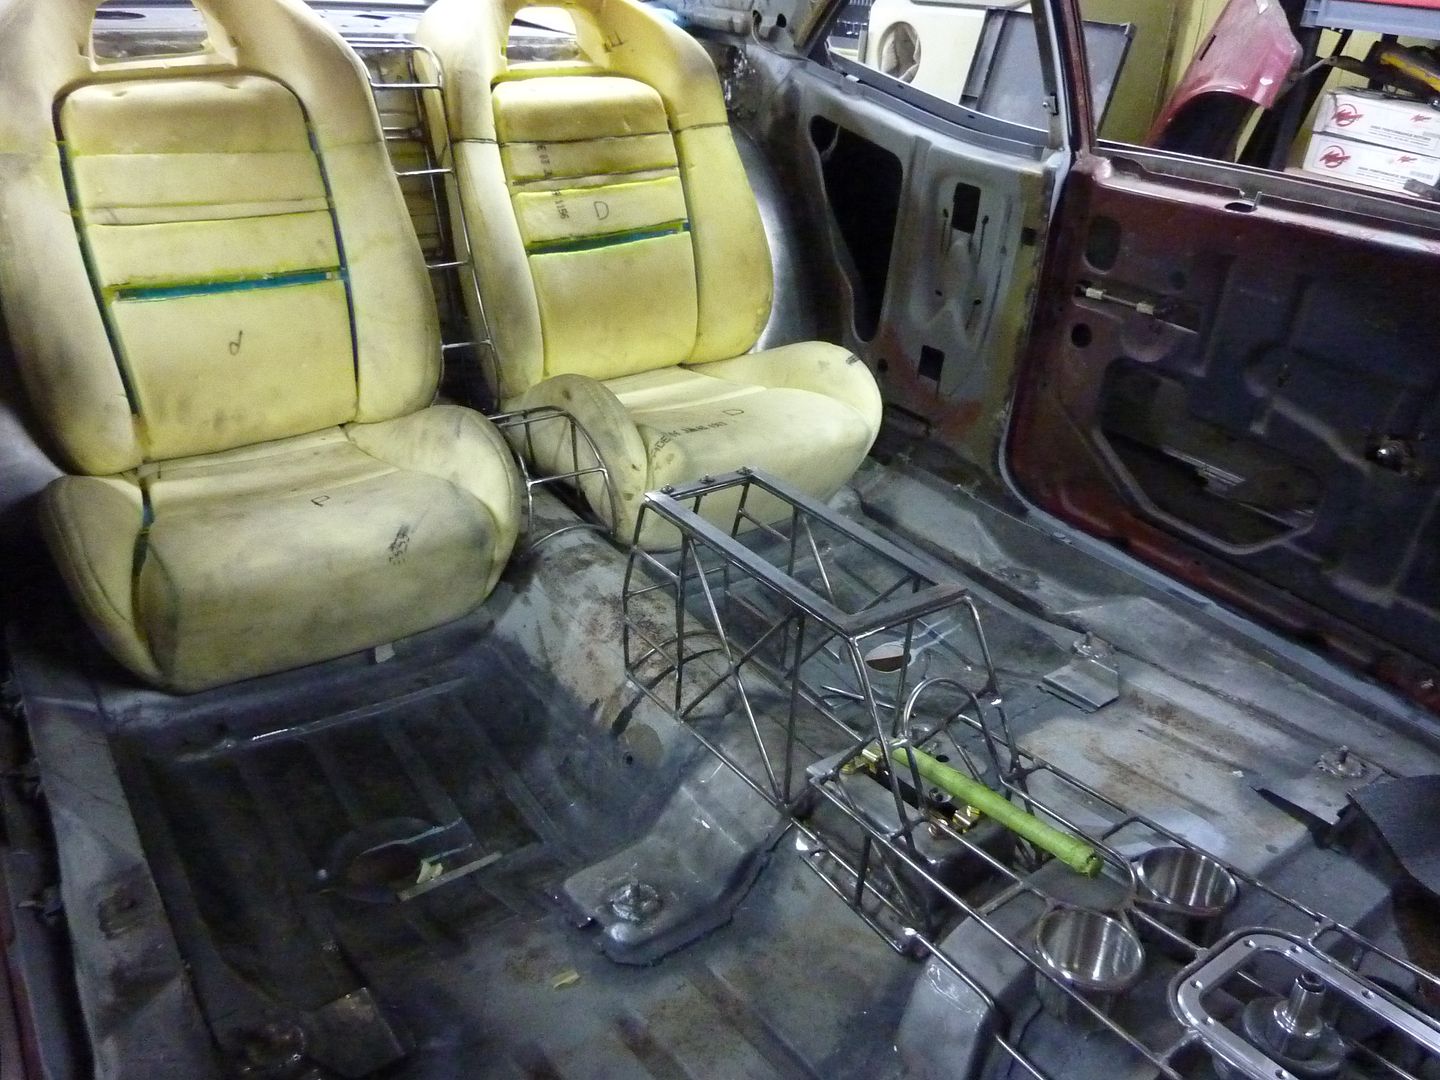
At the rear of the seat, I'm going to weld some bolts onto the floor and they will slide into the two pieces on the outside. The middle piece slides into the upper part of the seat. With these pieces, you'll just have to hook the front of the seats into the mounts, slide the rear of the seat over the bolts and tighten it down.
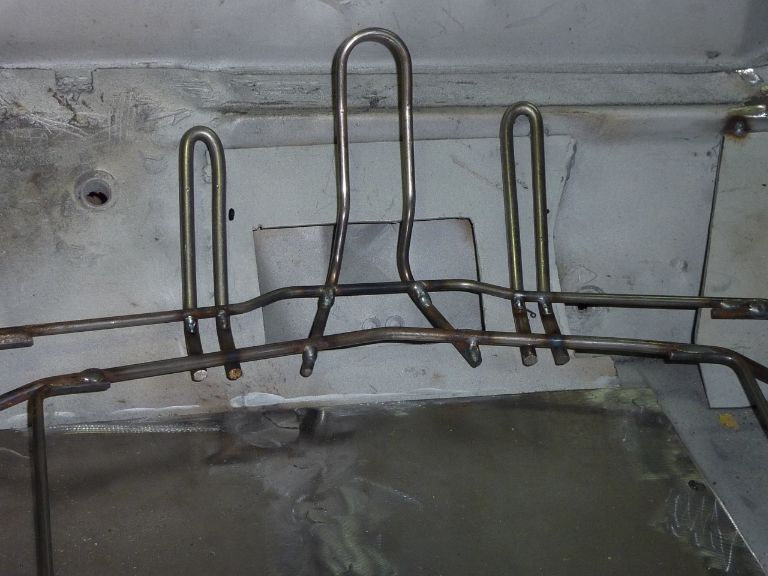
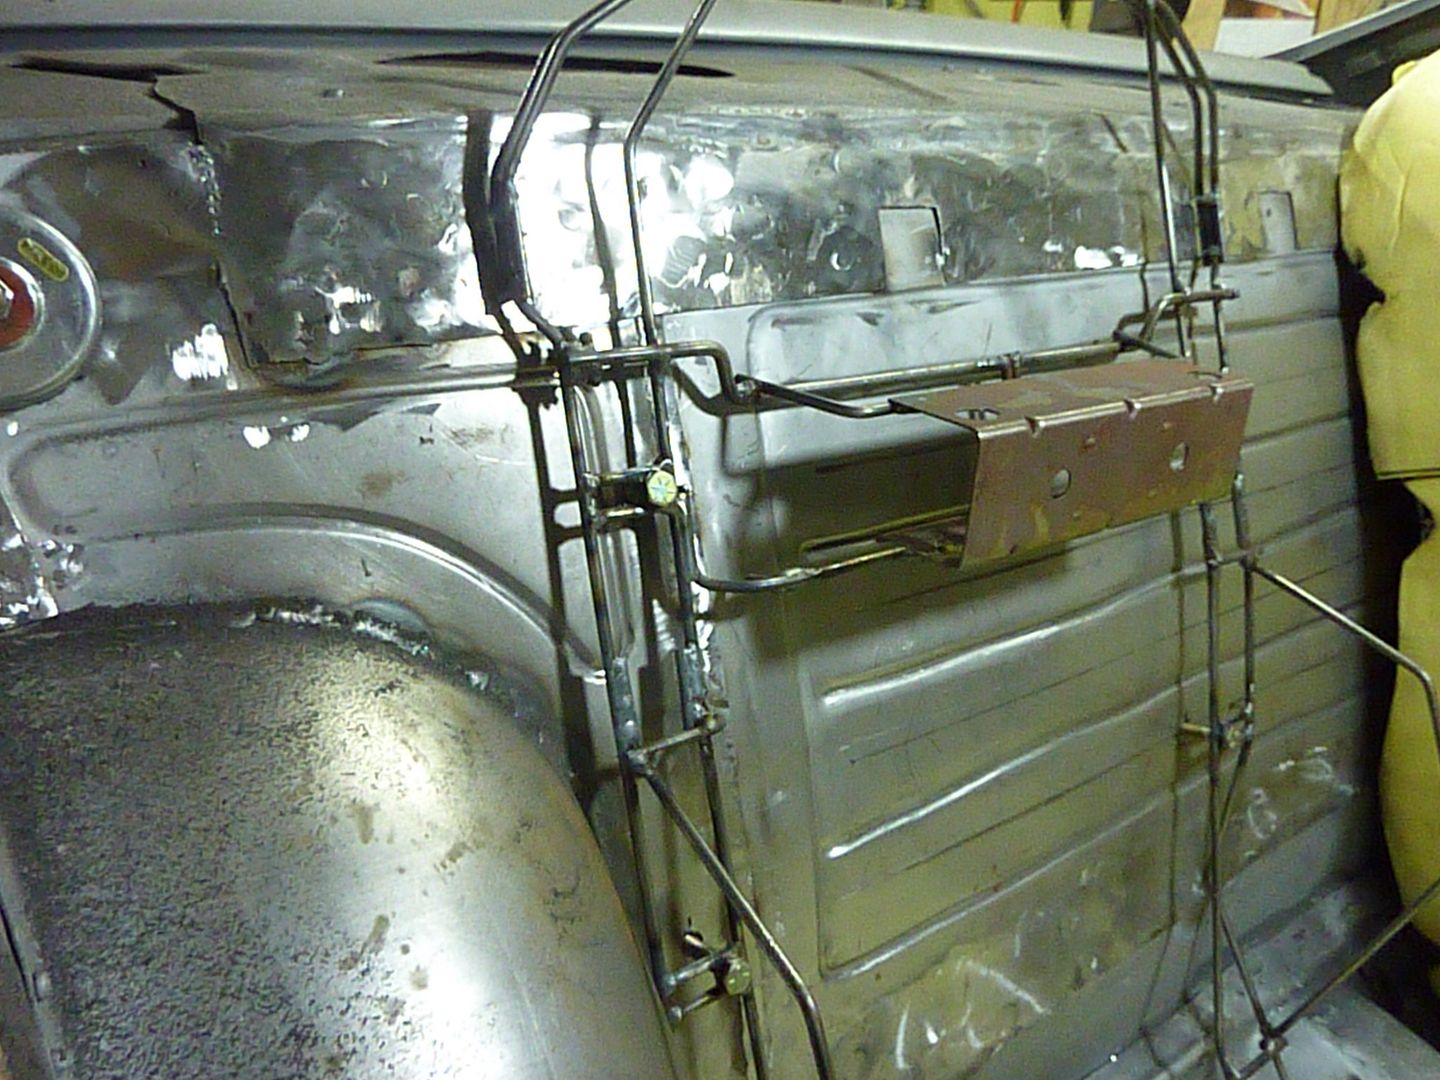
Here's with the rear part of the seat in place. You can see how much I need to cut the rear section down to make it fit better. Sits way too high
On a side note before I post the pics, for those that are using the new Photobucket and don't like the fact that they took away the easy links, if you go into your settings there is a box you can check off to get the easy links back. I just found it this morning. Now it's like the old one where you can just click on the IMG link and not have to go into each photo to get it.
Onto the updates:
I found my leather was getting quite dirty, so I decided to take it off the seats. It came off very easily. As shown before, the bottom is held on with plastic clips that snap over the round bar. Once all the clips are off, the leather is held on with velcro
First thing I did was add some sheet metal to where the back of the seat will rest. This will give it some more support
Next I realized that when the seat was sitting on the floor, there was a large part of it that had no support underneath it at all. This is due to the way the floor is. You can see under the left side of the skeleton that most of it is sitting in the air
With this, I decided to make the floor more level. I built a new section to raise the floor out of 16 gauge sheet metal. I also found out that an Ingersol Rand air sheer is not designed to cut 16 gauge.....gotta buy a new one now
Here's the new section
This pic gives a good idea as to what I was talking about with the floor being unlevel
I also added a brace in the center of the new section
It sits on the floor a lot better now. I've also had to modify a few sections of the skeleton to make it sit better. I didn't take pics of all the modifications as it would be different from car to car.
I decided to use round bar to make front mounts instead of the sheetmetal ones that I had made. I will add some rear support bars to these later.
At the rear of the seat, I'm going to weld some bolts onto the floor and they will slide into the two pieces on the outside. The middle piece slides into the upper part of the seat. With these pieces, you'll just have to hook the front of the seats into the mounts, slide the rear of the seat over the bolts and tighten it down.
Here's with the rear part of the seat in place. You can see how much I need to cut the rear section down to make it fit better. Sits way too high
03-18-2013, 06:50 PM
#184
On The Tree
Thread Starter
iTrader: (4)
Join Date: Mar 2009
Location: British Columbia, Canada
Posts: 132
Likes: 0
Received 0 Likes
on
0 Posts
This is one Nova that I cannot wait to see done. The quality of parts is top of the line and your attention to detail and skills are awesome. I have been subscribed for some time and have watching you do your thing. I have have a question for you. I saw you are using a vette pedal. How are you going to mount it? The firewall, as you know, is far from flat and I am having a difficult time figuring this one out on my swap. I am using a truck pedal and the mounting surface seems a little taller than your vette pedal. Any tips or suggestions would be helpful.
Have some updates. I've still been working on the rear seats.
I finished up the floor on the driver's side. Once that was done, I put the two skeletons in place to see how they fit.
Once they were in place, I decided that I would need to cut them down. I decided to take 4" out of the back. I cut one frame down and here you can see the difference in height between the two
I started by putting the frame onto the work bench.
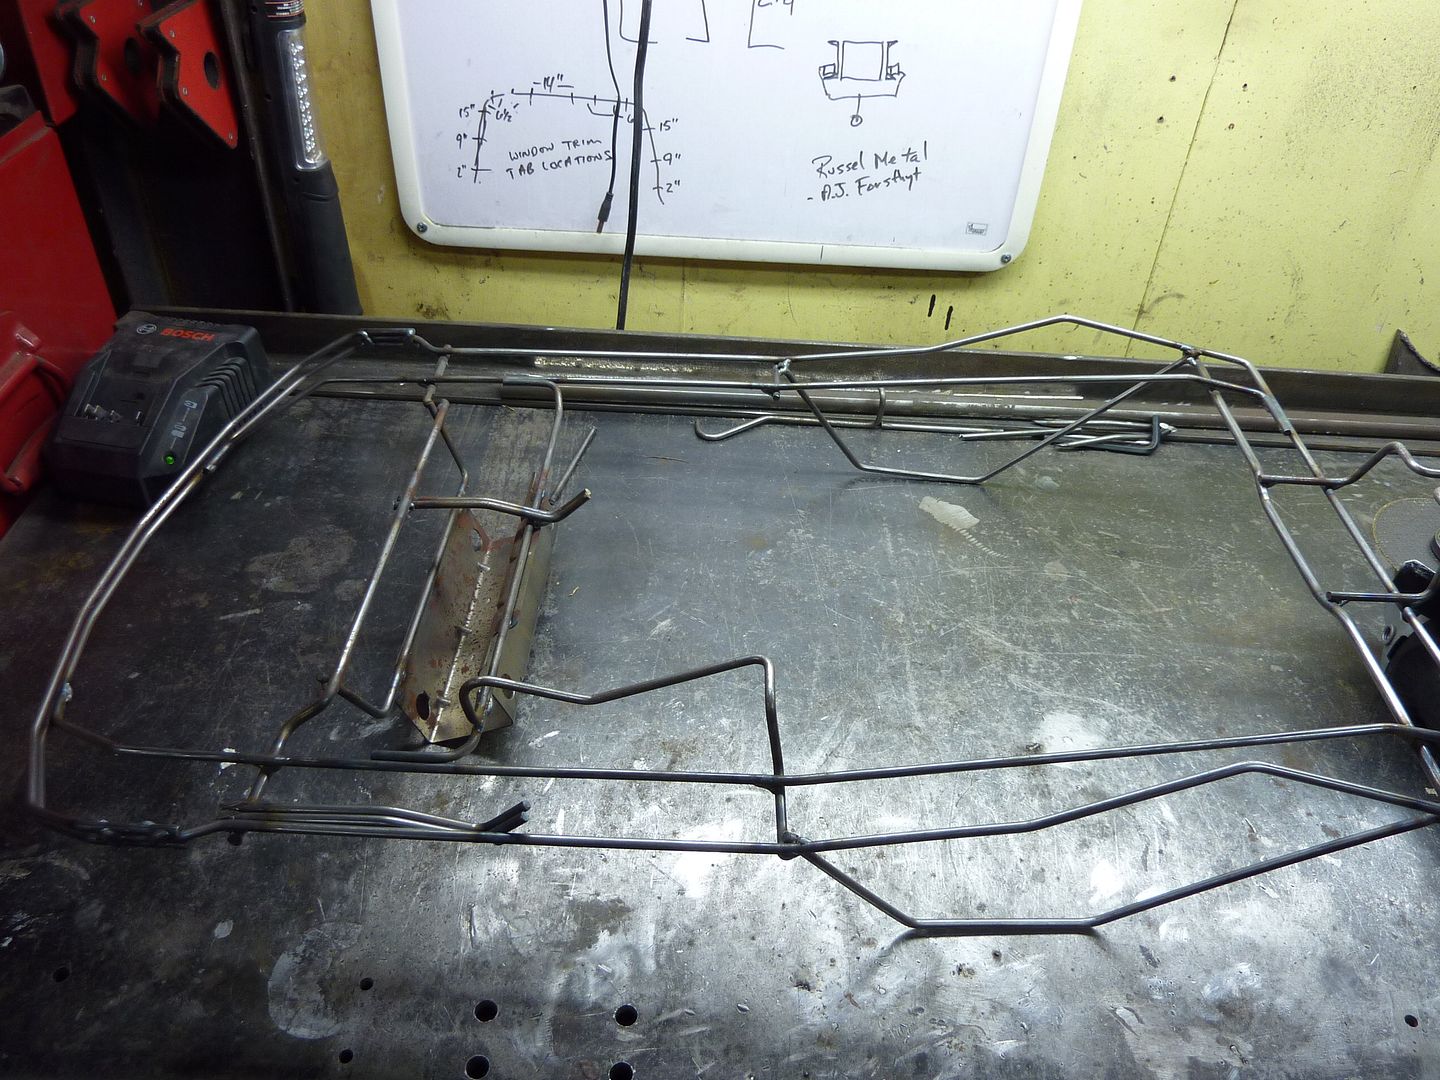
There were a few areas that needed to be cut out for it to sit flat
Once those sections were cut, I marked the frame where I was going to take the 4" section from. I decided to take it from the center as it was nice and straight
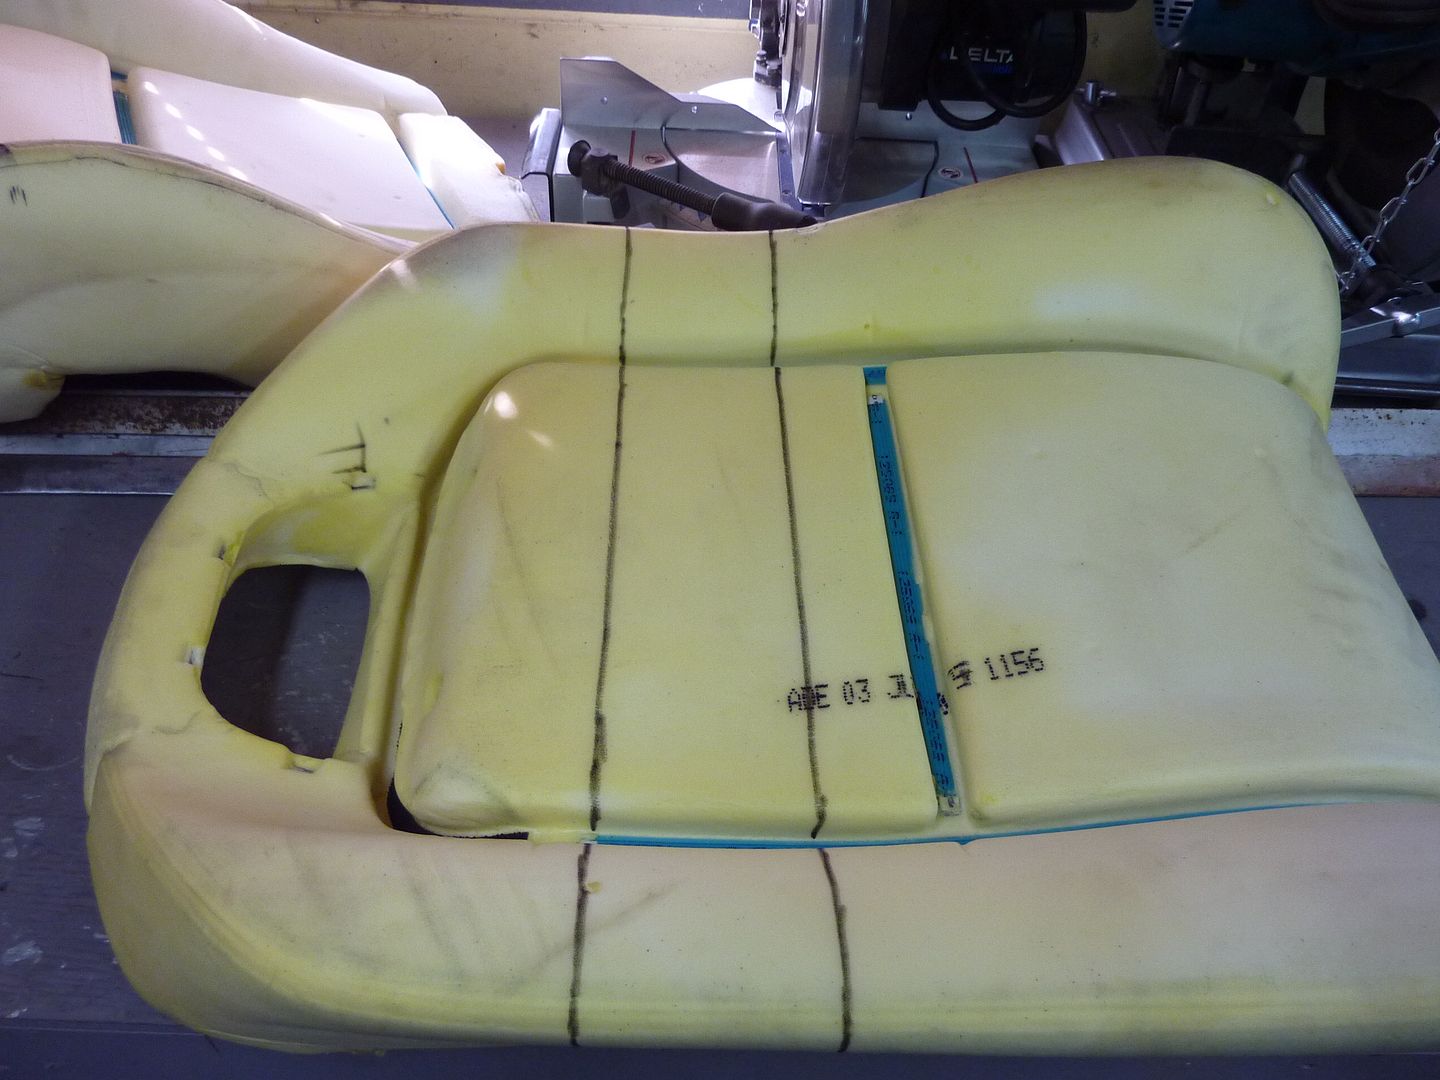
Before I cut the frame, I put it back into the foam and marked the foam where I would need to cut it
Then I cut the frame and I was left with two sections
I then welded the two sections back together and added some more round bar for strength

Then I started on the foam. I ran the lines around the foam as to where I needed to cut
Using a few exacto knife blades, I cut the section out. You will find that cutting foam with an exacto knife, the blades dull very quickly
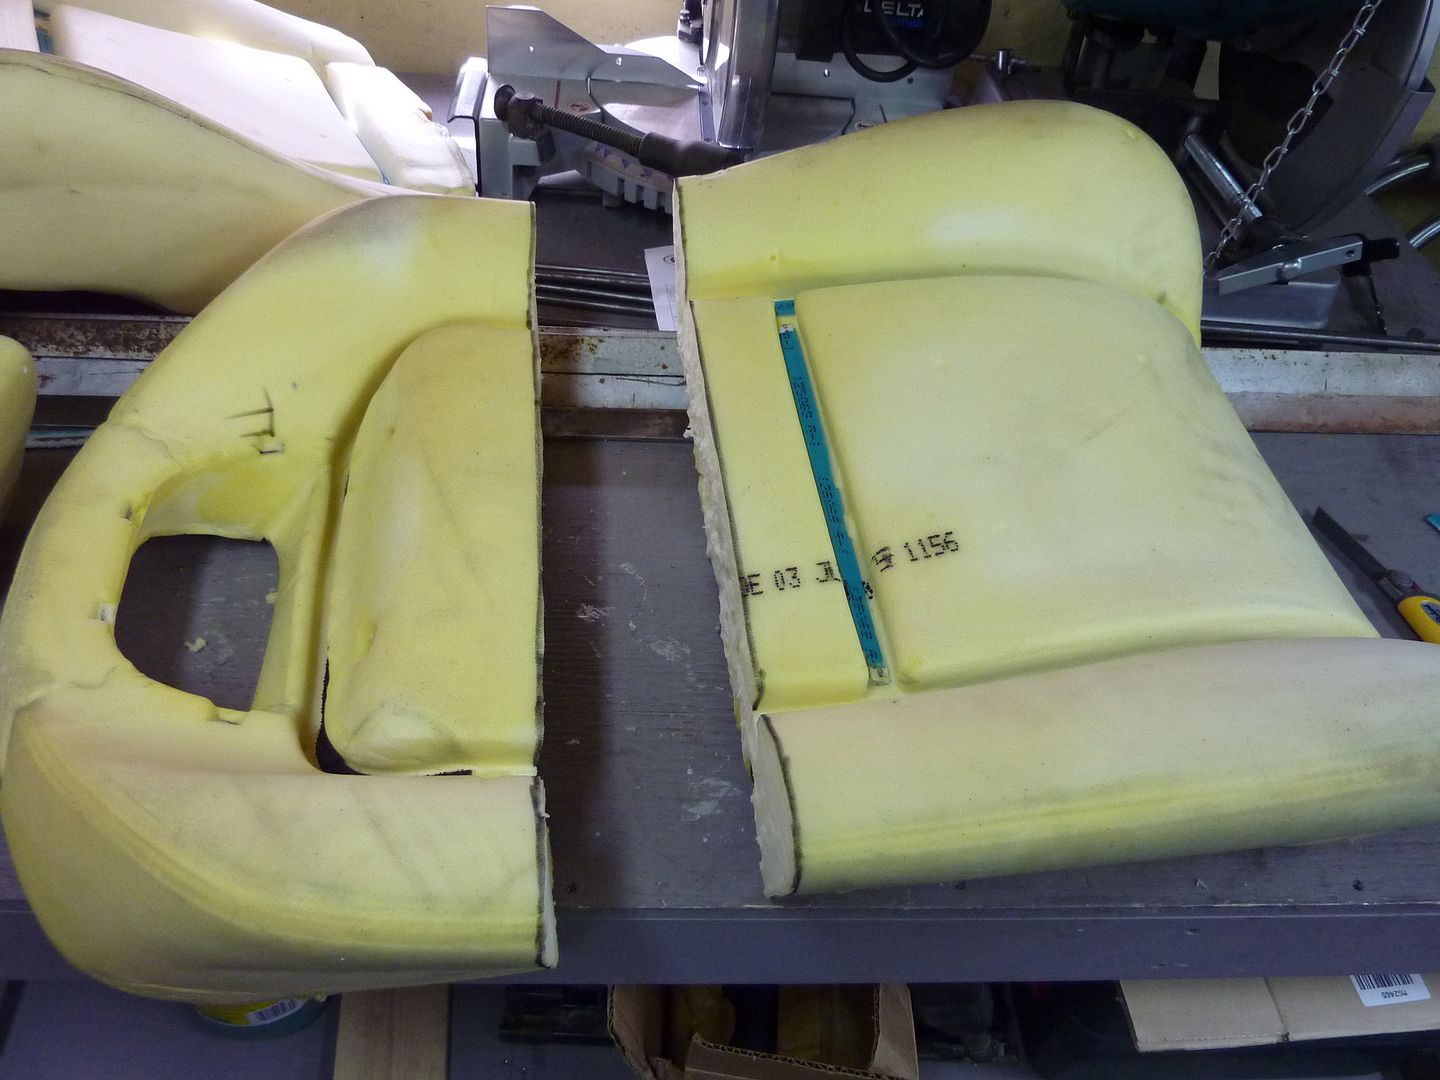

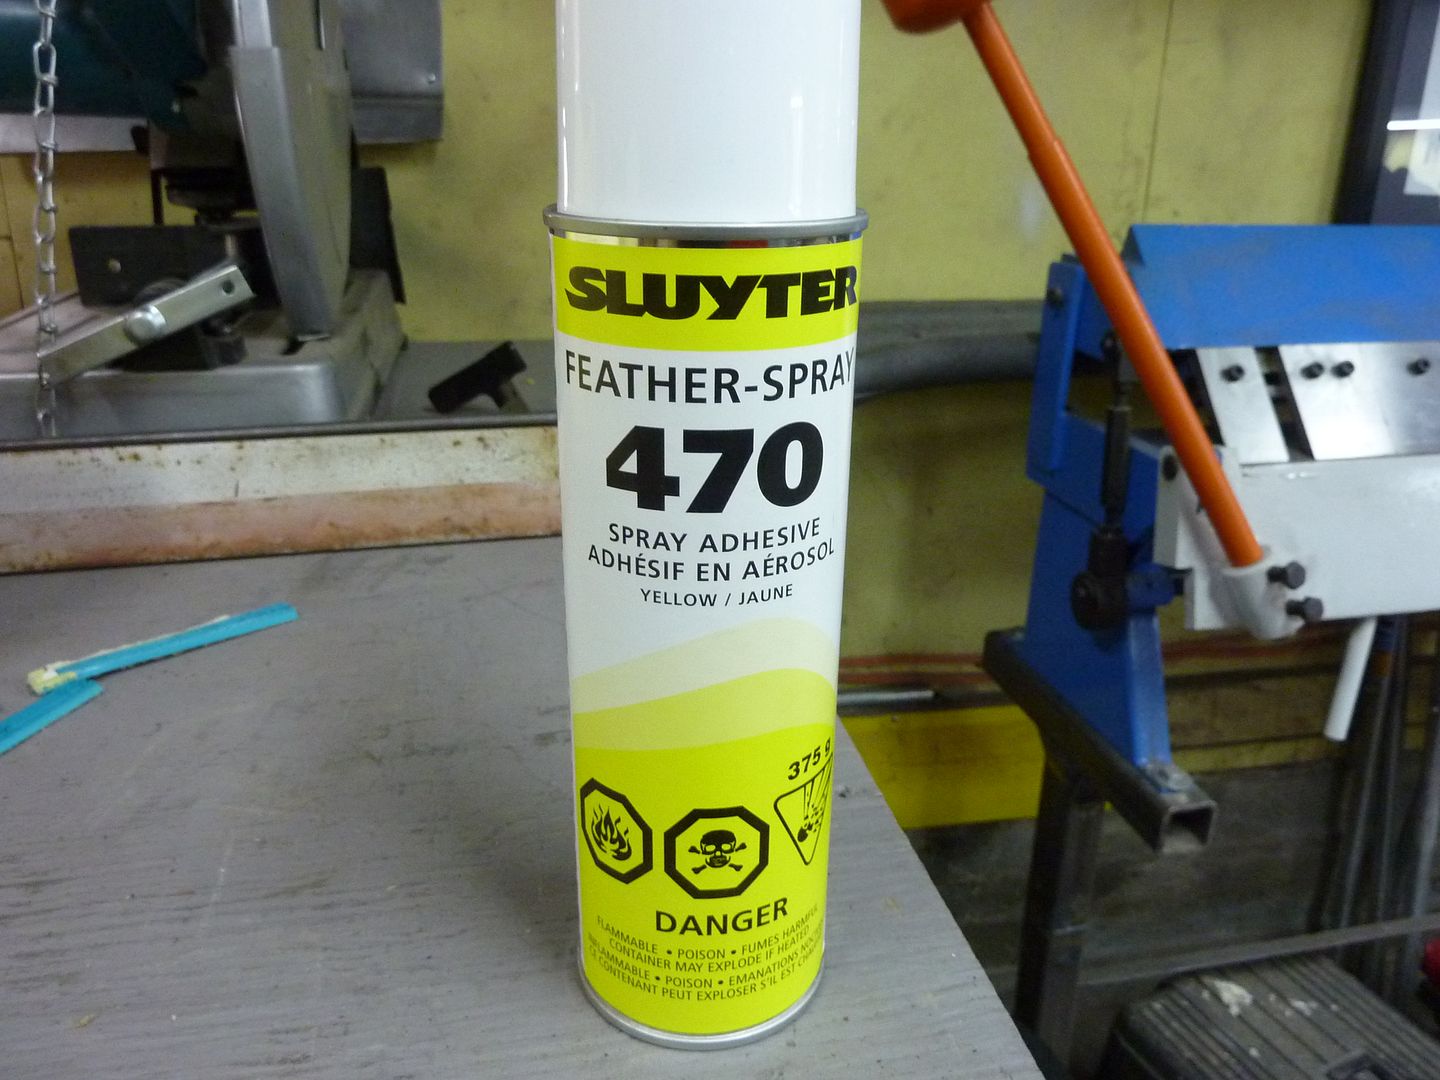
Using some upholstery glue, I glued the two pieces together
I then decided to move the velcro strip where the seat covers fit in the center. I started by marking the section 4" down from where it used to be
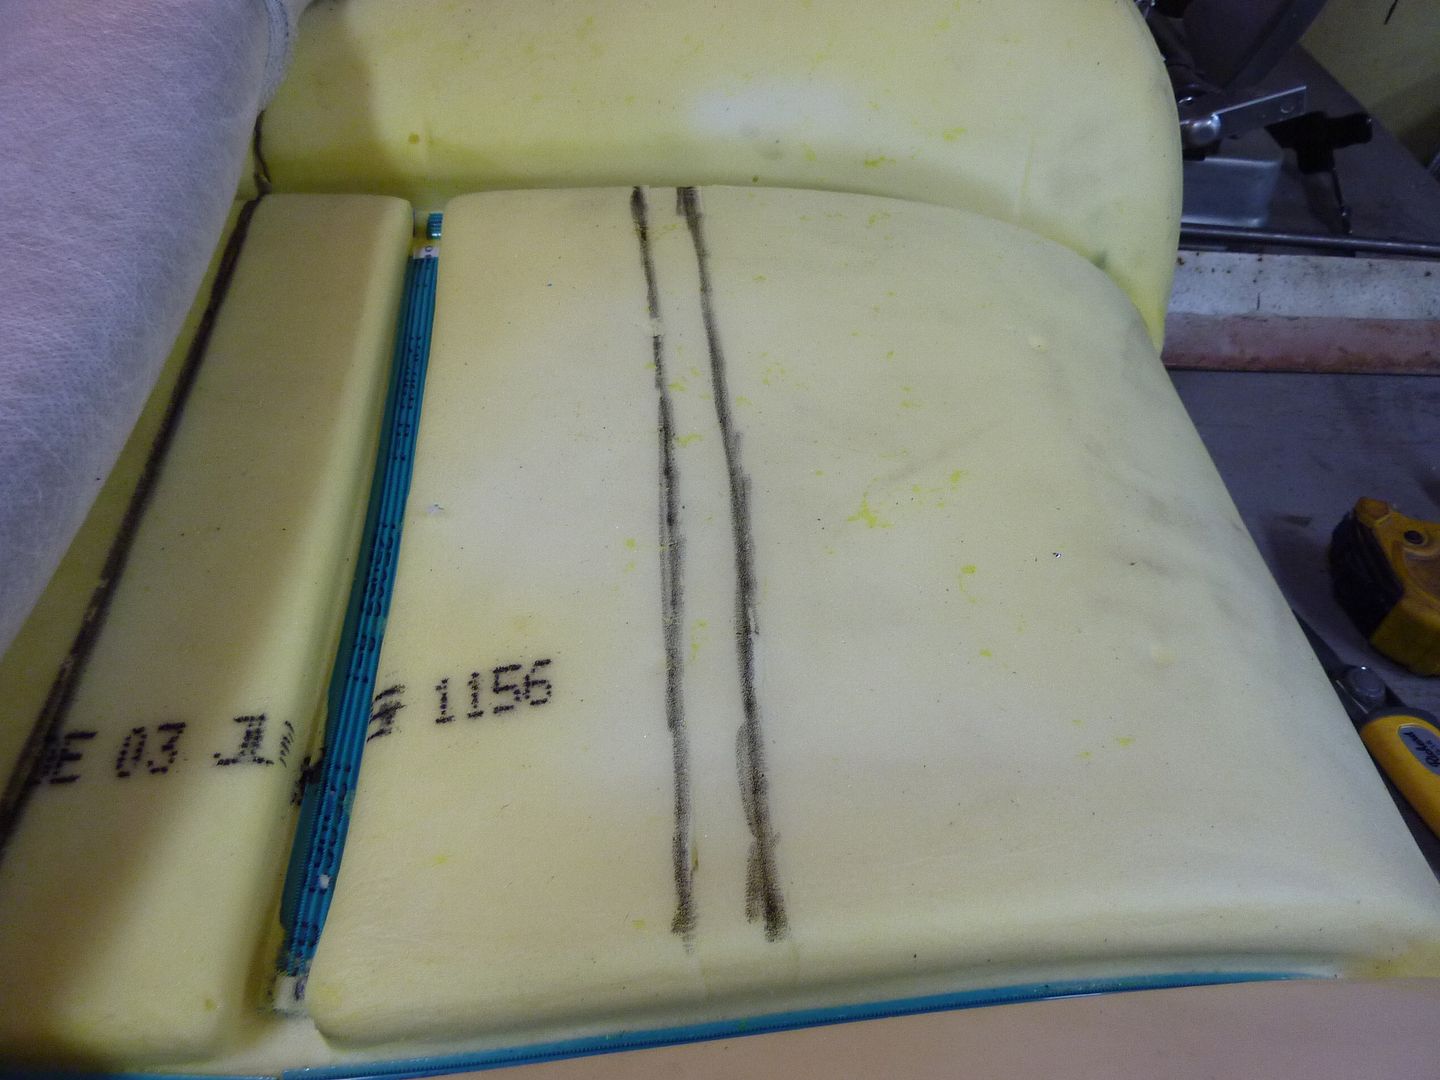
I then used an exacto knife to cut out the section. Once it was cut out, I glued the foam I just cut out into old spot and glued the velco into the new cut out strip. I was hoping that I wouldn't have to take the leather covers into an upholstery shop, but it looks like I will have to get them to make some modifications. I might move the velcro strip a bit up, but have decided yet.
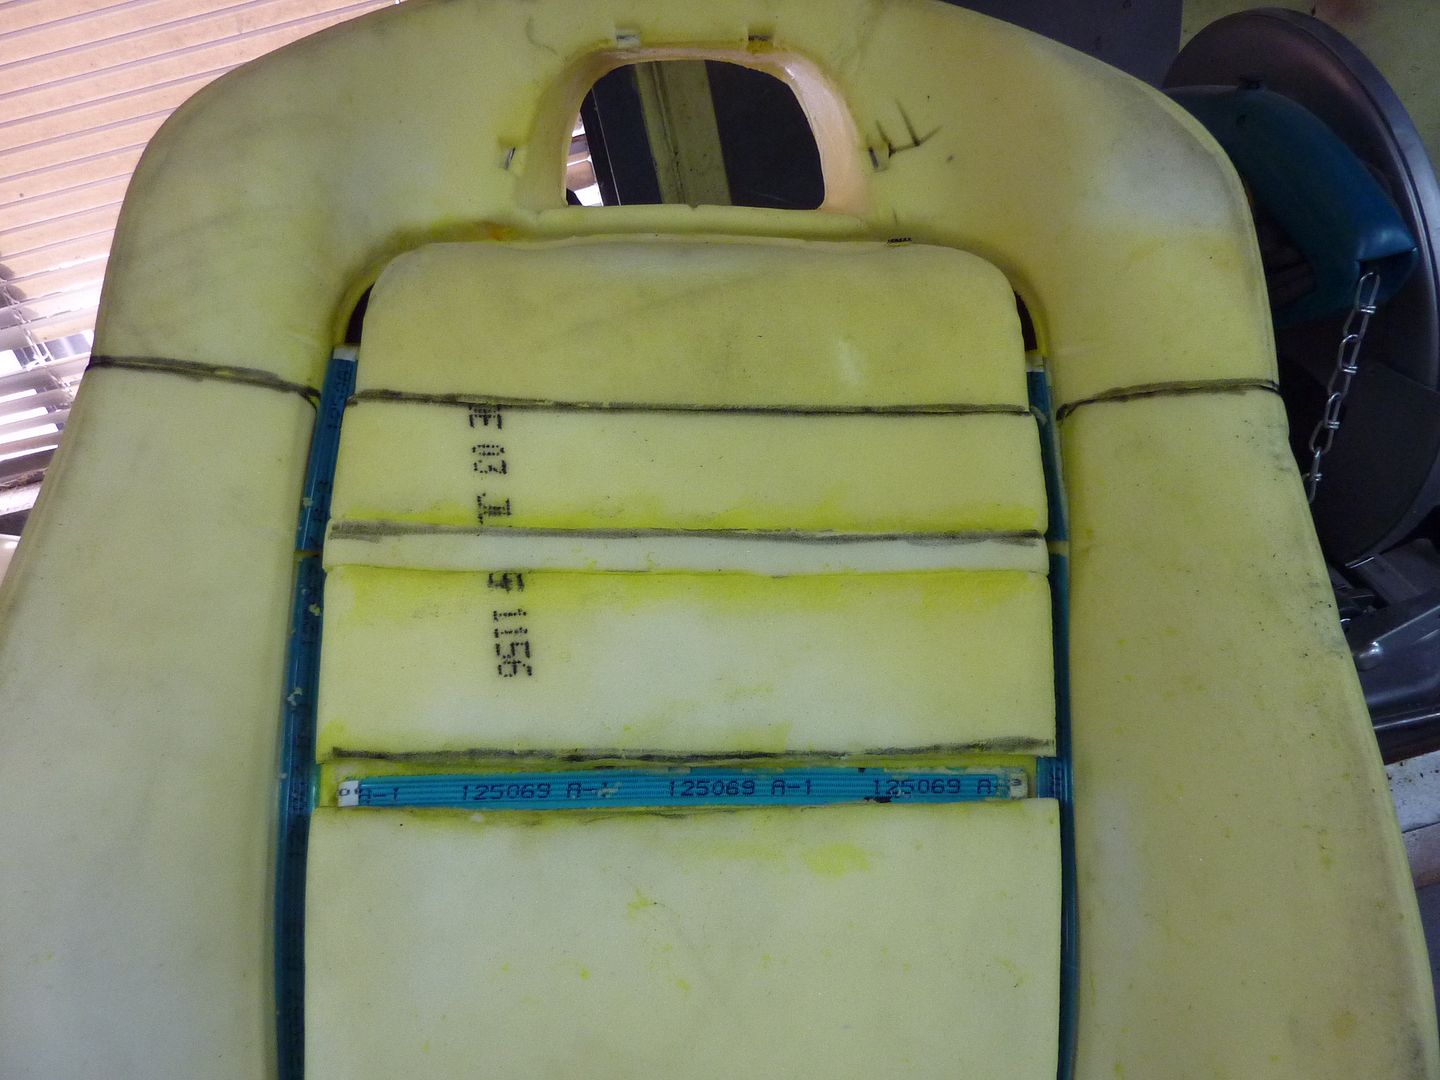
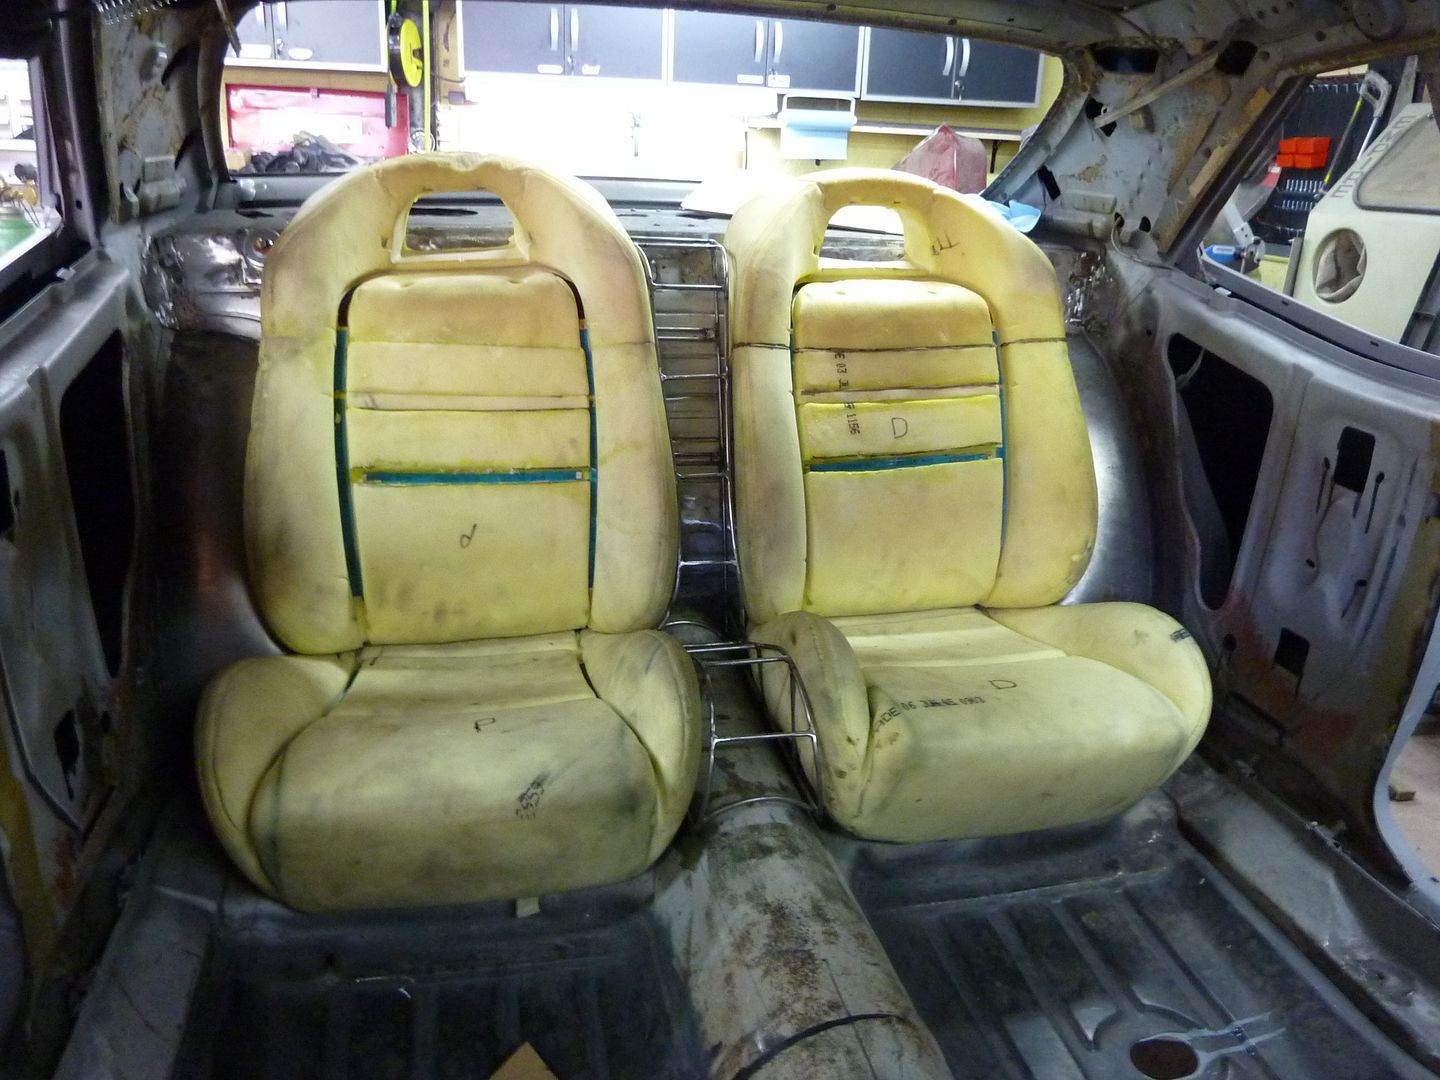
Once I got both sides done, I put them in to see how they fit. I like!!!!

From behind

Now that I had them cut down to where they fit better, I started to make the mounts for them
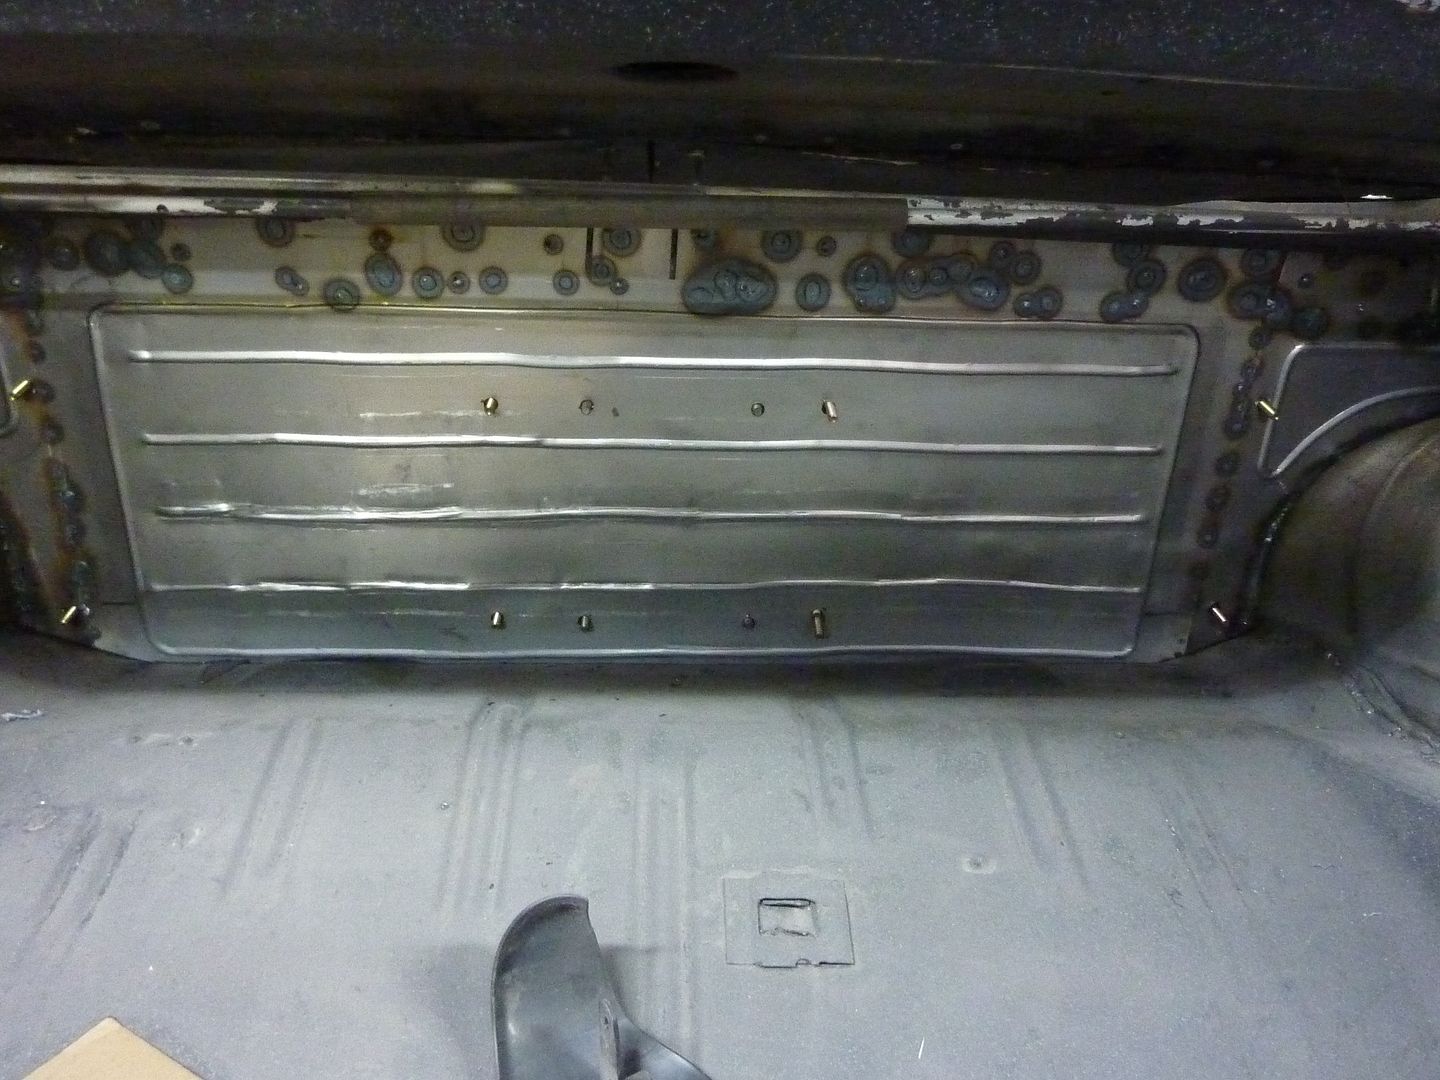
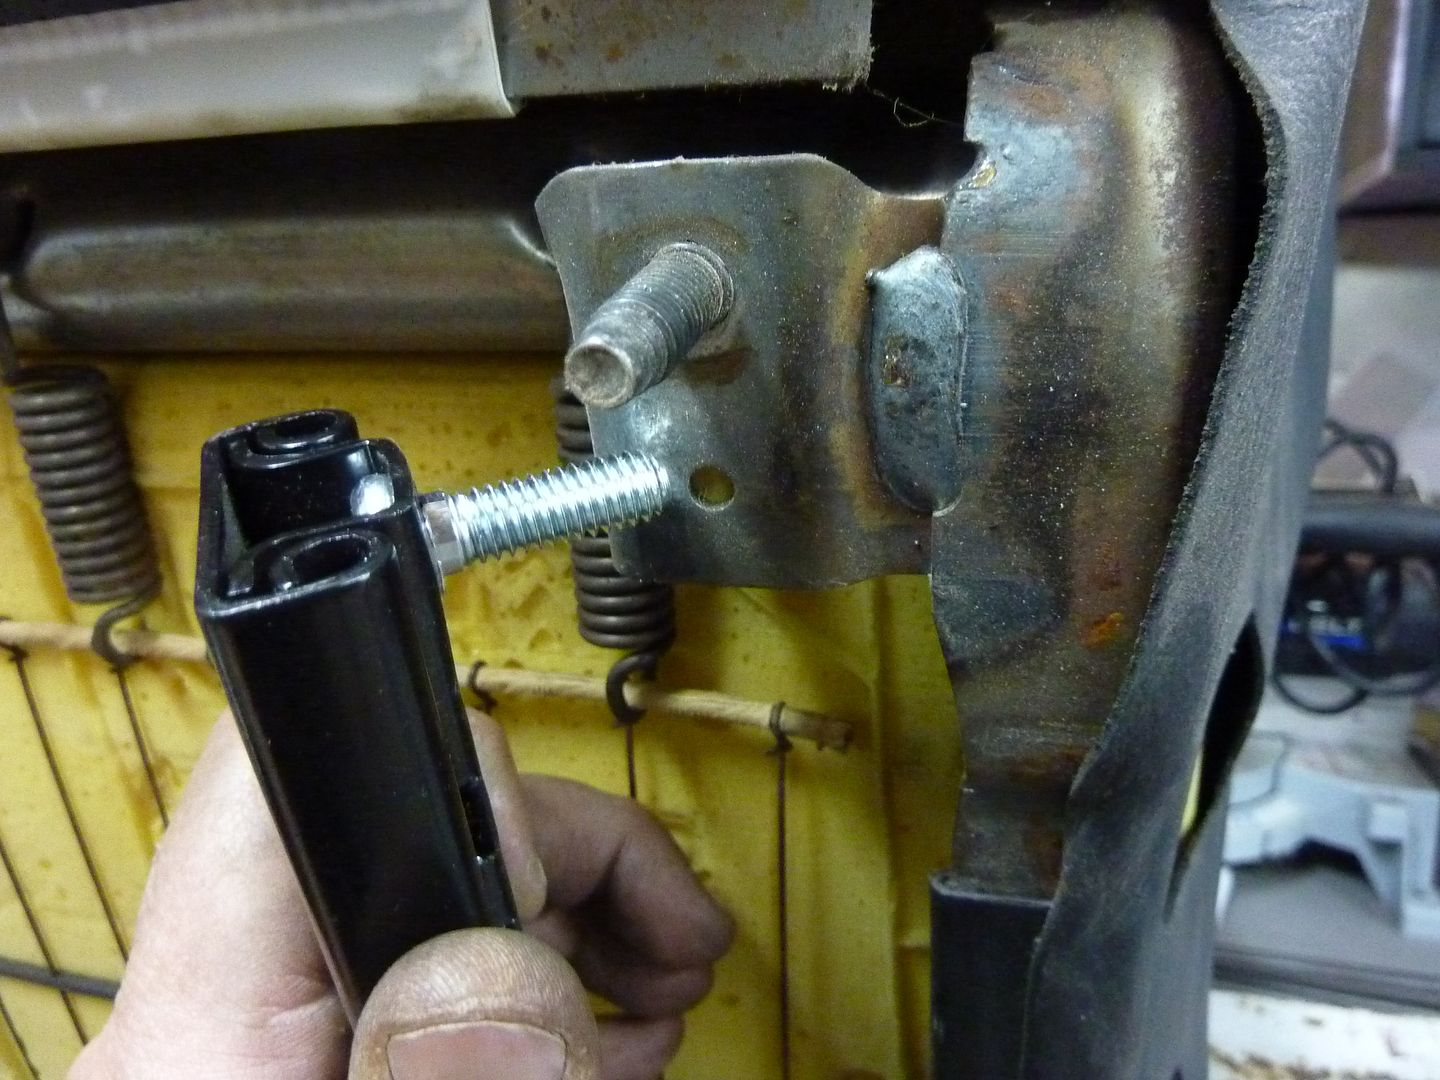
I welded some modified bolts onto the floor to secure the bottom section

Then for the top section, I welded on some bolts that will go through the rear piece of sheet metal and I will put nuts onto the bolts from inside the trunk
Here you can see where the bolts come through. I think I need to get some longer bolts as once I add sound deadner, they might not be quite long enough. I will also weld a piece of flat stock or large washers on the back to add some more strength to where the bolts come though
I just have a little more to do on the driver's side and both seats will be mounted. I am then going to start working on a console to go between the seats and arm rests on the sides to hide the deep tubs.
I've also spent a bit of time reorganizing the shop. I added a shelf and moved the stereo
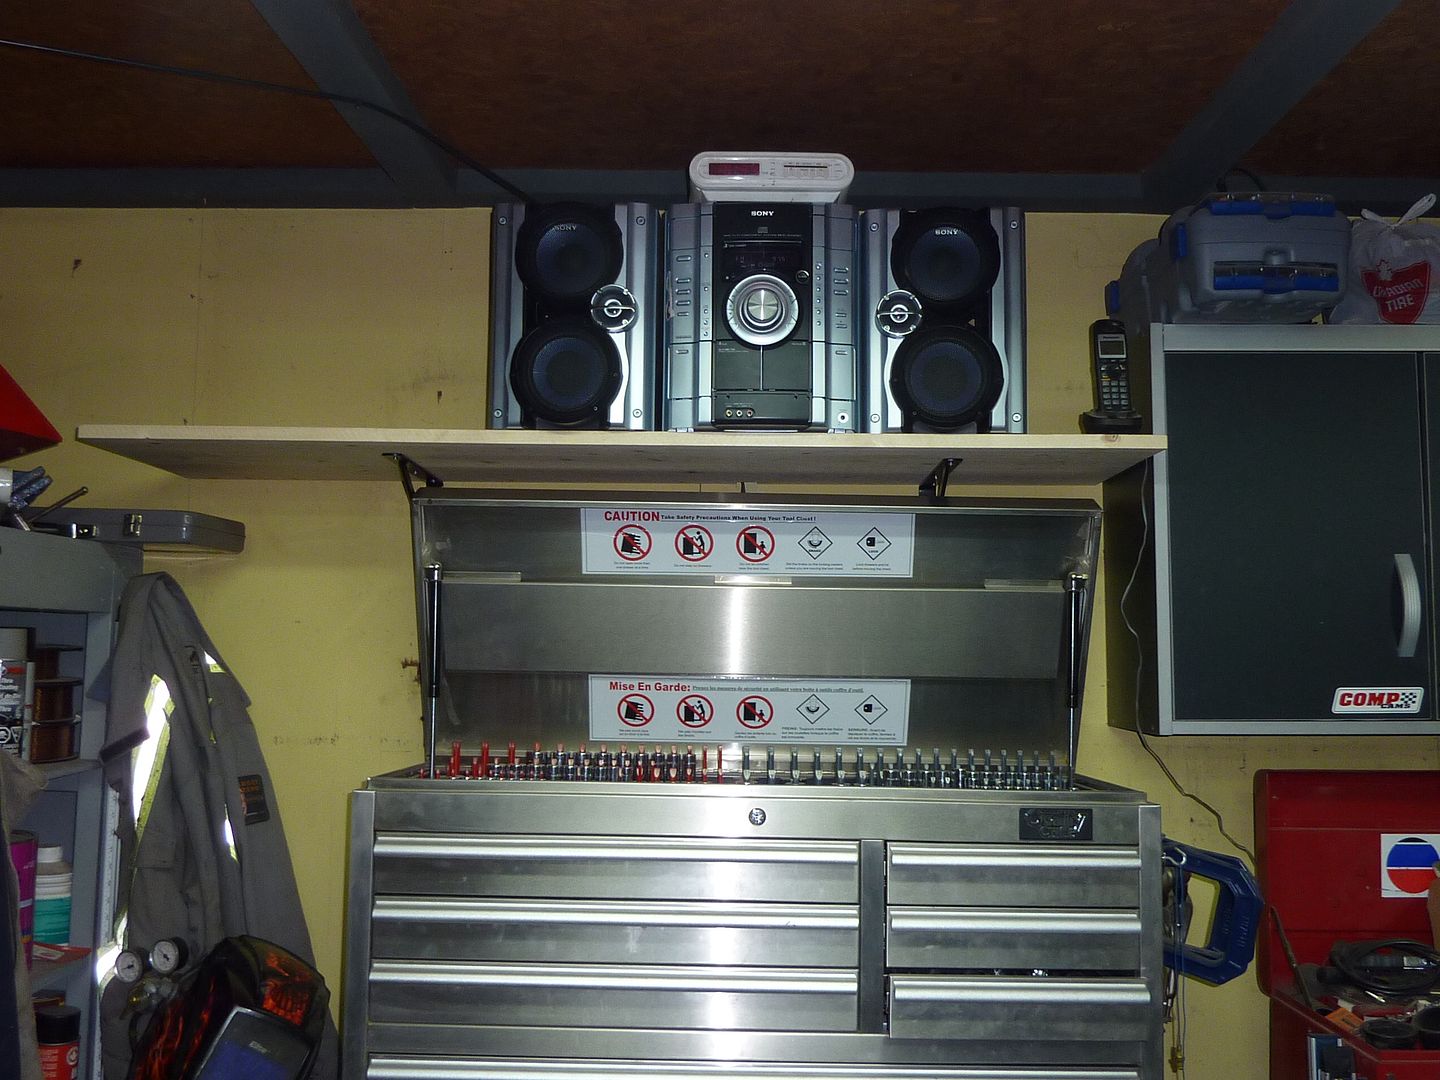
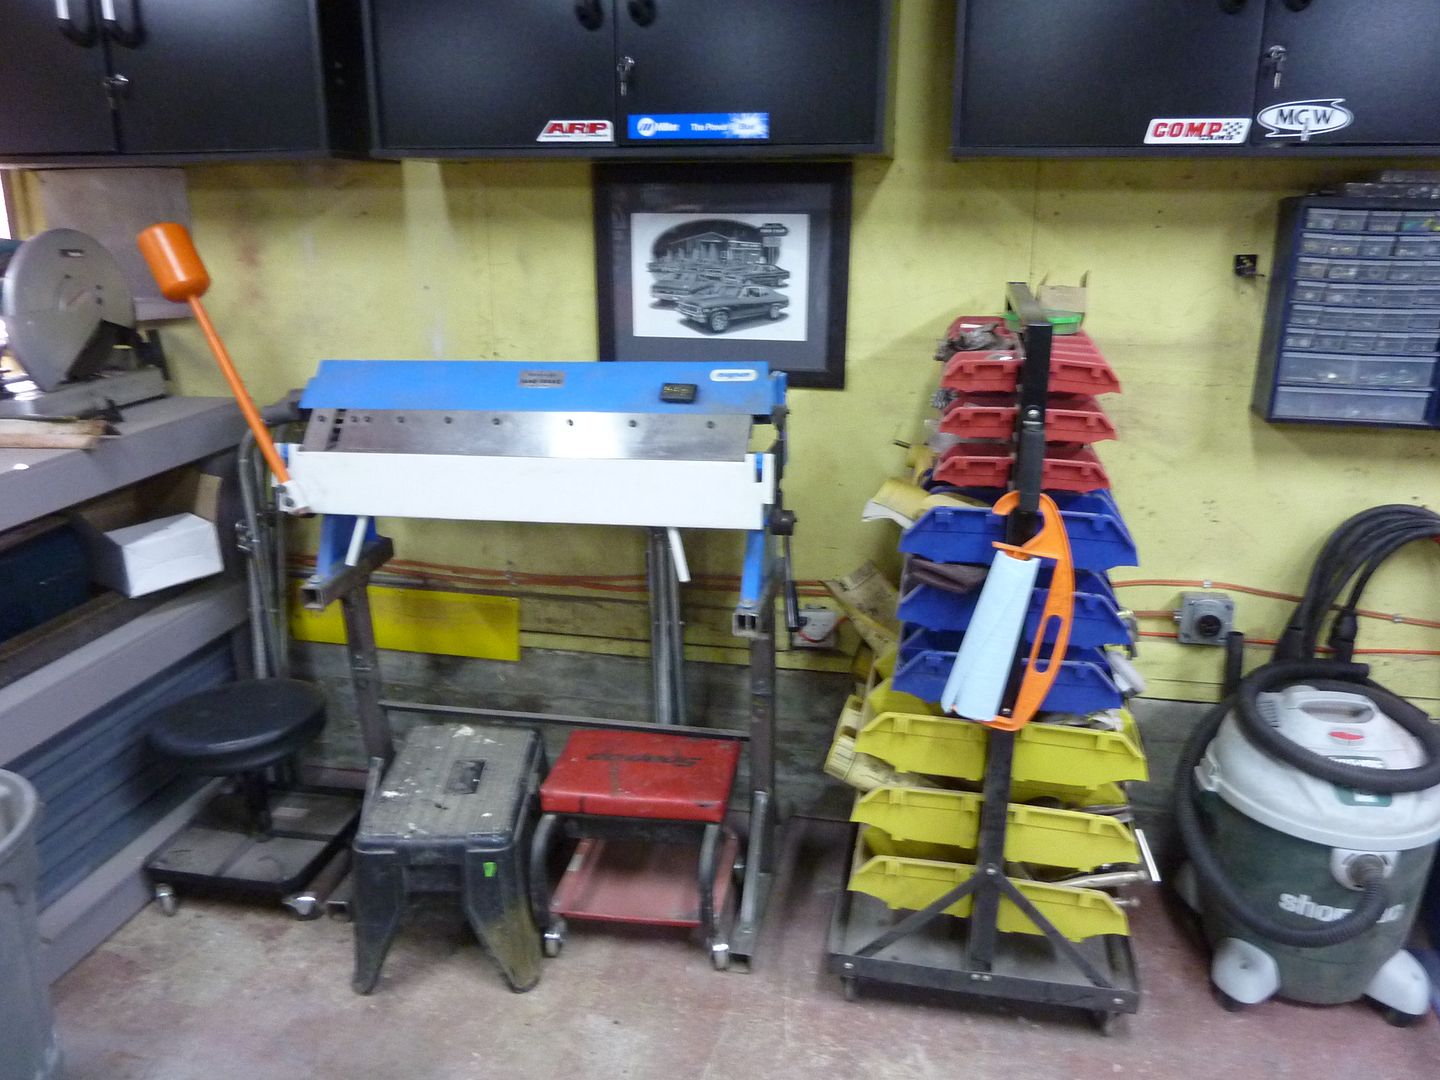
Which allowed me more room to actually use my brake
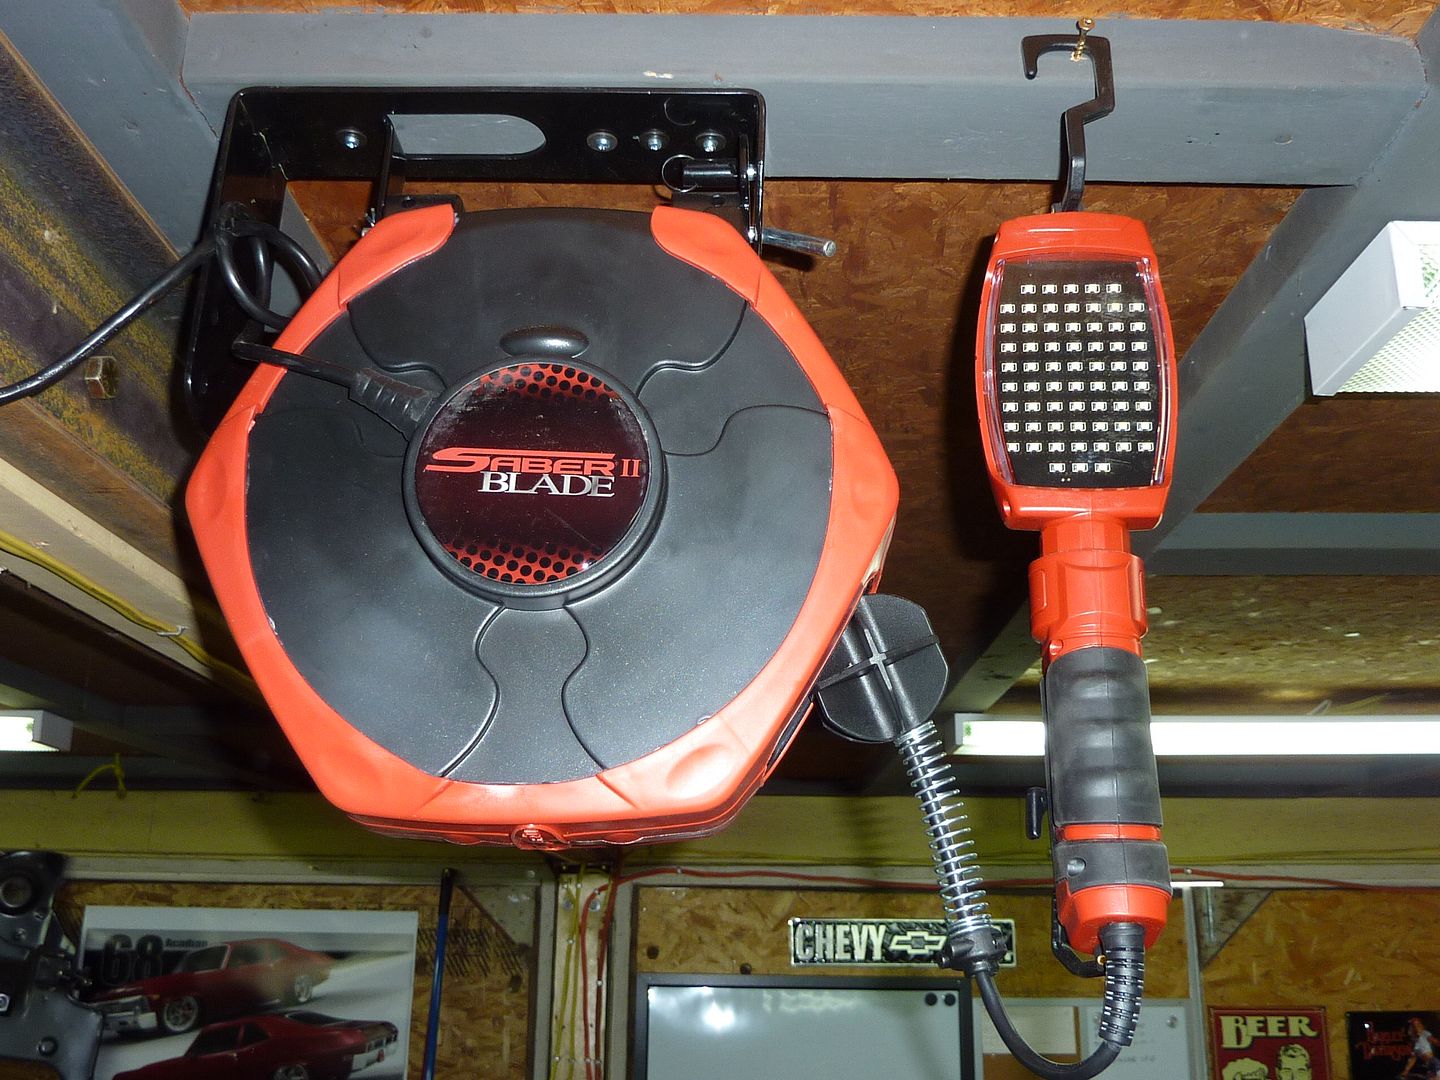
I also found I was hating having to unwind and them rewind up extension cords and trouble lights. So I got some new retractable stuff. I also replaced the retractable air hose with a new Flexilla set up

This is so much better. Especially being right above my car.
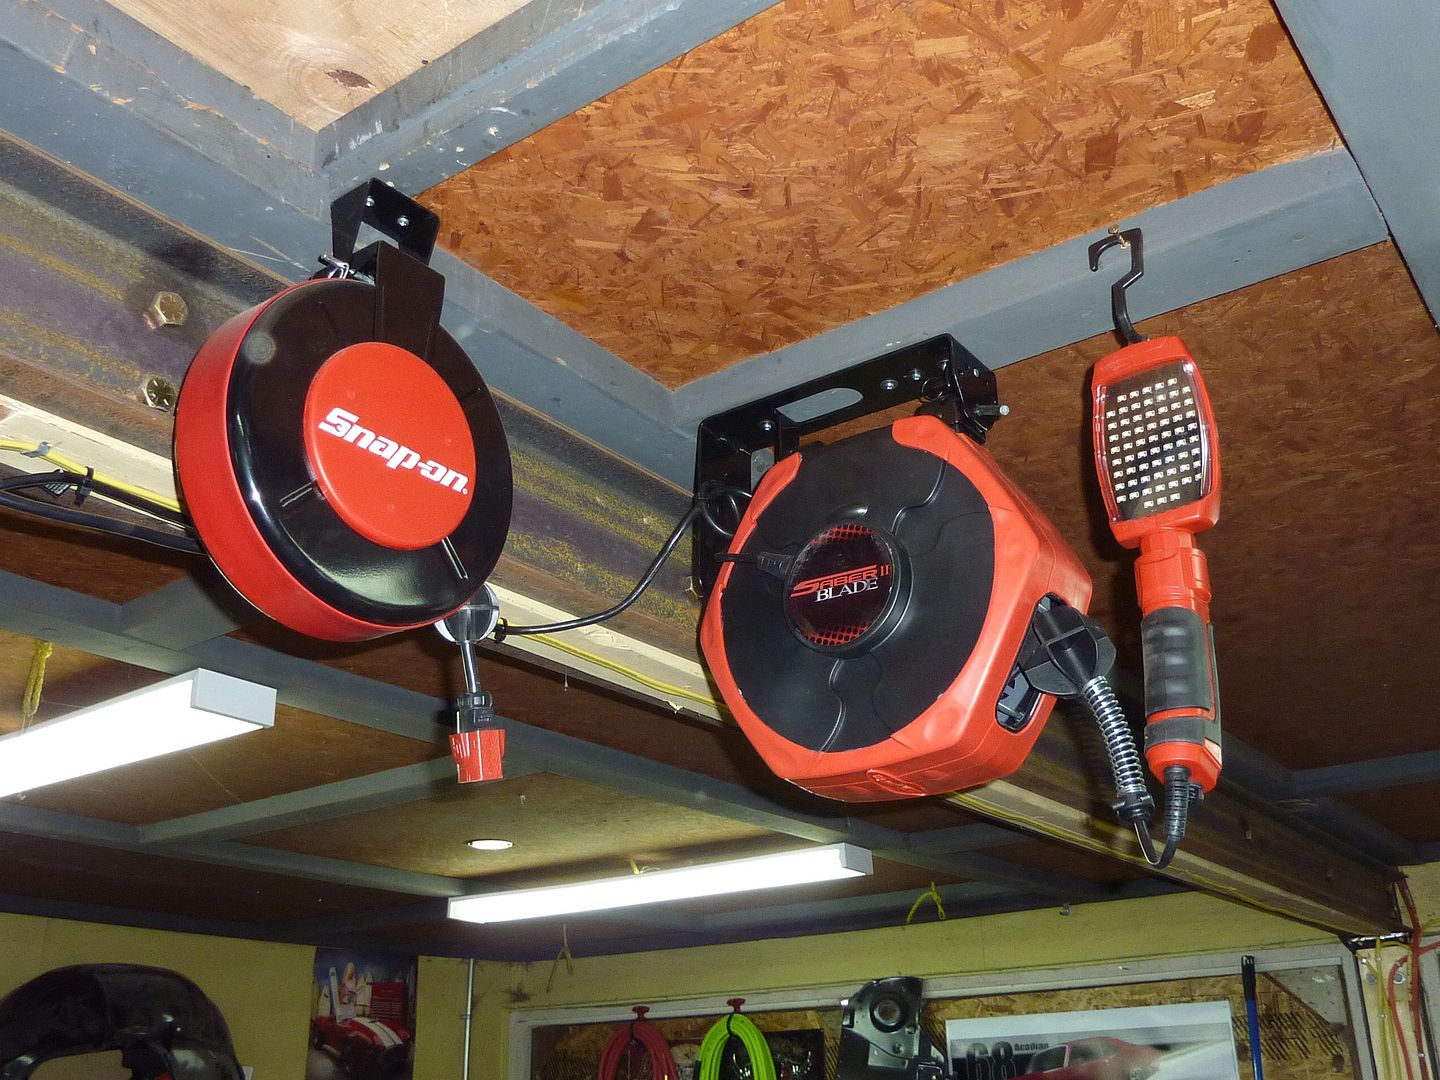
Got this from www.toolrage.com It's a 54 light LED.
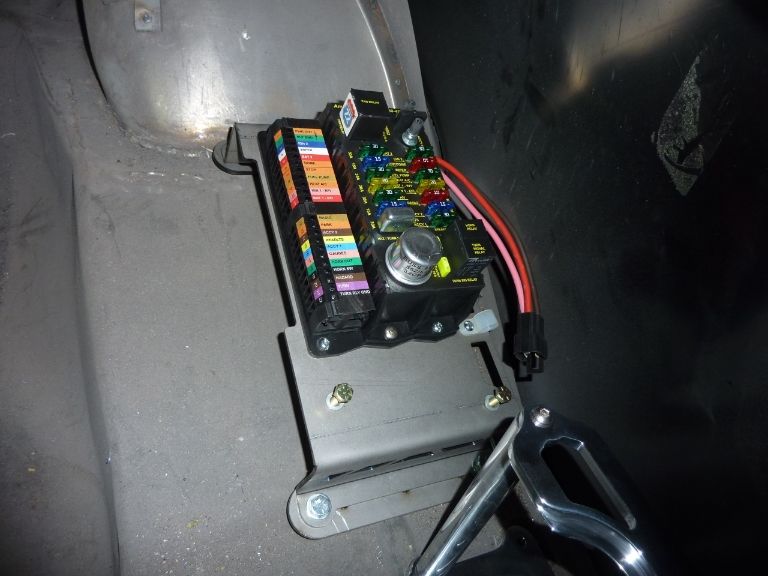
I also bought a new bracket to mount my Highway 22 wiring harness in the trunk. I originally bought one from Ironworks, but HPI Customs came out with one that has mounting brackets and more room for relays
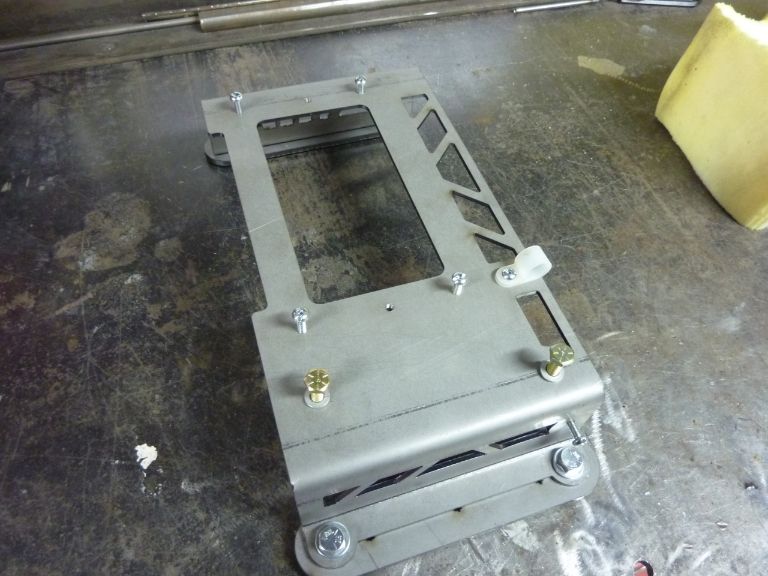
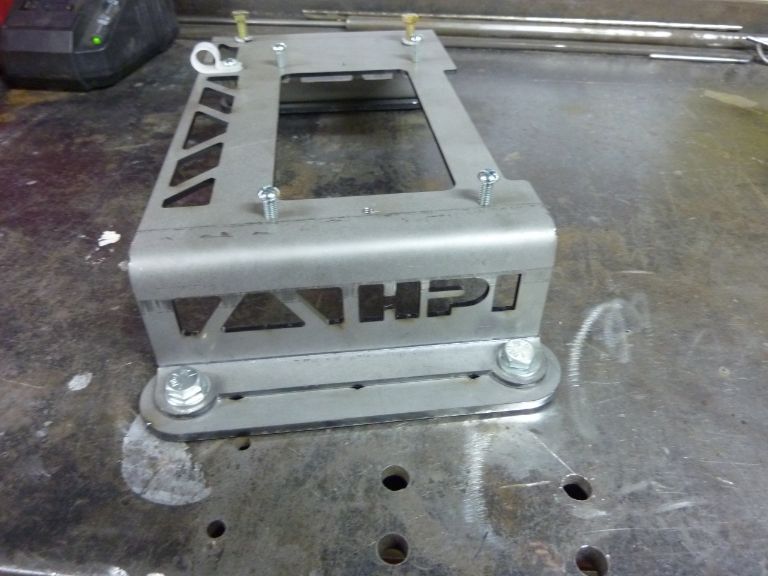
I'm going to mount it on the driver's side, but just put it here to see how it would look
I also got a Highway 22 trunk mount kit from Tyler at HPI Customs

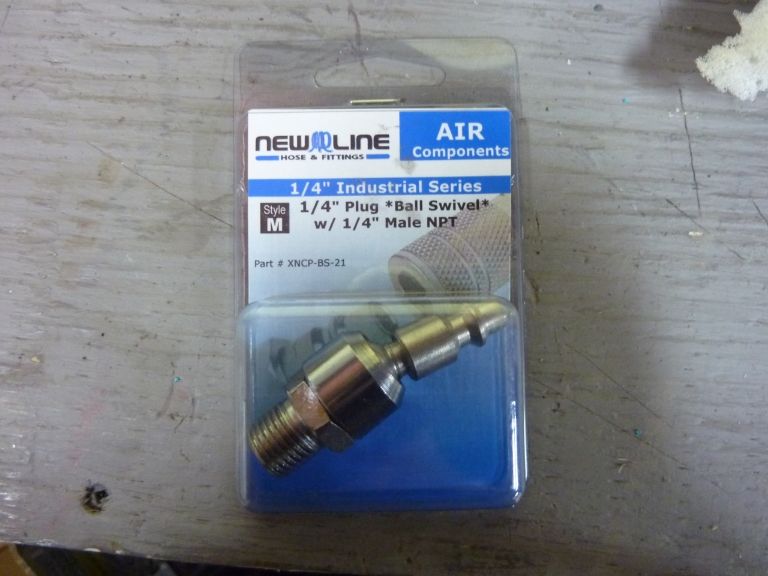
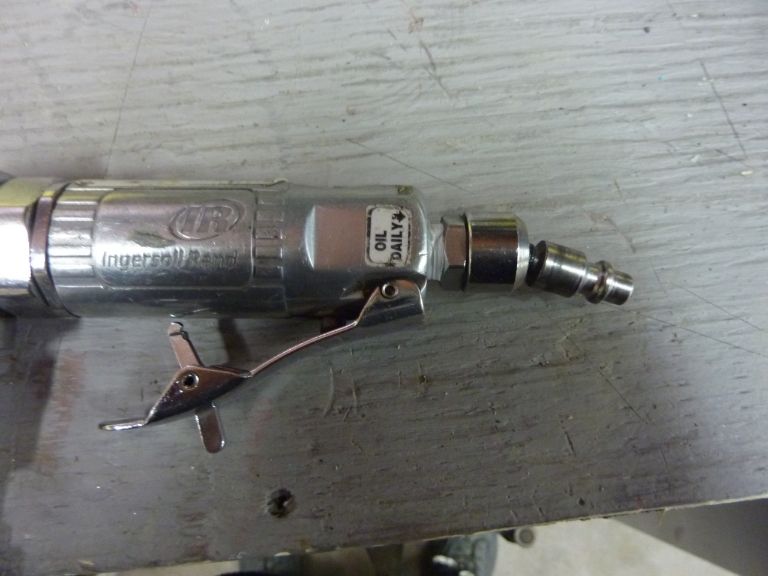
One other thing I did was swap out most of the male hose fitting on my air tools. The local tool shop had swivel fittings on for just under 5 bucks. They make a world of difference. I can actually lay my air tools down without them sounding like they have an air leak. It also probably helps that I bought a 2 foot lead hose to add to the end of my air line. It also has a swivel end on it.
I hope to get out to the shop again tomorrow and finish up the driver's rear seat and start on the console. Will post pics.
03-27-2013, 06:42 PM
#185
On The Tree
Thread Starter
iTrader: (4)
Join Date: Mar 2009
Location: British Columbia, Canada
Posts: 132
Likes: 0
Received 0 Likes
on
0 Posts
Got some work done on the rear console.
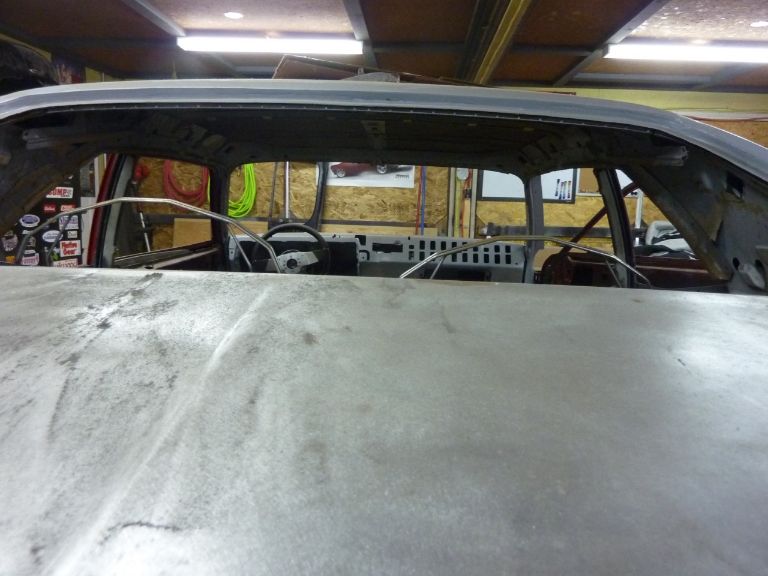
Started with bending some pieces of round bar
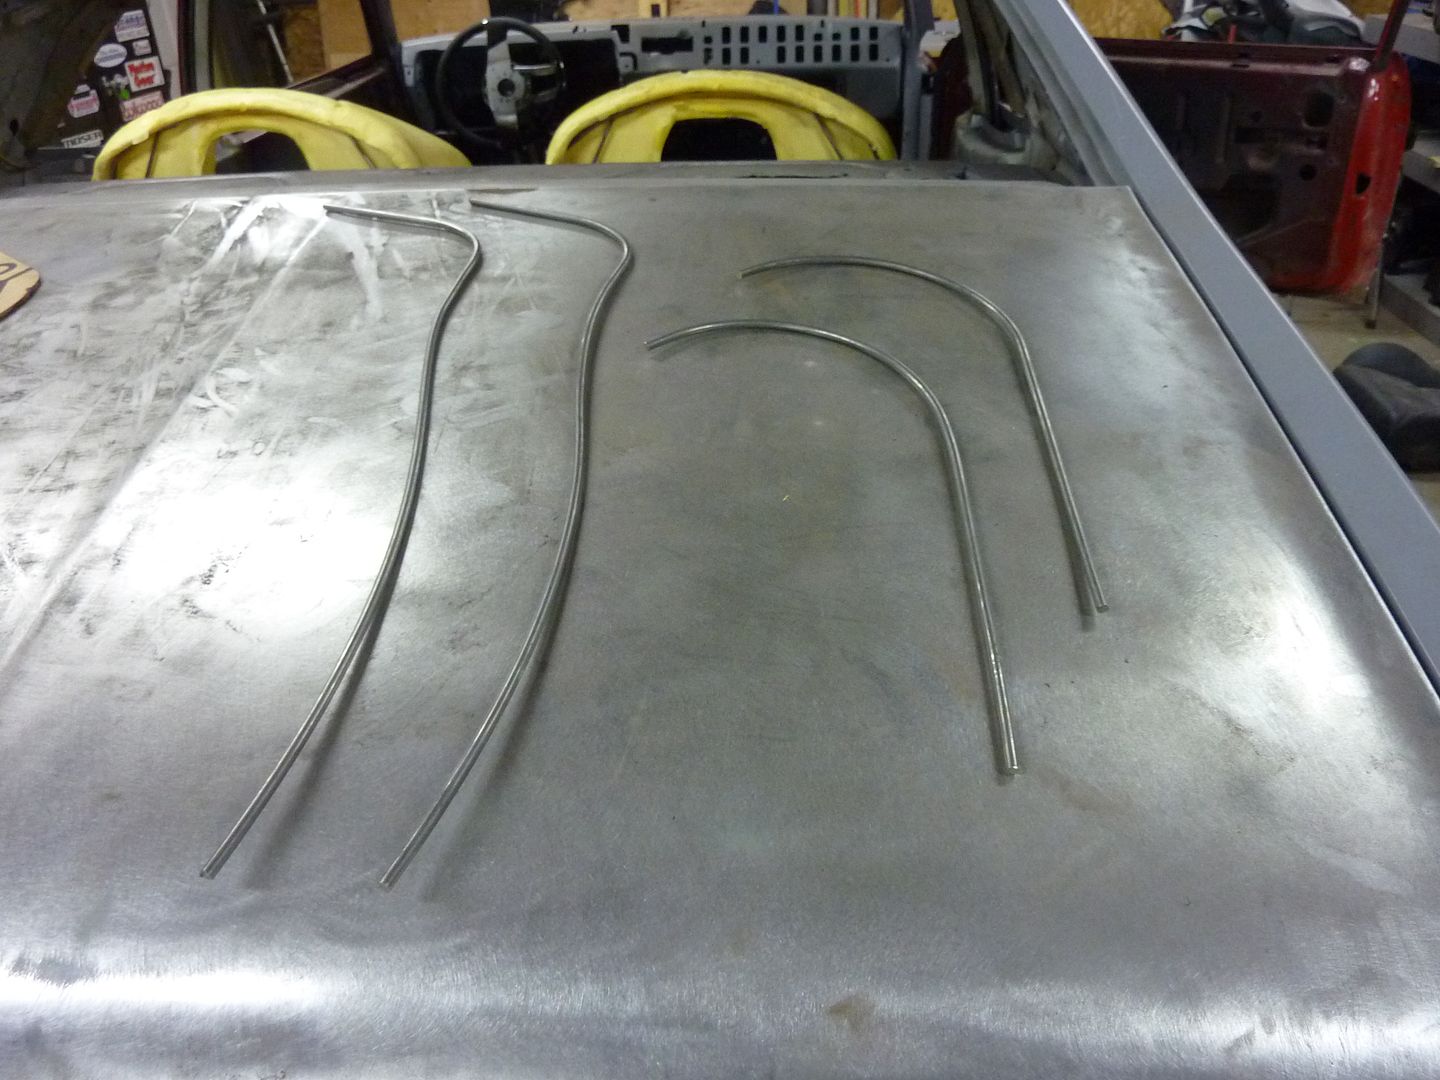
Tacked them to the car where I wanted them to be
After some more work, I ended up with this
Mocked it up in place with the seats
Here you can see how everything will attach
And with my other round bar creation in place
As with the front console, I plan on wrapping it with sheet metal and then wrapping the whole thing in leather or vinyl. Next up I will be working on the sides of the rear seats.
Started with bending some pieces of round bar
Tacked them to the car where I wanted them to be
After some more work, I ended up with this
Mocked it up in place with the seats
Here you can see how everything will attach
And with my other round bar creation in place
As with the front console, I plan on wrapping it with sheet metal and then wrapping the whole thing in leather or vinyl. Next up I will be working on the sides of the rear seats.
04-19-2013, 09:55 PM
#186
On The Tree
Thread Starter
iTrader: (4)
Join Date: Mar 2009
Location: British Columbia, Canada
Posts: 132
Likes: 0
Received 0 Likes
on
0 Posts
Got more done on the rear consoles. Started working on the sides.


I still have a bit to do on both sides and then I hope to start wrapping them all with sheet metal.
I also got some seat sliders for the front seats. I really wanted to try and keep the power sliders, but at almost 3" high, it makes the seats sit way too high in the car.


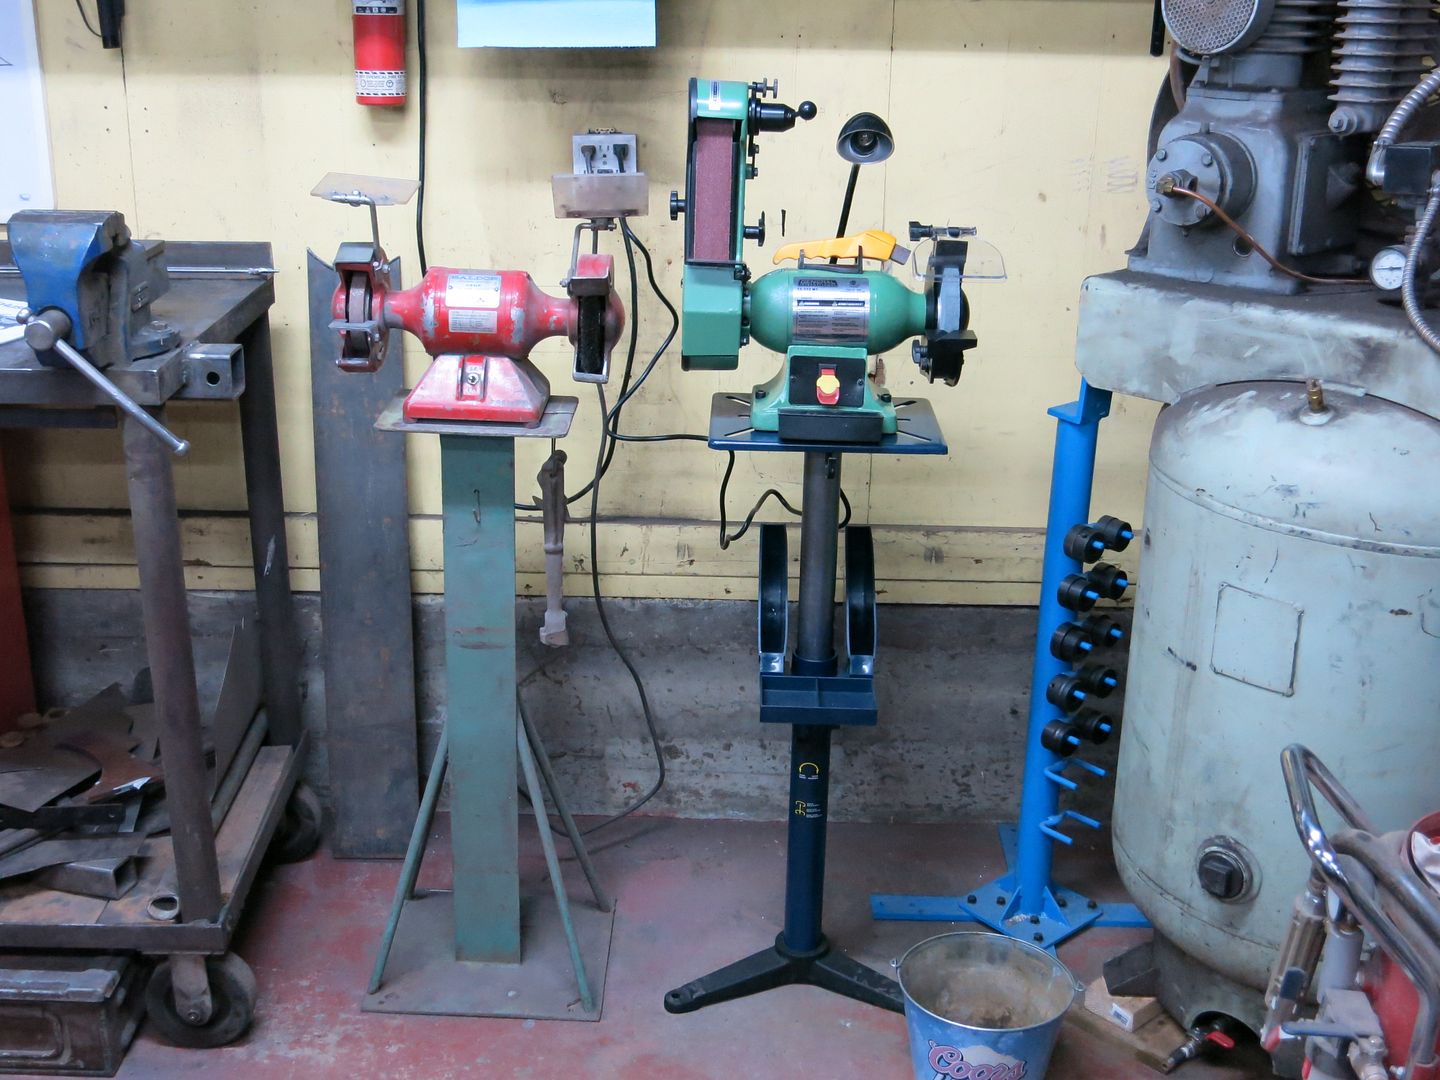
I also picked up a new grinder with belt sander. I have wanted a belt sander for a while and when this unit when on sale, I got one


I still have a bit to do on both sides and then I hope to start wrapping them all with sheet metal.
I also got some seat sliders for the front seats. I really wanted to try and keep the power sliders, but at almost 3" high, it makes the seats sit way too high in the car.


I also picked up a new grinder with belt sander. I have wanted a belt sander for a while and when this unit when on sale, I got one


 04-21-2013, 09:10 AM
#188


Great work as always. Still one of my favorite builds on here.
 06-24-2013, 05:04 PM
#189
On The Tree
Thread Starter
iTrader: (4)
Join Date: Mar 2009
Location: British Columbia, Canada
Posts: 132
Likes: 0
Received 0 Likes
on
0 Posts
Thanks Jimbo 
Well it's been a couple months since I've updated, so I thought I better do one. Unfortunately haven't gotten much actually done on the car. Things around the house and overtime shifts have gotten in the way. I hope to get a few productive days in though over the next few weeks as I will be on holidays for a bit.
Did get a few new sweet parts though. Thanks Matt at MCB!!
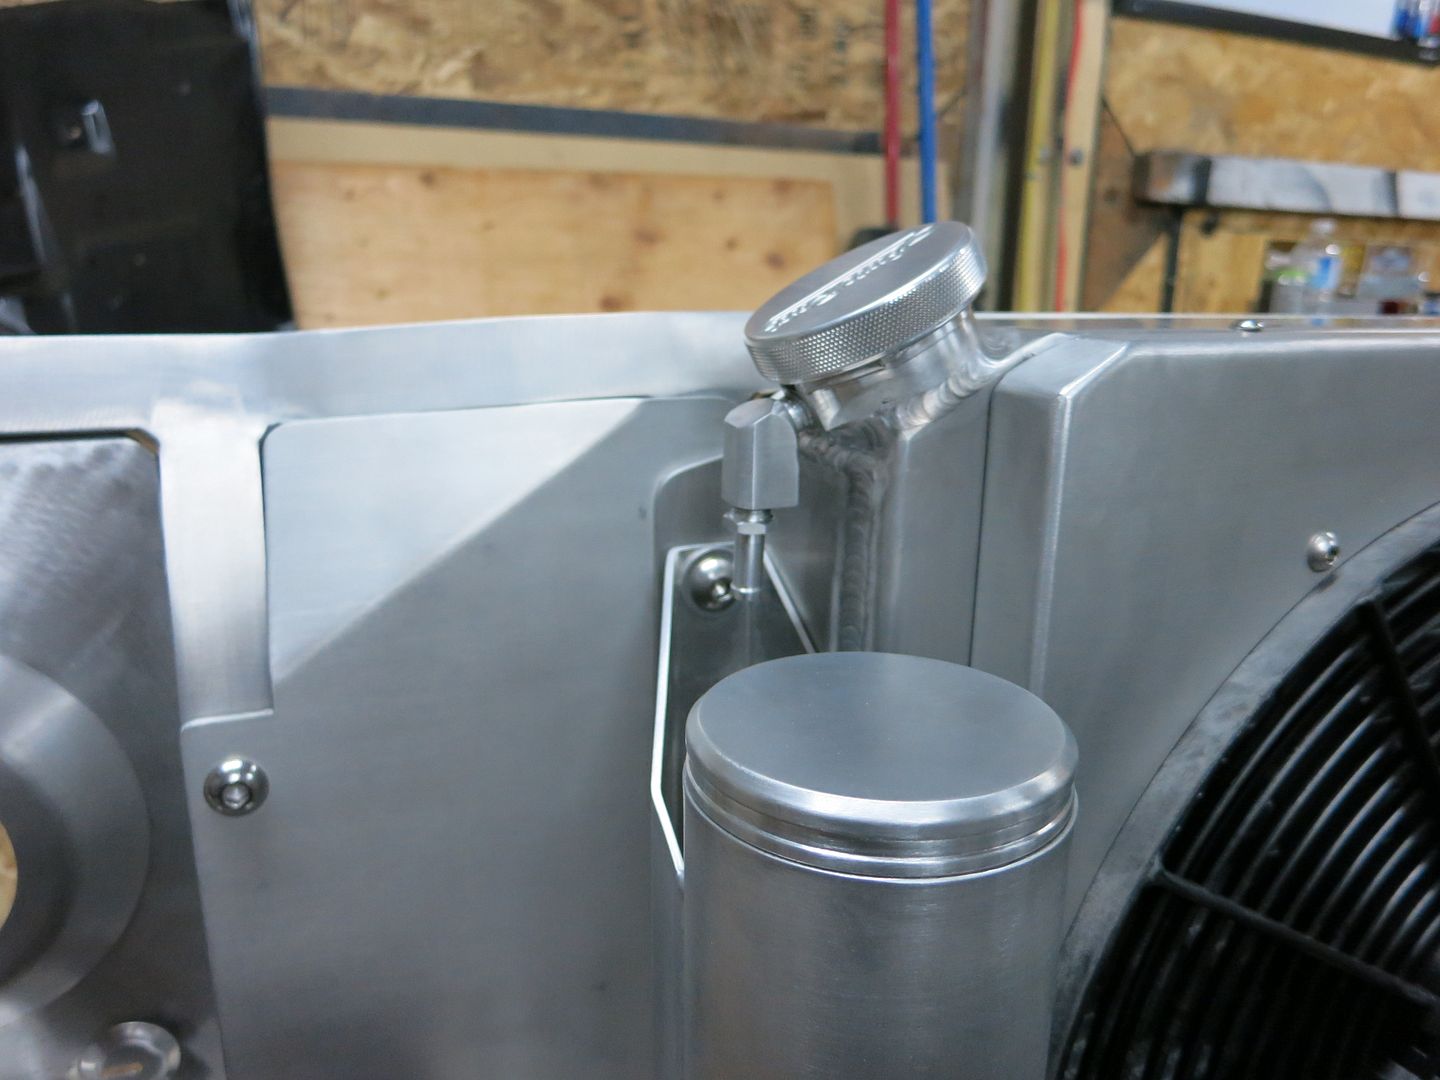
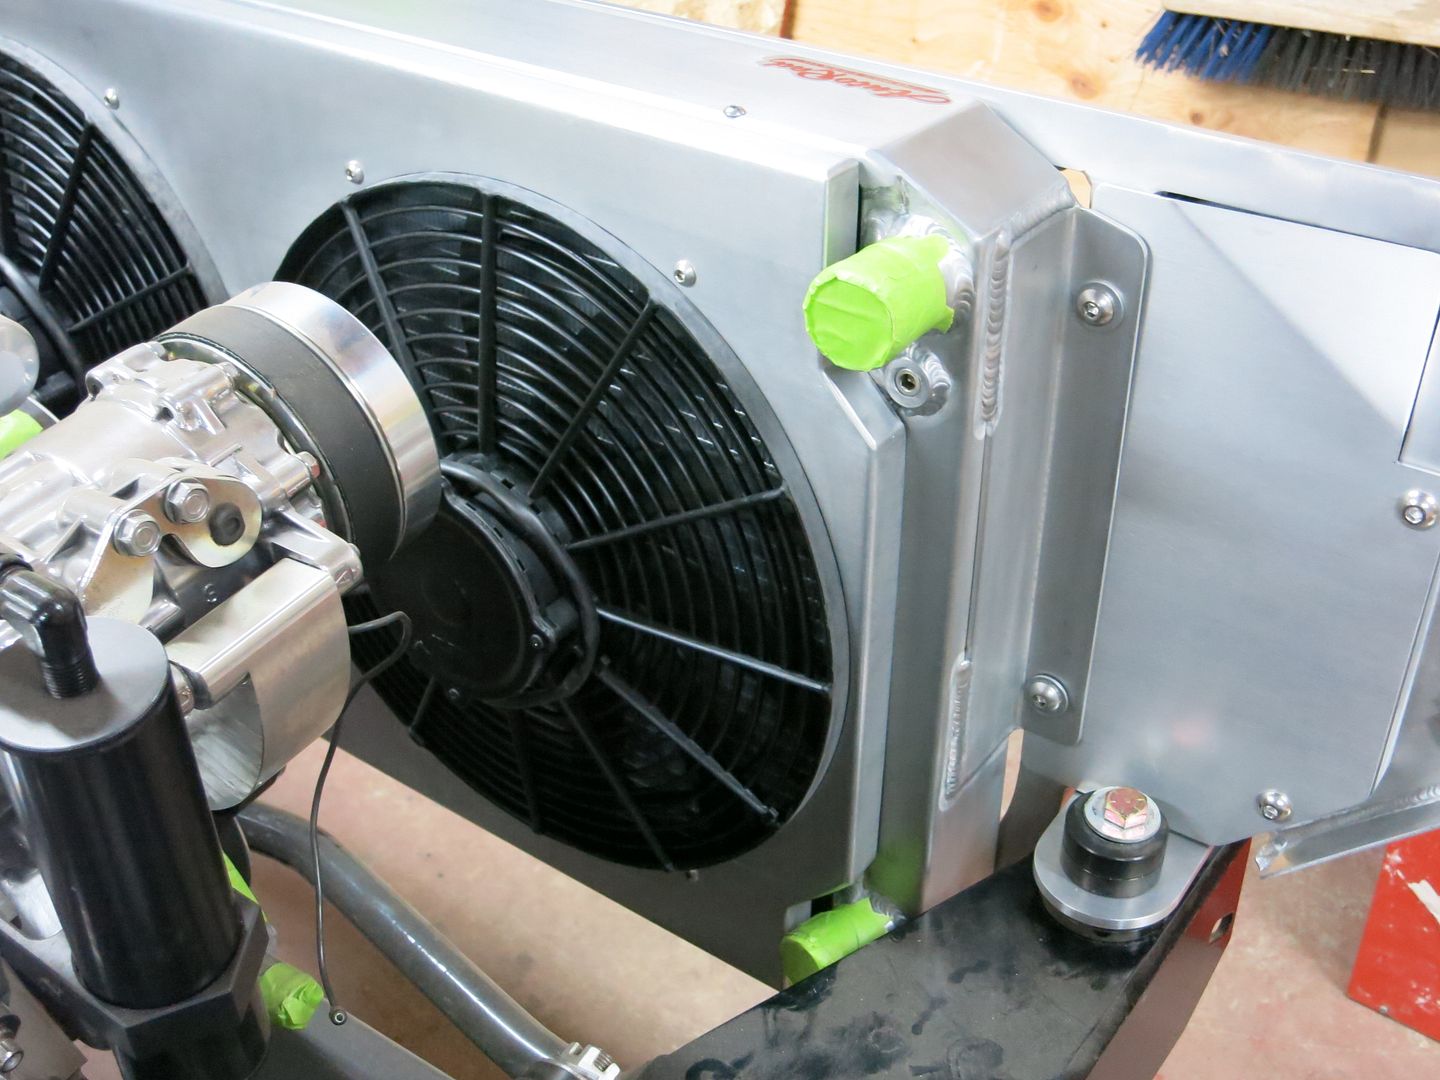
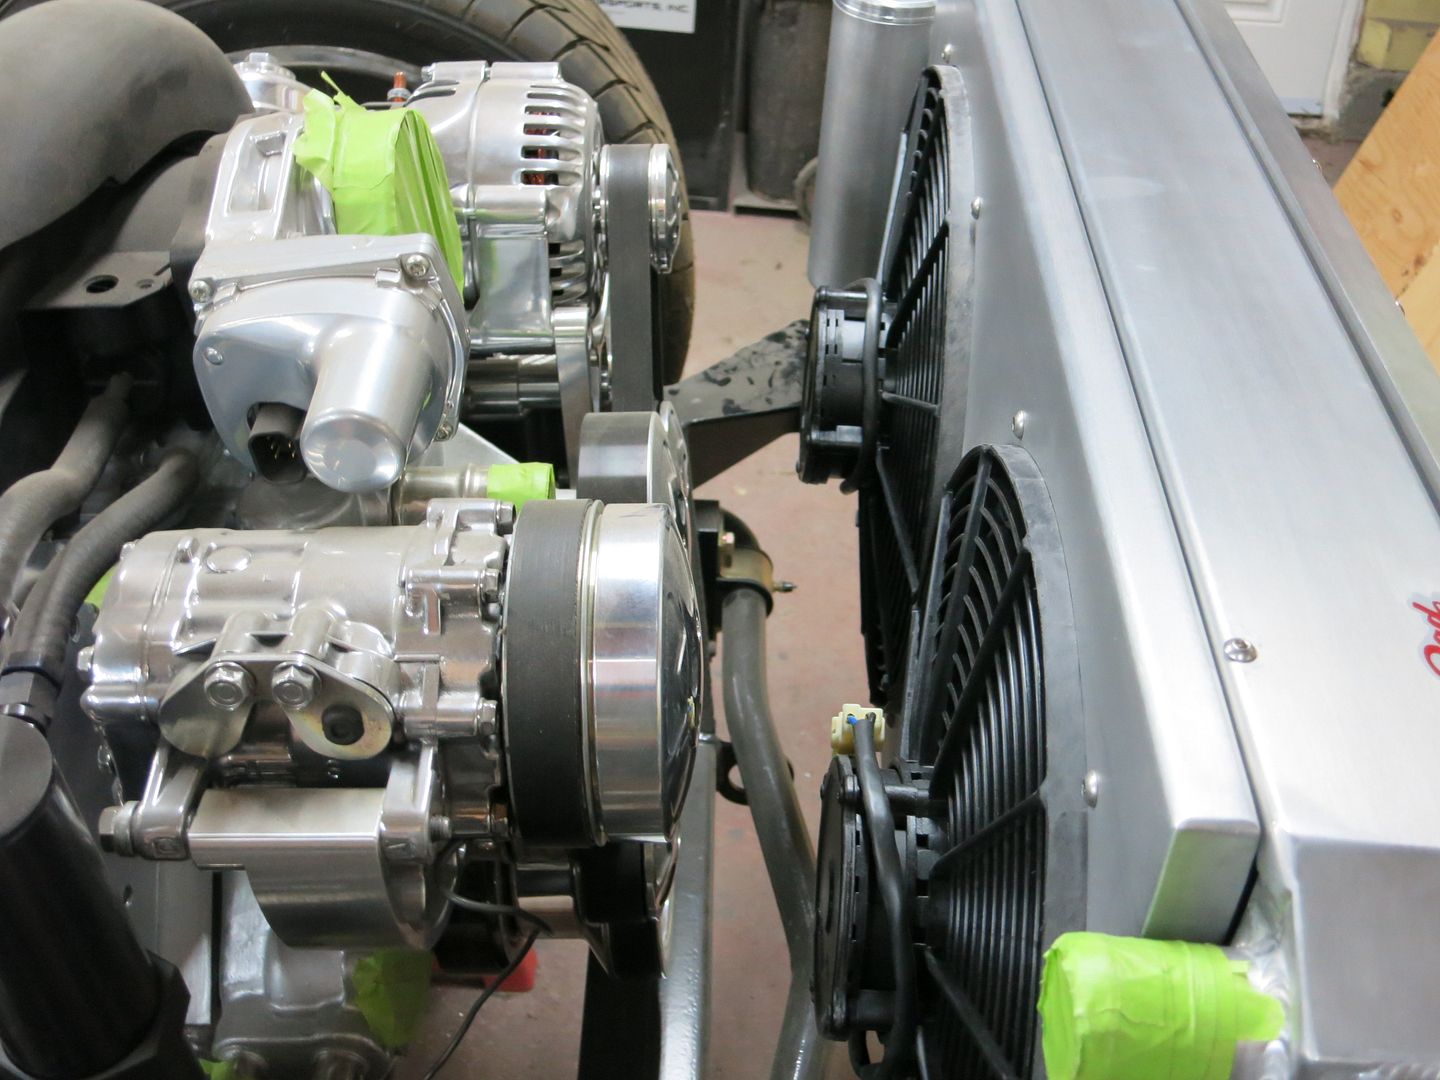
I borrowed this idea of a photo from another thread. Shows the difference in size between the stock rad and the Autorad one
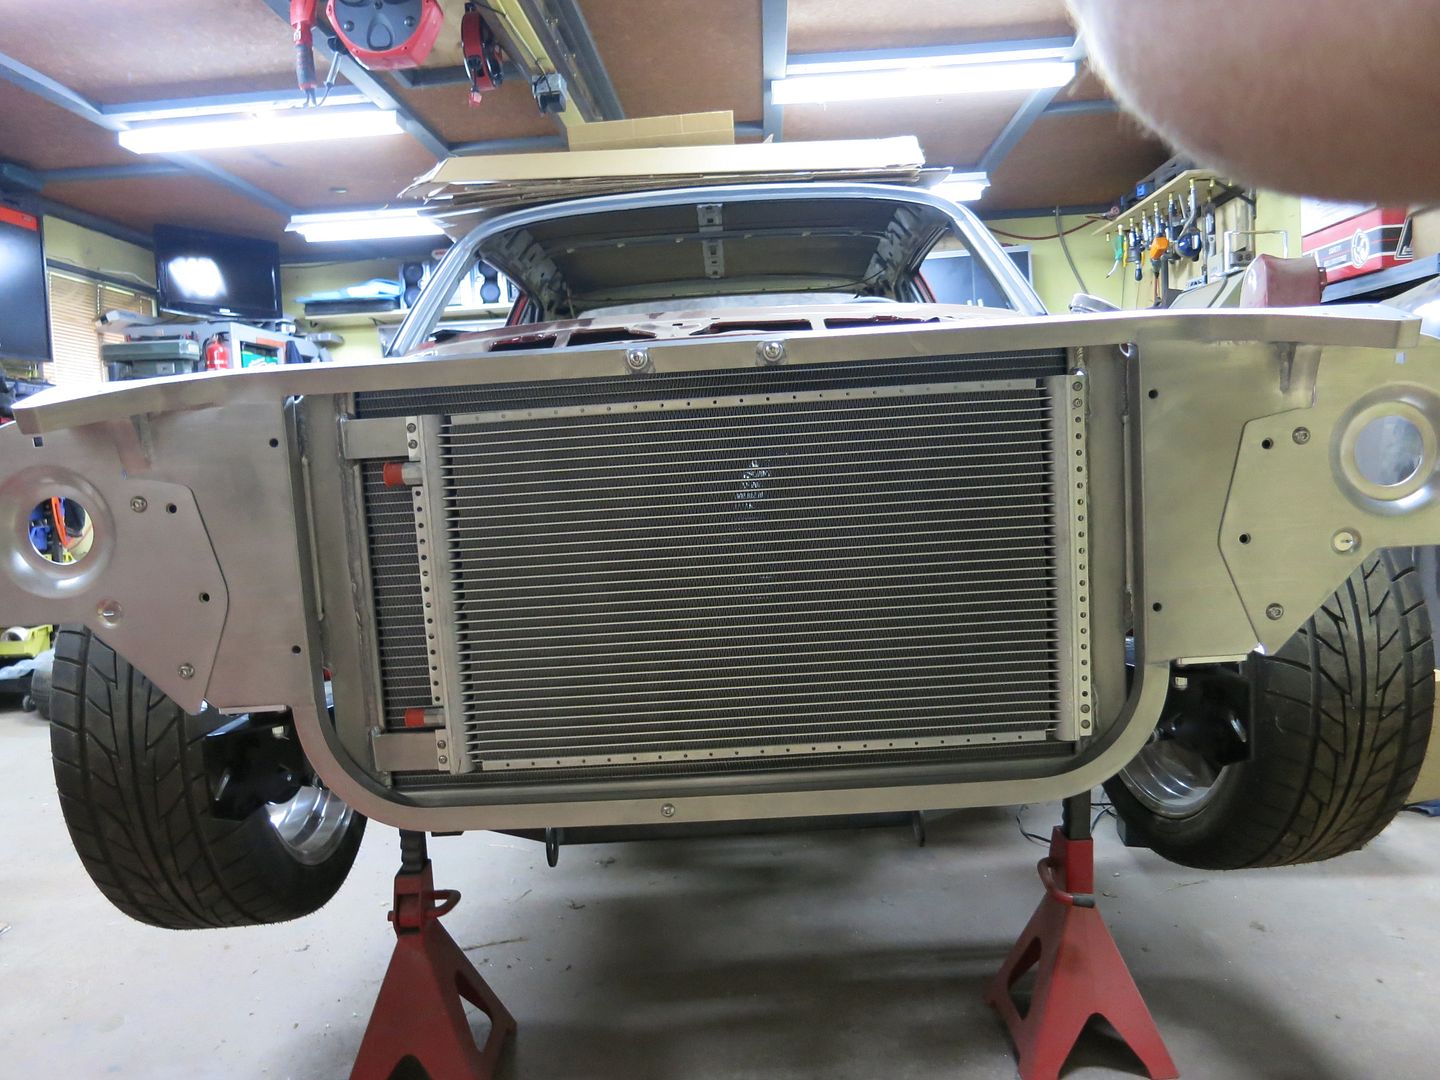
Don't think I'll have to worry about this setup not keeping the car cool on the hot desert summer days
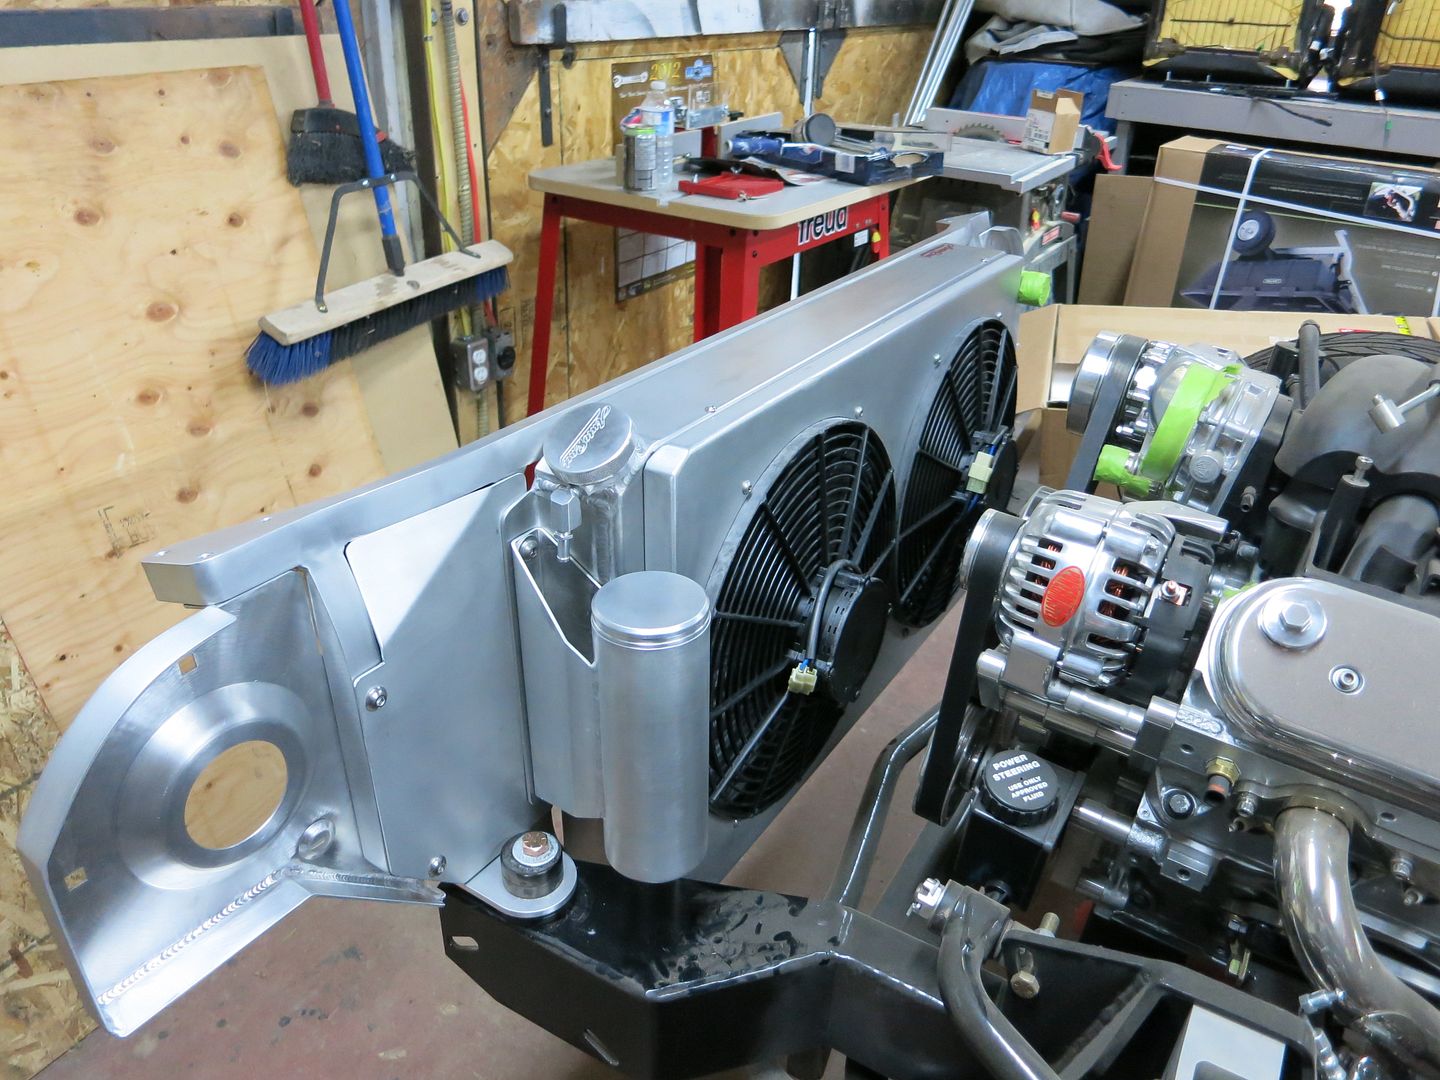

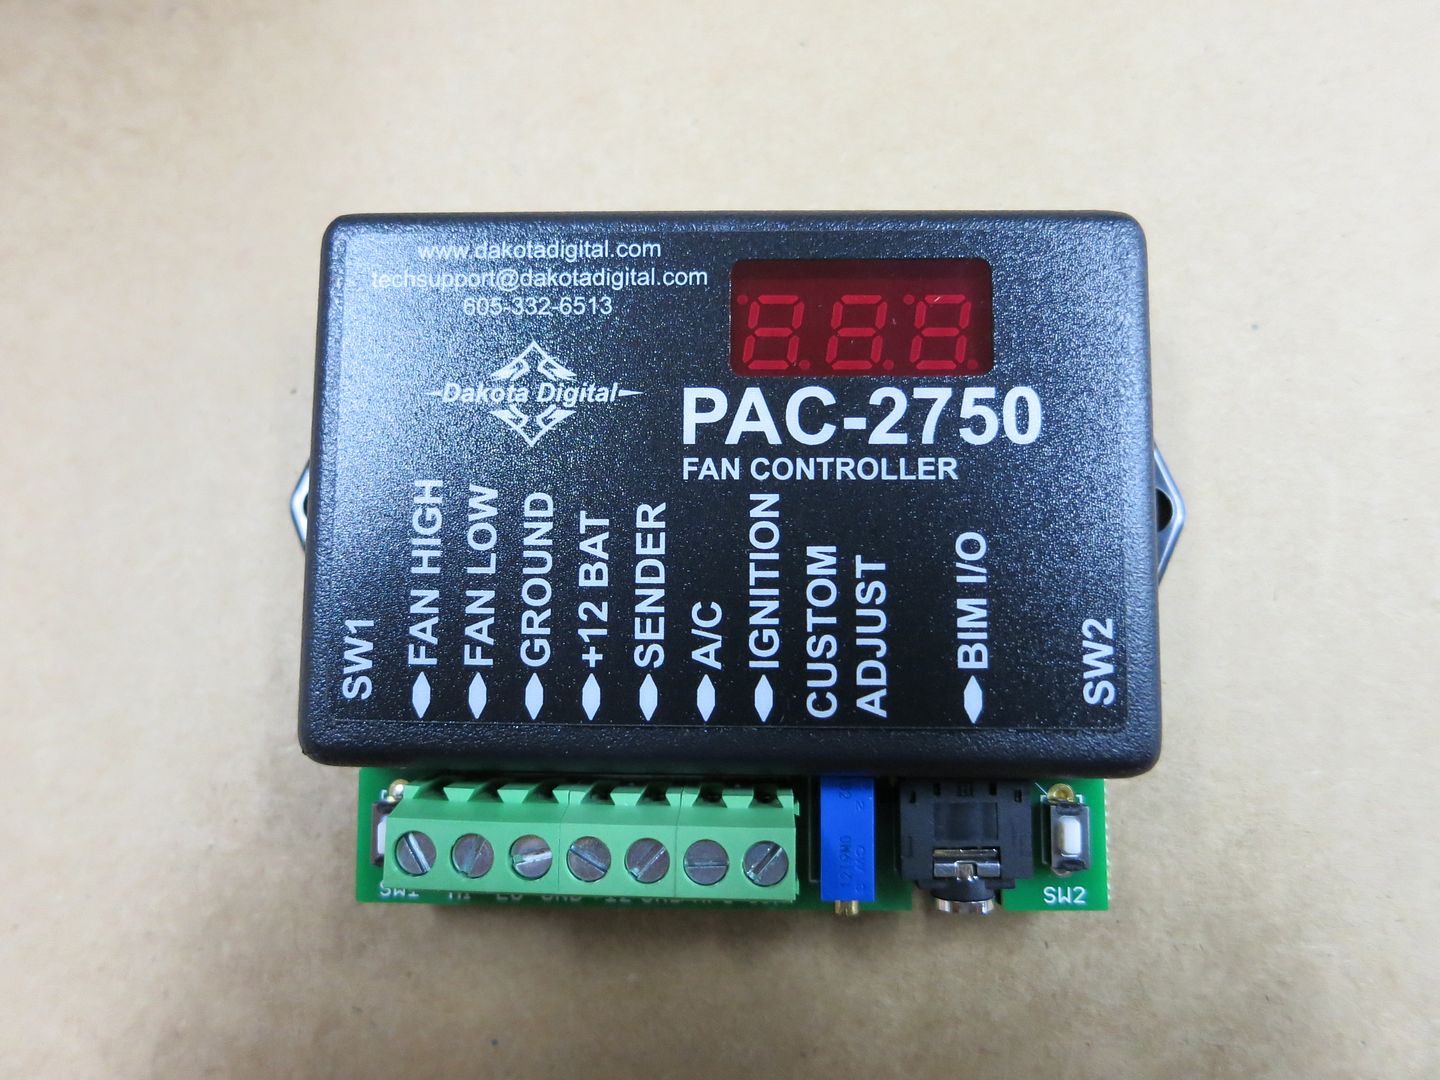
And a Dakota Digital programmable fan controller with LED display
Well it's been a couple months since I've updated, so I thought I better do one. Unfortunately haven't gotten much actually done on the car. Things around the house and overtime shifts have gotten in the way. I hope to get a few productive days in though over the next few weeks as I will be on holidays for a bit.
Did get a few new sweet parts though. Thanks Matt at MCB!!


I borrowed this idea of a photo from another thread. Shows the difference in size between the stock rad and the Autorad one


Don't think I'll have to worry about this setup not keeping the car cool on the hot desert summer days


And a Dakota Digital programmable fan controller with LED display
 07-18-2013, 08:58 AM
#190
Teching In
iTrader: (2)

Join Date: Mar 2010
Location: Southern California
Posts: 33
Likes: 0
Received 0 Likes
on
0 Posts
[QUOTE=scherp69;16036354]I also realized that I have never posted any pics of the Ridetech filler cap in place. Here's a few

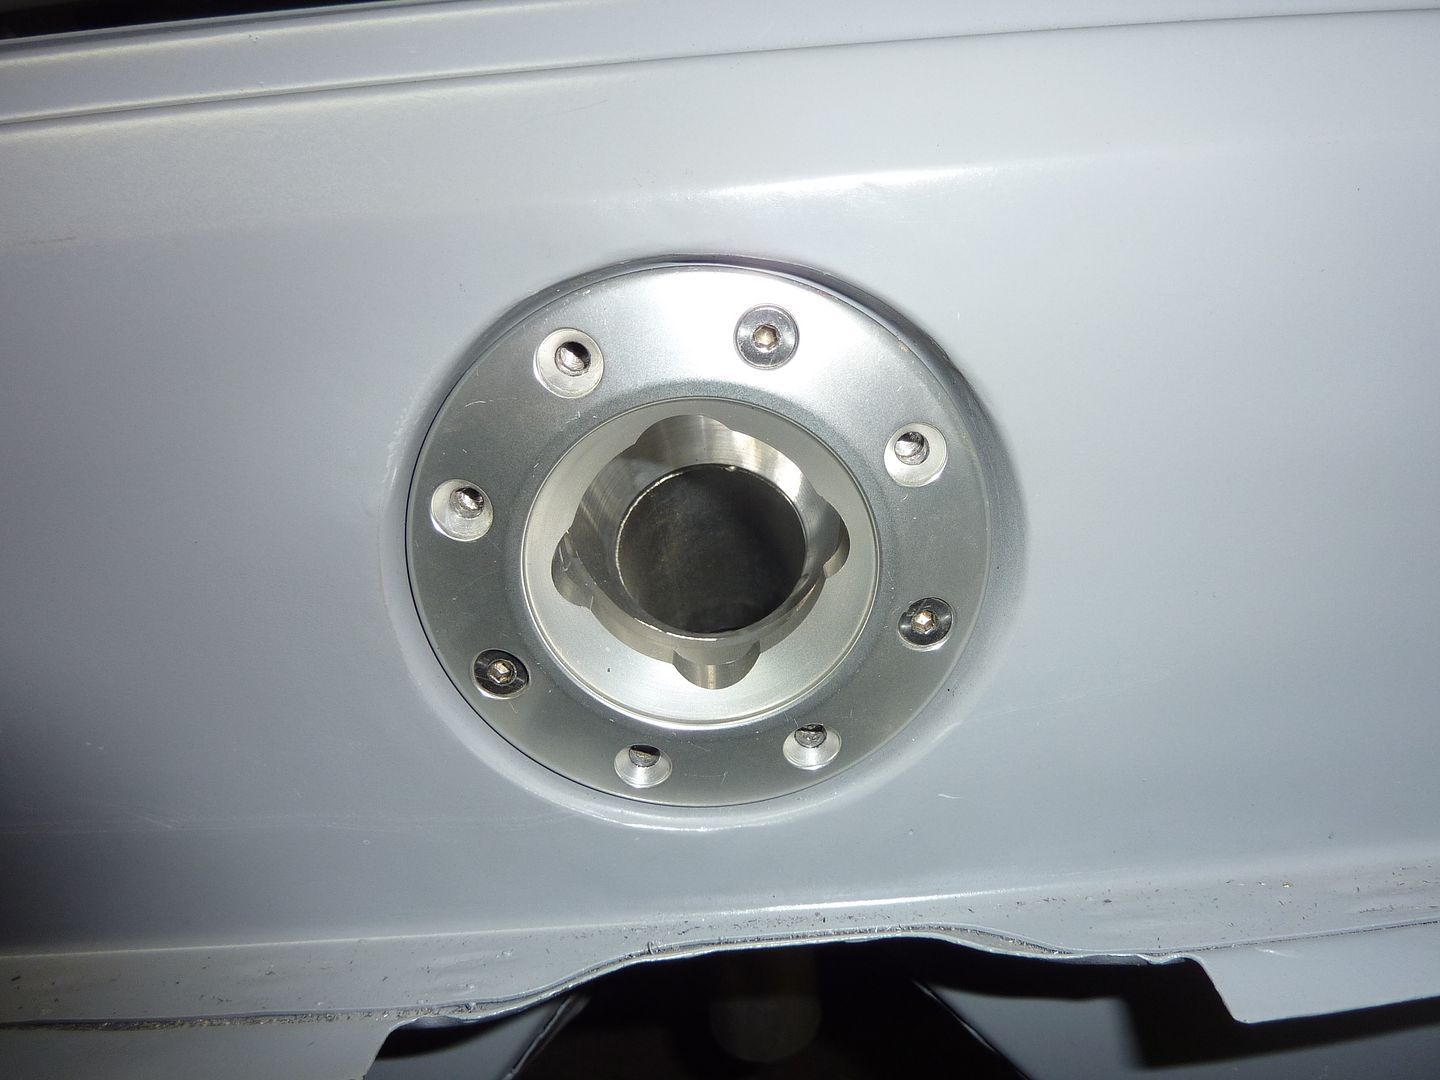
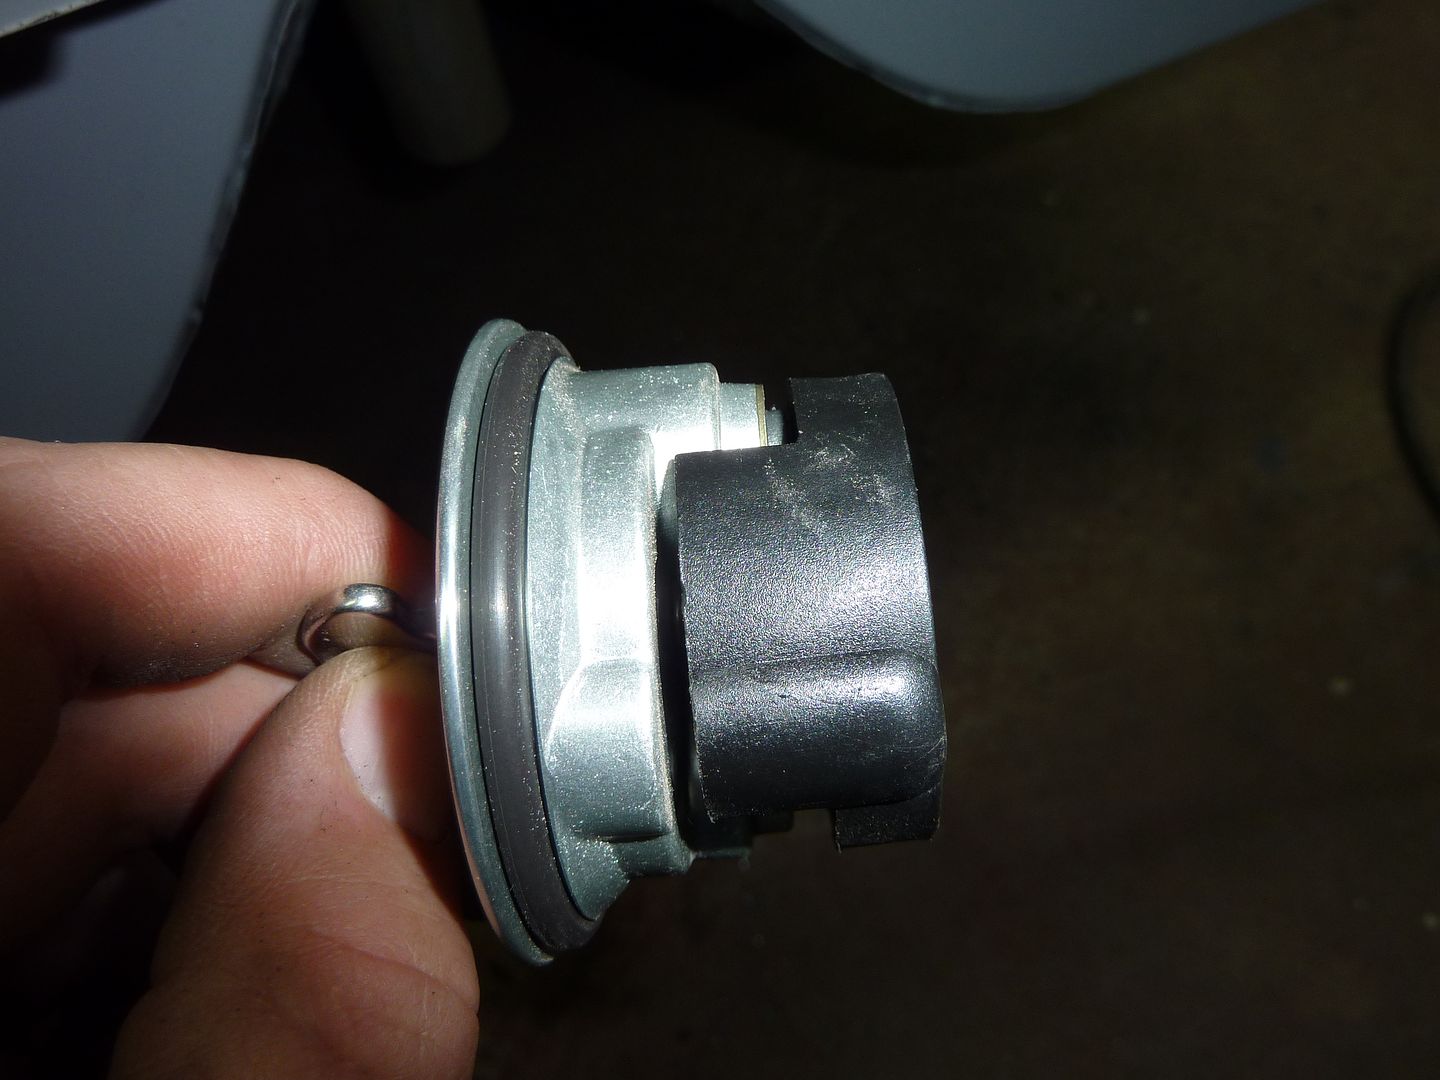
Hey really want to complement you on your build, nice job. Question on your fuel filling project, what did you use to the recess in the sheet metal for your new Ridetech filler cap? I'm wanting to do the same thing to my Nova. Any info would be great. Keep up the good work.
Hey really want to complement you on your build, nice job. Question on your fuel filling project, what did you use to the recess in the sheet metal for your new Ridetech filler cap? I'm wanting to do the same thing to my Nova. Any info would be great. Keep up the good work.
09-04-2013, 06:44 PM
#192
On The Tree
Thread Starter
iTrader: (4)
Join Date: Mar 2009
Location: British Columbia, Canada
Posts: 132
Likes: 0
Received 0 Likes
on
0 Posts
Hey really want to complement you on your build, nice job. Question on your fuel filling project, what did you use to the recess in the sheet metal for your new Ridetech filler cap? I'm wanting to do the same thing to my Nova. Any info would be great. Keep up the good work.
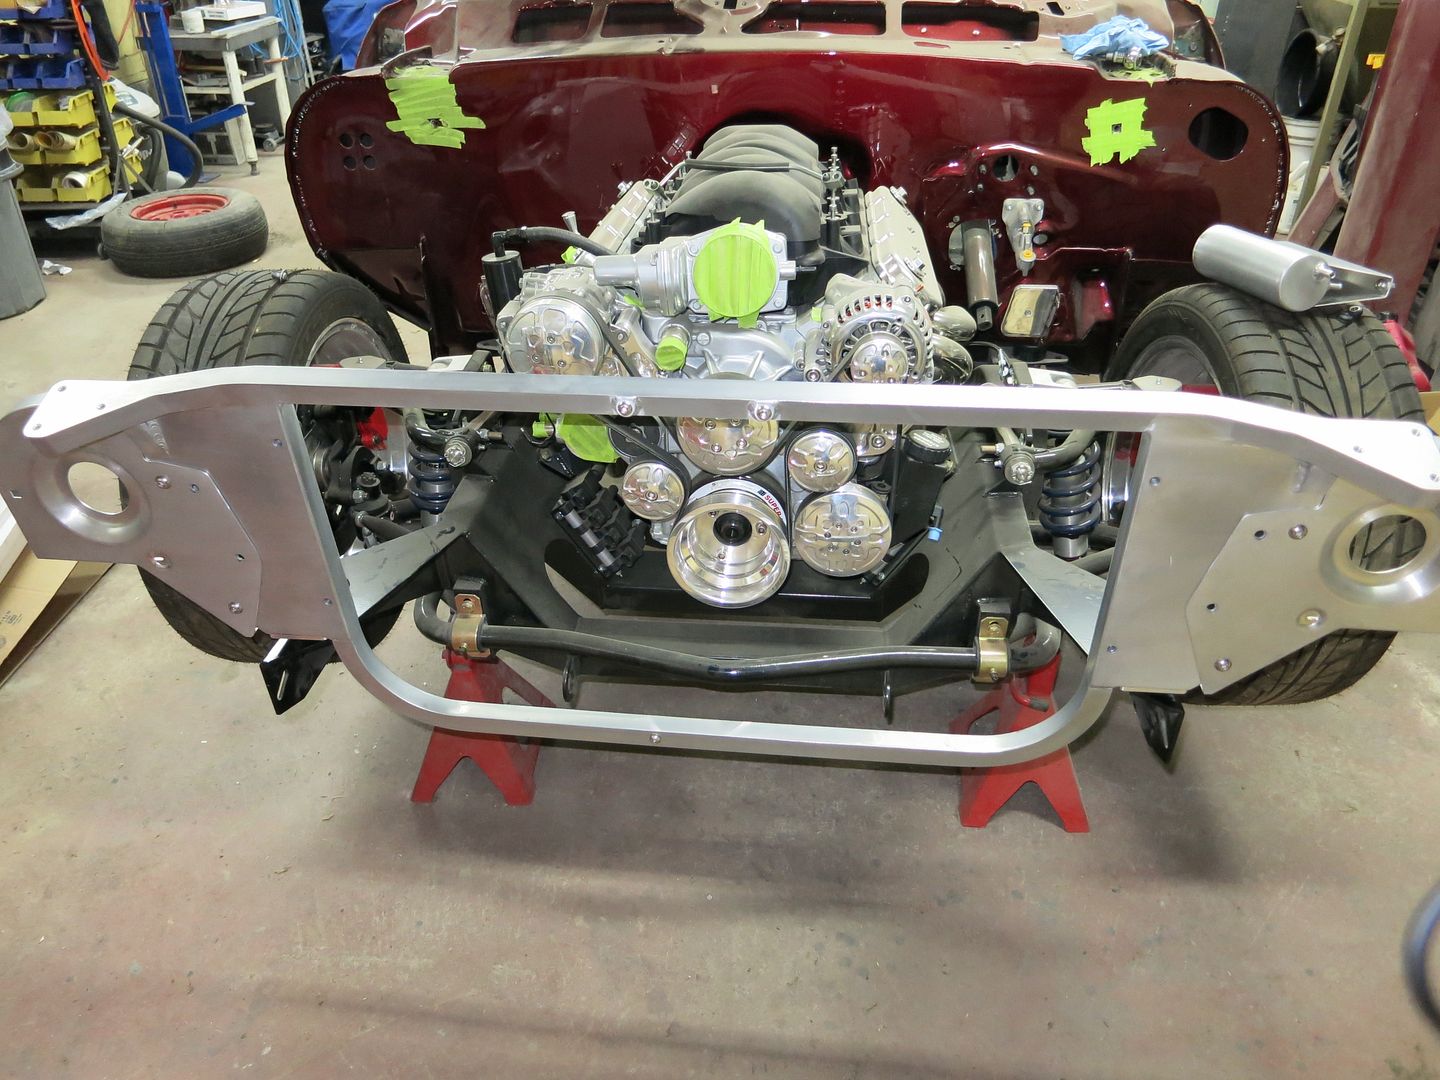
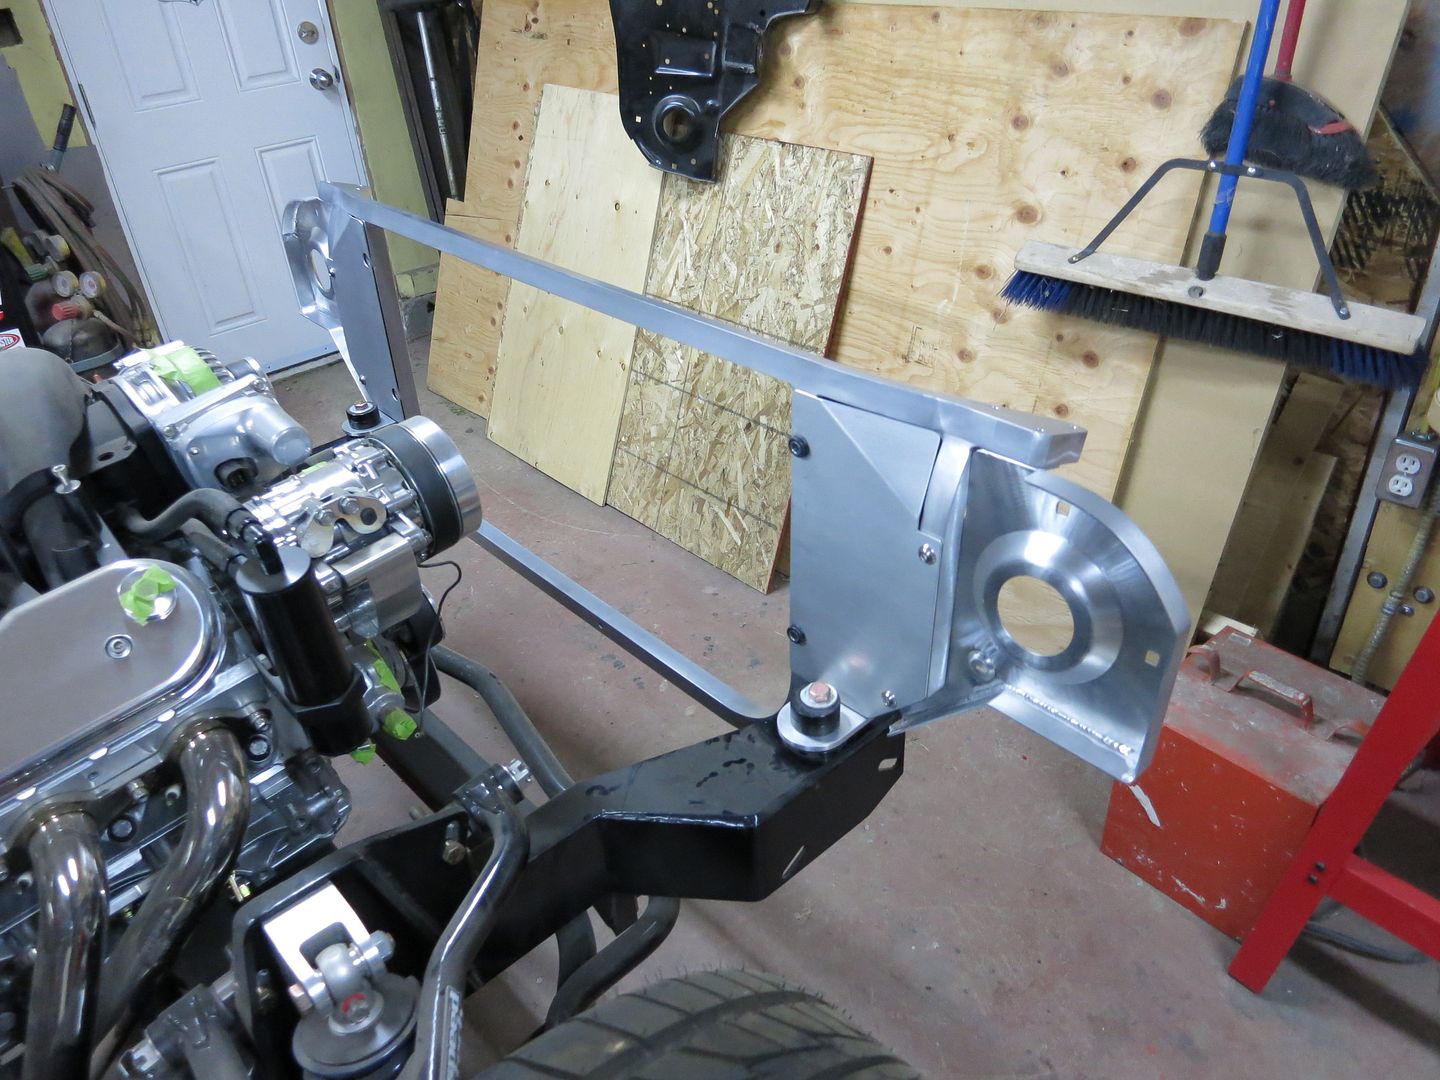
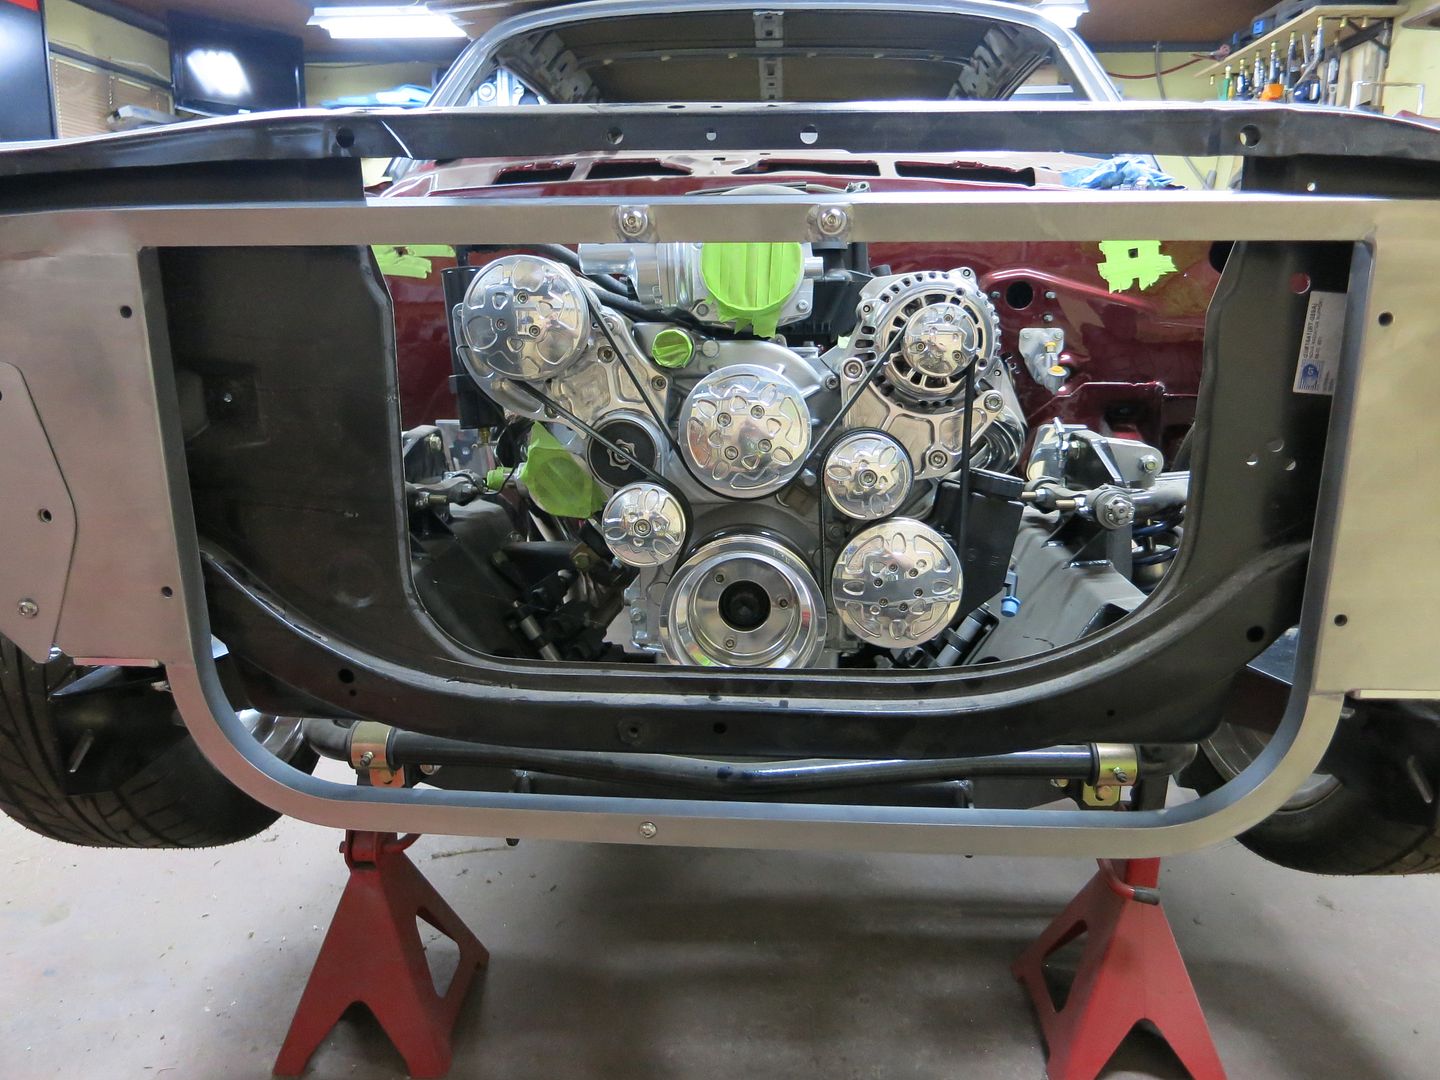
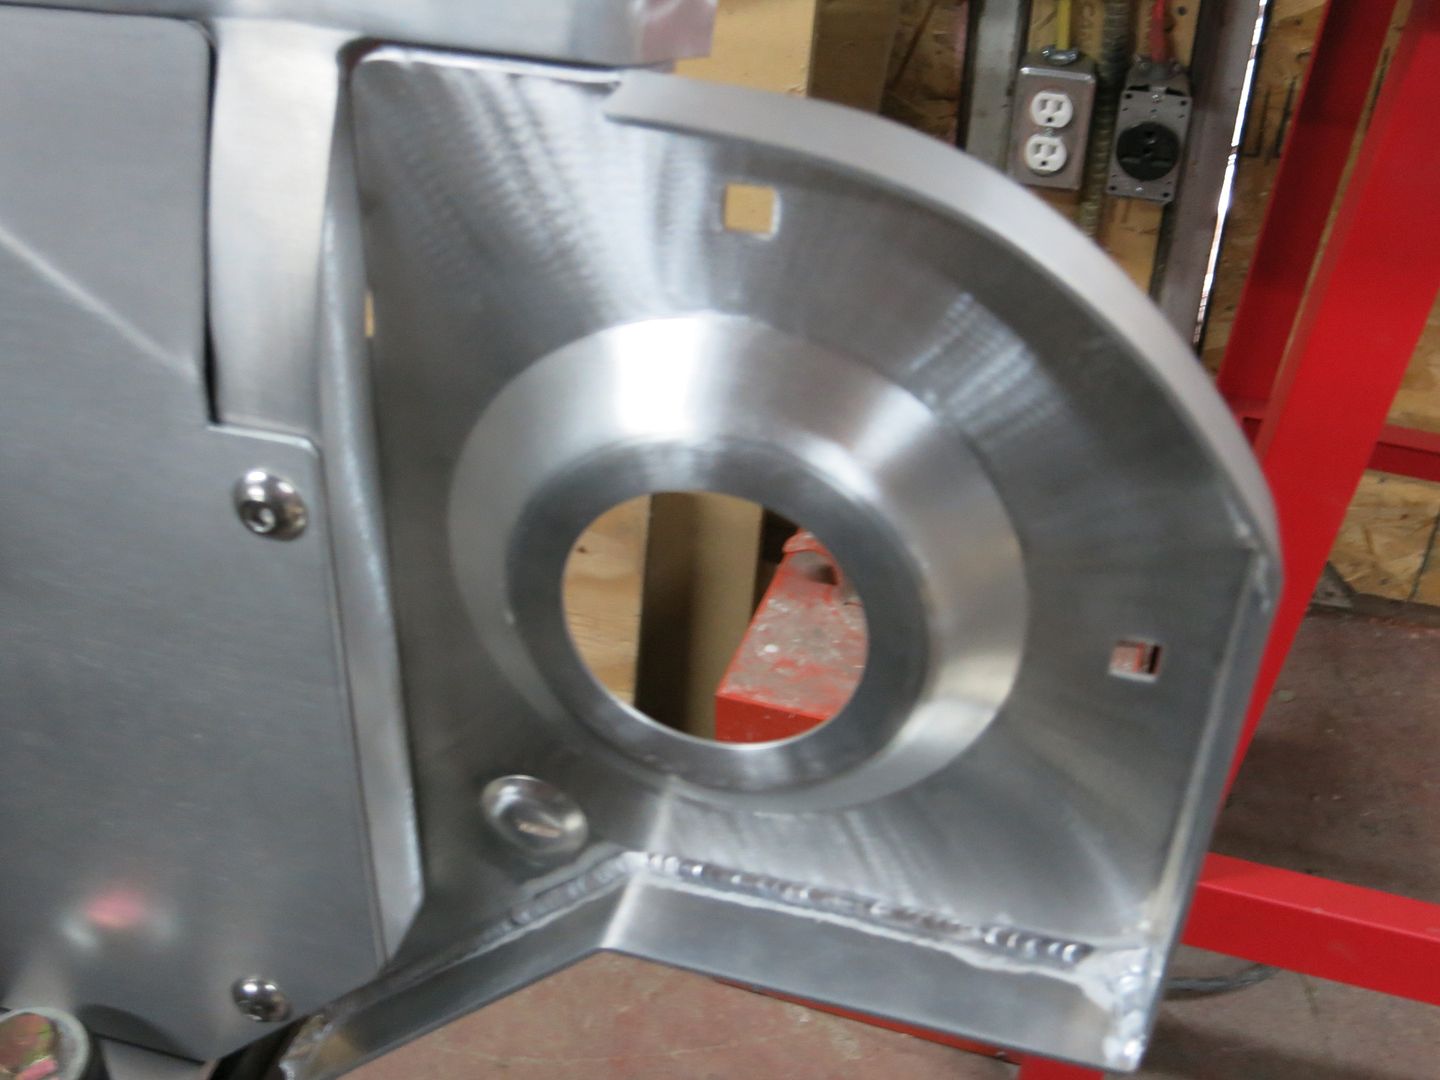
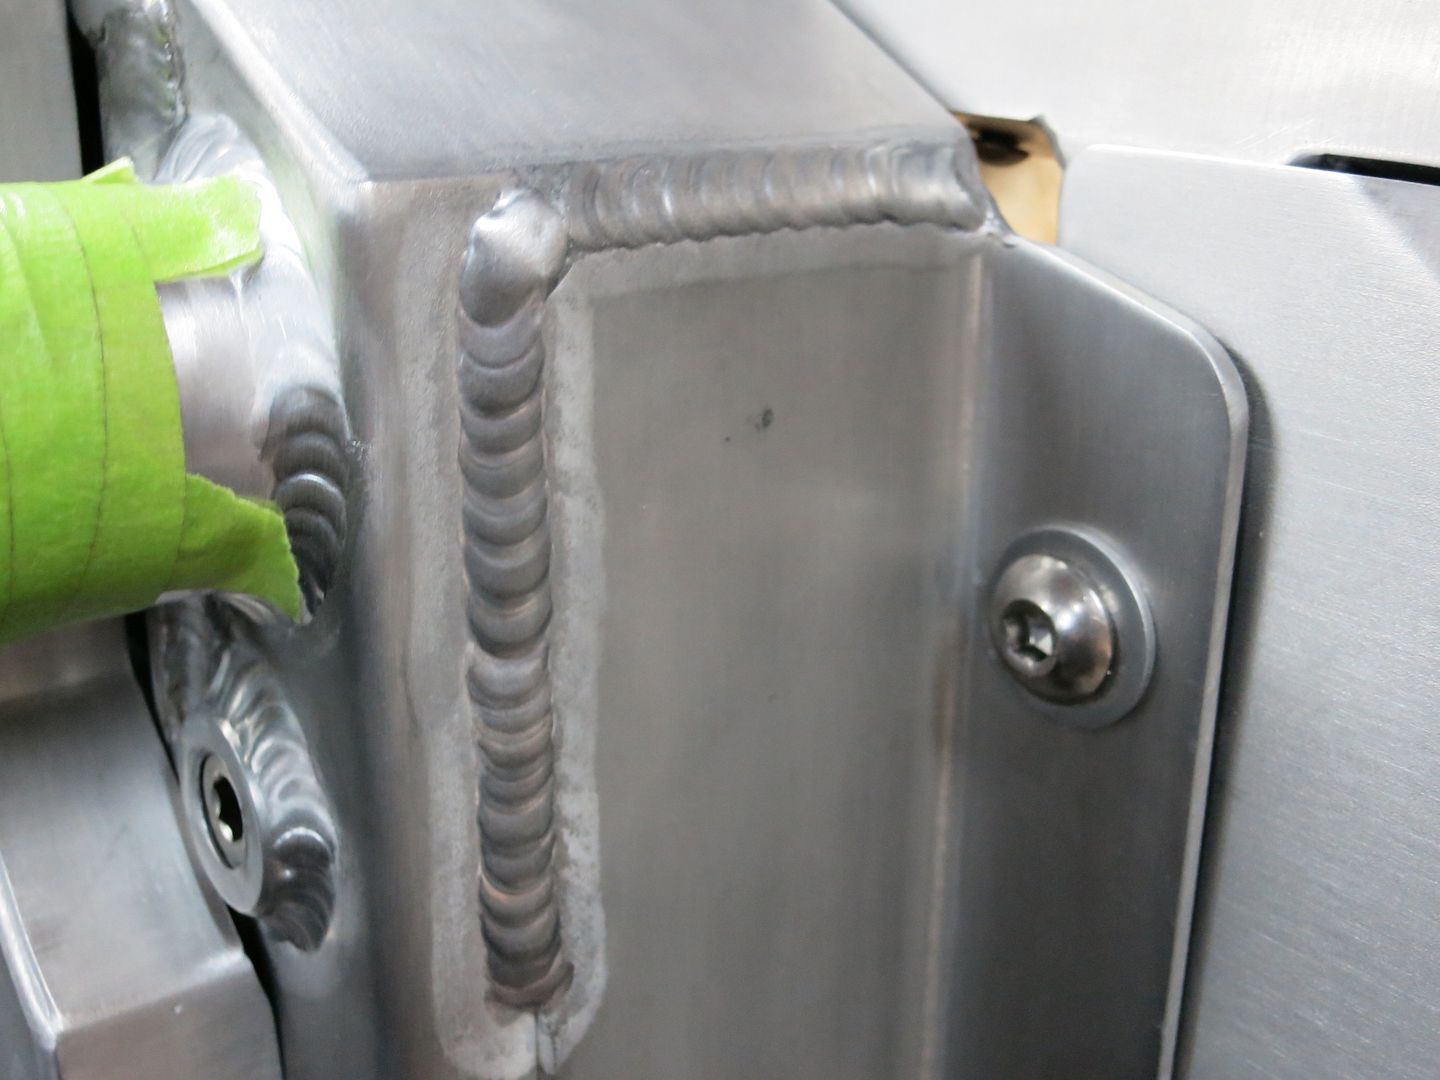
Time for an update. Cleaned up the shop a bit so I was able to get a better pic of the rad and rad support.

I've been slowing working on replacing the tail light panel.....again. When I put the first one in, I completely forgot to check the fit of the tail lights. Of course they didn't fit right and there was a huge gap. I also didn't like the way the truck aligned so here's where I'm at with that.

I got tired of working on the tail light panel, so I decided to get my front seats installed.
In a previous post, I stated that I used the existing holes in the bottom of the GTO seats to put the seat sliders. The thing I forgot to do, was to actually measure and make sure they were parallel. They weren't.
There was 1/2" difference between the top of the sliders and the bottom. So I had to drill new holes

And welded in the old ones

Another thing I ended up doing was replacing the bucket seat floor brackets. I cut the stock studs off and welded bolts onto the ones that I had already installed. I did this when I thought I could use the power tracks for the seats. So I cut out the old brackets and put in news ones.

I replaced all the stock studs with grade 8 bolts, but they are in the stock location. If anyone needs a set of bucket seat floor brackets, I now have an extra set that I will sell. I need to do some clean up on them to get rid of the bolts I welded on.
Next I made some brackets to mount the seats to the floor


Reinforced them and painted them black


And they were finally in


And with the seats finally in place, I had to modify the front console. I've been asked a few times why I chose to make the console out of round bar. Here's one big reason why. Very easy to change if needed.


I must say, it was pretty cool to sit in the driver's seat again. I think it's the first time I've done that in about 12 years.
On a side note, I'm still looking for a pair of driver's side door hinges if anyone can help me out. I really wanted to use some stock ones and rebuild them, but I might end up having to buy some Goodmark ones.
I've also been wanting to buy a mountain bike for a few years. Finally got one

Even found room in the shop to hang it

Between walking and biking, I've already lost 5 pounds over the past few weeks.
 09-20-2013, 03:01 AM
#194
scherp69,
I was happy to see you have been posting newer updates lately. We can see you aren't afraid of cutting your car apart. I love the creativity you are showing.
I was happy to see you have been posting newer updates lately. We can see you aren't afraid of cutting your car apart. I love the creativity you are showing.


 04-11-2014, 01:31 PM
#200
On The Tree
Thread Starter
iTrader: (4)
Join Date: Mar 2009
Location: British Columbia, Canada
Posts: 132
Likes: 0
Received 0 Likes
on
0 Posts
Thanks for all the comments and kind words guys. Really appreciate it.
Well it's been way too long with an update. I don't have much to update, but at least it's progress. Unfortunately the past winter I didn't get much at all done. Sucks when life gets in the way. The winter here was colder than normal and when it takes an hour to warm up the shop just to get it comfortable, it's hard to get motivated. Along with the weather and a few other things, didn't make it out to the shop much at all. I hope to try and play catch up now.
Last fall I bought a new rotisserie. I should have name this project Redo as it seems I keep redoing alot of it.


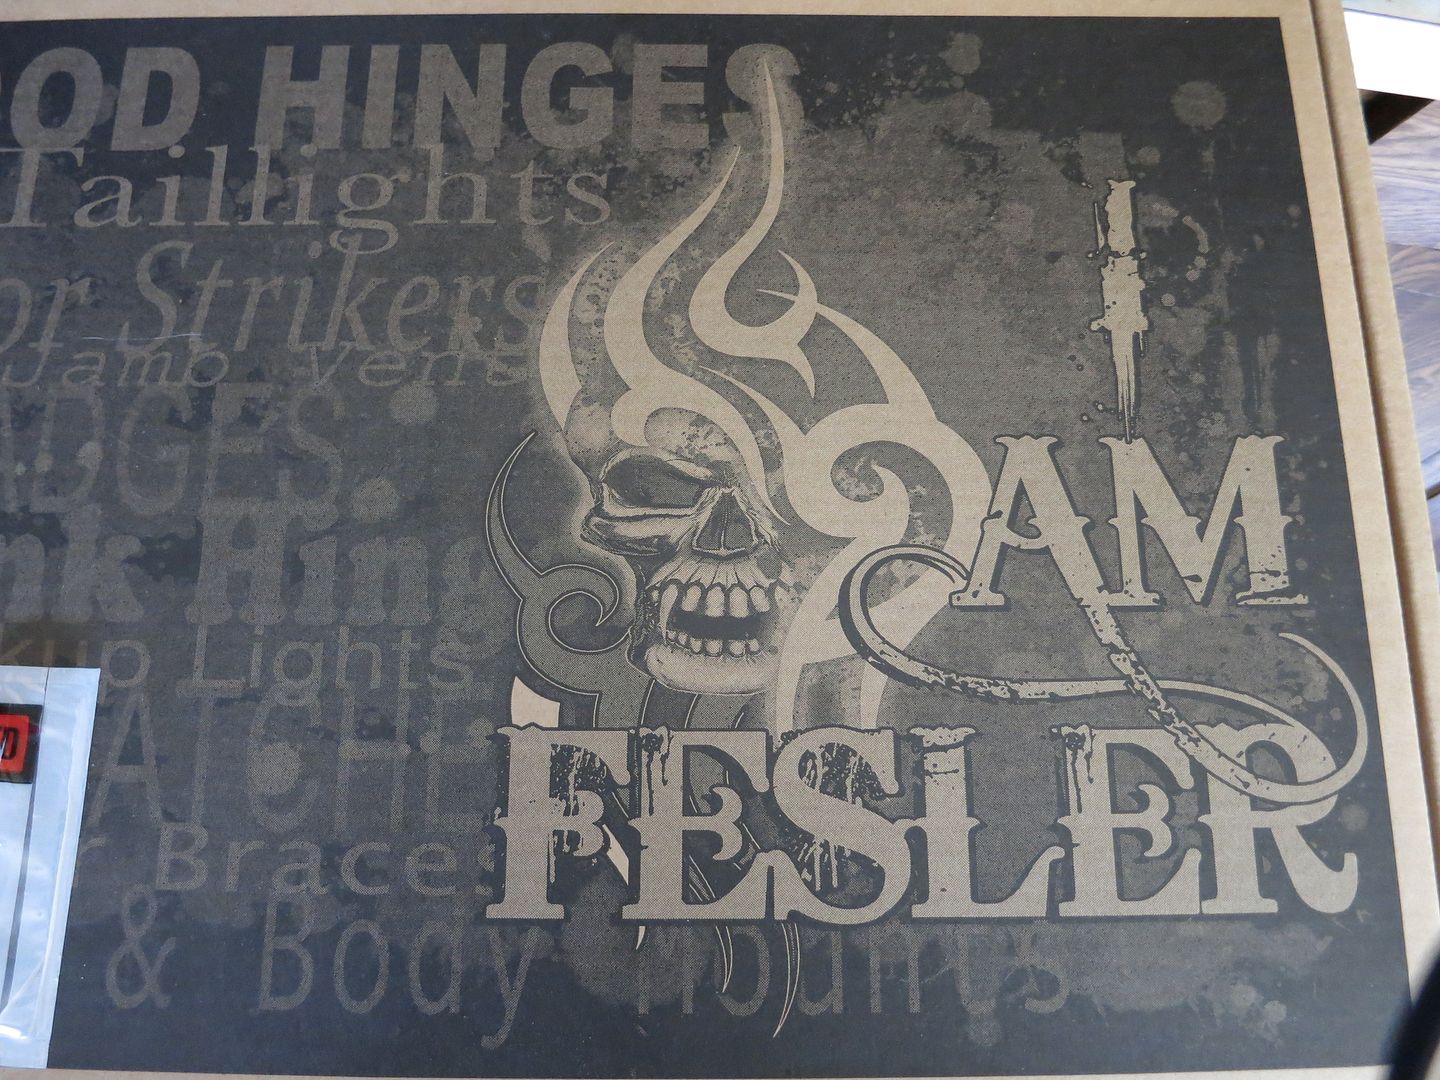
The end of February I got to spend three weeks in Phoenix on a work course. Being on expenses everyday is great. Also a great way to buy some parts. Unfortunately I wasn't able to make it to their shop as I was in course during their business hours. New trunk hinges from Fesler
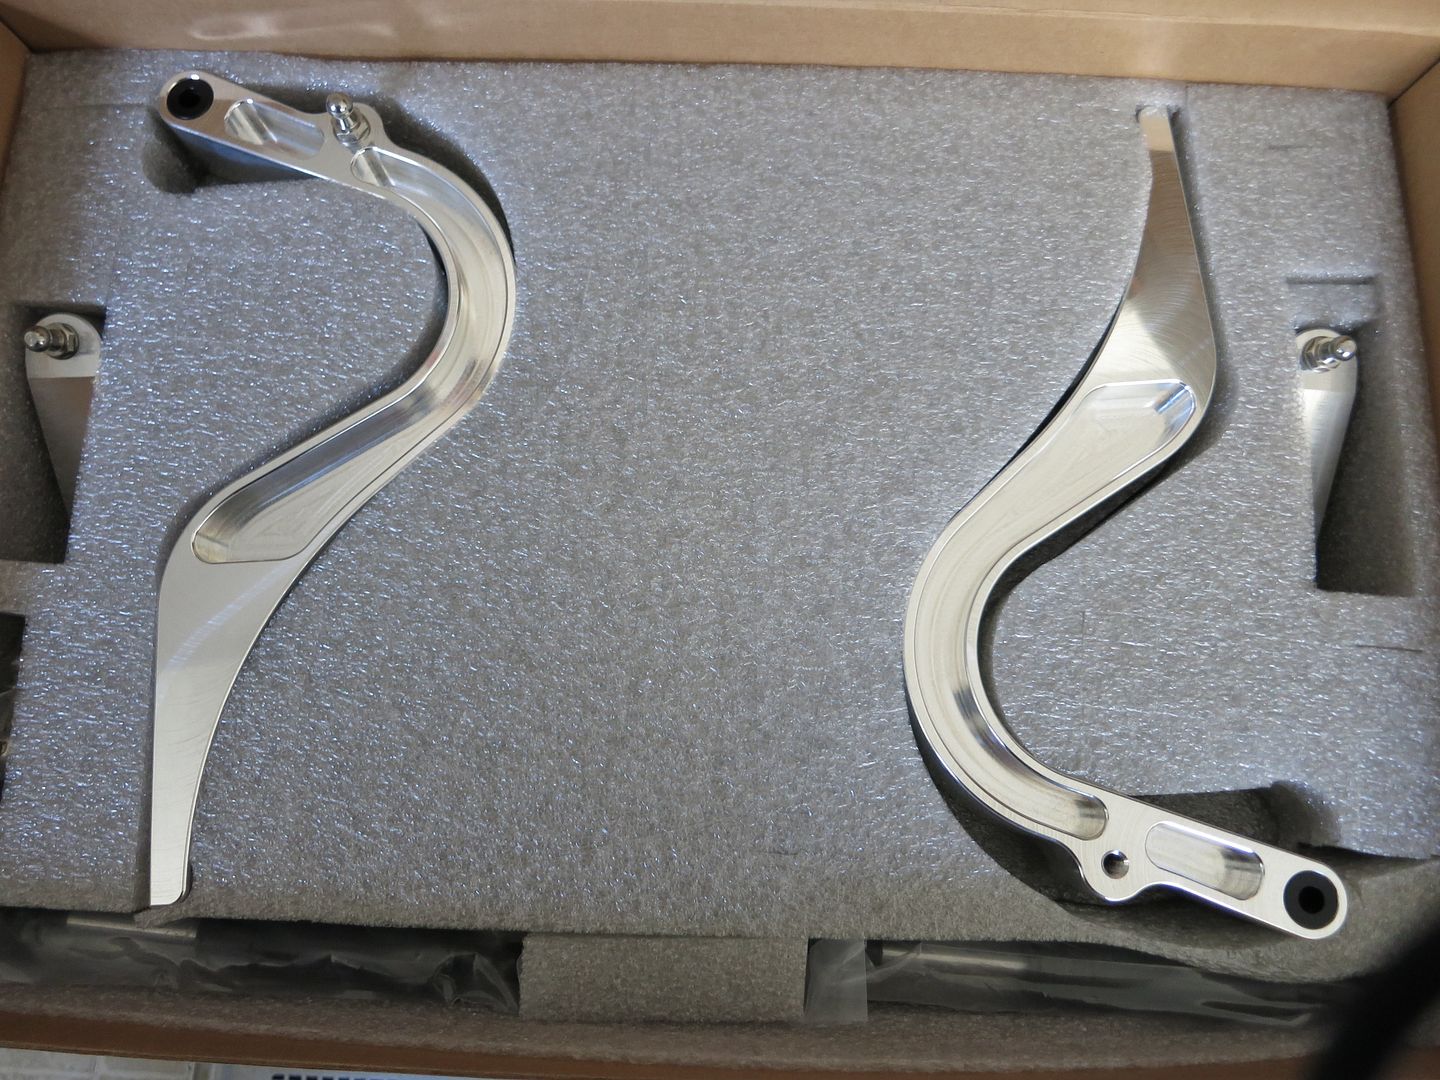

I also decided that I was done trying to find good stock hinges to rebuild. I had no problem finding passenger side ones, but I could not find driver's side ones that were not worn out alot. So I decided to buy new ones from Classic Industries (via Hot Rods and Classics in Chilliwack, BC).
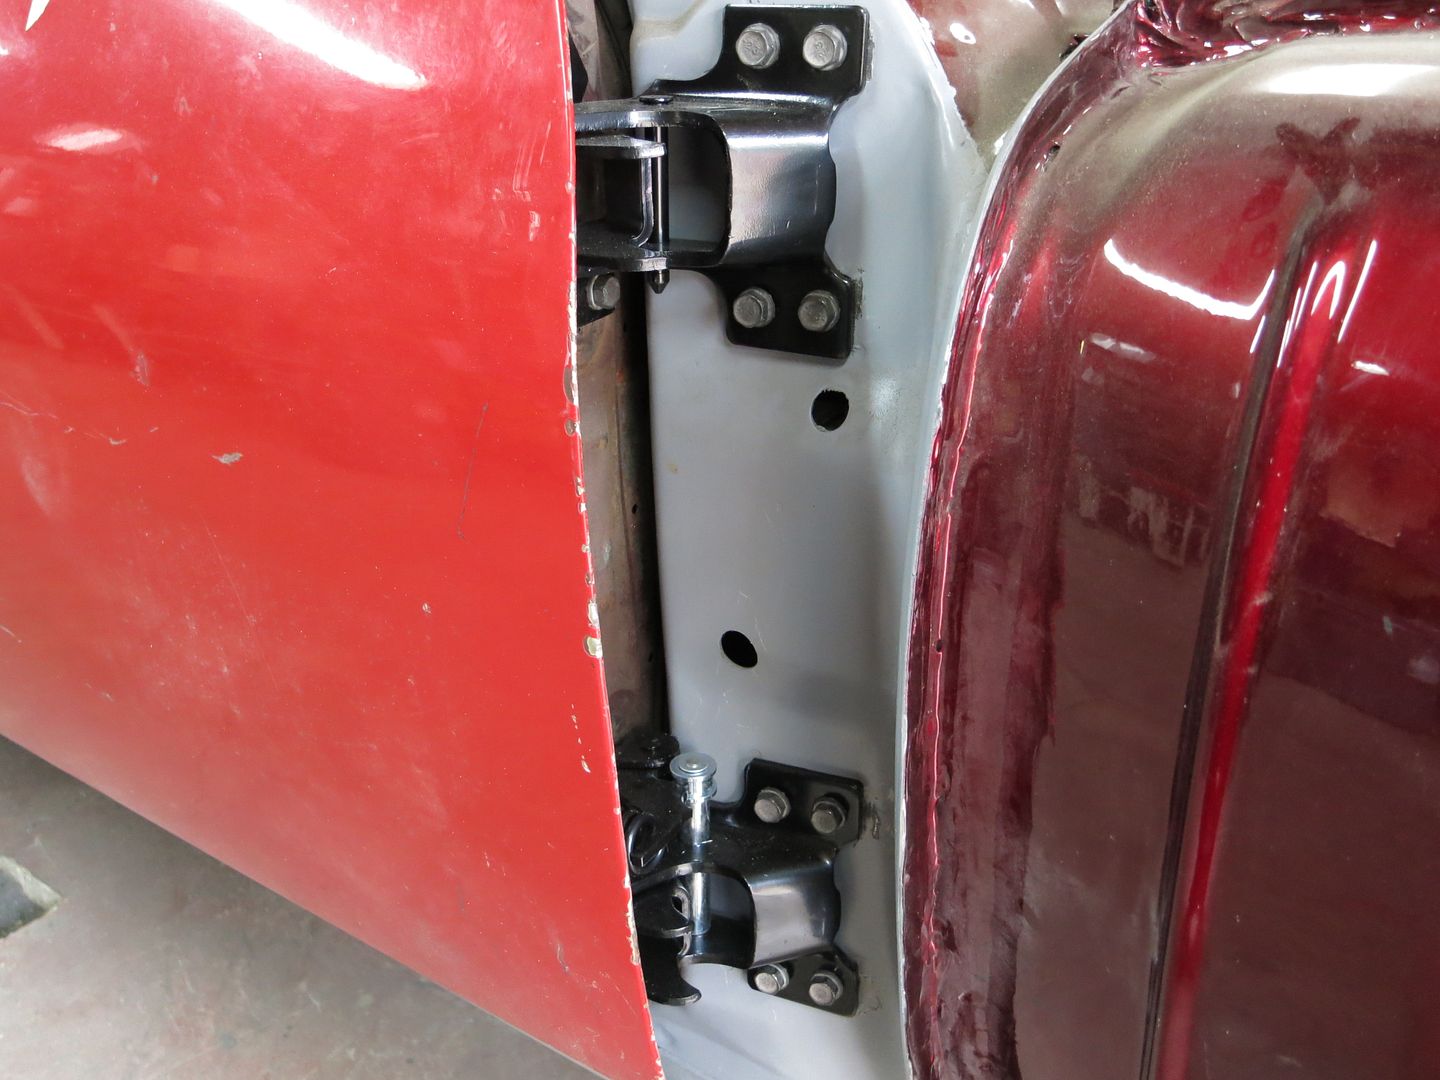
I'm still fighting trying to get the tail light panel right where I want it. Although I think I figured out one of the issues and hope to get that done soon. In the mean time, I thought I'd attack something else so I felt like I was accomplishing something.
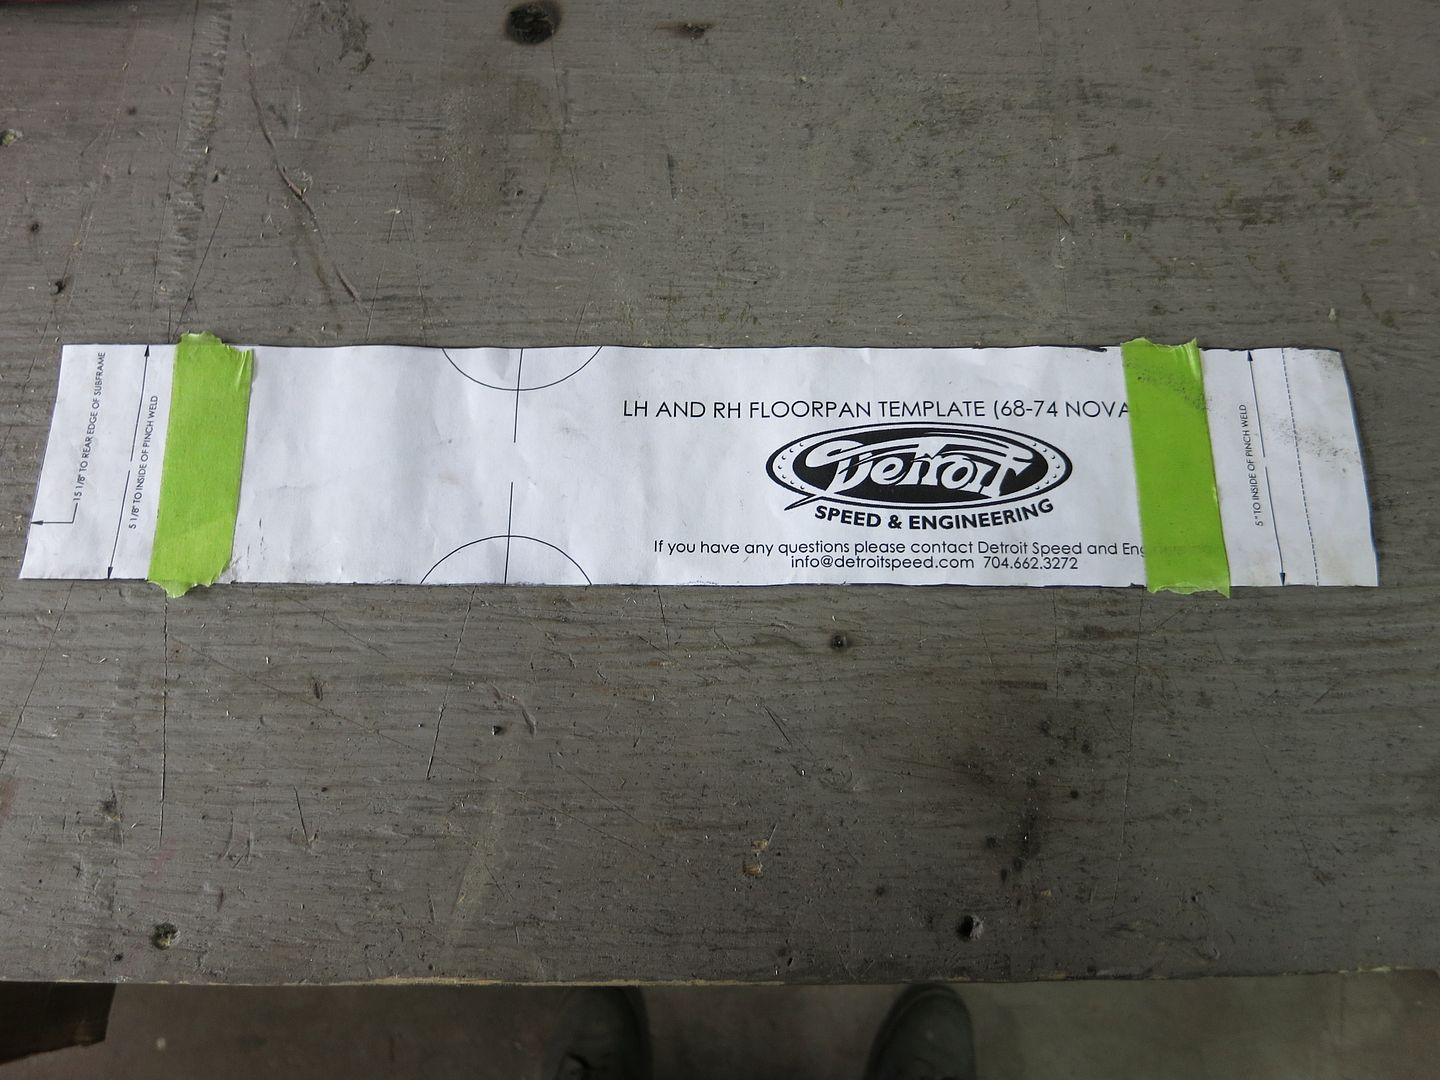
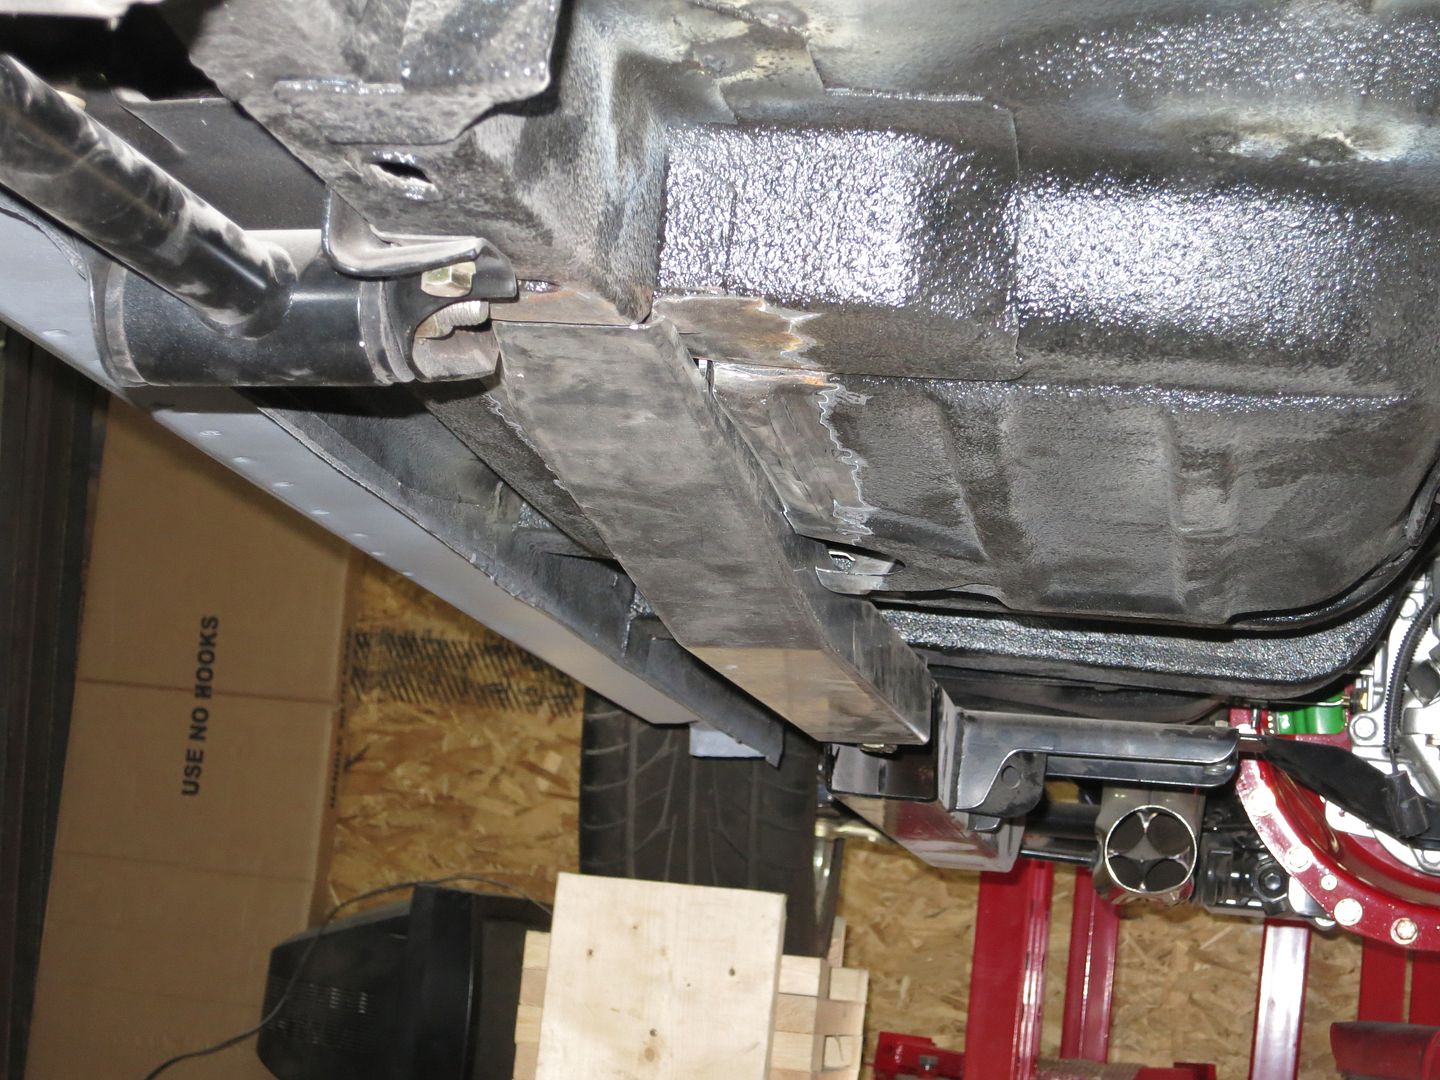
I started putting in the DSE subframe connectors. As I normally do, I thought I would take lots of pics so I could do a detailed write up. I haven't seen too many people actually show pics of the entire process. I've seen some comments that these aren't real subframe connectors. The way I look at it is there are a lot of guys out there that know a lot more than I do, or ever will, and they are running these connectors. Their cars are handling amazing and winning so they can't be all that bad
First you cut out the supplied template
Put it in place
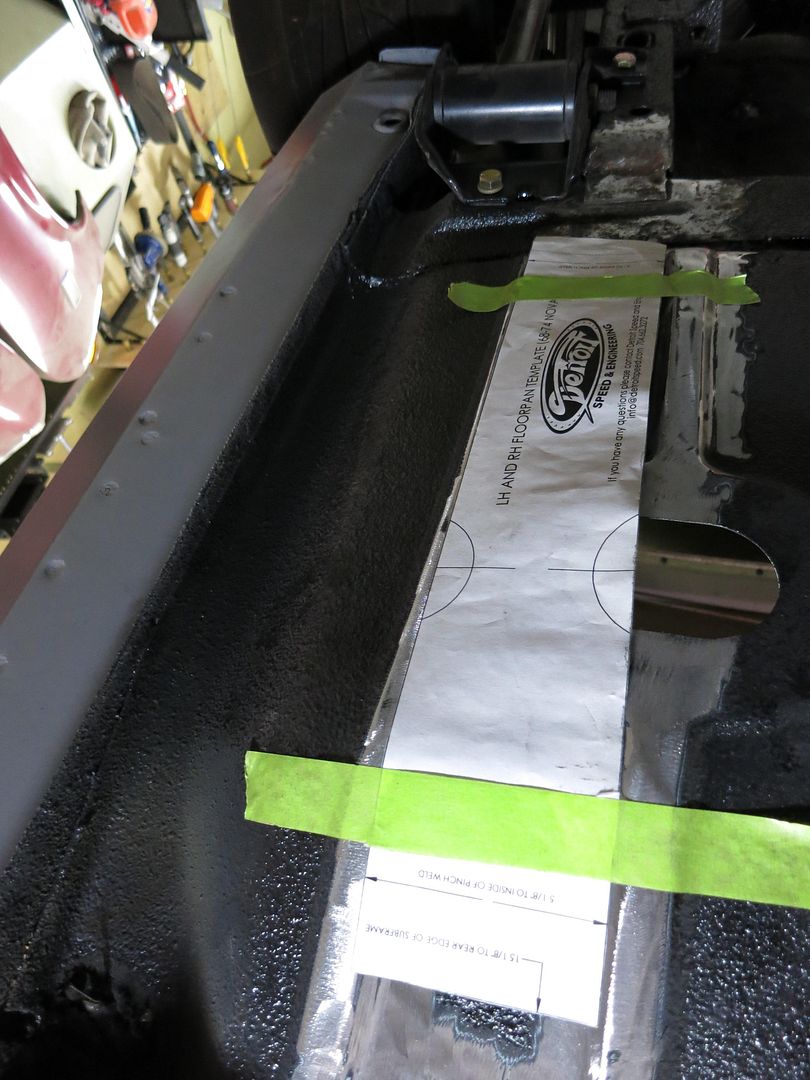
Trace the template

Cut
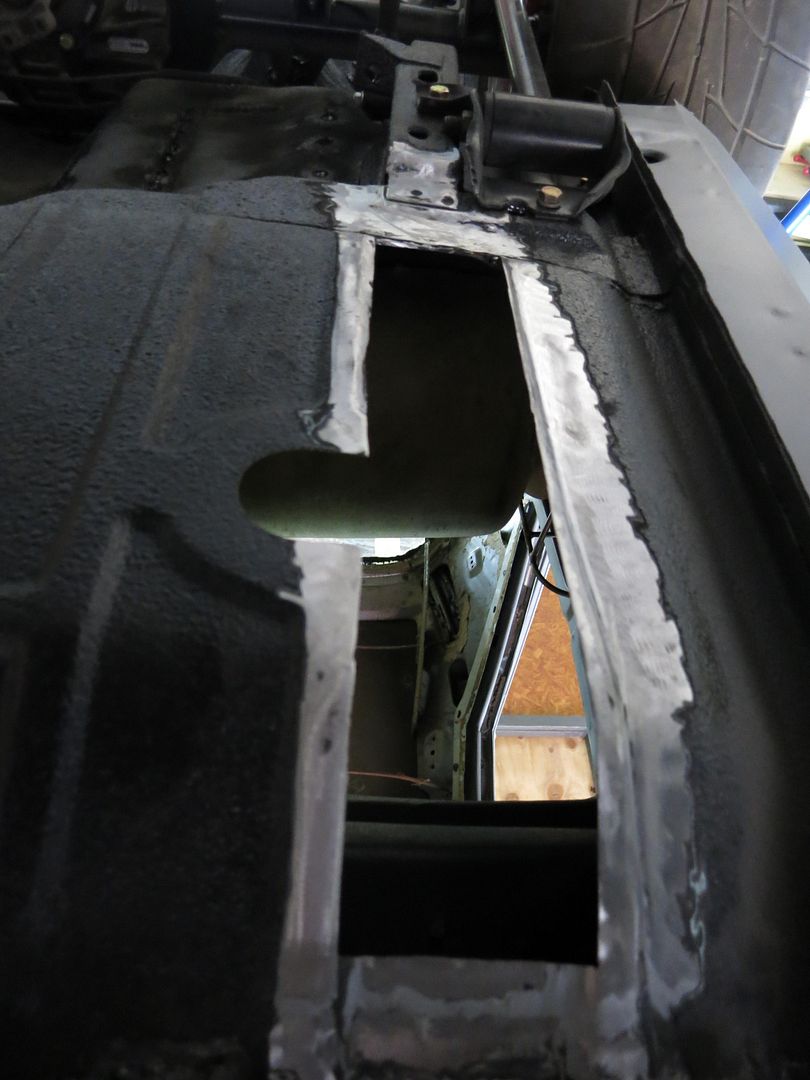
And test fit
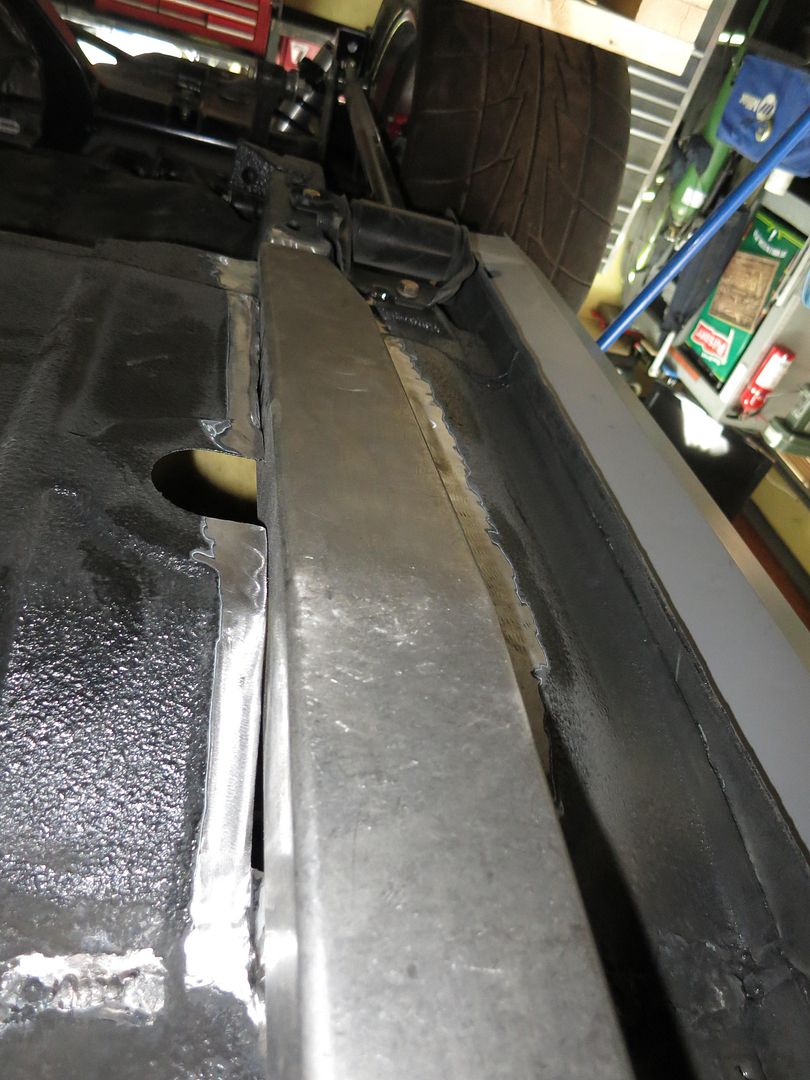
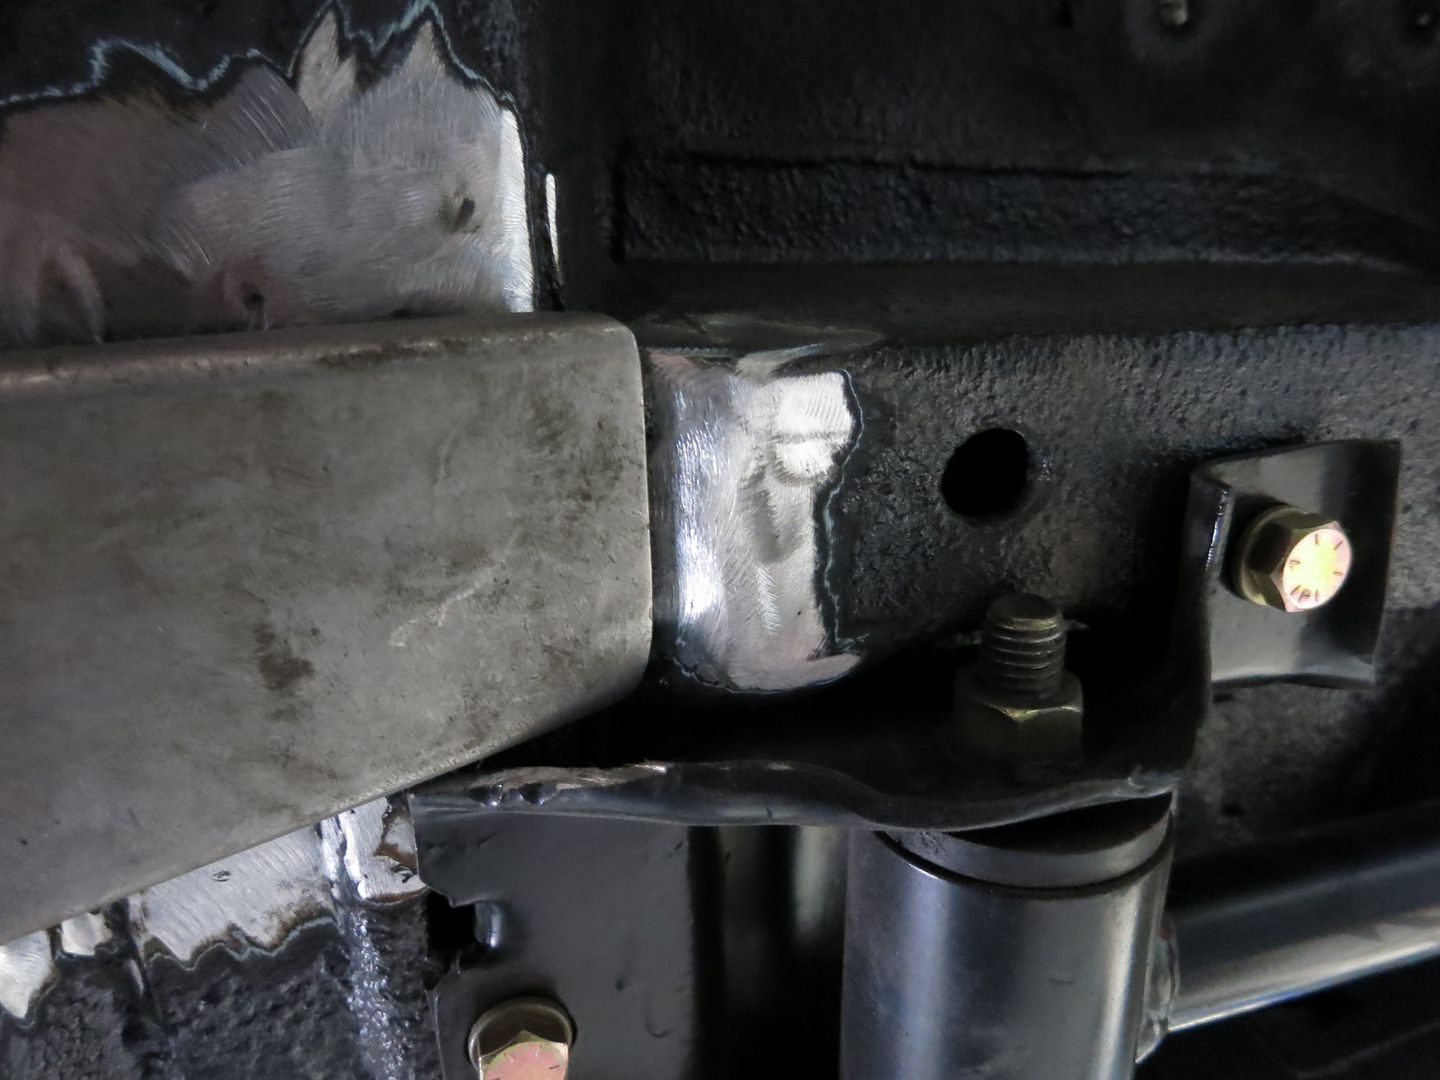
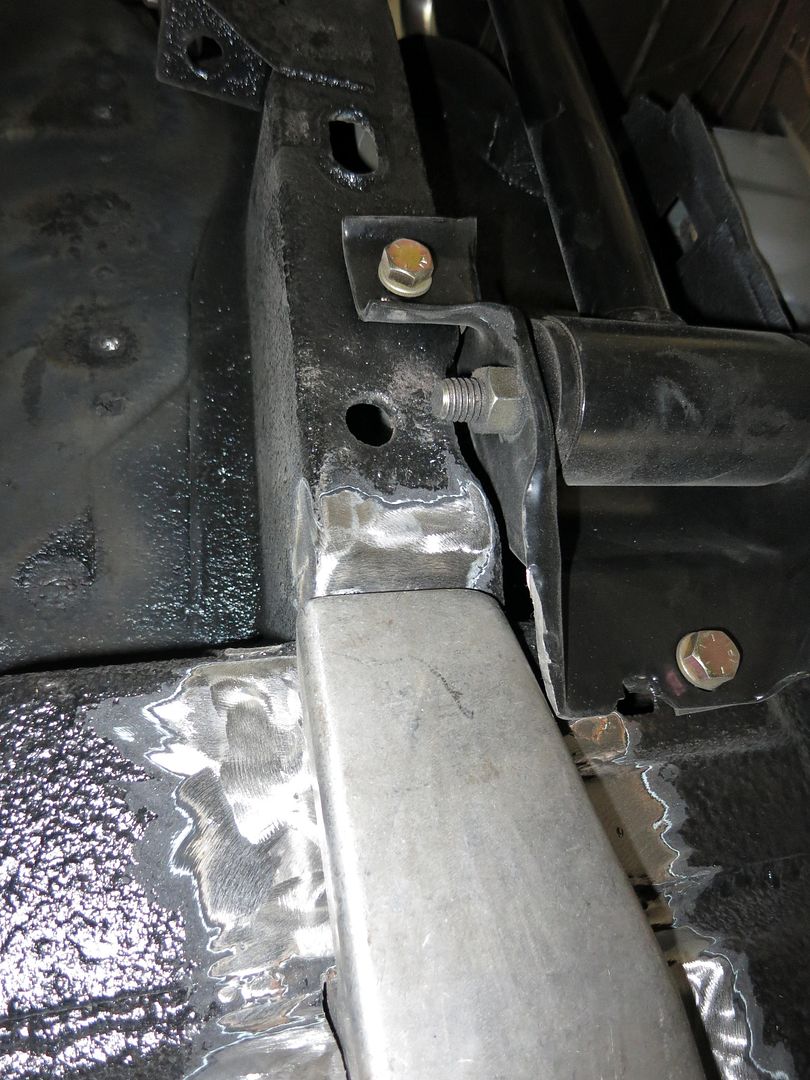
Both side mocked up

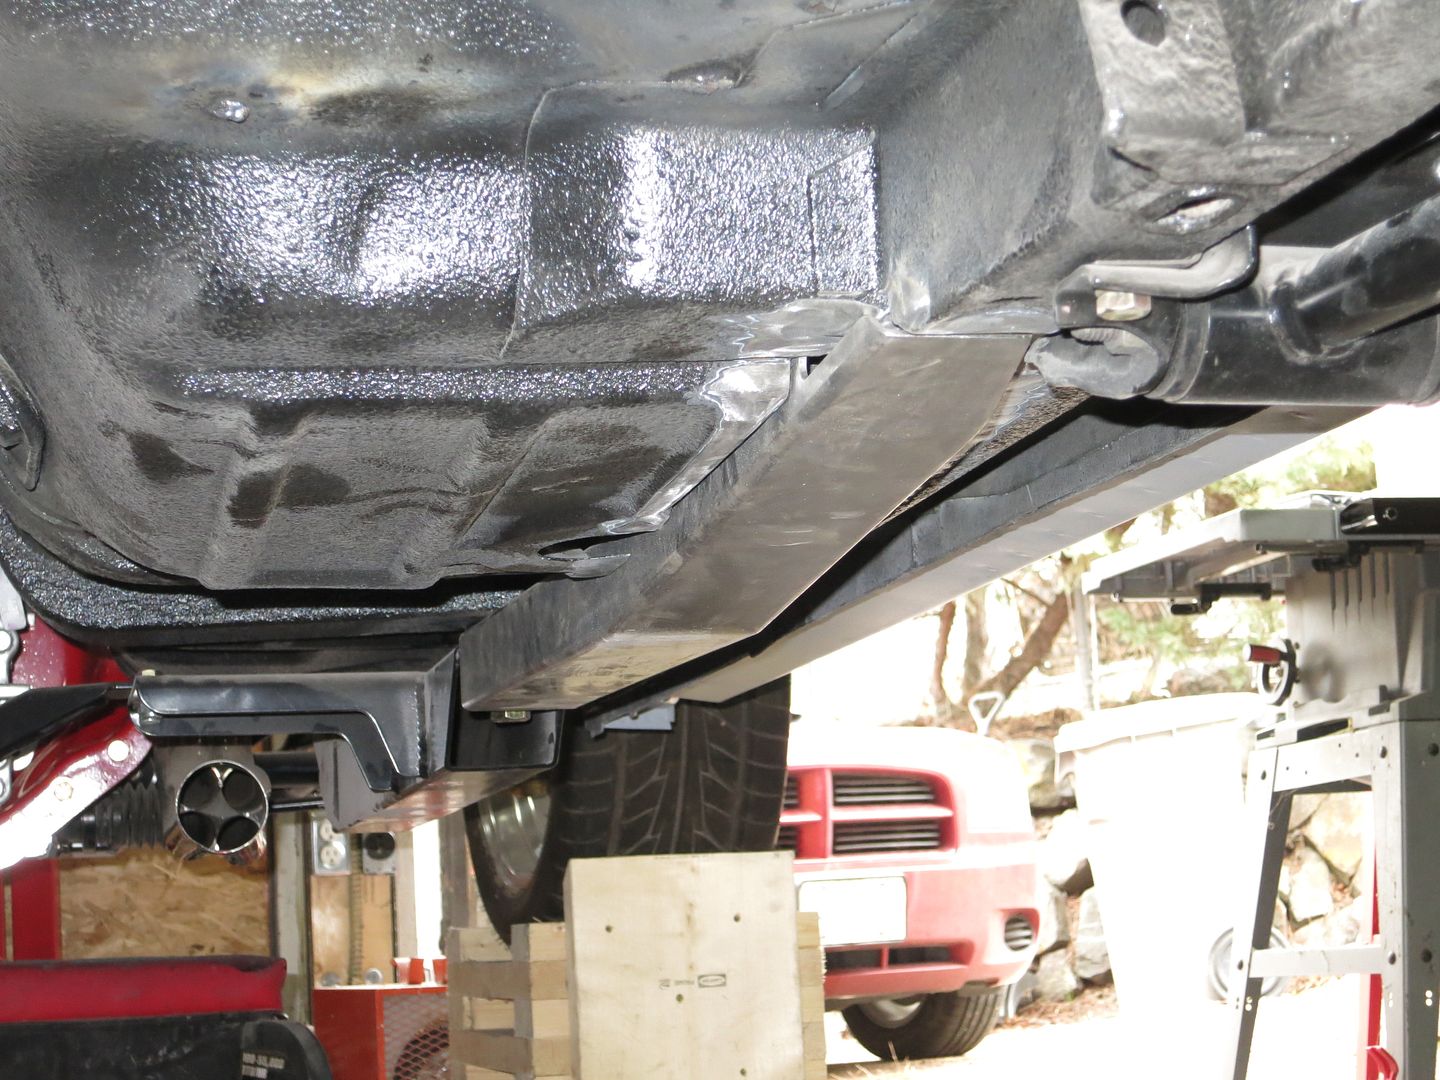
Next week I'll start welding them into place.
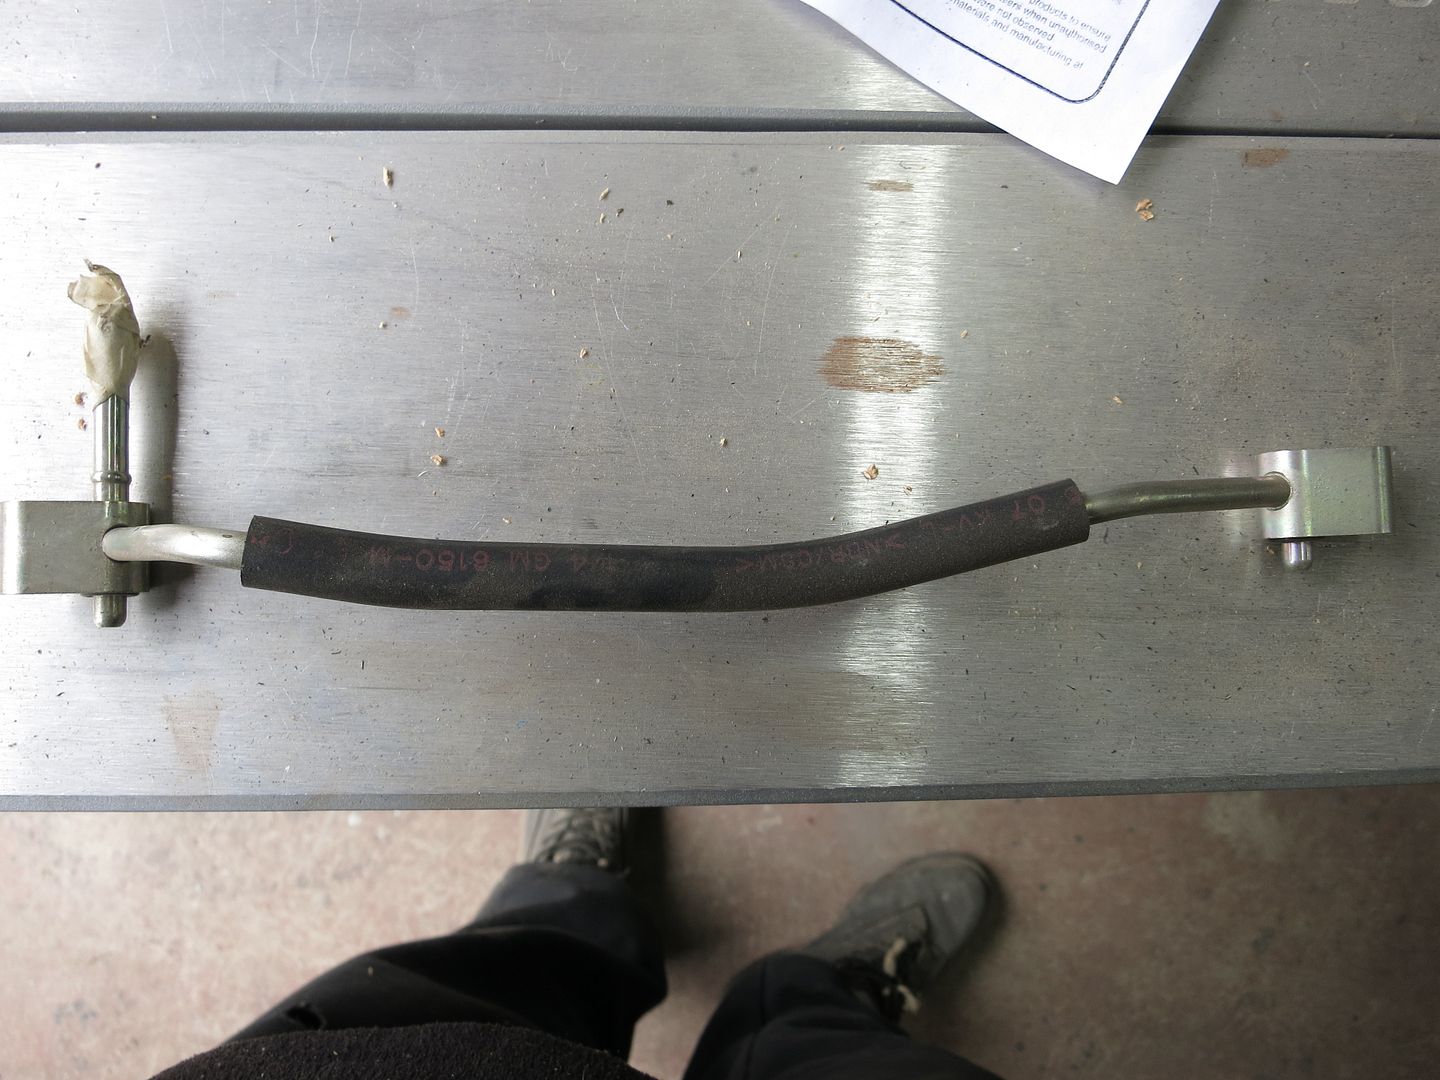
I also have a question regarding my motor. Do I need to put this back in place or can I just get some block offs. If I put it back, where does it hook up to.
Well it's been way too long with an update. I don't have much to update, but at least it's progress. Unfortunately the past winter I didn't get much at all done. Sucks when life gets in the way. The winter here was colder than normal and when it takes an hour to warm up the shop just to get it comfortable, it's hard to get motivated. Along with the weather and a few other things, didn't make it out to the shop much at all. I hope to try and play catch up now.
Last fall I bought a new rotisserie. I should have name this project Redo as it seems I keep redoing alot of it.


The end of February I got to spend three weeks in Phoenix on a work course. Being on expenses everyday is great. Also a great way to buy some parts. Unfortunately I wasn't able to make it to their shop as I was in course during their business hours. New trunk hinges from Fesler


I also decided that I was done trying to find good stock hinges to rebuild. I had no problem finding passenger side ones, but I could not find driver's side ones that were not worn out alot. So I decided to buy new ones from Classic Industries (via Hot Rods and Classics in Chilliwack, BC).

I'm still fighting trying to get the tail light panel right where I want it. Although I think I figured out one of the issues and hope to get that done soon. In the mean time, I thought I'd attack something else so I felt like I was accomplishing something.
I started putting in the DSE subframe connectors. As I normally do, I thought I would take lots of pics so I could do a detailed write up. I haven't seen too many people actually show pics of the entire process. I've seen some comments that these aren't real subframe connectors. The way I look at it is there are a lot of guys out there that know a lot more than I do, or ever will, and they are running these connectors. Their cars are handling amazing and winning so they can't be all that bad
First you cut out the supplied template

Put it in place

Trace the template

Cut

And test fit


Both side mocked up


Next week I'll start welding them into place.
I also have a question regarding my motor. Do I need to put this back in place or can I just get some block offs. If I put it back, where does it hook up to.
