
1973 RS Camaro LSX Swap
 11-28-2010, 06:18 PM
#201

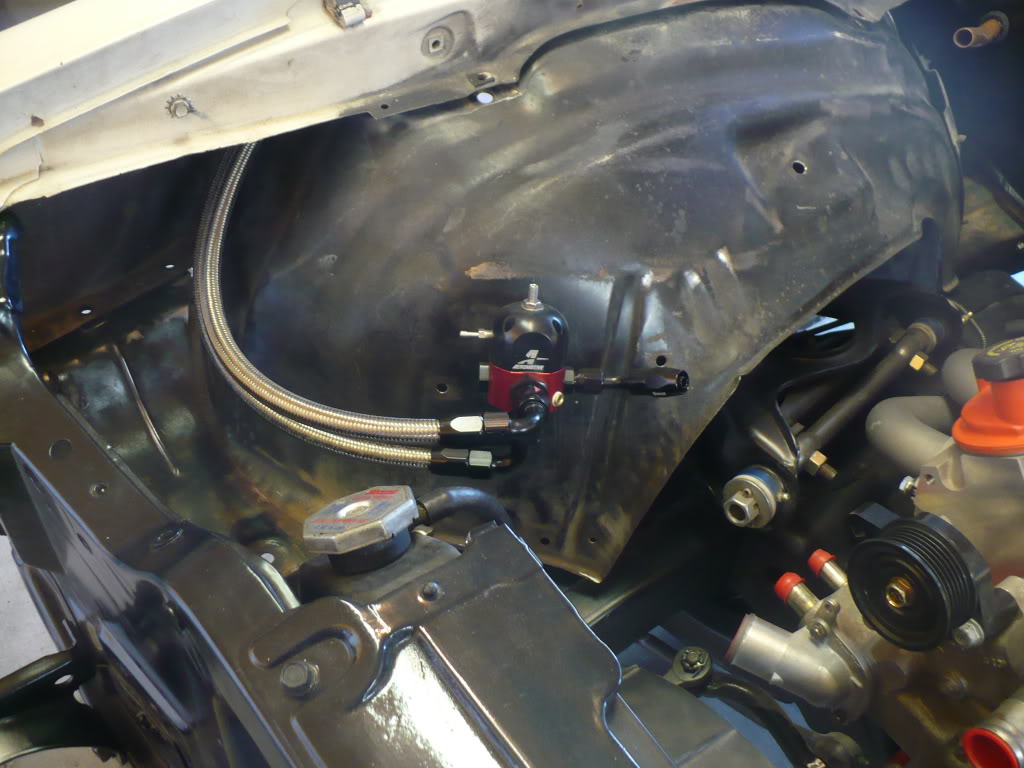
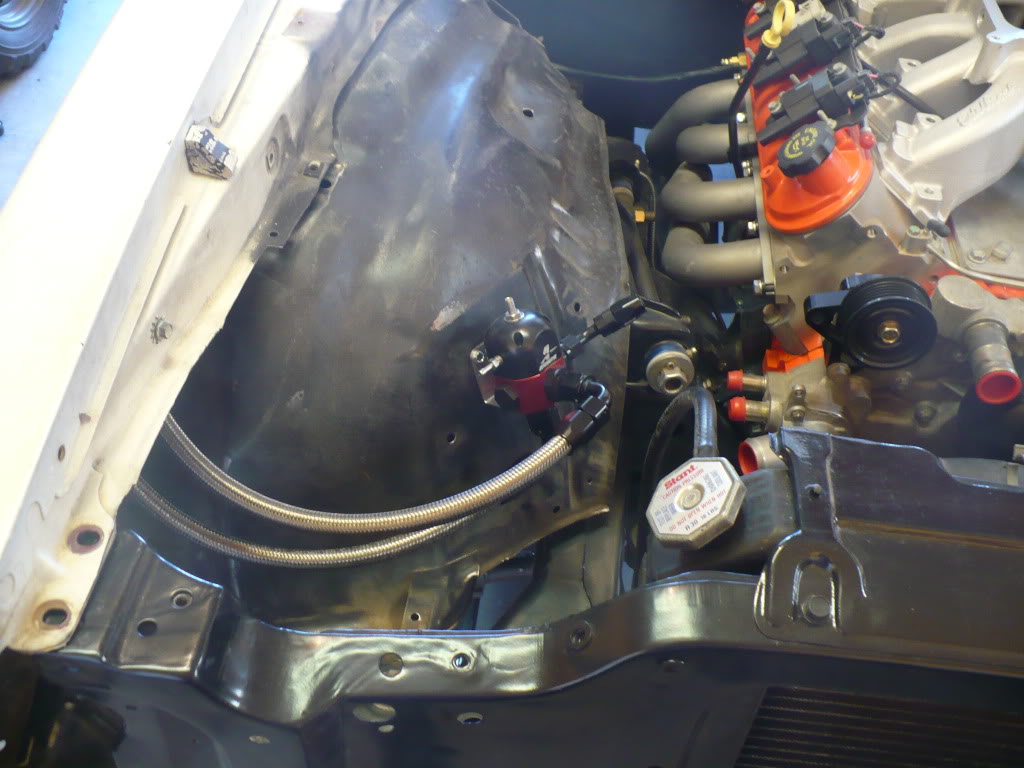
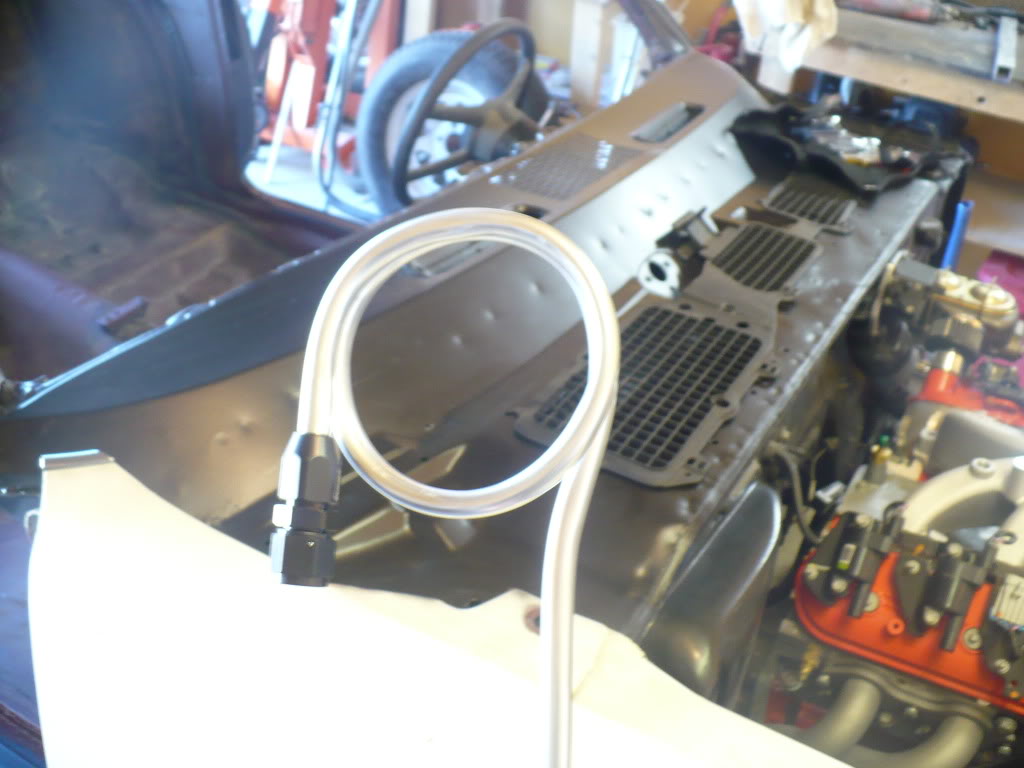
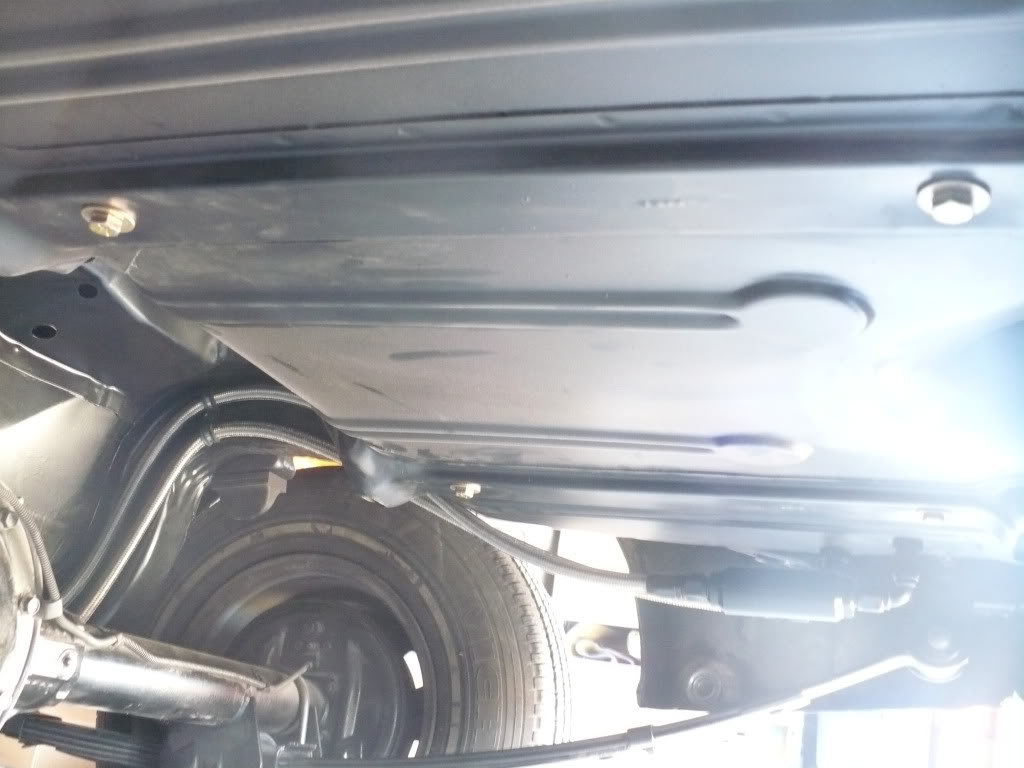
I got a little more done today. I finished off the rest (what I can for now) of my fuel system. Basically, I just finished what I started yesterday by building and routing my return line and I also built the hard vent line for my fuel cell. I didn’t take any more undercar pics, but here’s both lines running to the regulator with the fender set in place and the vent line.
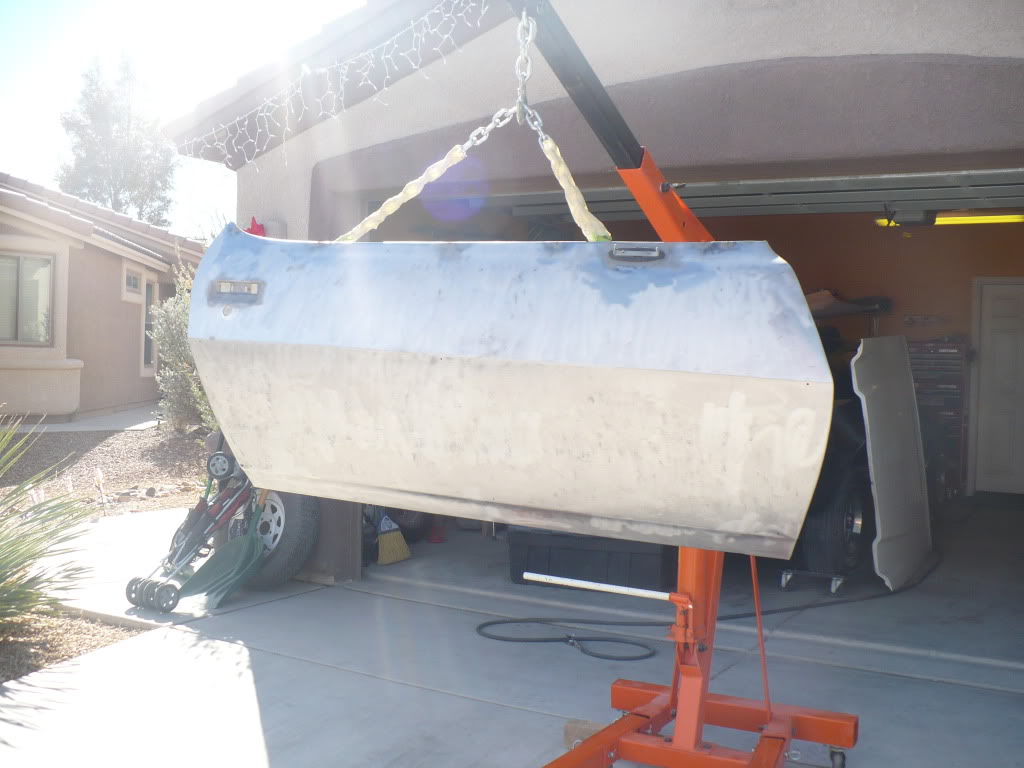
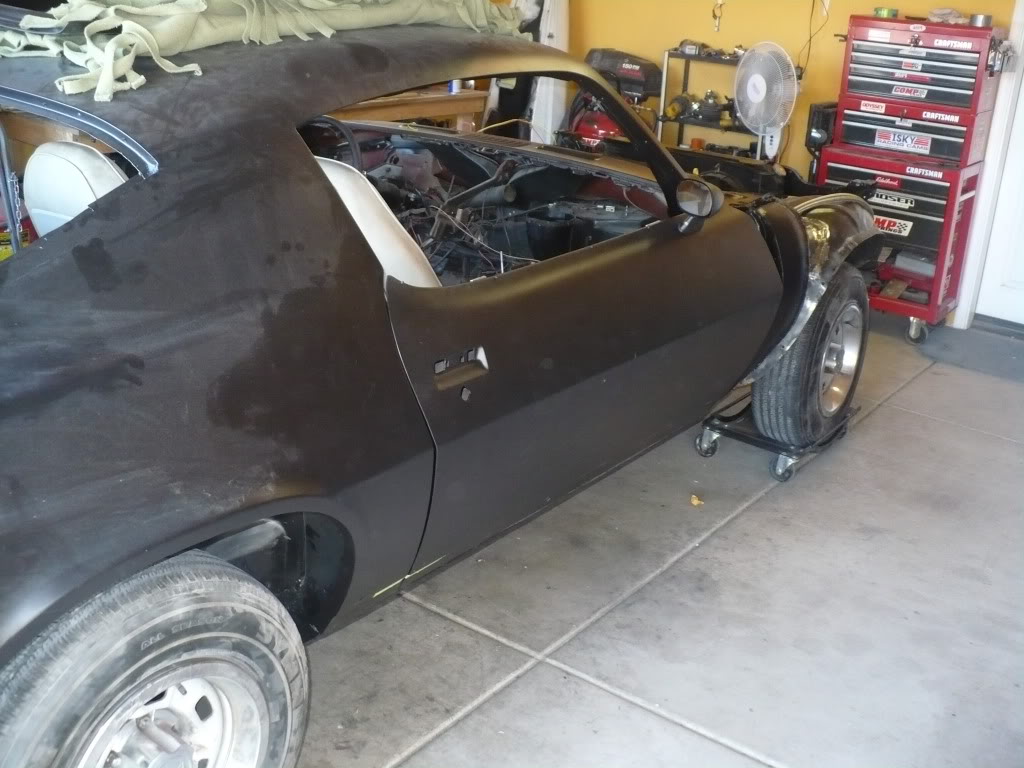
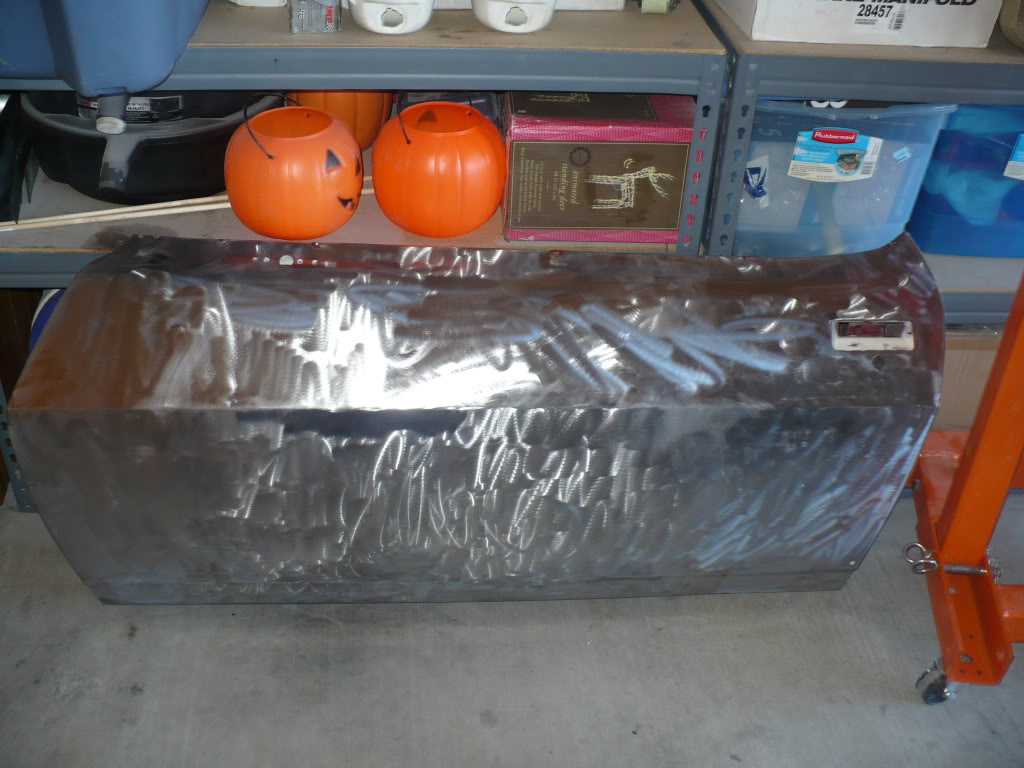
Since I was done for now with my fuel system work (aka the fun stuff), I decided it was time to get back to the bodywork part of this build. The doors are going to be the next things to be stripped, prepped and primed so I pulled out the passenger door and got to stripping.
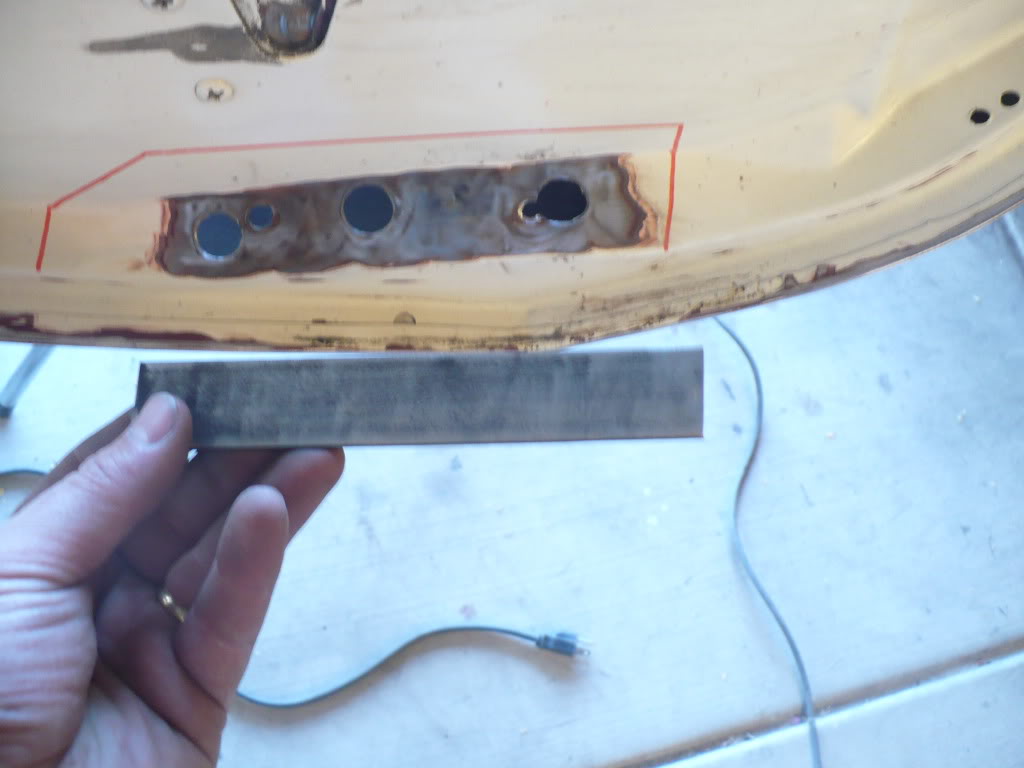
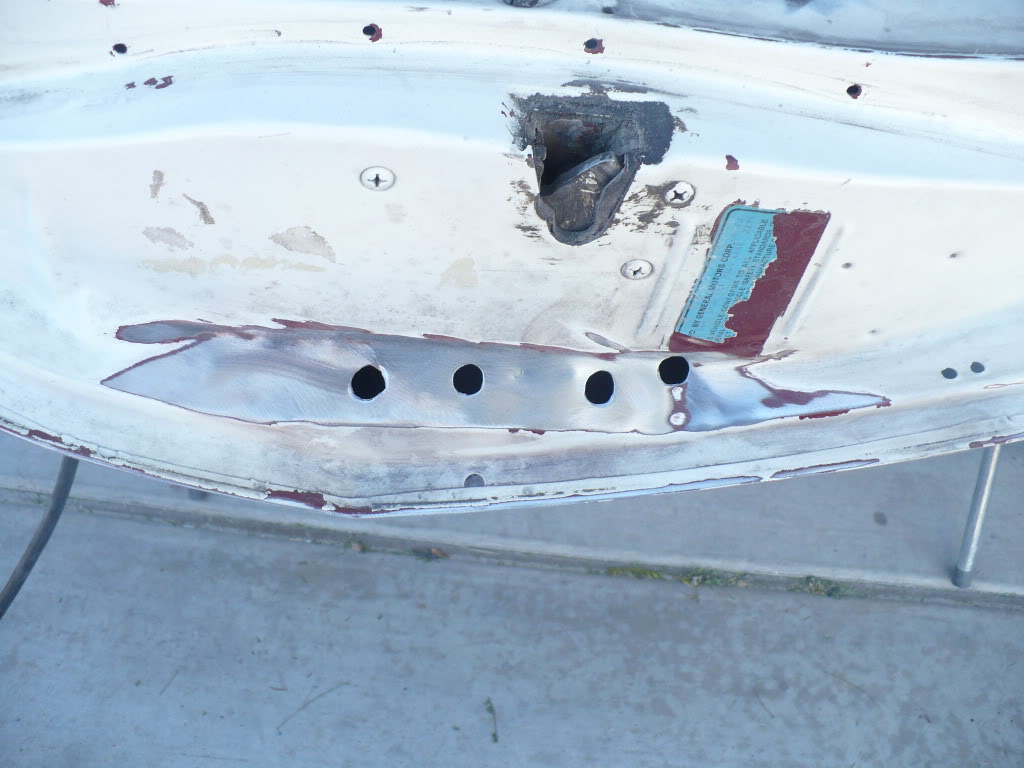
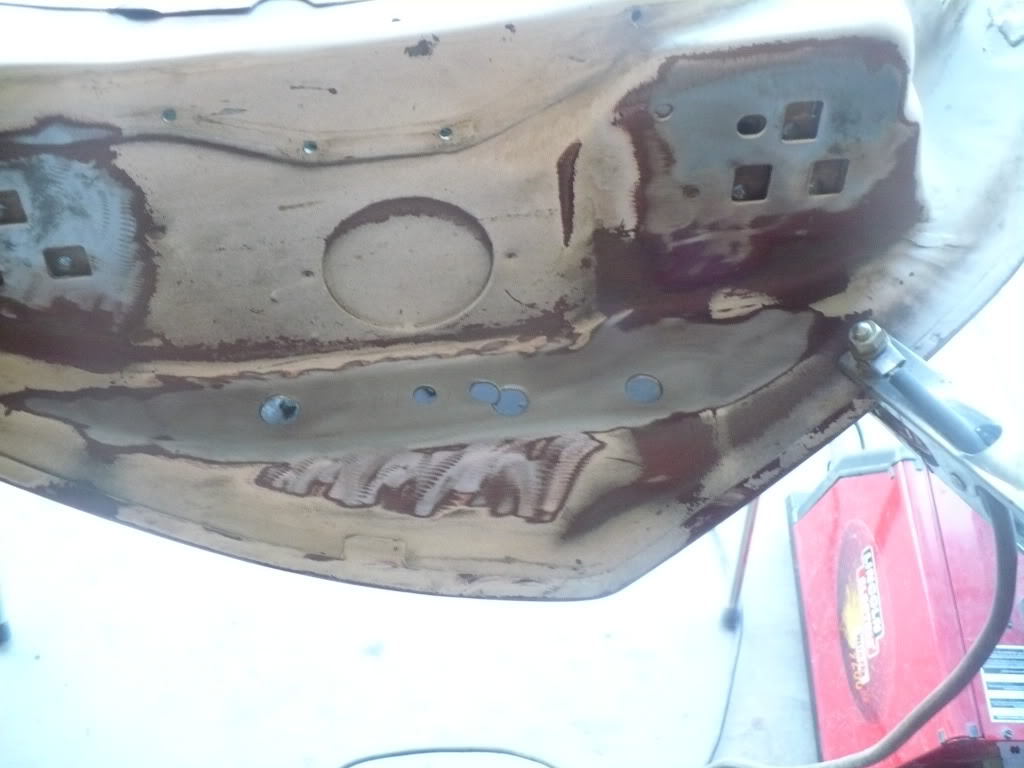
I only got the outer skin stripped before I wore out my only stripping disk. So, I decided to move on to closing off the holes left after drilling the spot welds for the crash bars. Here are the holes left in the hinge end of the door.
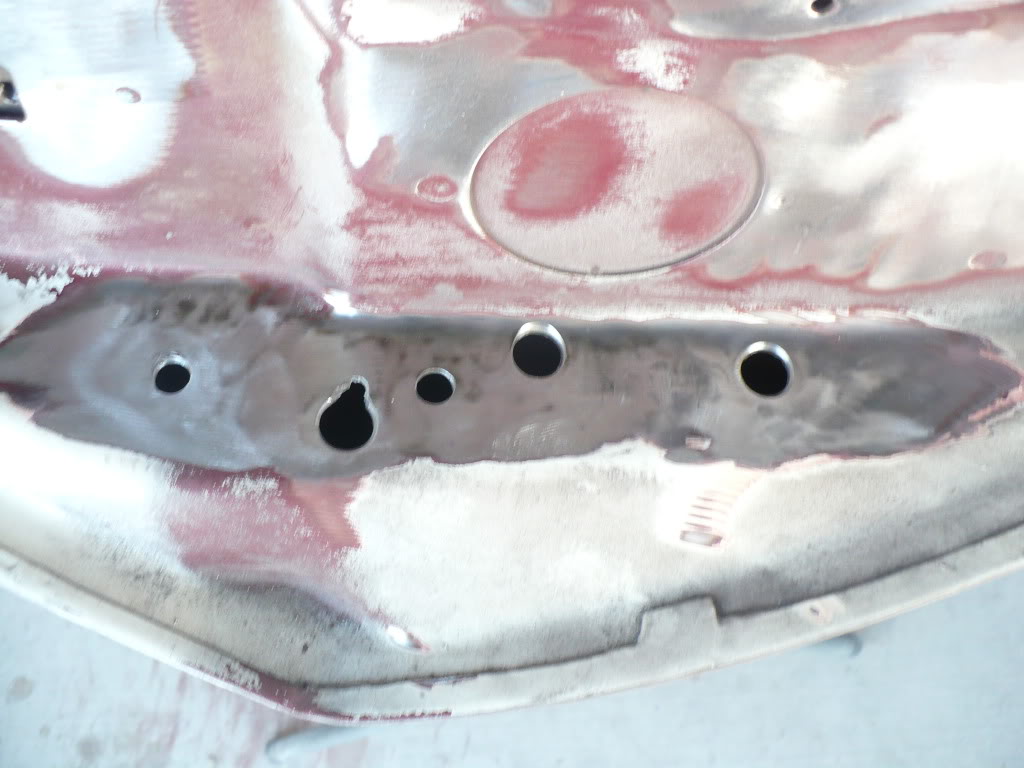
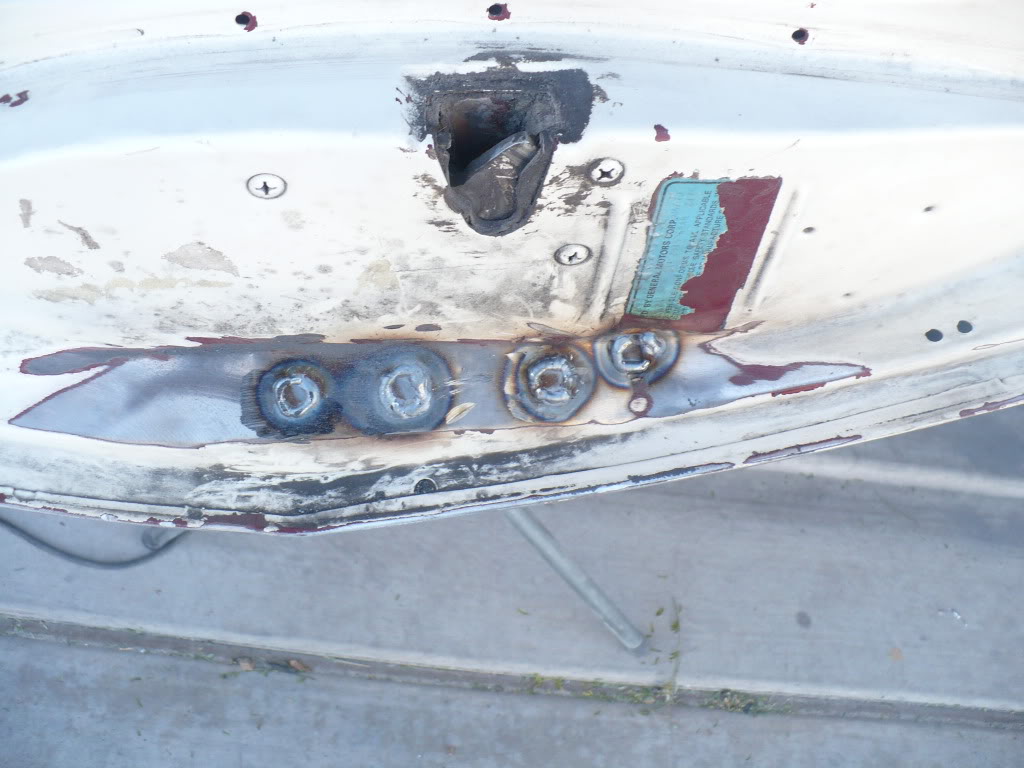
I decided the best way to close them off would be to put a similar sized bolt in the hole, tack it in place, cut it off and weld around it.
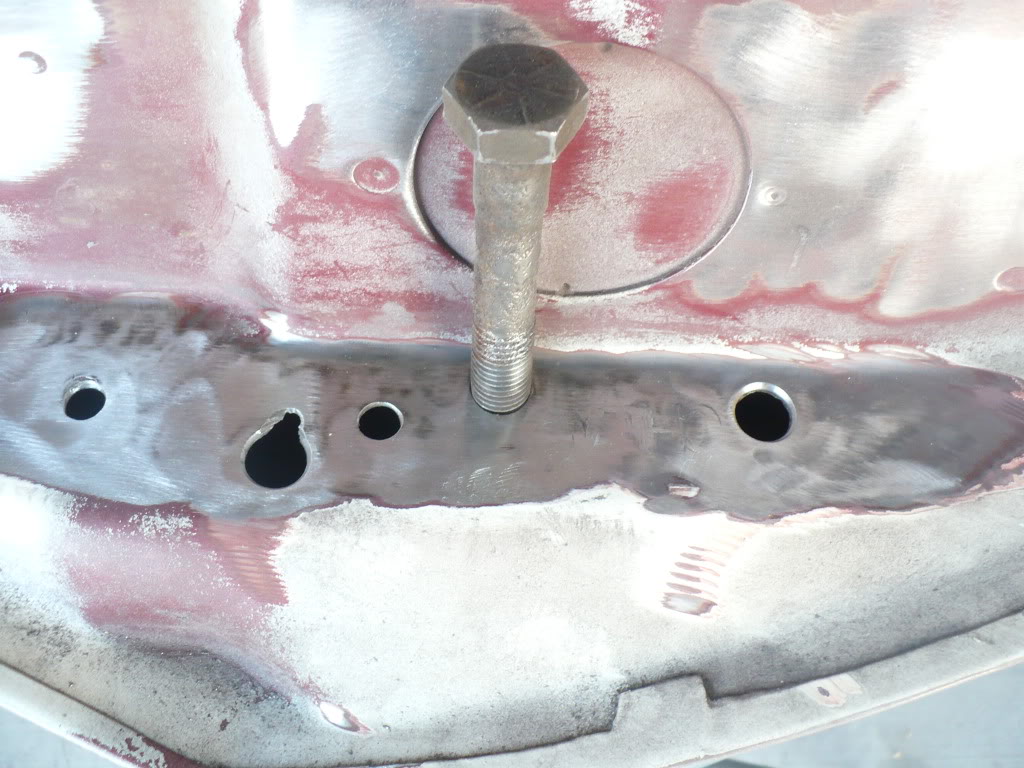
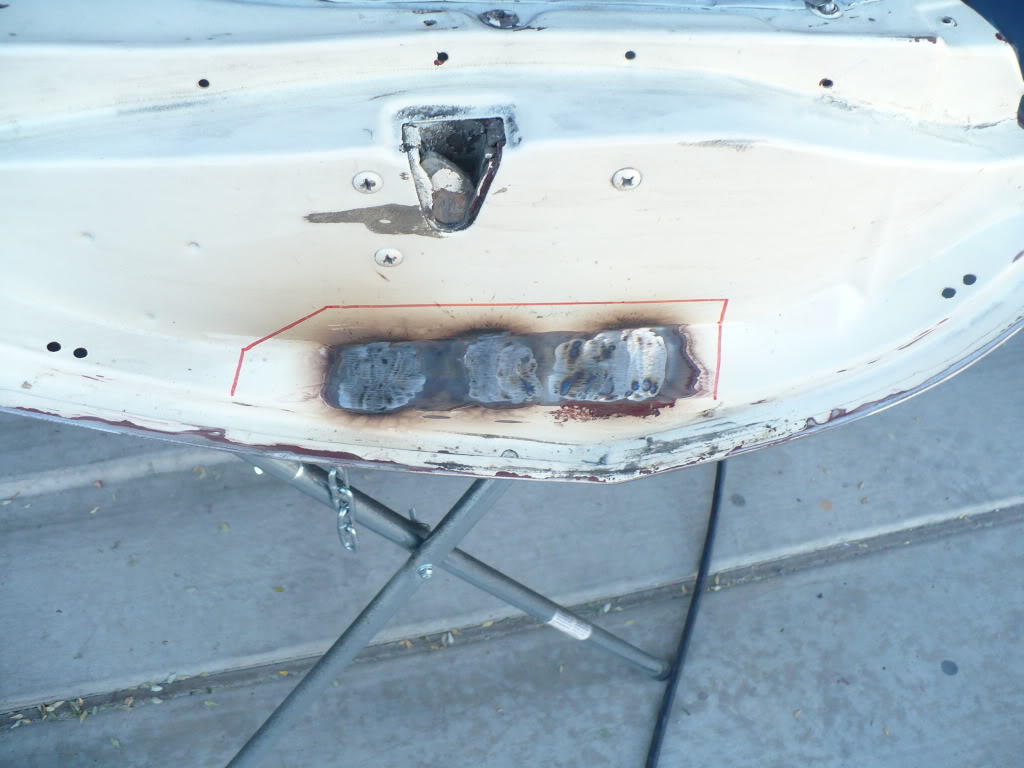
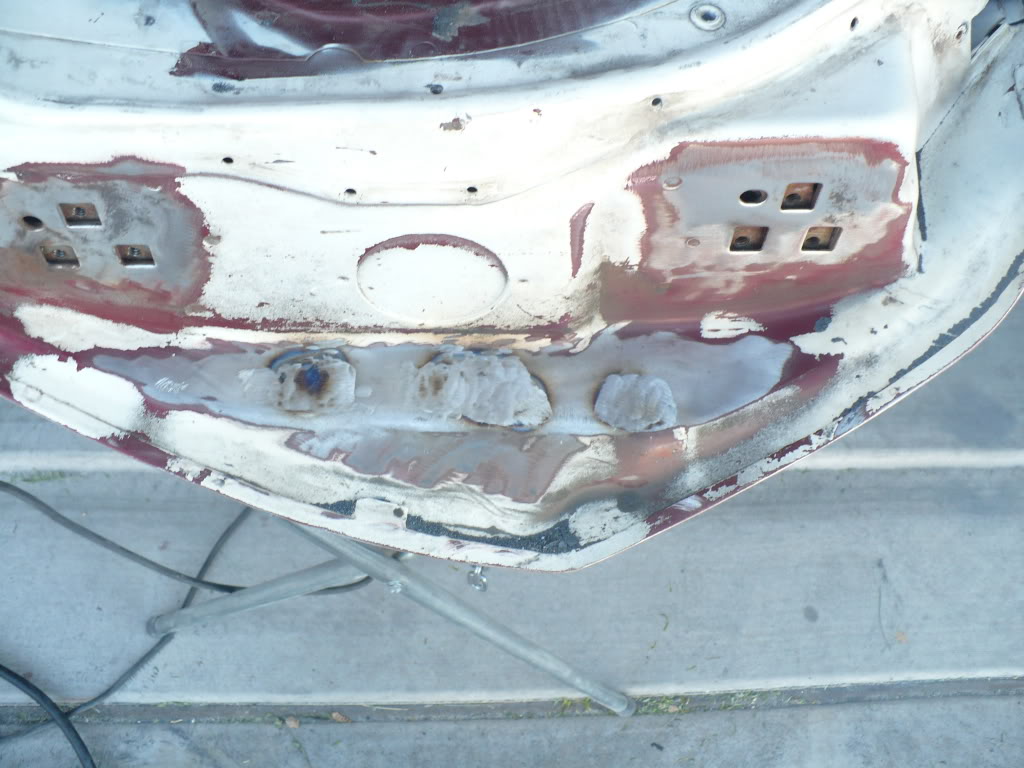
Here’s the result after they were all closed off and ground down.
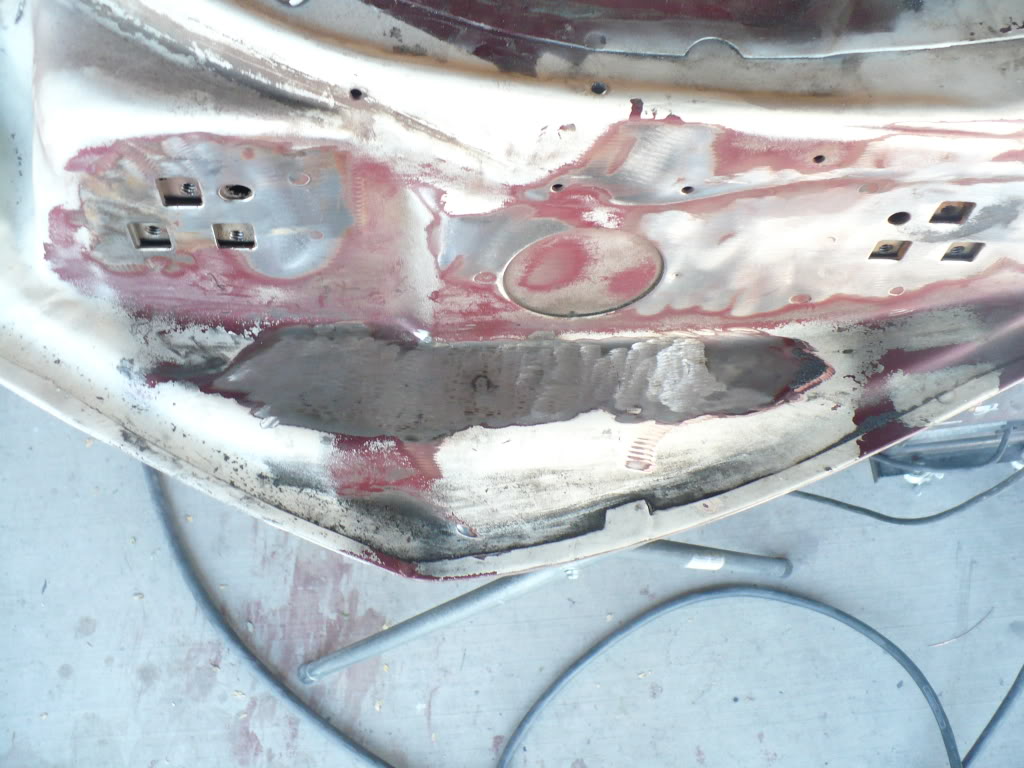
The holes on the rear of the door were a little bigger.
Since I didn’t have anything large enough to completely fill these holes, I decided to use this thin piece of flat bar inside the door (behind the holes). I tacked it into place and then filled the holes up to the level of the rest of the sheet metal.
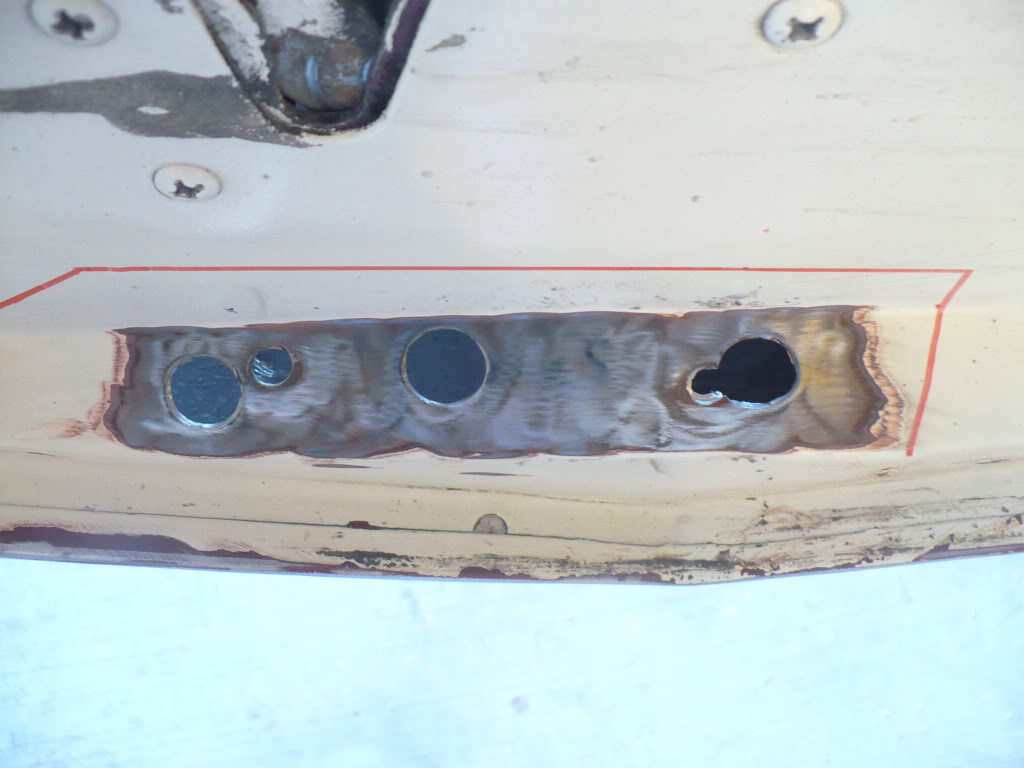
And here’s how this end looked after everything was ground down.
There’s still a lot of work to do on this door before it’s ready for primer, but it’s at least a little more progress than I had planned on making this weekend.
Since I was done for now with my fuel system work (aka the fun stuff), I decided it was time to get back to the bodywork part of this build. The doors are going to be the next things to be stripped, prepped and primed so I pulled out the passenger door and got to stripping.
I only got the outer skin stripped before I wore out my only stripping disk. So, I decided to move on to closing off the holes left after drilling the spot welds for the crash bars. Here are the holes left in the hinge end of the door.
I decided the best way to close them off would be to put a similar sized bolt in the hole, tack it in place, cut it off and weld around it.
Here’s the result after they were all closed off and ground down.
The holes on the rear of the door were a little bigger.
Since I didn’t have anything large enough to completely fill these holes, I decided to use this thin piece of flat bar inside the door (behind the holes). I tacked it into place and then filled the holes up to the level of the rest of the sheet metal.
And here’s how this end looked after everything was ground down.
There’s still a lot of work to do on this door before it’s ready for primer, but it’s at least a little more progress than I had planned on making this weekend.

 11-29-2010, 05:48 PM
#204


Gary,
Same-o Same-o ( looks great ) lol.
Same-o Same-o ( looks great ) lol.
12-01-2010, 05:10 PM
#207
Thanks man. Yeah, I'm definately not a fan of the body repairs either, but it's something I wanted to at least try, and I'm glad I did. Again, it will help me better appreaciate the money I have to part with to have the rest of it done professionally. I would love nothing more than to be able to say "I built the whole car" when I'm done, but I'll be just as satisfied with saying "I did everything but the bodywork and paint!"
 12-01-2010, 07:20 PM
#209
Thanks Charlie! I can't wait to see it done too! I've got it pictured in my mind, but there's nothing like actually seeing it all come together. The car will be a street/strip car so it'll be wearing Weld Pro Stars; 3.5inch up front and either 8's or 10's out back.
Last edited by GC99TA; 12-01-2010 at 07:43 PM.
12-01-2010, 07:49 PM
#211
Thanks man, and yeah I know the deal with the northern cars. I was born and raised in NW Pennsylvania. You can barely find a solid 10 year old car if it has seen winter driving, let alone a nearly 40 year old one. I've been wanting to pick up an early 2nd Gen RS for a long time, but I waited to get stationed out here in AZ before I finally pulled the trigger. Funny thing is, I was out here less than a month before I did!
12-05-2010, 05:41 PM
#212
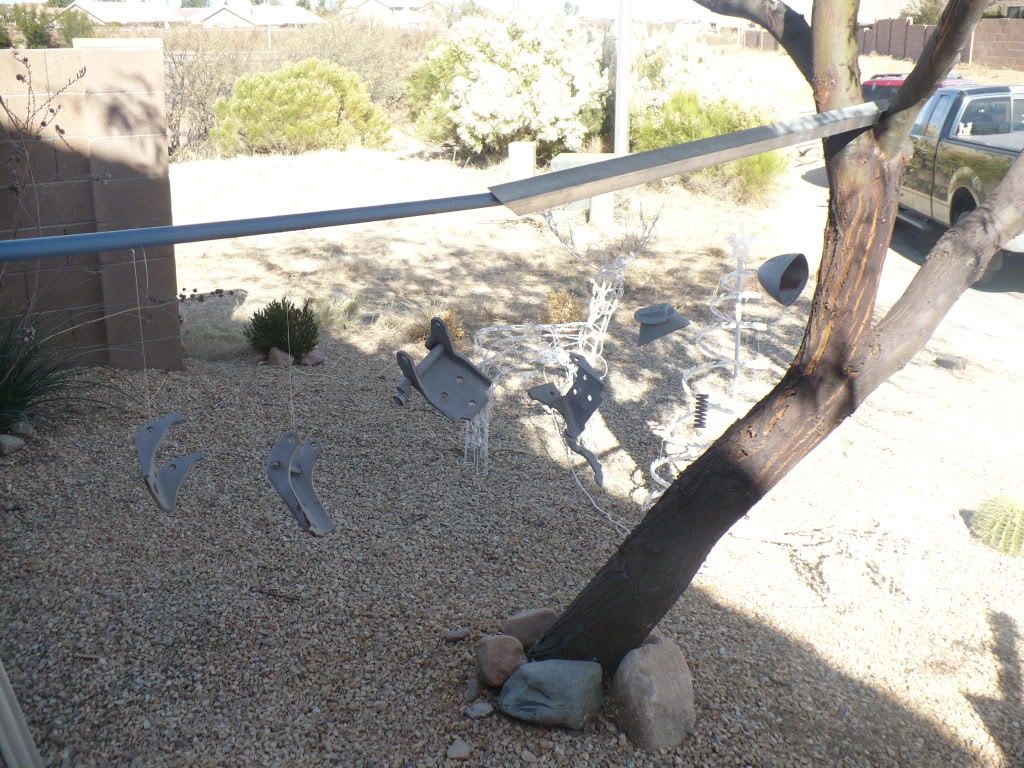
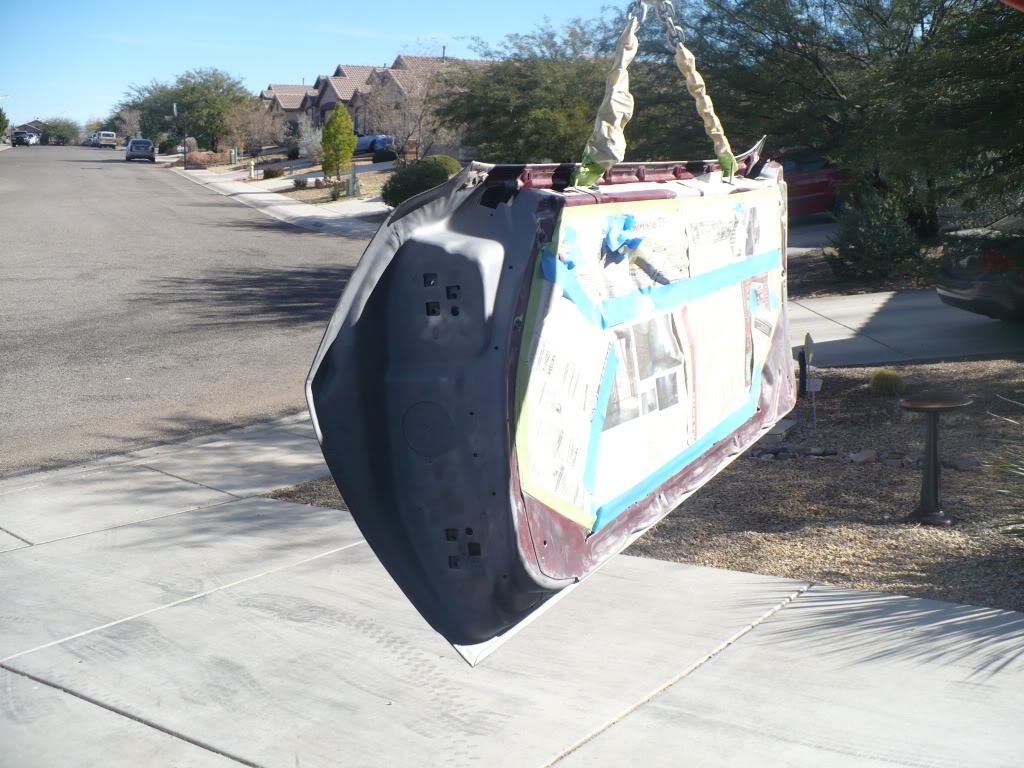
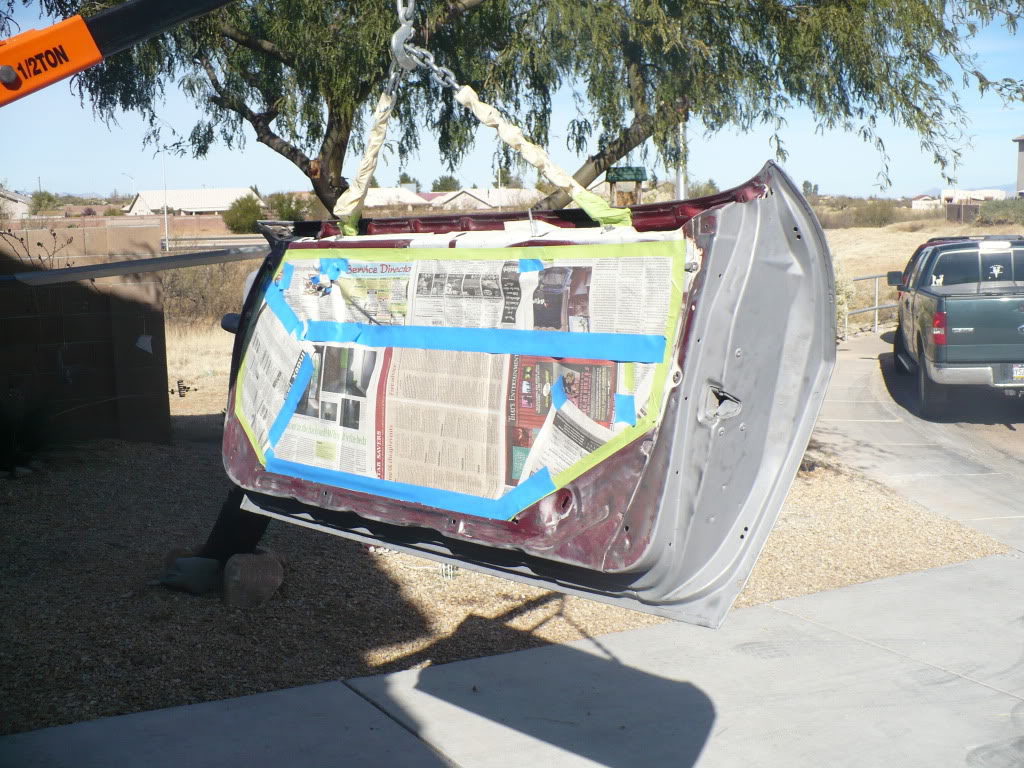
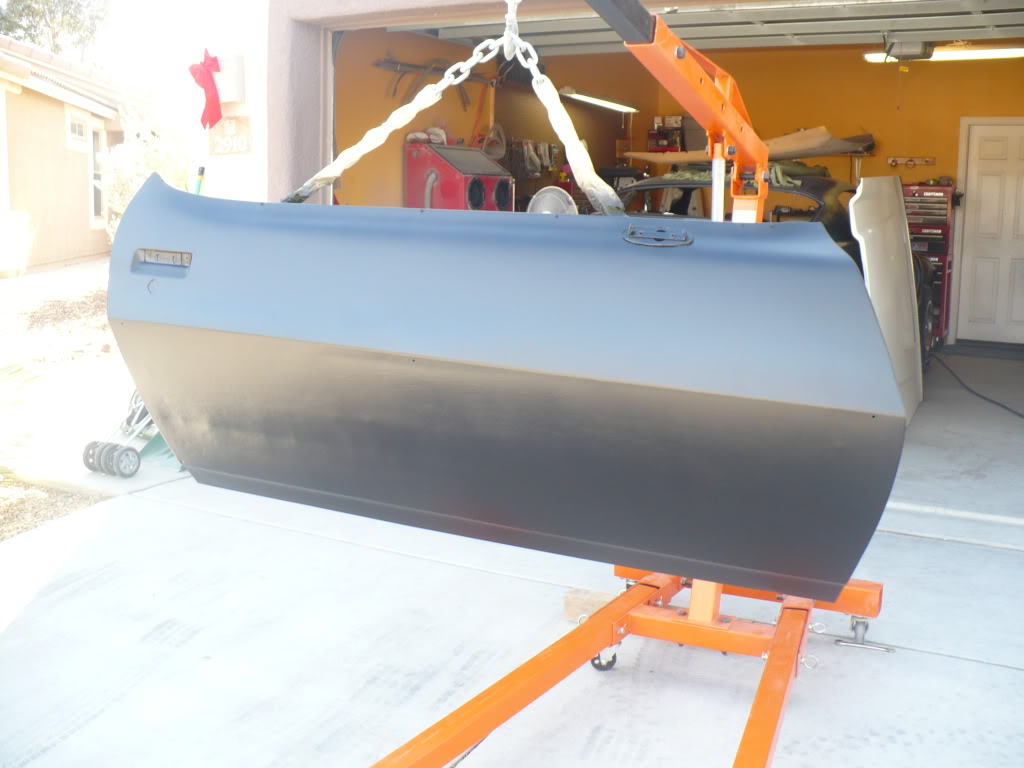
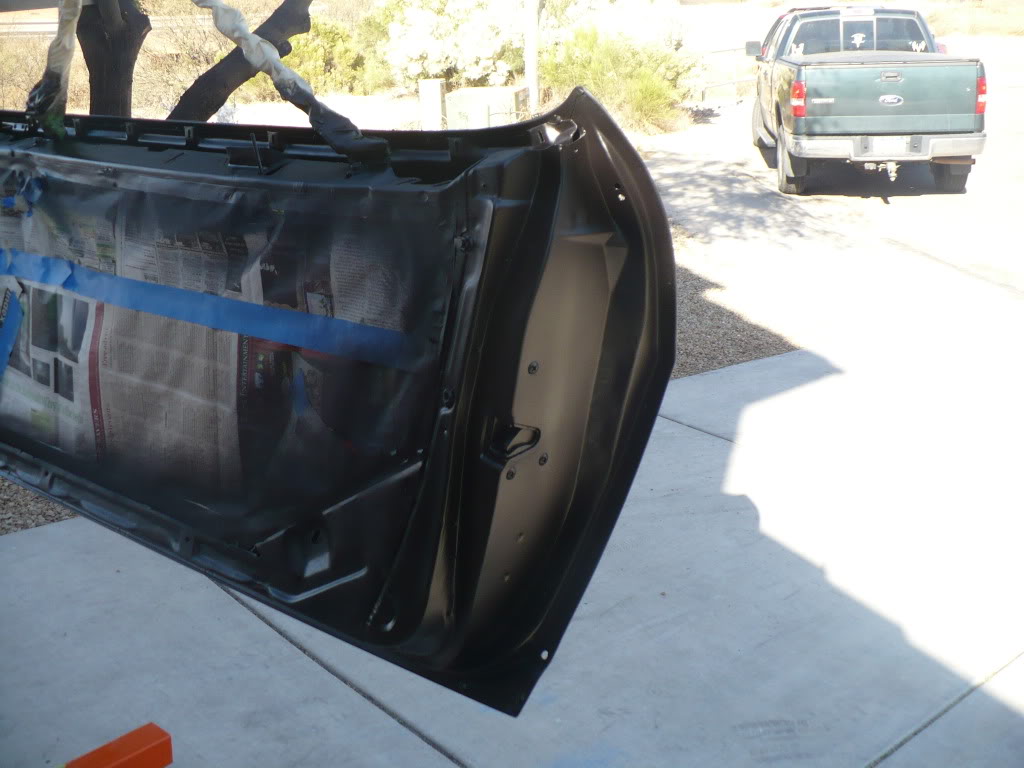
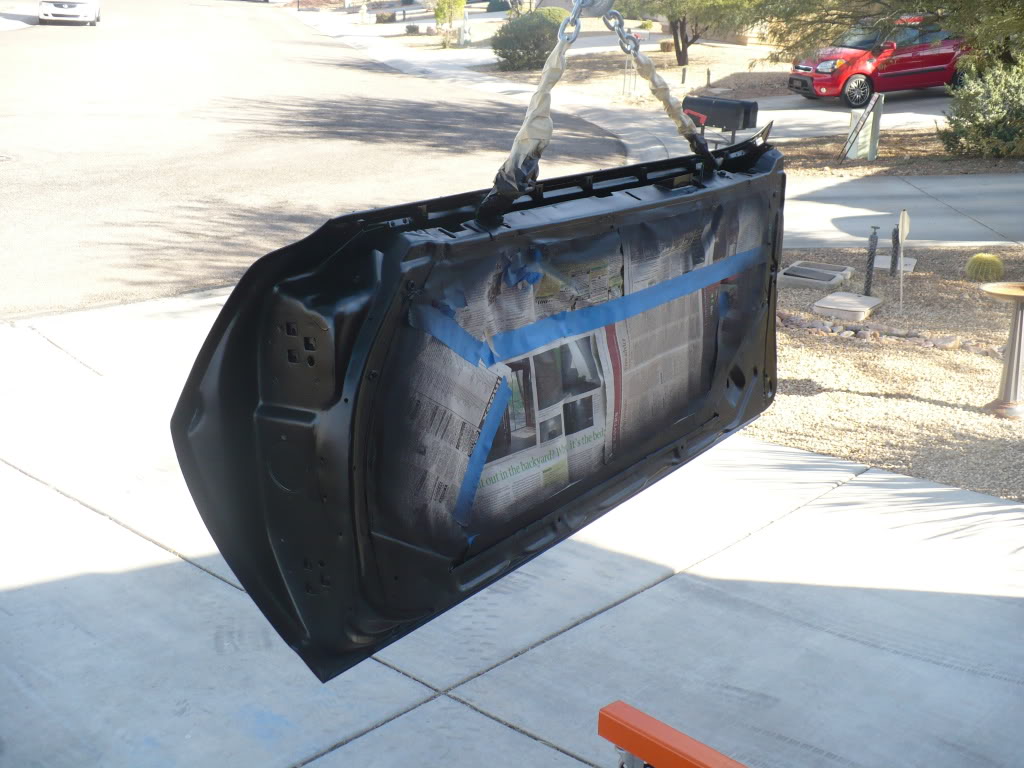
I was real lucky to have a weekend with temps in the mid 70’s, so it was a great time to spray some more paint. I started by finishing stripping the passenger side door. I had done the outer skin last weekend, but I still had to do the entire frame area. I started using a wire wheel but with all the contours I found it was easier to just sand blast the whole thing. When I was done I also disassembled and blasted the hinges, the mirror housing, and all the associated door hardware. Then today, everything got wiped down and primed. Here are some before and after shots. You can plainly see I didn’t do any body work on the door. It just got stripped and primed. Oh, and I’m sure you’ll love my redneck paint area…..amazing what you can do with a broomstick, a stepladder, a length of box tubing, a tree, some fishing line, and a cherrypicker…….
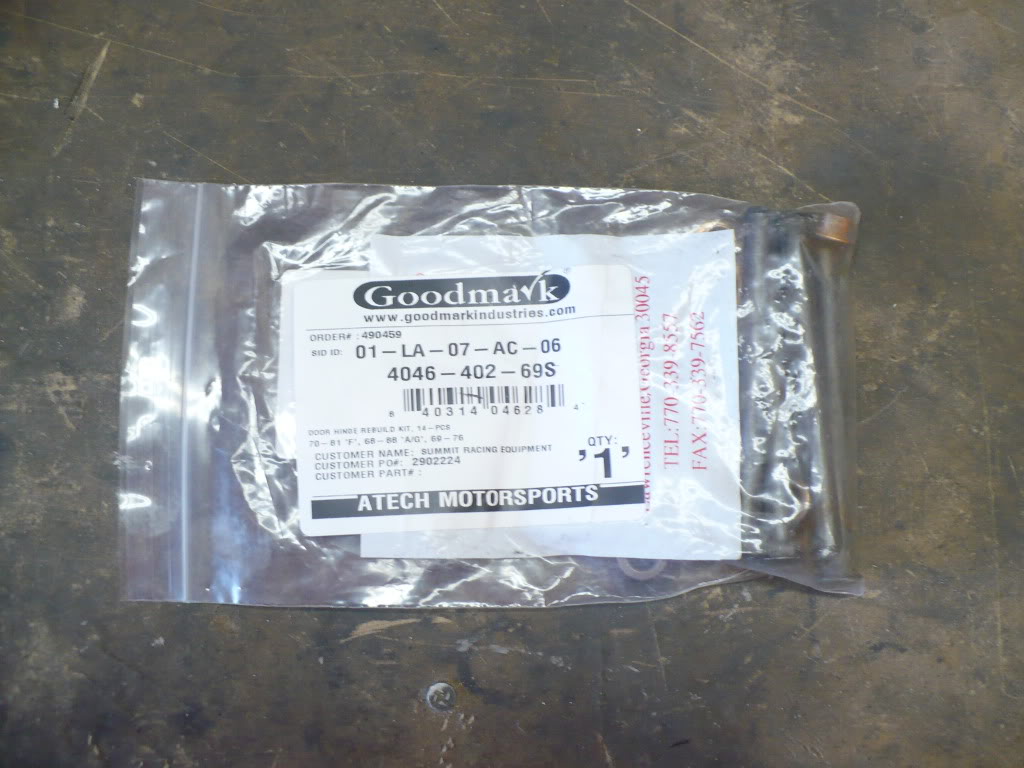
I’ve got a new set of Goodmark pins and bushings to put the hinges back together. Hopefully soon I’ll have at least one door back on! Wooo hooo…..progress!
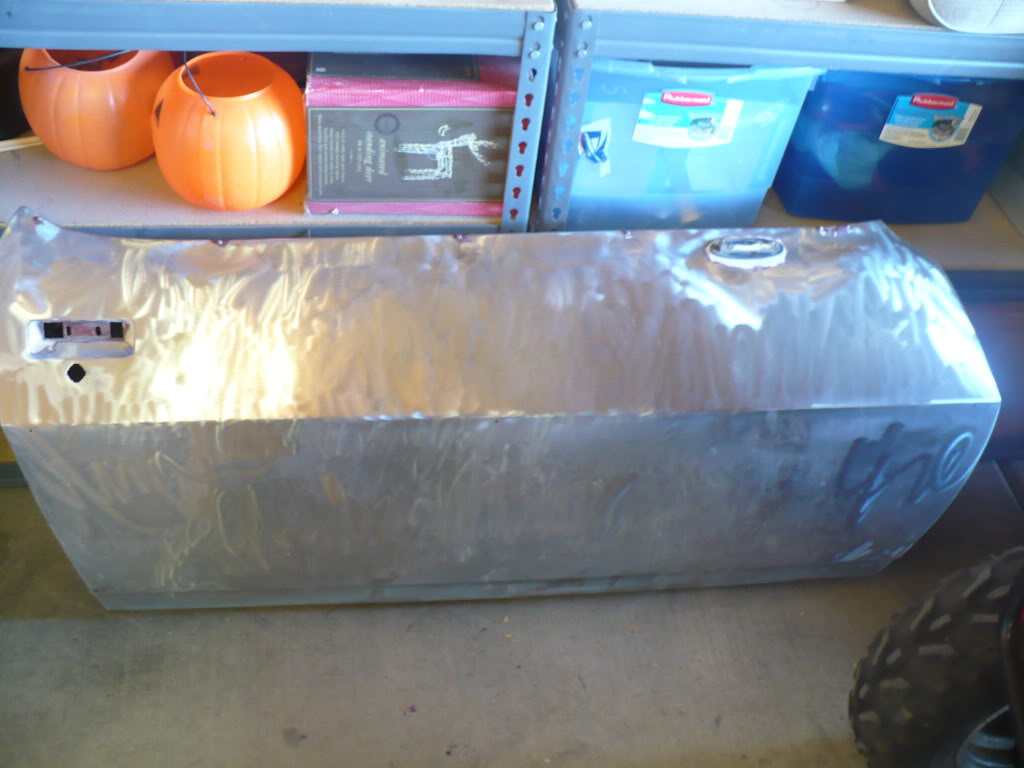
Oh, and I also dropped my fuel cell off with a guy to get the tubing welded on to the bottom of it. I hope to get that back later in the week.
I’ve got a new set of Goodmark pins and bushings to put the hinges back together. Hopefully soon I’ll have at least one door back on! Wooo hooo…..progress!
Oh, and I also dropped my fuel cell off with a guy to get the tubing welded on to the bottom of it. I hope to get that back later in the week.
Last edited by GC99TA; 12-08-2010 at 03:13 PM.
 12-11-2010, 06:49 PM
#214
Thanks Stormes!
My progress was all over the place this weekend. Earlier in the week, a friend came by and helped me hang the passenger side door. It still needs some adjusting to get the lines right, but for now at least it’s back on the car and out of my way.

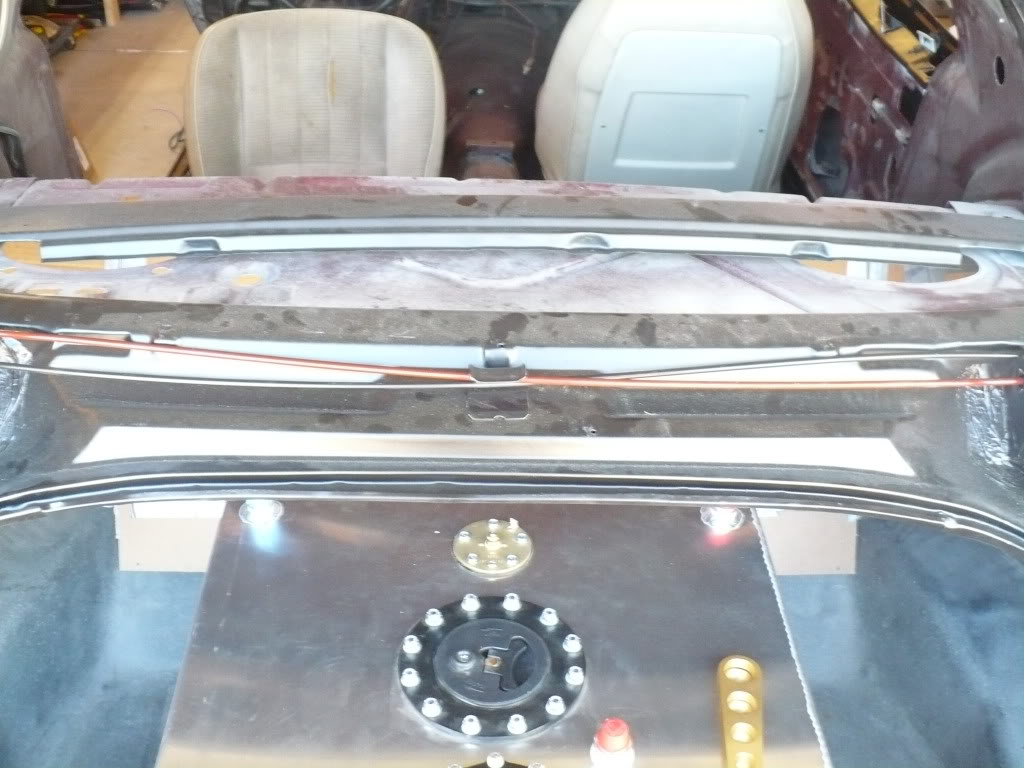
Yesterday I got back my fuel cell from the welder. He did a great job on it and it fits perfectly now.
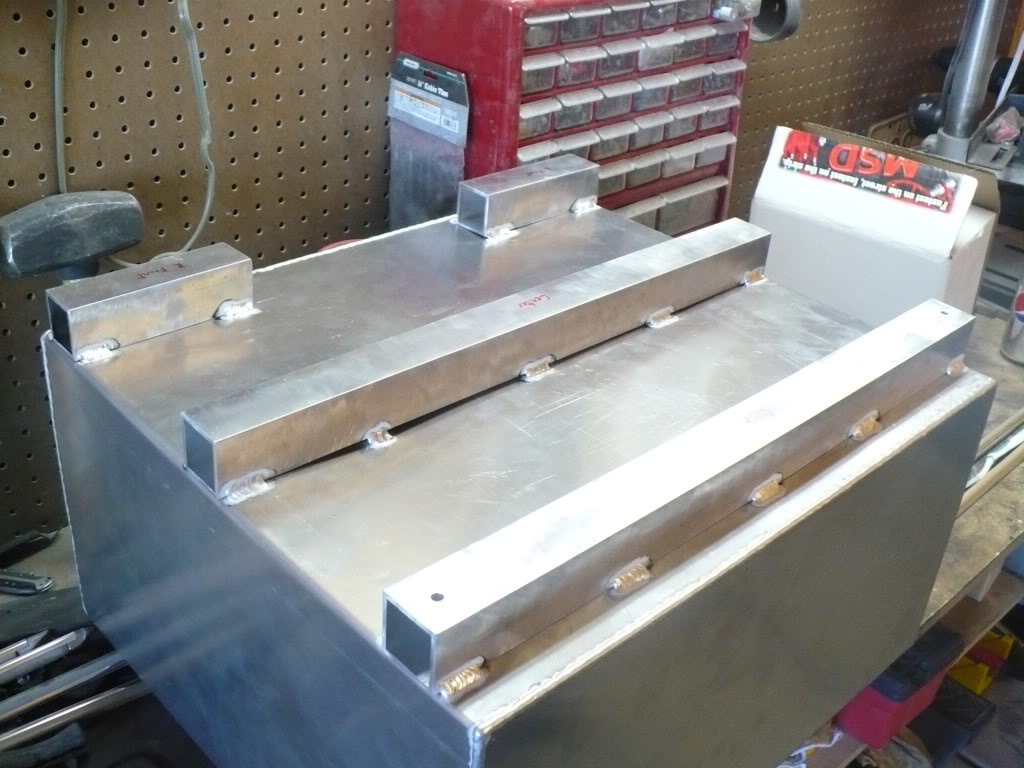
Here is how I secured it to the trunk floor. The bolts go up through the reinforcement straps in the trunk floor and into the box tubing where they’re secured with lockwashers and 3/8ths nuts.
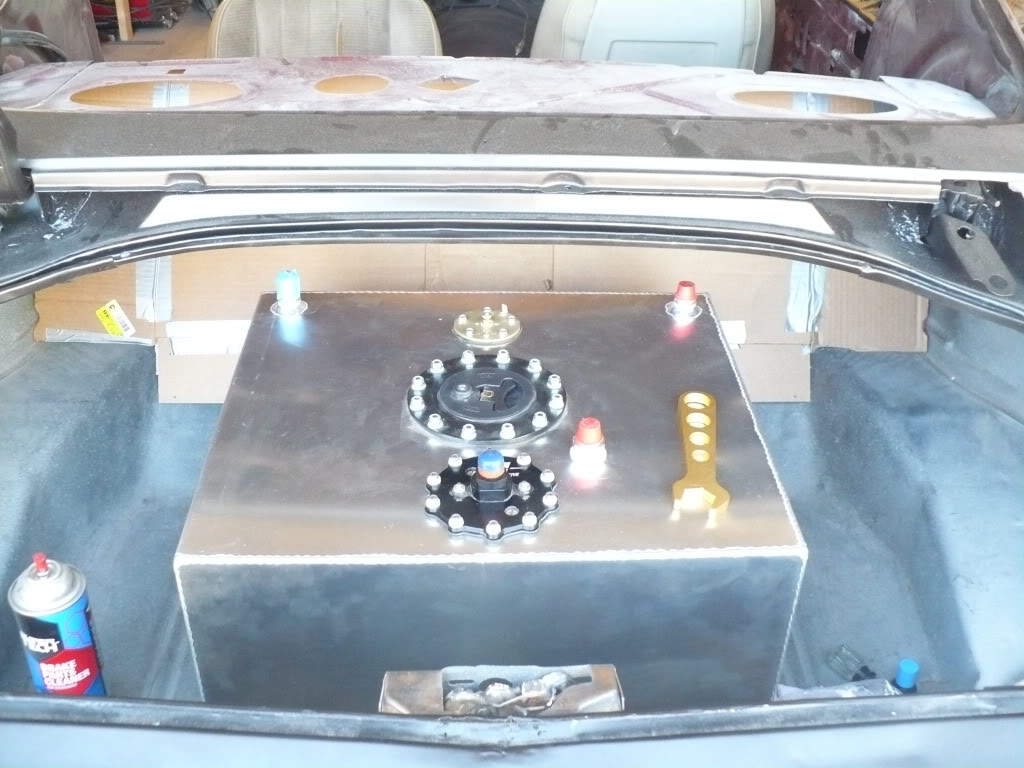
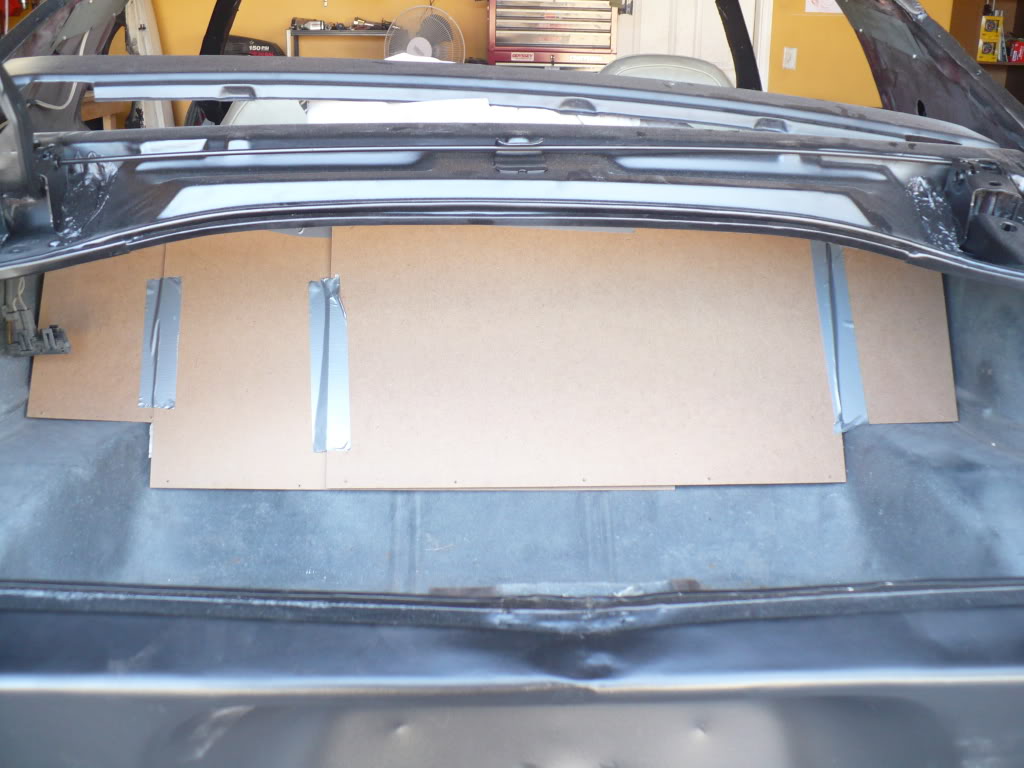
In front of the cell you can probably also see the cardboard template I’ve been working on for my NHRA/IHRA mandated bulkhead between the trunk and passenger compartment. I’ll have a separate piece to cover the package tray. I still haven’t decided if I’m going to build these out of 20 gauge aluminum or 24 gauge steel. Here’s another shot of it the template.
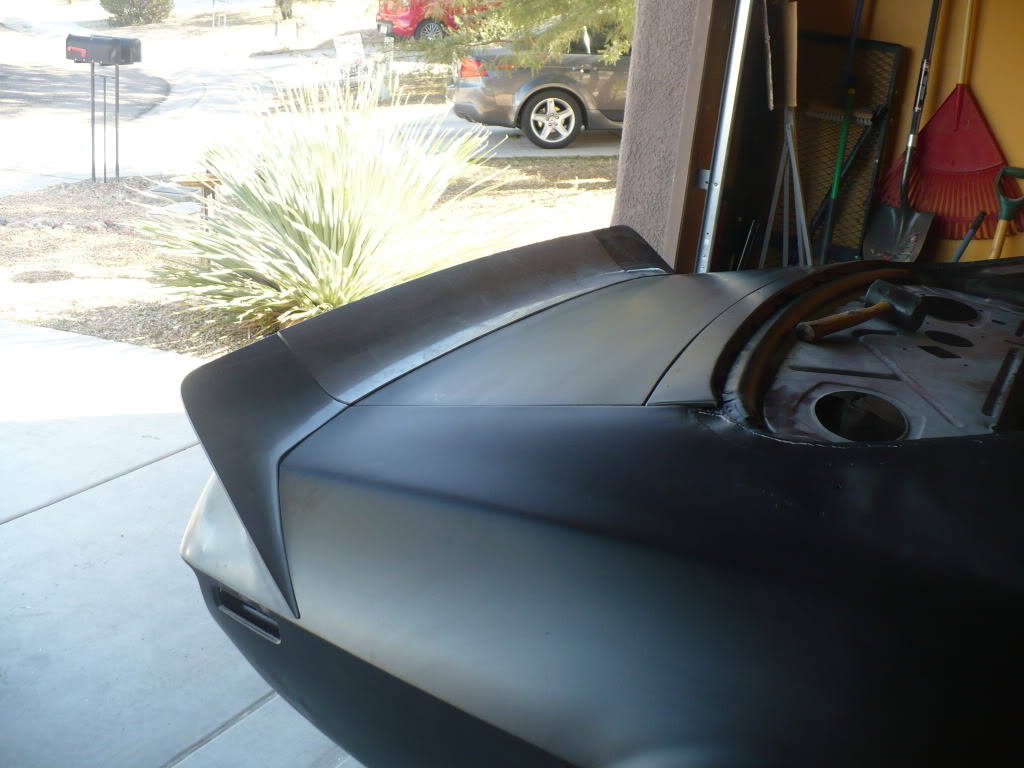
I also ordered a new right hand torsion spring for my deck lid since this car wasn’t originally equipped with a spoiler and I didn’t want to have to use a make-shift prop rod to hold the trunk lid open. Here you can see the new (red) torsion spring in place.
…..which allowed me to finally reinstall the deck lid and spoiler.
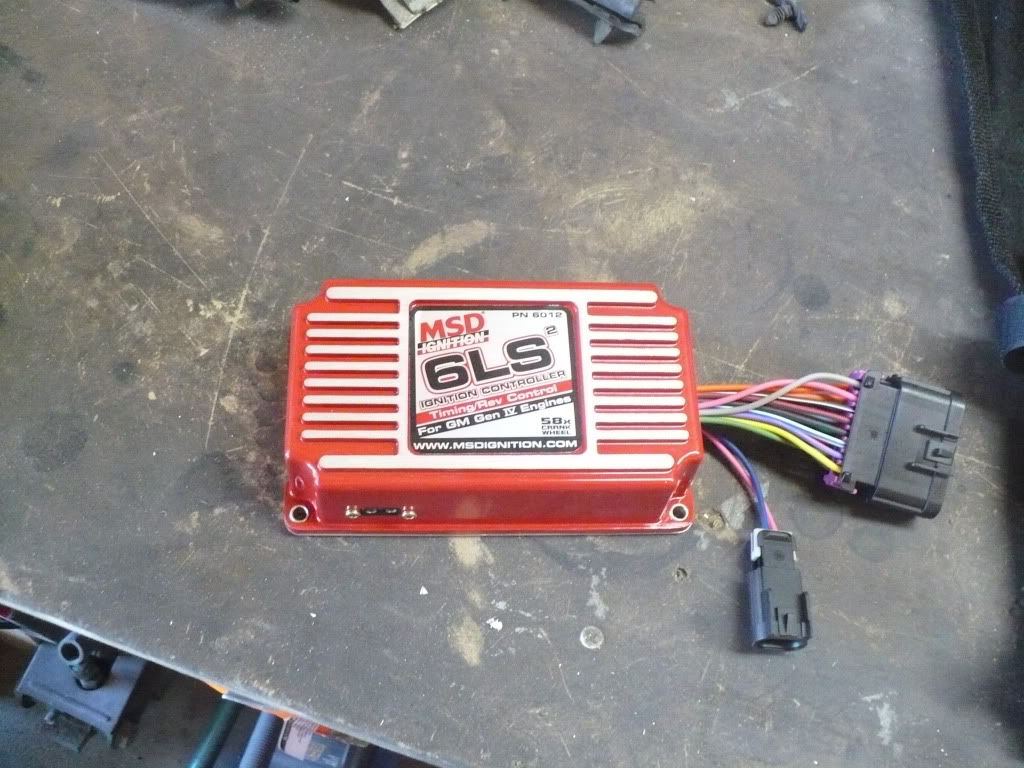
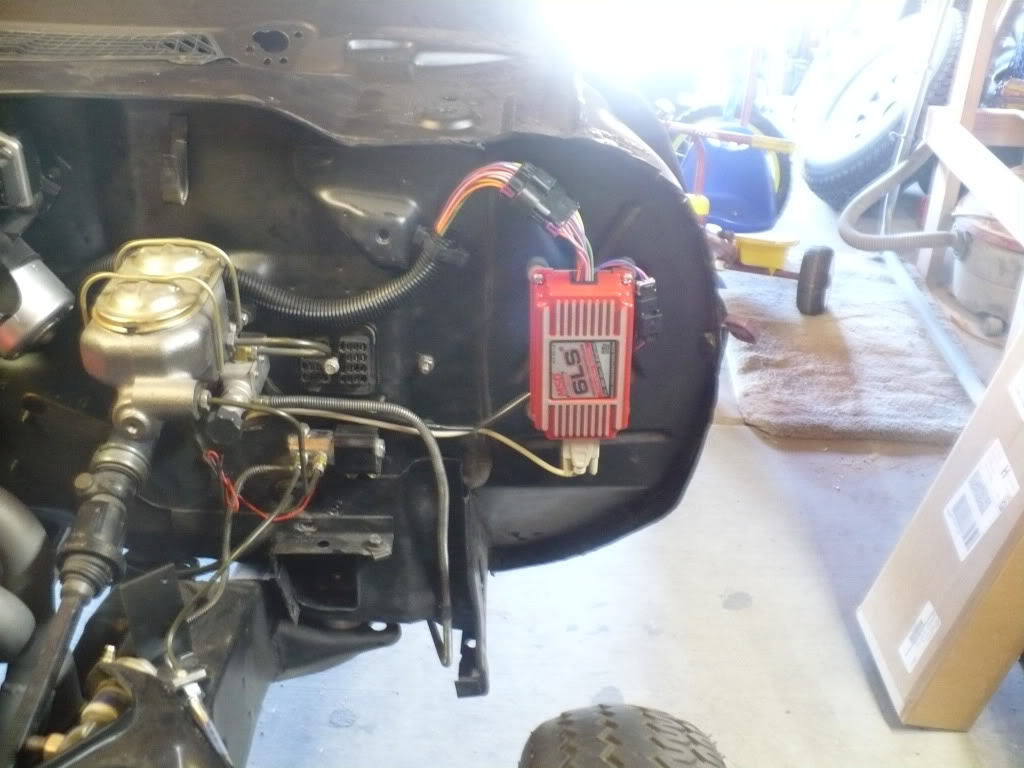
Finally, my MSD 6LS box came from Summit the other day. I got it mounted and routed some wires today.
Hopefully I’ll get some more stuff done tomorrow too.
My progress was all over the place this weekend. Earlier in the week, a friend came by and helped me hang the passenger side door. It still needs some adjusting to get the lines right, but for now at least it’s back on the car and out of my way.
Yesterday I got back my fuel cell from the welder. He did a great job on it and it fits perfectly now.
Here is how I secured it to the trunk floor. The bolts go up through the reinforcement straps in the trunk floor and into the box tubing where they’re secured with lockwashers and 3/8ths nuts.
In front of the cell you can probably also see the cardboard template I’ve been working on for my NHRA/IHRA mandated bulkhead between the trunk and passenger compartment. I’ll have a separate piece to cover the package tray. I still haven’t decided if I’m going to build these out of 20 gauge aluminum or 24 gauge steel. Here’s another shot of it the template.
I also ordered a new right hand torsion spring for my deck lid since this car wasn’t originally equipped with a spoiler and I didn’t want to have to use a make-shift prop rod to hold the trunk lid open. Here you can see the new (red) torsion spring in place.
…..which allowed me to finally reinstall the deck lid and spoiler.
Finally, my MSD 6LS box came from Summit the other day. I got it mounted and routed some wires today.
Hopefully I’ll get some more stuff done tomorrow too.
12-12-2010, 12:17 PM
#215
great progress.
 12-12-2010, 05:01 PM
#217
Thanks guys!
Just more door déjŕ-vu today. Got the drivers door stripped and luckily I didn’t find any more significant damage; just what I had already found near the back of the door under the door handle.
I didn’t have any sand (or ambition) to blast the door frame, but I did manage to get the spot weld holes from removing the crash bars welded shut.
I’ll probably be deer hunting next weekend, so I’m not sure I’ll get much else done for a while.
12-19-2010, 03:38 PM
#218

Just to say you have done a awesome job! Great looking car and should be fast. I am in the process of putting an LQ4 into my 69 Camaro and have a question for you. I am using the truck accessories and need to find a water pump the will work with this set up. I noticed you changed your water pump from the L92 version and installed a different one. Which water pump did you end up with? I like the new pump and wanted to know if it would work with the truck crank pulley? I am going fuel injected and the truck pump will be in the way, the L92 exits out the top and would probably work, but I like the front exit the best. I plan on using a radiator that both hoses will be on the right side. Thanks for any information you can throw my way.
12-19-2010, 05:29 PM
#219
I am in the process of putting an LQ4 into my 69 Camaro and have a question for you. I am using the truck accessories and need to find a water pump the will work with this set up. I noticed you changed your water pump from the L92 version and installed a different one. Which water pump did you end up with? I like the new pump and wanted to know if it would work with the truck crank pulley? I am going fuel injected and the truck pump will be in the way, the L92 exits out the top and would probably work, but I like the front exit the best. I plan on using a radiator that both hoses will be on the right side. Thanks for any information you can throw my way.
12-19-2010, 08:23 PM
#220
I am new so I don't believe I am allowed to start a new thread. I am unsure of how all of this works out. I tried to list a set of heads I have for sale and permission was declined. I did some research after posting to your thread. I found that a 2005 GTO water pump looks like the one you used. I went tonight and bought it from Advance Auto for $122. Not a bad deal for a brand new water pump. I measured the distance from the mount to the pulley on my truck pump and the GTO is a little shorter. Not by much. I may end up milling out me some 1/2" spacers using my gaskets as a guide. I appreciate the fast response and wish you luck on your project.