
1971 Nova Swap - 02 LS1/A4
 07-24-2011, 08:01 PM
#61

Well.. been MIA for a while. just out driving the Chevelle.. But it is now in the shop getting Detail (Cut and Polished).
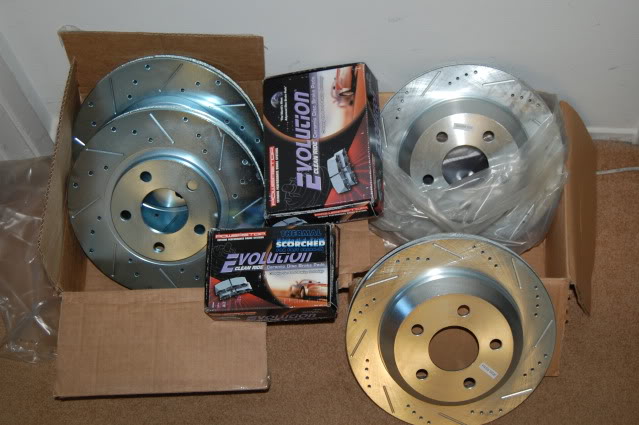
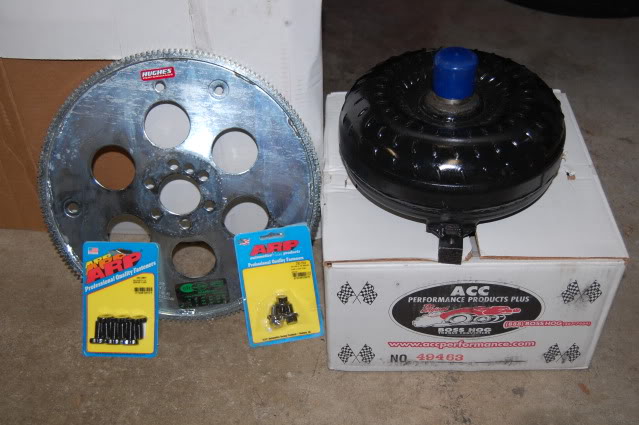
Finally got some parts in. TC was on back order for 2 months..
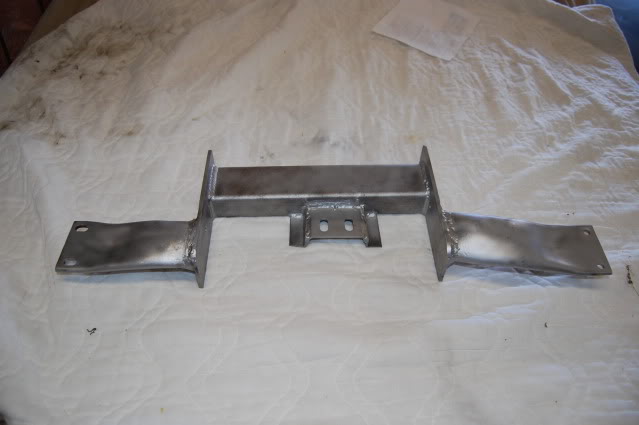
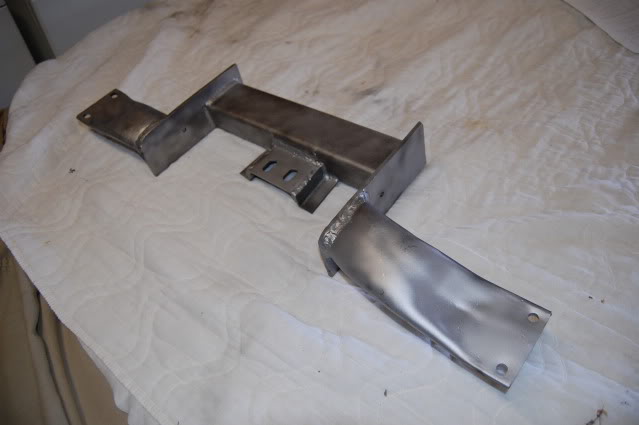
I didn't like the way the trans Crossmember was going. so I took it out/off and just cut the center section out. Adding to 1/4" plate on each side just inboard of the hump for the Exhaust and added a tube to tie the sides together. Don't have a picture yet.. but once I get that done I'll post a picture of it.
Also thinking it would be a good idea to refresh the Trans and maybe add a Shift kit and ?? You guys got any suggestion on a mid-Budget built for the 4L60E ? what parts, name brands ?.. if you could. I'll research your suggestion then.. This my 1st build using a Auto trans.. thanks in advanced...
BC
Finally got some parts in. TC was on back order for 2 months..
I didn't like the way the trans Crossmember was going. so I took it out/off and just cut the center section out. Adding to 1/4" plate on each side just inboard of the hump for the Exhaust and added a tube to tie the sides together. Don't have a picture yet.. but once I get that done I'll post a picture of it.
Also thinking it would be a good idea to refresh the Trans and maybe add a Shift kit and ?? You guys got any suggestion on a mid-Budget built for the 4L60E ? what parts, name brands ?.. if you could. I'll research your suggestion then.. This my 1st build using a Auto trans.. thanks in advanced...
BC
Last edited by bczee; 07-24-2011 at 08:07 PM.
 07-29-2011, 11:30 AM
#62
"I didn't like the way the trans Crossmember was going. so I took it out/off and just cut the center section out. Adding to 1/4" plate on each side just inboard of the hump for the Exhaust and added a tube to tie the sides together. Don't have a picture yet.. but once I get that done I'll post a picture of it."
Do you have a pic of the newly moded crossmember?
I do not like the x-member that I had made. I was thinking of getting one like you have.
Thanks
Do you have a pic of the newly moded crossmember?
I do not like the x-member that I had made. I was thinking of getting one like you have.
Thanks
08-21-2011, 04:58 PM
#63
TECH Enthusiast
iTrader: (2)
Join Date: Jul 2010
Location: missouri
Posts: 508
Likes: 0
Received 0 Likes
on
0 Posts
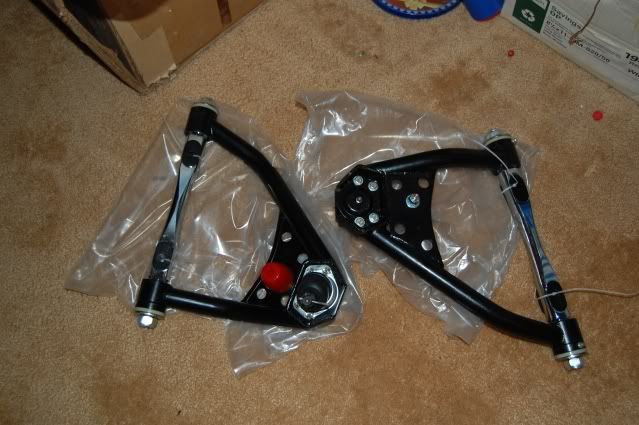
Which position did you mount up the top control arms? I purchased the same ones and could figure what would be best... I mean i dont wanna wear tires lol ... Also did you have any issues with the camber plugs? Mine where tight and they needed some reworking. They a little off and i would say unfinished.
08-22-2011, 11:14 AM
#64
sorry for the delay. .
Crosstraining = Crossmember is at a buddy shop getting Welded up. i seem to burn metal when I weld LOL. get it soon.
Firehawk68mcleod = A-Arm location of the insert. .I have not really checked it out.. yeah.. those inserts are not well made. don't torque them down to much. They seem to be cheap casted Aluminum. I broke or cracked two. Had to buy two more. Would suggest you put a washer between the nut and insert. I would like to see about making some out of steel.
But for racing application, I would expect to set them so that you have some +/pos Caster ... ? how much. I would start with OEM spec first and increase or decrease as you try and drive it and see what you like.
Some might make some recommendatin.. +3 to +5 drgee for road and auto-x... check out Pozzi Racing's site. good info there for 1st gen F-body and 3rd gen X-body.
08-22-2011, 12:01 PM
#65
bczee if you read through this thread there are some good tips on what to do to get those inserts to seat properly so they wont fail. Definitely worth a read: http://www.camaros.net/forums/showthread.php?t=141451
08-22-2011, 12:14 PM
#66
thanks. this thread has been going for a while now. and I have not been working on the project too much.. got to get going on it soon. picked up some more part while in Reno for HAN at Summit.. will get the Trans refreshed next month and then start working on the final assembly...
I'll go over them tips again..thanks..
I'll go over them tips again..thanks..
10-05-2011, 04:57 PM
#67
Bandit.. thanks. good info. might need to look into some better ones if the ones that came with the a-arm don't hold up.
Got the Transmission parts. Well be taking the trans over to the guy to get it rebuild within the next week or two..
Crossmember is still over at my buddy's shop. Haven't been over there to pick it up.
started working on the planning of the fuel system, was going to try a budget one with using a 4th Gen Fuel Pump Assembly with a walbro upgrade and mod'ing the bucket and maybe a small sump. All depnding on if I can shorten up the Assembly enough for it to find in the tank.
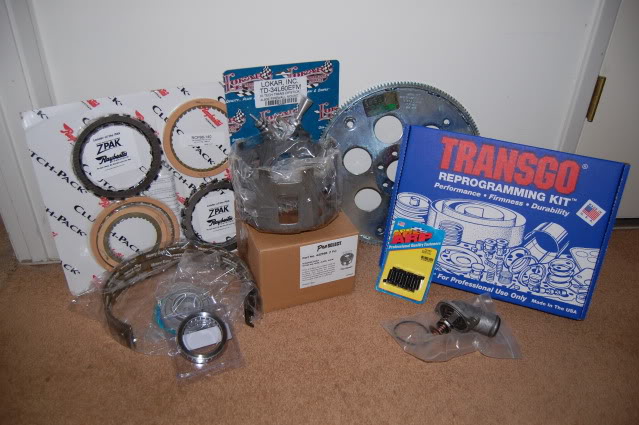
Last edited by bczee; 10-05-2011 at 05:08 PM.
02-07-2012, 07:22 PM
#69
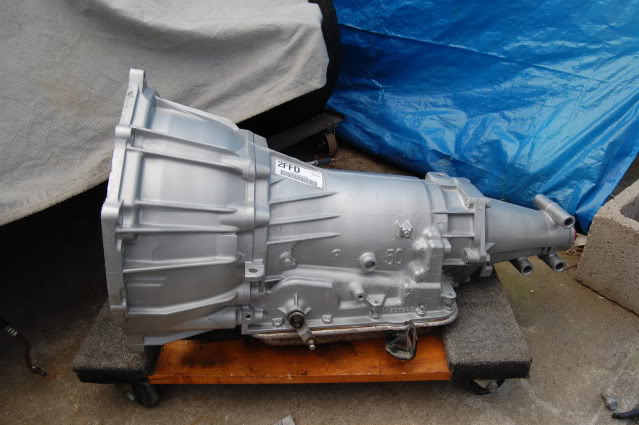
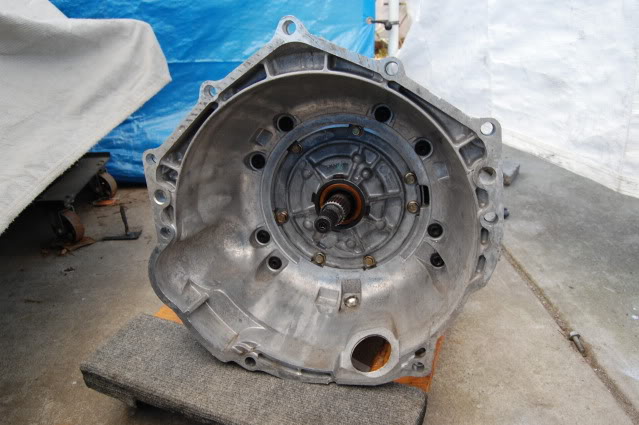
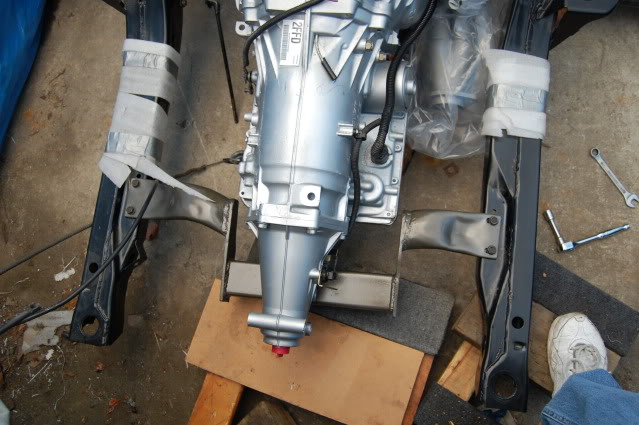
Got the Transmission back and the Crossmember done.
Refreshed the Trans with some update HP parts, Beast Sun Shell, Z-Pak disk, see the parts list on a earlier post. Hit it with some Cast Alum paint.
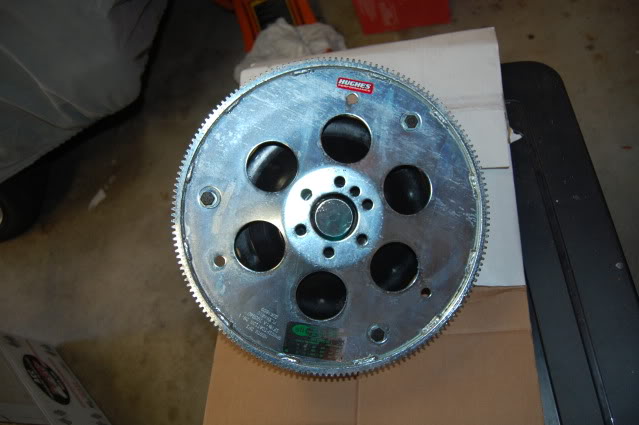
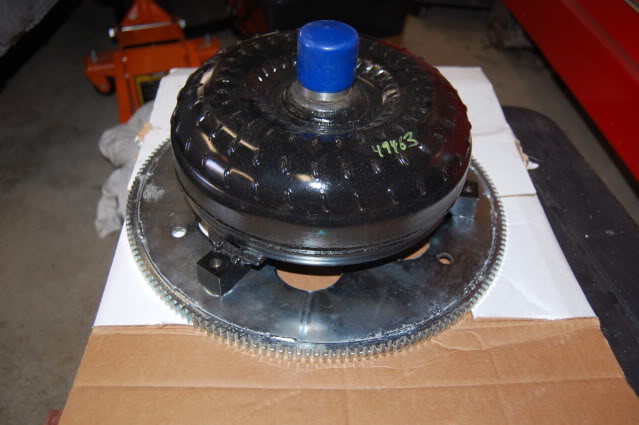
Made sure that the holes on the Flex plate and TQ lined up ok, they did.
Modified Crossmember
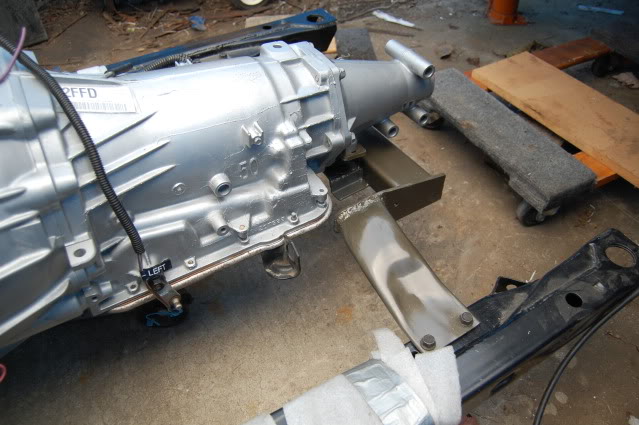
Bolded the Crossmember and attached the Trans
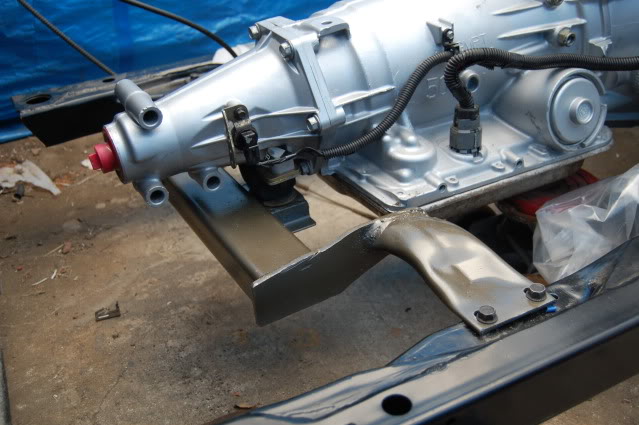
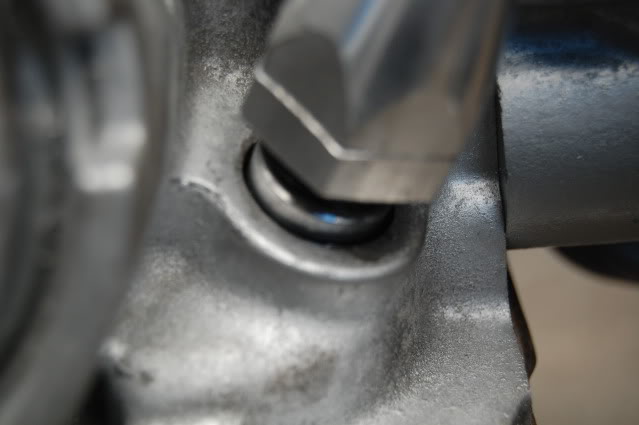
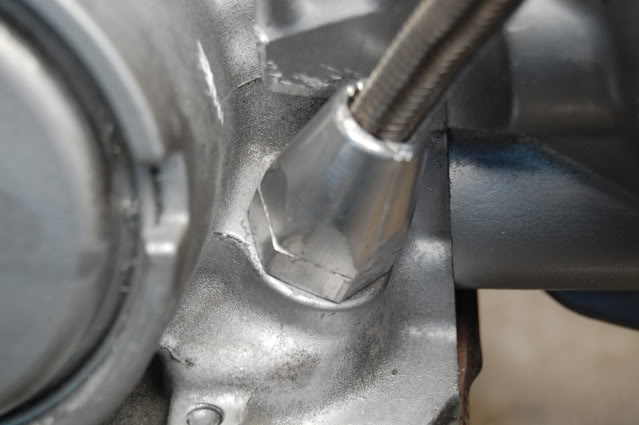
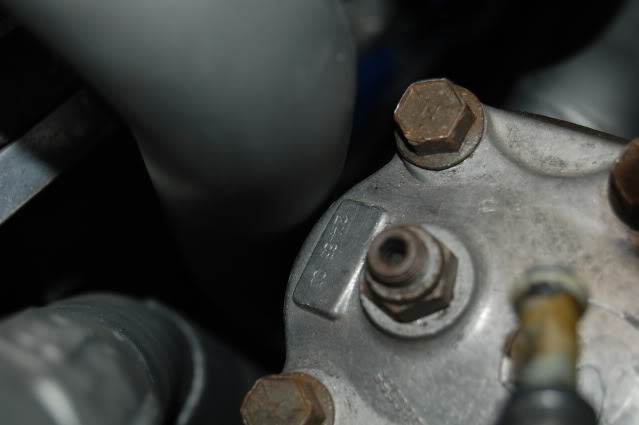
Checked fitted the Lokar Dip Stick. Found that the Trans case made contact with the lower fitting. Had to grind some of the case away to clearance it. As other have noted, not a well fitting item. It was loose, well have to check the O-Ring and sealer to make sure it doesn't leak.

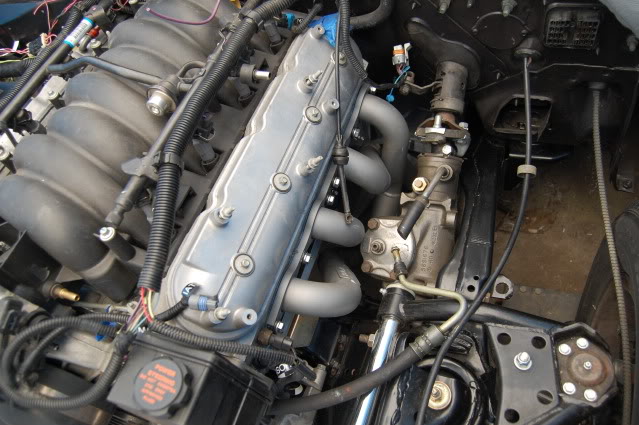
Bolted the Subframe/engine/trans back to the Body (again)
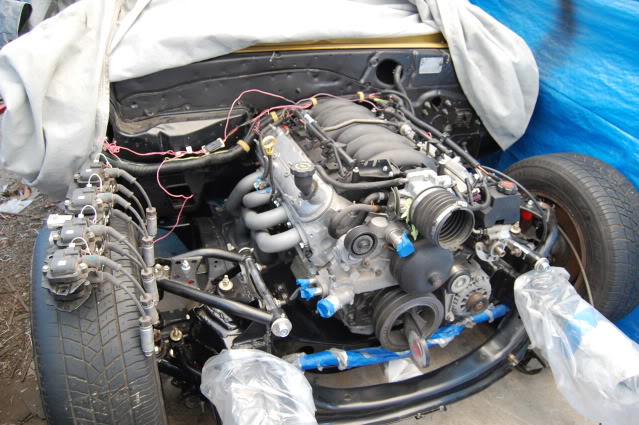
Got some tight clearance on the driver side header and steering box. but it should be ok. Also my Column linkage is hitting one of the tubes, I will have to modify something later.
Refreshed the Trans with some update HP parts, Beast Sun Shell, Z-Pak disk, see the parts list on a earlier post. Hit it with some Cast Alum paint.
Made sure that the holes on the Flex plate and TQ lined up ok, they did.
Modified Crossmember
Bolded the Crossmember and attached the Trans
Checked fitted the Lokar Dip Stick. Found that the Trans case made contact with the lower fitting. Had to grind some of the case away to clearance it. As other have noted, not a well fitting item. It was loose, well have to check the O-Ring and sealer to make sure it doesn't leak.
Bolted the Subframe/engine/trans back to the Body (again)
Got some tight clearance on the driver side header and steering box. but it should be ok. Also my Column linkage is hitting one of the tubes, I will have to modify something later.
Last edited by bczee; 02-07-2012 at 07:52 PM.
02-07-2012, 07:36 PM
#70
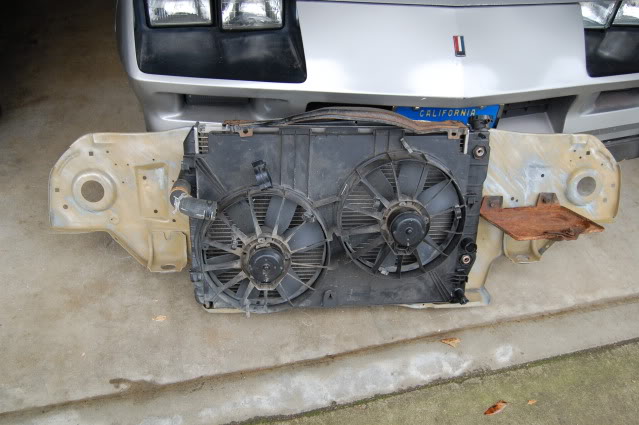
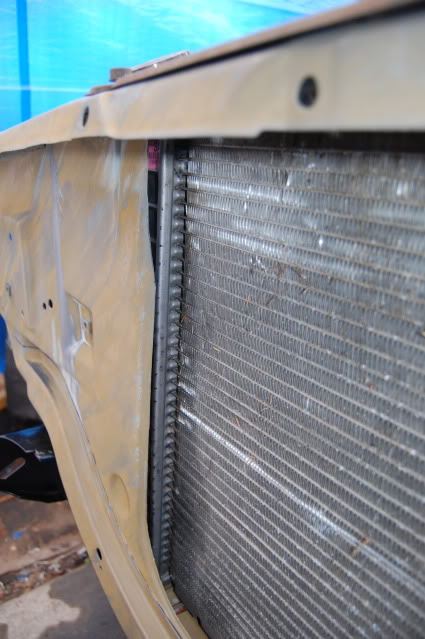
I am going to use the 4th Gen Radiator and Fans as it seemed like I could make it fit.
On the Passenger side was a stud rubber mount. I drilled a hole in the lower Radiator Support to match up and have Radiator sit level. I moved it about 1" from the Battery Tray (don't worry about that rusty old one, I will order a new one.) I had the Radiator Support and Fender wells Media basted, I used some Jasco Pre/Prime treament so that it wouldn't rust while I was working with them as It might be a few weeks before I get to paint. It turns the metal that yellow / gold color, I frist I though it was the paint. but those part were never painted that color at the factor.
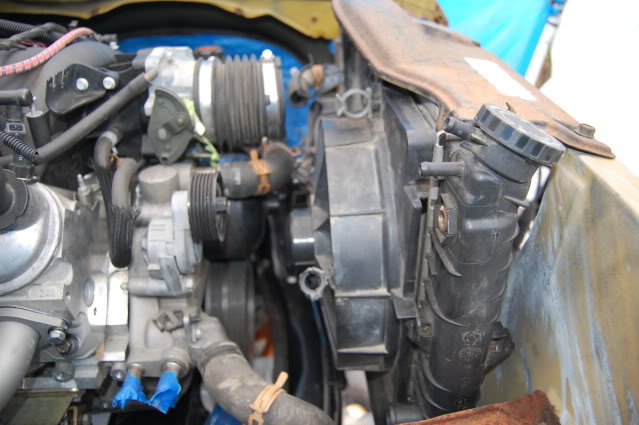
There is about a 1" gap between the radiator and support wall.. I will make some rubber bummper for them later. And there is more than enough room between the Fans and Pulley's.
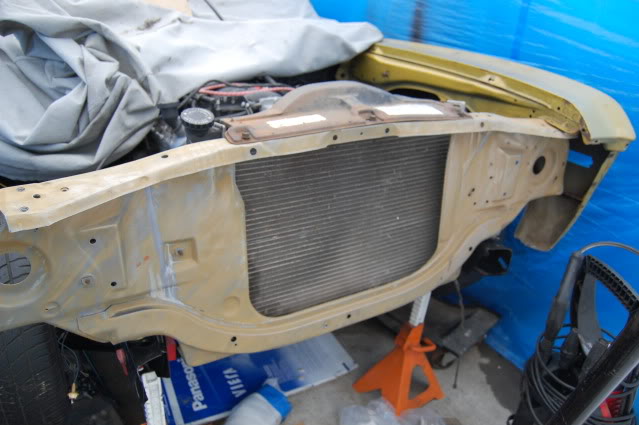
The passenger side Support wall is just about right, I will make a filler for both side later. But the Drive side is behind the wall about 2"-3". I am going to cut the opening larger by about 1"-2" to make sure air will flow to 90% of the fins.
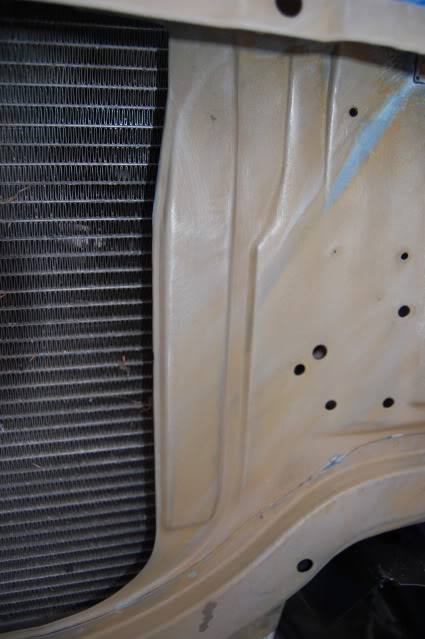
I opened up the opening on the driver side
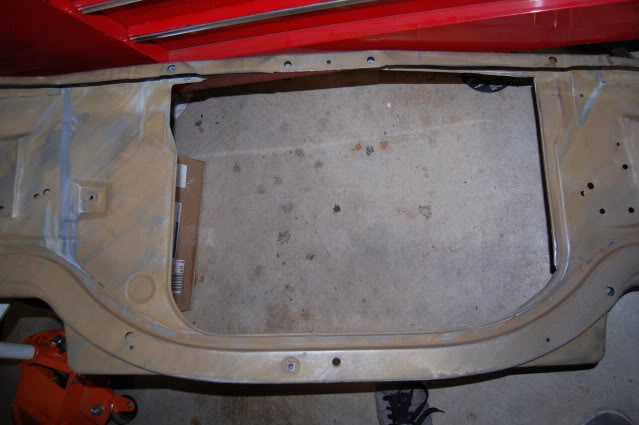
This is where I drilled the hole for the bottom mount on the radiator
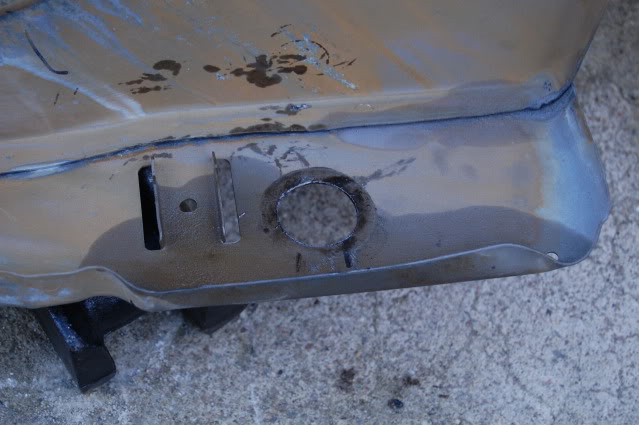
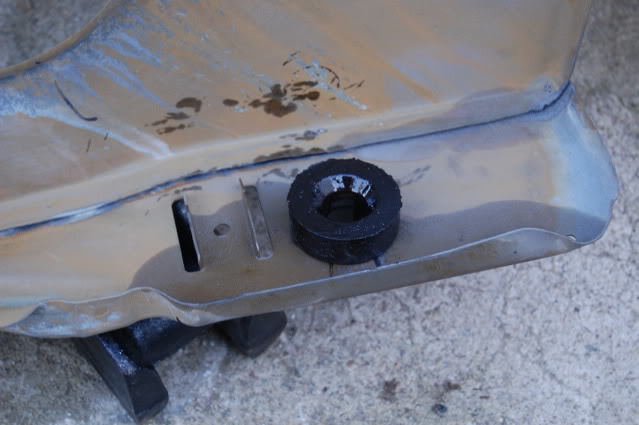
On the Passenger side was a stud rubber mount. I drilled a hole in the lower Radiator Support to match up and have Radiator sit level. I moved it about 1" from the Battery Tray (don't worry about that rusty old one, I will order a new one.) I had the Radiator Support and Fender wells Media basted, I used some Jasco Pre/Prime treament so that it wouldn't rust while I was working with them as It might be a few weeks before I get to paint. It turns the metal that yellow / gold color, I frist I though it was the paint. but those part were never painted that color at the factor.
There is about a 1" gap between the radiator and support wall.. I will make some rubber bummper for them later. And there is more than enough room between the Fans and Pulley's.
The passenger side Support wall is just about right, I will make a filler for both side later. But the Drive side is behind the wall about 2"-3". I am going to cut the opening larger by about 1"-2" to make sure air will flow to 90% of the fins.
I opened up the opening on the driver side
This is where I drilled the hole for the bottom mount on the radiator
Last edited by bczee; 12-10-2012 at 09:59 AM.
02-07-2012, 07:42 PM
#71
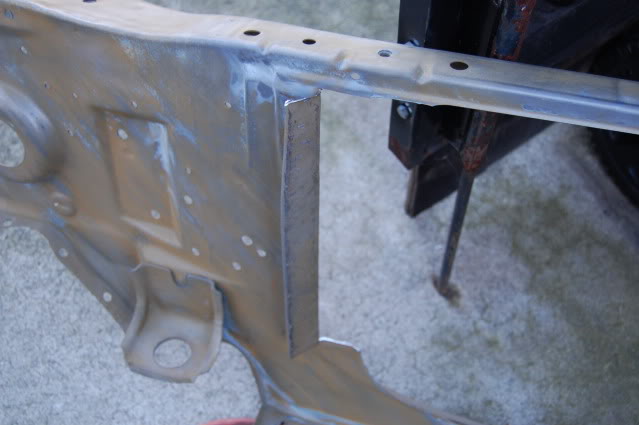
I am going to use the 4th Gen Brake Booster and Master. I saw a few posts on this. And wonder why he had to mod the bracket some. Now I know why... it does work out well.
I measured the studs on the firewall and master. They were close, but off some. But it didn't matter, I will only be using the lower two which lines up ok.
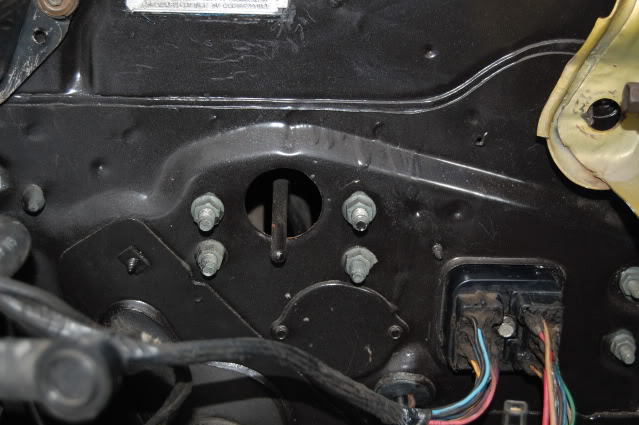
The post I saw said to weld or extend the bracket down for the lower bolts. I well also have to open up the upper part of the firewall hole where the rod go.. as the 4th Gen sits high and is a larger seal.
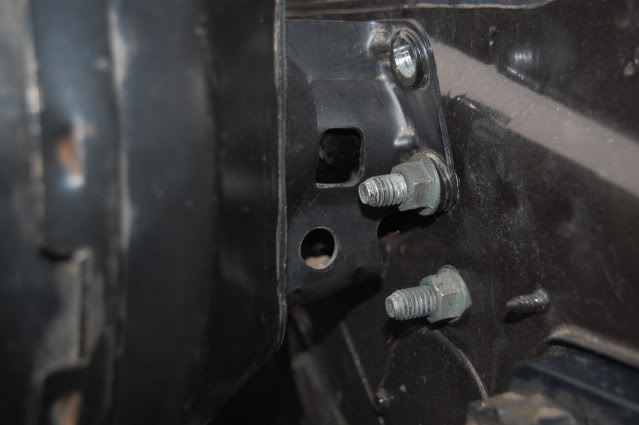
Made these and well weld them on to the bracket
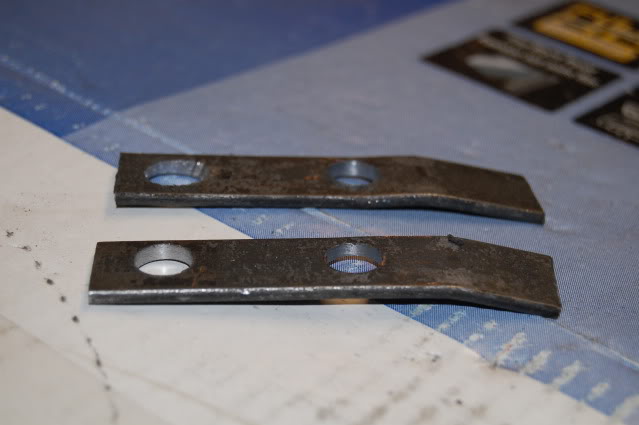
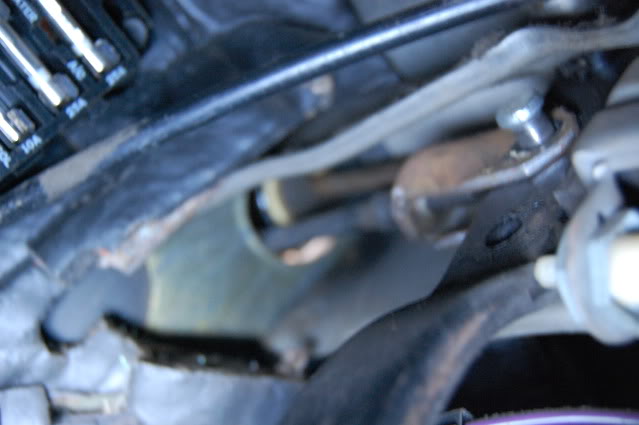
I well cut the two rods and weld them together so that match up ok. They are close as you can see (sorry for the bad picture. was a little dark and tight getting the camera in their.. well try a better one later)
Thats if for now.. well finish these stages and post more later.. just wanted to bring you guys up to speed and show you I was not being lazy, but the Rain and Flu got me for a while.
BC
I measured the studs on the firewall and master. They were close, but off some. But it didn't matter, I will only be using the lower two which lines up ok.
The post I saw said to weld or extend the bracket down for the lower bolts. I well also have to open up the upper part of the firewall hole where the rod go.. as the 4th Gen sits high and is a larger seal.
Made these and well weld them on to the bracket
I well cut the two rods and weld them together so that match up ok. They are close as you can see (sorry for the bad picture. was a little dark and tight getting the camera in their.. well try a better one later)
Thats if for now.. well finish these stages and post more later.. just wanted to bring you guys up to speed and show you I was not being lazy, but the Rain and Flu got me for a while.
BC
Last edited by bczee; 02-15-2012 at 02:07 PM.
02-08-2012, 09:53 AM
#73
Found it on the Pro-Turing site. Post #77
http://www.pro-touring.com/showthrea...9-Camaro/page4
http://www.pro-touring.com/showthrea...9-Camaro/page4
Last edited by bczee; 02-08-2012 at 10:22 AM. Reason: change site name ..
02-08-2012, 10:17 AM
#74
Found it on the Lat-g site. Post #77
http://www.pro-touring.com/showthrea...9-Camaro/page4
http://www.pro-touring.com/showthrea...9-Camaro/page4
Looks like you've made some really good progress. Glad to see an update.
02-08-2012, 10:21 AM
#75
Bandit.. Oops.. by bad.. it early for me.. I'll edit it now. .thanks for the catch..
I plan on doing more work now.. I hopefully well keep going. But I have an Swap car to drive already.. so. if the weather is good.. I'm out cruising !!
I plan on doing more work now.. I hopefully well keep going. But I have an Swap car to drive already.. so. if the weather is good.. I'm out cruising !!
02-08-2012, 12:11 PM
#76
Teching In
iTrader: (2)

Join Date: Jul 2011
Location: wash ch ohio
Posts: 17
Likes: 0
Received 0 Likes
on
0 Posts
thanks bczee.... looks like i found my answer to how im going to mount it another question did you have any problem adjusting the rod to where it need to be? also did you use the stock boot on back of booster? so how far do you have to open firewall up? any pics?
another question did you have any problem adjusting the rod to where it need to be? also did you use the stock boot on back of booster? so how far do you have to open firewall up? any pics?
02-08-2012, 12:16 PM
#77
Bczee, Project looks like it is coming along nice! Sometimes I start to b*itch about having a tiny garage and then I see guys like you making beautiful cars under tarp buildings and I shut up! Though I doubt it is 15�F there right now...
So I know I am a little behind the ball here, but I have a few questions about that sick powdercoating job you got on your subframe. I am considering getting my subframe powdercoated as well, after a little clean up, grinding amd abrasive blasting. But I am concerned about protection on the inside of the frame rails. What is the coverage like inside your framerails? I know powdercoating utulizes an electrical potential to help ensure even surface coverage. But I figured it couldn't hurt to ask how your turned out. Thanks Bczee.
So I know I am a little behind the ball here, but I have a few questions about that sick powdercoating job you got on your subframe. I am considering getting my subframe powdercoated as well, after a little clean up, grinding amd abrasive blasting. But I am concerned about protection on the inside of the frame rails. What is the coverage like inside your framerails? I know powdercoating utulizes an electrical potential to help ensure even surface coverage. But I figured it couldn't hurt to ask how your turned out. Thanks Bczee.
 02-08-2012, 12:35 PM
#79
Craig73 - I am still in the process of doing the booster. From looking at in the daylight this morning. I am thinking I will reposition the hole. .as the 4th gen one has the rod coming out of it centered between the mounting bolts. The Nova has the Rod coming out of the firewall level with the bolt.
I cut the bolt off at the base of the 4th Gen booster, plan to use the Nova bolt on the firewall/pedals. I drilled the hole to the correct size. But since I plan to reposition the bolt hole.. I will cut the flange off and weld a new flange on making the Booster/Master level, else it would be at a angle. I have not addressed the rod yet.. I'll get to that later. From FroJoe project, the rod is +5" from the firewall.
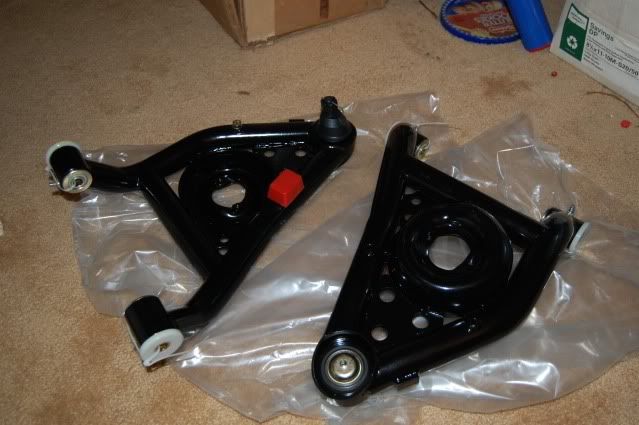
The A-Arm seem good, but well have to find out once I get the car on the road. They are POL's. One item I didn't like was the Adjustable Caster Insert.. they are made of cheap alum or metal. I had to order some extra cause i cracked them by over tighting them. I now use washers between the nut and insert to spead the load more evenly.
Cruisin73 - yeah. you got me beat on the temp..! LOL.. Since the subframe is so large and would not fit in my oven, I had a Shop do it. He did shot the PC in and down the inner of the frame. frome what I can see, he did a good job.
I cut the bolt off at the base of the 4th Gen booster, plan to use the Nova bolt on the firewall/pedals. I drilled the hole to the correct size. But since I plan to reposition the bolt hole.. I will cut the flange off and weld a new flange on making the Booster/Master level, else it would be at a angle. I have not addressed the rod yet.. I'll get to that later. From FroJoe project, the rod is +5" from the firewall.
The A-Arm seem good, but well have to find out once I get the car on the road. They are POL's. One item I didn't like was the Adjustable Caster Insert.. they are made of cheap alum or metal. I had to order some extra cause i cracked them by over tighting them. I now use washers between the nut and insert to spead the load more evenly.
Cruisin73 - yeah. you got me beat on the temp..! LOL.. Since the subframe is so large and would not fit in my oven, I had a Shop do it. He did shot the PC in and down the inner of the frame. frome what I can see, he did a good job.