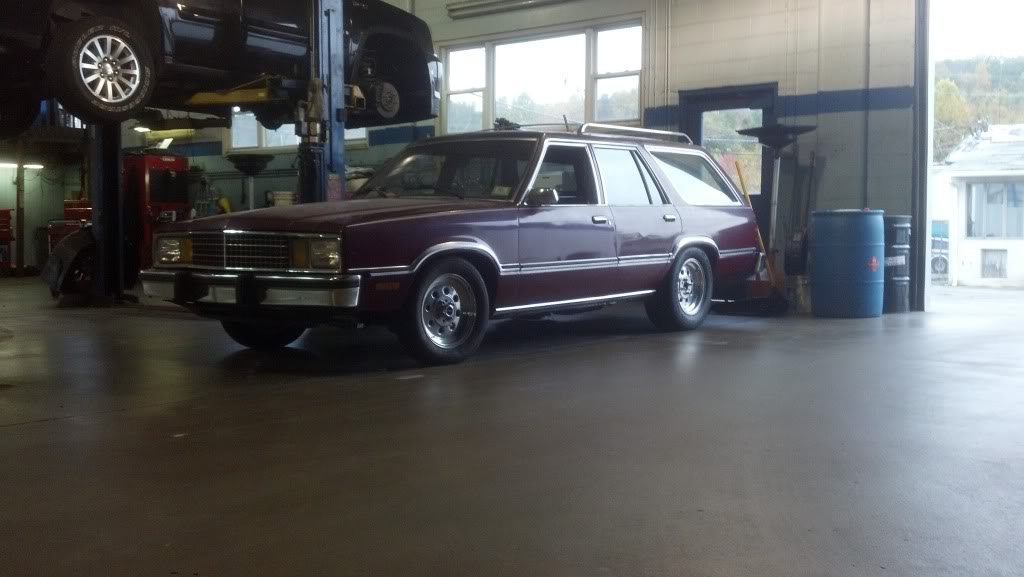
my new project: LS into an 81 fairmont wagon
 09-26-2013, 08:43 PM
#41


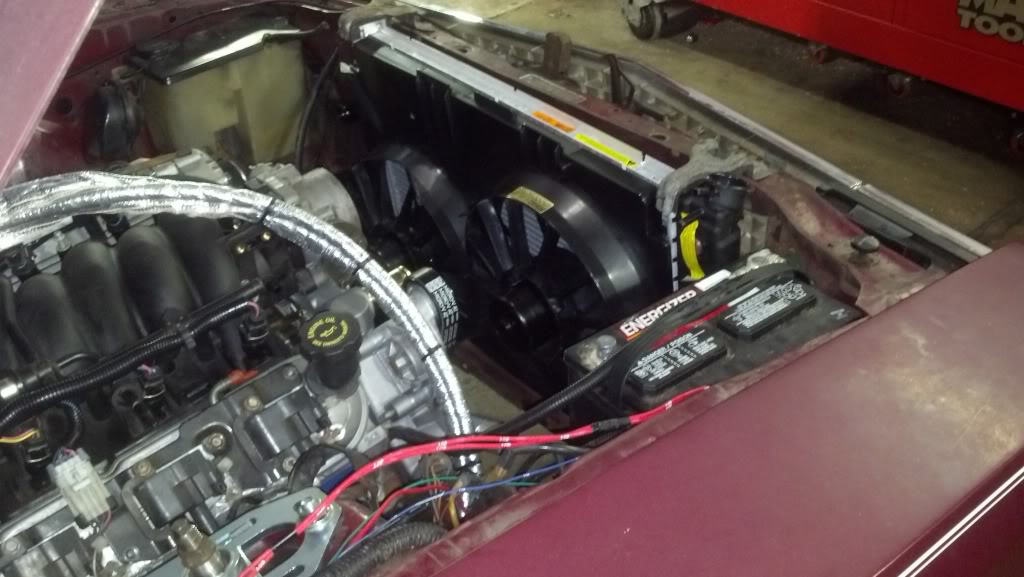
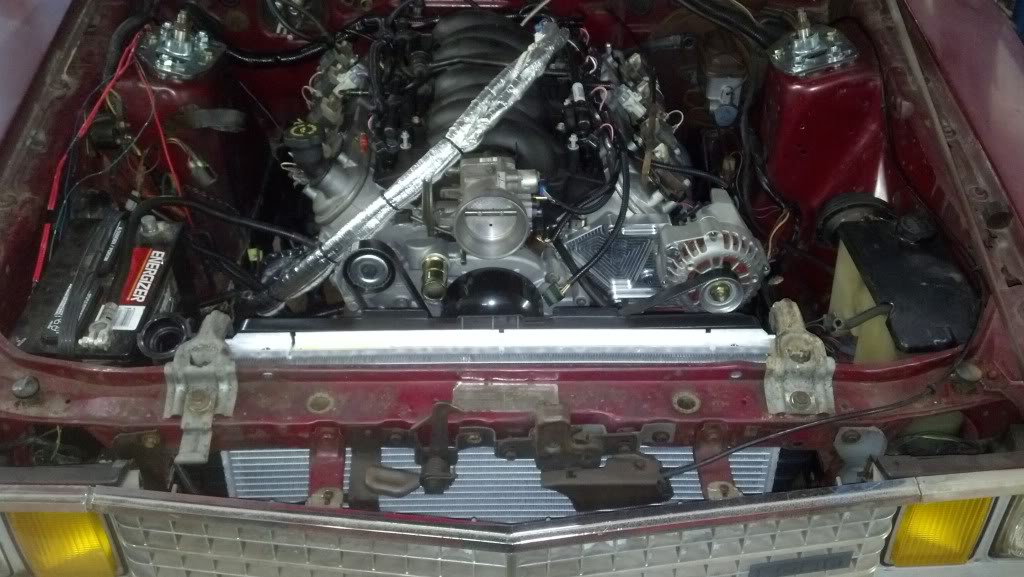
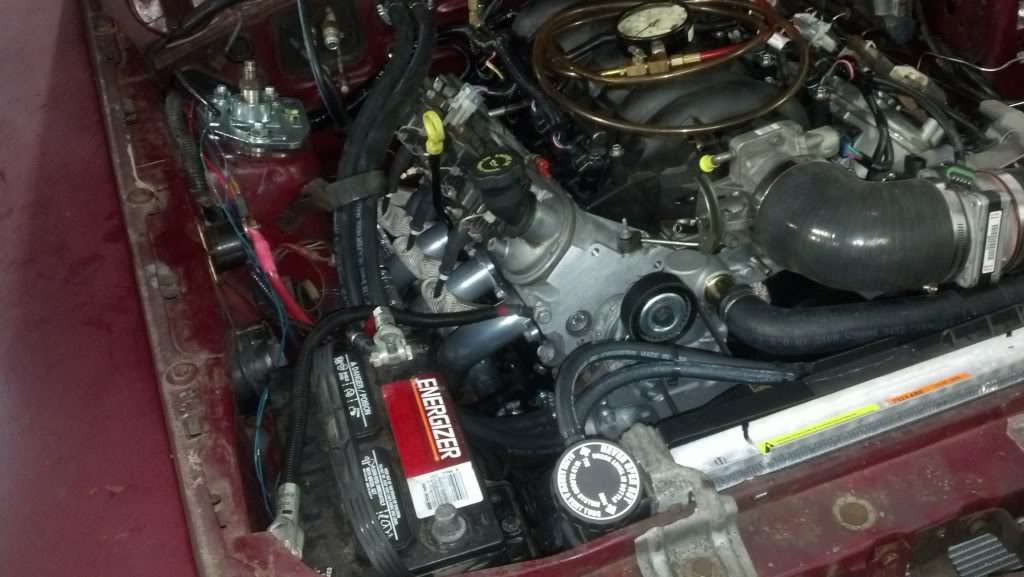
got a little more done tonight. made some brackets for the trans cooler, mounted the Camaro radiator/fan assembly, tackled a little more wiring also.
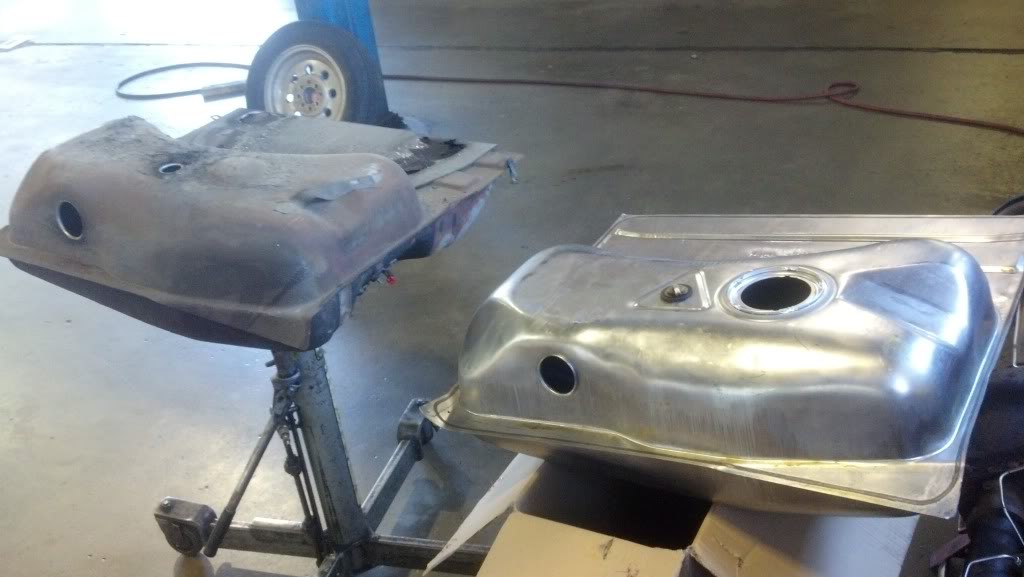
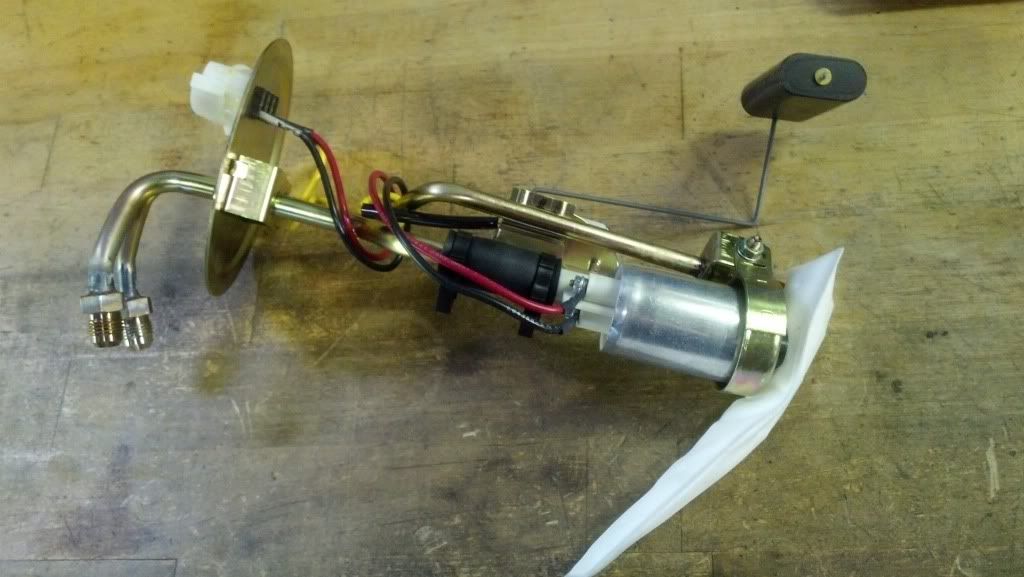
ive been having a hard time planning out the fuel system. i originally intended to use the spare aeromotive external pump i have and sump the stock tank but i really didn't want a loud pump or a sump hanging out the back so i ordered a fuel tank for an 86 ford LTD (these came with EFI) and a tank unit along with an aeromotive 340 in-tank pump. this seemed to be the most economical way to do it since the tank was like $80 and the tank unit was $65 - i needed a level sensor anyway since the one in the car is no good and i cant even find a replacement one. i guess ill see if this all works next week lol
ive been having a hard time planning out the fuel system. i originally intended to use the spare aeromotive external pump i have and sump the stock tank but i really didn't want a loud pump or a sump hanging out the back so i ordered a fuel tank for an 86 ford LTD (these came with EFI) and a tank unit along with an aeromotive 340 in-tank pump. this seemed to be the most economical way to do it since the tank was like $80 and the tank unit was $65 - i needed a level sensor anyway since the one in the car is no good and i cant even find a replacement one. i guess ill see if this all works next week lol
 09-28-2013, 09:07 PM
#42
more stuff done today:
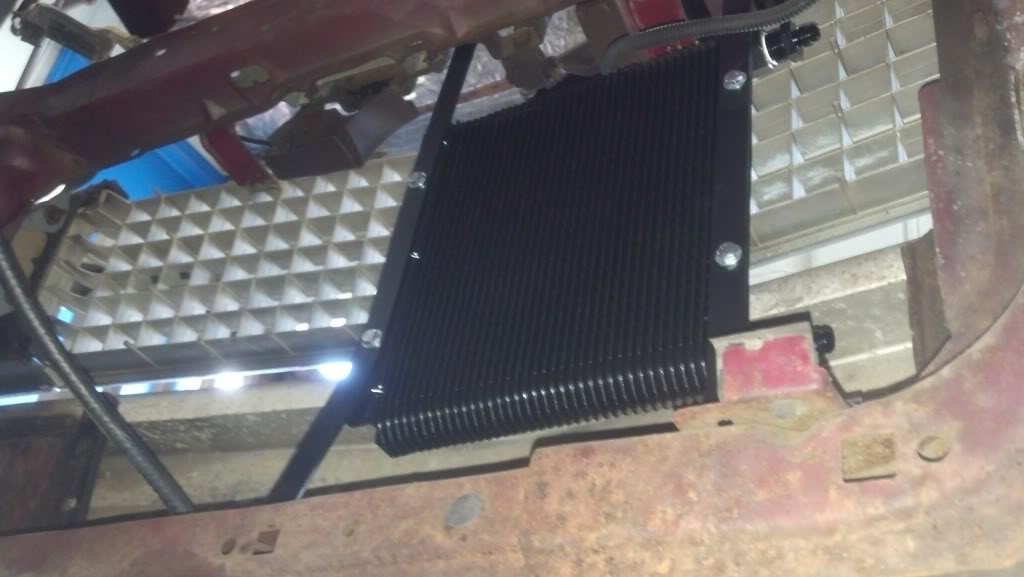
mounted the trans cooler using the brackets I made, nothing fancy but functional
pulled out the old tank, had about 13 gallons of stale gas, fuel gauge said it had 1/4 tank... so physically the tanks are the same - the LTD tank filler neck hole is smaller though (2.25 diameter as opposed to the fairmonts 2.50 diameter) so for anyone looking to do this you will need to grab a filler neck also. im hoping to hit up the junk yard next week.
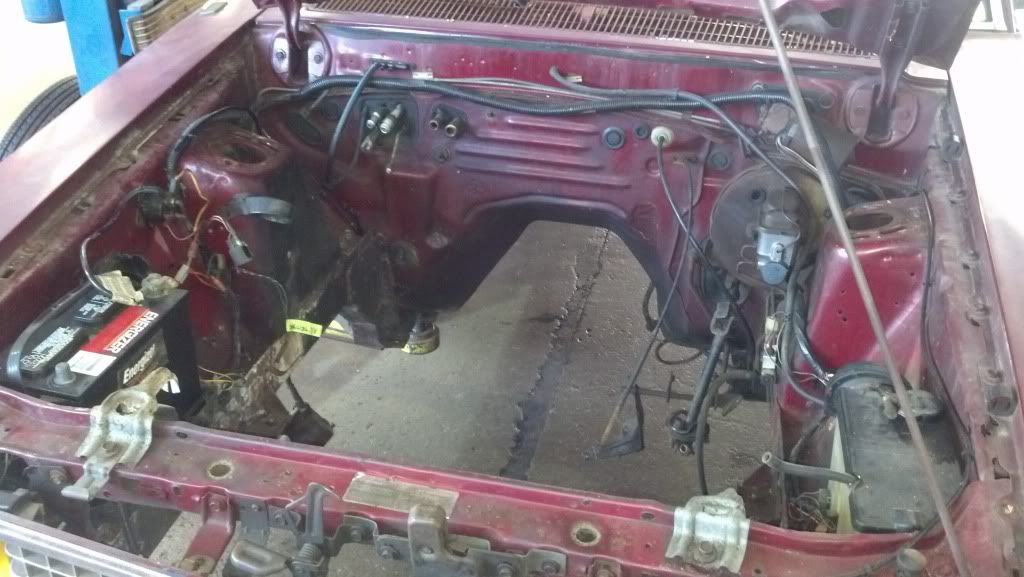
made some brake lines, did some wiring, started basically getting things wrapped up in the engine compartment

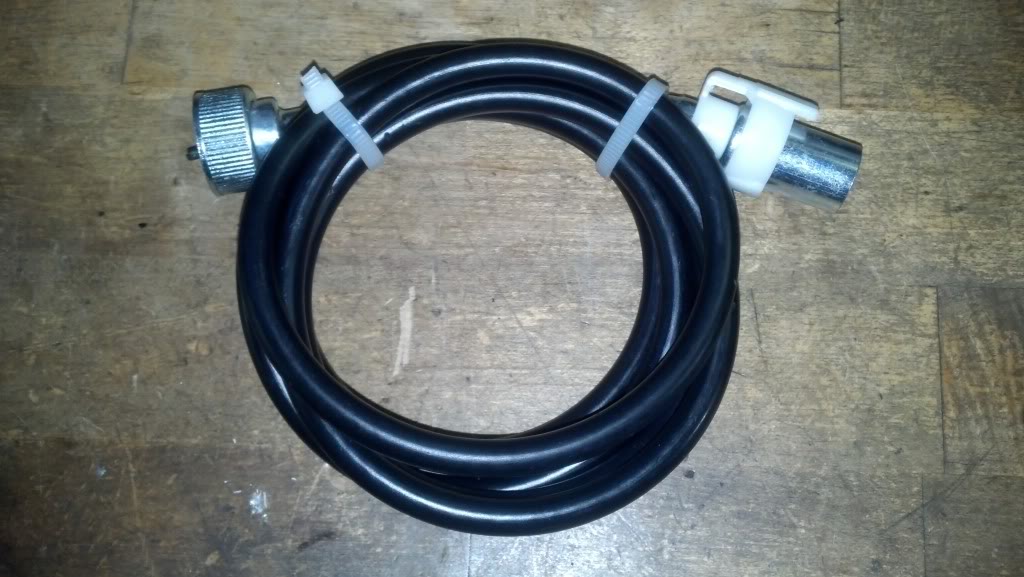
also for anyone putting an older GM trans in a ford with a cable driven speedometer, they actually make a cable so you can make it functional
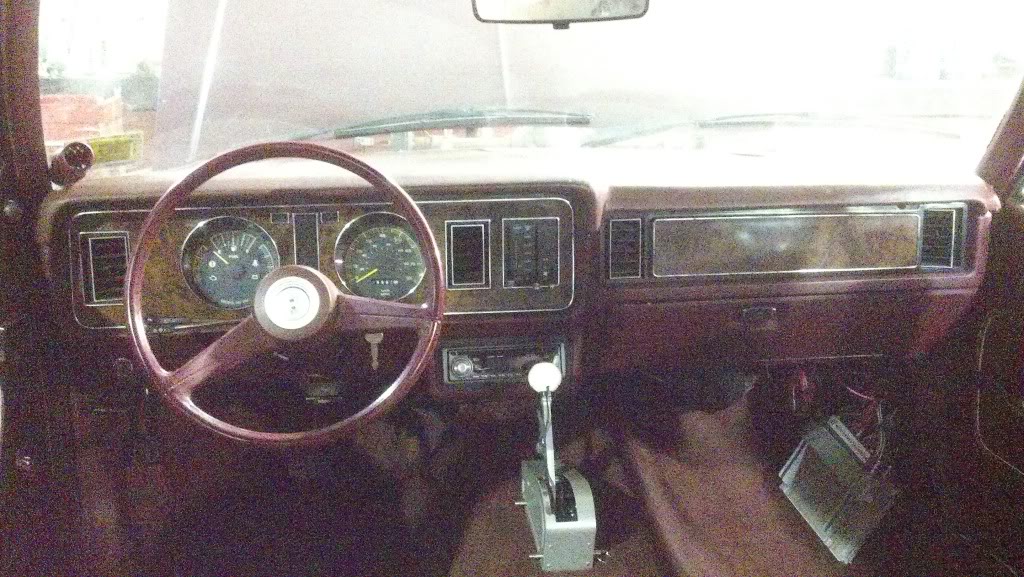
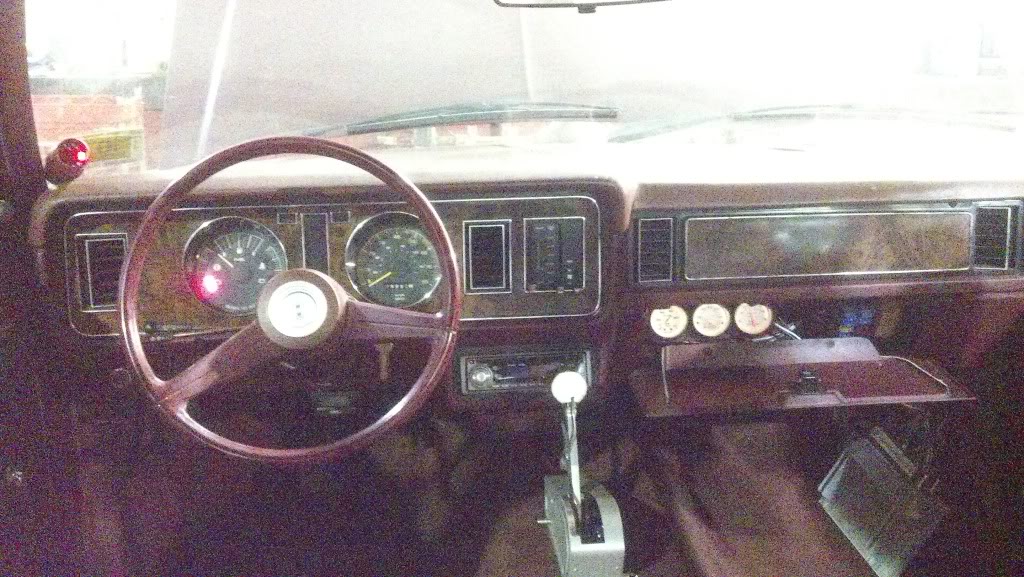
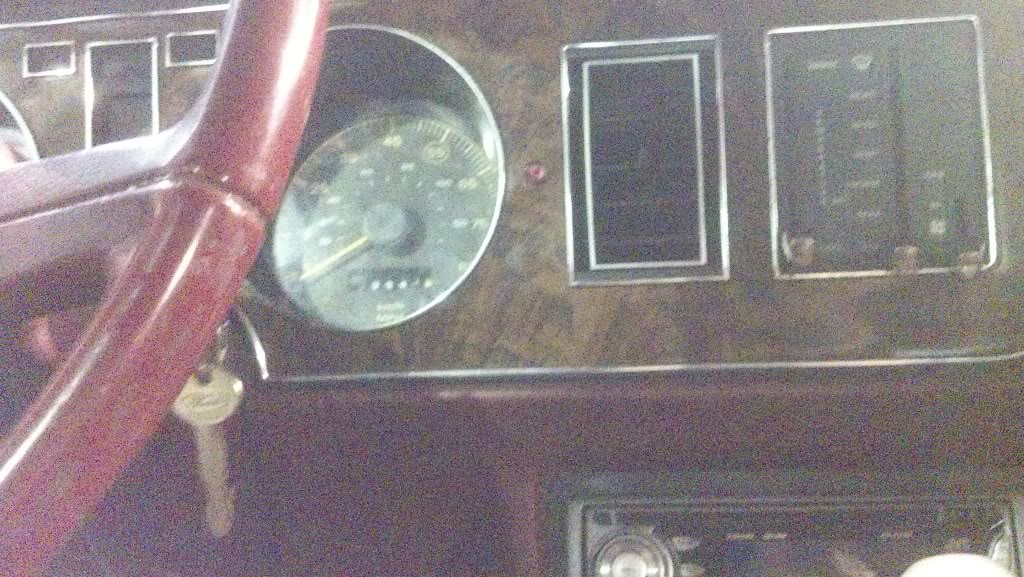
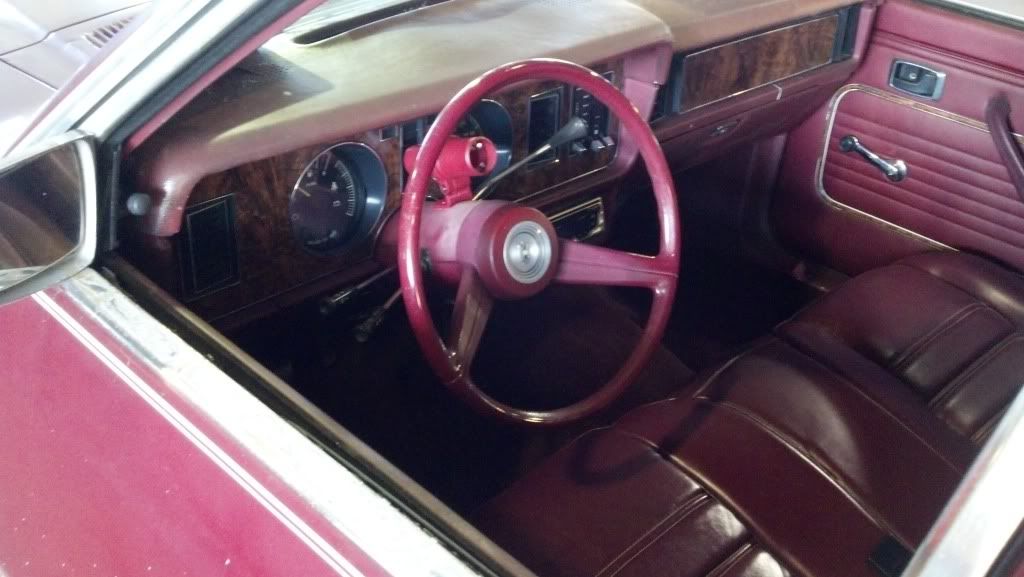
gauges mounted in the glove box (freebies from my buddy who upgraded the ones in his racecar )
)
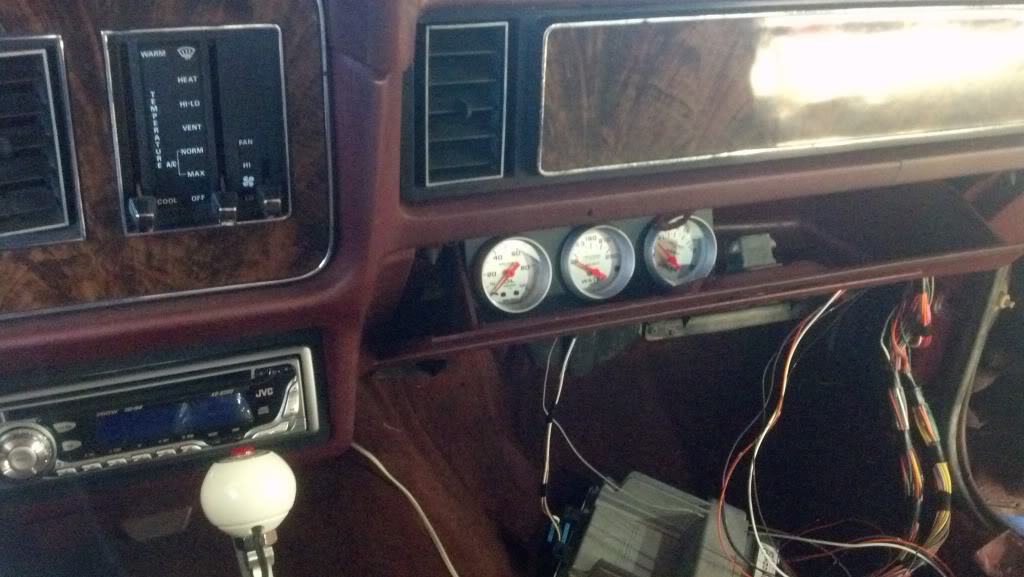
also because im weird and stupid little things bother me, I painted the PRNDL indicator since it has a prostick on the floor and the column shift is no more(the interior is literally falling apart and I don't care but seeing the indicator would bug the **** outta me!)
mounted the trans cooler using the brackets I made, nothing fancy but functional
pulled out the old tank, had about 13 gallons of stale gas, fuel gauge said it had 1/4 tank... so physically the tanks are the same - the LTD tank filler neck hole is smaller though (2.25 diameter as opposed to the fairmonts 2.50 diameter) so for anyone looking to do this you will need to grab a filler neck also. im hoping to hit up the junk yard next week.
made some brake lines, did some wiring, started basically getting things wrapped up in the engine compartment
also for anyone putting an older GM trans in a ford with a cable driven speedometer, they actually make a cable so you can make it functional
gauges mounted in the glove box (freebies from my buddy who upgraded the ones in his racecar
)also because im weird and stupid little things bother me, I painted the PRNDL indicator since it has a prostick on the floor and the column shift is no more(the interior is literally falling apart and I don't care but seeing the indicator would bug the **** outta me!)
Last edited by lt4malibu; 09-28-2013 at 10:16 PM.
10-03-2013, 08:09 PM
#45
got some more updates:
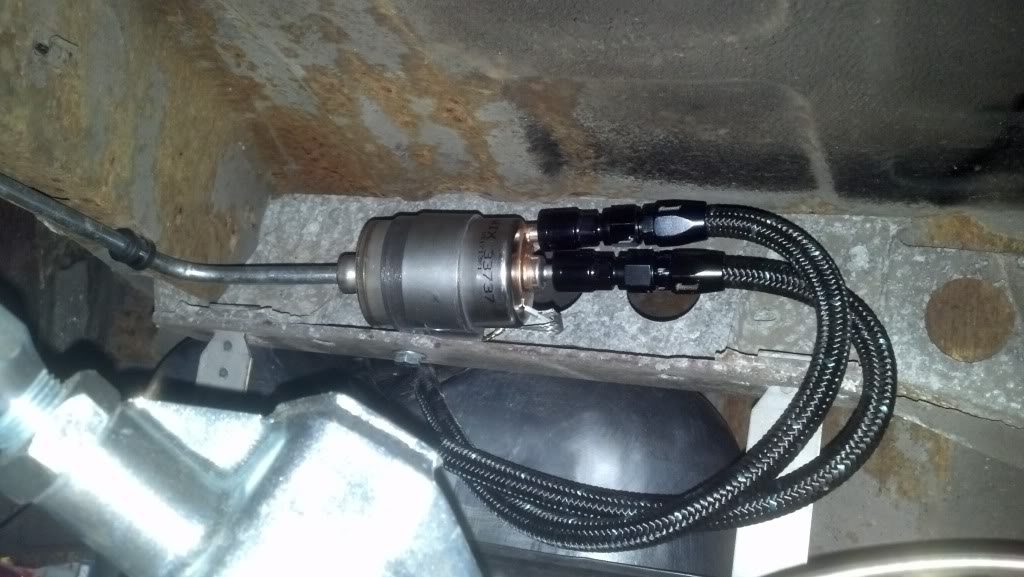
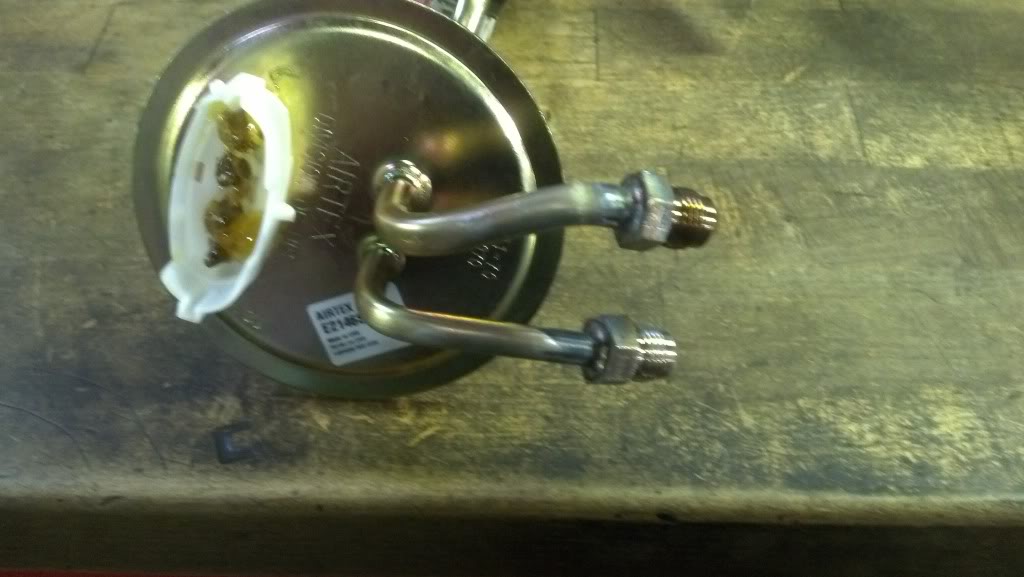
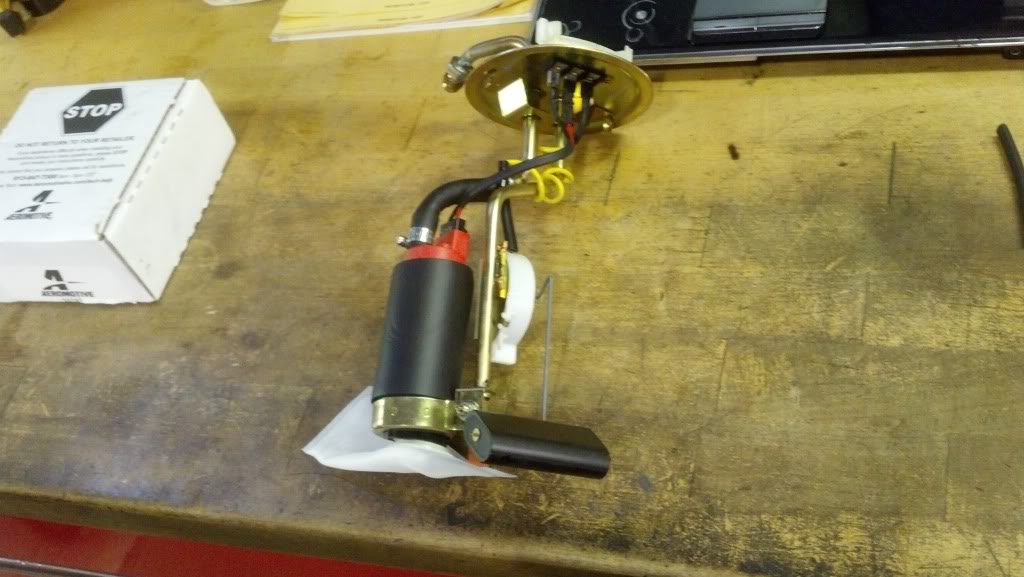
EFI tank unit showed up Monday, for some reason they used 3/8 line but step it down to 5/16 and 1/4 for the feed and return (I knew this when I ordered it though) so I cut the factory quick connects off and had my buddy Sam weld some -6 stainless AN fittings on it. then I wedged an aeromotive 340 pump. looks like it should work
so the tank was $85, the EFI sending unit/bracket was $65 and the pump was $150 so for around $300 I have all new stuff and no external sump or loud pumps to deal with.
 (stock photo but you get the idea)
also hooked up the shifter cable, installed the speedo cable, pulled the bench seat out so I can wire up the neutral safety/reverse lights to the shifter, pulled the carpets(yes plural) back so I can run the fuel pump wiring and that's about it
EFI tank unit showed up Monday, for some reason they used 3/8 line but step it down to 5/16 and 1/4 for the feed and return (I knew this when I ordered it though) so I cut the factory quick connects off and had my buddy Sam weld some -6 stainless AN fittings on it. then I wedged an aeromotive 340 pump. looks like it should work
so the tank was $85, the EFI sending unit/bracket was $65 and the pump was $150 so for around $300 I have all new stuff and no external sump or loud pumps to deal with.
(stock photo but you get the idea)also hooked up the shifter cable, installed the speedo cable, pulled the bench seat out so I can wire up the neutral safety/reverse lights to the shifter, pulled the carpets(yes plural) back so I can run the fuel pump wiring and that's about it
10-04-2013, 09:05 PM
#46
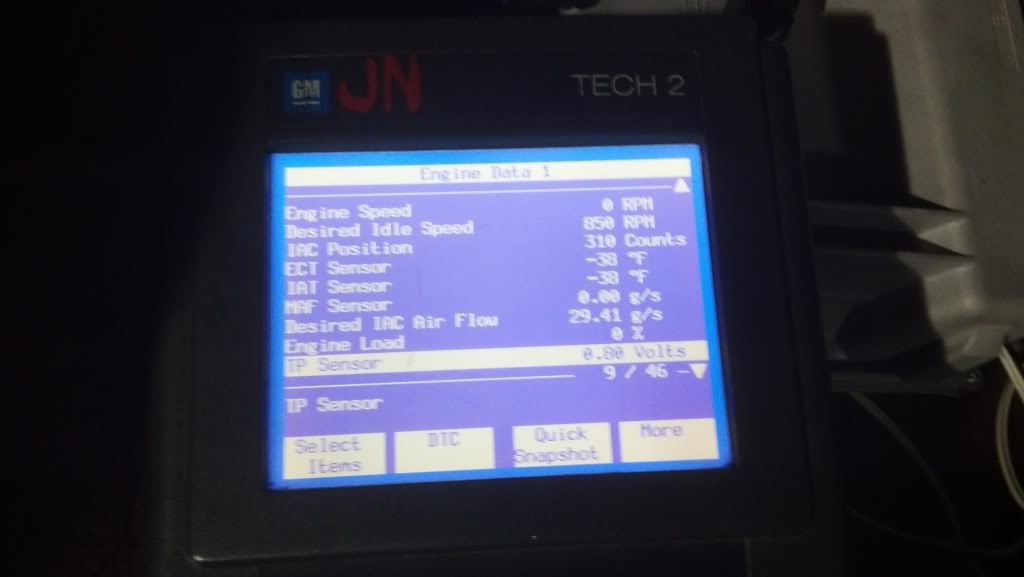
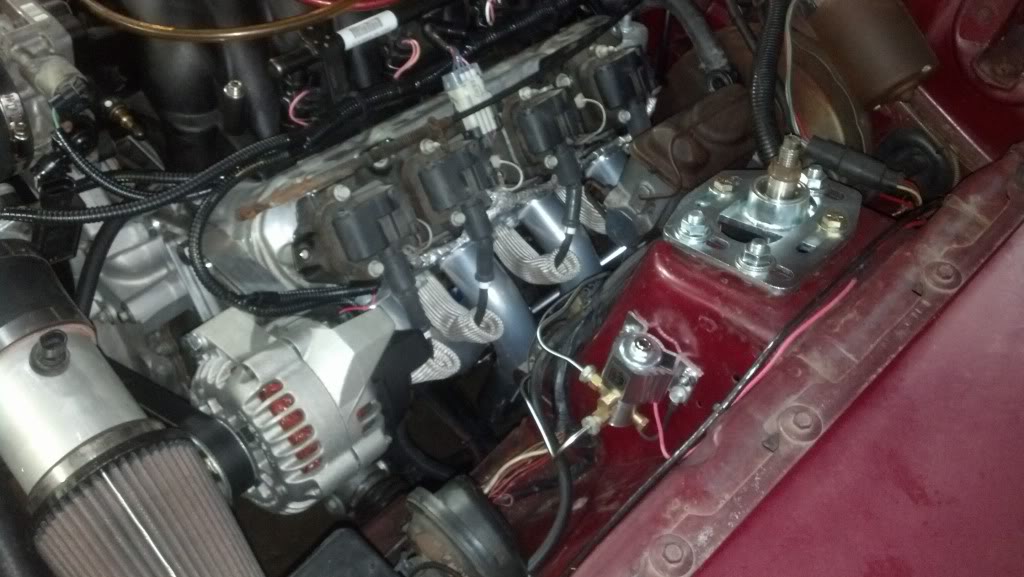
made a little more progress with the wiring tonight! wired up the final connections inside the car and was able to power up the ECM tonight and make sure I could see data/communicate. also utilized the factory "engine" light for the MIL. I could technically start it if I put the headers on and put some fluids in it but I want to get a few other small things sorted out before I run it.
10-06-2013, 09:43 PM
#47
damn its been a long weekend. worked till 1 Saturday, left and drove straight to Maryland to help my boy with his first outing in the 8.50 index, got home at like 1am, woke up at 8am this morning, worked till 1 again then put in a good 7hours of wrenching on the wagon.
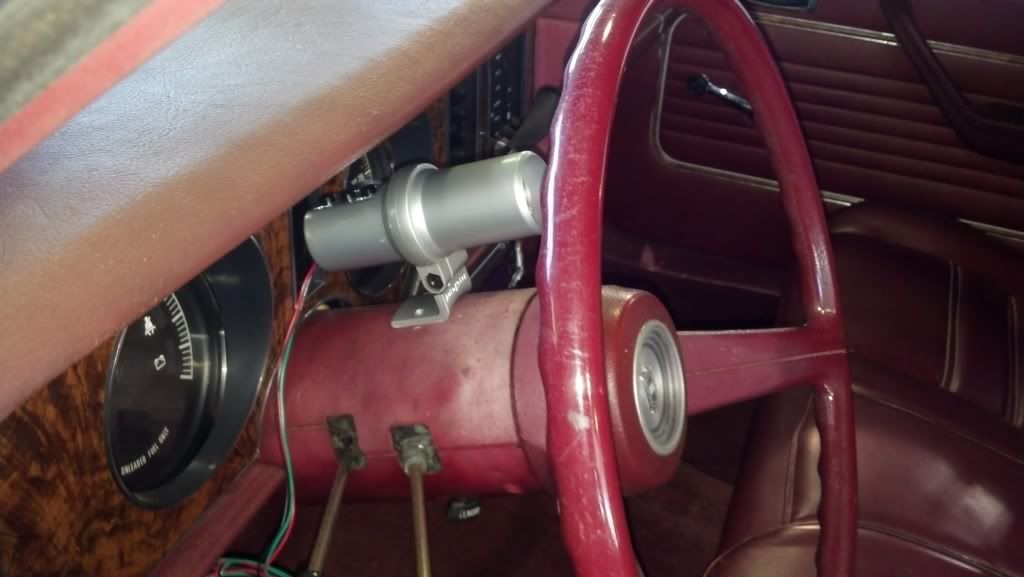
soooo I basically have everything wrapped up inside, spent most of my afternoon finishing up the wiring. amazingly everything works reverse lights, neutral safety, gauges, etc. I ended up moving the tach/shiftlight from the column to the a-pillar area.
I basically cut the glove box pocket off and its now just the door, mounted the fuse panel in there also.
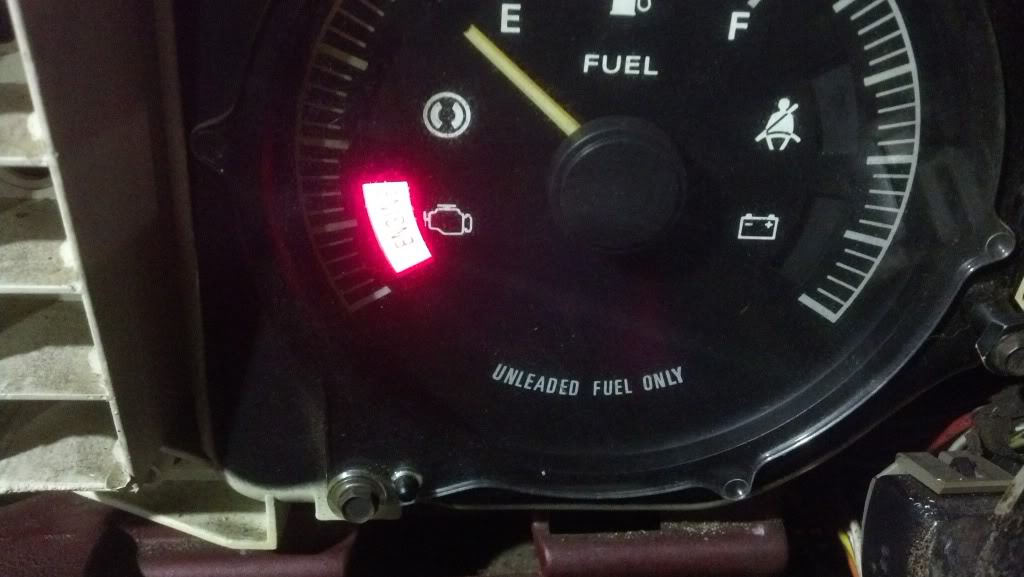
since I have a thing about keeping "factory type" functions, I originally wanted to use the factory "brake" warning lamp for the line lock indicator... well its controlled by grounding the circuit(line lock its controlled on the power side) so I did this instead: took the little light they give you with the line lock kit and pulled all the fancy chrome fasteners off, drilled a 3/8 hole in the dash plate and superglued the **** outta it (sits flush with the panel) and with the woodgrain its not even noticeable until its lit. does anybody care about this? probably not lol
with any luck it will run this week!
soooo I basically have everything wrapped up inside, spent most of my afternoon finishing up the wiring. amazingly everything works
reverse lights, neutral safety, gauges, etc. I ended up moving the tach/shiftlight from the column to the a-pillar area. I basically cut the glove box pocket off and its now just the door, mounted the fuse panel in there also.
since I have a thing about keeping "factory type" functions, I originally wanted to use the factory "brake" warning lamp for the line lock indicator... well its controlled by grounding the circuit(line lock its controlled on the power side) so I did this instead: took the little light they give you with the line lock kit and pulled all the fancy chrome fasteners off, drilled a 3/8 hole in the dash plate and superglued the **** outta it (sits flush with the panel) and with the woodgrain its not even noticeable until its lit. does anybody care about this? probably not lol
with any luck it will run this week!
 10-08-2013, 09:20 PM
#49
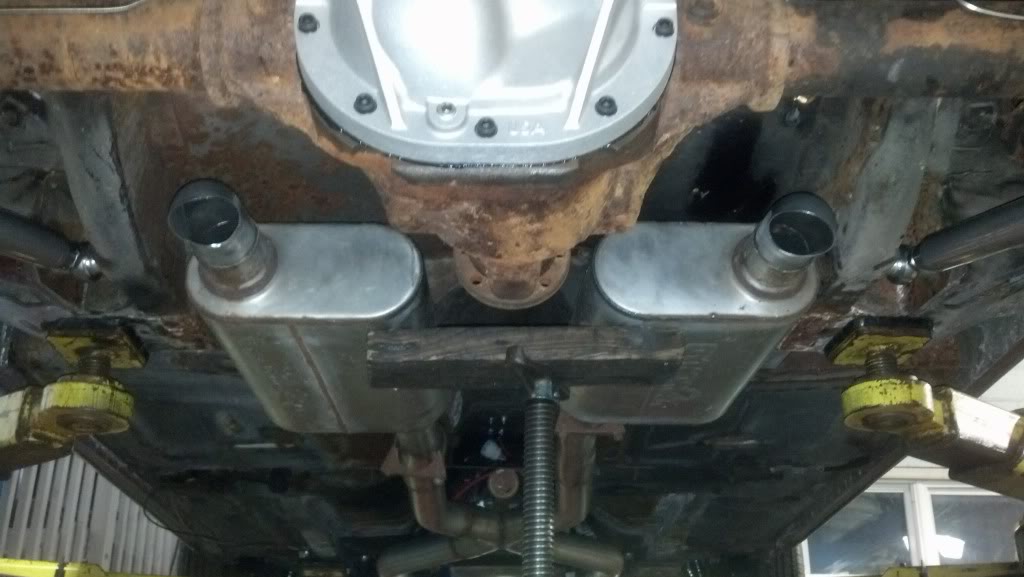
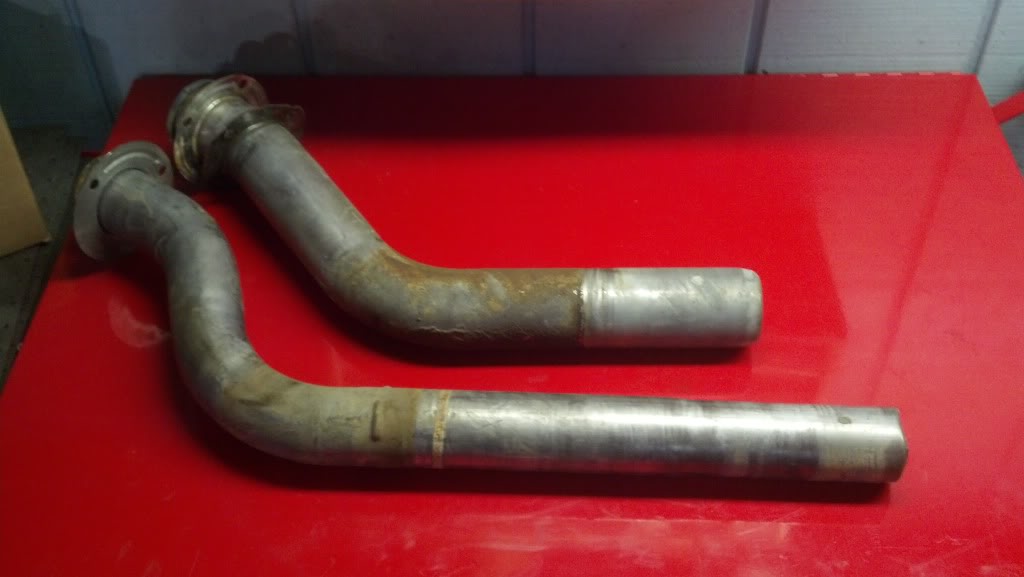
plumbed up my line lock tonight, bolted the headers on for hopefully the last time for a while, test fit the old exhaust off my mustang (fits perfect!), bolted down the intake manifold and put together a little "stand alone" fuel system consisting of an old walboro pump and a gas can and fired it off for a minute. hopefully I can find a filler neck this weekend at the junkyard so I can install the tank and run the lines.


 10-10-2013, 12:17 PM
#55
so the car sat all week, had too much other work going on so tonight I pulled the stock K-member, control arms, rack, struts, etc. degreased the firewall a little and noticed it was actually starting to strip the paint right off(I was using some normal degreaser and a rag lol)
went from this:
to this:
then this:
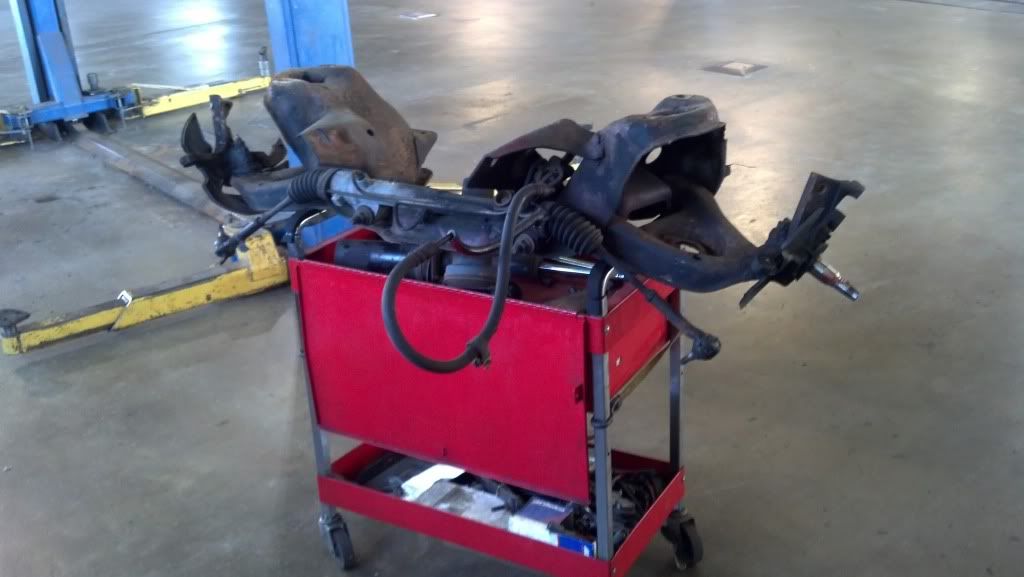
hope to have the front suspension in tomorrow and possibly the rear. since my UPR rear control arms came today along with a few other things this week.
also since its a sleeper im trying to kinda hide things in plain sight, sometimes it works and others... well...
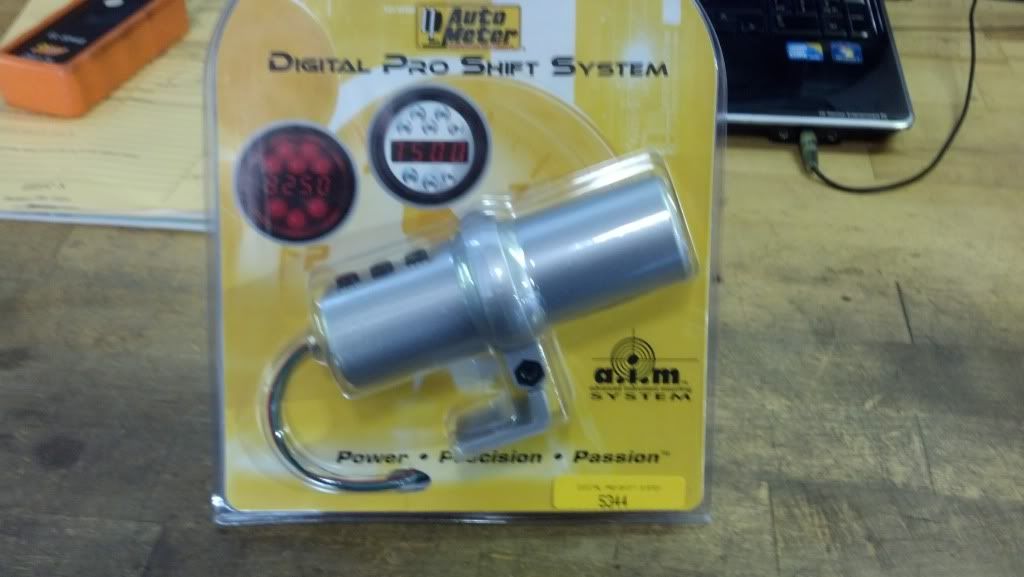
since I didn't want a huge tach on the dash I went with the autometer digital tach/shiftlight again and took it apart and tried to match it to the interior color(worked pretty well on the Malibu so I figured id try it again). well apparently the interior is pretty faded lol
went from this:
to this:
then this:
hope to have the front suspension in tomorrow and possibly the rear. since my UPR rear control arms came today along with a few other things this week.
also since its a sleeper im trying to kinda hide things in plain sight, sometimes it works and others... well...
since I didn't want a huge tach on the dash I went with the autometer digital tach/shiftlight again and took it apart and tried to match it to the interior color(worked pretty well on the Malibu so I figured id try it again). well apparently the interior is pretty faded lol
 10-13-2013, 09:17 AM
#57
9 Second Club
iTrader: (9)

Join Date: Apr 2011
Location: Indian Rocks Beach Fl
Posts: 1,059
Likes: 0
Received 0 Likes
on
0 Posts
I think next year spring might do this to a white faimont wagon we have sitting after seeing yours. The stang everybody expects it to be fast with a LS1 but a wagon would be just the cool factor in itself. nice job.
10-13-2013, 10:43 AM
#58
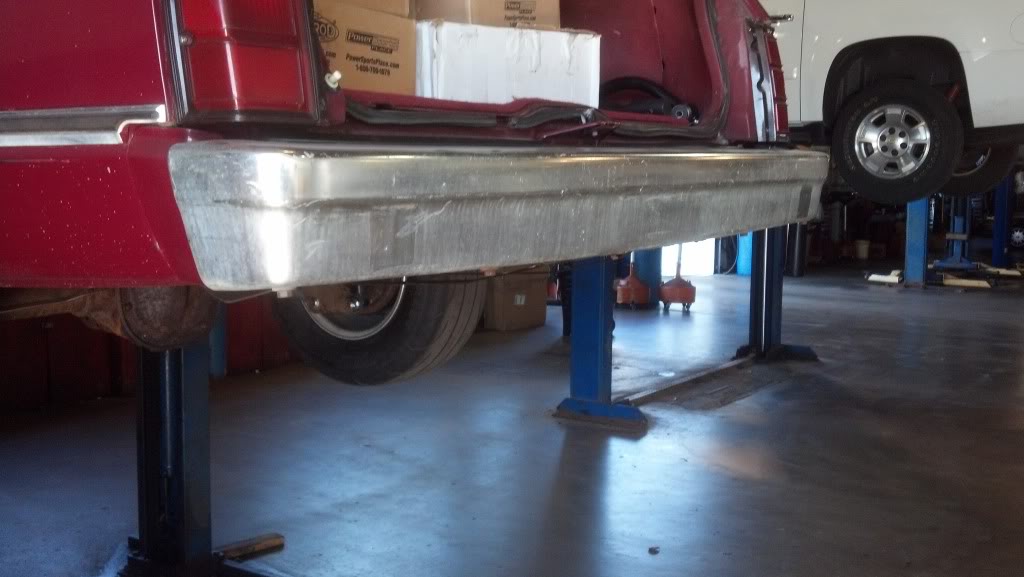
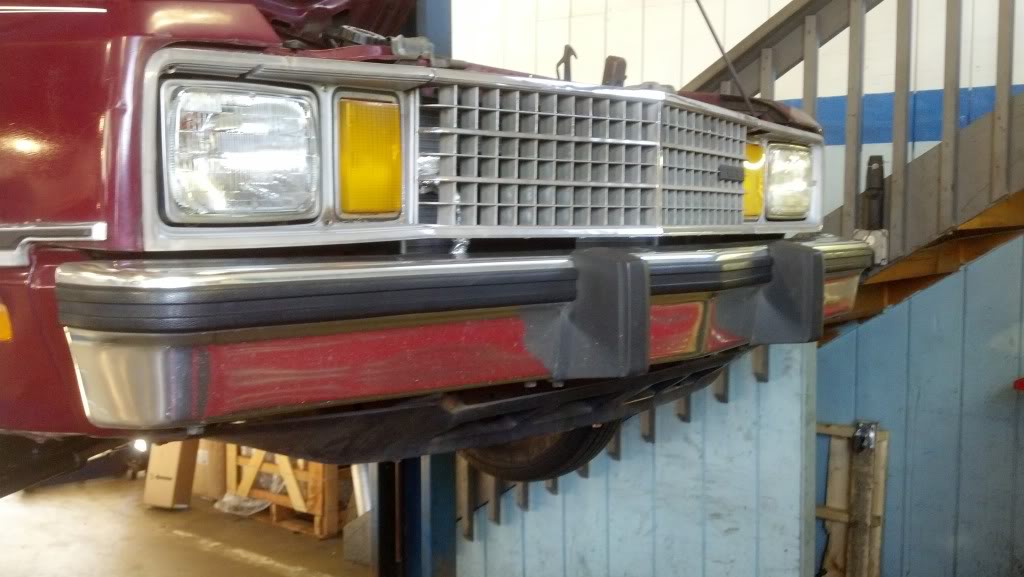
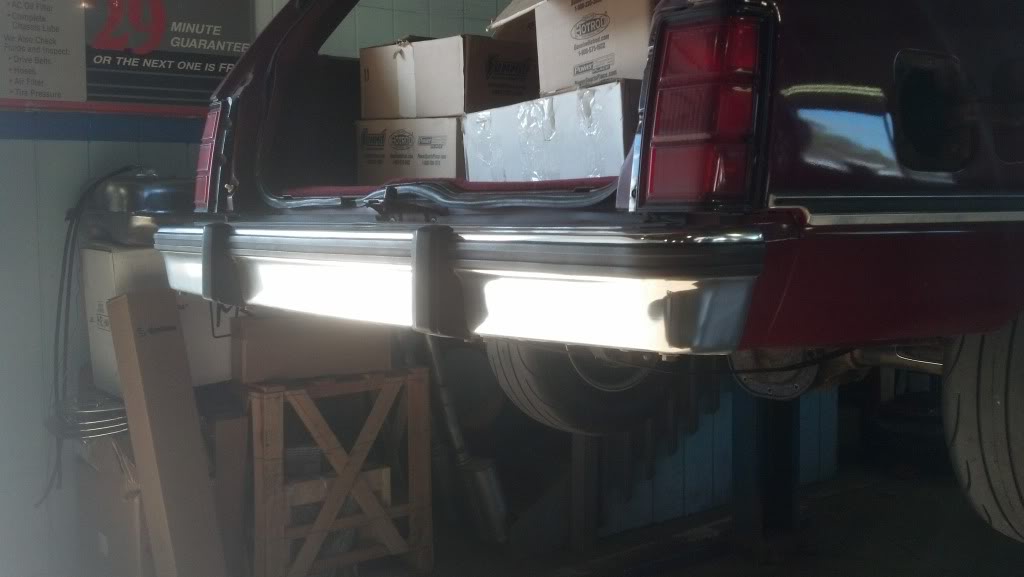
no real updates, ended up going to the junkyard Friday to find my filler neck - there was an 82 zephyr there that was probably 10times nicer than this car but was completely ripped apart. it had really nice bumpers so I snagged them. I wasn't really looking to do anything to improve the cosmetics of this thing but my front one was beat up pretty bad. they also have the black moldings on them to add that extra "grandma" appeal.
before:
after:
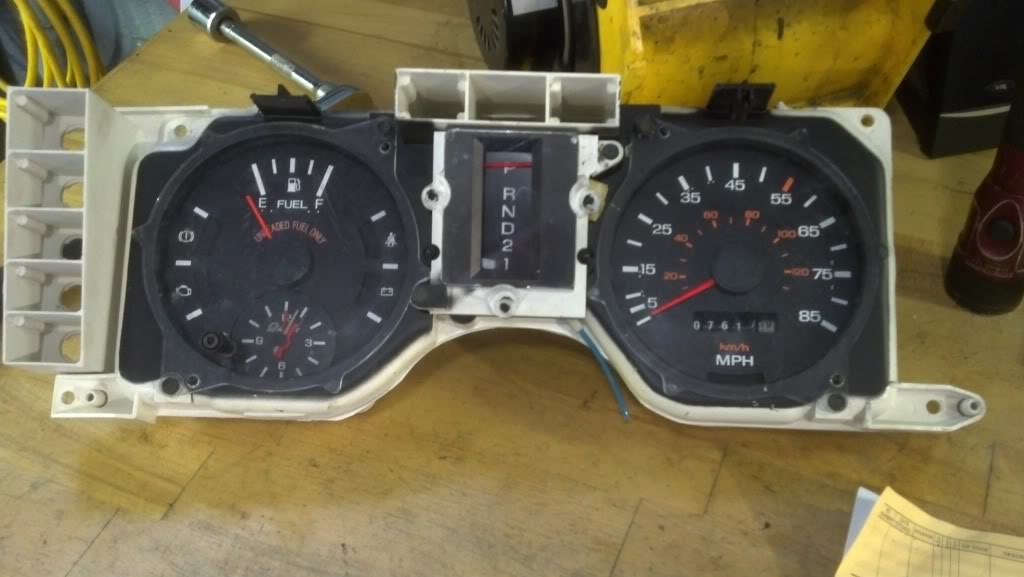
also picked up a nicer cluster(has a clock and it actually works)
and the filler neck I found wont work as is(the 4door is a deifferent shape than the wagon) but im gonna cut it and weld the smaller tube to the wagon one so it fits
before:
after:
also picked up a nicer cluster(has a clock and it actually works)
and the filler neck I found wont work as is(the 4door is a deifferent shape than the wagon) but im gonna cut it and weld the smaller tube to the wagon one so it fits
10-19-2013, 09:52 PM
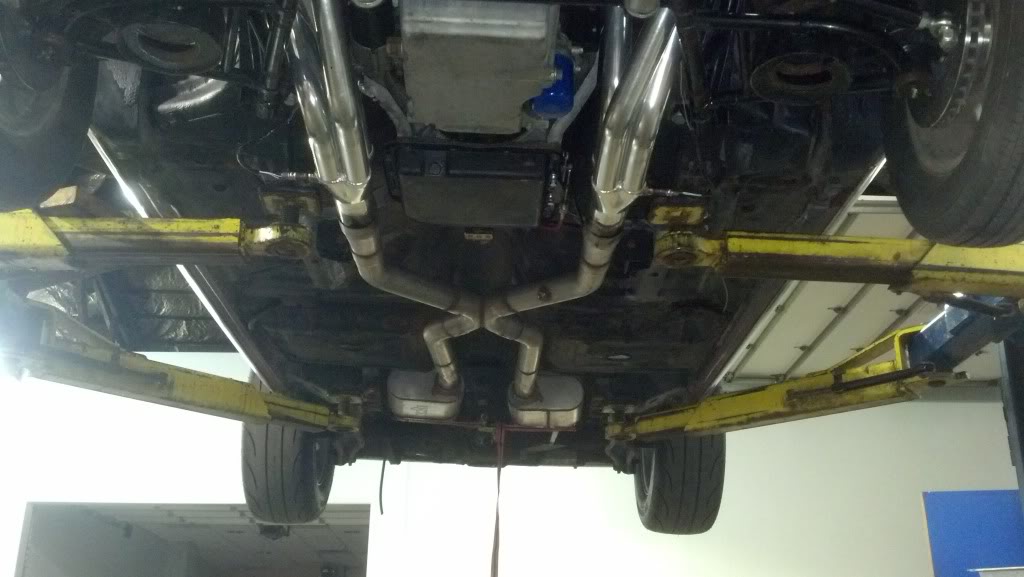
#59
wrapped up the fuel system tonight, installed the tank and wired the fuel pump/sender up. mounted the vette regulator/filter on the crossmember where the tank straps attach. if I never have to bend coiled up 3/8 line again it'll be to soon. came out pretty neat though. put the exhaust on and put the turn-downs in which kills me because all my street cars have tail-pipes I cant wait to take these things out and get some tailpipes made this winter! also bolted on the moser girdle for the rear, filled that up and buttoned up the rear suspension(UPR forgot to send me the spacer bushings for the adjustable uppers but took care of it quick for me) installed the strange adjustable rear shocks. I think the stance is pretty good, would like the rear lower a little but it has only 2gallons of gas in it so ill see how it sits full. should hopefully get the driveshaft this week. getting close now