When you click on links to various merchants on this site and make a purchase, this can result in this site earning a commission. Affiliate programs and affiliations include, but are not limited to, the eBay Partner Network.
Just joined. Thought I share my build so far. Here is what I started with:
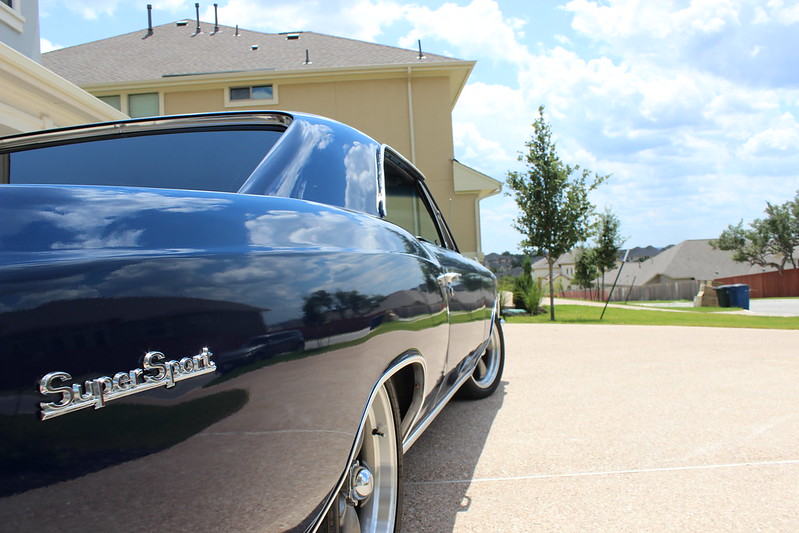
- 66 Chevelle
- Non-SS, but the previous owner made it a clone
- A "10 footer" - looks good from a ways, but up close you start to see the flaws
- Didn't want a perfect car as I will be building it with my son and enjoying modifications
- 355 SBC
- 700R4
- Drums
- WAS manual sterring. Just added power steering with Quick Ration Jeep Cherokee gear box
- 10 bolt rear
- OK interior. Carpet, door panels and headliner are OK, but bucket seats are out of a Ford Edge and are hideous
- Body is alright, but has a few issues (covered by recent paint)
- Suspension is lowered, but all bushings, etc are JACKED
Planned:
- Steering - check
- Brakes - Baer (almost complete)
- Suspension - RideTech airbags (almost complete)
- LS (not too crazy, probably just an LS3 to start)
- 6 speed manual
Pics:
In the beginning:
Mod pile from early December:
Stock suspension removal and beginning of front suspension:
Stock suspension and drum:
Coming out:
Stock suspension out:
What the steering arm was caked with on the back of the stock spindle:
Steering arms after clean up:
Started bending brake lines with a different route due to the header. Still doesn't conflict with upper arm, but I'll still probably redo as it's in a precarious spot:
Brake line across crossmember:
New parts!!!
Had to cut the spring pocket on frame to make way for the bags (I cleaned them up after test fitting, but forgot to take pictures):
Back together to spindle and caliper bracket:
Brakes and starting rear suspension:
Finished the front end except brake lines:
Blue looks lighter than it is
And started on the rear.
Grinded frame and suspension mounting points and sprayed metal prep:
Undercoating:
Stock rear control arms:
New airbag mount (Attached to rear end):
After removing the rear upper control arms, I found the bushings that are in the rear end for the upper rear control arms were toast. Needed to remove them. Watched a couple videos...tried...failed. Luckily I have a lot of air tools. Here is the aftermath:
Got the rear end bushings done, which allowed me to complete the rear upper control arms. My stainless rear brake lines came, so I was able to get those in as well. I went stainless for the rears for a couple reasons. 1 - who doesn't like stainless? 2 - Because I can order the pre-bents ones for the rear. Since I am changing the master cylinder and adding proportioning valve, no one really makes a Wilwood - stock location lines so I have to bend my own. Since I've never done that before, I figured I'd do the fronts with regular brake lines to get the hang of it and go back with stainless later as I hear it's harder to bend and flare. Also ran the air lines for the bags. And some more rust-proofing and undercoating. So the suspension is all done except mounting the tank, compressors, ECU, controller, and doing the wiring. That is a lot like audio work I used to do for a living, so I'm not concerned about that at all. And the brakes are finished except bleeding. I am concerned about that as I've never made brake lines before and I am sure 90% of them will leak. :p Pictures:
Master cylinder and lines. I'm not too happy about the middle line, so I'll probably change the routing when I go stainless:
More of the lines:
Line across cross-member:
Stainless rear brake lines (front to rear and across rear end to each brake):
Airlines:
Undercoating:
The "ONLY" stuff left...LOL:
More updates to come as I complete stuff. Will probably be a week before I get back to working on anything.
Very nice driver.I will be watching this closely as I have just purchased a 66 Chevelle and intend to do much of the same mods as you did with yours. Probably not going to be air ride but coilover.
Thanks MantyCarGuy. I was on the fence between coilovers and bags. I like the performance of coilovers, but also really like the look and adjust-ability of bags. I like really low cars, but driveways, speed bumps etc kill me. After doing some research on the performance capabilities of the newer airbag systems, I figured I try it out. Not sure your reasoning, but if it is due to cornering performance, I suggest doing some research on it. The stuff has come a LONG way from when they were first introduced.
I know there is nearly endless arguments over airbags, so I'm not trying to incite a riot. And I won't know until I drive it so I can't offer a real word opinion except for what I've read. Hopefully I can provide real world experience soon.
Originally Posted by mantycarguy
Very nice driver.I will be watching this closely as I have just purchased a 66 Chevelle and intend to do much of the same mods as you did with yours. Probably not going to be air ride but coilover.
Great effort on the transformation from the 10 footer (really looks better than that !) Driver.. to a great handling corner craver... any report on the latest update !
When you going to get around to dropping a LSx in ! I'll be watching...
All - Finished running the airlines today and started wiring and plumbing. Had a couple questions about a check valve that I'm waiting on an answer from Ridetech on. Sorry for the slowness, but probably won't have her able to stop under her own power and move up and down until next week. I'm upset as I was hoping to have it done this weekend, but that's how it goes. Oh well.
Originally Posted by M6 Swap
Cool build, good looking car, subscribed
Thanks. More updates soon.
Originally Posted by 66Chevellelq4
sweet ride! ill be watching for sure
Thank you. Hope to have some good updates and pics next weekend
Originally Posted by MikeMcMasters
You say it has a lot of flaws but is sure looks great in the pictures!! Looks like a great project!!
Pictures hide a lot of close up flaws. It DOES look good until you start really inspecting.
Originally Posted by bczee
Great effort on the transformation from the 10 footer (really looks better than that !) Driver.. to a great handling corner craver... any report on the latest update !
When you going to get around to dropping a LSx in ! I'll be watching...
Hopefully you'll be seeing some good stuff soon
Originally Posted by oldgoat69
Very nice, welcome aboard. Now comes the real fun.
Originally Posted by Guard dog
This will be one helluva cruiser, but I'll vote for an LSA in it
I know you would...I recognize your screen name. I would love to copy the LSA from my CTS-V, but I'm thinking I'll do an LS3 / 6sp, then add snails in the future...like someone else I know with a 69 Chevelle...
Originally Posted by Alwhite00
Car is looking very nice, You do good work. BTW your house is beautiful.
Muchas thank you. The house is nice, but I can't take credit other than paying for it. I GREATLY appreciate the vote of confidence on the work. That means a lot.
So I have mixed feelings about how the progress is going. We'll start with the update.
Got the compressors, tank, and stuff test-mounted and installed:
Got RideTech wired and calibrated. Is this too low?
Can't see, but the header actually sits on the ground. Had to change settings a little bit to have the parking height up a little bit
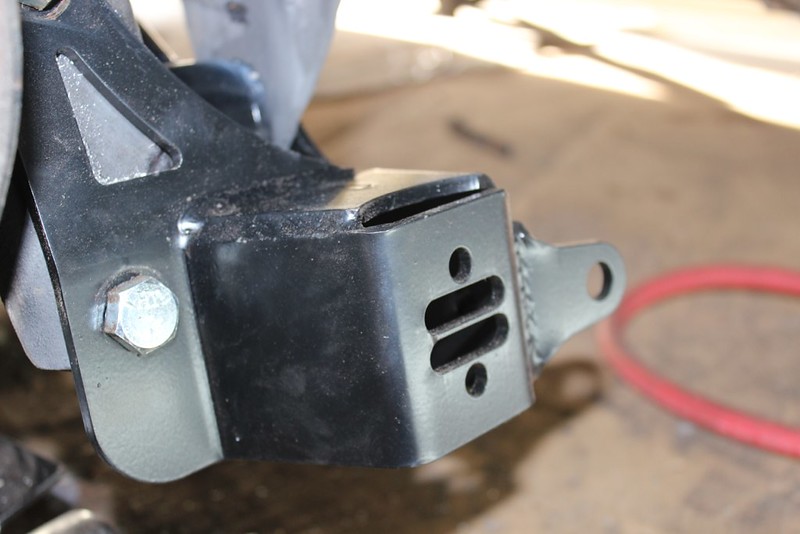
So I know this all sounds good. And I am SUPER happy about that part. Here's my bigger problem. I got to bench bleeding the Wilwood master cylinder. Their install instructions are poor. So after bench bleeding, I had to take it out of the vice and move it to the car and plumb it...all while brake fluid was leaking from the cylinder. Now this doesn't just mean bolting it to the firewall. That means plumbing it to the proportioning valve. Not a big deal, but fluid was going everywhere. I did that, but also leave it a little loose so I could attach the plunger to the brake pedal. Doing that requires move the plunger and actuating the master cylinder. Which wouldn't be a big deal, except for this:
Notice something wrong with the flare? Bad flare which leaked BAD while I was getting the master cylinder in place. GRRR...I paid extra to get stainless lines. I was concerned with the brake lines I made and flared would leak, but as it turns out, those aren't the ones that leaked...the ones I bought from OPGI did.
So I called OPGI. The guy was cool after I sent a picture and said he would send a replacement. He called a little after and said he checked their other one and it had the same problem. Although I was pissed, I think it's cool that he checked before sending me bad lines again. But that was their last set of stainless, so he's refunding the difference and sending me normal ones. He checked those and their fine. What I am most frustrated about is that I could've driven the car this weekend, but now I have to wait for the new line. Guess I should've made ALL my own lines.
Sorry that the pictures aren't great...I couldn't move it out of the garage to take good shots at ride height, parked height and max. And I can't give an opinion of useability of the RideTech Level II airbag suspension yet. I need to fully test.
Finally got the Chevelle running (well, more importantly stopping) under it's own power. I've had it done for a while, but the weather hasn't been good to take her out, or I've been traveling. At any rate, here's a minor update. Got the new brake line for the rear installed, bled the brakes and did some other minor stuff. Took it out today and cleaned her off here's some pics.
Low as she'll go:
Next up is the interior. I have Corbeau seats, RideTech Tiger Cage, new carpet, American Autowire, Guard Dawg keyless ignition, Dynamat, AutoMeter Carbon Fiber guagues and 5pt harnesses. Just need to order dash panel from ABC Performance, Steering column (any suggestions?), door cards and headliner. Then striup it all, have the interior painted and start adding parts. Hopefully start all that next month.
I suppose I could have. However, this is my first time even bending and flaring brake lines. I am actually surprised none leaked so far. And I believe flaring SS is harder, so I wasn't confident in my abilities to to so. On top of that, I figured I would just let OPGI make it right...which they did
Looks very nice. You better add a CV driveshaft to the budget for when you do the LS swap. With a lowered ride height in the rear, I can guarantee that you will have a high speed vibration.


 01-19-2015, 04:15 PM


 It DOES look good until you start really inspecting.