
1970 Bug Mid Engine - Assembly Time (Auto-x videos posted)
 12-11-2015, 01:09 PM
#21
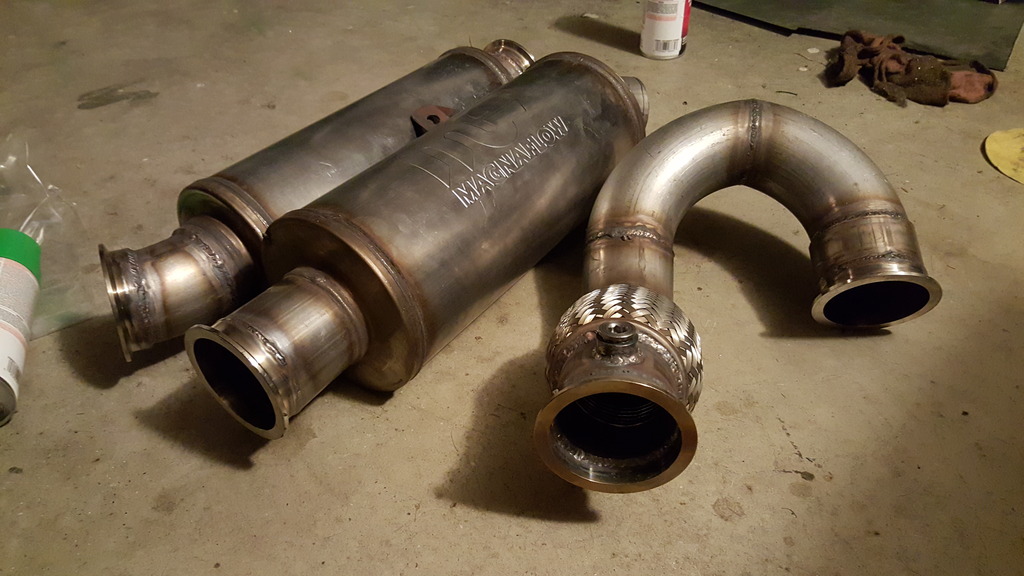
More assembly done! I had to finish welding the exhaust before I threw it on.
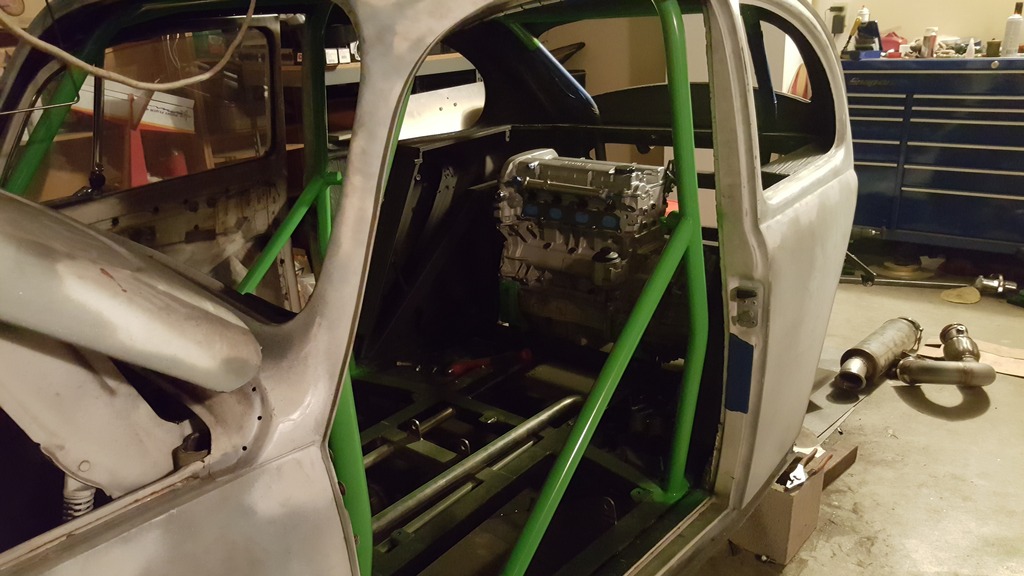
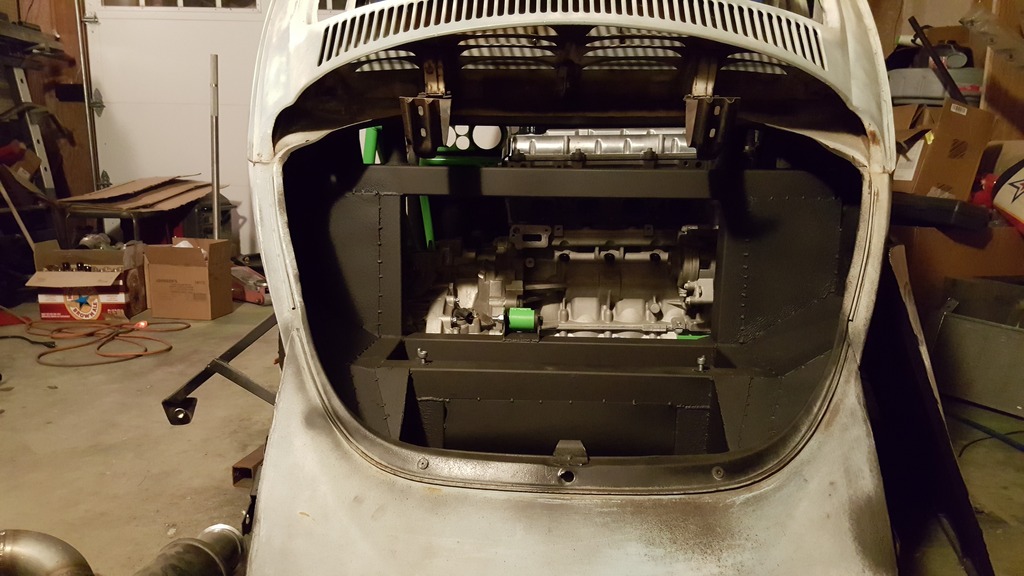
Nice and empty for now
All welding done!
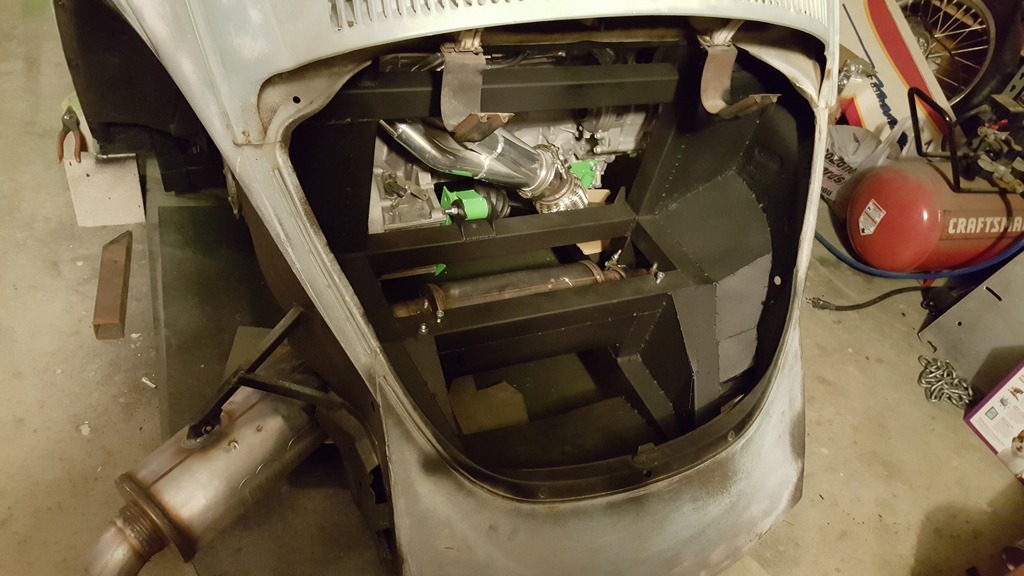
Exhaust is in
Moving on to the engine next. I still need to cut the snout on my blower and weld on a LS1 throttle body flange. After that, the engine should fly together. I only have a few more wires on my harness to pin so firing it up next week is still a possibility.
Nice and empty for now
All welding done!
Exhaust is in
Moving on to the engine next. I still need to cut the snout on my blower and weld on a LS1 throttle body flange. After that, the engine should fly together. I only have a few more wires on my harness to pin so firing it up next week is still a possibility.
 12-15-2015, 11:49 PM
#22
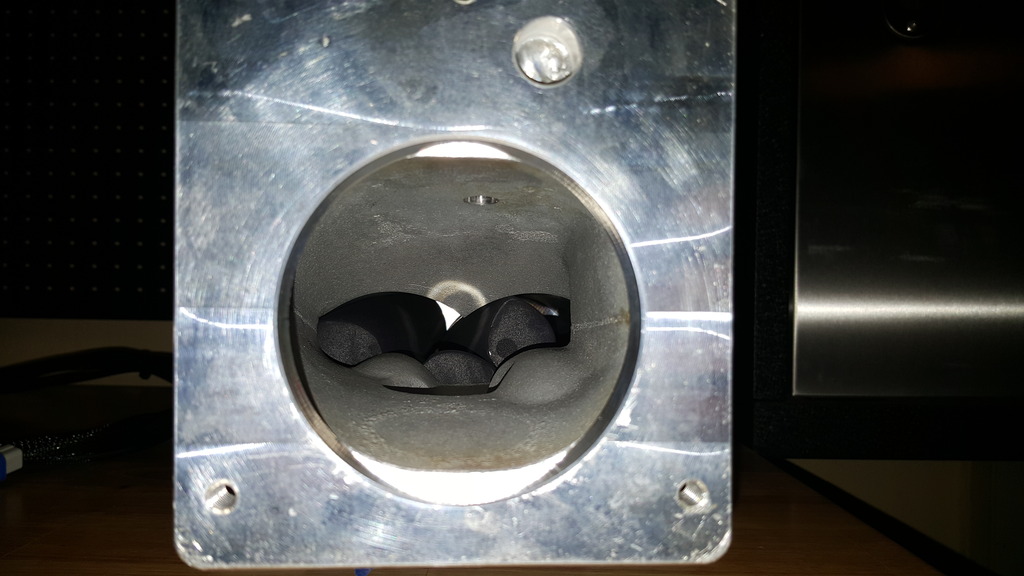
On to the blower as promised.
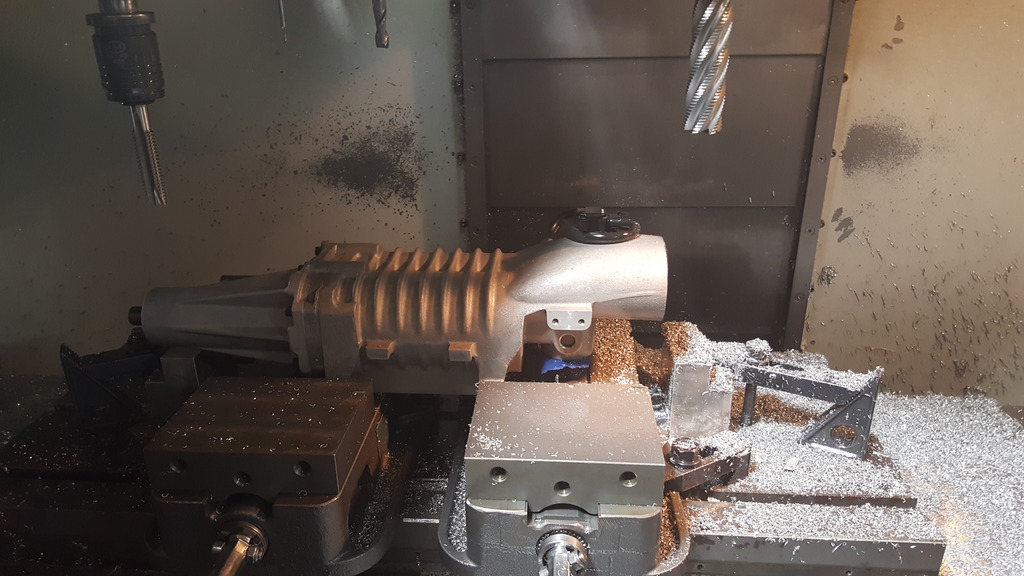
Perks of having an in house machine shop...

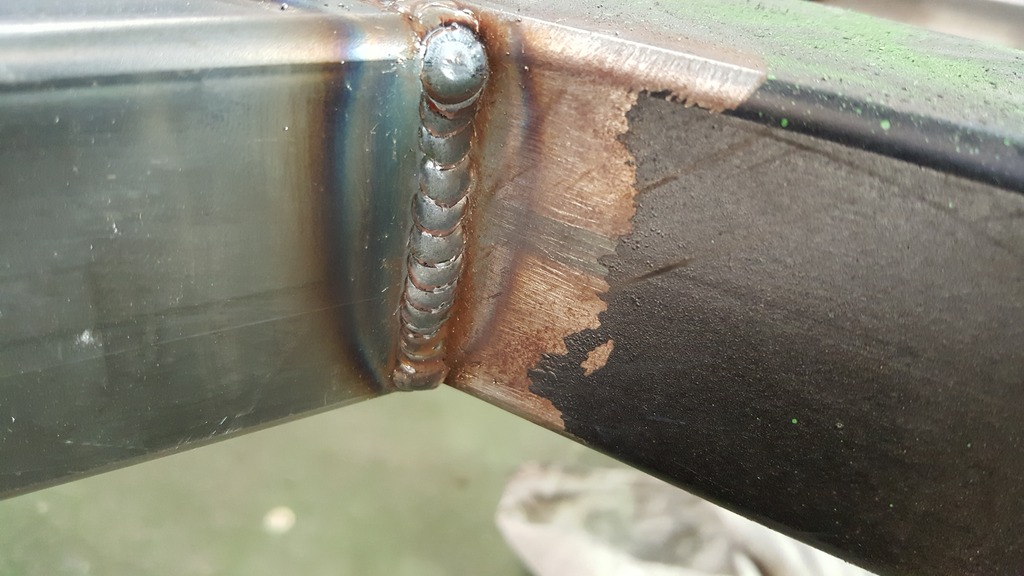
So I had two choices for the throttle body mounting. I am using a LS1 Camaro throttle body. 1 - run a bolt on adapter and go from 76mm down to 58mm taper. 2 cut the snout and go directly to 76mm. As you see, the snout was cut and I welded a LS1 flange throttle body flange on.
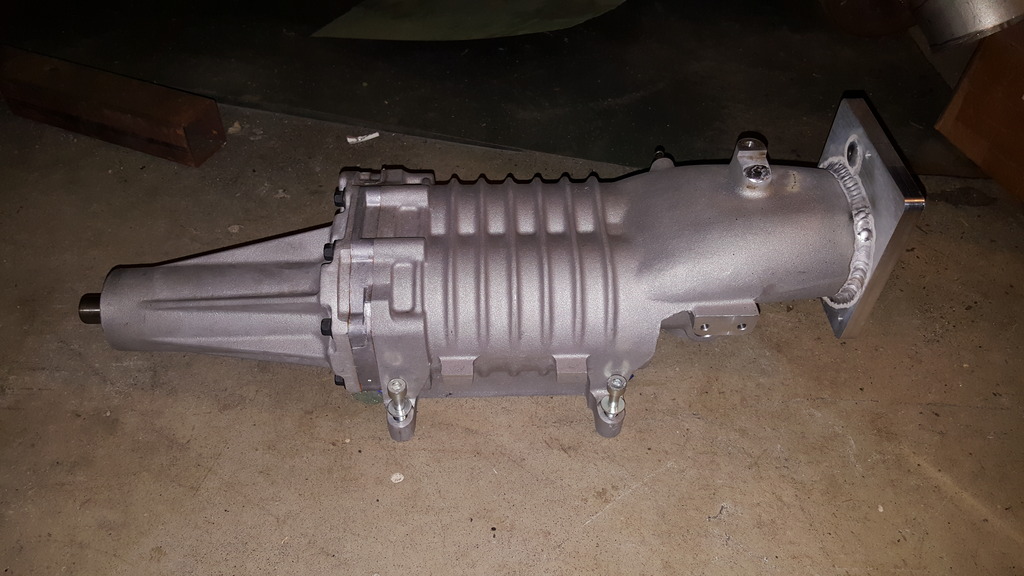
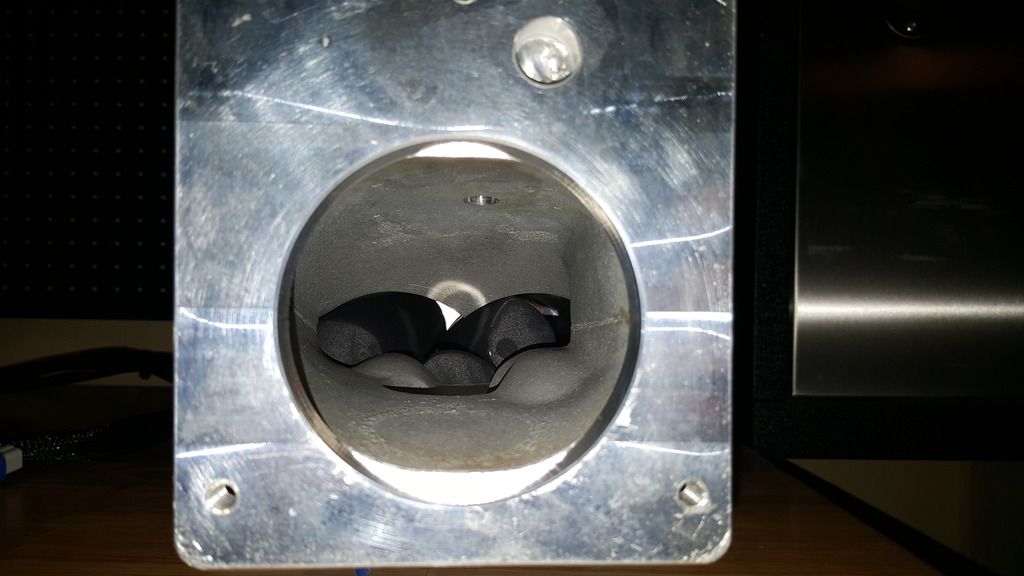
Welded and good to go!
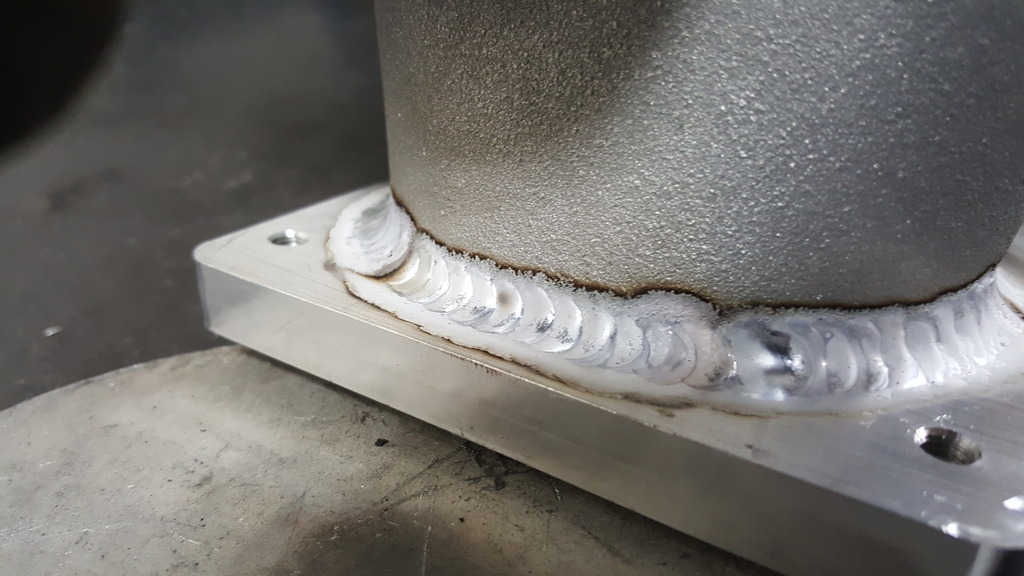
Haven't done any aluminum welding in a while but didn't turn out too bad
Perks of having an in house machine shop...
So I had two choices for the throttle body mounting. I am using a LS1 Camaro throttle body. 1 - run a bolt on adapter and go from 76mm down to 58mm taper. 2 cut the snout and go directly to 76mm. As you see, the snout was cut and I welded a LS1 flange throttle body flange on.
Welded and good to go!
Haven't done any aluminum welding in a while but didn't turn out too bad
12-16-2015, 02:59 AM
#23


I wish my alum. welding looked that good. LOL
12-18-2015, 06:46 PM
#24
Little more work done! Doesn't look like it will get fired up this week though. Too much Christmas stuff going on.
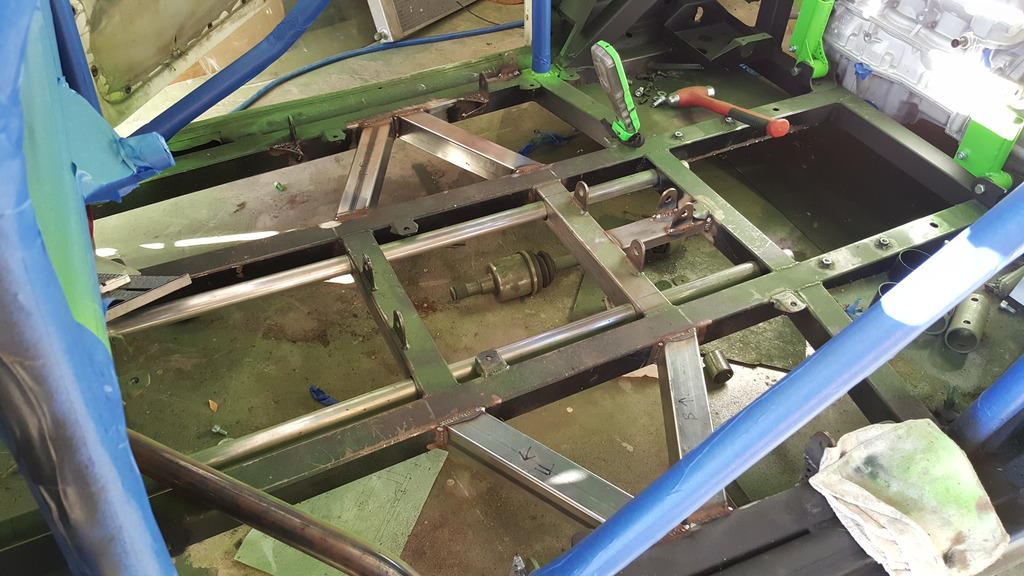
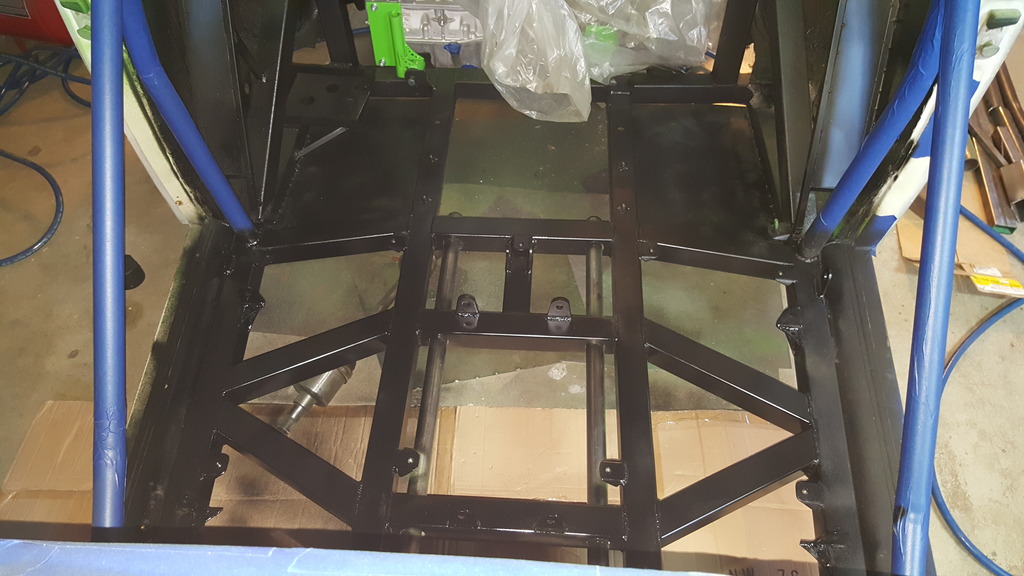
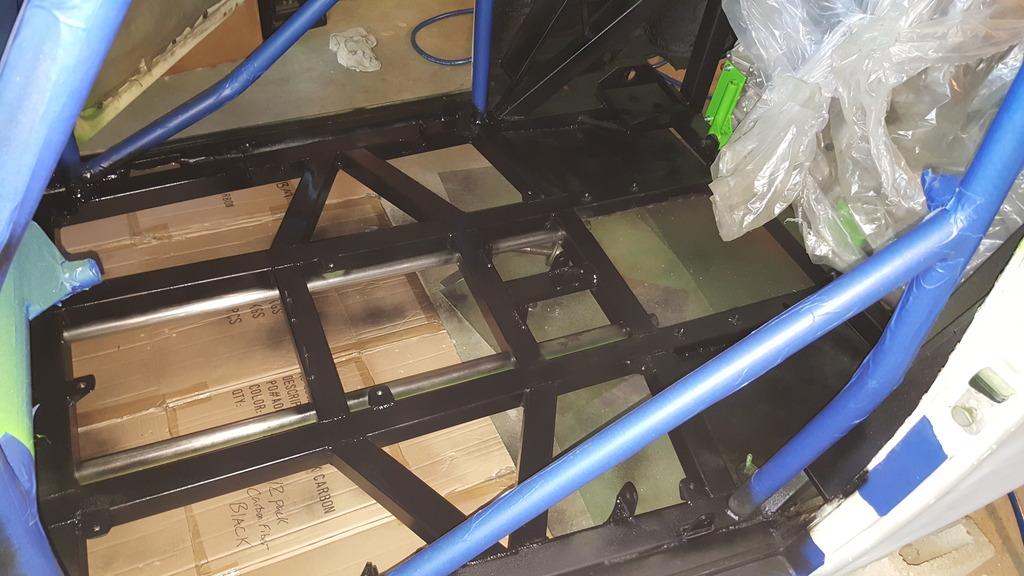
The floor bracing is finally done. All seat mounts and belt mounts fully welded!
More welding. I need a TIG at my house. The MIG is nice and all but a TIG is more what I am used to.
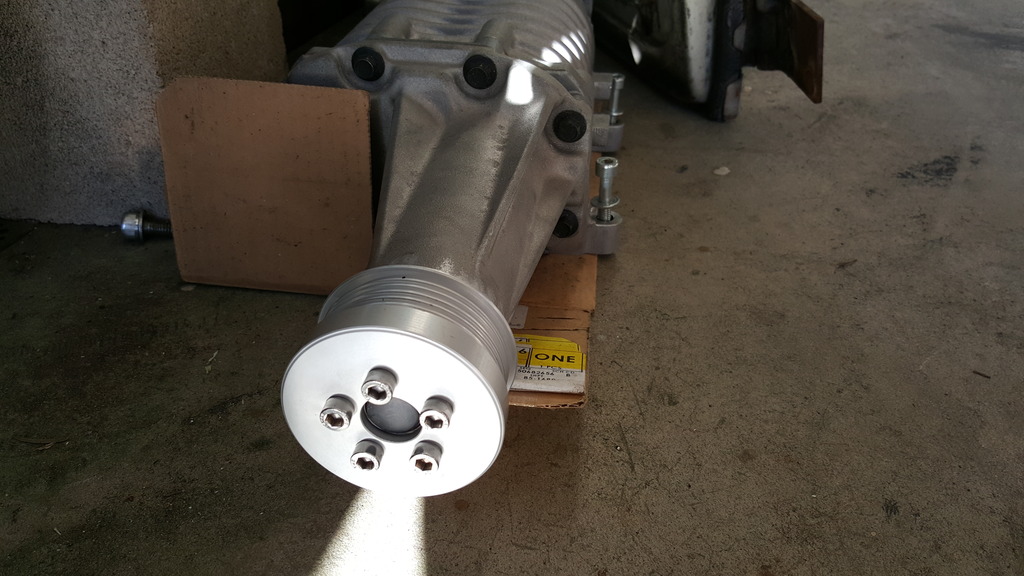
I also got the blower pulley put on. Stock size is a 3.35". This one is a 2.7". They make smaller but we will see what boost I end up with. I had to clearance the snout how it is so anything smaller will require a lot more work.
The floor bracing is finally done. All seat mounts and belt mounts fully welded!
More welding. I need a TIG at my house. The MIG is nice and all but a TIG is more what I am used to.
I also got the blower pulley put on. Stock size is a 3.35". This one is a 2.7". They make smaller but we will see what boost I end up with. I had to clearance the snout how it is so anything smaller will require a lot more work.
12-20-2015, 10:25 AM
#25
This build has come a long way. Glad to see it in the assembly stage. Do you think you will try starting it before the newyear?
 12-21-2015, 01:19 AM
#27
Jimbo1367- yes it will be running this year for sure. Hopefully in a few days!
Static low 92 - Sorry to say but there will be no tire smoking videos. This thing is going to hook up! No traction issues for me (we will see)
Static low 92 - Sorry to say but there will be no tire smoking videos. This thing is going to hook up! No traction issues for me (we will see)
 12-22-2015, 03:57 PM
#30
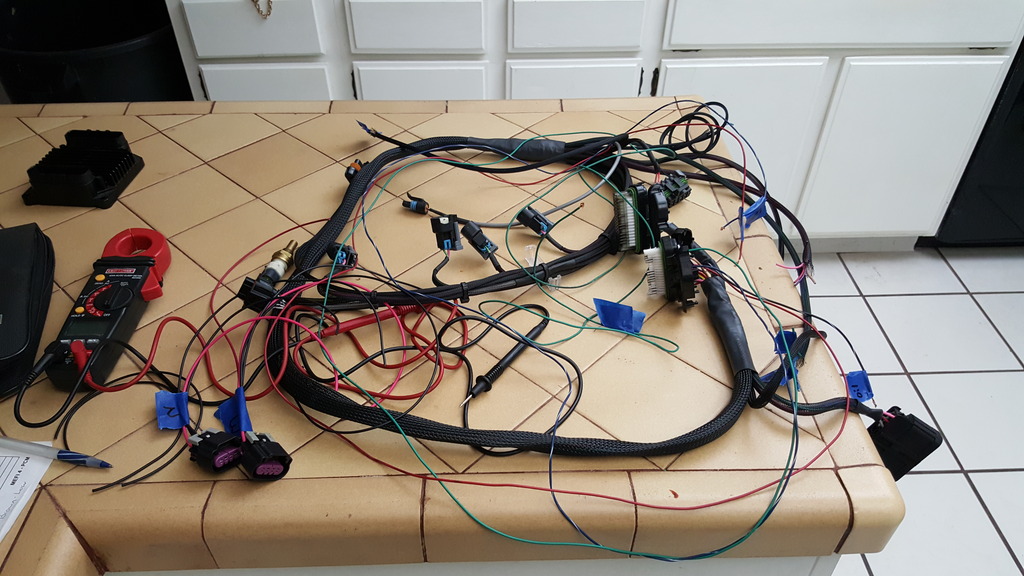
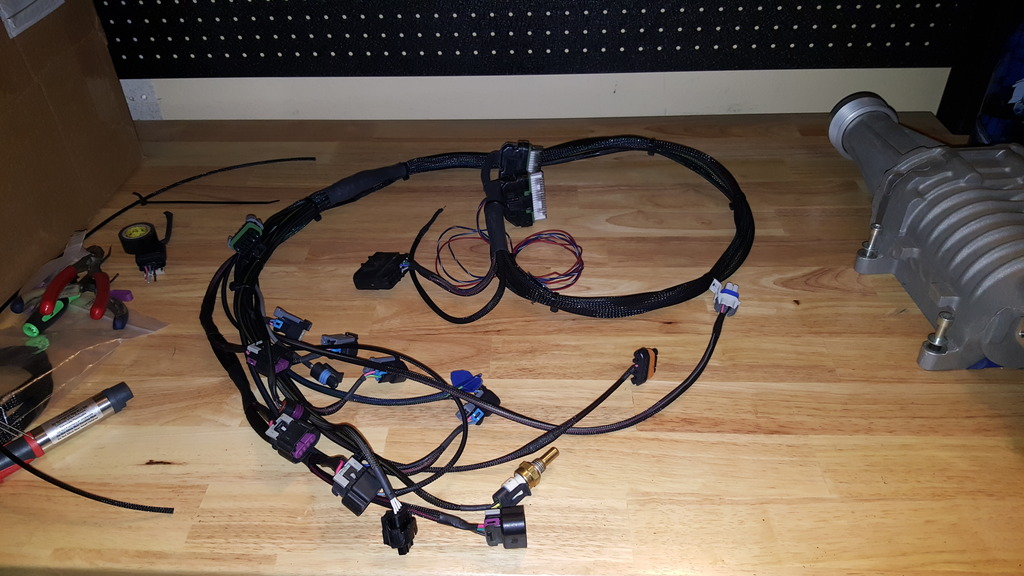
Haha ya it is quite simple. Just think of a V8 harness cut in half. The MEFI computer I am using is quite a simple unit. It doesn't need much to make it go! The engine itself really doesn't have many sensors either which helps out.
4 - coils
4 - injectors
1 - crank sensor
1 - TPS
1 - IAC
1 - MAP/Air temp
1 - Coolant temp
1 - Alternator
1 - Oil psi
1 - o2
That is it!
4 - coils
4 - injectors
1 - crank sensor
1 - TPS
1 - IAC
1 - MAP/Air temp
1 - Coolant temp
1 - Alternator
1 - Oil psi
1 - o2
That is it!
12-24-2015, 12:00 PM
#31
We are getting close to fire up! Only a few more things to go. Hopefully I get some time over the weekend to finish off the last little things.
- Add one more coil wire
- Crimp on TPS and IAC connector
- Add starter
- Add temporary fuel system
- Rig up some power to everything
- Add blower and belt
- Fire!
- Add one more coil wire
- Crimp on TPS and IAC connector
- Add starter
- Add temporary fuel system
- Rig up some power to everything
- Add blower and belt
- Fire!
12-24-2015, 06:23 PM
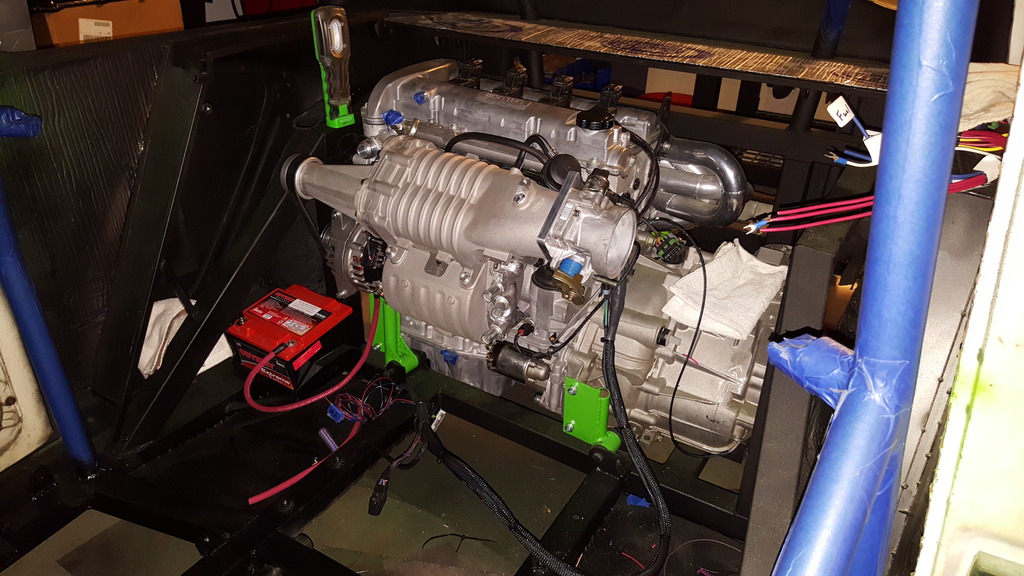
#32
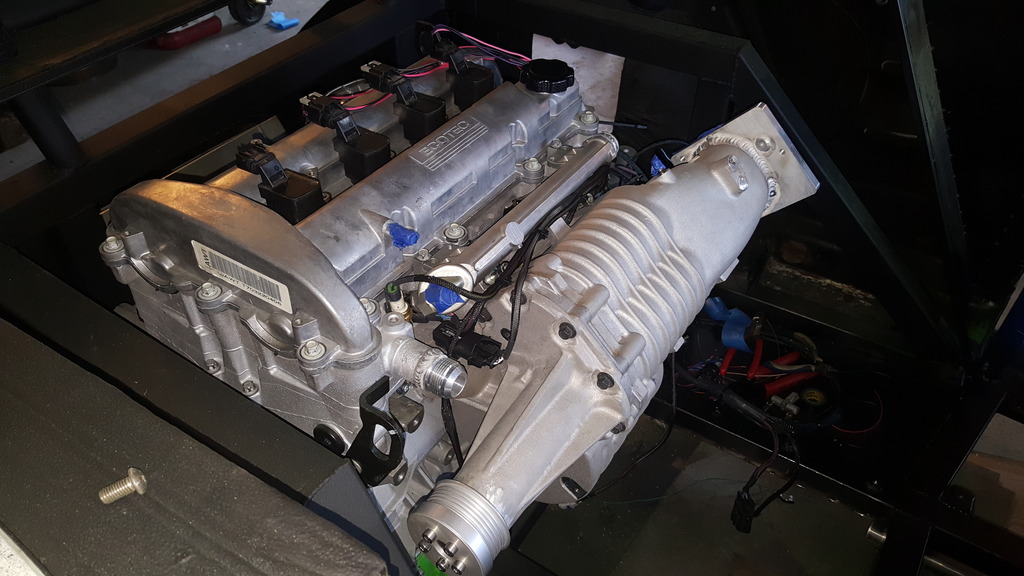
I slapped the blower on just to make sure everything lined up. So far it's not looking like the thing will fire off this weekend. Too busy. Guess I'll try for the first of next week.
 12-26-2015, 09:31 PM
#34
 12-28-2015, 03:37 PM
#35
Dniemi - You will be getting a video of it running this week! Driving won't be for a little while though.
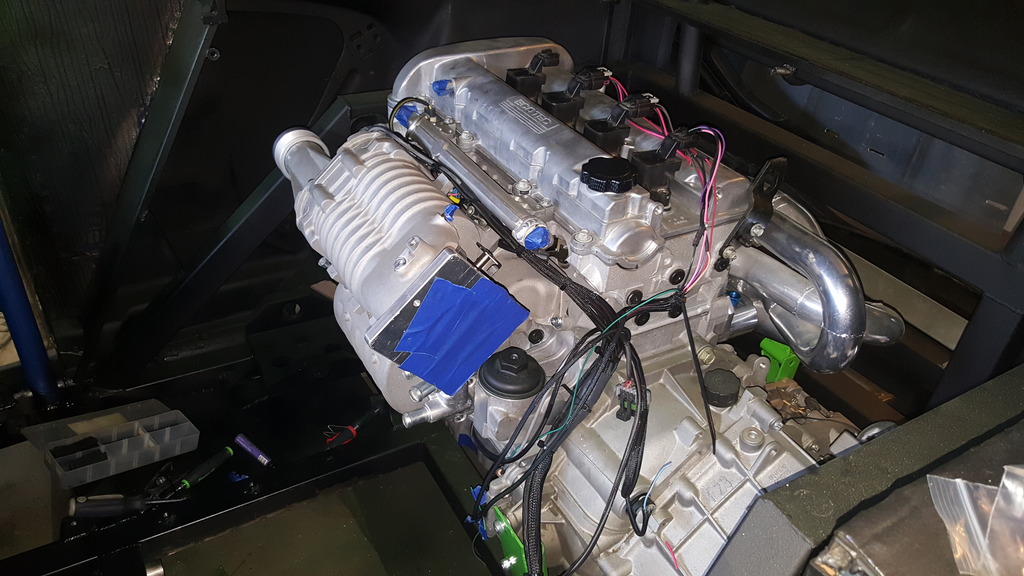
Andrew - My ECU will support DBW but I do not want to go that route. I like the cable throttle bodies better. I also went with the LS1 flange due to the size. A 90mm/4 bolt would have been way too big. The one I have is 78mm inside and since I cut the snout of the blower, it matches up perfectly. I will post some pictures tonight so you can see what I mean. Also, keep in mind, the stock throttle body was a 58mm so this is quite a step up.
Andrew - My ECU will support DBW but I do not want to go that route. I like the cable throttle bodies better. I also went with the LS1 flange due to the size. A 90mm/4 bolt would have been way too big. The one I have is 78mm inside and since I cut the snout of the blower, it matches up perfectly. I will post some pictures tonight so you can see what I mean. Also, keep in mind, the stock throttle body was a 58mm so this is quite a step up.
 12-29-2015, 05:52 PM
#38
Andrew - Don't forget how stubborn I am too! DBC all the way for me! Personally, I think the engine location is more set up for a cable. All I had to do was run it down the middle of the floor, through the rear fire wall, and up and over to mount on the blower. It is like a 6ft long cable with one 90� bend.
12-31-2015, 02:06 AM
#40
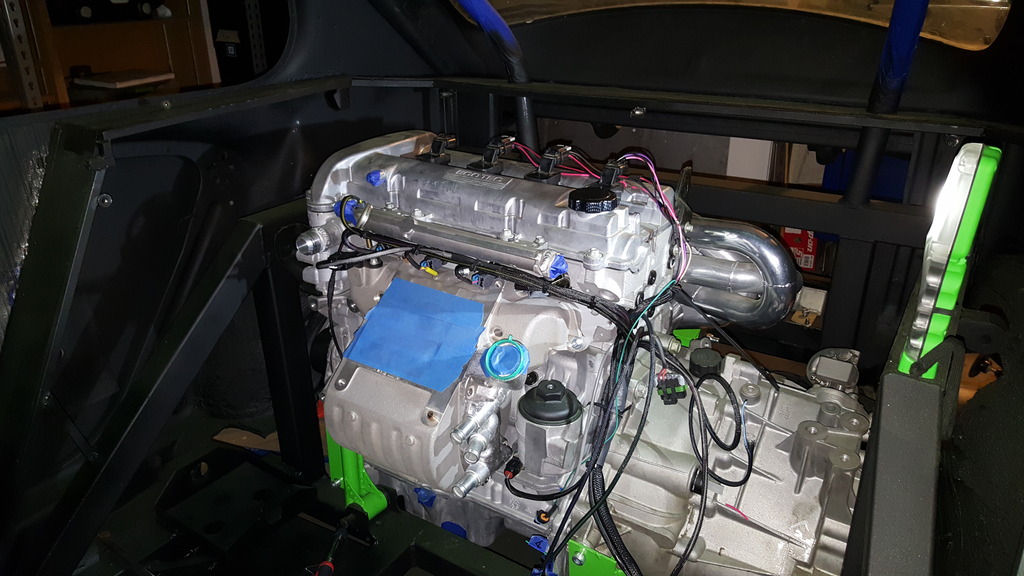
Well it might not look like much but there is much progress done. For the most part, everything is connected. Firing it off tomorrow might just be possible. I only have the fuel lines left to run.