

1970 Bug Mid Engine - Assembly Time (Auto-x videos posted)
 12-03-2015, 06:03 PM
#1
Hey guys. Many of you probably followed the build thread on the Bug. I got tired of posting from my work account so I made a new one, hence the new name.
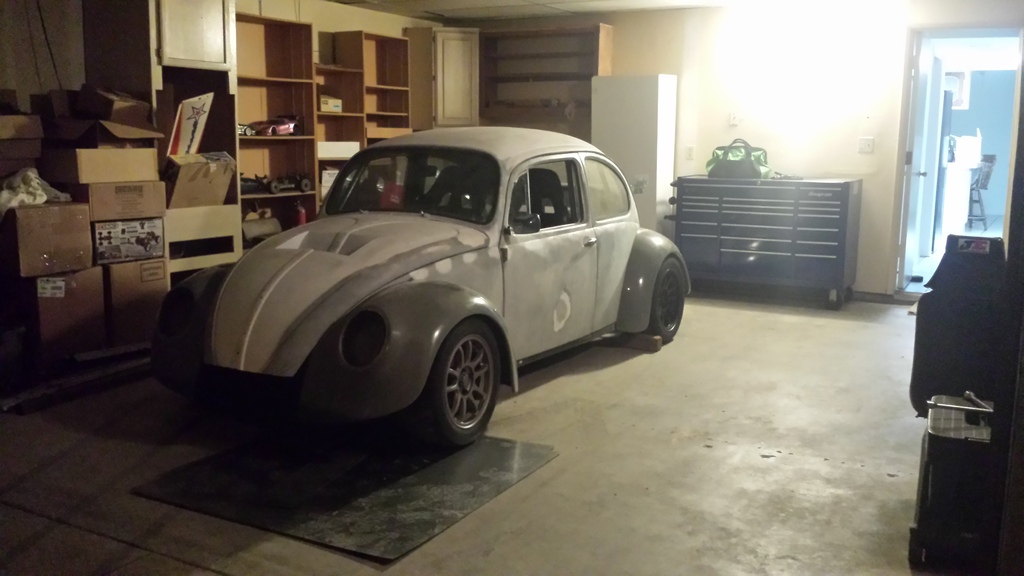
This is going to be more of an assembly thread rather then a build thread. The car has already been built but then completely disassembled. So now, finally, it is going back together for its final time.
Quick recap for those who didn't see the build thread.
Build thread - https://ls1tech.com/forums/conversio...uild-pg15.html
How it all started.
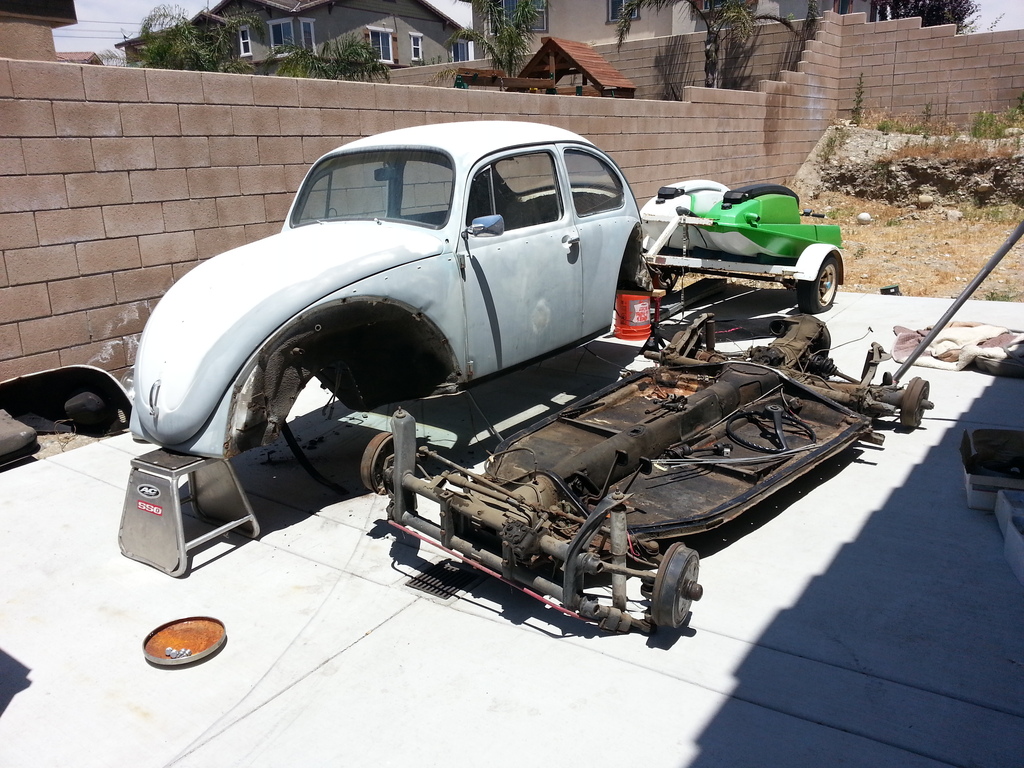
What happened after
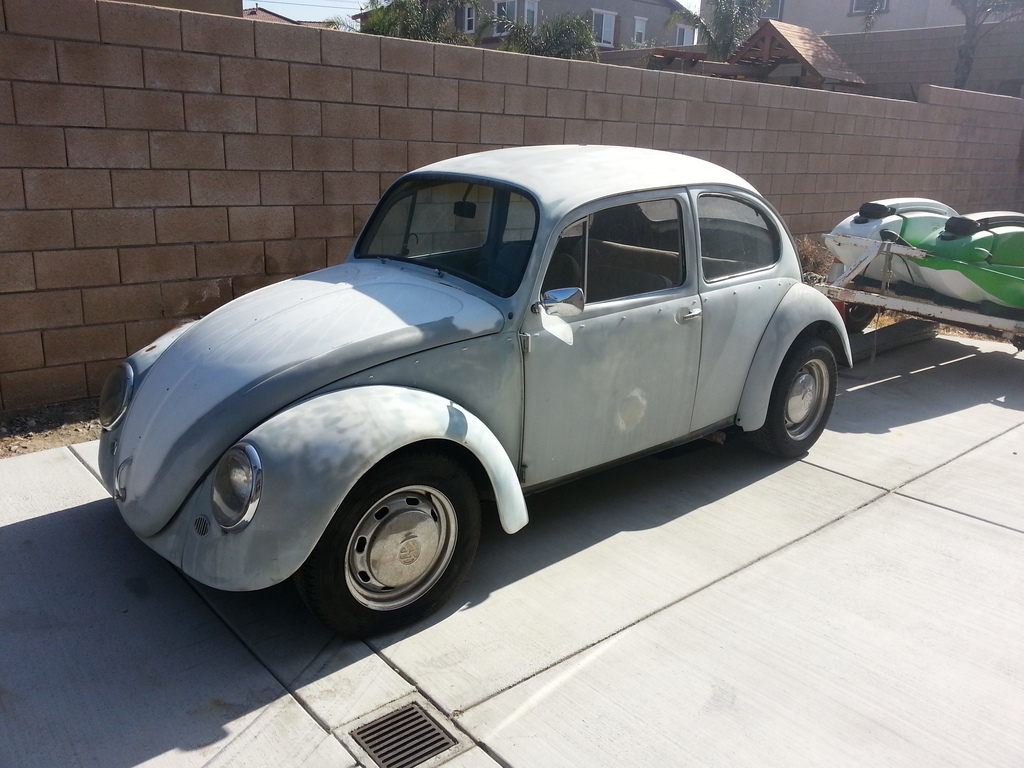
How it sat before being taken apart
Now to the fun stuff. I wanted to paint the out side of the car before I started this thread but it didn't happen. I am putting if off until the end. So at this point, the frame is done, the cage is done except for paint and the back half of the frame is all painted and done. I am going to start assemble from the back of the car to the front.
This is going to be more of an assembly thread rather then a build thread. The car has already been built but then completely disassembled. So now, finally, it is going back together for its final time.
Quick recap for those who didn't see the build thread.
Build thread - https://ls1tech.com/forums/conversio...uild-pg15.html
How it all started.
What happened after
How it sat before being taken apart
Now to the fun stuff. I wanted to paint the out side of the car before I started this thread but it didn't happen. I am putting if off until the end. So at this point, the frame is done, the cage is done except for paint and the back half of the frame is all painted and done. I am going to start assemble from the back of the car to the front.
Last edited by 70 Bug Mid Engine; 10-04-2016 at 03:09 PM.
 12-03-2015, 06:13 PM
#2
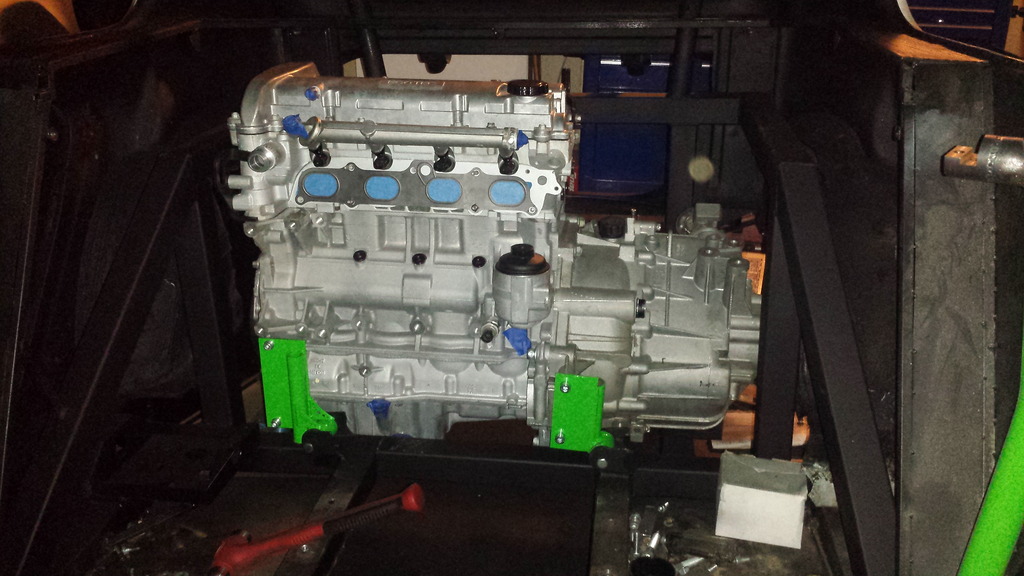
Step one. Install engine
This one has to go in a different way then normal. Yes that would be through the drivers door.
So we take this....
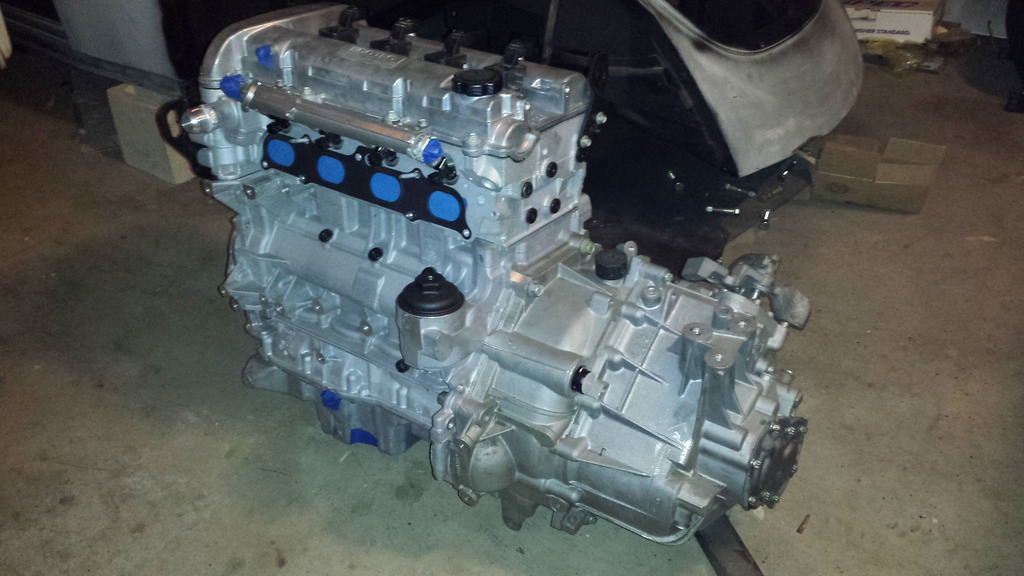
And try to put it in through here...
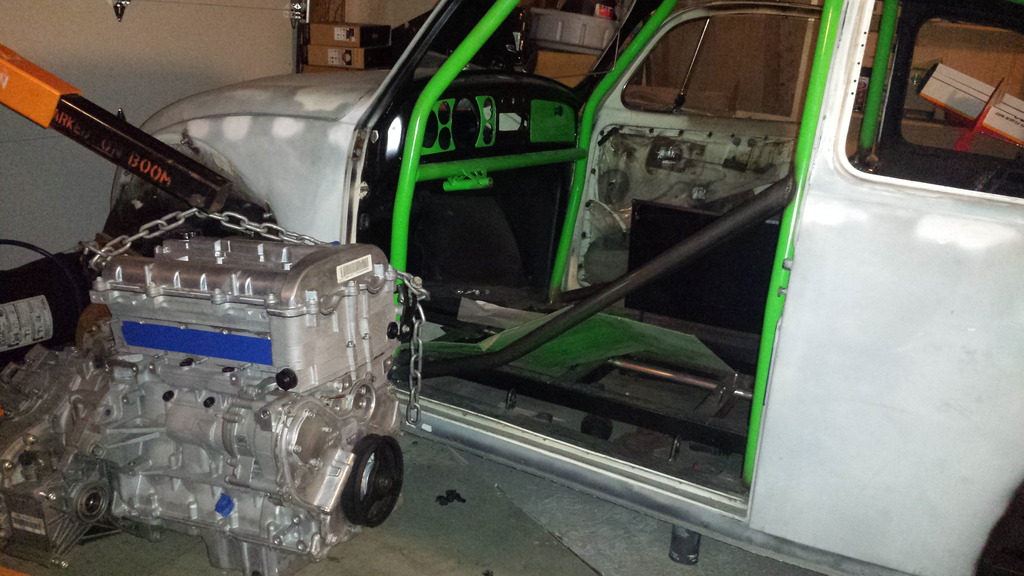
And it goes something like this....
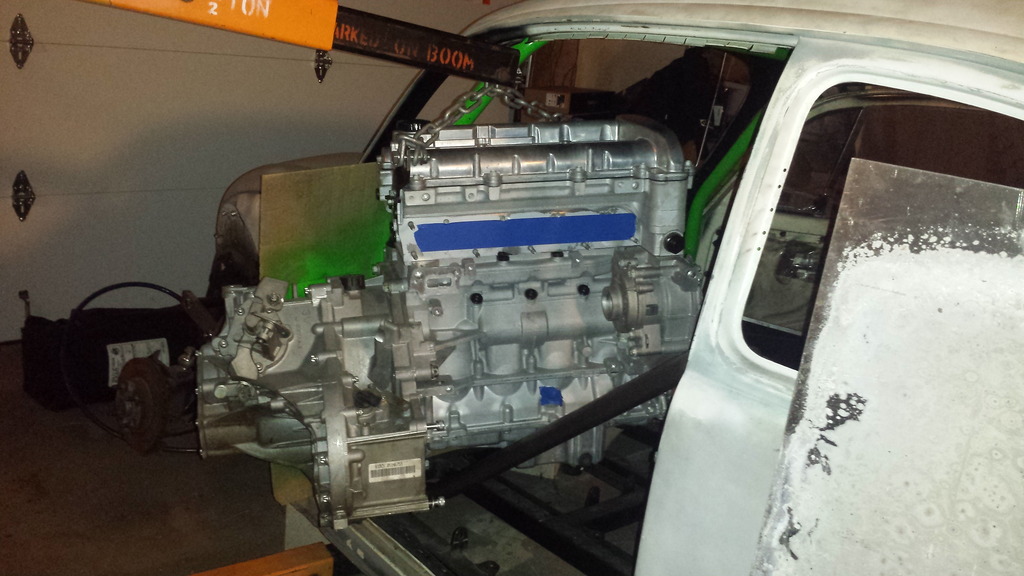
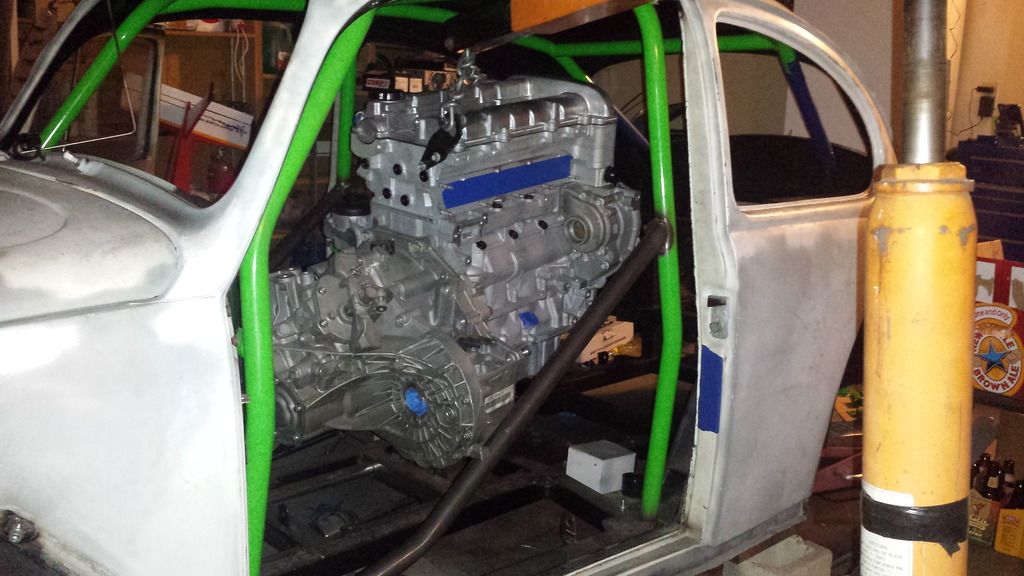
Dropped it down and let it sit on the frame. Then readjust and go through the rear side window to move in to final position.
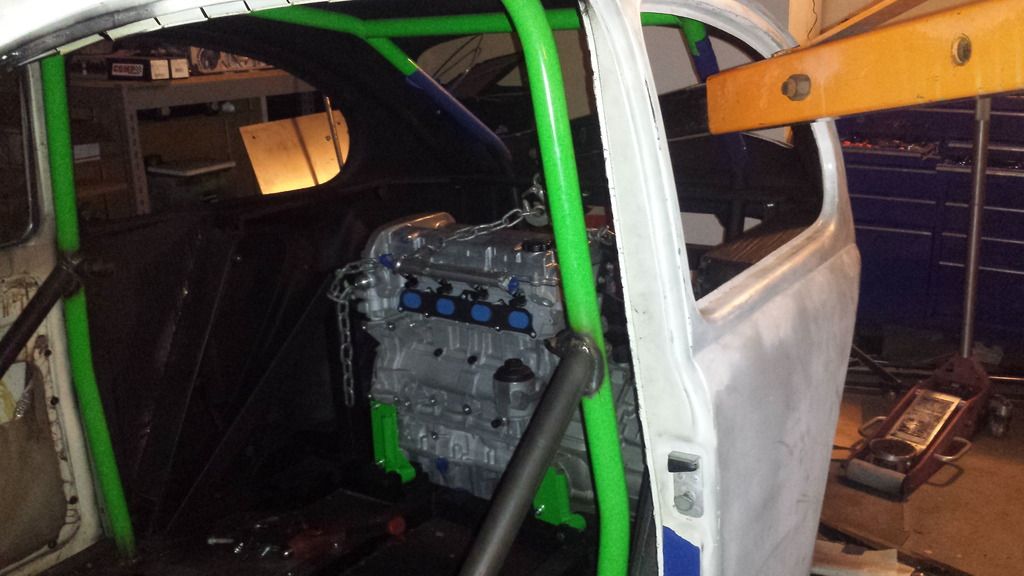
Last but not least, it is in!
This one has to go in a different way then normal. Yes that would be through the drivers door.
So we take this....
And try to put it in through here...
And it goes something like this....
Dropped it down and let it sit on the frame. Then readjust and go through the rear side window to move in to final position.
Last but not least, it is in!
 12-04-2015, 03:35 PM
#4

Cool. Are you gonna address the excessive engine noise or are you just going to embrace it?
12-04-2015, 03:53 PM
#5
Jimbo - I am quite ready to hear a bunch of noise. I am doing a ton of stick on insulation plus spray on insulation but I know its still going to be loud inside (its mostly there to keep the heat out). The carbon fiber/lexan engine hatch is where most of the noise will come from I am sure. I am also sure that the suspension itself is going to be loud since there are no soft bushings, just a bunch of heims. I am building this car for fun, not comfort, so bring on the noise!
12-04-2015, 03:59 PM
#6
And speaking of comfort or lack there of, check out the clutch it got. Should fit right in!
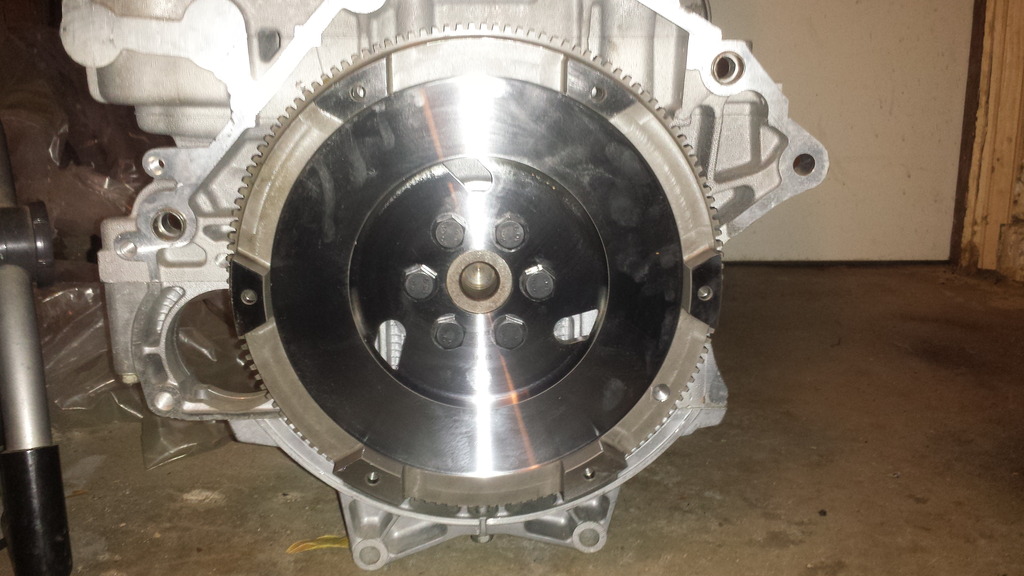
Exedy 12lbs chromoly flywheel
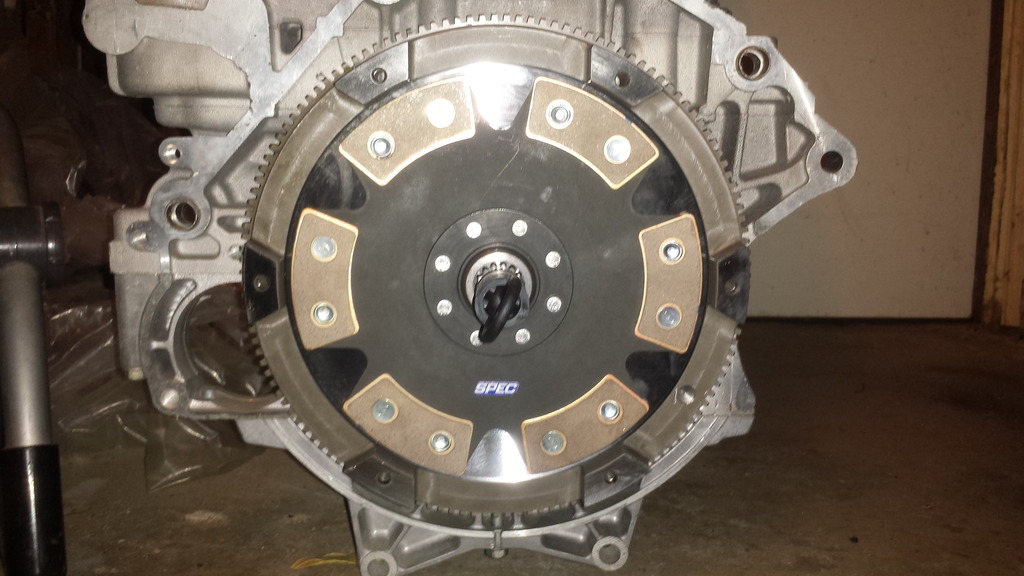
Spec 6 pu-u-u-u-u-u-u-uck disk
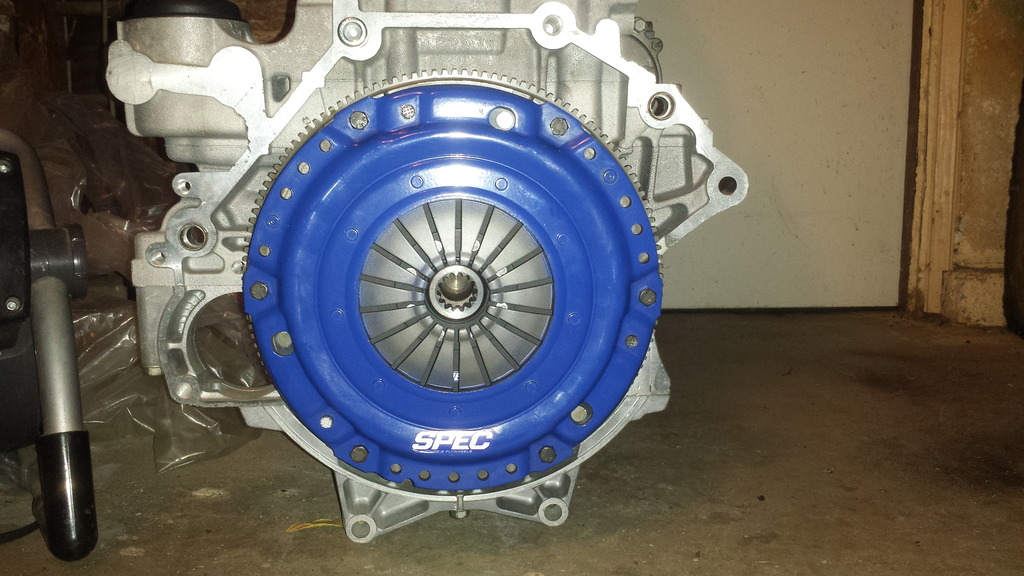
Spec pressure plate. This combo is good for 450tq which is way more then it will see.
Exedy 12lbs chromoly flywheel
Spec 6 pu-u-u-u-u-u-u-uck disk
Spec pressure plate. This combo is good for 450tq which is way more then it will see.
12-05-2015, 07:33 AM
#7
This is going to be epic. Not long now !!!
Trending Topics
 12-06-2015, 06:45 AM
#11
Awesome project!!!!!!! You'll have to weigh it when you're done. Bob
__________________
ATI ProCharger and Moser Sales 260 672-2076
PM's disabled, please e-mail me
E-mail: brutespeed@gmail.comob@brutespeed.com
https://brutespeed.com/ Link to website

ATI ProCharger and Moser Sales 260 672-2076
PM's disabled, please e-mail me
E-mail: brutespeed@gmail.comob@brutespeed.com
https://brutespeed.com/ Link to website
 12-07-2015, 12:44 PM
#14
hokeplaya05 - Ya those are mine. Yet another project I have to finish. One is up and running, just needs outside paint. I went with the paint theme of black and green for the engine compartment as well. Supposedly the one I have running has a full race engine and is supposed to do around 60mph! The other one has a blown engine and will probably just sit as a spare parts ski. Unless someone wants to buy them cheap....
Thanks to all other comments. I am glad it is finally going together! My goal is to fire it up next week just to make sure its all good before I completely bury the engine in. Then I will need to figure out how to post videos...
Bob - It will get weighed in the end. There is a scale about 2 blocks away from work that I plan on using. Or if I get crazy enough, I am going to get a corner balance scale setup. They aren't cheap though.
12-07-2015, 01:10 PM
#15
hokeplaya05 - Ya those are mine. Yet another project I have to finish. One is up and running, just needs outside paint. I went with the paint theme of black and green for the engine compartment as well. Supposedly the one I have running has a full race engine and is supposed to do around 60mph! The other one has a blown engine and will probably just sit as a spare parts ski. Unless someone wants to buy them cheap....
 12-08-2015, 12:36 PM
#19
You guys are crazy, but at the same time, I did think about putting a hitch on the Bug. It would be nice to tow a trailer to events with tires, tools and the EZ-up. since there is no room inside the bug for anything.
12-10-2015, 02:45 PM
#20
Those standups and trailer don't weigh much. Obviously small weigh trailers would be fine.