
Project 5.3 Rocket 88
 03-16-2016, 06:06 AM
#1
Staging Lane
Thread Starter

Join Date: Feb 2013
Location: Westminster, SC
Posts: 73
Likes: 0
Received 0 Likes
on
0 Posts
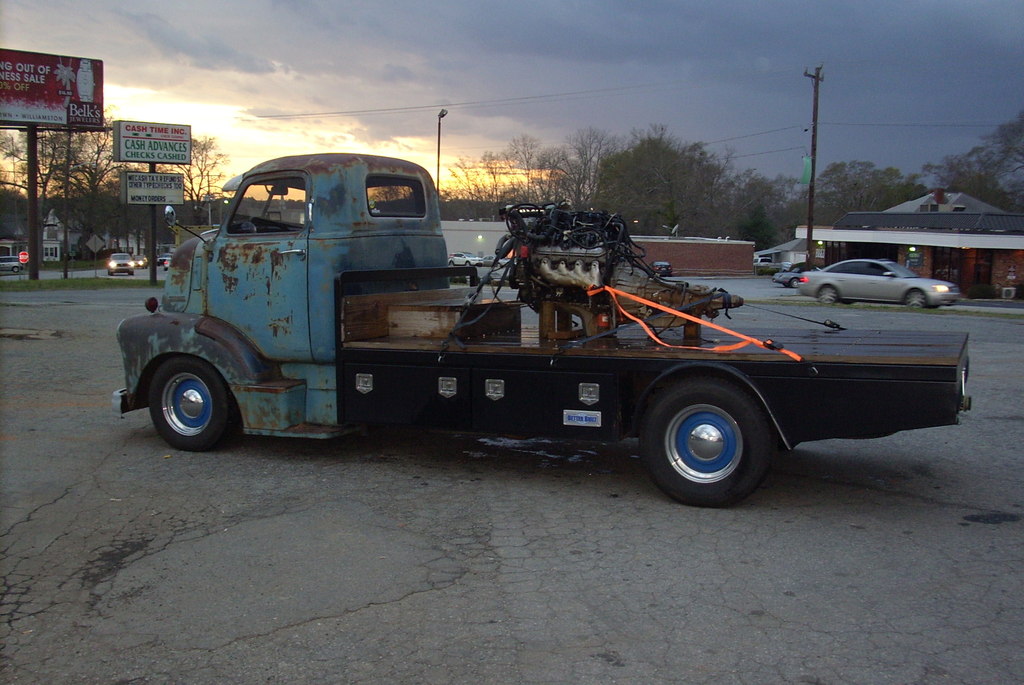
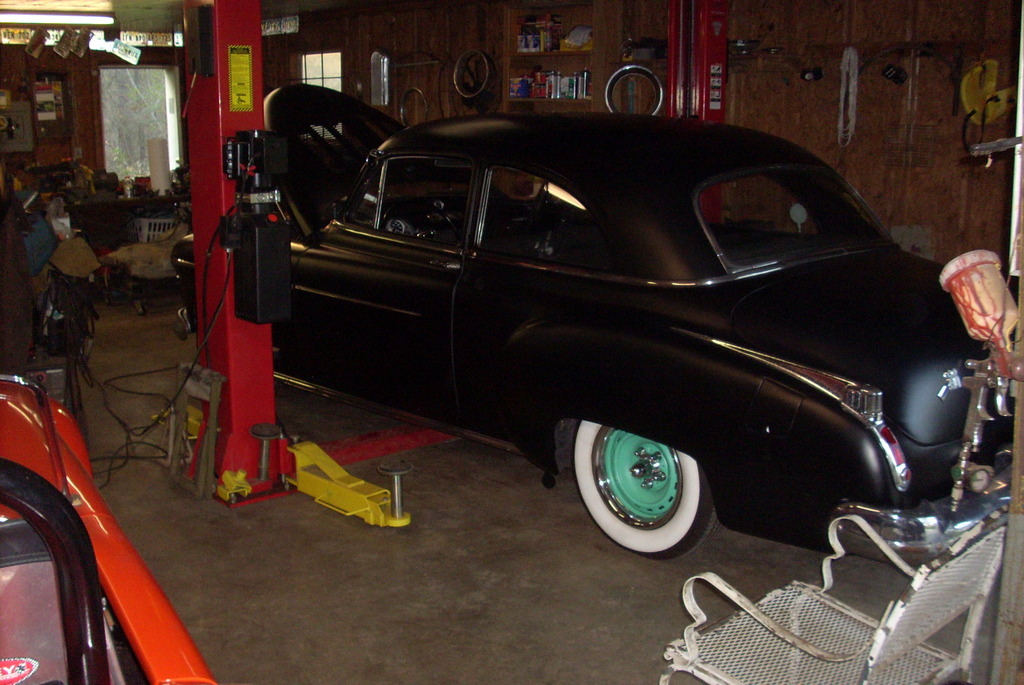
Hi all, so it's time for conversion number 2. This one will be a 1950 Olds Rocket 88 a buddy of mine owns. He bought this ride about 6 months ago. It's been a good car but has potential to be a really cool ride. Currently it has a mild 302 with a C4 trans. Not sure why someone chose this combination but we're gonna change that. The plan is a 30 day swap. On this one I will document the total cost and total labor hours. I will also post daily updates.
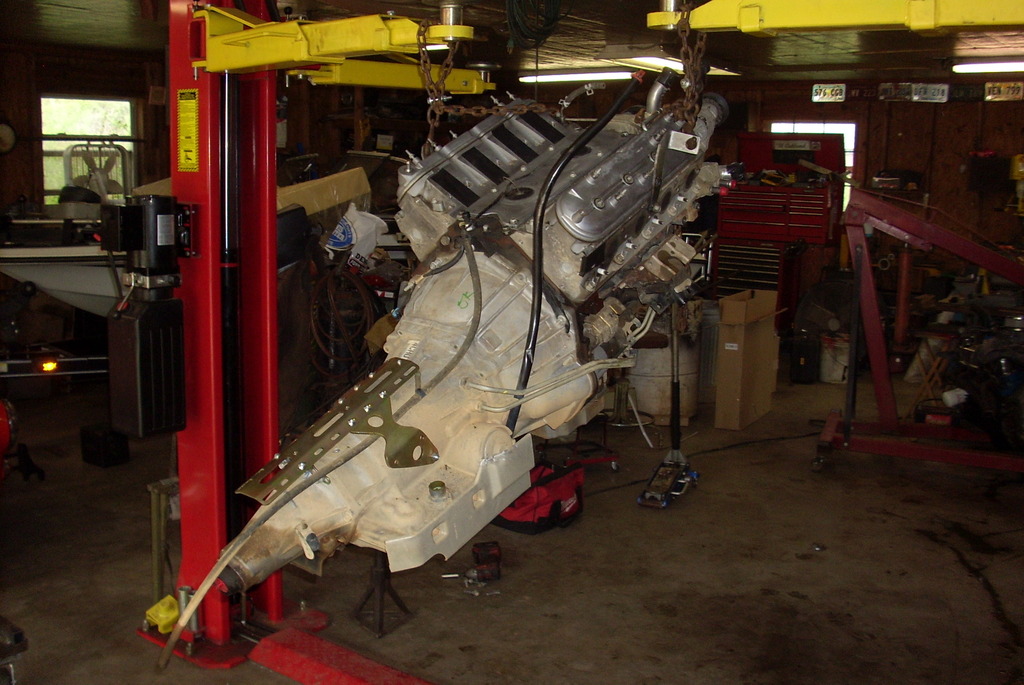
Day one: We picked up a 5.3/4l60E from a 2004 GMC Sierra. First we made engine mounts using the engine stands from the donor truck, trimmed them up and welded them to 2 inch tubing. We also welded up an engine cart using the same stands. These will later be used for the engine mount in the car,
I did this on the COE and it has worked out well. We also stripped the engine and cleaned it a bit. The COE is my 1st conversion and my daily ride.You can view that build @ '47 Chevy COE, 03 Sillerado, LR4/4L60E
Total time:10.75 hours
Cost: Engine/trans, $2000
Gas for pick up, $10
Total: $2010


Last edited by Fastoys; 03-16-2016 at 06:25 AM.
 03-16-2016, 05:24 PM
#2
Staging Lane
Thread Starter
Join Date: Feb 2013
Location: Westminster, SC
Posts: 73
Likes: 0
Received 0 Likes
on
0 Posts
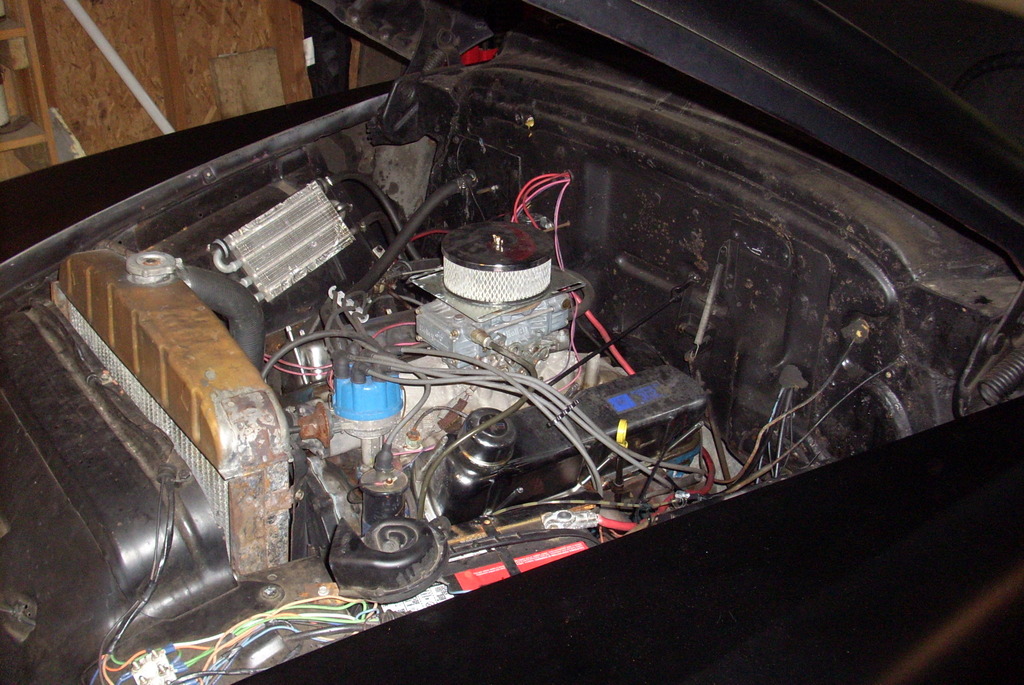
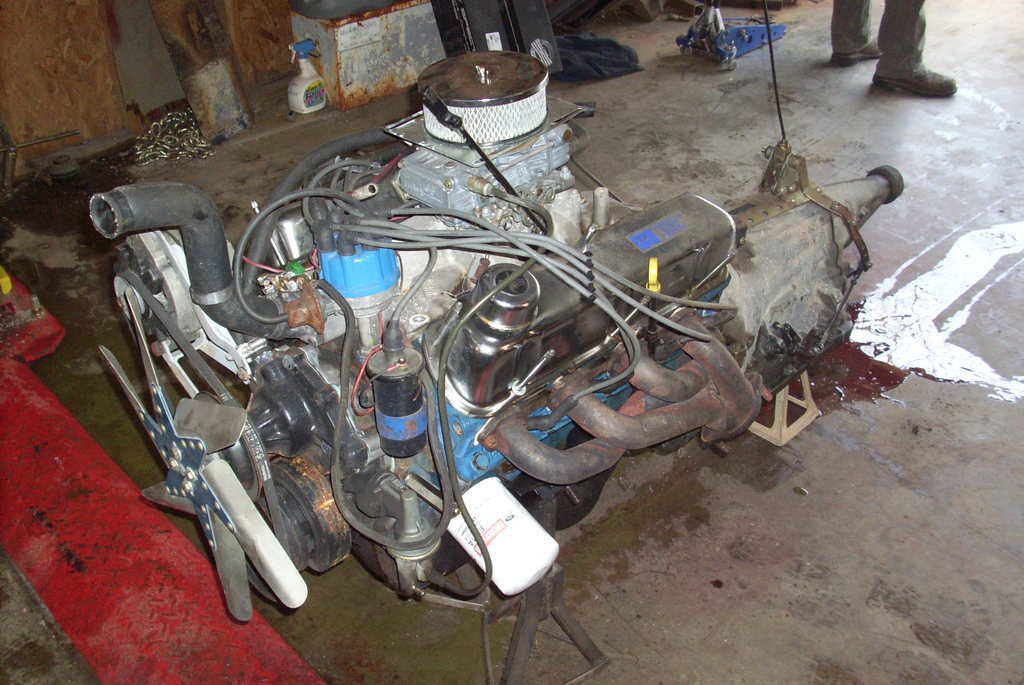
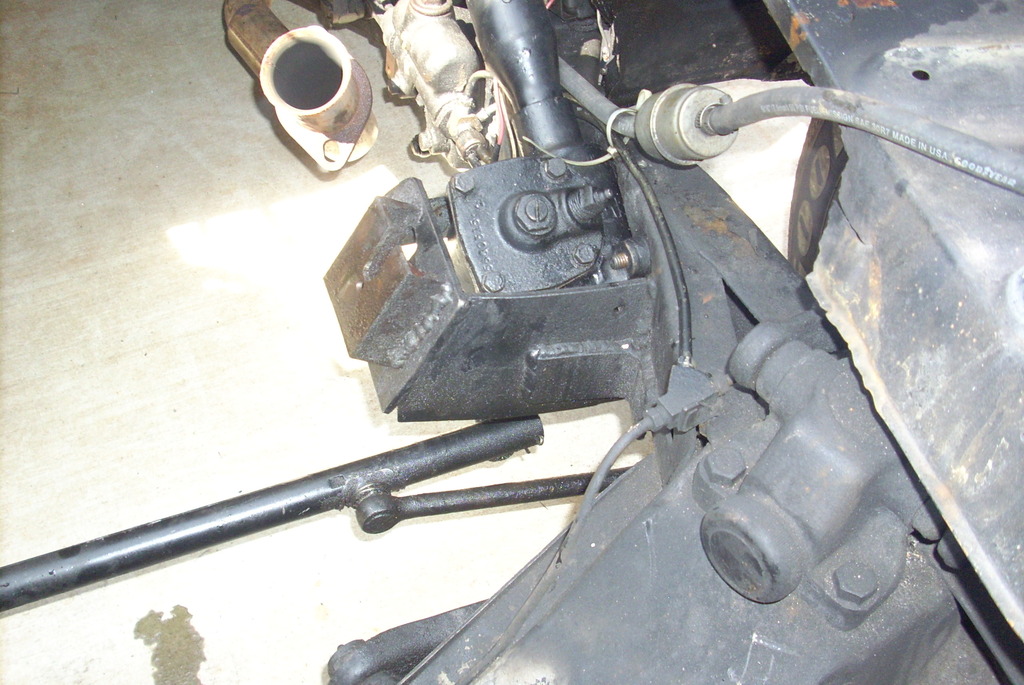
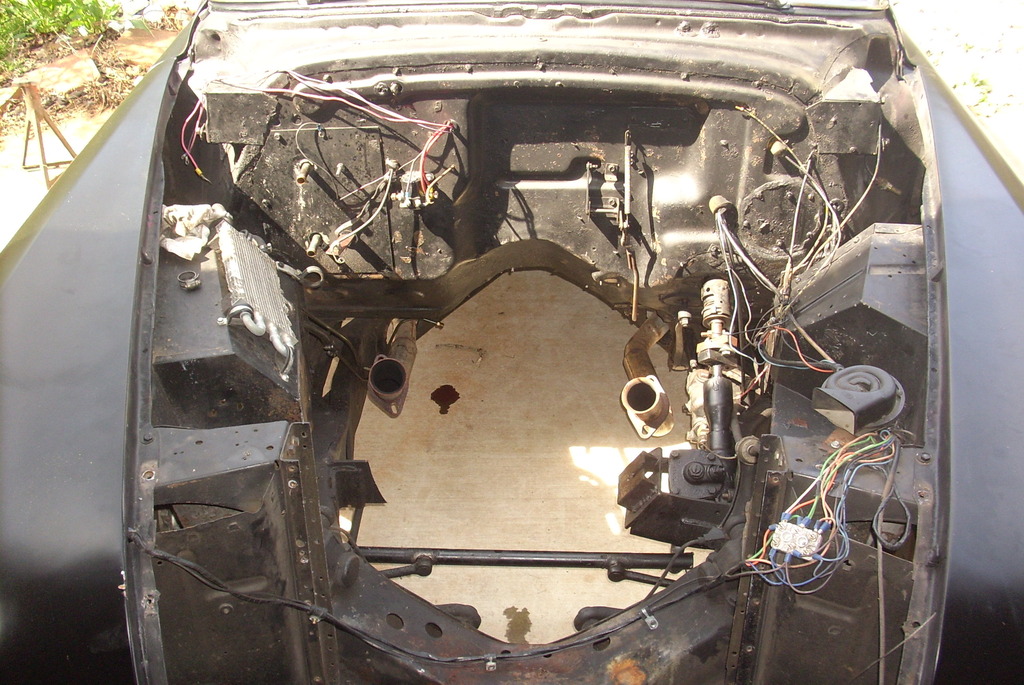
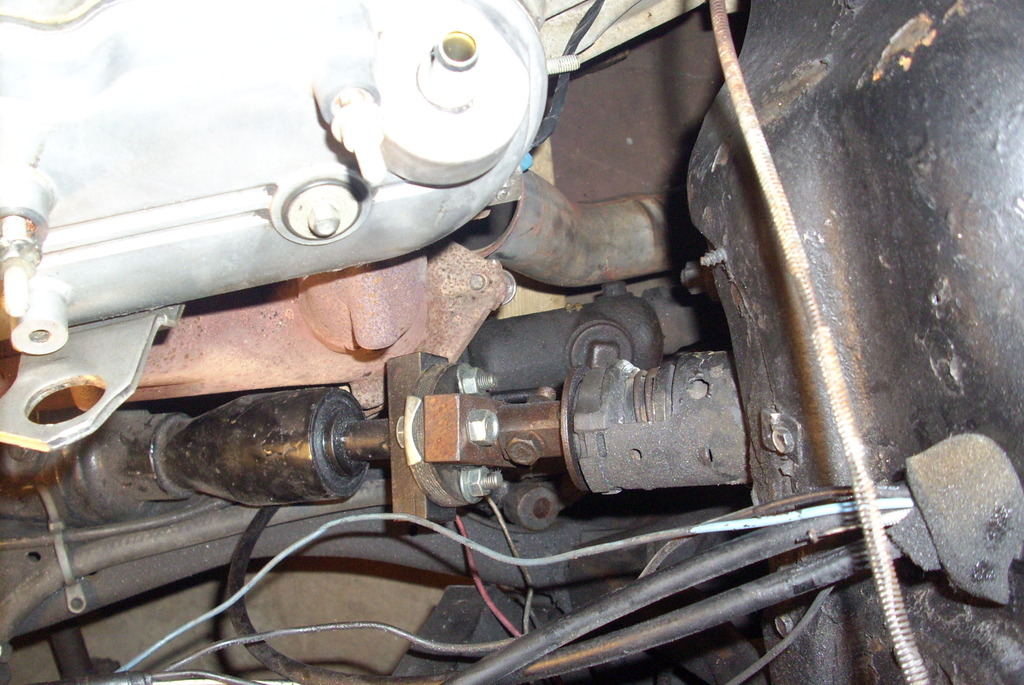
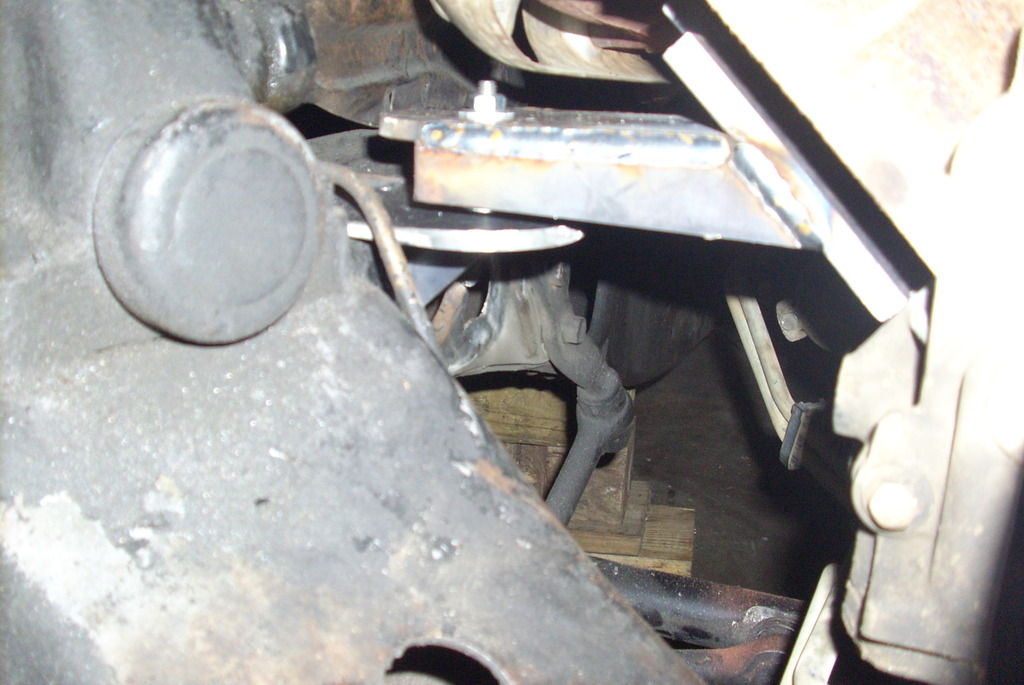
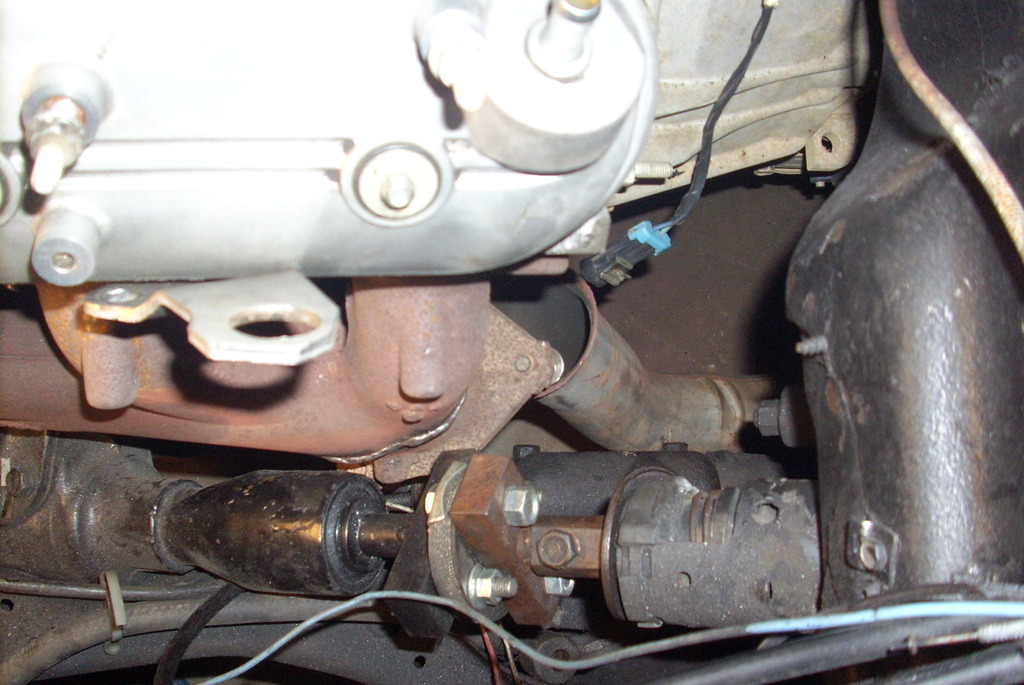
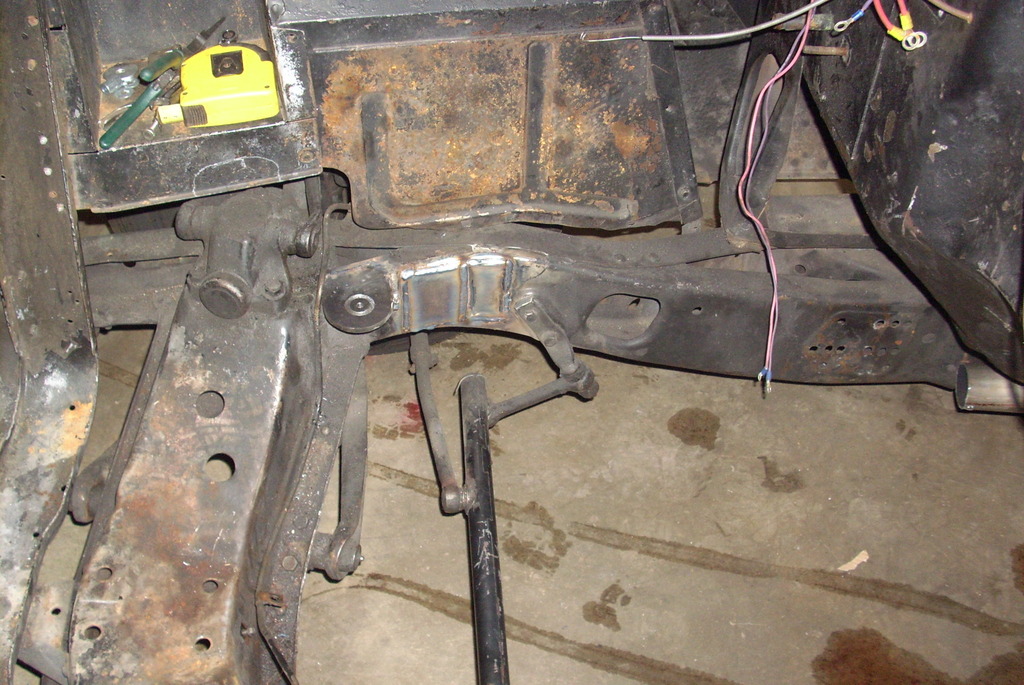
Day 2: We got the Olds into the shop and pulled the engine and trans. The install of the 302 was a real hack job and it appears they set it in place and welded what ever scraps they could find to hold it in place. One issue I can see is the steering box sets right where the engine cross member should go. We will need to locate a better radiator and may need to move it forward. It also looks like the steering cross link will be pretty to thr pan.
Rob
Total time: 20.75 hours
Cost:Trans mount $13
Shop supplies $21
Total: $2,031
Rob
Total time: 20.75 hours
Cost:Trans mount $13
Shop supplies $21
Total: $2,031


 03-16-2016, 06:28 PM
#3
TECH Resident

cool - look forward to seeing more of your work. I bought an aluminum radiator from speedway for my swap which was pretty cheap and also pretty nice, but requiring fab to make it work. It has cooled in very warm temps (up to 100F). It was narrow and tall to fit the U-shaped mount on my '51 F1 truck.
I think the radiator was $175.
Perhaps a rack and pinion install will be in order?
I think the radiator was $175.
Perhaps a rack and pinion install will be in order?


 Oh, and that... I guess, trans cooler on the inner fender....
03-20-2016, 06:24 AM
Oh, and that... I guess, trans cooler on the inner fender....
03-20-2016, 06:24 AM
#9
Staging Lane
Thread Starter
Join Date: Feb 2013
Location: Westminster, SC
Posts: 73
Likes: 0
Received 0 Likes
on
0 Posts
Yea, I hated to see them go but their history now. I was out of town for the RTTS car show the last few days so I have a little catching up to do. I will post pictures later on what was completed while I was gone. For the suspension question: at this point we have dropped the front 2 1/2" using lowered uprights and the rear 3" using new coils. Later we will probably go to air bags in the rear. Build thread for the hauler: '47 Chevy COE, 03 Sillerado, LR4/4L60E
Rob
Rob
03-20-2016, 06:44 PM
#10
Staging Lane
Thread Starter
Join Date: Feb 2013
Location: Westminster, SC
Posts: 73
Likes: 0
Received 0 Likes
on
0 Posts
Day 3: Removed old mounts, trans cooler, lines and cleaned frame.
Total time: 23.75 hours
Cost: Cold air intake and filter, $55.00
Total: $2099 ((error on last day total)
Day 4: Picked up parts at car show.
Cost: Shifter, $169.00
Radiator $211.00
Relays for Fuel system, ignition etc. $8.00
Total: $2487.00
Day 5: No work, out of town.
Day 6: Checked fit of engine/trans, assembled shifter, removed 2 broken studs (exhaust), drilled and tapped cylinder for temperature sender. Checked fit of radiator. We also realized a few things, we will be able to use the mechanical fan and we will not be able to use the stock motor mounts. We will use a biscuit style mount, we will also be able to use the stock manifolds by setting the engine to the passenger side 3/4 of an inch.
Rob
Total time: 36.75 hours
Cost : $0
Total Cost: $2487.00


 03-21-2016, 07:27 PM
#12
Staging Lane
Thread Starter
Join Date: Feb 2013
Location: Westminster, SC
Posts: 73
Likes: 0
Received 0 Likes
on
0 Posts
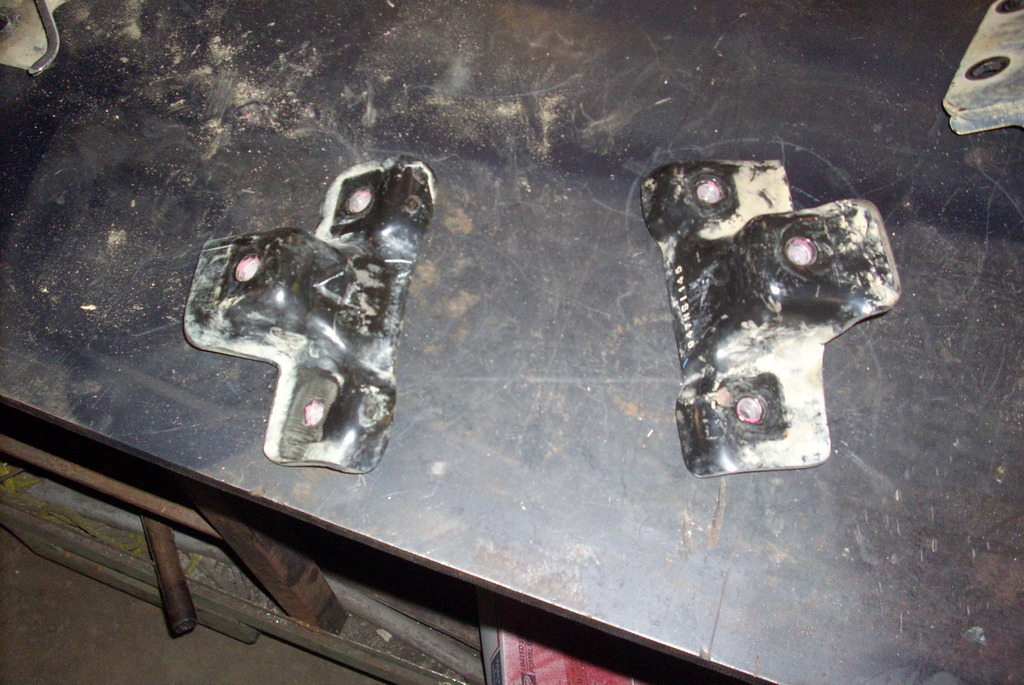
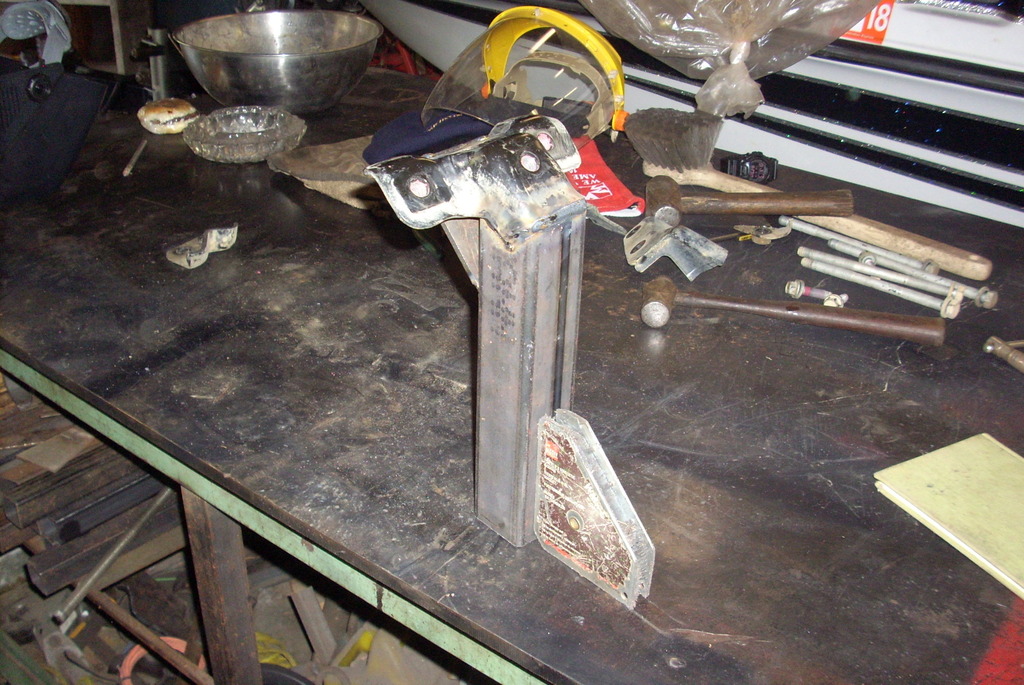
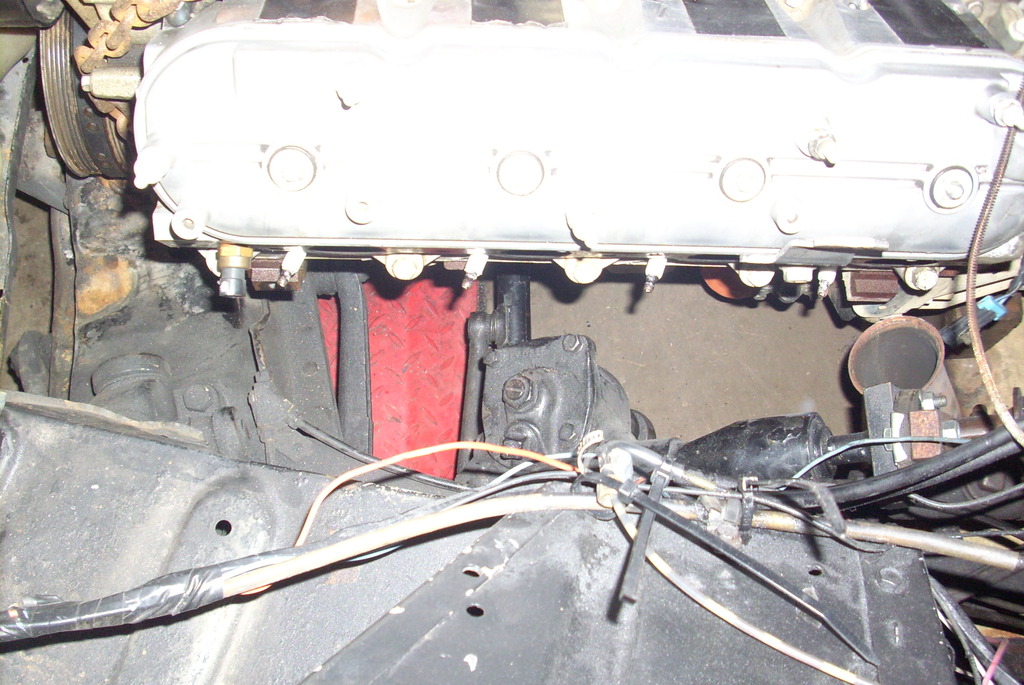
Day 7: After closer inspection the left exhaust manifold exits right into the brake master cylinder. Not wanting to spend money we can use elsewhere, I was able to pie cut the down tube of the manifold and weld it back up, which will push the pipe away from the master cylinder. That's one of the pluses of the modern manifolds, being made of cast steel it's easy to make mods to them. I will be removing the manifolds again tomorrow so I will post up some pictures. My buddy cut all the 1/4 inch plates and cut and drilled the 3/8 inch plates to be used for the motor mounts. I will build them tomorrow.
Total time:39.25 hours
Cost: $0 (steel came from drops at his work)
Total cost: $2487.00

Total time:39.25 hours
Cost: $0 (steel came from drops at his work)
Total cost: $2487.00
03-23-2016, 05:38 AM
#13
Staging Lane
Thread Starter
Join Date: Feb 2013
Location: Westminster, SC
Posts: 73
Likes: 0
Received 0 Likes
on
0 Posts
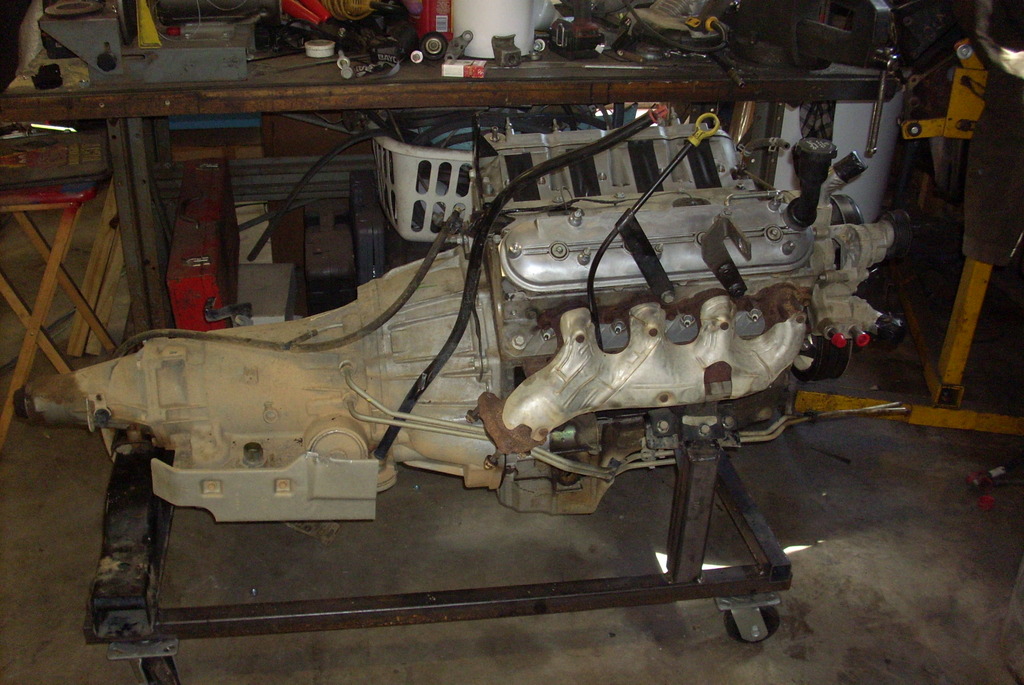
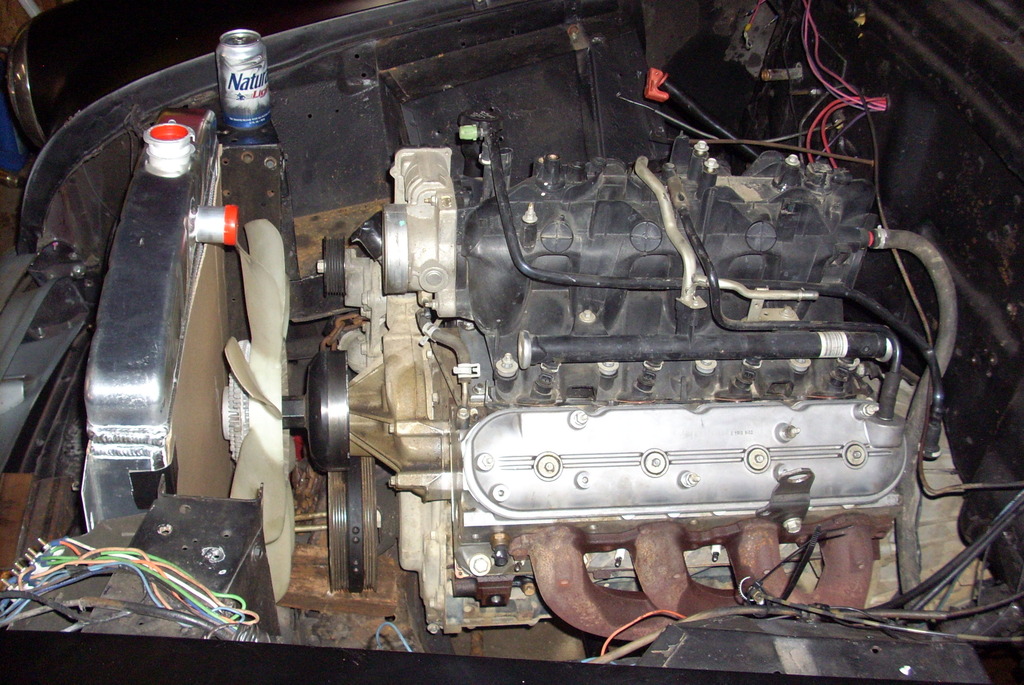
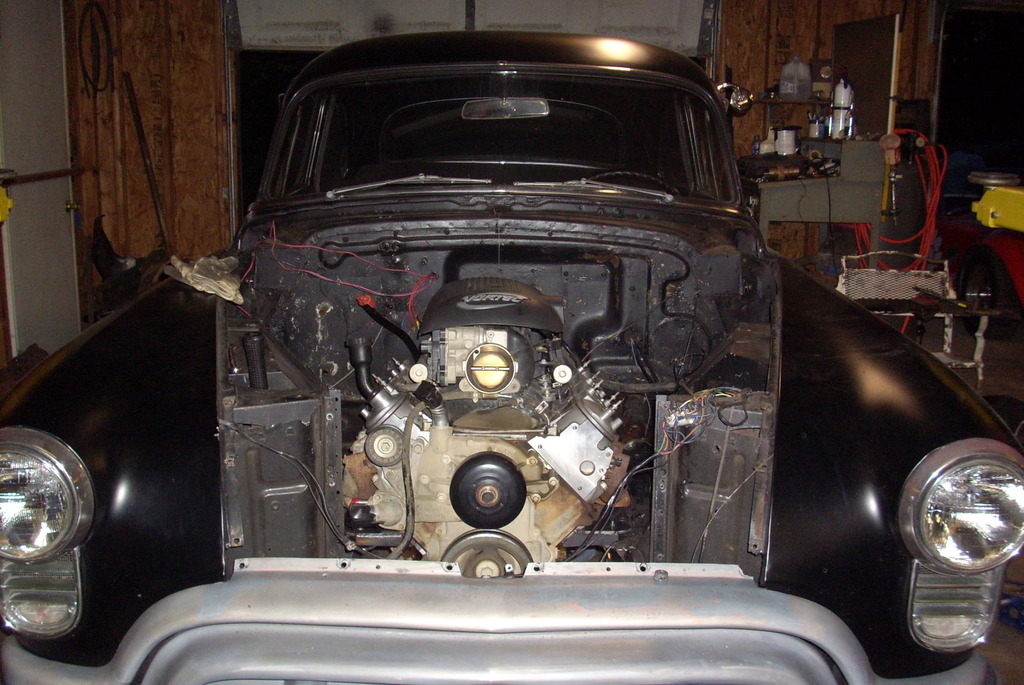
Day 8: Built biscuit mounts and modified trans mount for new trans. We used 1/4 inch plate for the mounts and 3/8 inch plate for the engine plates. The engine is now in its final location with all angles and level correct. After I get the measurements for the drive shaft and a few other things I will pull it back out for clean up and final welding of the mounts. All clearances look to be good with the exception of the trans tube is touching the fire wall, this can be fixed with a minor mod. We ended up with the engine off set to the passengers side 3/4 inch. Overall very pleased with the placement and looks. Also sent off the ECU for reprogramming.
Total time:53.25 hours
Cost: ECU shipping and programming, $88.00
Total: $2575.00
Rob

Total time:53.25 hours
Cost: ECU shipping and programming, $88.00
Total: $2575.00
Rob


 03-23-2016, 07:43 PM
#14
Staging Lane
Thread Starter
Join Date: Feb 2013
Location: Westminster, SC
Posts: 73
Likes: 0
Received 0 Likes
on
0 Posts
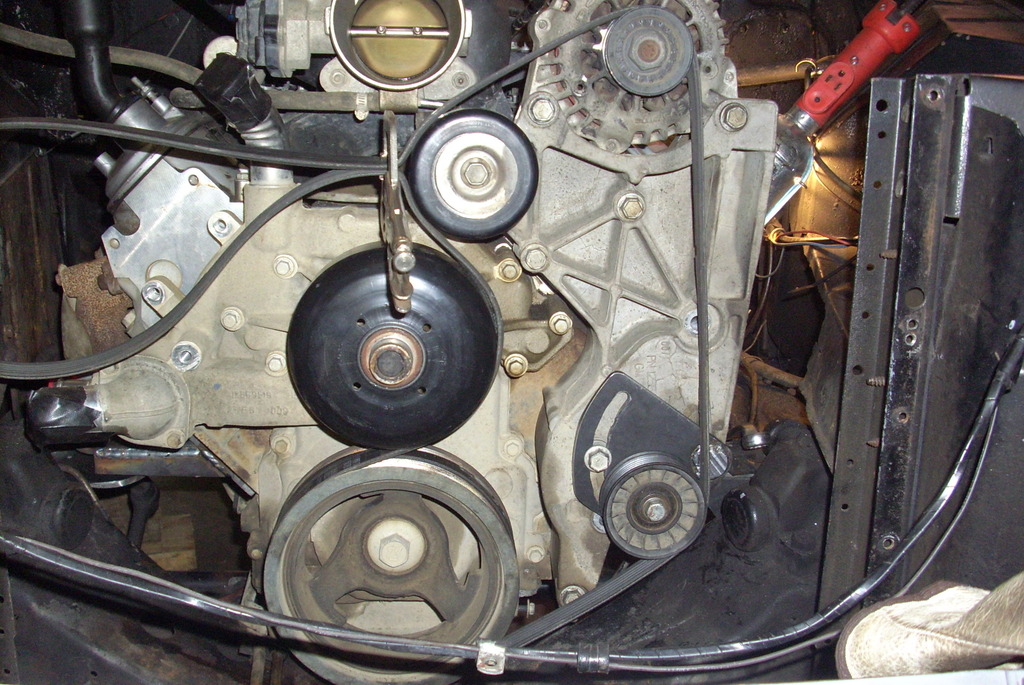
Day 9: Put the alternator mount on today. We will not be running PS so I added a ribbed pulley in it's place. I made this pulley adjustable because I will not use the tensioner. This frees up the thermostat housing for replacement using one designed to rotate. I still need to get another grooved pulley to replace the idler pulley.
Total time: 57.75 hours
Cost: $0
Total cost: $2575.00
Total time: 57.75 hours
Cost: $0
Total cost: $2575.00
 03-25-2016, 05:19 PM
#15
Staging Lane
Thread Starter
Join Date: Feb 2013
Location: Westminster, SC
Posts: 73
Likes: 0
Received 0 Likes
on
0 Posts
Day 10: Spent some more time working on the belt arrangement, we ended up with a 57 inch minimum belt length and the closest we could come up with was 58 3/8 so well see if that works. I had to mill out a spacer/bushing for the new pulley. I used the old tensioner for the base as it had the right diameter for the bearing.Marked all the locations for the shifter, fan shroud, water outlet and cold air intake in preparation for engine pull. Got a guy coming Saturday to look at the 302/C6 that will off set some of the cost.
Total time: 72 hours
Cost: 0 (it's coming)
Total cost: $2575.00
Total time: 72 hours
Cost: 0 (it's coming)
Total cost: $2575.00
03-25-2016, 05:51 PM
#16
Staging Lane
Thread Starter
Join Date: Feb 2013
Location: Westminster, SC
Posts: 73
Likes: 0
Received 0 Likes
on
0 Posts
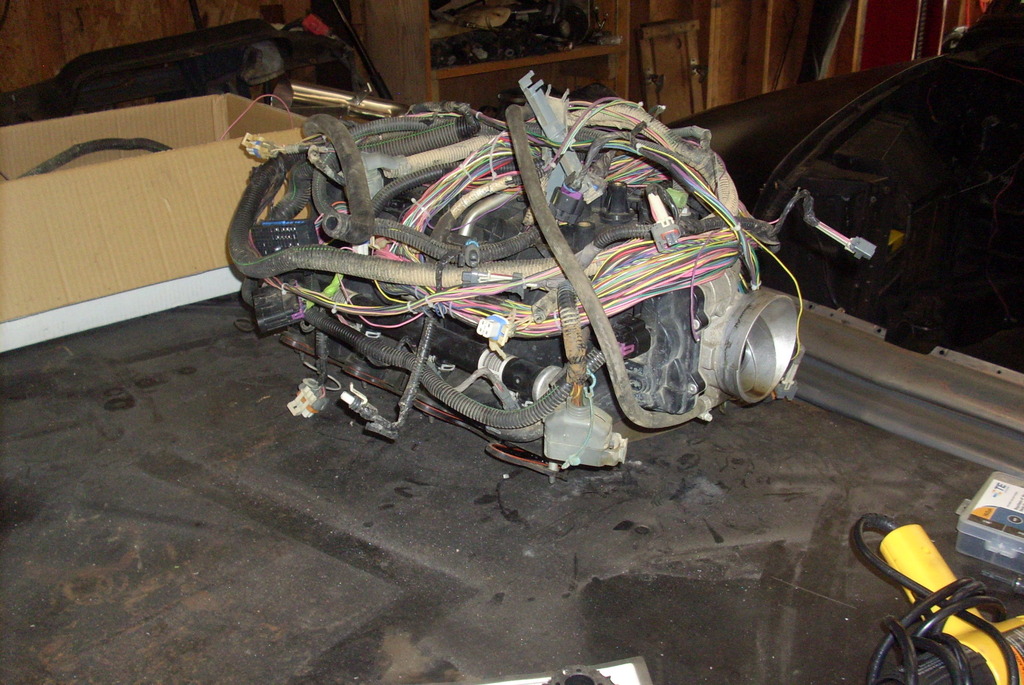
Day 11: Pulled the engine/trans back out, for what should be the last time. Finish welded the engine mount stands, did some hole filling on the frame. Started the mods to the wiring for stand alone, about 30 % done. Had a few parts come in.
Total time:92 hours
Cost: Adjustable water neck, $42.56
Fuel kit with pump, filter and connectors $179.99
Biscuit mount set $19.99
Electronic connectors, fuse holders, relays, light $40.00
Total Cost: $2857.54

Total time:92 hours
Cost: Adjustable water neck, $42.56
Fuel kit with pump, filter and connectors $179.99
Biscuit mount set $19.99
Electronic connectors, fuse holders, relays, light $40.00
Total Cost: $2857.54


 03-25-2016, 07:16 PM
#17
 03-27-2016, 12:05 AM
#18
Staging Lane
Thread Starter
Join Date: Feb 2013
Location: Westminster, SC
Posts: 73
Likes: 0
Received 0 Likes
on
0 Posts
Day 12: Good day and bad day, We had a good start with selling the old engine/trans for $900. The rest of the day was frustrating, we broke a tap off in the left rear of the head trying to remove the last exhaust bolt. Spent way to much time setting up the new shifter for the 4L60E, I think it will work but what a pain. We also had a very hard time drilling the 1 1/8 inch holes for the biscuit mounts, it turns out we hardened the plates while welding them. Now to add to all that we could not find a belt at the proper length. We did get the fire wall stripped and prepped for paint tomorrow. Also spent more time on the wiring.
Total time:112 hours
Cost: Still adding
Total cost; Still adding
Total time:112 hours
Cost: Still adding
Total cost; Still adding
03-27-2016, 02:03 PM
#19
have you tried welding the exhaust bolt out? it's the easiest way. I just ground right to the head bolt and push wire right down the bolt hole until a nubbin sticks out, then i put a nut on the nub and push wire into that. let it cool a bit and hit it with some pb blaster and they come right out.
also it looks like you could ditch the upper idler and still have ~20% wrap on the water pump which is about the minimum i have found.
good luck I am fond of the olds from that era. you gotta spray some gold on that block for me ala the j-2 motor.
also it looks like you could ditch the upper idler and still have ~20% wrap on the water pump which is about the minimum i have found.
good luck I am fond of the olds from that era. you gotta spray some gold on that block for me ala the j-2 motor.