1991 Nissan 240sx – T76 LQ4 with T56


 01-28-2014, 02:20 AM
#102
Staging Lane

Join Date: Nov 2012
Posts: 50
Likes: 0
Received 0 Likes
on
0 Posts
Man you're doing a hell of a job. Don't you dare take that thing out on test drives over the next few icy days. Nobody in Austin knows how to drive with ice in the mix.
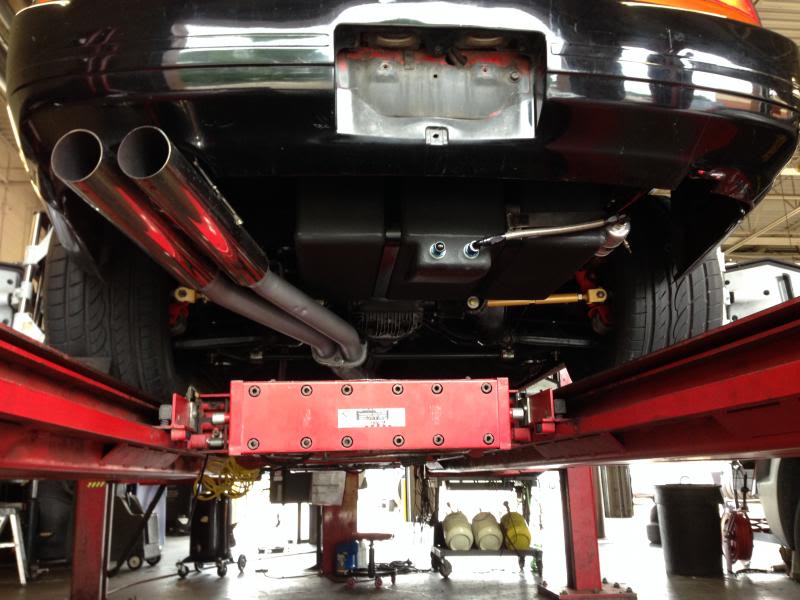
And jeebus christo.....those calipers.....flippin' gigantor....
And jeebus christo.....those calipers.....flippin' gigantor....
01-28-2014, 08:55 AM
#103
I have a feeling these calipers will help slow this thing down, even with the added weight of the iron block and t56. maybe in the next week or two i'll have it back together enough to take it around and bed the pads and see how they perform.
04-11-2014, 07:36 PM
#104
well, I haven't had an update lately as I've been troubleshooting several things.
had a p/s leak in the rack, attempted a rebuild that failed epically, then finally settled on a reman'd rack.
Then I've been battling overheating issues. I caved and ditched my current setup to something else.
Old set up was a C&R single pass with dual 12" pusher fans and a 160* tstat.
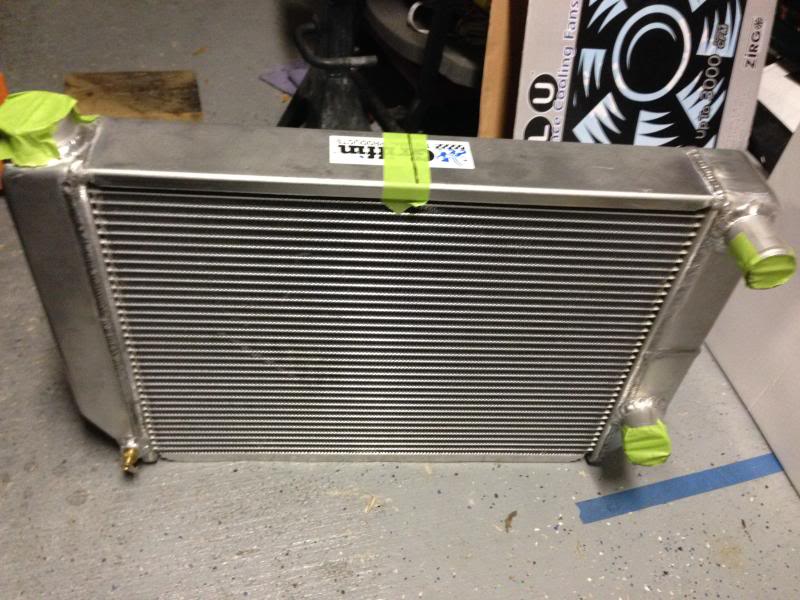
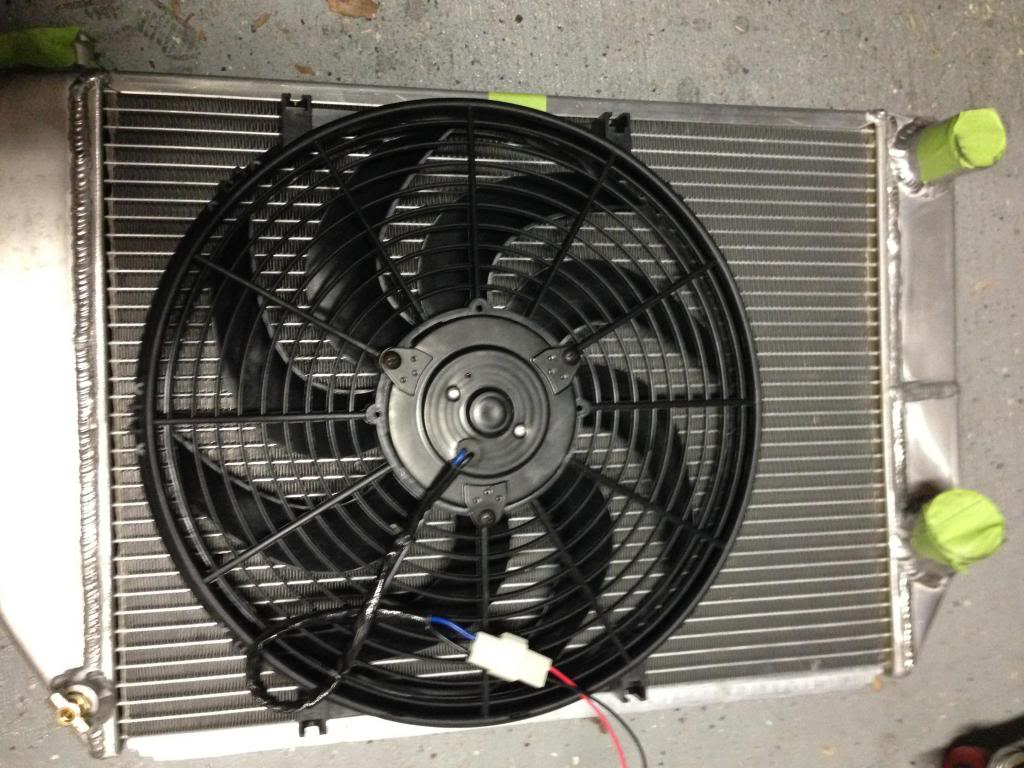
Now i'm going with a Griffin 52801-x, dual 1.25" core, dual pass, a single zirgo 14" puller fan and an OEM 180* tstat.
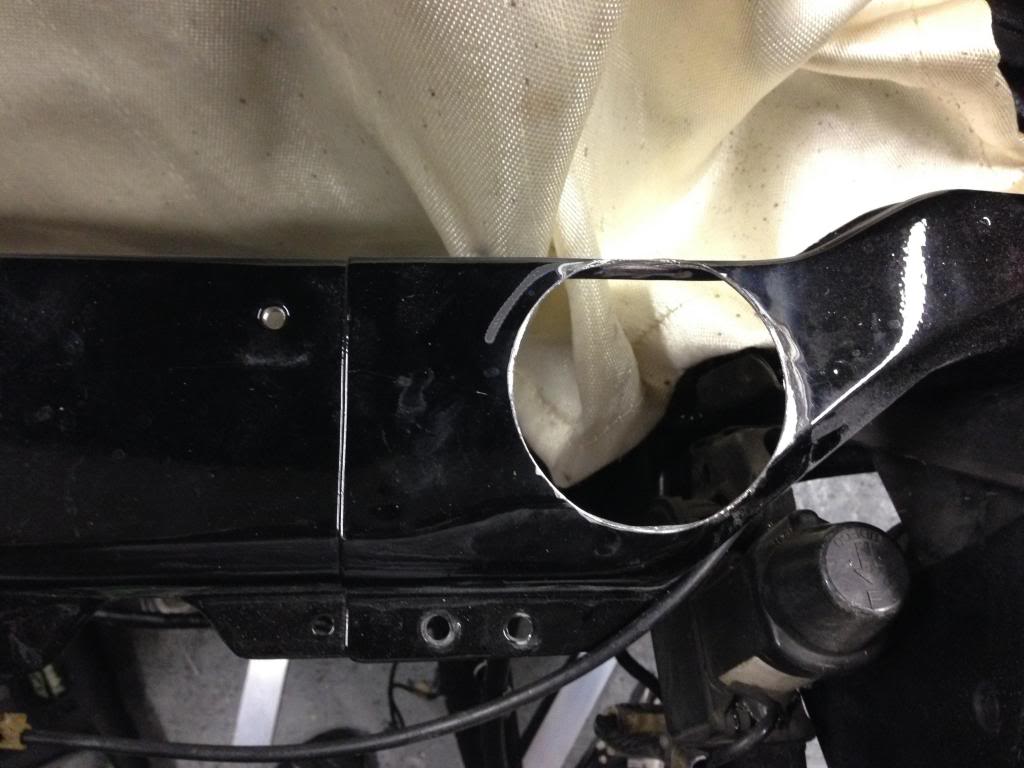
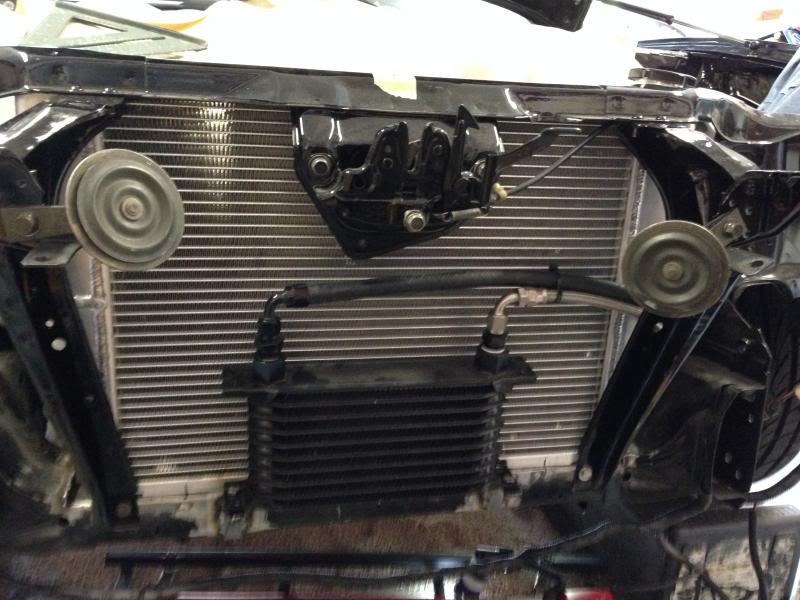
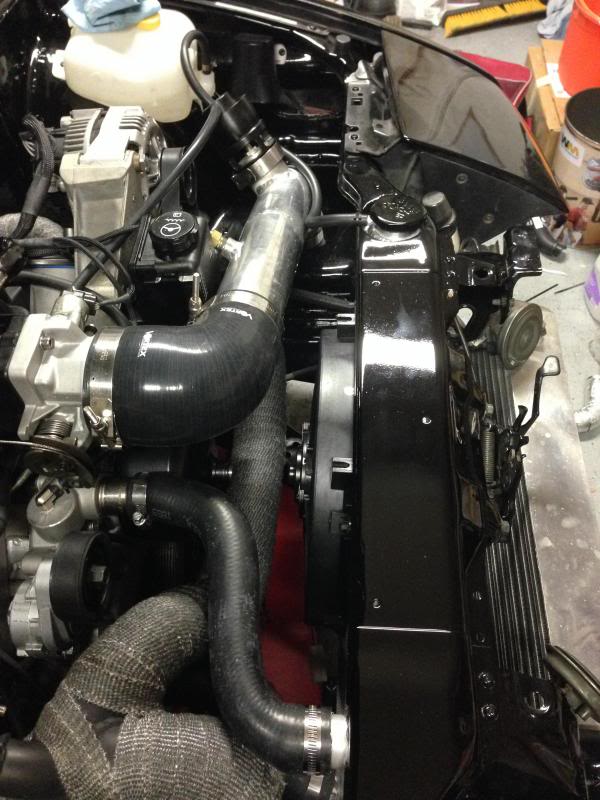
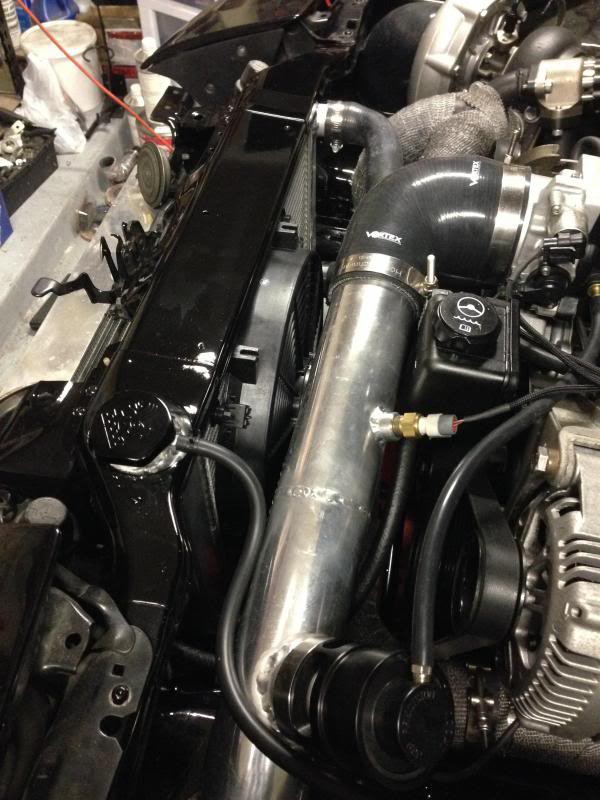
i'm doing a custom tucked radiator setup to move the rad 3" away from the motor and turbo piping. this requires a little fab work that I haven't fully completed yet, but I have a few pics of where i'm at right now. I hope to have more progress over the next week or so.
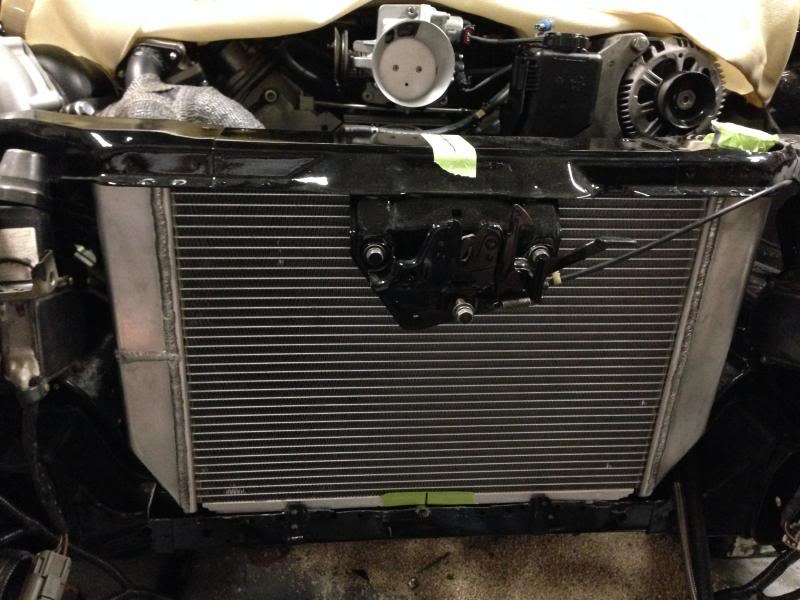
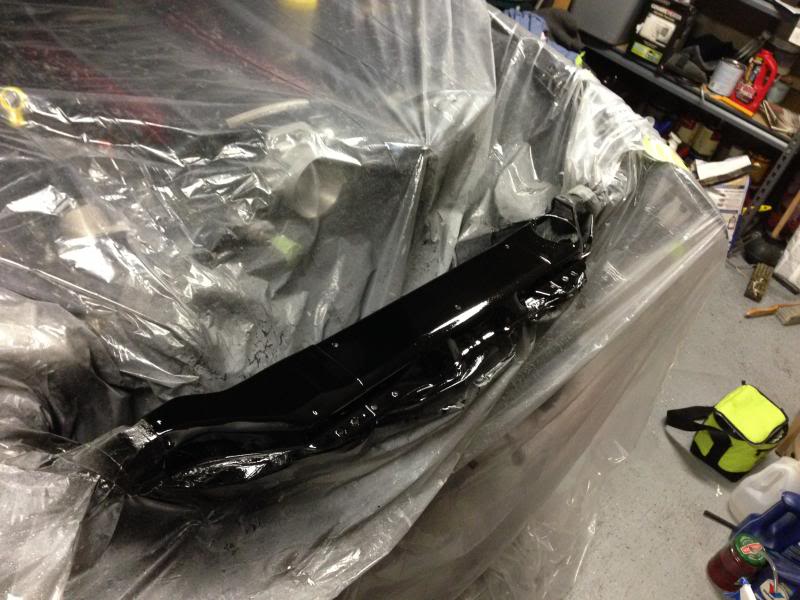
pic of rad and new fan
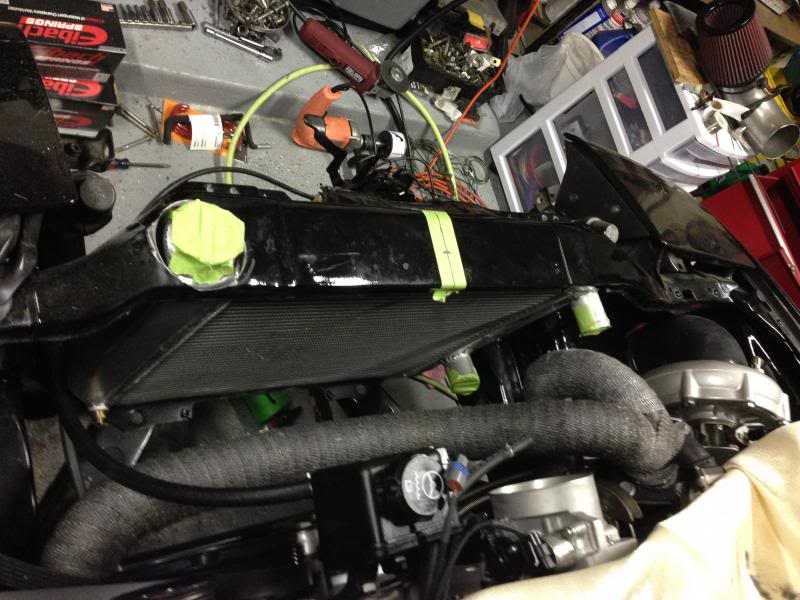
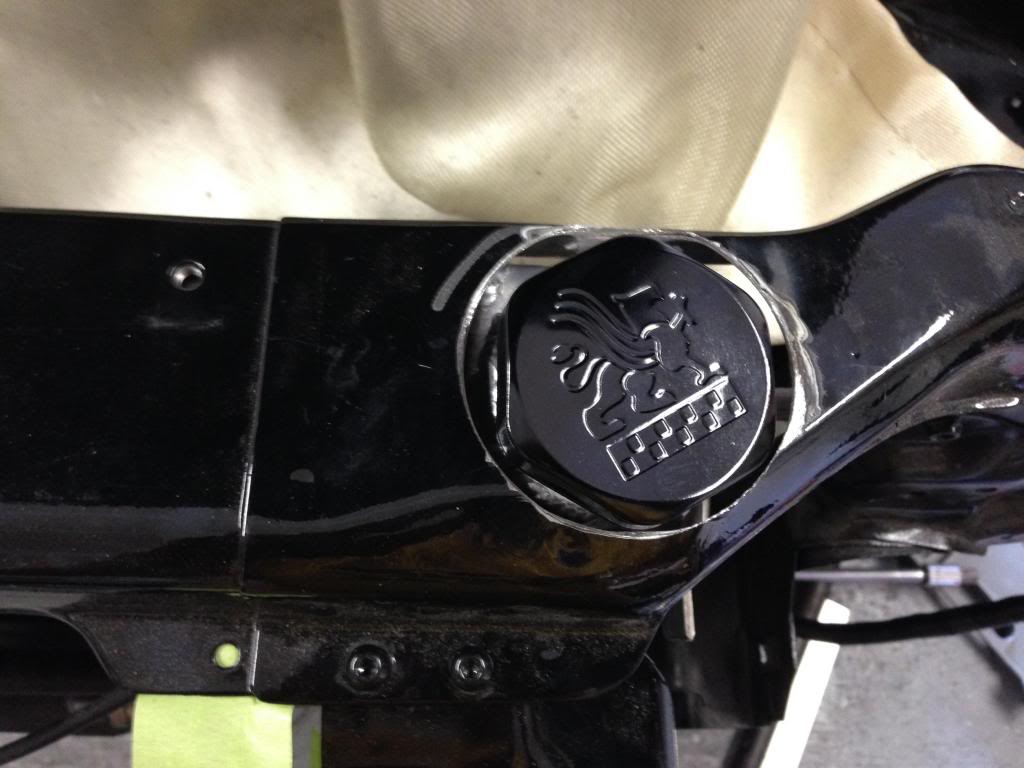
hole in the upper rad support for the rad filler neck
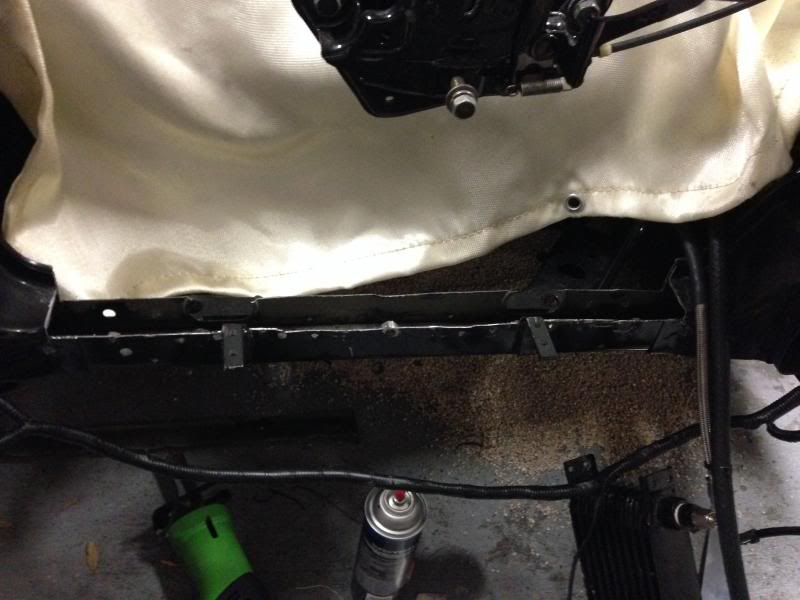
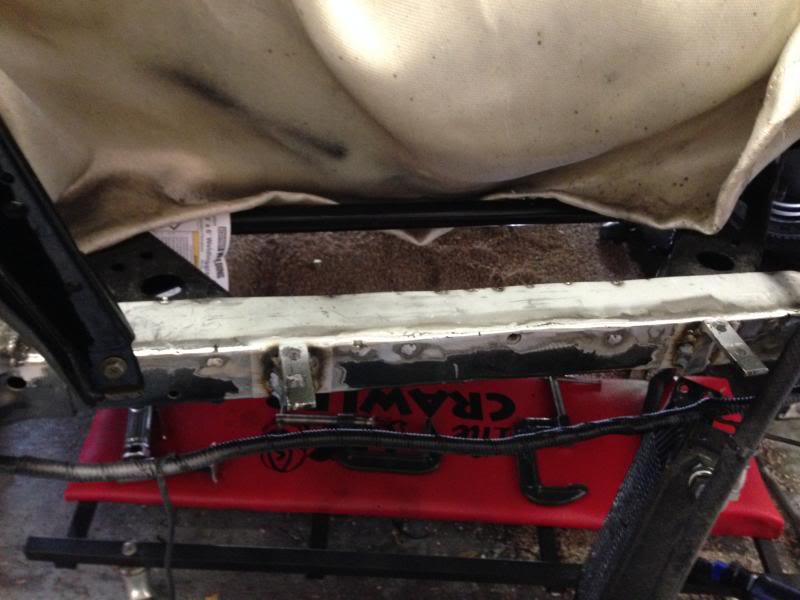
notched about 3/8" from the lower rad support. i'll be welding this up to regain rigidity from notching
front view of temp mounting
engine side view of temp mounting
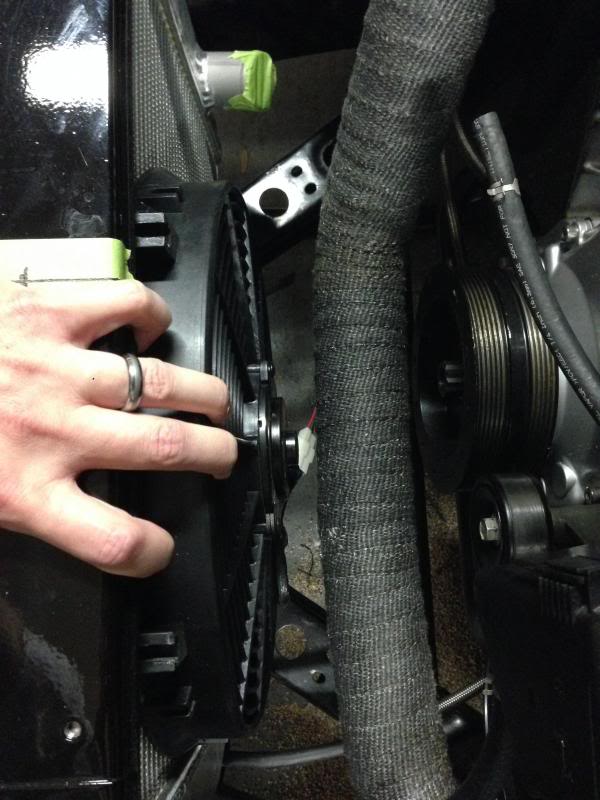
new clearance I have to mount the 14" puller. I have right at 1" of space between the fan motor and exhaust. hopefully this will be enough
I just need to figure out now to mount it to the car to be strong enough to support the weight.
Hopefully I'll have more updates in the next 2 weeks.
had a p/s leak in the rack, attempted a rebuild that failed epically, then finally settled on a reman'd rack.
Then I've been battling overheating issues. I caved and ditched my current setup to something else.
Old set up was a C&R single pass with dual 12" pusher fans and a 160* tstat.
Now i'm going with a Griffin 52801-x, dual 1.25" core, dual pass, a single zirgo 14" puller fan and an OEM 180* tstat.
i'm doing a custom tucked radiator setup to move the rad 3" away from the motor and turbo piping. this requires a little fab work that I haven't fully completed yet, but I have a few pics of where i'm at right now. I hope to have more progress over the next week or so.
pic of rad and new fan


hole in the upper rad support for the rad filler neck

notched about 3/8" from the lower rad support. i'll be welding this up to regain rigidity from notching

front view of temp mounting

engine side view of temp mounting

new clearance I have to mount the 14" puller. I have right at 1" of space between the fan motor and exhaust. hopefully this will be enough

I just need to figure out now to mount it to the car to be strong enough to support the weight.
Hopefully I'll have more updates in the next 2 weeks.
04-17-2014, 05:52 PM
#105
I took the day off of from work yesterday to get a little bit of work done, as time on the weekends just doesn't exist anymore.
I worked more on my tucked radiator setup.
First I boxed in the lower rad support. prep and paint should happen over the weekend.....maybe
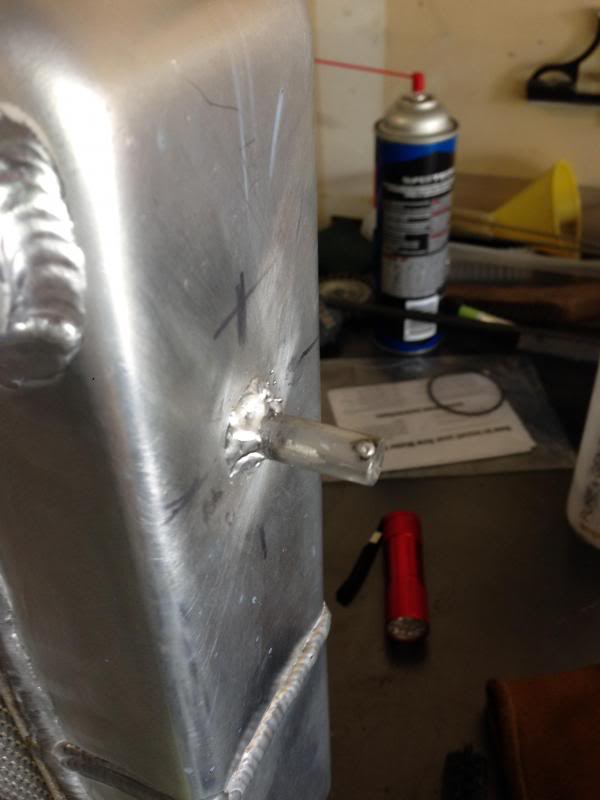
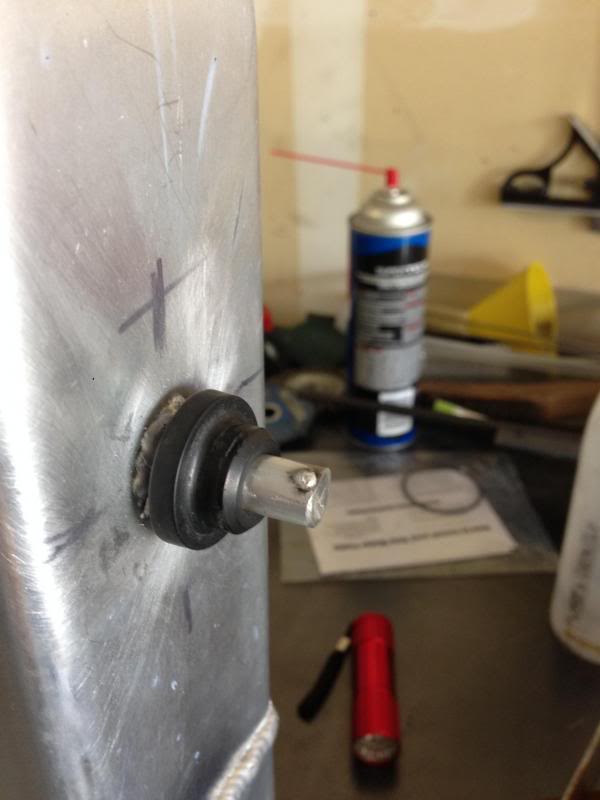
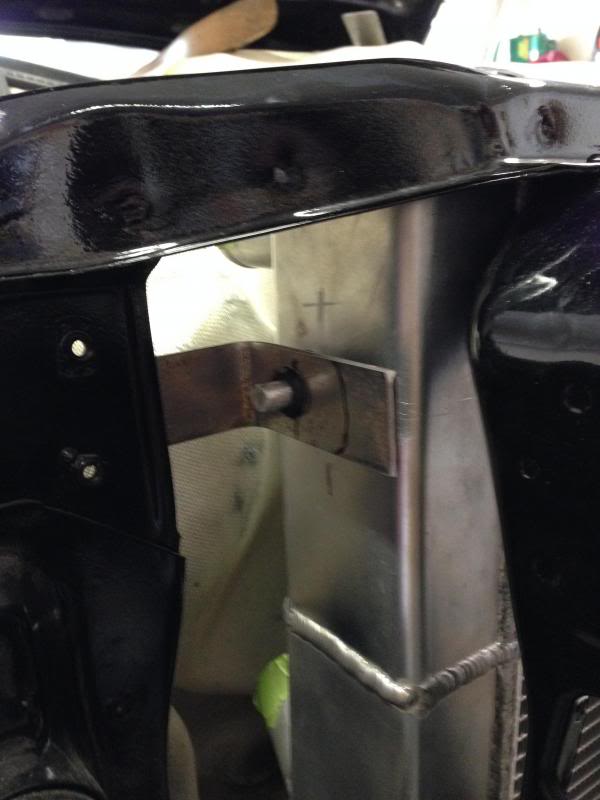
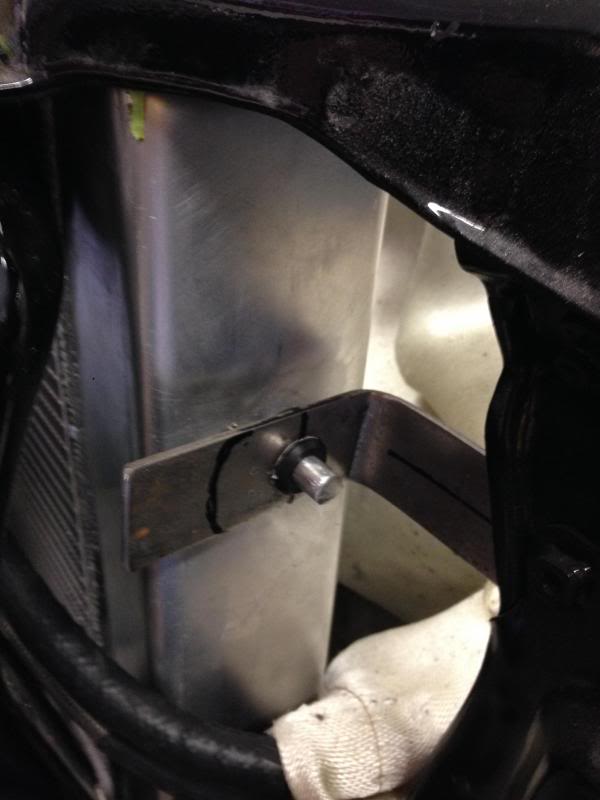
Then I welded on 1" pieces of 3/8" alum rod to each side of the radiator to mimic the OEM upper mounts and reused the stock rubber isolators. I made a couple of brackets that still need to be trimmed and them bolted to the core support to fully mount the radiator.
I worked more on my tucked radiator setup.
First I boxed in the lower rad support. prep and paint should happen over the weekend.....maybe

Then I welded on 1" pieces of 3/8" alum rod to each side of the radiator to mimic the OEM upper mounts and reused the stock rubber isolators. I made a couple of brackets that still need to be trimmed and them bolted to the core support to fully mount the radiator.


 04-28-2014, 12:52 PM
#107
Slow, Slow progress with the tucked radiator, but coming down the how stretch....hopefully.
Big thing to do was to clean up the upper core support and repaint as drilling a 3.5" hole and notching for the upper outlet did some damage to my nice(ish) paint.
prepped and sanded with 340 grit

2 coats of 2k primer/surfacer
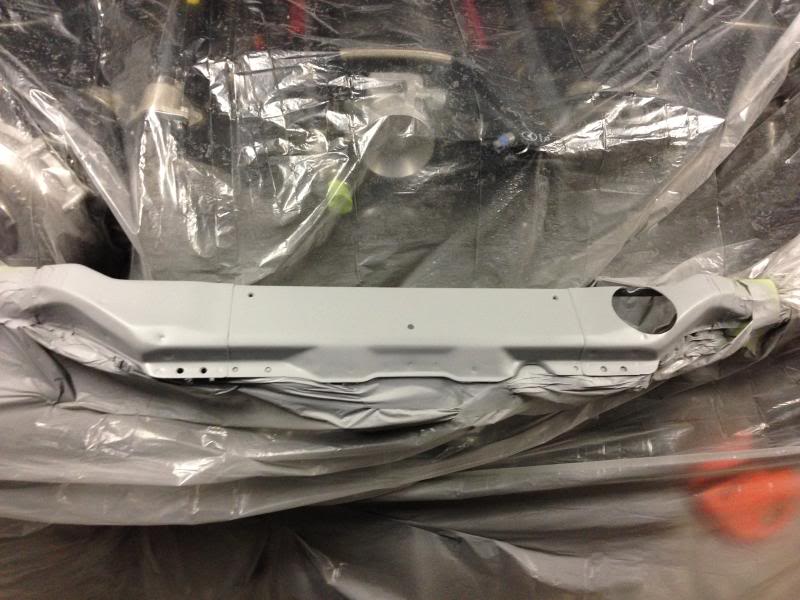
Prepped and wet sanded with 800 grit
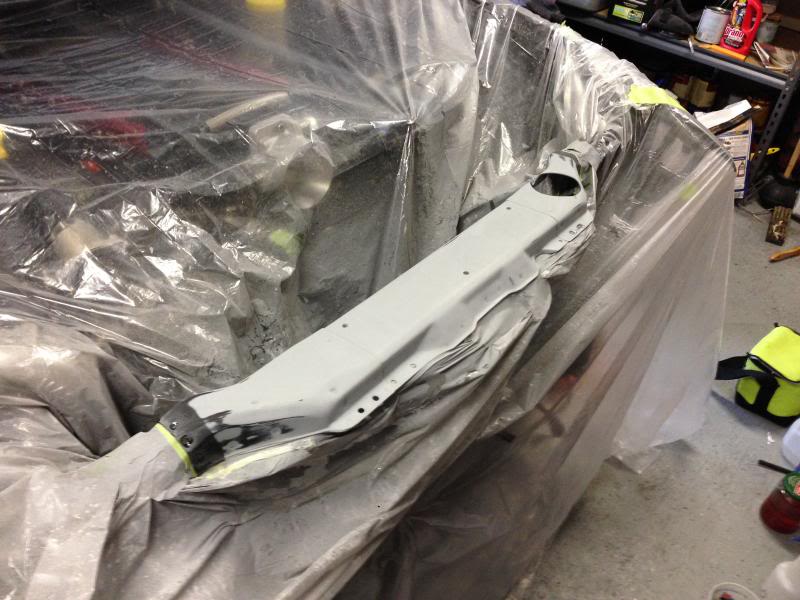
Finally, 2 coats of single stage jet black base
Tonight and hopefully later this week I strip all of the masking off and starting mounting everything back on to the car.
Big plans for this weekend are to bleed the coolant and test to make sure the new setup is working properly. Then hopefully, i'll be able to put some miles on it to get an alignment done.
Big thing to do was to clean up the upper core support and repaint as drilling a 3.5" hole and notching for the upper outlet did some damage to my nice(ish) paint.
prepped and sanded with 340 grit

2 coats of 2k primer/surfacer

Prepped and wet sanded with 800 grit

Finally, 2 coats of single stage jet black base

Tonight and hopefully later this week I strip all of the masking off and starting mounting everything back on to the car.
Big plans for this weekend are to bleed the coolant and test to make sure the new setup is working properly. Then hopefully, i'll be able to put some miles on it to get an alignment done.
05-07-2014, 10:37 AM
#108
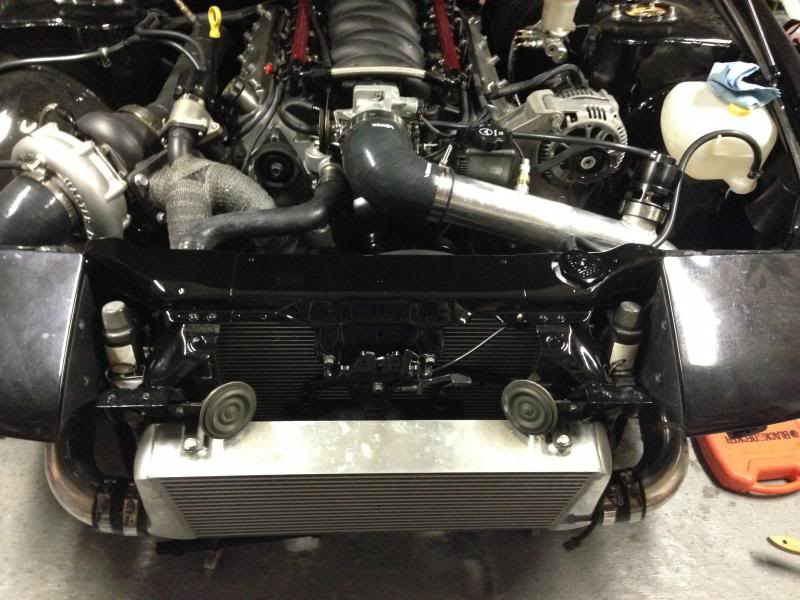
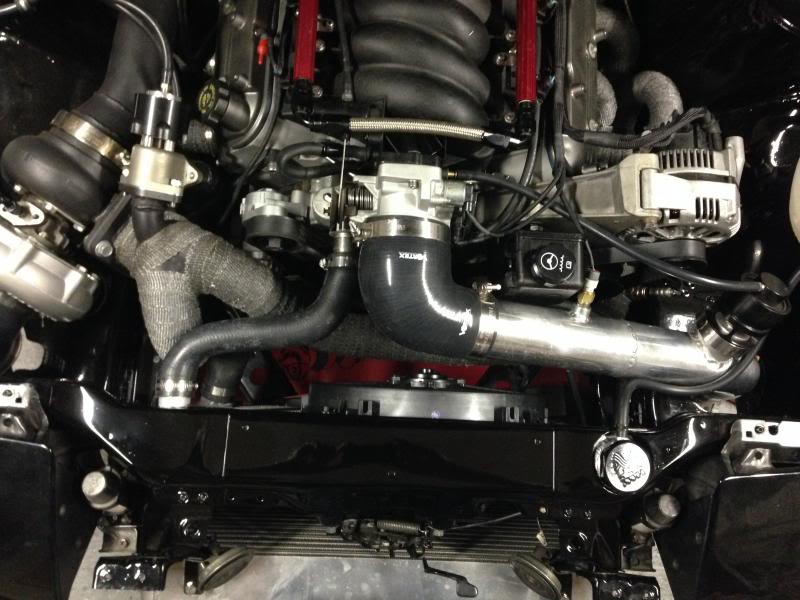
I got some work done over the weekend and completed my tucked radiator setup, well, for the time being.
I got it all buttoned up and decided to take it for a test drive to get an alignment. it did pretty good for the most part until I got stuck in traffic or at lights, then it started to warm up again. once I got moving it cooled back down some but still a little warm for my liking. The upper hose is very close to the exhaust, i some heat wrap on the way for that. I took it back apart again and am working on building a custom fan shroud as well as adding a surge tank to aid in bleeding coolant. More details on this over the weekend.
On to some pics


 05-24-2014, 03:10 PM
#110
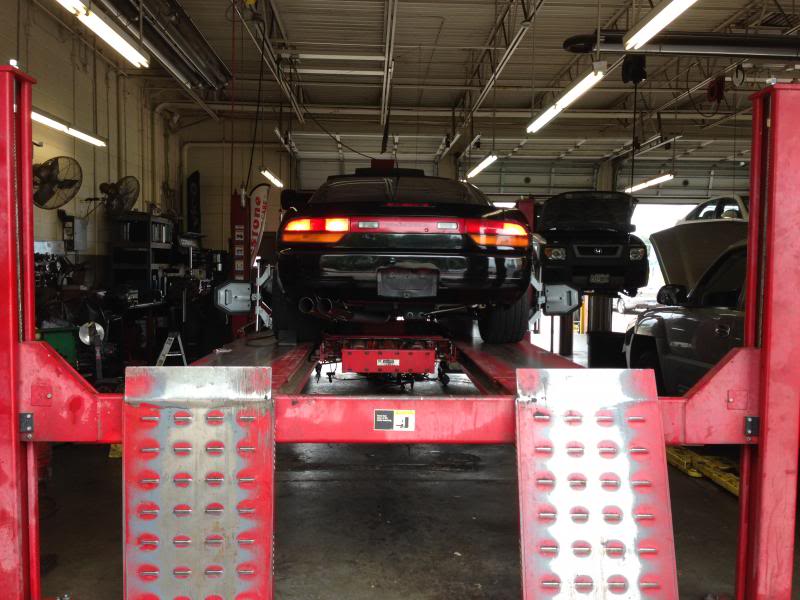
Alignment is done, and we're on the road!
I've added an external surge tank from Keyser Manufacturing to help with the cooling issues I've been having. Huge help but still have some kinks to work out.
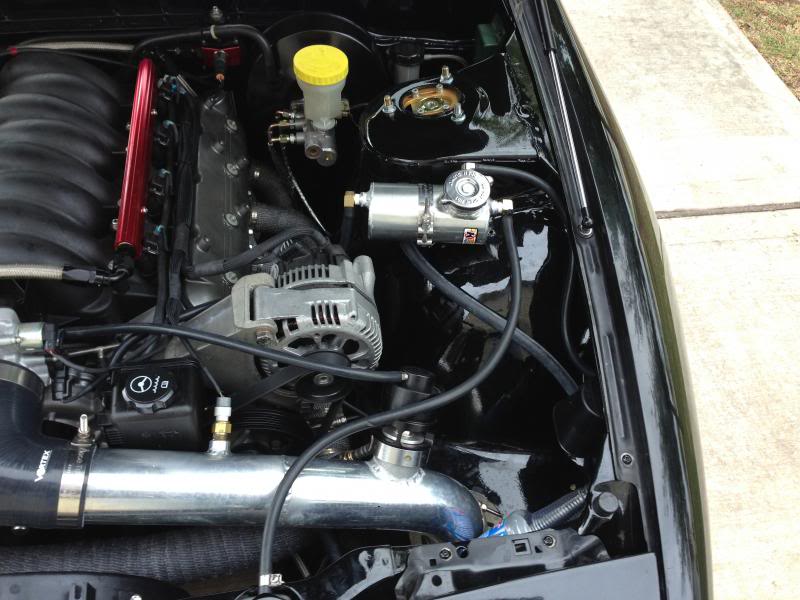
I've also finally mounted my Saikou Michi dual catch can and routed all lines.
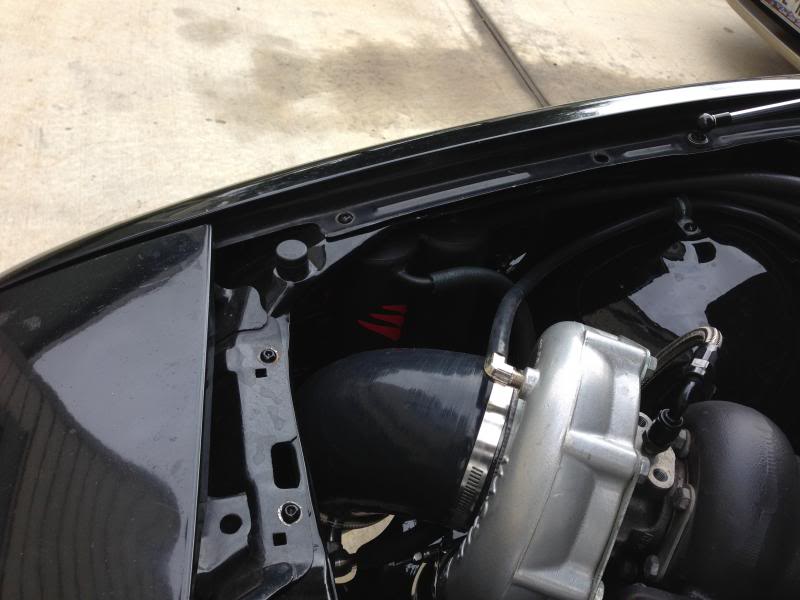
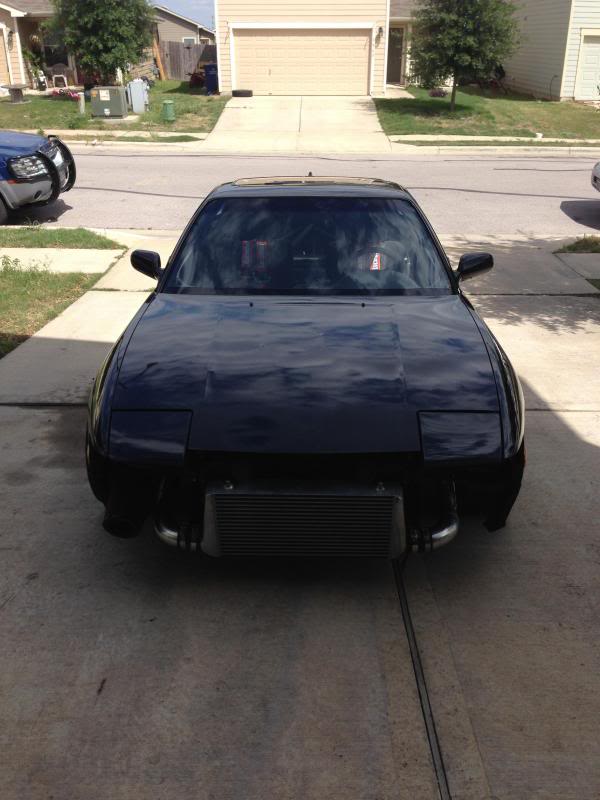
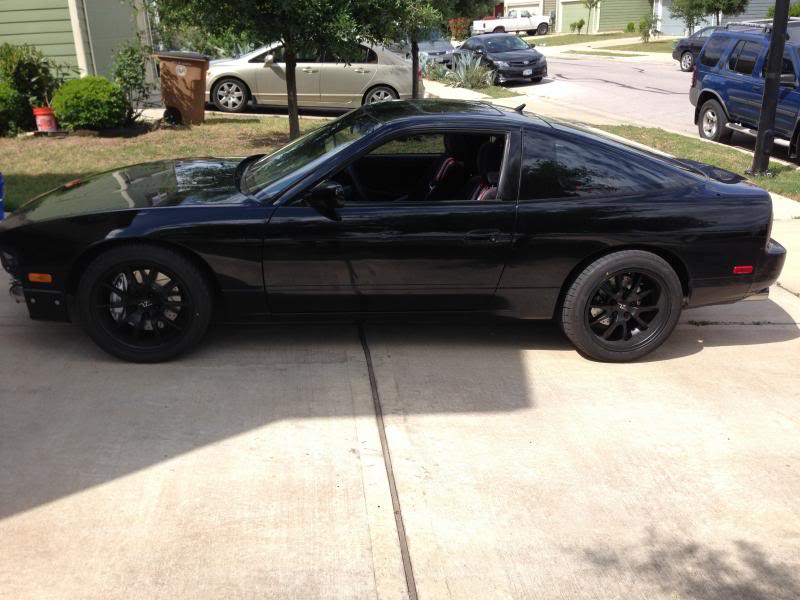
Here's the final bay setup. I don't plan of changing anything else at the moment.
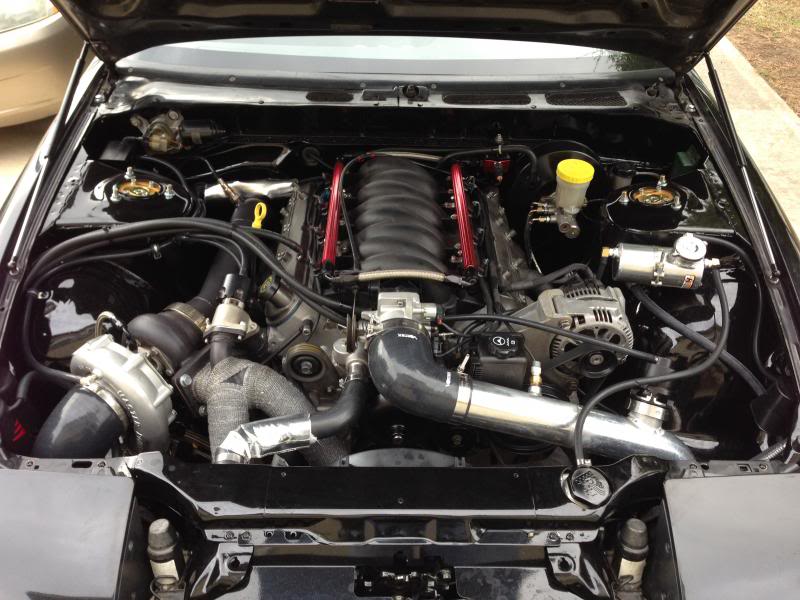
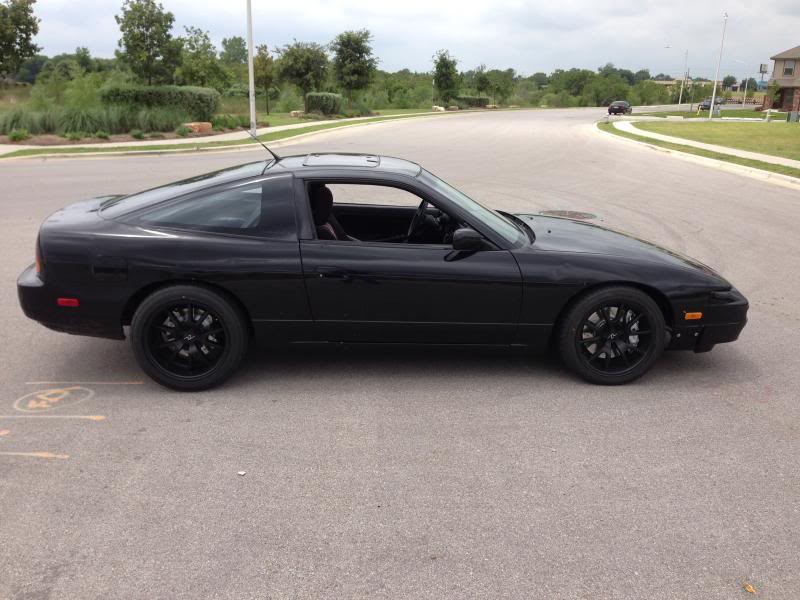
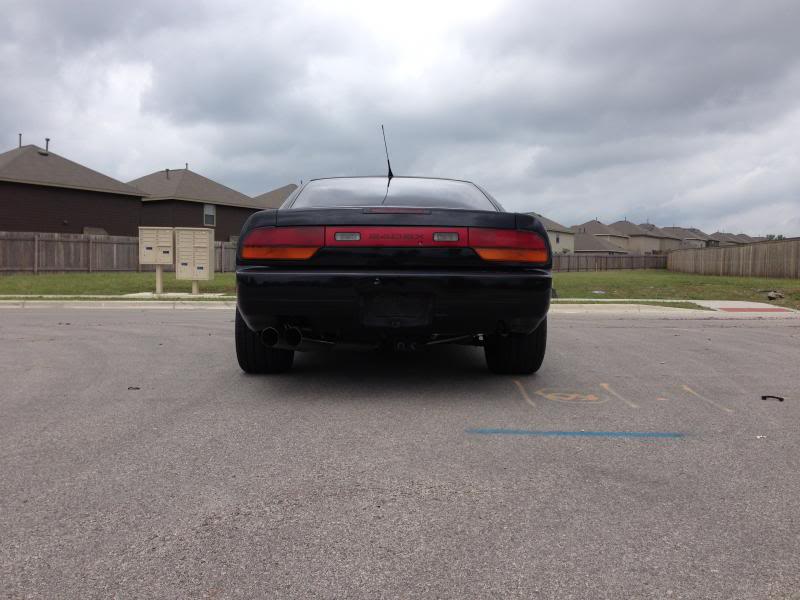
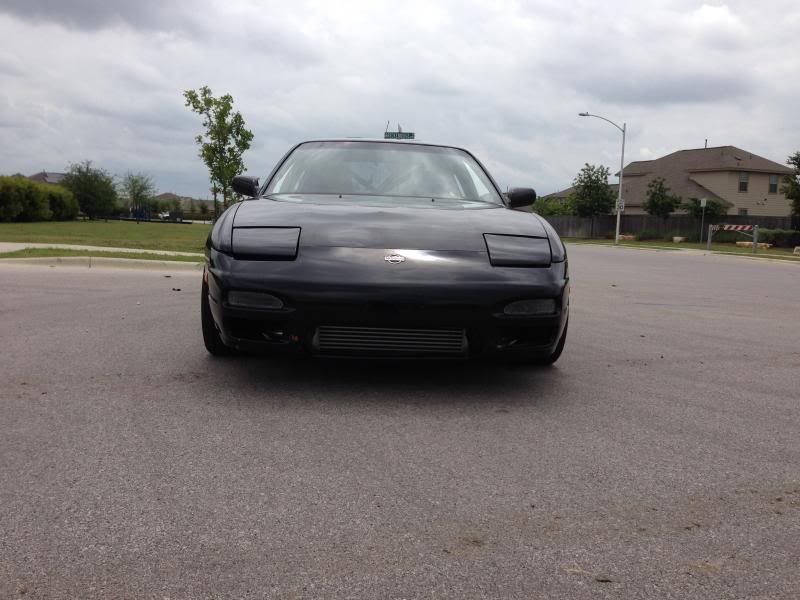
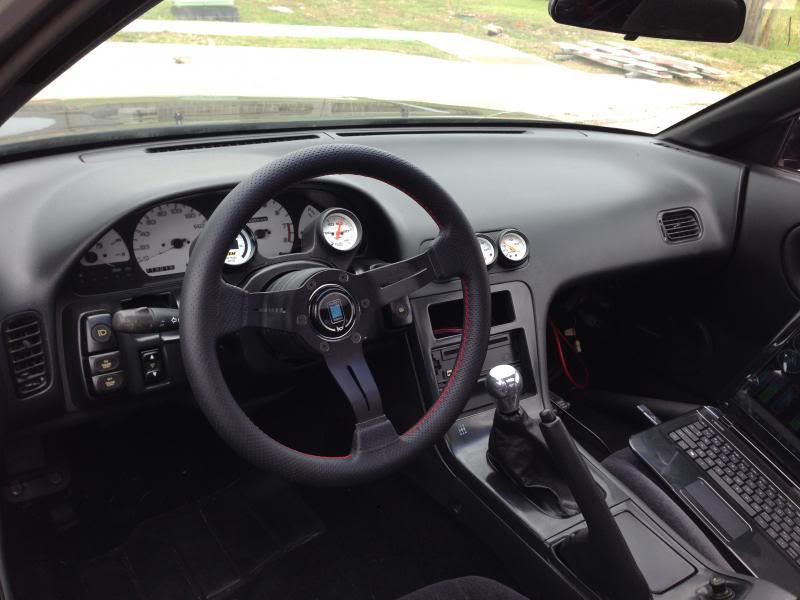
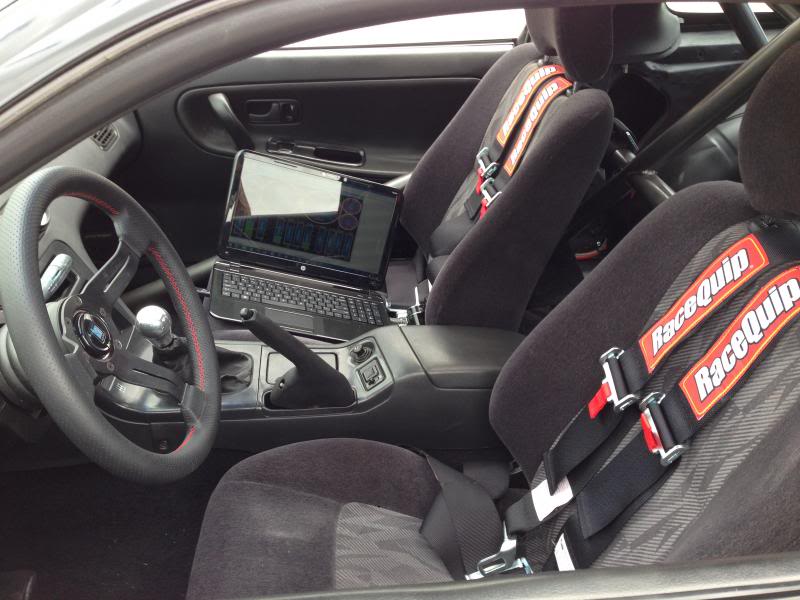
Here are some general shots of the car as it sits now. It's about 98% complete right now, hatch wiring, couple of interior panels, glove box, headliner, etc.
Finally, I've got an in car vid of the last few miles of my way back home from getting the alignment. Feels damn good to drive it again.


I've added an external surge tank from Keyser Manufacturing to help with the cooling issues I've been having. Huge help but still have some kinks to work out.

I've also finally mounted my Saikou Michi dual catch can and routed all lines.

Here's the final bay setup. I don't plan of changing anything else at the moment.

Here are some general shots of the car as it sits now. It's about 98% complete right now, hatch wiring, couple of interior panels, glove box, headliner, etc.


Finally, I've got an in car vid of the last few miles of my way back home from getting the alignment. Feels damn good to drive it again.
 06-02-2014, 11:58 AM
#114
Well, I've got some Good new and some Bad news.
Good News - I think I've discovered what's been causing my ongoing overheating issues
Bad News - motor has to come apart
I finally decided to do a combustion leak test (http://www.arrowheadradiator.com/hea..._leak_test.htm) on my setup to be 100% sure. Sure enough, I have a leak. Here's the strange thing though....no signs of coolant in exhaust..no white smoke, no mixing of coolant in oil or oil in coolant, leak down test was consistent across all 8 cylinders (30%) and compression was between 145-150 psi across all 8.
In the process of pulling heads to inspect the headgaskets (LS9 MLS) and will take my 317 heads to get inspected for possible cracks or warping. IF all come back good, I guess i'll be taking apart the block
06-02-2014, 02:00 PM
#116
Well, I've got some Good new and some Bad news.
Good News - I think I've discovered what's been causing my ongoing overheating issues
Bad News - motor has to come apart
I finally decided to do a combustion leak test (http://www.arrowheadradiator.com/hea..._leak_test.htm) on my setup to be 100% sure. Sure enough, I have a leak. Here's the strange thing though....no signs of coolant in exhaust..no white smoke, no mixing of coolant in oil or oil in coolant, leak down test was consistent across all 8 cylinders (30%) and compression was between 145-150 psi across all 8.
In the process of pulling heads to inspect the headgaskets (LS9 MLS) and will take my 317 heads to get inspected for possible cracks or warping. IF all come back good, I guess i'll be taking apart the block
Good News - I think I've discovered what's been causing my ongoing overheating issues
Bad News - motor has to come apart
I finally decided to do a combustion leak test (http://www.arrowheadradiator.com/hea..._leak_test.htm) on my setup to be 100% sure. Sure enough, I have a leak. Here's the strange thing though....no signs of coolant in exhaust..no white smoke, no mixing of coolant in oil or oil in coolant, leak down test was consistent across all 8 cylinders (30%) and compression was between 145-150 psi across all 8.
In the process of pulling heads to inspect the headgaskets (LS9 MLS) and will take my 317 heads to get inspected for possible cracks or warping. IF all come back good, I guess i'll be taking apart the block
You did such an awesome job with everything else, I'd give the fan setup a little more attention. Even if you do end up having to pull the heads that fan setup is horrible. Get a nice sealed shroud of some sort on there and make sure your fan is up to snuff CFM wise. 2100ish cfm across 75% of the core is pretty poor.
My setup is is a joke compared to yours, but I cool the engine easily with a 14"x14" core "half" radiator and a large IC blocking it completely. I used a ford taurus fan cut to fit the core exactly and sealed on with RTV. (3200 CFM on low,
6000 CFM on high running right off the alt)
On a 90* day I don't see over 190* sitting in traffic. I can usually get it down to 172ish at night in the staging lanes before a pass.
Last edited by Forcefed86; 06-02-2014 at 02:23 PM.
06-02-2014, 02:55 PM
#117
I wouldn't go pulling a motor apart based on that one test. Esp since all the other tests were fine. I'd pressure test the radiator next. Also with a pressure gauge on rad, rev the engine up pretty good and watch the gauge. If combustion is leaking into the rad it will show up very clearly. Shud push into your rad catch can as well if it was bad enough to cause overheating. You did such an awesome job with everything else, I'd give the fan setup a little more attention. Even if you do end up having to pull the heads that fan setup is horrible. Get a nice sealed shroud of some sort on there and make sure your fan is up to snuff CFM wise. 2100ish cfm across 75% of the core is pretty poor. My setup is is a joke compared to yours, but I cool the engine easily with a 14"x14" core "half" radiator and a large IC blocking it completely. I used a ford taurus fan cut to fit the core exactly and sealed on with RTV. (3200 CFM on low, 6000 CFM on high running right off the alt) On a 90* day I don't see over 190* sitting in traffic. I can usually get it down to 172ish at night in the staging lanes before a pass.
06-02-2014, 03:41 PM
#118
I wouldn't go pulling a motor apart based on that one test. Esp since all the other tests were fine. I'd pressure test the radiator next. Also with a pressure gauge on rad, rev the engine up pretty good and watch the gauge. If combustion is leaking into the rad it will show up very clearly. Shud push into your rad catch can as well if it was bad enough to cause overheating.
You did such an awesome job with everything else, I'd give the fan setup a little more attention. Even if you do end up having to pull the heads that fan setup is horrible. Get a nice sealed shroud of some sort on there and make sure your fan is up to snuff CFM wise. 2100ish cfm across 75% of the core is pretty poor.
My setup is is a joke compared to yours, but I cool the engine easily with a 14"x14" core "half" radiator and a large IC blocking it completely. I used a ford taurus fan cut to fit the core exactly and sealed on with RTV. (3200 CFM on low,
6000 CFM on high running right off the alt)
On a 90* day I don't see over 190* sitting in traffic. I can usually get it down to 172ish at night in the staging lanes before a pass.
 07-10-2014, 06:59 PM
#119
Slight update. tore the motor down and took the heads to get checked out. Had them pressure tested and came back good. Ended up needing .008 to resurface the heads flat. Not sure if that was from the overheating issues I was having or poor machine work from the initial build.
New LS9 head gaskets and valves seals are at home, so the reassembly starts tonight. Hopefully things go better this time around.
New LS9 head gaskets and valves seals are at home, so the reassembly starts tonight. Hopefully things go better this time around.
07-10-2014, 07:14 PM
#120
Slight update. tore the motor down and took the heads to get checked out. Had them pressure tested and came back good. Ended up needing .008 to resurface the heads flat. Not sure if that was from the overheating issues I was having or poor machine work from the initial build.
New LS9 head gaskets and valves seals are at home, so the reassembly starts tonight. Hopefully things go better this time around.
New LS9 head gaskets and valves seals are at home, so the reassembly starts tonight. Hopefully things go better this time around.