69 Nova. 5.3 L33 Turbo build. Billet S474, LOTS of pictures...
 .
.
 04-22-2014, 11:26 PM
#42
Well shoot. It will be a nice car when you are done!
I found a few here. See if they help. My guess is those are small block stands, they look pretty tall.


For what it's worth, lots of big blocks get installed on SB frame stands. Then it's beat the drive side header because it hits the steering box.
I found a few here. See if they help. My guess is those are small block stands, they look pretty tall.


For what it's worth, lots of big blocks get installed on SB frame stands. Then it's beat the drive side header because it hits the steering box.
04-22-2014, 11:37 PM
#43
Restricted User
Thread Starter

You're right, I must have the small block stands. You're also right on the header, as mine had been slightly 'modified' to fit around the steering box.
I'm going to try to install it with the stock small block stands (since thats what everyone recommends anyway). If they won't line up with the mounts flipped, I'll probably cut them off and start looking for a pair of big block stands. I want the engine a little lower anyway, but I'm not going to go through the hassle right now if I don't have to. I plan on upgrading the subframe next year to try and drop some weight off of the front and make the car handle better. This year it'll get control arms, sway bar, and corvette disks.
I'm going to try to install it with the stock small block stands (since thats what everyone recommends anyway). If they won't line up with the mounts flipped, I'll probably cut them off and start looking for a pair of big block stands. I want the engine a little lower anyway, but I'm not going to go through the hassle right now if I don't have to. I plan on upgrading the subframe next year to try and drop some weight off of the front and make the car handle better. This year it'll get control arms, sway bar, and corvette disks.
04-22-2014, 11:51 PM
#44
Something I've noted since having it all together. The trans pan actually slopes to the front of the car. In simple terms, the engine actually sits about a half inch too low. If I would have paid better attention I would have either raised the engine or lowered the tail shaft. Too late now.
04-23-2014, 12:12 AM
#45
Launching!
iTrader: (4)

Join Date: May 2010
Location: asheboro, nc
Posts: 289
Likes: 0
Received 0 Likes
on
0 Posts
I would cut the frame stands off.
Bolt them to the mounts, then set it were u want it then weld or bolt them back to the frame.
Idk if its just a nova thing but i seen alot of ppl run into issues with doing ls swaps in them.
The only thing i can think is they most have the motors sitting really low in them from the factory.
An also if them adapter plates are ment for a truck, then yes u will have issues with alignment
04-23-2014, 08:51 AM
#46

I bought moroso frame stands for my 73 because it came factory with clamshell mounts. With those mounts and an autocraft pan I had to notch my cross member about a 1/2" because my LS sits so low. I tried every frame stand configuration there is for a nova or first gen camaro and the moroso mounts worked best IMO.
04-23-2014, 11:04 AM
#47
Looking at your subframe photos when you primed it, clearly not BB frame stands.
FWIW, Novas and Camaros use the same stands, the subframes are the same.
The BB stands work well and allow good clearance for the steering box.
They do set the engine nice and low, I didn't have pan issues.
I'm sure you will figure it out. If they are welded to the subframe, time to get out the cutoff wheel.
04-23-2014, 02:54 PM
#48
Restricted User
Thread Starter
From some measurements, it actually looks like I'll be able to squeeze it in there if I flip the mounts. I may have to slightly slot one of the holes in the frame stand about a quarter inch.
I was hoping to sit the engine lower with the big block stands, but I'll use what I have. Most use small block stands anyway. I should still have enough hood clearance for the truck intake with a cowl hood.
I was hoping to sit the engine lower with the big block stands, but I'll use what I have. Most use small block stands anyway. I should still have enough hood clearance for the truck intake with a cowl hood.
Last edited by JoeNova; 04-23-2014 at 03:00 PM.
04-23-2014, 05:37 PM
#49
Restricted User
Thread Starter
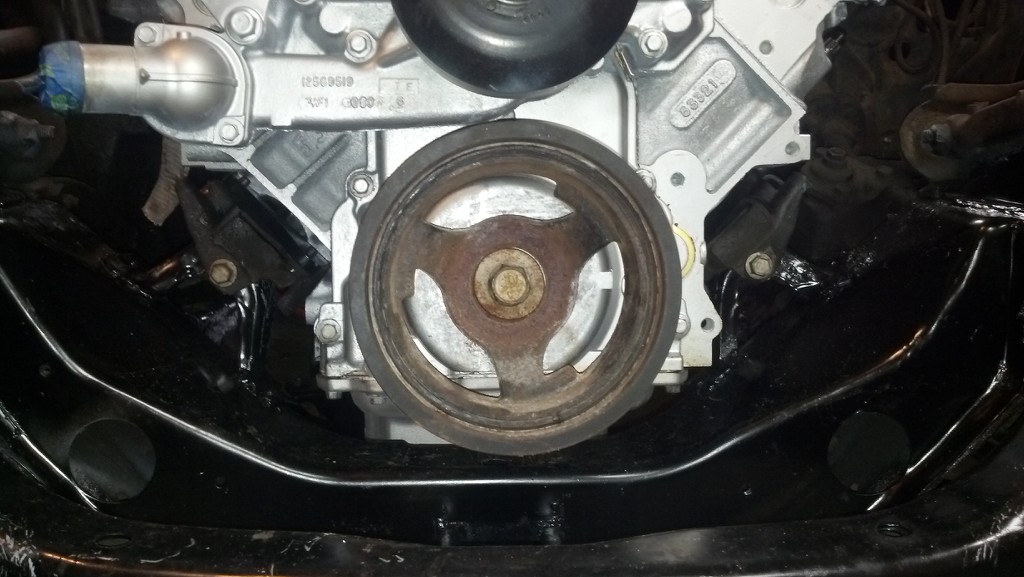
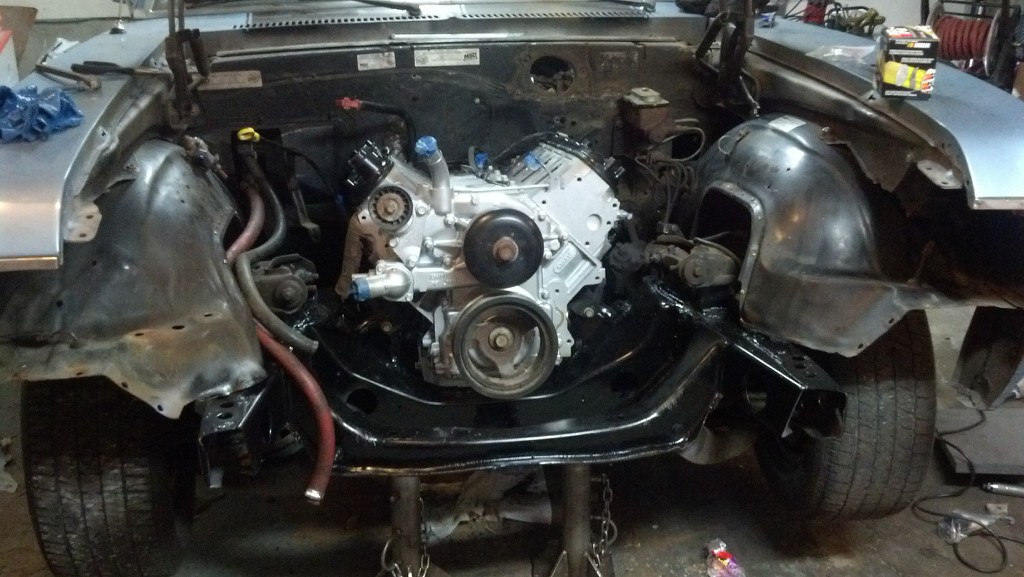
Engine is in. Flipped mounts lined up just fine. I did have to trim the lip off of them to get them to fit since they were now upside down.
Has anyone with a 4L80e measured the space between the tailshaft and driveshaft tunnel? The transmission is rubbing the tunnel in one spot and I think its sitting too low. I will likely have to pull it back out and grab the hammer again. I don't want to hear a loud squeaking or vibrating while driving.
Has anyone with a 4L80e measured the space between the tailshaft and driveshaft tunnel? The transmission is rubbing the tunnel in one spot and I think its sitting too low. I will likely have to pull it back out and grab the hammer again. I don't want to hear a loud squeaking or vibrating while driving.
04-23-2014, 06:54 PM
#50
4L80E-some of those straight AN fittings hit once you use a 90 deg AN fitting
I found a guy on Ebay selling 90 Deg swivel fittings for AN, and they were the correct 1/4 18 straight thread (trans side)-a little pricy though
I have them and work great
I have used the stock fitting and welded #6 AN 90 deg fittings
I use steel 1/4 pipe to #6 90 deg, cut some of the pipe end off, weld it to the stock fitting in the direction I want
if your oil pan has the same oil filter threads as the GM hot rod pan, I used a WIX 57045-i know it was diff than the truck pan and the CTSV pan
04-23-2014, 08:02 PM
#51
Restricted User
Thread Starter
Yeah I just got to looking at that, and the fittings are going to hit, even with 90* fittings. My guess is, I'll have to remove the engine/trans one more time and grab the hammer again. I have to do it in a couple of spots anyway where the trans is rubbing the tunnel.
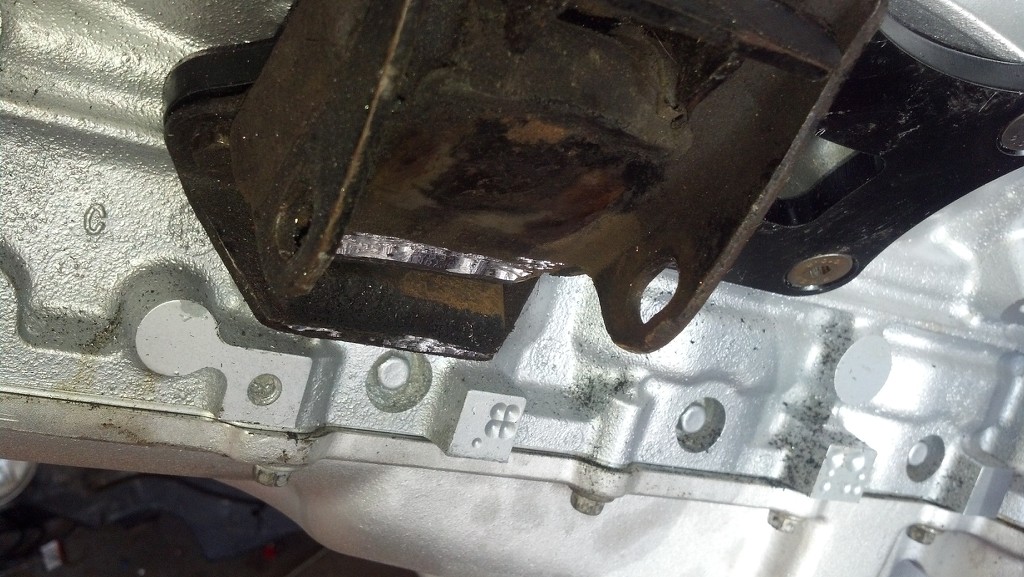
But anyway, the problem with my mounts was the little lip at the top of them thats supposed to sit at the top of the frame stand and sort of curl around the outer side for stability. Flipping the mounts put these right in the way, and they were sitting on the frame stands. So I cut them off, and test-fit the engine again. The engine dropped right onto the stands without any adjustments and lined up perfectly.
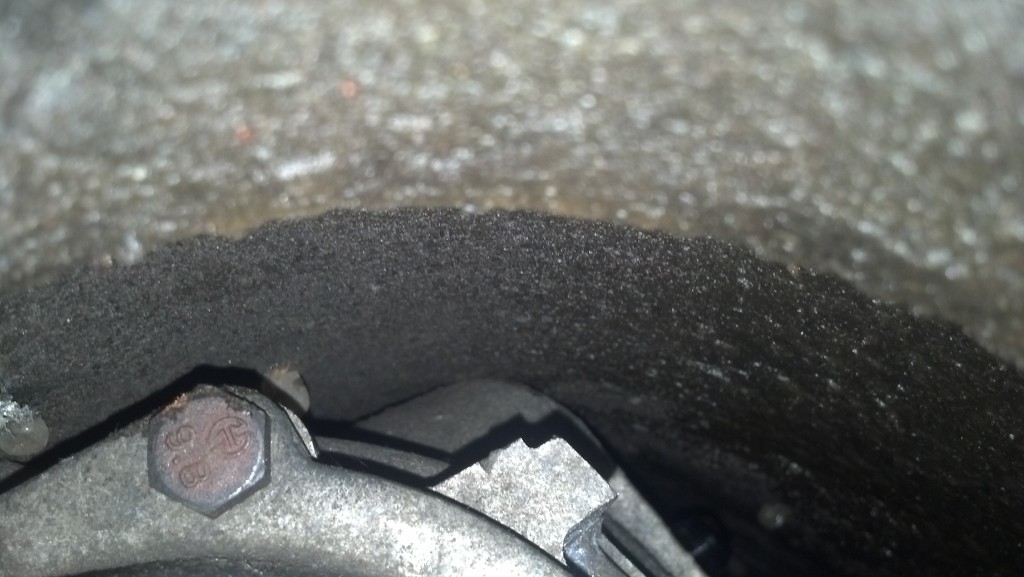
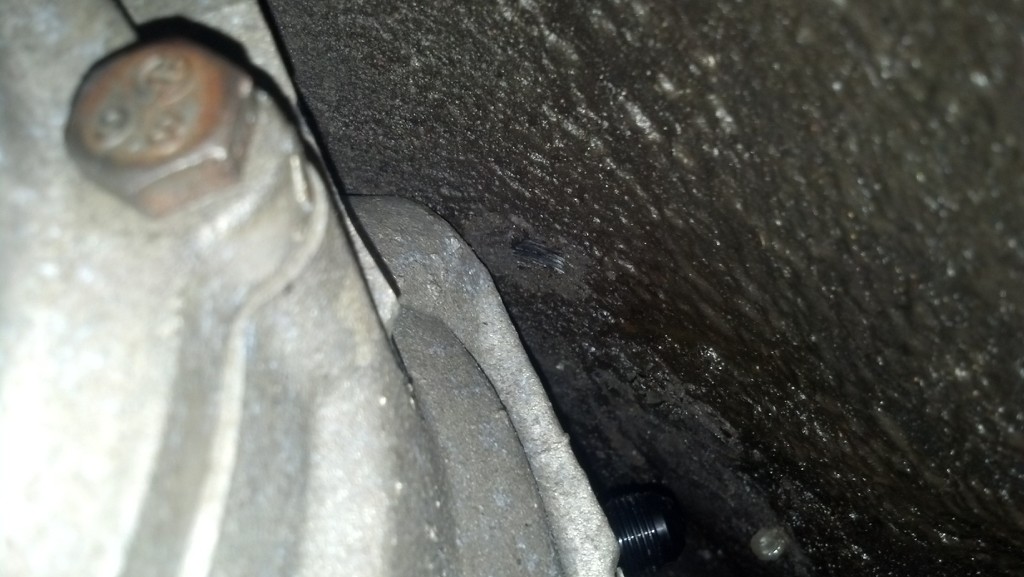
There are still some issues with the transmission. I grabbed a hammer and fixed where it was hitting the tunnel right where it opens up to the bellhousing. Now its hitting in the rear right before the tailshaft. You can also see how close the fittings are here. The front one is even closer to the tunnel. Its also rubbing on the driver's side in this same spot. The transmission MIGHT be raised up just a touch high, I haven't done any measurements. Either way, I don't want the mount to flex and the trans hit the tunnel. Wierd noises when I'm driving always make me pull over wondering what is broken.
I've already started measuring for the crossmember. I have one design in mind that will work fine, but actually getting it into the car will be a hassle. Here is a little pic to show my measuring.

The two rods are 37" long, which is the distance between the outer sides of the subframe. They are also 2" apart. I plan on taking a 37" section of 2" square tube steel, and cutting 3 sides off of the last 3" of each end. The remaining side will sit atop the subframe, while the rest hangs below. From there, its a simple 3" x 3" plate welded to the bottom of the tube with a hole drilled in it, and the mount bolted to it.
The bad thing about this is getting it into the subframe. I can't just angle it since there isn't enough room, and it will sit half an inch below the tailshaft in the narrow most part. It looks like I'll have to get it welded up, bolt the mount to it first, and then remove one of the subframe bushings at the rear (which might be a good time to replace them) and slide the other end on, before bolting the transmission mount back up to the tailshaft.
Since I have to remove the transmission again anyway and do the tunnel mods for the cooler fittings, I might go ahead and get the tube steel, and see if I can squeeze the transmission between it and the tunnel on the next install (I actually think this is very unlikely). From there I can weld on the steel plate.
I just want this transmission in and sorted out so I can start putting the rest of the car back together....
But anyway, the problem with my mounts was the little lip at the top of them thats supposed to sit at the top of the frame stand and sort of curl around the outer side for stability. Flipping the mounts put these right in the way, and they were sitting on the frame stands. So I cut them off, and test-fit the engine again. The engine dropped right onto the stands without any adjustments and lined up perfectly.
There are still some issues with the transmission. I grabbed a hammer and fixed where it was hitting the tunnel right where it opens up to the bellhousing. Now its hitting in the rear right before the tailshaft. You can also see how close the fittings are here. The front one is even closer to the tunnel. Its also rubbing on the driver's side in this same spot. The transmission MIGHT be raised up just a touch high, I haven't done any measurements. Either way, I don't want the mount to flex and the trans hit the tunnel. Wierd noises when I'm driving always make me pull over wondering what is broken.
I've already started measuring for the crossmember. I have one design in mind that will work fine, but actually getting it into the car will be a hassle. Here is a little pic to show my measuring.
The two rods are 37" long, which is the distance between the outer sides of the subframe. They are also 2" apart. I plan on taking a 37" section of 2" square tube steel, and cutting 3 sides off of the last 3" of each end. The remaining side will sit atop the subframe, while the rest hangs below. From there, its a simple 3" x 3" plate welded to the bottom of the tube with a hole drilled in it, and the mount bolted to it.
The bad thing about this is getting it into the subframe. I can't just angle it since there isn't enough room, and it will sit half an inch below the tailshaft in the narrow most part. It looks like I'll have to get it welded up, bolt the mount to it first, and then remove one of the subframe bushings at the rear (which might be a good time to replace them) and slide the other end on, before bolting the transmission mount back up to the tailshaft.
Since I have to remove the transmission again anyway and do the tunnel mods for the cooler fittings, I might go ahead and get the tube steel, and see if I can squeeze the transmission between it and the tunnel on the next install (I actually think this is very unlikely). From there I can weld on the steel plate.
I just want this transmission in and sorted out so I can start putting the rest of the car back together....
04-23-2014, 08:15 PM
#52
Teching In
iTrader: (1)

Join Date: Apr 2014
Location: at a track near you
Posts: 47
Likes: 0
Received 0 Likes
on
0 Posts
i have a 5.3 in my 68 camaro and i measured the distance from the bottom of the block to the top of the engine crossmember and it is 2.25in.that is with using sbc engine stands and moroso solid engine mounts.it sits about as low as you would want it.i can take pics and measurements if need be.looking good.more pics of the tank as you put the sump bucket in it.keep up the good work
04-25-2014, 06:49 AM
#53
I might have told you wrong on the oil filter, have mine on the lift for some housekeeping and noticed the oil filter is a NAPA 7045
I think the hot rod pan had the larger spin on nipple, the other pan had the smaller one
my records show I had a WIX filter, but its a NAPA 7045 on the car, unless it was a cross over or something
I think the hot rod pan had the larger spin on nipple, the other pan had the smaller one
my records show I had a WIX filter, but its a NAPA 7045 on the car, unless it was a cross over or something
 05-02-2014, 06:36 AM
#55
Restricted User
Thread Starter
It bolted directly to the firewall. I stripped some of the wires at the ends to inspect and they look fine. I'm gonna cut about 50 feet of wiring off this weekend when I do the column connector. I'm actually going to use the excess wiring for a small robotics project I've been working on.
I'm not saying its the easiest harness to deal with. Its pretty basic and requires a lot of work, but I'm in the middle of a turbo LS swap so I don't have any right to complain about the extra work.
I'm not saying its the easiest harness to deal with. Its pretty basic and requires a lot of work, but I'm in the middle of a turbo LS swap so I don't have any right to complain about the extra work.
05-02-2014, 09:14 AM
#57
Teching In
Join Date: Jun 2011
Location: Alabama
Posts: 40
Likes: 0
Received 0 Likes
on
0 Posts

Great pictures and detail on your build so far.
It helps people like myself get a realistic idea of what it takes to make a swap into an old Chevy.
Also love the fact your building it to run in the 5's.
It helps people like myself get a realistic idea of what it takes to make a swap into an old Chevy.
Also love the fact your building it to run in the 5's.
05-02-2014, 12:02 PM
#58
11 Second Club
iTrader: (8)
Join Date: Mar 2007
Location: Windsor, Ontario Canada
Posts: 569
Likes: 0
Received 3 Likes
on
3 Posts
Nice build! I also used those swap mounts on my last build. They were terrible. It ***** the geometry of the holes up. To get mine to fit in I ended up Slotting the stock mount then grinding the back flat (mine had dimples on the backside. Was a PITA.
Jay
Jay
05-07-2014, 12:19 PM
#60
Teching In

Join Date: Apr 2014
Posts: 20
Likes: 0
Received 0 Likes
on
0 Posts
Great project Joe and thanks for the documentation. Its nice that you share the issues your having. Its very helpful to others. Im currently putting a 6.0/4l80e into my 72 Camaro and I'm having issues lining up the clamshell mounts. What did you cut off the frame mounts?
The little nubs that fit into the recess of the clamshell? I was going to cut mine off but was concerned about the stability of the mount without them. I think I may just need to move the frame mounts a little, its so close. Problem is I have to remove the lower control arms to access the nuts that hold them in. It's not hard to rip the suspension out but it's hard to remove springs without the weight of the engine in the car. I'm off to a rough start lol.
Keep up the good work and keep us updated