66 Chevelle Turbo 6.0 Sloppy Style
 11-24-2014, 11:07 AM
#21
TECH Fanatic
iTrader: (9)
Join Date: Mar 2004
Location: CANADA!
Posts: 1,347
Likes: 0
Received 0 Likes
on
0 Posts

youll hear mixed opinions...
iat in the intake to avoid heat soaking(hot air blown from the rad fan, heat in the intake pipe, etc)
you'll hear keep the iat down stream of the meth because it is a more realistic temp value.(meth wont wet the sensor and chill it altering the values)
you'll hear keep the iat up stream because it tells you how effective the meth is ...

 12-22-2014, 01:27 AM
#23
TECH Apprentice
Thread Starter
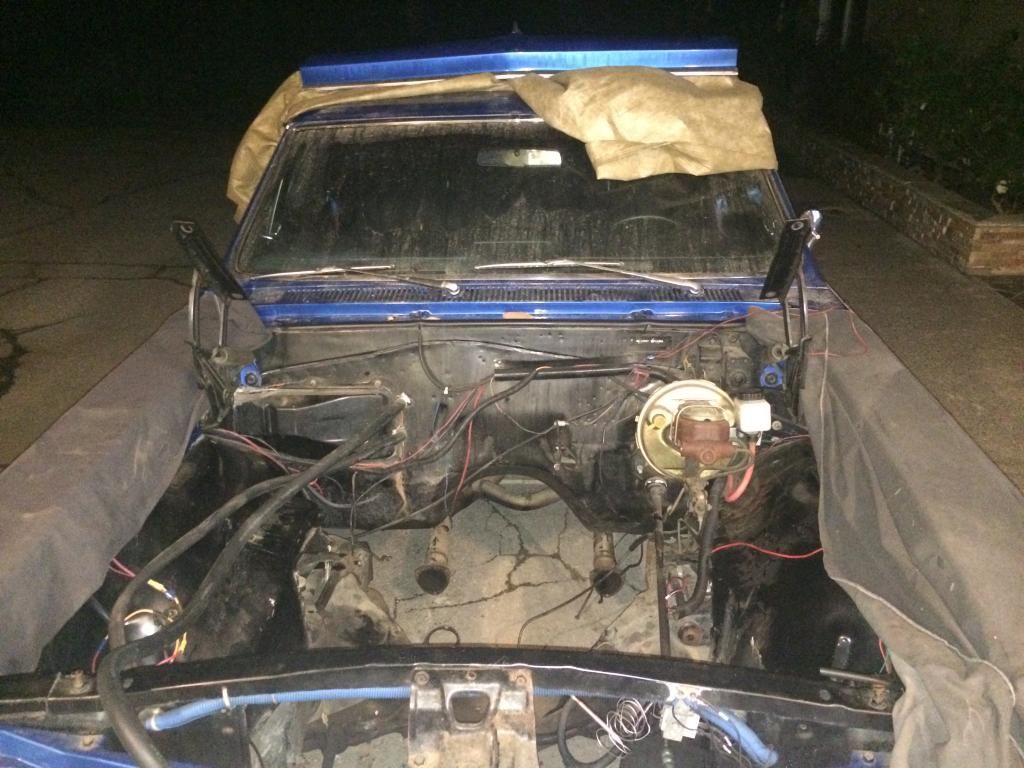
Im finally home from school! Its nice to come home to 30 boxes full of go fast parts! Everything looks like its gonna work, there was a small confusion with the vs racing sloppy kit though. Online it says you get a 60mm wastegate but they shipped me out a 44mm so i emailed them and they said the latest shipment of 60's were defective so they only have 44's  so hopefully that will be enough gate for me! Other than that, i got home late saturday, so sunday i got to work and got the old 396 and 4 speed torn out, and i had a ton of other sutff to do so thats it for now. Tomorrow im gonna mock up the LQ4 and make sure the f body pan fits, hopefully i wont have to notch anything. Ill be updating every day until i have to go back! Dont mind the dust, its been sitting outside for 9 months since my dad kicked me out of the garage. He thinks the garage "is his woodshop now" Thanks for lookin
so hopefully that will be enough gate for me! Other than that, i got home late saturday, so sunday i got to work and got the old 396 and 4 speed torn out, and i had a ton of other sutff to do so thats it for now. Tomorrow im gonna mock up the LQ4 and make sure the f body pan fits, hopefully i wont have to notch anything. Ill be updating every day until i have to go back! Dont mind the dust, its been sitting outside for 9 months since my dad kicked me out of the garage. He thinks the garage "is his woodshop now" Thanks for lookin
 12-22-2014, 07:58 PM
#25
TECH Apprentice
Thread Starter
Thanks sarg! Small victory today, the engine was in! I used dirty dingo slider pates, and som short and wide big block mounts and it worked out great! The f body pan clears, but juuuuuust barely, the trans and engine will have to go in seperately, and the drag links for the steering clear as well, so i guess all my research payed off! Also, for us A body guys, i got a power steering puley og of an 89 E 150 ford van and that sucker clears the power steering box bout about 1/4 inch, so all the info i got off the internet is working great, The best news is that i popped the hood back on real quick, and it clears everything. I got under there and i have about an inch to spare. The only downside is that i have a set of truck manifolds that i already welded v bankds on to like an idiot, and only one side clears. I ordered another v band tonight it should be here weds and then ill go to a pick a part tomorrow and get another manifold. I also pick up my build 4l80 tomorrow. So for now the plan is to pressure wash and paint the engine bay, clean up the wiring, and work on the fuel system tomorrow. Cant wait
 12-23-2014, 12:06 PM
#28
Staging Lane
Join Date: Apr 2013
Posts: 97
Likes: 0
Received 0 Likes
on
0 Posts
Nice car! I love the blue.
I used the "LS1 style" 3bar sensor from efisource (not the block one.) It's a direct plug and play, replaced the stock sensor in the stock location on the truck intake.
I have always liked the smaller A-bodies! Good luck with the swap, 10 days might be a little bit ambitious though.
Check out my build thread, basically did the same thing as you the first time around!
You will love it.
12-23-2014, 09:30 PM
#30
TECH Apprentice
Thread Starter


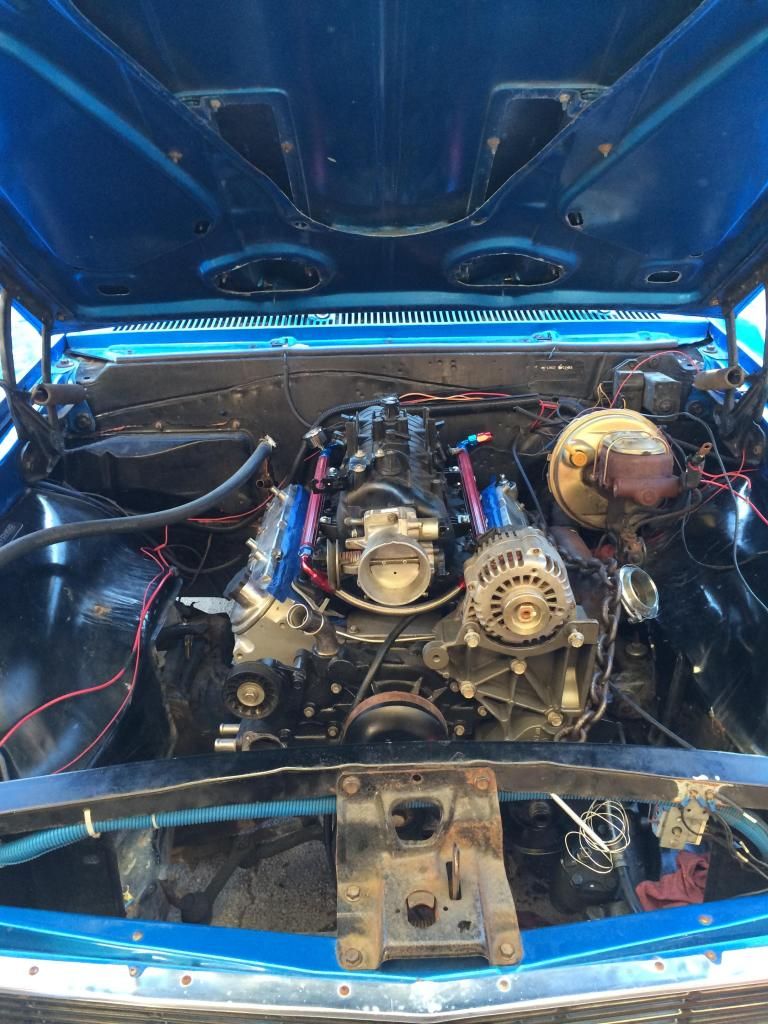
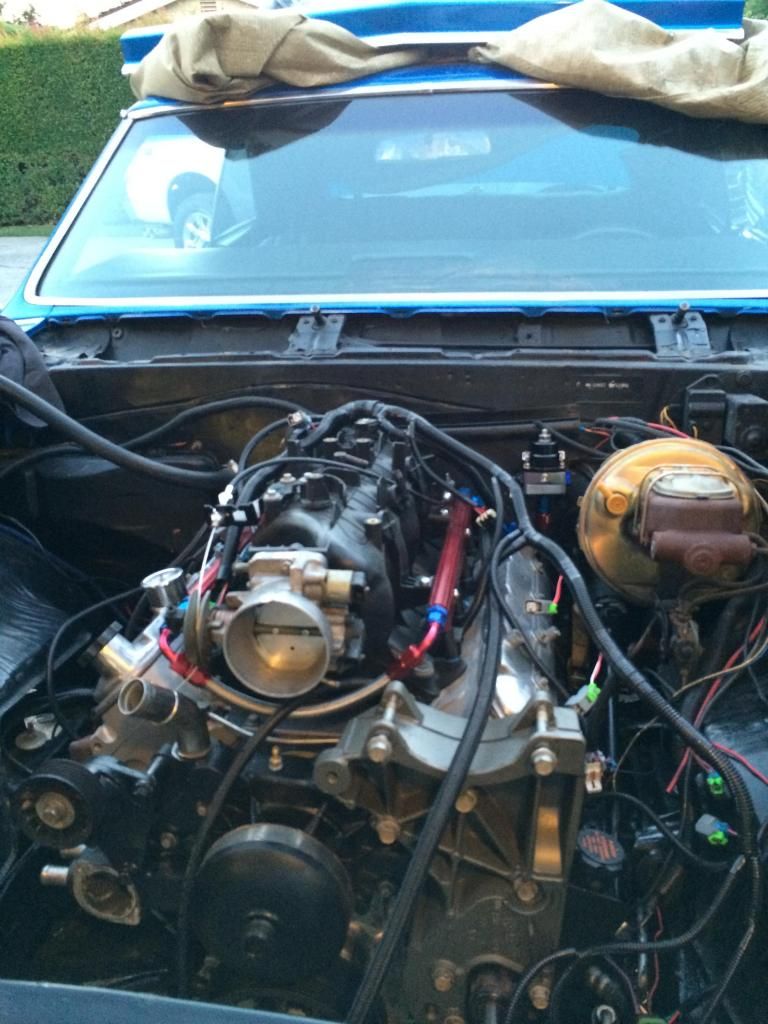
Then i wire brushed the engine bay and pressure washed an painted it, its not show quality but at least its all black now. I also pulled the cowl and filled a small hole that always leaked on my foot every time it rained. It doesn't seem like i got alot done today, but im happy with the progress so far.
 12-24-2014, 08:37 PM
#31
TECH Apprentice
Thread Starter
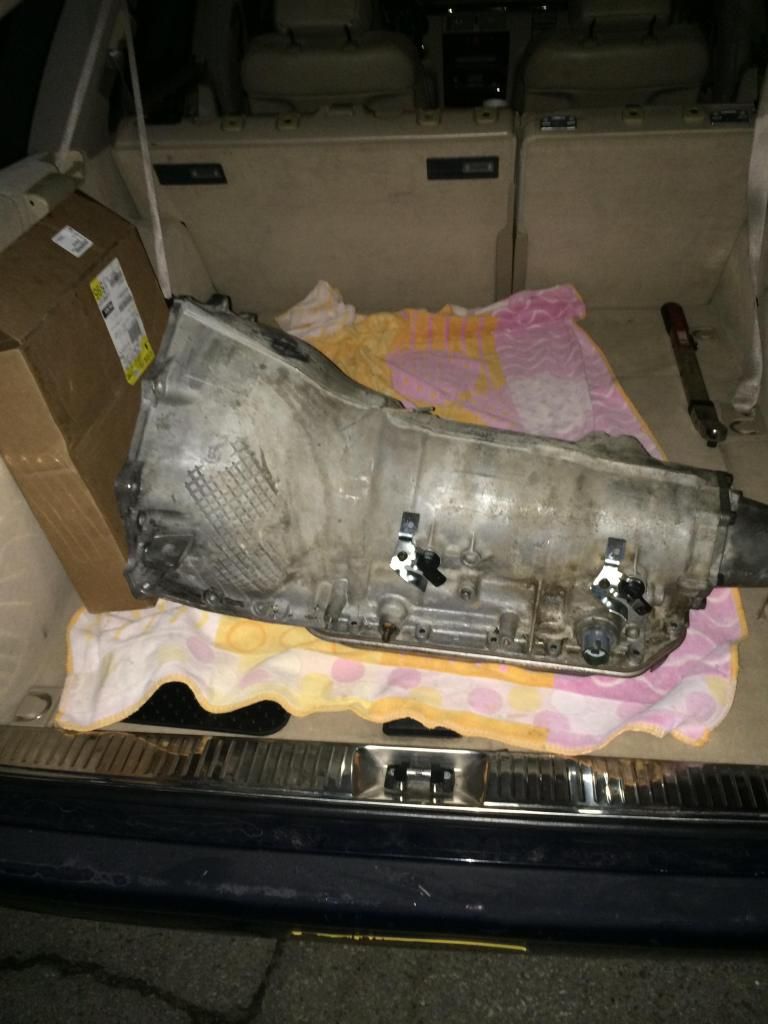
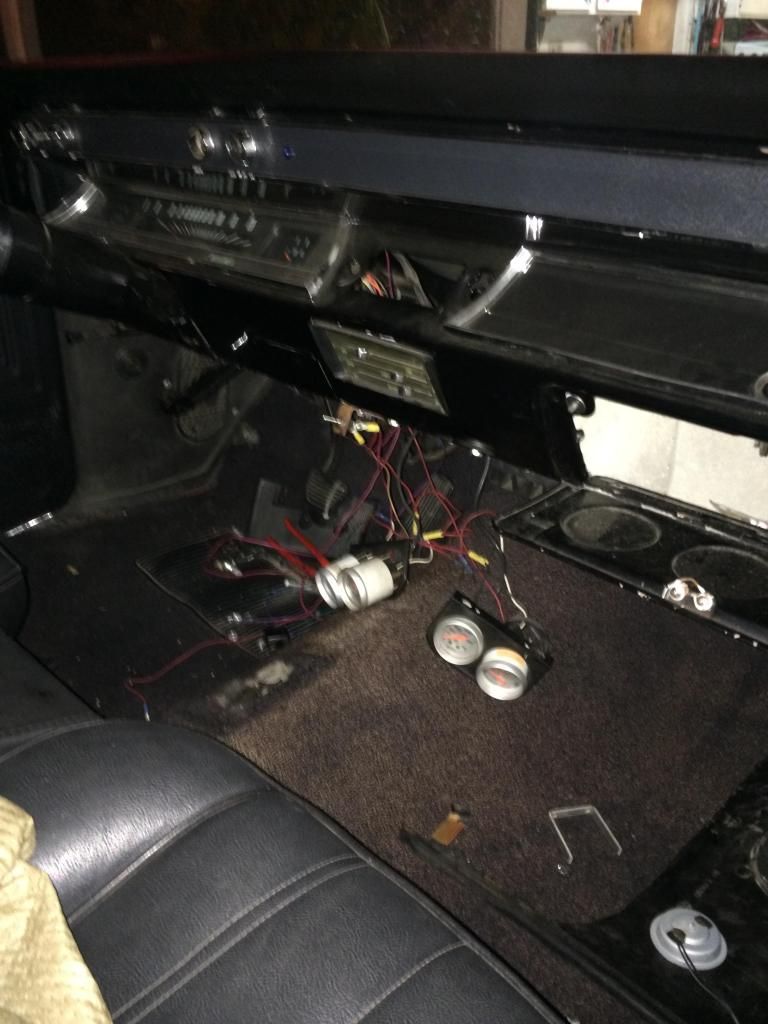
Today i cut the hole in the trunk, and ran around town and got misc fuel fittings and ran to the pick a part yard and got the harness that connects all the coils together, thats the last thing i need for the entire harness so it should be good to go. I started assembly my fuel lines and running them, and i also picked up my freshly built 4l80, new flex plate, and high stall torque converter (dont know the specs yet, my dad got it). I also started tackling some of the wiring inside the car, trying to untangle the rats nest under the dash. Thats it for today, merry christmas! 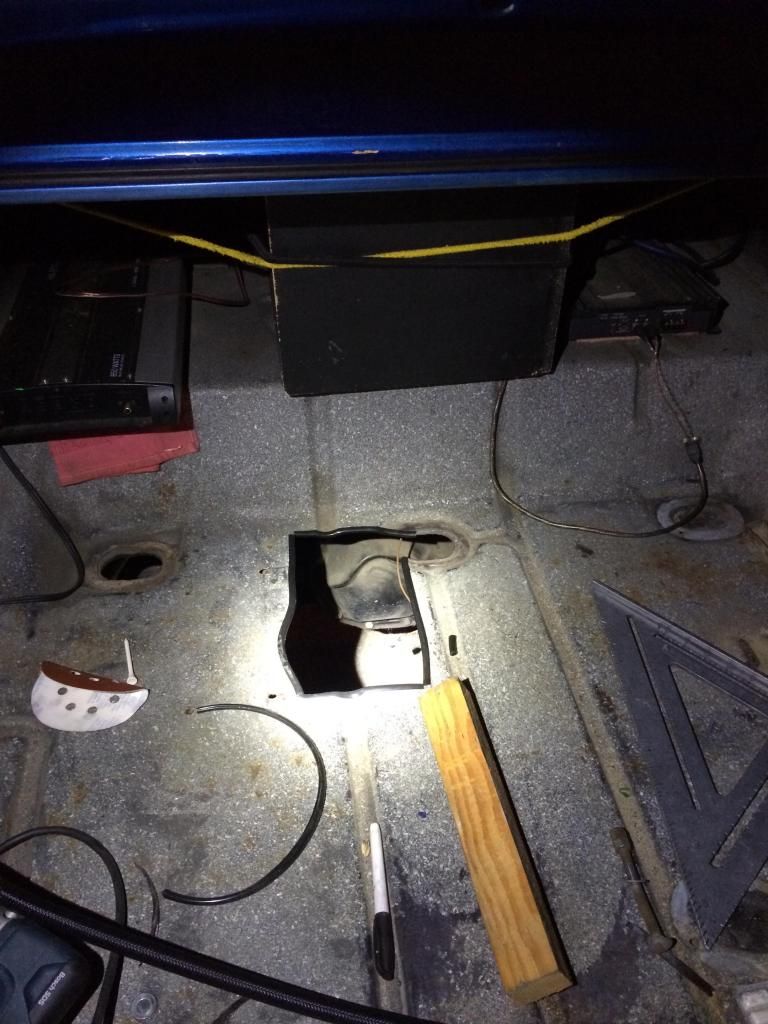


 12-25-2014, 11:29 AM
#32
nice build,,, get some pic's of your mounts and oil pan setting in the car. also pic of how much from firewall too..im doing a 67 chevelle... im glad to see the hood clears..
12-25-2014, 11:46 AM
#33
That cam is all wrong for a mild 600HP build. You'd be better off selling it. The OEM truck cam would be better suited for your needs. If your going cheap an LS1 cam is a good upgrade and more than capable of 600whp.. If you can afford an aftermarket cam contact a vendor.
If you do use that cam you need to have very little back pressure. Which means slow spool times (might not be a bad thing on a healthy 6.0). You'd need huge hotside for a single turbo setup. Coupled with a small compressor for 600hp. Not cost effective to build one this way IMO. Some of the large Holset diesel stuff would work well. 18cm HX55 would work ok.
If you do use that cam you need to have very little back pressure. Which means slow spool times (might not be a bad thing on a healthy 6.0). You'd need huge hotside for a single turbo setup. Coupled with a small compressor for 600hp. Not cost effective to build one this way IMO. Some of the large Holset diesel stuff would work well. 18cm HX55 would work ok.
Last edited by Forcefed86; 12-25-2014 at 12:06 PM.
12-27-2014, 10:26 PM
#35
TECH Apprentice
Thread Starter
Sorry for the lack of updates! Iv still been working, but not an all out thrash the past couple of days due to x mas and some other things.
These are the dirty dingo sliders slid all the way up to the front of the engine to put it as far back as possible
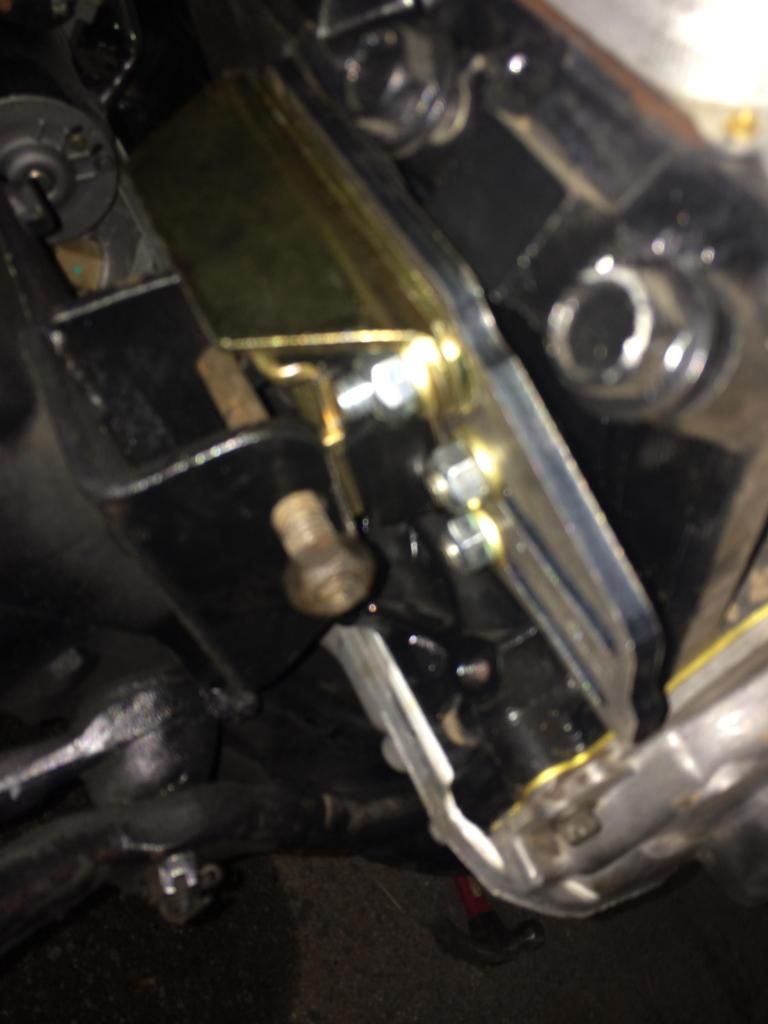
Oil pan clearance
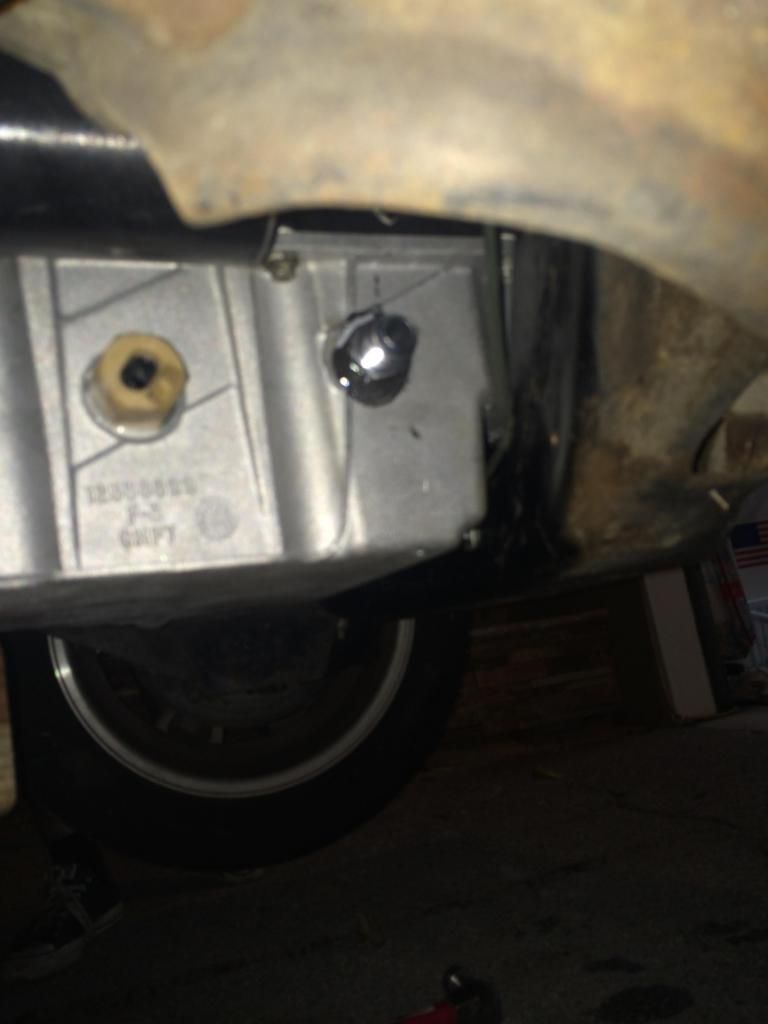
Firewall clearance. Its a bit closer now, about 3/4 of an inch
 [URL=http://s42.photobucket.com/user/lukestreeter/media/IMG_1027_zpsdfd2412e.jpg.html]
Had to put the harness through the firewall right here, kinda high for my taste, but the heater core and some other stuff was in the way so it had to go here
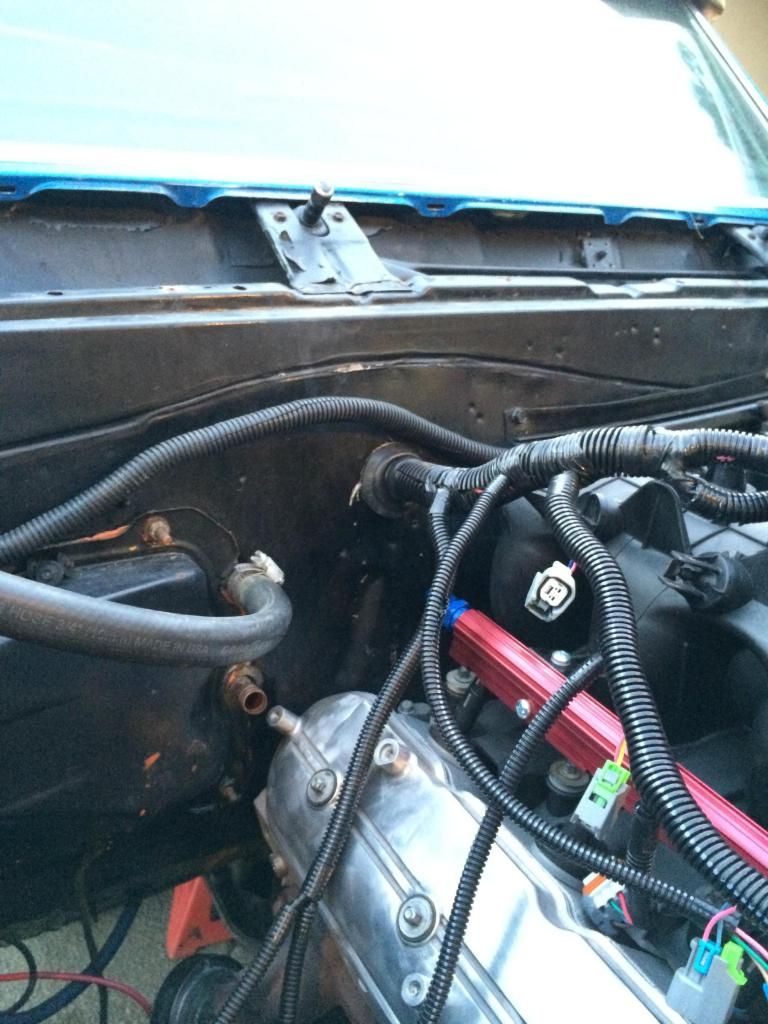
intake finally bolted down, pulled the harness through the firewall and started to run it to all the connectors. Also got my boost referenced FPR mounted on the firewall, and got my throttle cable hooked up. I used a lokar universal kit and hooked it right to the stock throttle arm and it works great. With the pedal on the floor it goes wot.
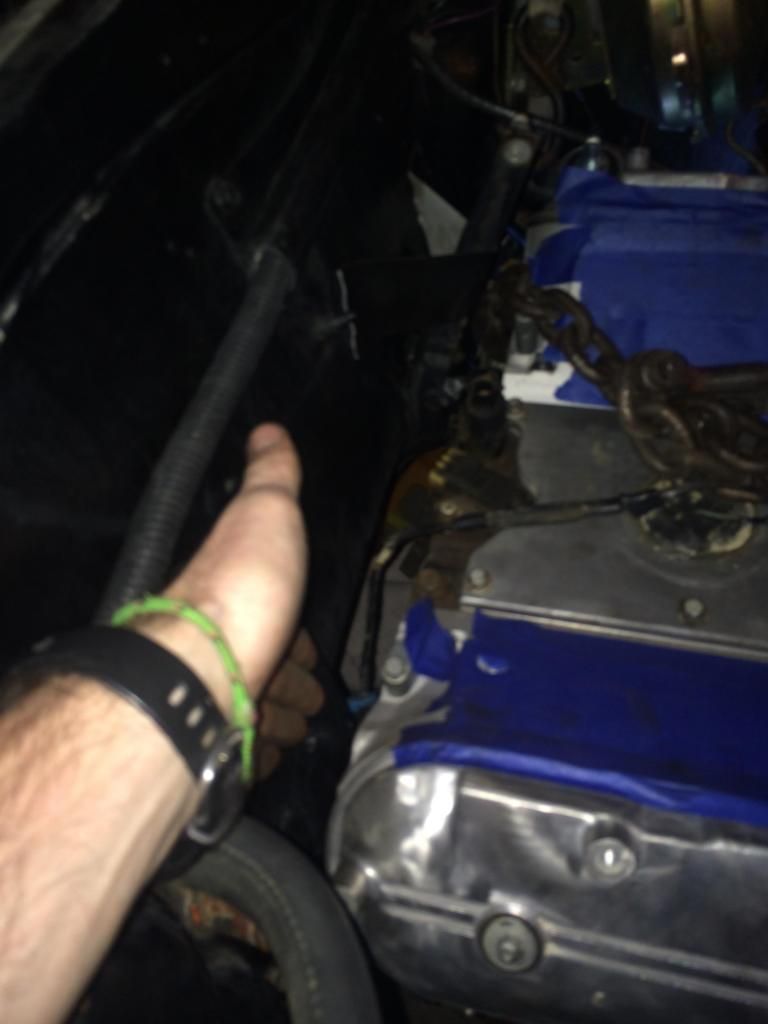
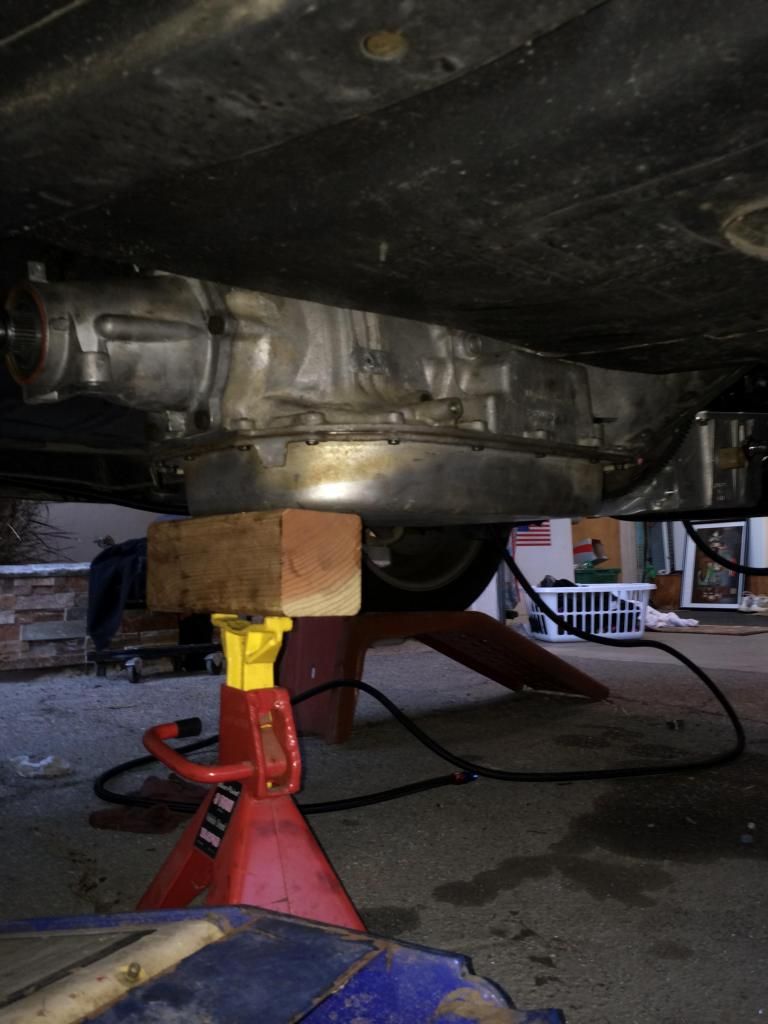
Finally got the 4l80 bolted up, that sucker is HUGE. I pounded on the trans tunnel in only one spot, and im gonna need to hit it juuuust a hair on the top of the tunnel near the bell housing, but it should fit. With the jack under it in the picture, its still about an inch lower than when mounted, but next week im gonna either modify my old x member or fab up and new one to get it mounted for good. The only thing that might be an issue is the trans cooler lines, i have to get two 90 degree fittings to make it work, but no big deal.
I dont have any pics but all the fuel lines are run except i broke a -6 fitting and i have to order another one, so that sucks! All thats left to do is make an x member, mount my battery in the trunk, wire up the computer, and let it eat! So basically, a ton of work still haha
 Thanks for the heads up, iv honestly given up on the getting the thing boosted for now. Im gonna try an fire it up NA and get a couple of miles on the thing, and then fab up a hotside, later in the summer, im running out of time. It sounds like the cam i have wont work to great, so in the future im sure it will be switched out.

Oil pan clearance

Firewall clearance. Its a bit closer now, about 3/4 of an inch
 [URL=http://s42.photobucket.com/user/lukestreeter/media/IMG_1027_zpsdfd2412e.jpg.html]
Had to put the harness through the firewall right here, kinda high for my taste, but the heater core and some other stuff was in the way so it had to go here

intake finally bolted down, pulled the harness through the firewall and started to run it to all the connectors. Also got my boost referenced FPR mounted on the firewall, and got my throttle cable hooked up. I used a lokar universal kit and hooked it right to the stock throttle arm and it works great. With the pedal on the floor it goes wot.

Finally got the 4l80 bolted up, that sucker is HUGE. I pounded on the trans tunnel in only one spot, and im gonna need to hit it juuuust a hair on the top of the tunnel near the bell housing, but it should fit. With the jack under it in the picture, its still about an inch lower than when mounted, but next week im gonna either modify my old x member or fab up and new one to get it mounted for good. The only thing that might be an issue is the trans cooler lines, i have to get two 90 degree fittings to make it work, but no big deal.
I dont have any pics but all the fuel lines are run except i broke a -6 fitting and i have to order another one, so that sucks! All thats left to do is make an x member, mount my battery in the trunk, wire up the computer, and let it eat! So basically, a ton of work still haha

That cam is all wrong for a mild 600HP build. You'd be better off selling it. The OEM truck cam would be better suited for your needs. If your going cheap an LS1 cam is a good upgrade and more than capable of 600whp.. If you can afford an aftermarket cam contact a vendor.
If you do use that cam you need to have very little back pressure. Which means slow spool times (might not be a bad thing on a healthy 6.0). You'd need huge hotside for a single turbo setup. Coupled with a small compressor for 600hp. Not cost effective to build one this way IMO. Some of the large Holset diesel stuff would work well. 18cm HX55 would work ok.
If you do use that cam you need to have very little back pressure. Which means slow spool times (might not be a bad thing on a healthy 6.0). You'd need huge hotside for a single turbo setup. Coupled with a small compressor for 600hp. Not cost effective to build one this way IMO. Some of the large Holset diesel stuff would work well. 18cm HX55 would work ok.
04-28-2015, 01:09 AM
#36
TECH Apprentice
Thread Starter
Im back from achool finally! My last deadline came way too fast. Im home for a few more weeks, trying to get this pig on the road, then back up to school, hopefully with the car.
Started the day by swapping the old (still brand new but way too much lift and duration for what i'm doing) cam and sliding in the small trick flow thats for sale on summit. I went dot to dot, i know i should degree it but i don't know how. Hopefully its close! Also, the cam is for sale in the classifieds. Bought it for $375, i will take $300 for it. The engine has never been fired. Heres a link to the cam and the classifieds.
Cam: http://www.summitracing.com/parts/cc...9-11/overview/
Classifieds: https://ls1tech.com/forums/parts-cla...rice-drop.html
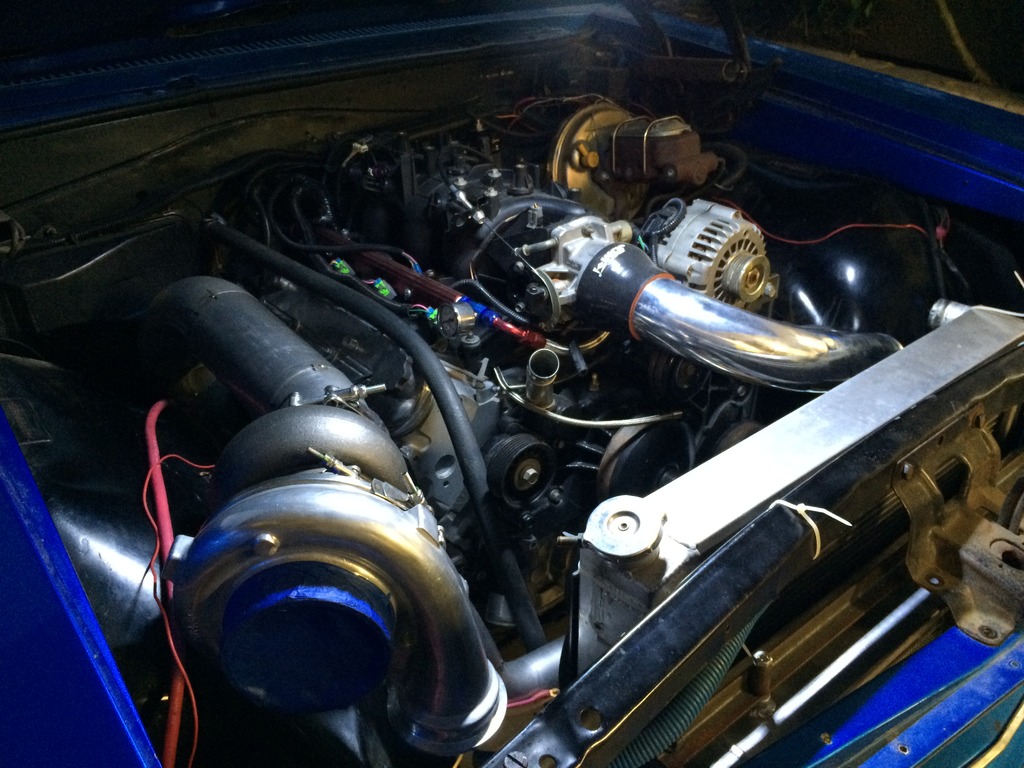
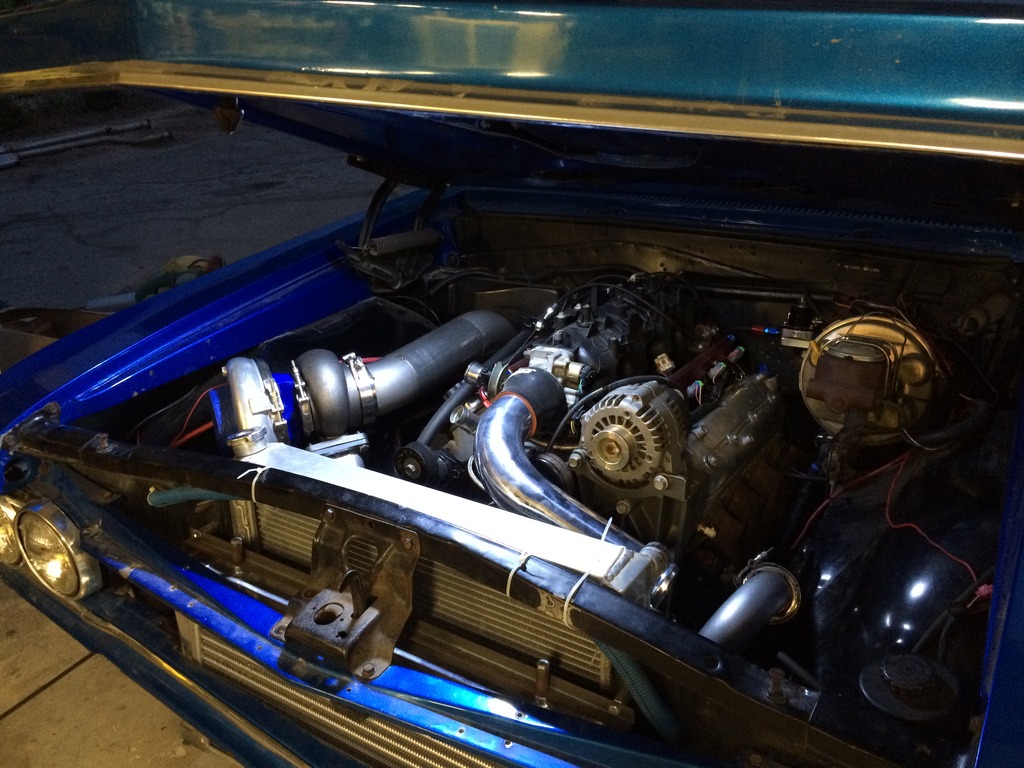
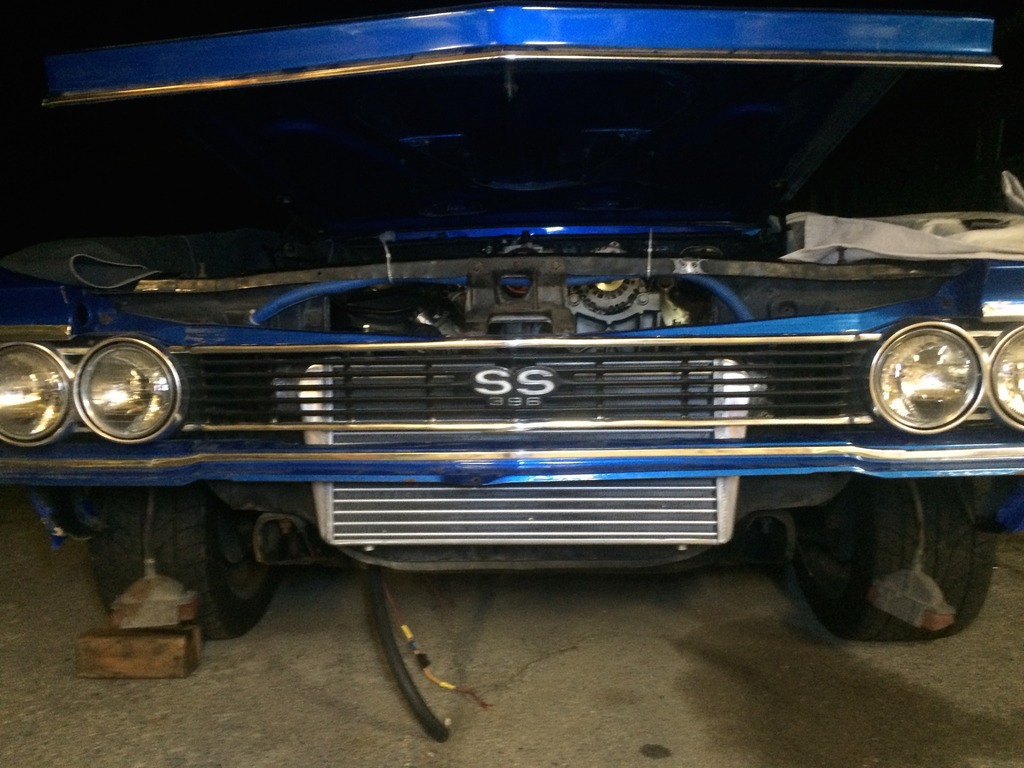
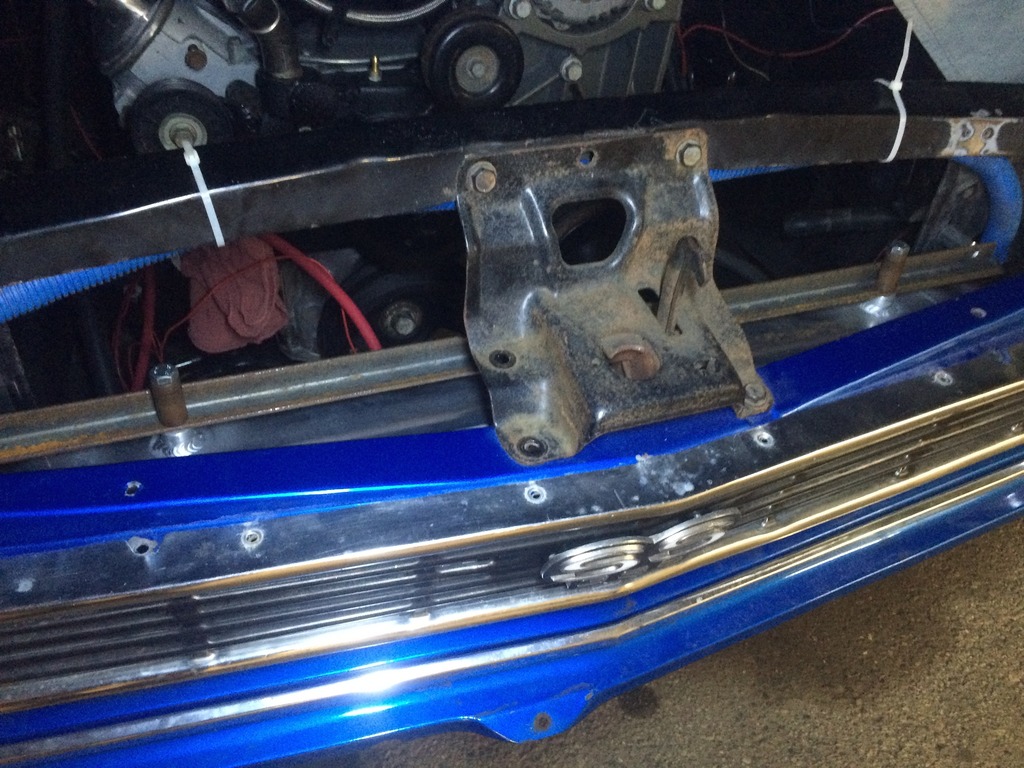
Mounted the vs racing intercooler. Ended up being able to notch a small portion of the painted lip (dont know what its called) and slide the cooler up from the bottom. Looks great behind the grill
Made a mount with same angle iron on top and L brackets on bottom
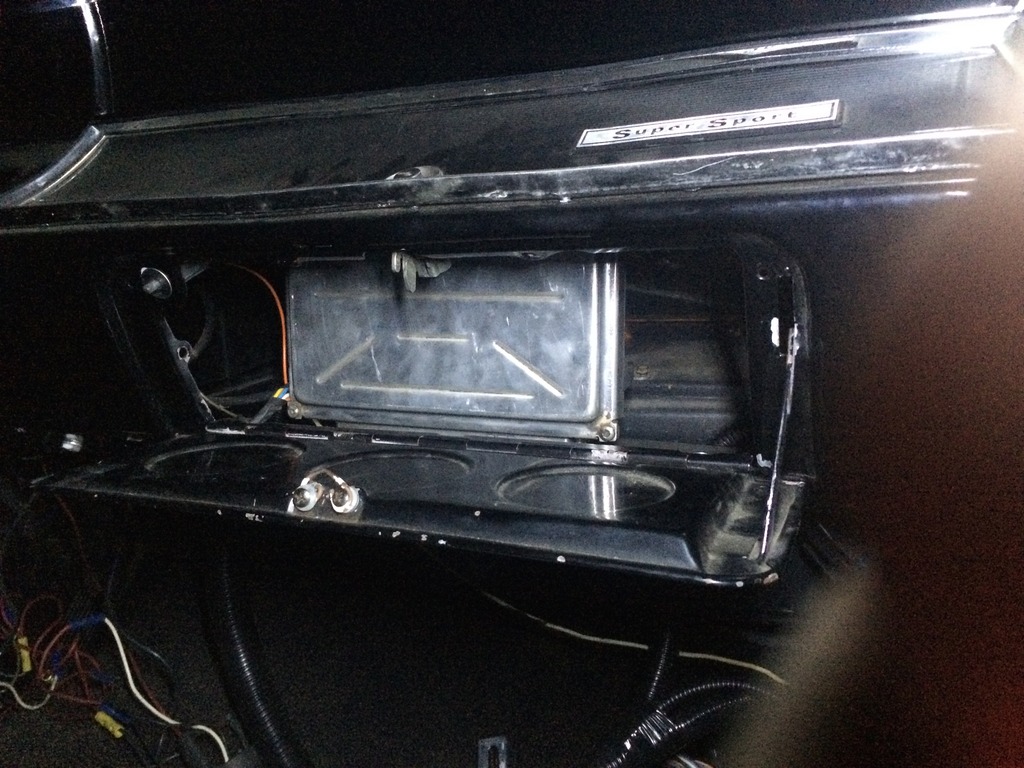
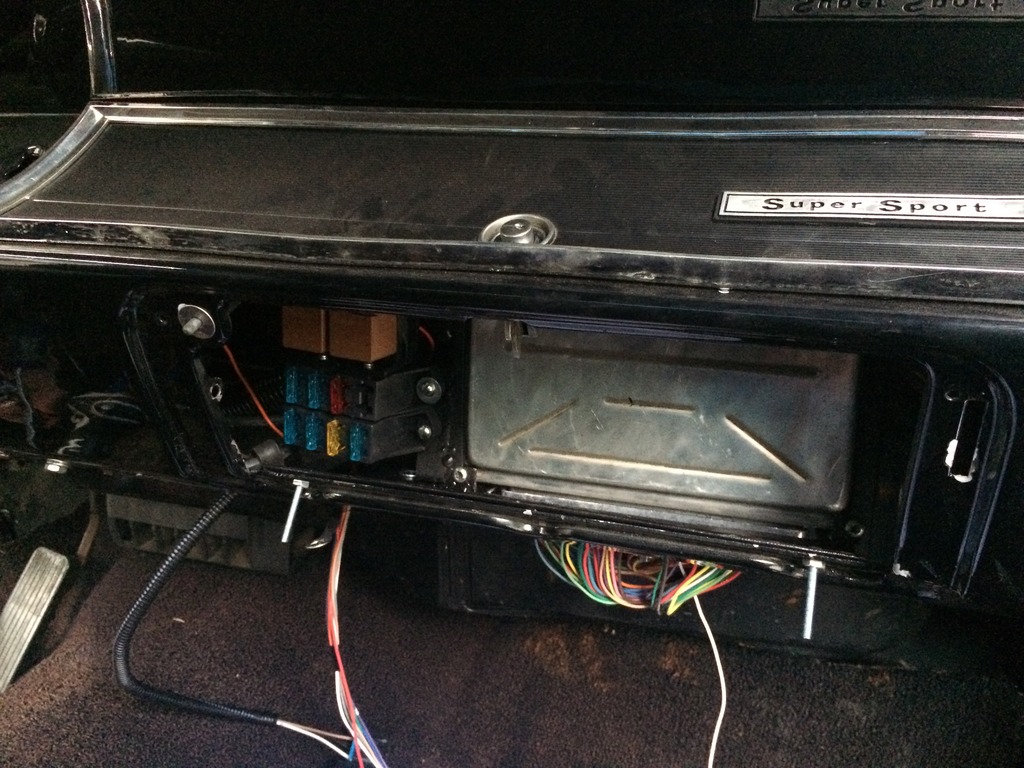
Got to work mounting the computer, its going in the glove box along with the fuse panel and relays.
I also finished putting all my fittings on for my fuel lines, i will pressure test it in the next couple of days. I will keep the updates coming!
Started the day by swapping the old (still brand new but way too much lift and duration for what i'm doing) cam and sliding in the small trick flow thats for sale on summit. I went dot to dot, i know i should degree it but i don't know how. Hopefully its close! Also, the cam is for sale in the classifieds. Bought it for $375, i will take $300 for it. The engine has never been fired. Heres a link to the cam and the classifieds.
Cam: http://www.summitracing.com/parts/cc...9-11/overview/
Classifieds: https://ls1tech.com/forums/parts-cla...rice-drop.html

Mounted the vs racing intercooler. Ended up being able to notch a small portion of the painted lip (dont know what its called) and slide the cooler up from the bottom. Looks great behind the grill

Made a mount with same angle iron on top and L brackets on bottom

Got to work mounting the computer, its going in the glove box along with the fuse panel and relays.

I also finished putting all my fittings on for my fuel lines, i will pressure test it in the next couple of days. I will keep the updates coming!
04-29-2015, 10:39 PM
#37
TECH Apprentice
Thread Starter
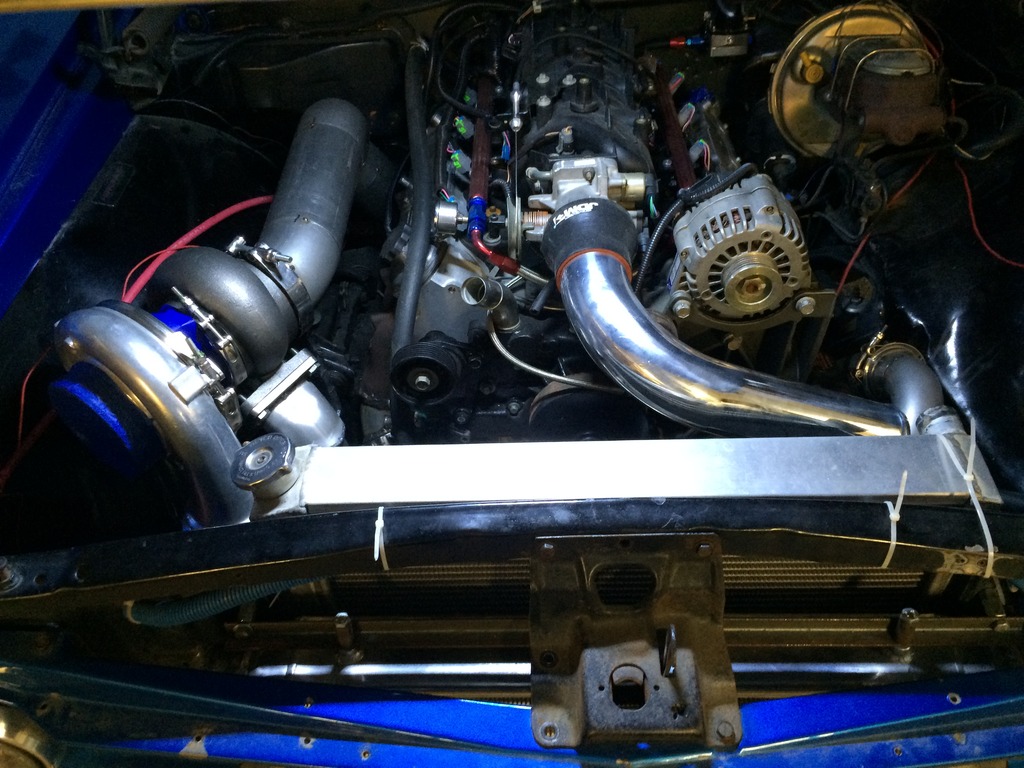
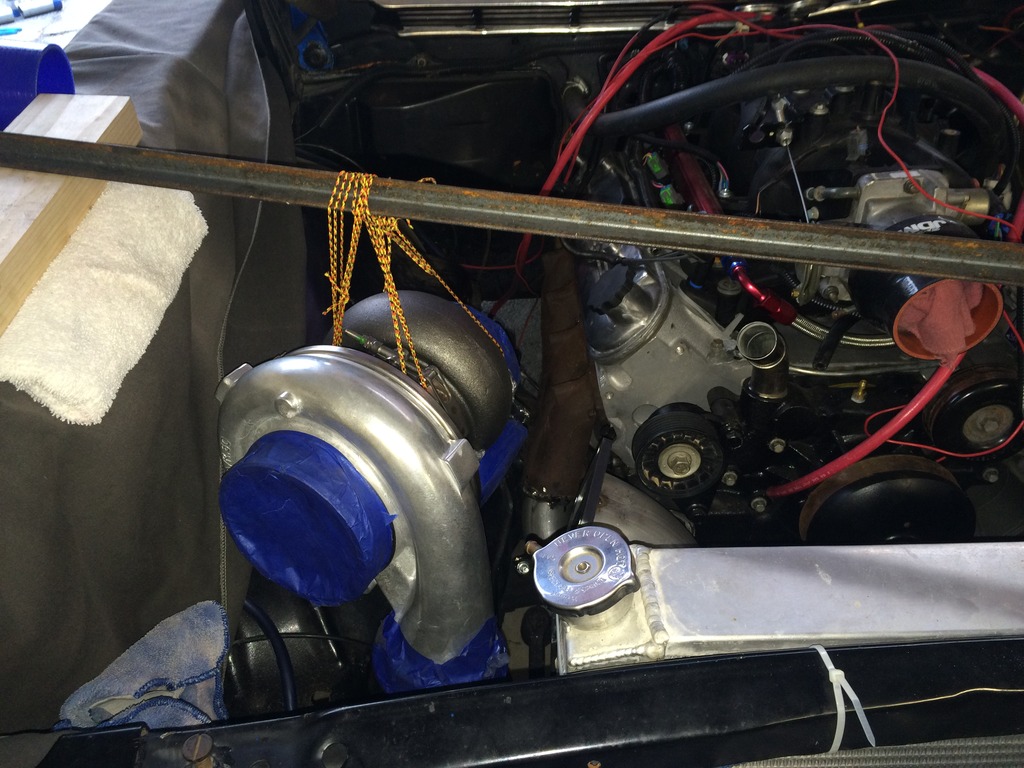
Well i thought i got a lot of work done, until i got the hot side done and decided to change it because i didn't like where the turbo was sitting. This is where i got so far, but i will bust the tacks and change it slightly. The wastegate will sit on top of the corner just before the 90 in the t4 flange. I tried hard to make a spot that would flow nicely

I want the turbo to sit more to the left so i have room for the discharge pipe. I would be happy to get it to sit like this. Also, on my 80mm gt45, does anyone know where to get the v band for the discharge and what size? I didnt get one from my vs racing kit and im confused
I did however get my computer and fuse box mounted and started on the wiring. Everything fits nicely in the glove box, and the wires beneath wont hang as low when i'm done

I want the turbo to sit more to the left so i have room for the discharge pipe. I would be happy to get it to sit like this. Also, on my 80mm gt45, does anyone know where to get the v band for the discharge and what size? I didnt get one from my vs racing kit and im confused

I did however get my computer and fuse box mounted and started on the wiring. Everything fits nicely in the glove box, and the wires beneath wont hang as low when i'm done
 05-01-2015, 01:02 AM
#38
TECH Apprentice
Thread Starter
Finally feel like im actually getting somewhere with the car. Got all my hot side done, the 4inch down pipe is made and tacked. I just need to build a brace for the turbo,brace for the down pipe, and finalize WG placement and the exhaust is done! I am just dumping it below the car for now, ill eventually tie it back into the exhaust. on to the pictures!