
Interior Carbon Fiber Project - FINALLY DONE!!!
 09-09-2011, 06:43 PM
#1
TECH Apprentice
Thread Starter
iTrader: (4)

Join Date: Apr 2008
Posts: 393
Likes: 0
Received 0 Likes
on
0 Posts

***Finished parts and in-car pics on Page 7***
I am a fan of carbon fiber (even my wedding ring has CF in it) and I have been wanting to do a project with CF for a long time! I finally ordered the supplies to wrap some of my interior trim. I went with a larger weave (11oz) 2x2 twill CF fabric.
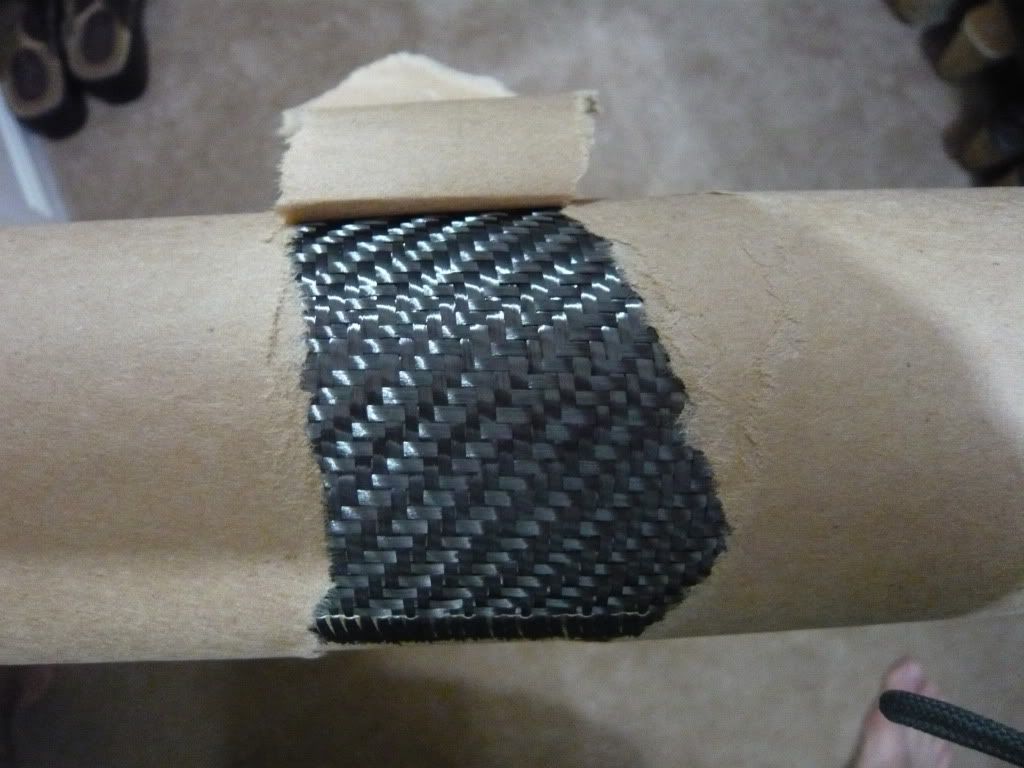
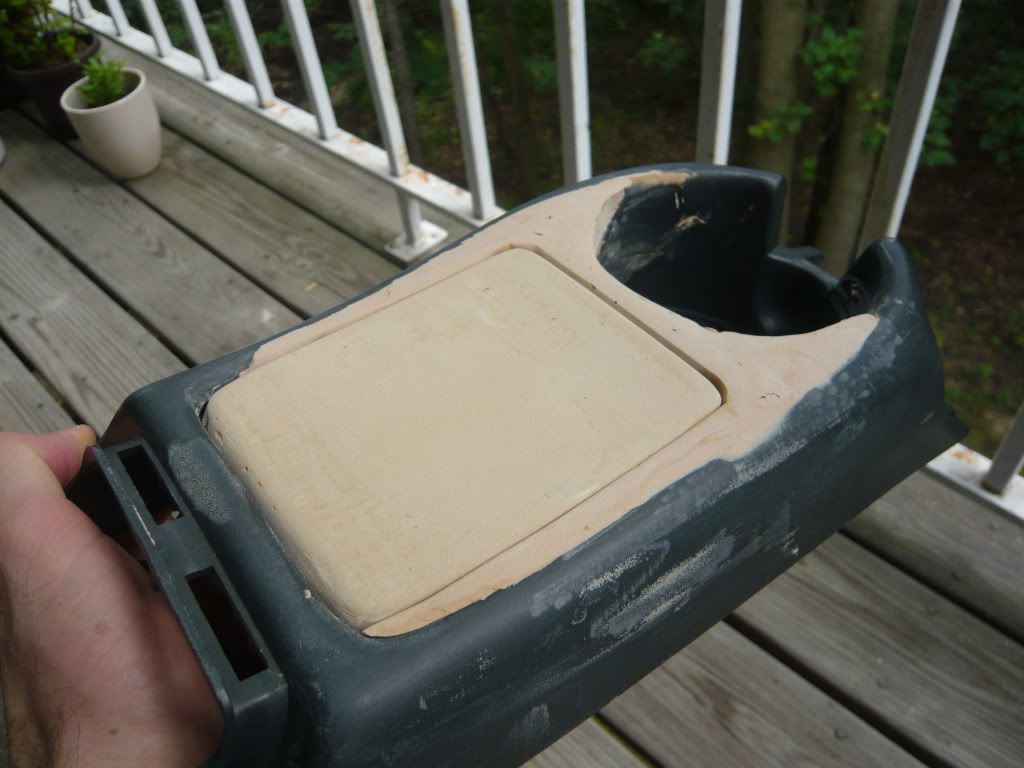
I am going to be wrapping the trim pieces by the interior door handles, the center console upper, the radio bezel, and possible the large trim piece behind the steering wheel (undecided on that one as of yet). I am also going to reshape the center console too. Going to make the cup holder useful! (make it deeper, build up the front edge, and decrease the diameter) as well as extend the ashtray lid to also cover the slot between the ashtray and the cupholder so that the whole console upper is smooth CF without losing functionality.
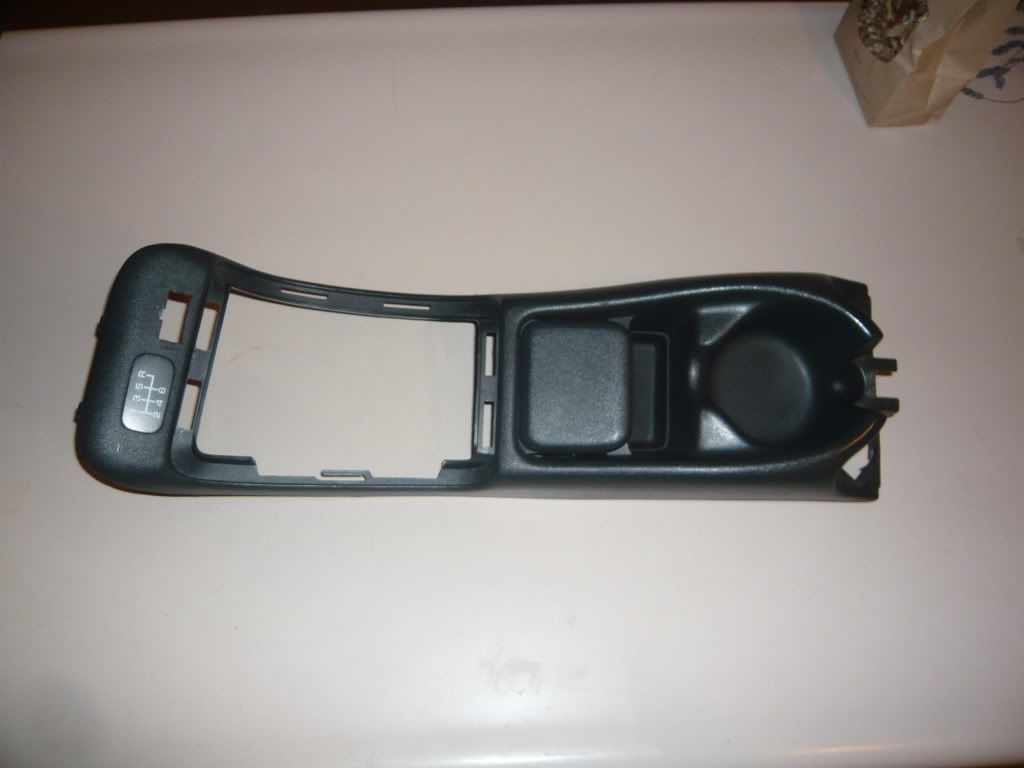
Before altering:
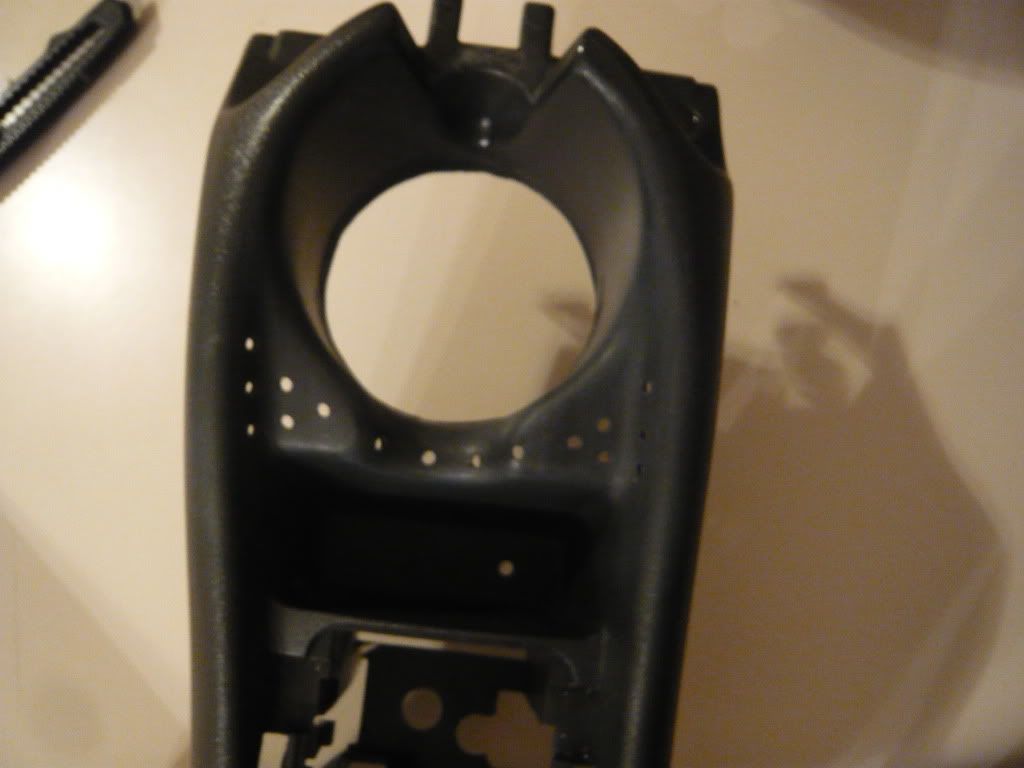
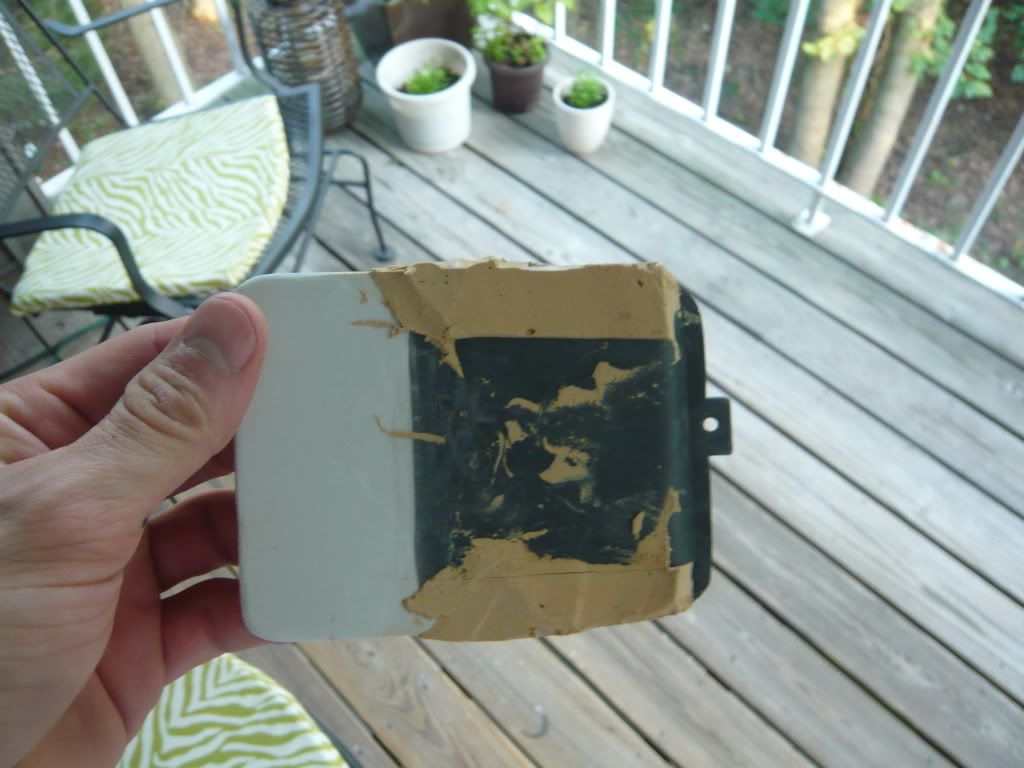
Bottom of cup holder cut out and holes drilled to help bodyfiller hold:
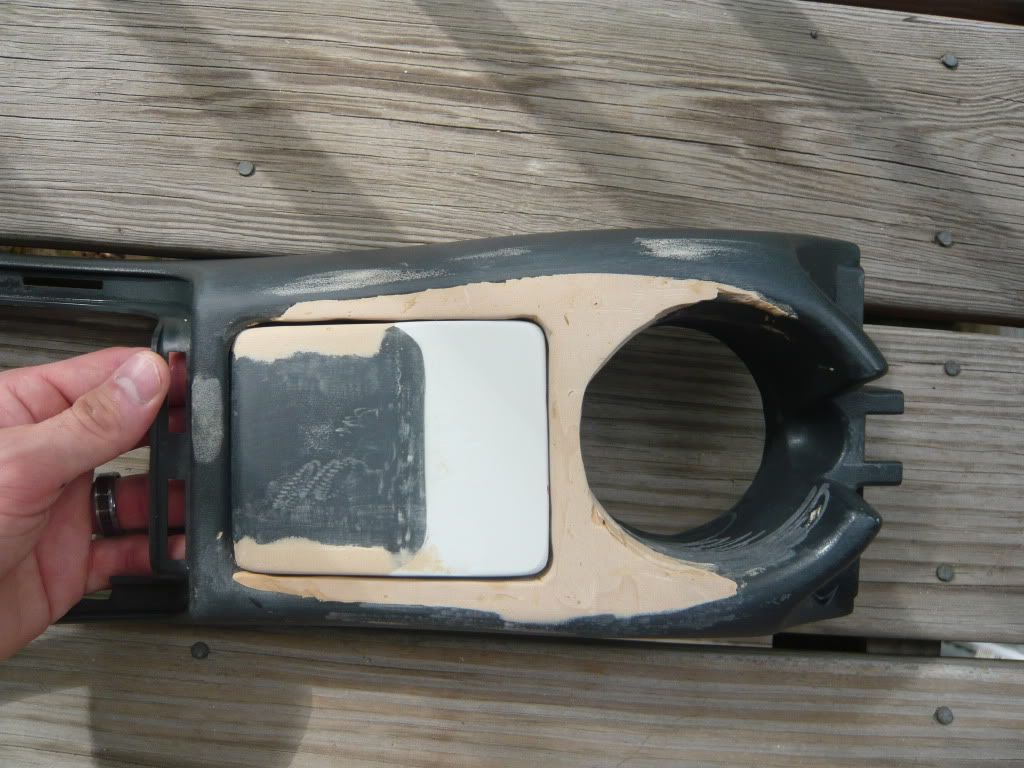
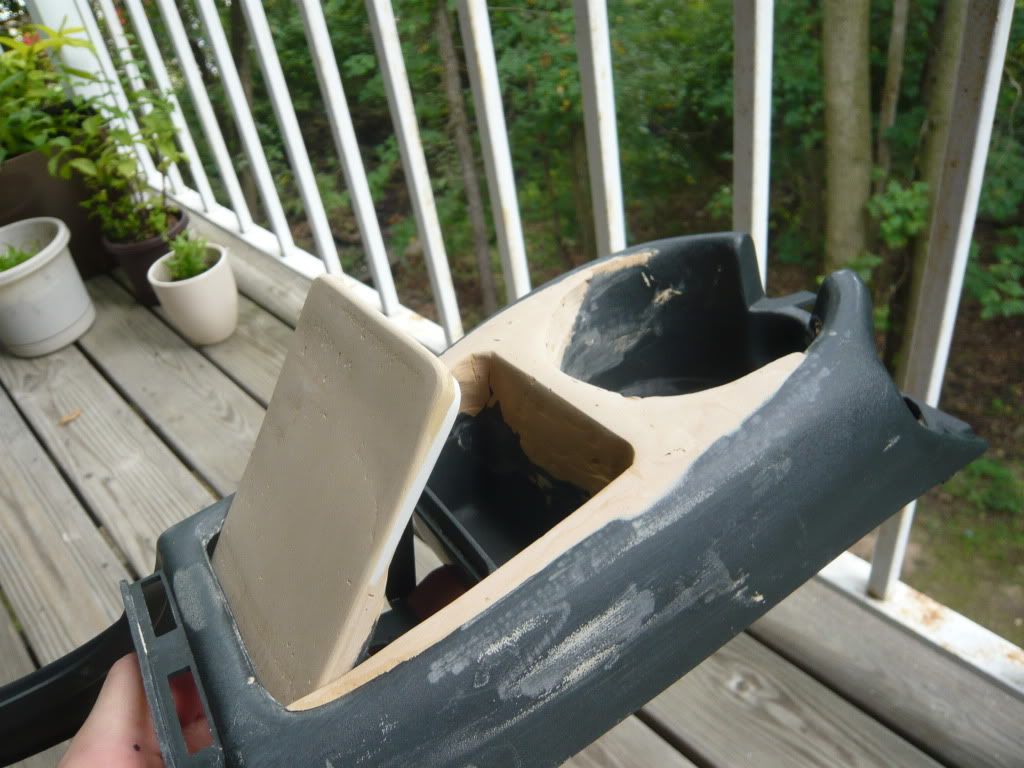
Building up console (work in progress):
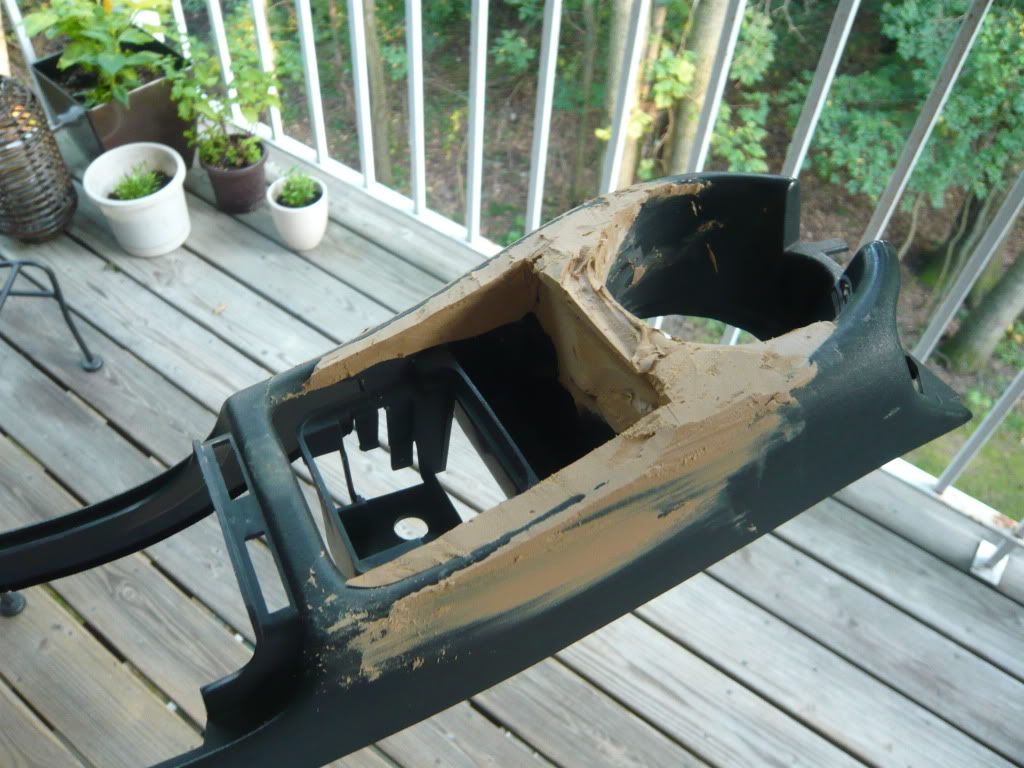
Extended ashtray lid (work in progress):
That's it so far. Should be updating almost daily for a week or two. Looking forward to feedback and advice since this is my first time with a project like this.
I am a fan of carbon fiber (even my wedding ring has CF in it) and I have been wanting to do a project with CF for a long time! I finally ordered the supplies to wrap some of my interior trim. I went with a larger weave (11oz) 2x2 twill CF fabric.
I am going to be wrapping the trim pieces by the interior door handles, the center console upper, the radio bezel, and possible the large trim piece behind the steering wheel (undecided on that one as of yet). I am also going to reshape the center console too. Going to make the cup holder useful! (make it deeper, build up the front edge, and decrease the diameter) as well as extend the ashtray lid to also cover the slot between the ashtray and the cupholder so that the whole console upper is smooth CF without losing functionality.
Before altering:
Bottom of cup holder cut out and holes drilled to help bodyfiller hold:
Building up console (work in progress):
Extended ashtray lid (work in progress):
That's it so far. Should be updating almost daily for a week or two. Looking forward to feedback and advice since this is my first time with a project like this.
Last edited by 1quickTransAm; 10-28-2011 at 01:56 PM.
 09-09-2011, 07:00 PM
#2
TECH Addict
iTrader: (15)

Join Date: Sep 2005
Location: San Antonio, TX
Posts: 2,062
Likes: 0
Received 0 Likes
on
0 Posts
I think it can look really good, but some people do too much then it's over done. It sounds like you have a good idea IMO I wouldn't do the piece behind the steering wheel it might be too much
09-09-2011, 09:37 PM
#6
TECH Apprentice
Thread Starter
iTrader: (4)
Join Date: Apr 2008
Posts: 393
Likes: 0
Received 0 Likes
on
0 Posts
These parts are all really simple so no real need to vacuum bag. There isn't enough complicated geometry or crisp lines to justify it. I do have access to a ton of vacuum pumps through my work though if I decide to go that route. We'll see...
Trending Topics
09-10-2011, 10:34 AM
#8
TECH Apprentice
Thread Starter
iTrader: (4)
Join Date: Apr 2008
Posts: 393
Likes: 0
Received 0 Likes
on
0 Posts
Progress pics!
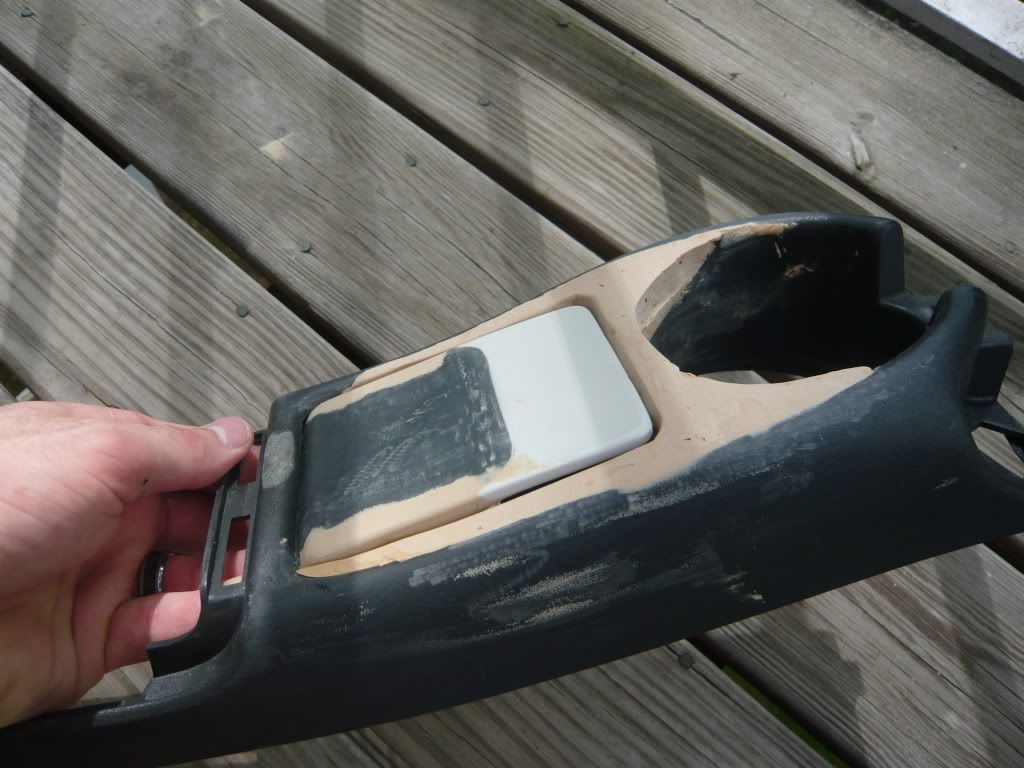
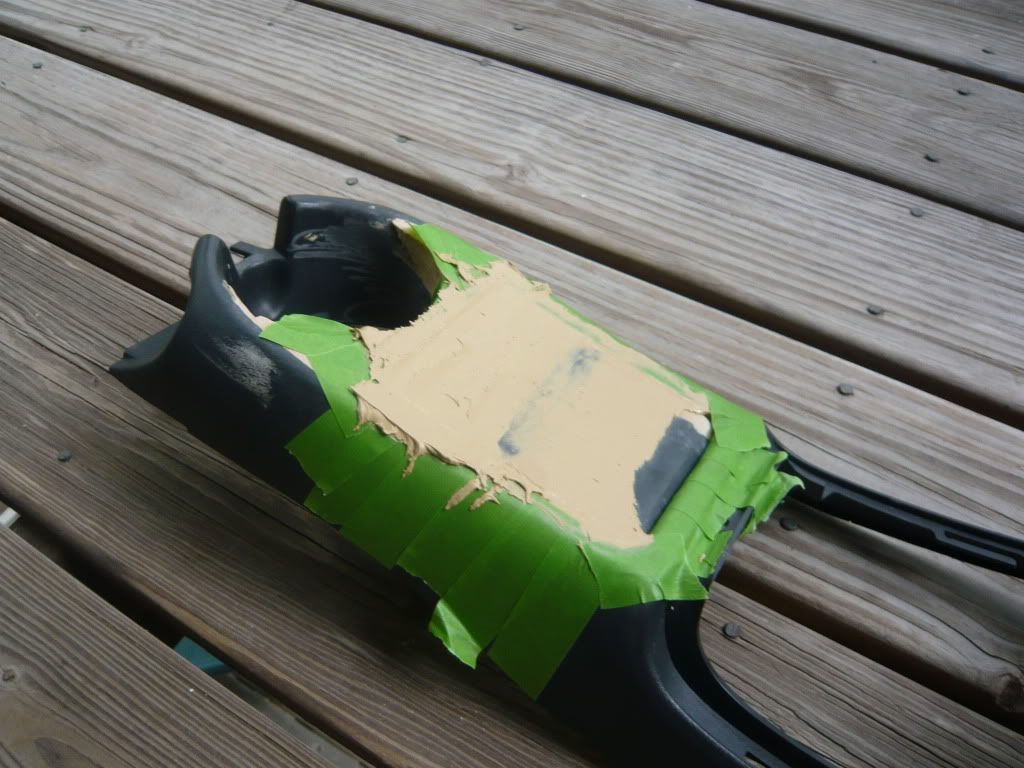
You can start to see what I meant by "extending the ashtray lid" and "bringing up the front edge of the cup holder". I want the whole top to be smooth and clean. I am also using the filler to make the gaps smaller and radius tighter to the edges of the ashtray for a nicer look.
I'm happy with the progress so far, especially since this is my first time doing something like this. I am thinking about 3 more coats of bodyfiller to get the shape just like I want.
09-10-2011, 11:25 AM
#9
TECH Apprentice
Thread Starter
iTrader: (4)
Join Date: Apr 2008
Posts: 393
Likes: 0
Received 0 Likes
on
0 Posts
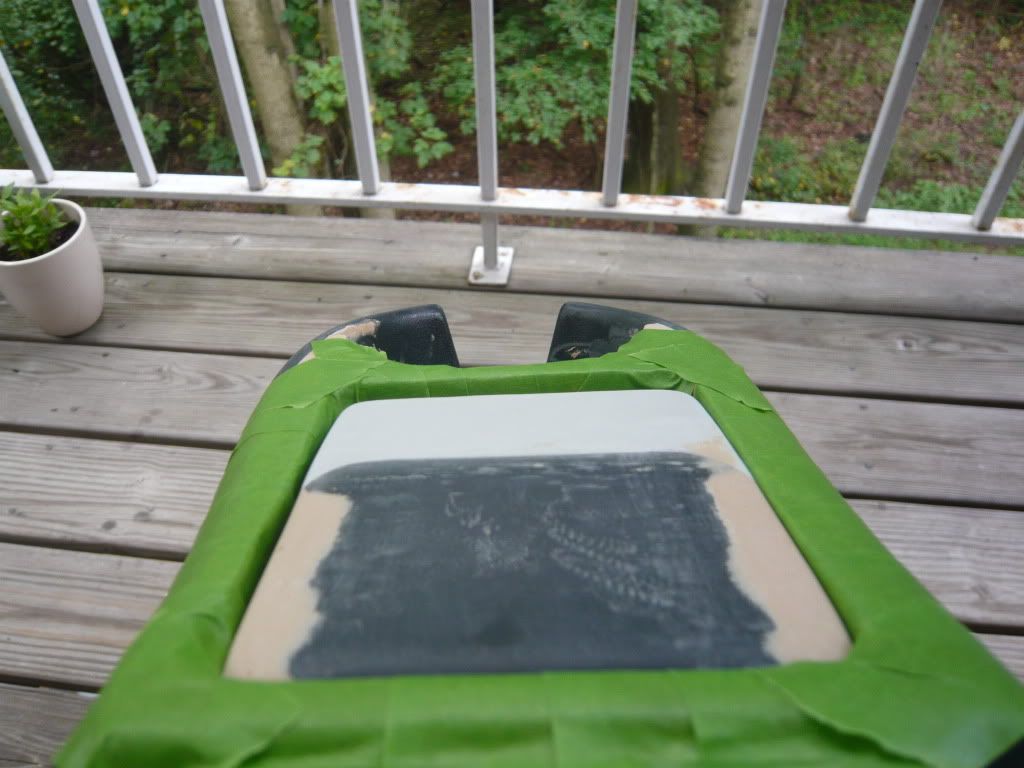
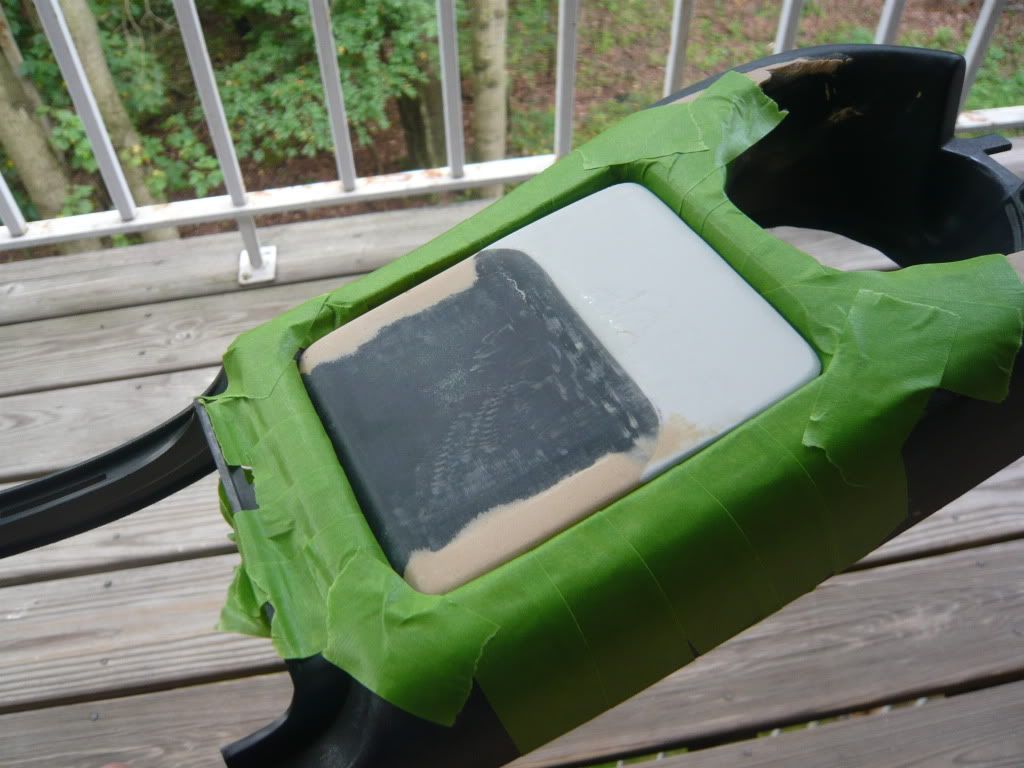
The perimeter on the console upper is the right profile now so I taped off the edges, put the ashtray in place, and put a layer of filler on top and scraped it even with the console. After it dries I will sand it in place so the whole top is smooth and level. This project is a lot of fun! 
*I keep mixing up waaaay more body filler than I need!
*I keep mixing up waaaay more body filler than I need!

 09-10-2011, 01:51 PM
#12
TECH Apprentice
Thread Starter
iTrader: (4)
Join Date: Apr 2008
Posts: 393
Likes: 0
Received 0 Likes
on
0 Posts
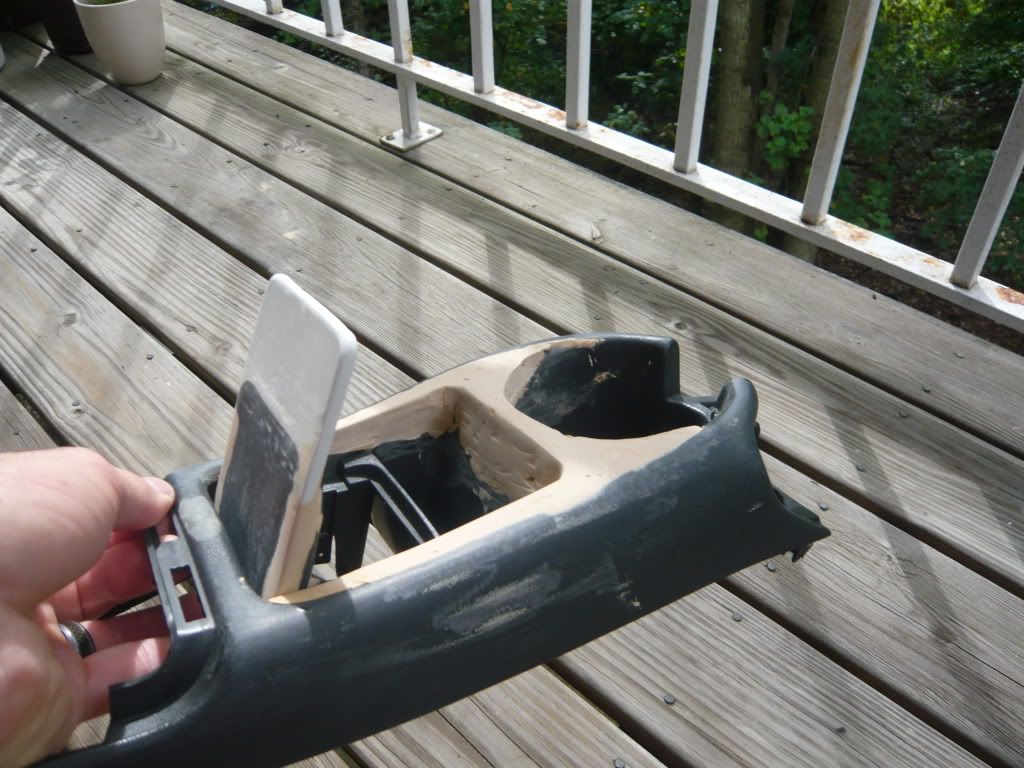
Progress pics!!!
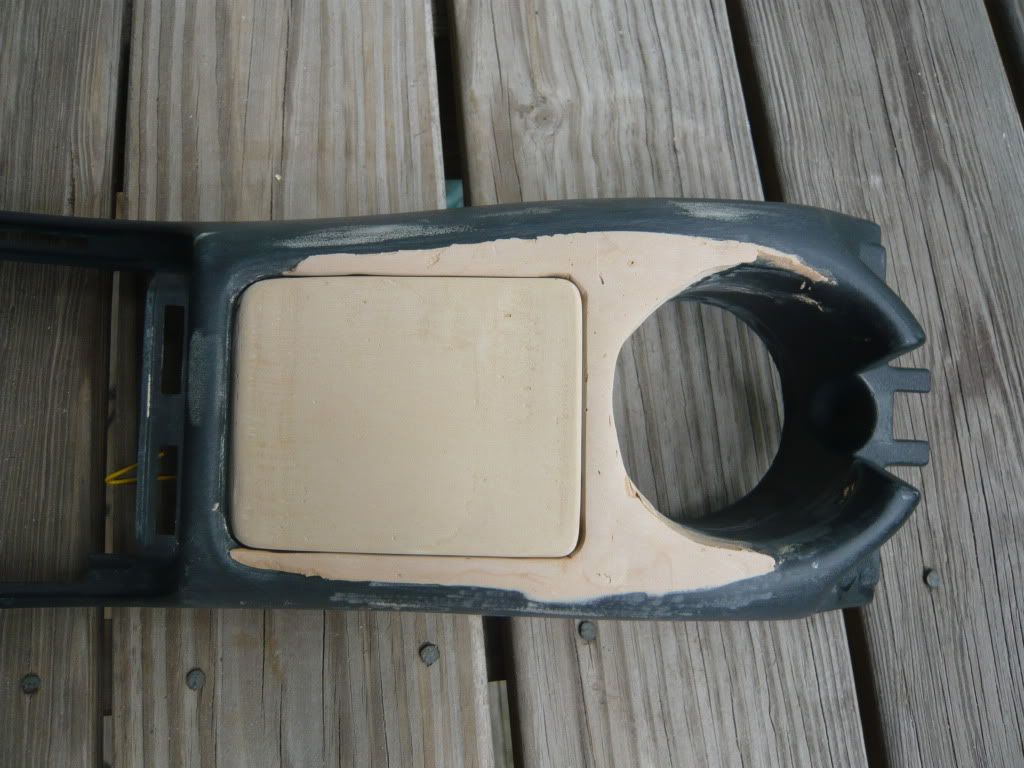
That section is just about how I want it. Just need to clean up some clearances for the door to open all the way and then clean up the insides/undersides so it looks clean when the door is open.
Time to start working on the cup holder area. I think it will be the FIRST EVER functional cupholder in a 4th gen! At least the first in a pre-97' 4th gen for sure!
*I'm not planning on doing a thin skim coat to fill in the tiny bubbles as I don't think those will matter at all since there will be a layer of resin and then the carbon fiber film, and resin above that. I really can't imagine they would carry through but if someone thinks different, please speak up!
Last edited by 1quickTransAm; 09-10-2011 at 01:59 PM.
09-10-2011, 04:33 PM
#16
TECH Apprentice
Thread Starter
iTrader: (4)
Join Date: Apr 2008
Posts: 393
Likes: 0
Received 0 Likes
on
0 Posts
Anybody know how the resin will built up from experience so I can compensate?
Last edited by 1quickTransAm; 09-10-2011 at 05:37 PM.
 09-10-2011, 05:54 PM
#18

How thick is the sheet? 1.6mm? How many layers will you be using?
Knowing these will help you determine the spacing. Also, less resin will make the piece stronger.
Edit: You're going to be wrapping the factory pieces? Its not going to come out glossy I can tell you that.
Knowing these will help you determine the spacing. Also, less resin will make the piece stronger.
Edit: You're going to be wrapping the factory pieces? Its not going to come out glossy I can tell you that.
09-10-2011, 05:55 PM
#19
TECH Apprentice
Thread Starter
iTrader: (4)
Join Date: Apr 2008
Posts: 393
Likes: 0
Received 0 Likes
on
0 Posts
Haven't measured it yet so I don't know the thickness yet, but I will only be using one layer of carbon fiber since it is purely cosmetic. Being cosmetic, I also am not really worried about the strength and want some depth to the resin on top for a nice deep finish.