
69 Nova. 5.3 L33 Turbo build. Billet S474, LOTS of pictures...
 04-02-2014, 08:49 PM
#1
Restricted User
Thread Starter

Hey everyone,
Not a new user. Have another very active username that I'm no longer going to use because I am starting this project log and want other people from other forums that I am a part of to be able to find this easier.
I'm quite a ways into the project, so its going to take me a few LONG posts to get caught up. So to start, I have a 69 Nova that my dad picked up over 20 years ago. I loved the car from the start, and was there through all of its transformations. My dad sold it to my uncle, and long story short I ended up with it when he hit a rough spot.
When I got the car, it wasn't running. It had wiped out a lobe on the cam, so I got a new cam and got it running again. It got 4 mpg, ran hot, had zero creature comforts, was extremely loud, smoked, blah blah. After a year of driving it I decided it was time for an LS swap, and I wanted more power so I was going turbo. This is NOT my first turbo. After about a hundred hours of research (I'm a research *****), I decided an L33 was my best candidate. Thick cylinder walls, good heads, gen 4 rods/pistons, and aluminum. I picked one up as a complete pull-out with wiring/ecu and accessories with about 70k for $1200. Then I picked up a 4L80e a few days later.
The plan is:
Engine:
Stock 5.3 L33
Cheap head studs. Stock gaskets, stock bottom end.
PAC 1218 springs.
Isky 218/218 112 LSA from stock48
Stock truck intake
Stock DBW throttle body (yay for built-in cruise control!)
Transmission:
4L80e with 60k miles and a Transgo HD2.
Circle D Billet Multi Disk. 3200-3400 stall.
Fuel:
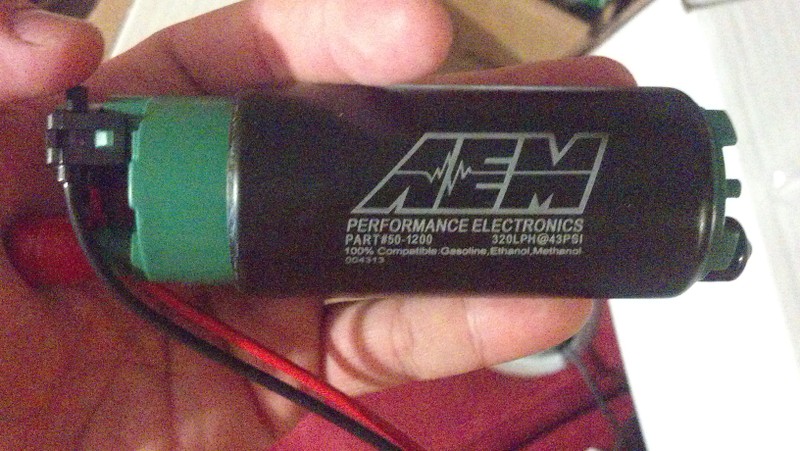
Twin AEM 320 LPH E85 pumps.
New stock tank, modified for Tanks Inc. PA module internal pump setup.
-8 AN Feed/Return, braided lines.
Aeromotive 13129 regulator
Siemens Deka 80 lb injectors.
Stock trucks rails (until I purchase the Holley Hi-Ram and rails
Tuning:
HPTuners (not Pro) on stock ECU.
AEM UEGO wideband
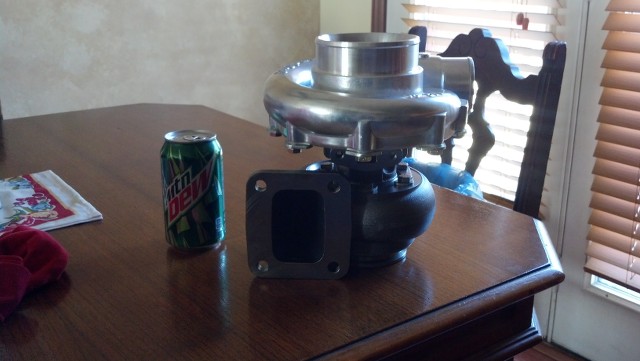
Turbo:
BW S476R. Haven't decided turbine wheel size.
(I now have a billet S474, 87mm turbine T4)
Single 44mm Tial knockoff.
KB Racing hotside.
4" downpipe.
I would eventually like to prep that car for Outlaw 8.5 since its local to me (15 minutes away). That means I'll have to shed some weight and get this thing to run 5.60s in the 1/8th mile (flat 9 in the quarter). Anyone know anyone in the Cincinnati area that does custom roll cages for street cars?
Forgive the picture quality, ALL of these pictures were taken with my phone, which doesn't get a very good picture in low lighting.
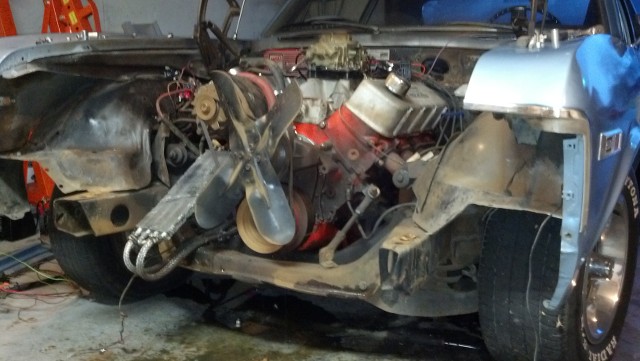
Here is the car when I decided to do the swap, broken....

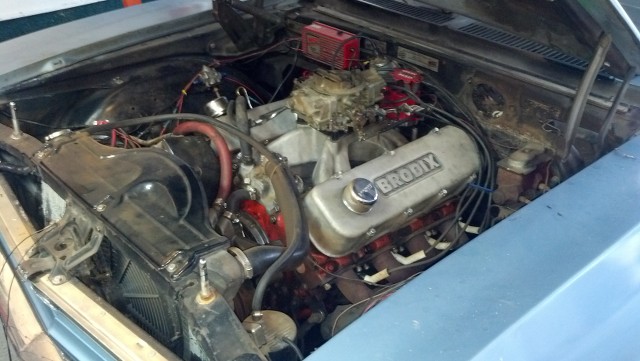
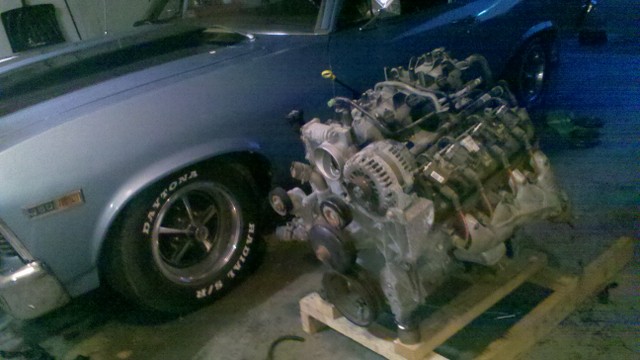
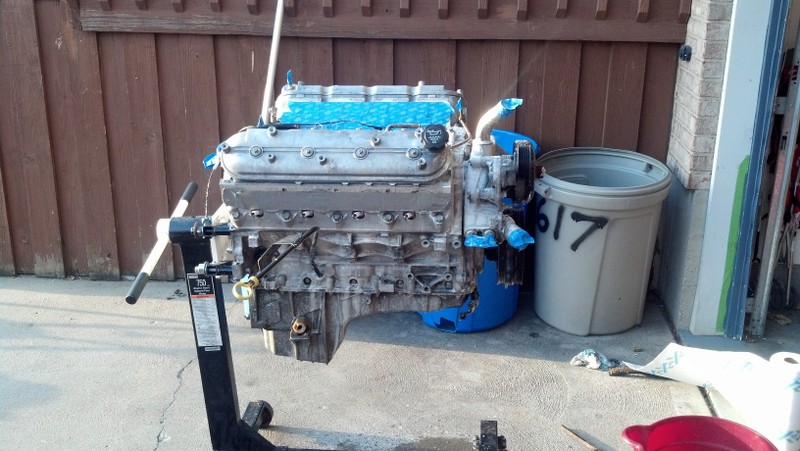
The L33 after picking the wiring and some accessories off:
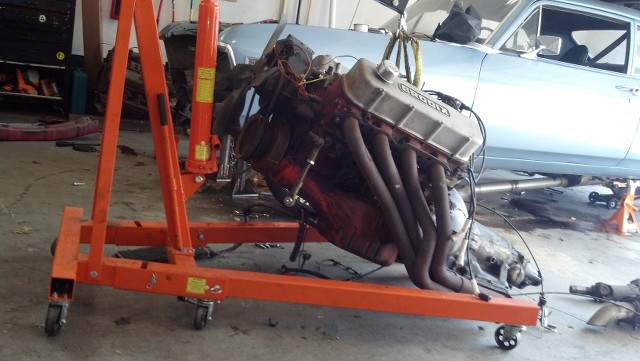
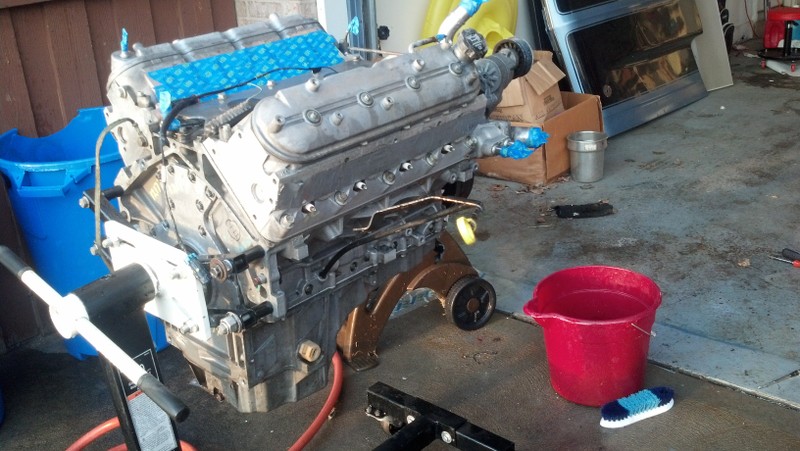
Picking it apart:
I originally picked up this On3 turbo. I have to say I was impressed with the customer service. I wanted to change A/R on the exhaust and they did it all free of charge.
Not a new user. Have another very active username that I'm no longer going to use because I am starting this project log and want other people from other forums that I am a part of to be able to find this easier.
I'm quite a ways into the project, so its going to take me a few LONG posts to get caught up. So to start, I have a 69 Nova that my dad picked up over 20 years ago. I loved the car from the start, and was there through all of its transformations. My dad sold it to my uncle, and long story short I ended up with it when he hit a rough spot.
When I got the car, it wasn't running. It had wiped out a lobe on the cam, so I got a new cam and got it running again. It got 4 mpg, ran hot, had zero creature comforts, was extremely loud, smoked, blah blah. After a year of driving it I decided it was time for an LS swap, and I wanted more power so I was going turbo. This is NOT my first turbo. After about a hundred hours of research (I'm a research *****), I decided an L33 was my best candidate. Thick cylinder walls, good heads, gen 4 rods/pistons, and aluminum. I picked one up as a complete pull-out with wiring/ecu and accessories with about 70k for $1200. Then I picked up a 4L80e a few days later.
The plan is:
Engine:
Stock 5.3 L33
Cheap head studs. Stock gaskets, stock bottom end.
PAC 1218 springs.
Isky 218/218 112 LSA from stock48
Stock truck intake
Stock DBW throttle body (yay for built-in cruise control!)
Transmission:
4L80e with 60k miles and a Transgo HD2.
Circle D Billet Multi Disk. 3200-3400 stall.
Fuel:
Twin AEM 320 LPH E85 pumps.
New stock tank, modified for Tanks Inc. PA module internal pump setup.
-8 AN Feed/Return, braided lines.
Aeromotive 13129 regulator
Siemens Deka 80 lb injectors.
Stock trucks rails (until I purchase the Holley Hi-Ram and rails
Tuning:
HPTuners (not Pro) on stock ECU.
AEM UEGO wideband
Turbo:
BW S476R. Haven't decided turbine wheel size.
(I now have a billet S474, 87mm turbine T4)
Single 44mm Tial knockoff.
KB Racing hotside.
4" downpipe.
I would eventually like to prep that car for Outlaw 8.5 since its local to me (15 minutes away). That means I'll have to shed some weight and get this thing to run 5.60s in the 1/8th mile (flat 9 in the quarter). Anyone know anyone in the Cincinnati area that does custom roll cages for street cars?
Forgive the picture quality, ALL of these pictures were taken with my phone, which doesn't get a very good picture in low lighting.
Here is the car when I decided to do the swap, broken....
The L33 after picking the wiring and some accessories off:
Picking it apart:
I originally picked up this On3 turbo. I have to say I was impressed with the customer service. I wanted to change A/R on the exhaust and they did it all free of charge.
Last edited by JoeNova; 08-19-2015 at 01:14 PM.
 04-02-2014, 09:36 PM
#2
Restricted User
Thread Starter
Fast forward about a month (these are more recent).
I've been scouring the internet for a couple of months for which parts to use and where the best prices were, blah blah.
I decided it was time to rewire the entire car. Most of the wiring in the car was replaced and it was a hack-job. The wires that go to the fuel pump had about 8 splices in them. No butt connectors, just twisted together and covered with 10 feet of electrical tape. It had stereo wiring in it, but it was a rats nest. There were a dozen wires shoved into random spots on the fuse panel. So I started looking around for wiring kits. Since I'm very much a 'Do-It-Yourself' kind of guy, I decided to go with a cheaper kit that would use a little work, but I could set up everything myself the way I wanted it. After hours of searching I stumbled upon this:
http://www.ebay.com/itm/261304203669
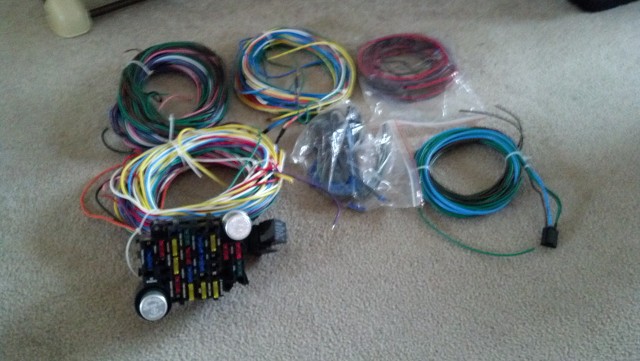
22 circuit wiring harness, with some connectors, bolts to factory firewall location. All wires are labelled every foot or so, fuse panel is labelled, etc. Seems like a no-brainer for $200. Came with extra circuits incase I decide to add some creature comforts later like power windows and locks. Its also from CPP, who is a fairly large company that supplies parts for restorations and other classic/muscle projects. So I decided to buy it.
Then it delivered.............

That's right. The Nova/Chevelle/Camaro wiring harness (as advertised) by CPP, was in-fact a GENERIC wiring harness from Pro Comp. They didn't even change the box. So I opened it up to inspect.
A large jumble of wires like I expected.
Here is a closeup of the fuse panel. While confusing, it does have most of what I need.
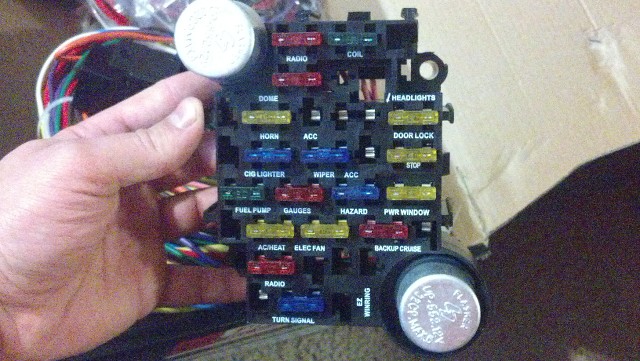
The quality of the wiring itself is fine. I was expecting worse. I am not one of those people that thing chinese this or that is the end of the world or is complete junk. Most of what we own/use is made in China. Your precious Apple phone was made in China. Its not all bad. So I'm going to give it a shot.
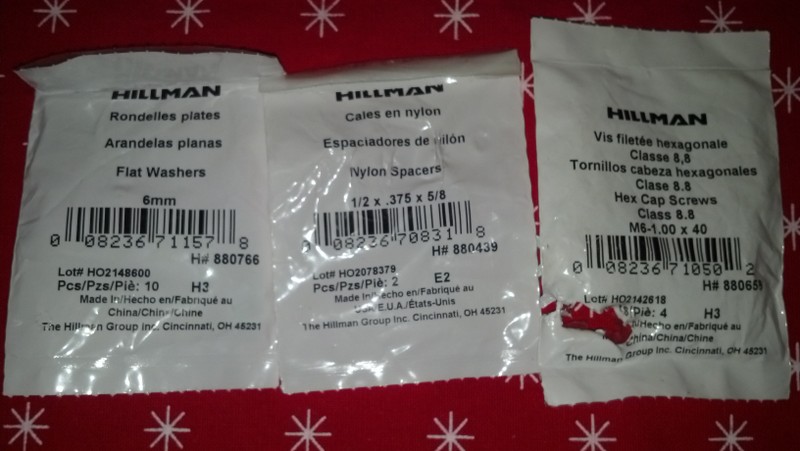
After that I picked up some 80 lb Siemens Deka injectors from ebay per Denmah's recommendation. I might not be able to squeeze all of the power out of them that I need, but I probably won't do much racing until next year. As of right now I'm using the stock truck intake and throttle. So I had to find a way to make the rails fit on these injectors since they are longer. A quick trip to lowes, and I bought these for less than $5 bucks total. I passed this info on to Denmah, but I don't know if he ever added it to the Sloppy Mechanics Wiki.
From there I needed to think about how I was going to get the fuel to these injectors. I didn't want to run an external because of the insane noise of the Holley pump I had before, and how it drove me INSANE. So I was on a quest for an internal setup. At the time, the only internal tank I could get was a Rick's tank, which was WAY out of my budget. So I made this thread over on Stevesnovasite:
http://www.stevesnovasite.com/forums...d.php?t=214403
Long story short, I test fit a Camaro tank onto my Nova. The dimensions were close enough that nothing had to be changed. The filler neck was the only problem. I sent a message to Tanks Inc letting them know this new info, and told them that with some slight adjustments to their EFI camaro tanks, they would have a 3rd gen Nova tank with minimal R&D. At first they ignored me. So after a few other forum members emailed them, I sent them another message and told them that lots of people were beginning to buy cheaper tanks from Spectra and modifying them to their needs. VERY shortly after, they had a prototype Nova tank at SEMA, which was just a Camaro tank with a hacked off filler neck, and they designed a 2 piece filler neck in its place (a piece of pipe and a rubber connector). The outcome to that thread was eventually, that Tanks Inc started producing EFI tanks for 3rd gen Novas.
1 Problem. The opening in the tank is just over 2 inches, and I could only fit a single pump in. I emailed Chris about this back and forth for a while and decided to get their retro-fit EFI module that required me to drill into the factory tank, but would give me enough room for 2 tanks. I pull my stock tank and its covered in a red coating that I have to chisel off. I try to get it all off of the stock sending unit, and when I attempt to remove it, I rip the lock ring out of the tank and have to buy a new tank.
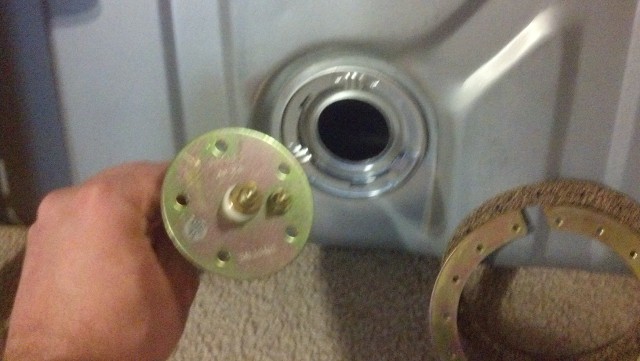
In comes new stock replacement tank, PA module, and pickup free sending unit from Tanks Inc.
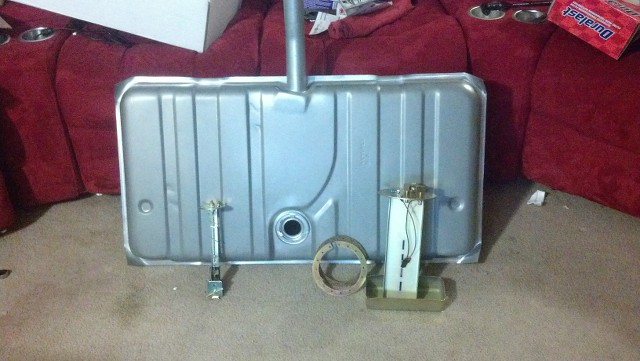
I noticed immediately that the sending unit is a 5-bolt and the tank is a traditional ring-lock. They could have at least let me know...
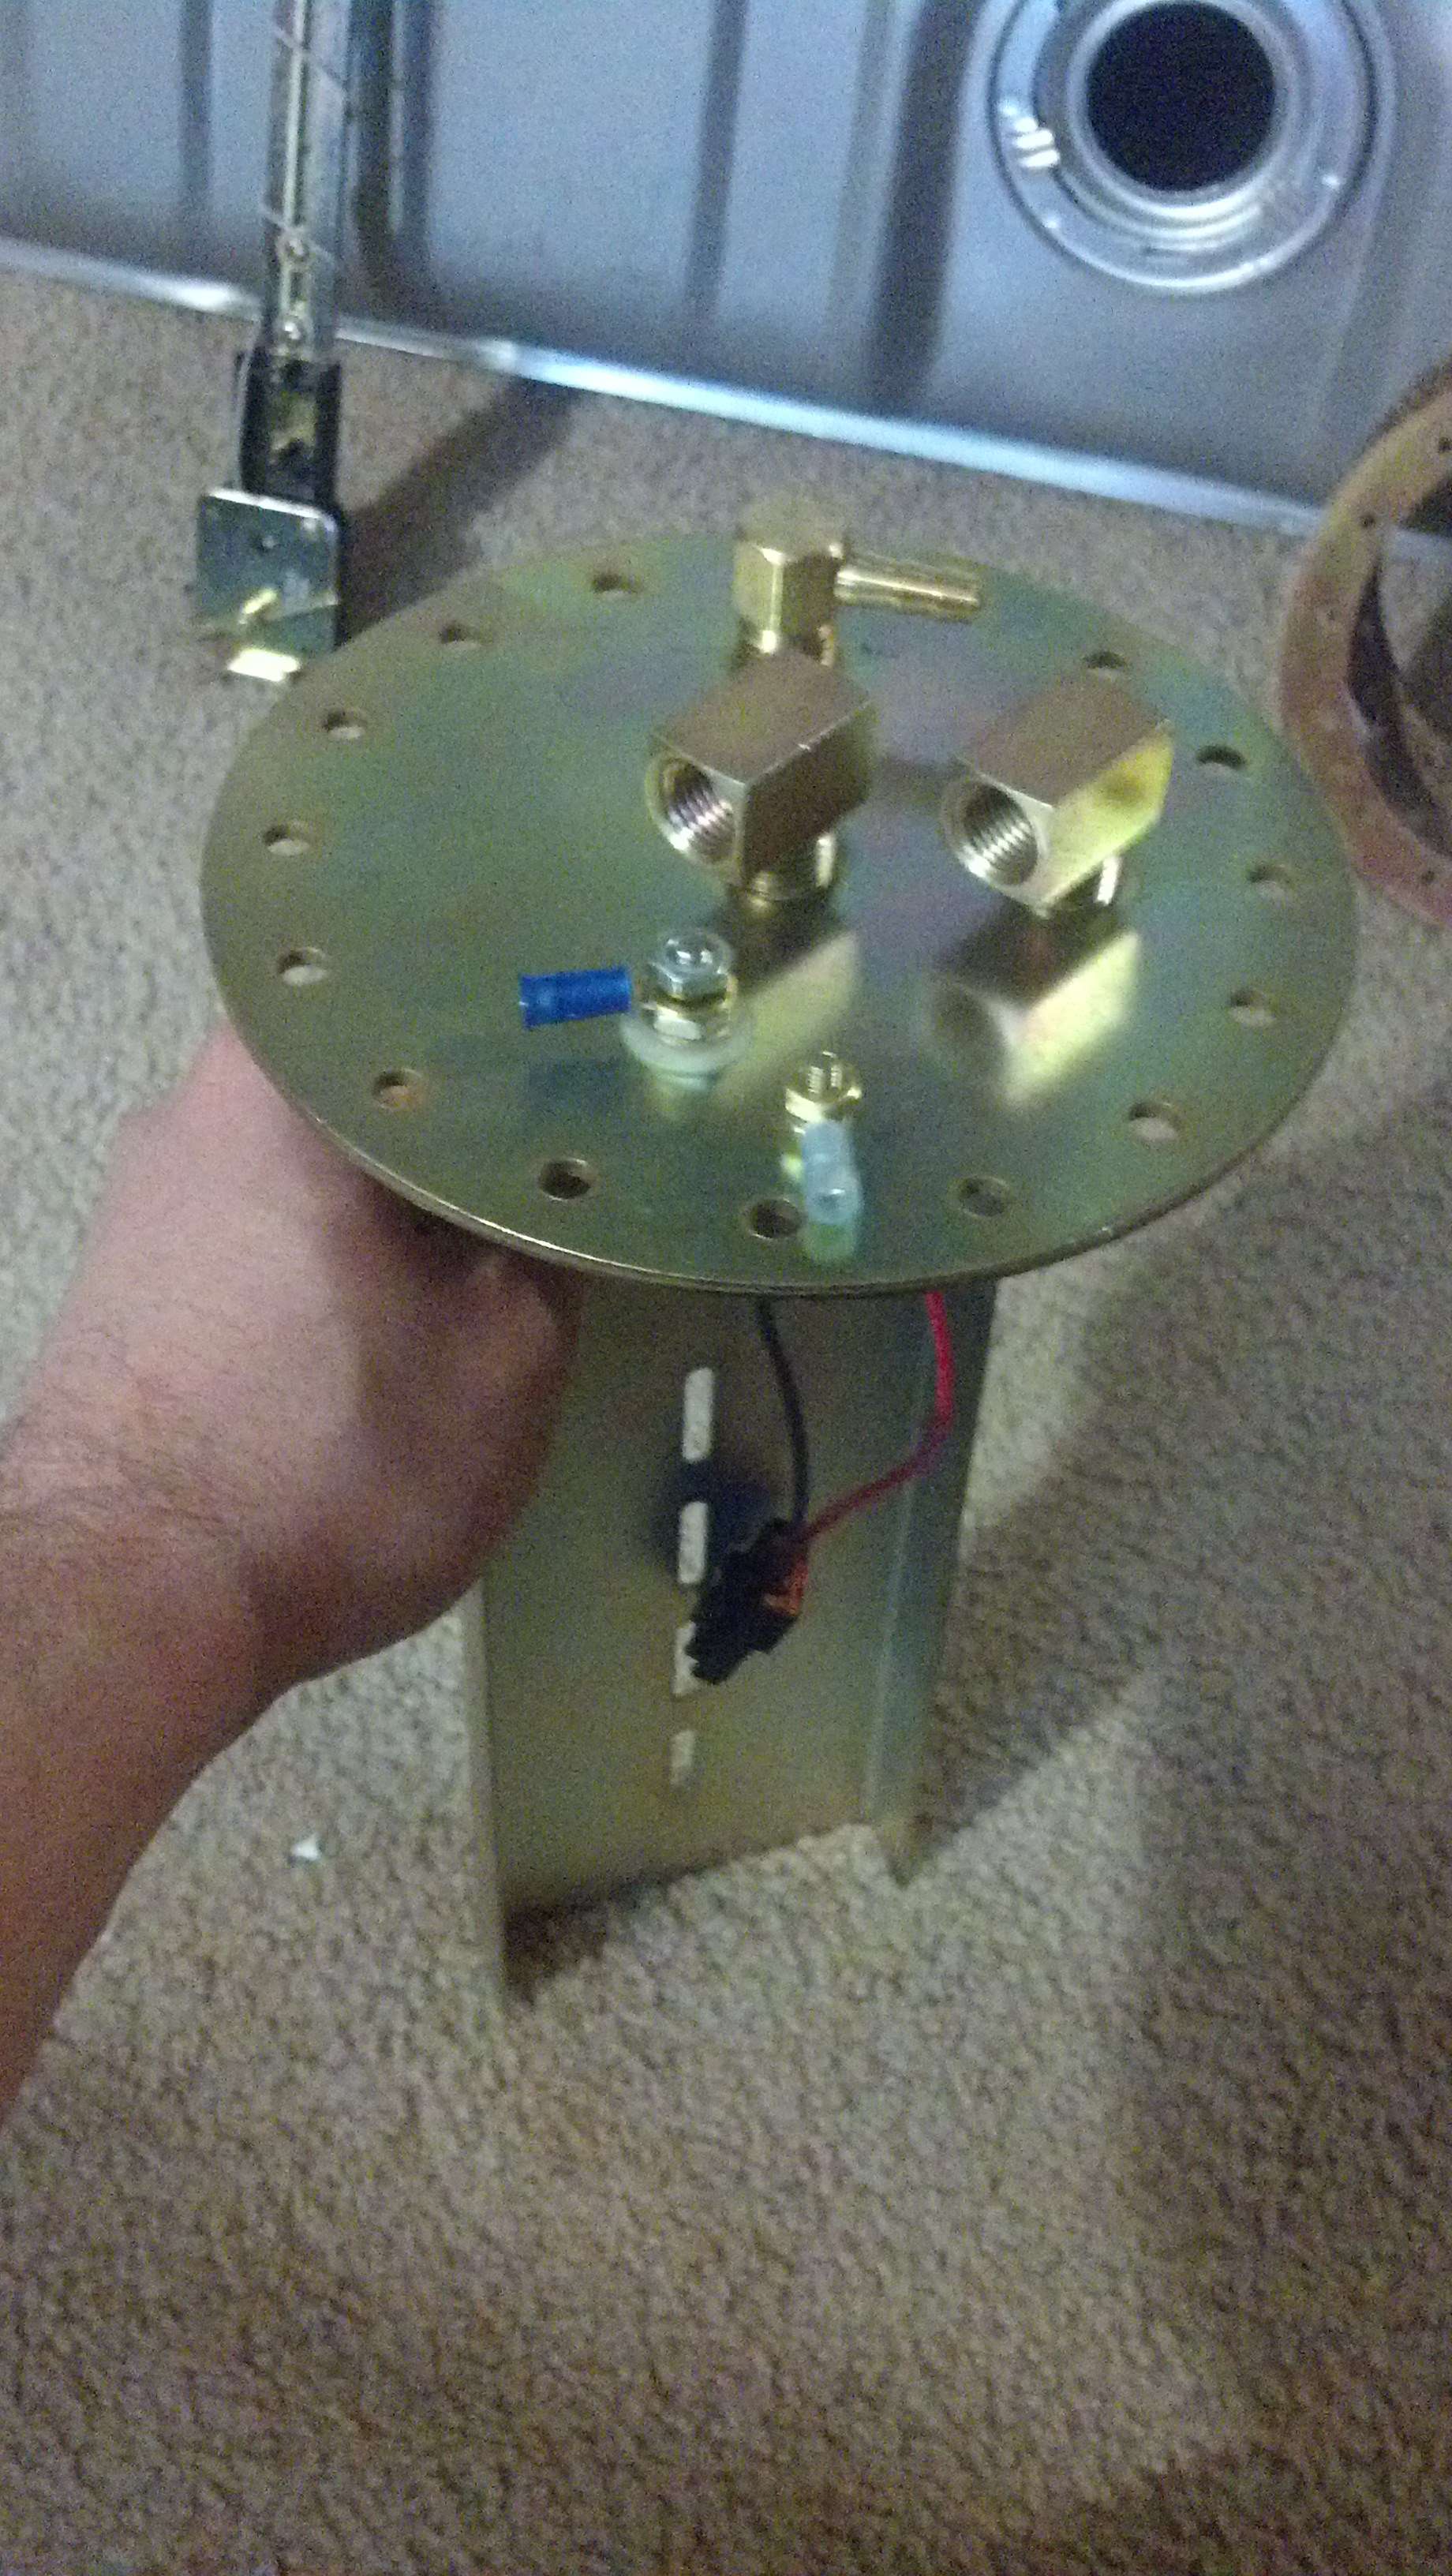
And here is the PA module. Its setup for 1 feed, 1 return. It comes with a small baffle that bolts to the bottom. You cut a 4.5" hole in your tank and use the supplied gaskets to mount this to the tank (I'll get lots of pictures when I do this). I originally planned on putting both pumps in the baffle, T'ing them together inside of the tank, and drilling out the current feed/return on the module so I could run larger -8 Feed/Return bulkhead fittings through the top. I bought all of the fitting I needed, and come to find out the tank is WAY too shallow to do this. So I will be running them out of the top with the supplied fittings and T'ing them together outside of the tank.
I've been scouring the internet for a couple of months for which parts to use and where the best prices were, blah blah.
I decided it was time to rewire the entire car. Most of the wiring in the car was replaced and it was a hack-job. The wires that go to the fuel pump had about 8 splices in them. No butt connectors, just twisted together and covered with 10 feet of electrical tape. It had stereo wiring in it, but it was a rats nest. There were a dozen wires shoved into random spots on the fuse panel. So I started looking around for wiring kits. Since I'm very much a 'Do-It-Yourself' kind of guy, I decided to go with a cheaper kit that would use a little work, but I could set up everything myself the way I wanted it. After hours of searching I stumbled upon this:
http://www.ebay.com/itm/261304203669
22 circuit wiring harness, with some connectors, bolts to factory firewall location. All wires are labelled every foot or so, fuse panel is labelled, etc. Seems like a no-brainer for $200. Came with extra circuits incase I decide to add some creature comforts later like power windows and locks. Its also from CPP, who is a fairly large company that supplies parts for restorations and other classic/muscle projects. So I decided to buy it.
Then it delivered.............
That's right. The Nova/Chevelle/Camaro wiring harness (as advertised) by CPP, was in-fact a GENERIC wiring harness from Pro Comp. They didn't even change the box. So I opened it up to inspect.
A large jumble of wires like I expected.
Here is a closeup of the fuse panel. While confusing, it does have most of what I need.
The quality of the wiring itself is fine. I was expecting worse. I am not one of those people that thing chinese this or that is the end of the world or is complete junk. Most of what we own/use is made in China. Your precious Apple phone was made in China. Its not all bad. So I'm going to give it a shot.
After that I picked up some 80 lb Siemens Deka injectors from ebay per Denmah's recommendation. I might not be able to squeeze all of the power out of them that I need, but I probably won't do much racing until next year. As of right now I'm using the stock truck intake and throttle. So I had to find a way to make the rails fit on these injectors since they are longer. A quick trip to lowes, and I bought these for less than $5 bucks total. I passed this info on to Denmah, but I don't know if he ever added it to the Sloppy Mechanics Wiki.
From there I needed to think about how I was going to get the fuel to these injectors. I didn't want to run an external because of the insane noise of the Holley pump I had before, and how it drove me INSANE. So I was on a quest for an internal setup. At the time, the only internal tank I could get was a Rick's tank, which was WAY out of my budget. So I made this thread over on Stevesnovasite:
http://www.stevesnovasite.com/forums...d.php?t=214403
Long story short, I test fit a Camaro tank onto my Nova. The dimensions were close enough that nothing had to be changed. The filler neck was the only problem. I sent a message to Tanks Inc letting them know this new info, and told them that with some slight adjustments to their EFI camaro tanks, they would have a 3rd gen Nova tank with minimal R&D. At first they ignored me. So after a few other forum members emailed them, I sent them another message and told them that lots of people were beginning to buy cheaper tanks from Spectra and modifying them to their needs. VERY shortly after, they had a prototype Nova tank at SEMA, which was just a Camaro tank with a hacked off filler neck, and they designed a 2 piece filler neck in its place (a piece of pipe and a rubber connector). The outcome to that thread was eventually, that Tanks Inc started producing EFI tanks for 3rd gen Novas.
1 Problem. The opening in the tank is just over 2 inches, and I could only fit a single pump in. I emailed Chris about this back and forth for a while and decided to get their retro-fit EFI module that required me to drill into the factory tank, but would give me enough room for 2 tanks. I pull my stock tank and its covered in a red coating that I have to chisel off. I try to get it all off of the stock sending unit, and when I attempt to remove it, I rip the lock ring out of the tank and have to buy a new tank.
In comes new stock replacement tank, PA module, and pickup free sending unit from Tanks Inc.
I noticed immediately that the sending unit is a 5-bolt and the tank is a traditional ring-lock. They could have at least let me know...
And here is the PA module. Its setup for 1 feed, 1 return. It comes with a small baffle that bolts to the bottom. You cut a 4.5" hole in your tank and use the supplied gaskets to mount this to the tank (I'll get lots of pictures when I do this). I originally planned on putting both pumps in the baffle, T'ing them together inside of the tank, and drilling out the current feed/return on the module so I could run larger -8 Feed/Return bulkhead fittings through the top. I bought all of the fitting I needed, and come to find out the tank is WAY too shallow to do this. So I will be running them out of the top with the supplied fittings and T'ing them together outside of the tank.
Last edited by JoeNova; 04-02-2014 at 09:57 PM.
04-02-2014, 10:20 PM
#3
Restricted User
Thread Starter
Btw, if anyone knows how to do those ebay hotlinks that show the item picture here on the forum along with the description, that would be great. I'll probably end up linking a LOT of stuff from ebay on here.
04-02-2014, 10:38 PM
#4
Restricted User
Thread Starter
I decided to go with twin AEM 320 LPH E85 pumps just in case I ever decide to go E85. I seen Scoggin Dickey had them in the sponsor sales forum while I was there looking for torque converters one day. I picked up a pair of them for $250ish.
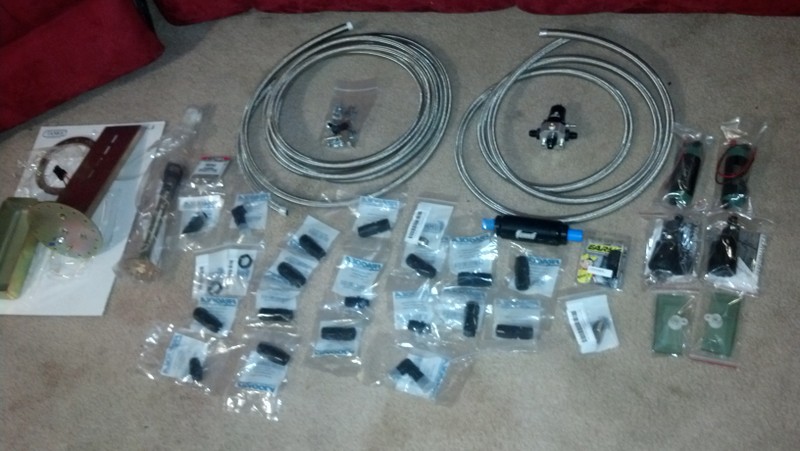
I'm using Russell's braided stainless -8 AN line. I bought 30 feet. Come to find out its CPE and not FTPE hose, but I already have it and the fittings so I'll have to deal with it for now. I'm also going to run an Aeromotive 13129 regulator. Its -6 AN in/out, but the second pump will be on a Hobbs so the regulator won't be overwhelmed.
Here is most of the fuel system. Summit 10 micron filter. Mostly Fragola fittings.
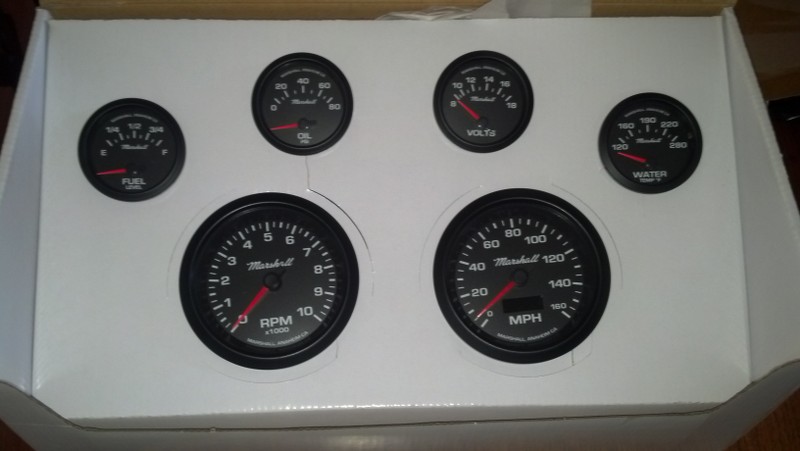
I also picked up these Gauges on ebay for sale for $270. I plugged them in and connected them to a battery and they all lit. Really not a bad price for a set of gauges, and the AEM UEGO matches them pretty well with the black bezel which works in my favor. They are Marshall Gauges. I'll probably pick up their boost gauge as well.
While I was out in the garage I was looking at the seats in the car and how much I don't like them. They do slide, but they don't tilt. They're extremely uncomfortable. They also pretty much mount to the floor. I'm 5'9" and can't see much over the dashboard in these seats:
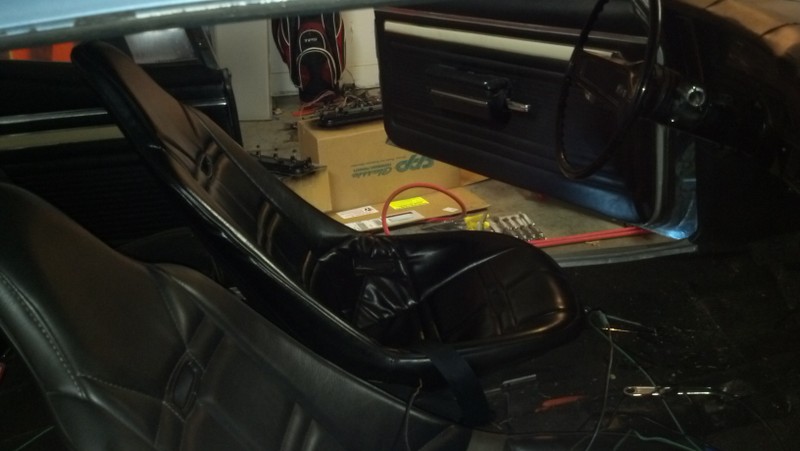
So I decided to tear apart an old creation of mine. I built this out of PVC a couple years ago on New Year's Eve when I had too much to drink and too much leftover PVC in the garage. It uses a GT Force wheel and pedals. The seat is a Summit brand cloth seat mounted on sliders. I paid like $130 for the seat. My 55" Sony is 3D so I built this to play Gran Turismo 5 in. Wheel has forced feedback, so with surround sound, it was pretty realistic.

And I took the seat off of it and pitched most of the PVC, and then sat the seat in the car. I sit about 6" higher off of the floor, and it TILTS!!!
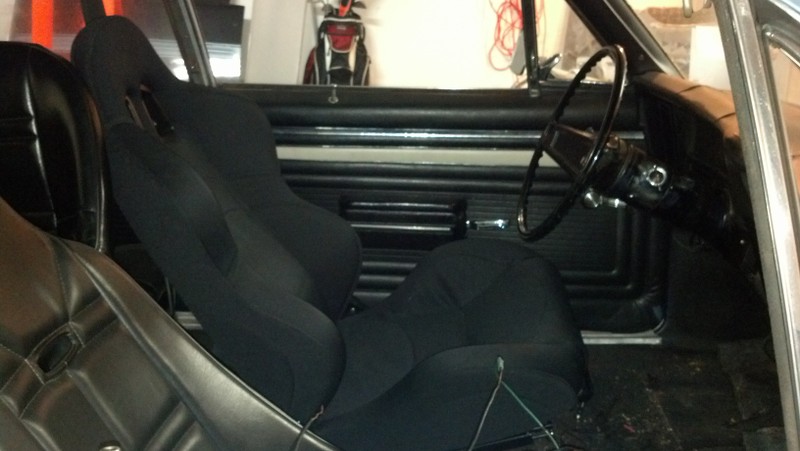
I probably won't use it in the car. There are a couple on ebay I really would prefer to have. I wanted to fit this one in since its similar and just needed it as motivation to make the switch.
I'm using Russell's braided stainless -8 AN line. I bought 30 feet. Come to find out its CPE and not FTPE hose, but I already have it and the fittings so I'll have to deal with it for now. I'm also going to run an Aeromotive 13129 regulator. Its -6 AN in/out, but the second pump will be on a Hobbs so the regulator won't be overwhelmed.
Here is most of the fuel system. Summit 10 micron filter. Mostly Fragola fittings.
I also picked up these Gauges on ebay for sale for $270. I plugged them in and connected them to a battery and they all lit. Really not a bad price for a set of gauges, and the AEM UEGO matches them pretty well with the black bezel which works in my favor. They are Marshall Gauges. I'll probably pick up their boost gauge as well.
While I was out in the garage I was looking at the seats in the car and how much I don't like them. They do slide, but they don't tilt. They're extremely uncomfortable. They also pretty much mount to the floor. I'm 5'9" and can't see much over the dashboard in these seats:
So I decided to tear apart an old creation of mine. I built this out of PVC a couple years ago on New Year's Eve when I had too much to drink and too much leftover PVC in the garage. It uses a GT Force wheel and pedals. The seat is a Summit brand cloth seat mounted on sliders. I paid like $130 for the seat. My 55" Sony is 3D so I built this to play Gran Turismo 5 in. Wheel has forced feedback, so with surround sound, it was pretty realistic.
And I took the seat off of it and pitched most of the PVC, and then sat the seat in the car. I sit about 6" higher off of the floor, and it TILTS!!!
I probably won't use it in the car. There are a couple on ebay I really would prefer to have. I wanted to fit this one in since its similar and just needed it as motivation to make the switch.
04-02-2014, 10:56 PM
#5
Restricted User
Thread Starter
I'm almost caught up, I swear.
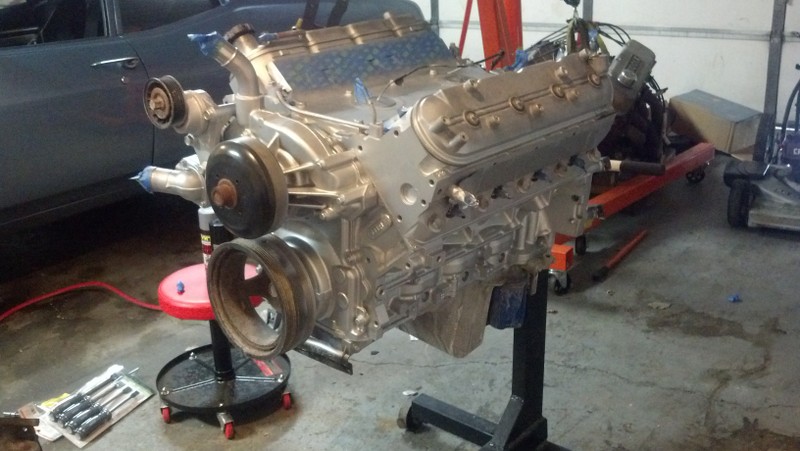
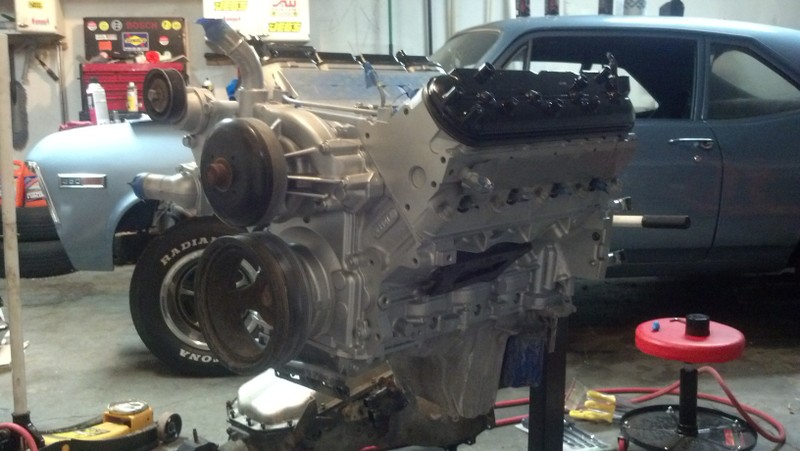
A couple of weeks ago when we first hit some warm weather, I decided to pull the engine out of the garage on the stand and let the girlfriend clean it up for me. Used Eagle 1 Mag cleaner I got from Autozone and some super cheap wire brushes from Harbor Freight. Does very well at cleaning up aluminum.
Here it is after being scrubbed on for a bit:
Here it is after a coat of VHT grey primer and a coat of VHT universal aluminum:
I picked up some cheap LS swap adapter plates on ebay that were advertised as 4x4 LS swap adapters. I went ahead and hit them with primer to get ready for black.
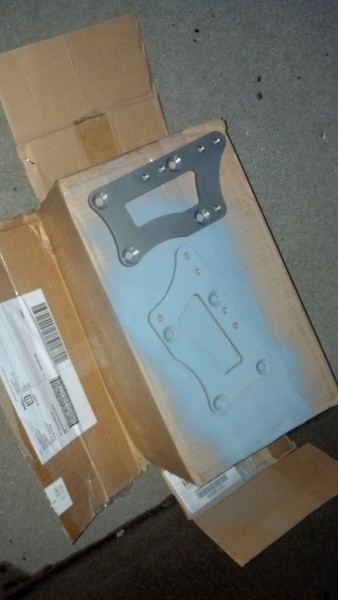
I hit the valve covers with black and put it all together. This is how it sits while I wait on my Isky 218 to show up:
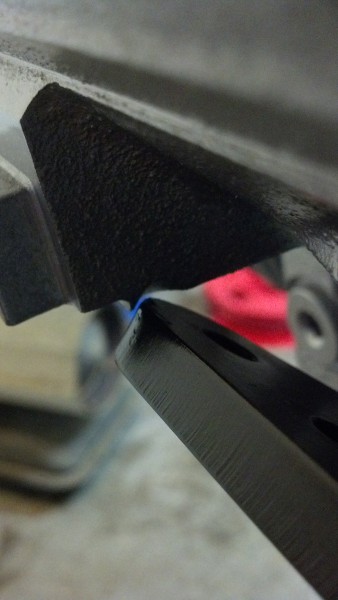
If anyone picks these same mount adapters up, I did have to dremel the block a bit to get them to fit. They wouldn't tighten down all of the way without hitting the block.
Then I cracked open the 80e and did the transgo kit.
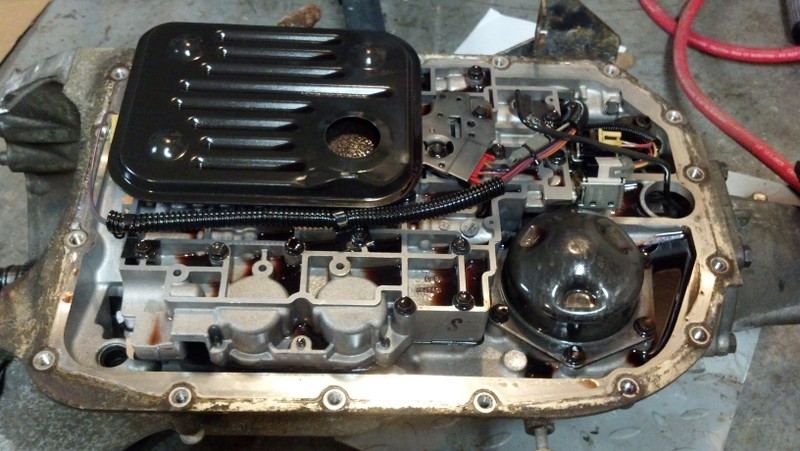
If you're going to do the transgo kit, you need a few things. It does come with a couple of drill bits. You'll need snap ring pliers, and drill bits for the plate to drill out 2nd, 3rd, and 4th to where you want them. I drilled out 3rd and 4th to .125 (1/8"). I didn't want the 1-2 shift to hit too hard, so I drilled it out with a 7/64" drillbit, which is right around .110. I ended up leaving the checkball out of 3rd gear anyway, so I probably didn't have to drill the plate.
Oh and you're going to need lots of patience. You have to shave down a filter to fit one of the new end plugs in since the roll pin might not fit through it if the holes don't line up. Yes it mentions this in the instructions. I had to shave the filter down almost to the wire material before the pin would go through, and I still had to tap it with a hammer.
Btw, when you drill out the two 3/16" holes in your valve body, make sure the valve body is not sitting over the trans or you'll get shavings everywhere. Brake parts cleaner does wonders for getting the shavings out of the valve body. I held it upside down and sprayed both sides out very well. Took about half a can but I couldn't find any shavings afterwards. Whole process took about 5 hours, but a good hour was trying to figure out how to remove and replace a snap ring when I didn't have snap ring pliers. A grinder and some needle nose ended up doing the trick.
A couple of weeks ago when we first hit some warm weather, I decided to pull the engine out of the garage on the stand and let the girlfriend clean it up for me. Used Eagle 1 Mag cleaner I got from Autozone and some super cheap wire brushes from Harbor Freight. Does very well at cleaning up aluminum.
Here it is after being scrubbed on for a bit:
Here it is after a coat of VHT grey primer and a coat of VHT universal aluminum:
I picked up some cheap LS swap adapter plates on ebay that were advertised as 4x4 LS swap adapters. I went ahead and hit them with primer to get ready for black.
I hit the valve covers with black and put it all together. This is how it sits while I wait on my Isky 218 to show up:
If anyone picks these same mount adapters up, I did have to dremel the block a bit to get them to fit. They wouldn't tighten down all of the way without hitting the block.
Then I cracked open the 80e and did the transgo kit.
If you're going to do the transgo kit, you need a few things. It does come with a couple of drill bits. You'll need snap ring pliers, and drill bits for the plate to drill out 2nd, 3rd, and 4th to where you want them. I drilled out 3rd and 4th to .125 (1/8"). I didn't want the 1-2 shift to hit too hard, so I drilled it out with a 7/64" drillbit, which is right around .110. I ended up leaving the checkball out of 3rd gear anyway, so I probably didn't have to drill the plate.
Oh and you're going to need lots of patience. You have to shave down a filter to fit one of the new end plugs in since the roll pin might not fit through it if the holes don't line up. Yes it mentions this in the instructions. I had to shave the filter down almost to the wire material before the pin would go through, and I still had to tap it with a hammer.
Btw, when you drill out the two 3/16" holes in your valve body, make sure the valve body is not sitting over the trans or you'll get shavings everywhere. Brake parts cleaner does wonders for getting the shavings out of the valve body. I held it upside down and sprayed both sides out very well. Took about half a can but I couldn't find any shavings afterwards. Whole process took about 5 hours, but a good hour was trying to figure out how to remove and replace a snap ring when I didn't have snap ring pliers. A grinder and some needle nose ended up doing the trick.
04-02-2014, 11:06 PM
#6
Restricted User
Thread Starter
I had some parts show up recently. One was my LS swap radiator from Summit. It showed up with a bit of a boo boo.
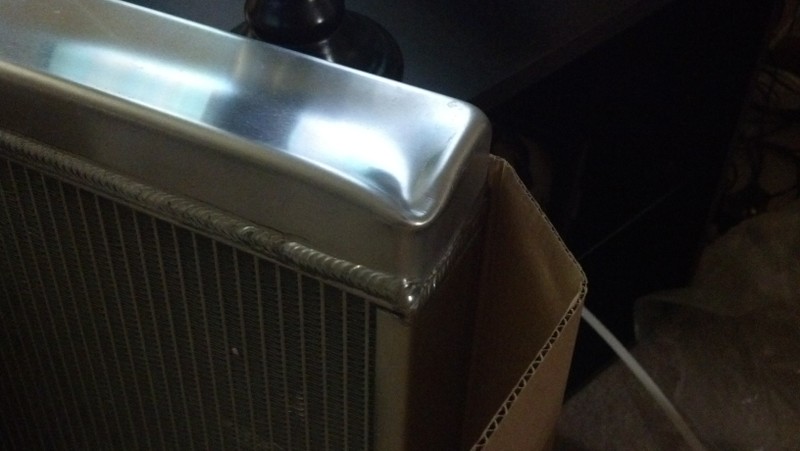
I called up Summit and told them my radiator was damaged. There weren't any sharp dings or scratches so it must've been crushed by weight and not dropped. No questions asked, she said box it up and she will have a new one sent out. They will pick up the damaged one when the new one is dropped off. She even threw in a few Griffin radiator cap. How is that for customer service? I have since gotten the replacement, and its in perfect shape.
Btw, the radiator is this one. Same side inlet/outlet and it has a steam hose fitting:
http://www.summitracing.com/parts/gri-8-00019-ls
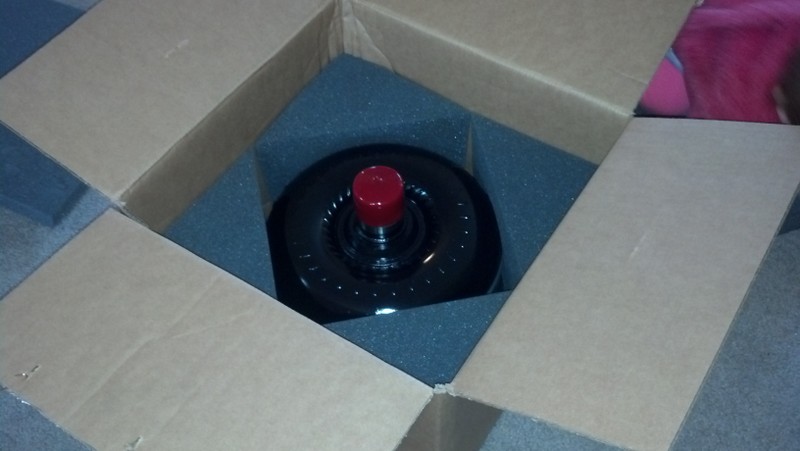
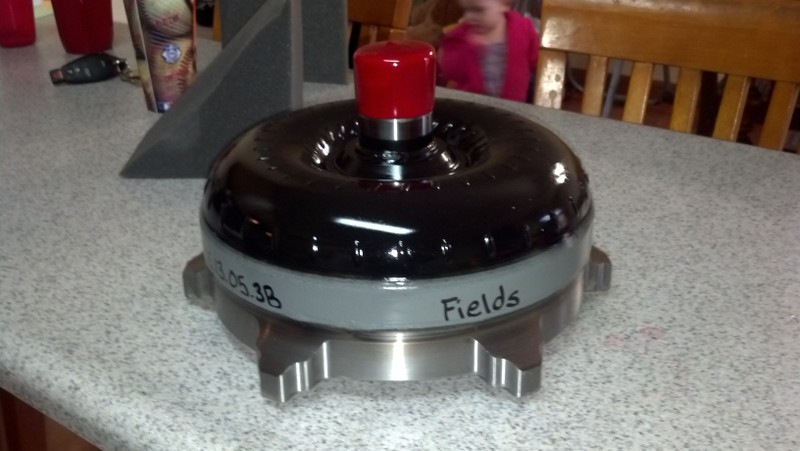
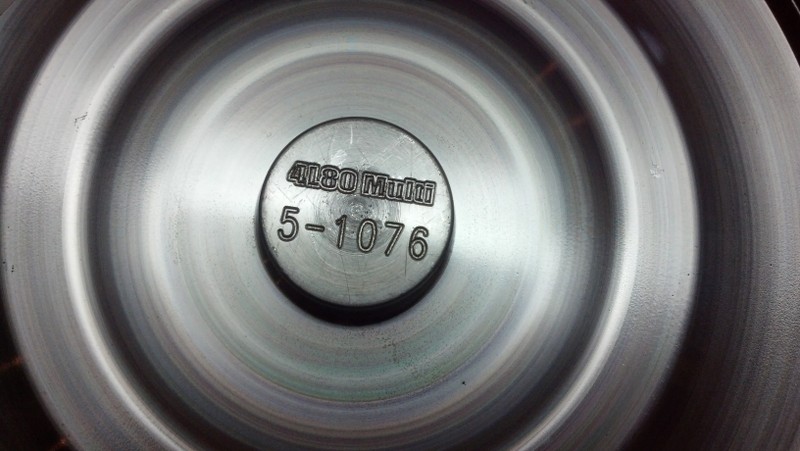
I also ordered a Billet triple disk converter from Circle D. I didn't want to spend $1200 on a converter but it happens . It actually just showed up today. They do some damn good packaging to make sure it doesn't get damaged. Its a 3400 stall, 258mm.
That looks like all of the pictures I have uploaded to Imageshack (which made this all SO ridiculously easy, its SO much better than photobucket IMO). I'll try to finish getting all caught up tomorrow, but there's still a lot to go through.
Looks like its bed time.
I called up Summit and told them my radiator was damaged. There weren't any sharp dings or scratches so it must've been crushed by weight and not dropped. No questions asked, she said box it up and she will have a new one sent out. They will pick up the damaged one when the new one is dropped off. She even threw in a few Griffin radiator cap. How is that for customer service? I have since gotten the replacement, and its in perfect shape.
Btw, the radiator is this one. Same side inlet/outlet and it has a steam hose fitting:
http://www.summitracing.com/parts/gri-8-00019-ls
I also ordered a Billet triple disk converter from Circle D. I didn't want to spend $1200 on a converter but it happens
. It actually just showed up today. They do some damn good packaging to make sure it doesn't get damaged. Its a 3400 stall, 258mm.That looks like all of the pictures I have uploaded to Imageshack (which made this all SO ridiculously easy, its SO much better than photobucket IMO). I'll try to finish getting all caught up tomorrow, but there's still a lot to go through.
Looks like its bed time.


Trending Topics
04-02-2014, 11:30 PM
#8
Restricted User
Thread Starter
Stock PCM to control the 80e. I did pick up an HPTuners last month from Scoggin Dickey because they gave me a HUGE discount on my AEM wideband when I bundled them. I've used megasquirt before in my SRT4 so I am familiar with it. I just wanted the HPTuners for a cleaner install and less hassle on my part, especially since this will be a street car. I'm going to update the first post with a better parts list and some more info.
Btw, what does everyone think I should do for turbine wheel size?
The 83mm wheel is $879 and is within my budget. I'm opting out of T4 housing since I'm trying to keep costs down or I won't have it finished in time to race this year. Will the 83mm wheel with a 1.10 T6 get me 5.50 in the 1/8th @ 3300 lbs? I could always go up to 87 or 92mm but they're both $320 more, and I'm probably only looking at 50 more HP per step up. The car will honestly be 95% street and I don't want to kill spool, especially since I'll be using a T6 housing.
Last edited by JoeNova; 04-02-2014 at 11:43 PM.
04-03-2014, 12:18 AM
#11

Thanks for the write up Joe. Lots of good info there. So why weren't you able to modify the tanks Inc tank to hold two fuel pumps? Does making a bigger opening affect the baffling in the tank? Curious as I was planning on running dual pumps in my tanks Inc tank. Thanks
Last edited by blu72nova; 04-05-2014 at 04:01 PM.
04-03-2014, 05:41 AM
#12
Restricted User
Thread Starter
I asked about the PA module, but the flat spot on the EFI tank that holds the sender and pump isnt wide enough to support the 4 1/2" hole with the bolt pattern around it. This was pretty bad news to me considering the trouble we went through with tanks inc to get them to produce EFI tanks for the Nova.
04-03-2014, 05:49 AM
#13
Restricted User
Thread Starter
I still have the big block. I'll sell it to ya  .
.
This isn't my only username, but its the one I'll be using from now on. I've followed your build from the start and can't wait to see the results. I don't doubt that the 87mm will spool great.
.This isn't my only username, but its the one I'll be using from now on. I've followed your build from the start and can't wait to see the results. I don't doubt that the 87mm will spool great.
 04-03-2014, 01:17 PM
#16
Restricted User
Thread Starter
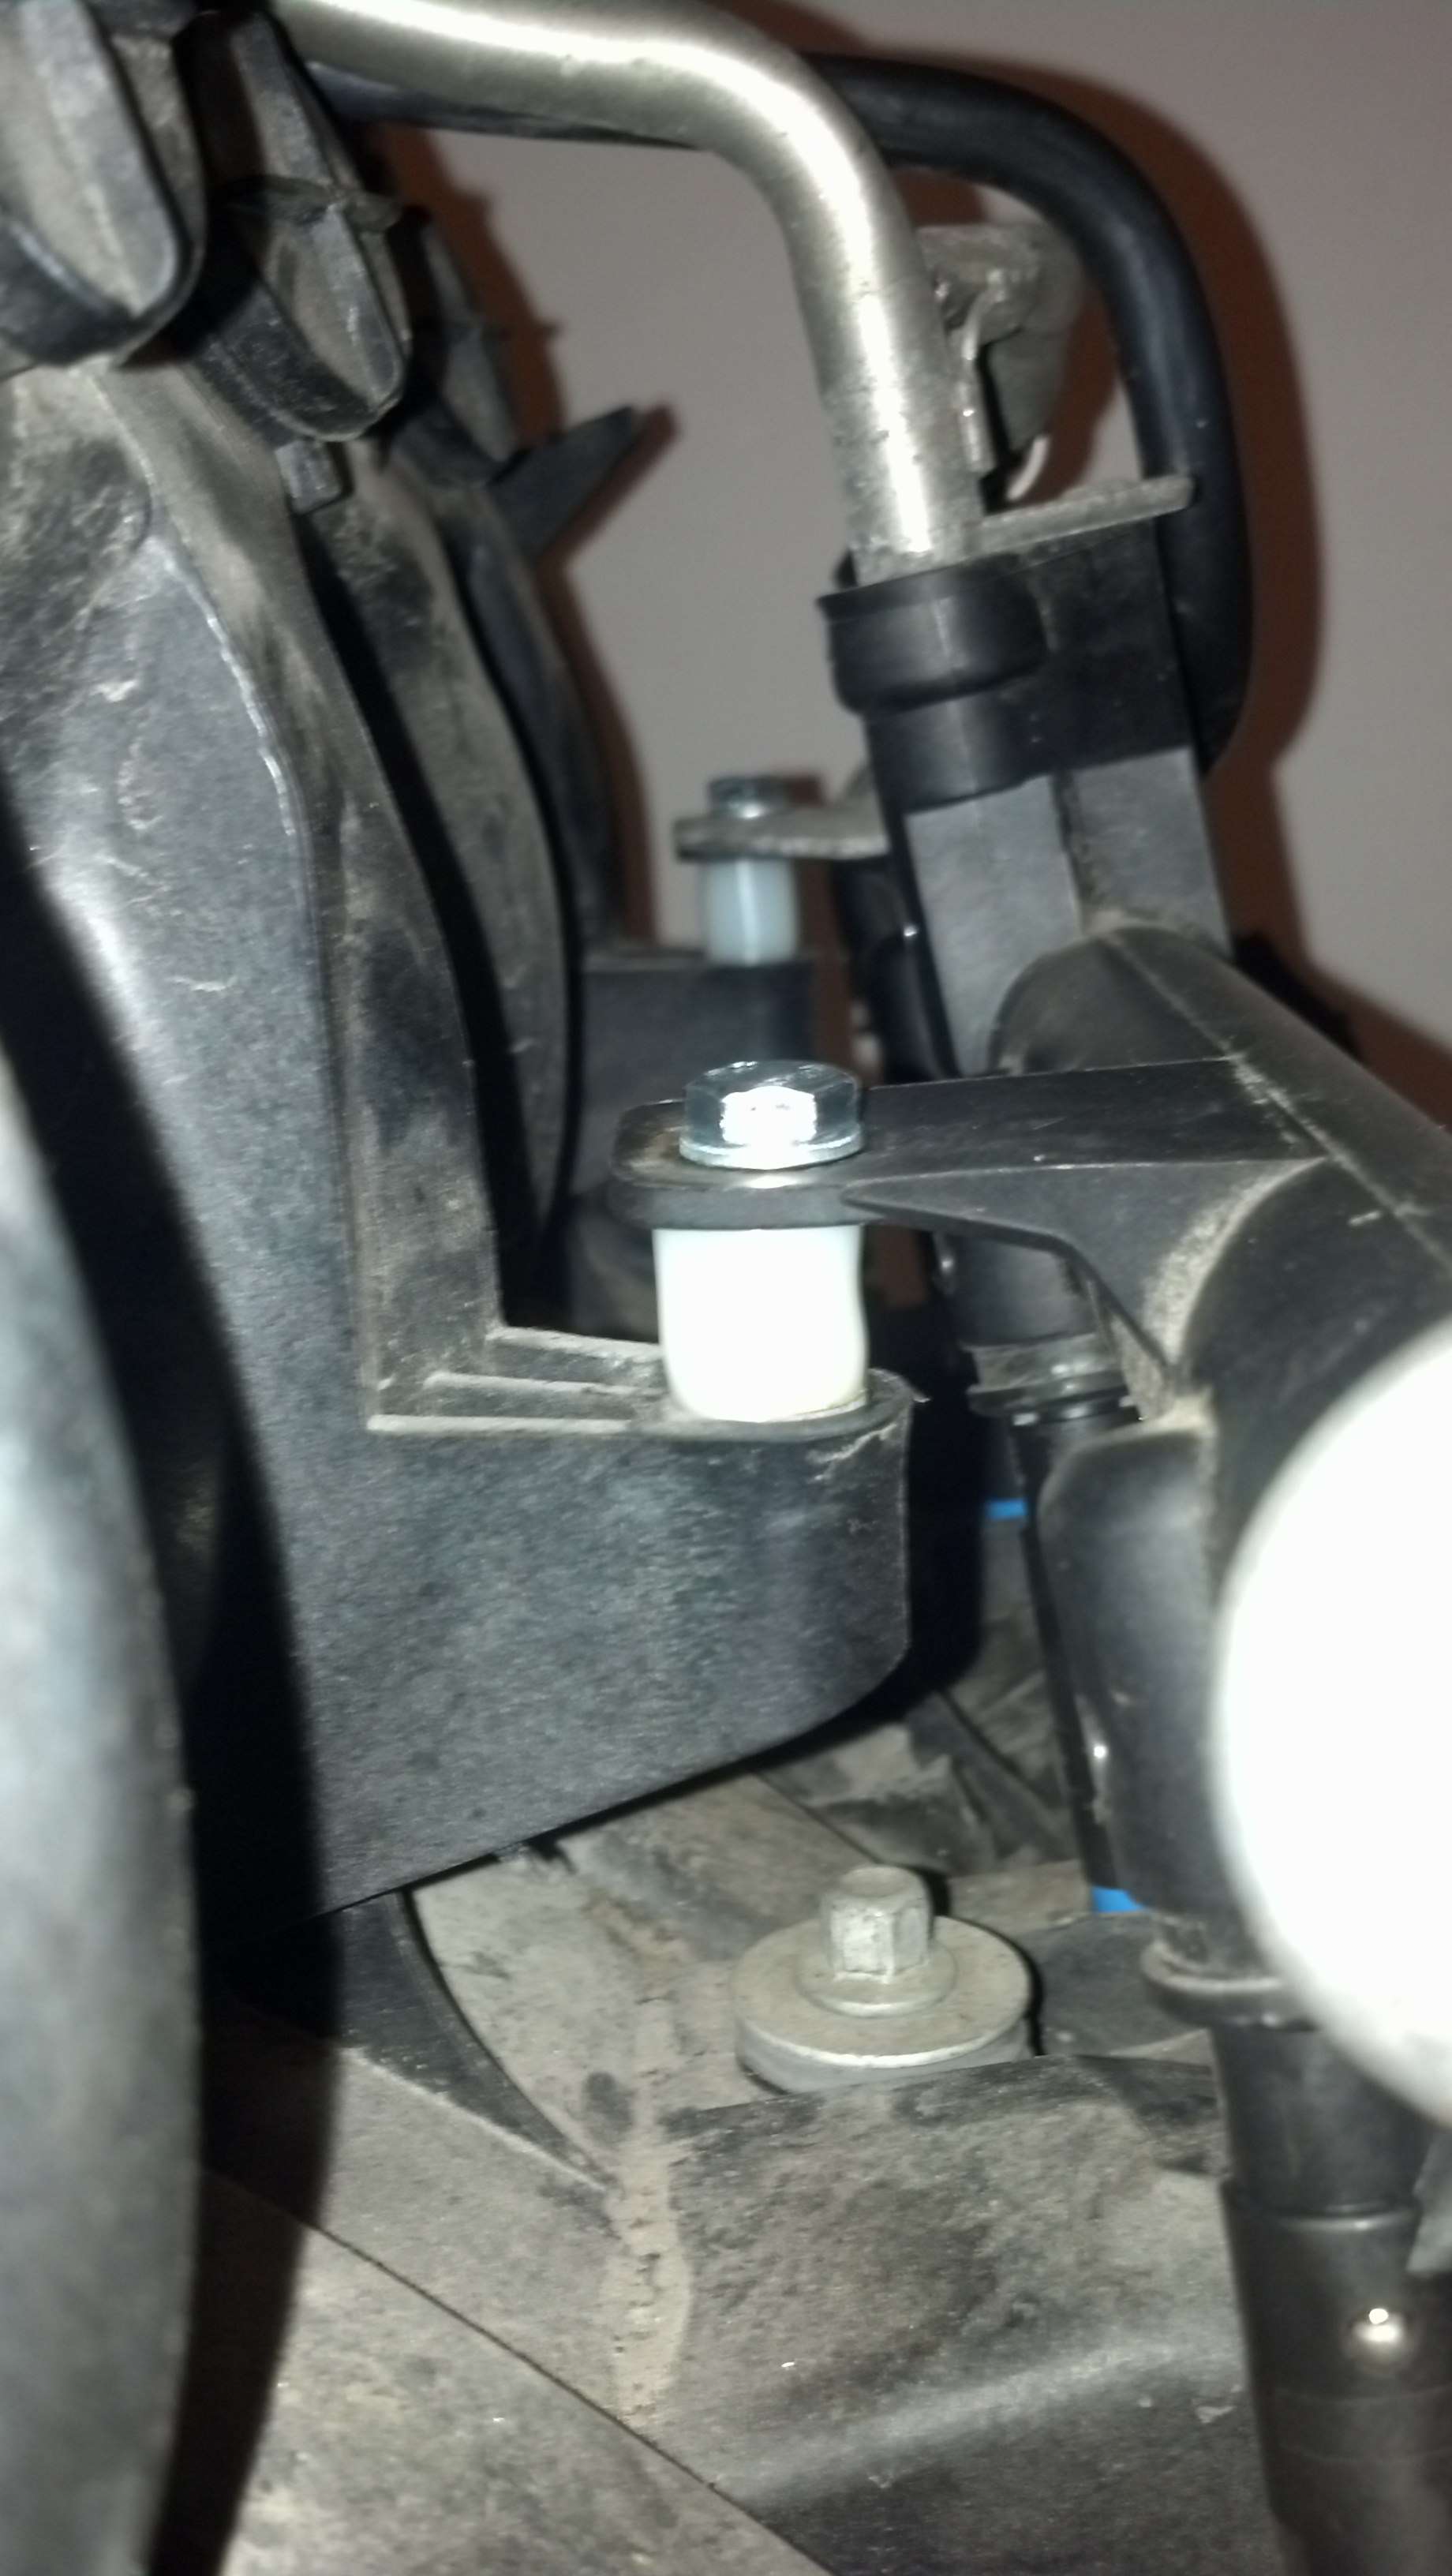
Other than that, the only thing I'm having concerns about is the 4L80 crossmember. 90% of what I've read say that there isn't an aftermarket one for cheaper than $300 that fits without modification.
04-03-2014, 01:56 PM
#17
looking good-I used the Tanks Inc FI tank in my chevelle, and got their GPA-6 pump-so far it seems to keep up with around 15 Lbs boost-with the small (1/4 pipe?) fittings in the pump I didn't think it could move enough fuel, but I guess with pressure you can overcome a lot
The tank wasn't really meant for the GPA pump, but they came out with a thicker gasket to raise the pump up-been in a year now, so far so good
If I fill it up expansion pushes fuel out the vent, thinking about making an overflow tank, where it can drain back in the tank as it goes down
I just modified my stock X member for the 80E, but I think the chevelles have a little more room underneath-I know Summit sells a X mem, has more clearance for exhaust, but like you said, pricy
keep the picks coming
04-04-2014, 08:25 AM
#19
To clean out the gas tank before CUTTING even, I just poured a generous amount of dawn soap in it, stuck the garden hose in it and filled it up with water and let it over-flow for 15 minutes. While it was still full, I roughed out where the hole went using a 4 1/2" cut-off disk.
Then, I drained the tank, inspected it seeing as there was a nice big viewing port.
I let it sit in the sun and bake and I checked for the scent of gas.
Not the first time ive welded a tank and it works good.
I always take my propane torch and waft it at the tank prior to welding...the tank wont explode after you wash it out but there might be trace vapors that will give it a small "pop".
The one time I didnt waft the torch at the filler neck, I sparked a weld and the small lil "pop" from igniting the vapors came out the filler neck and burned the arm hair off my fore-arm.
Or, if you want to be really careful, you can tin-foil off most of the openings and purge the tank with Argon welding gas.
04-04-2014, 11:40 AM
#20
Restricted User
Thread Starter
Shipping would probably kill me to return my tank to tanks inc. I'll sell it locally. Did you use the weld in plate from tanks inc or did you make your own? Right now it seems like my best option to use the original tank since the hole where the stock sending unit goes is trashed anyway. I already have the PA module and the 5 bolt sending unit. If I used the new tank I would have my stock sending unit and block off the tubes and still drill a hole for the PA module.