
**Stock Adjustable Master Cylinder Writeup**
 05-06-2005, 01:41 PM
#1
i made a writeup a few years back on how to make the stock master cylinder adjustable. i needed to find it today and had a ton of trouble doing so, so now that i found it i thought i would repost in case anyone else was interested.
How To Make The Stock Master Cylinder Adjustable
By Ryan Prentiss (Tally TransAm)
Parts Needed:
3/8”x16 Jam Nut
3/8”x16x1.75” Coupling Nut
3/8”x16 Die
Dremel and Cutoff Wheel
Disassembly of Stock Master:

This is what it looks like when you take the rubber boot off the master. See the little metal ring holding the white plastic piece in, that holds everything together, you need to remove it. Take you time and be patient, it’s a pain. I found using a very small flathead screwdriver was the easiest method.

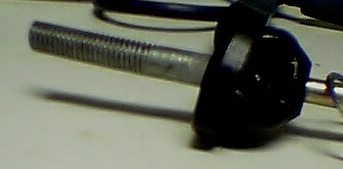
This is what it looks like when you start to pull the inside of the master out.

This is what will come out of the master cylinder. See the cone shaped object inserted into the spring on the left; that is the internal stop.
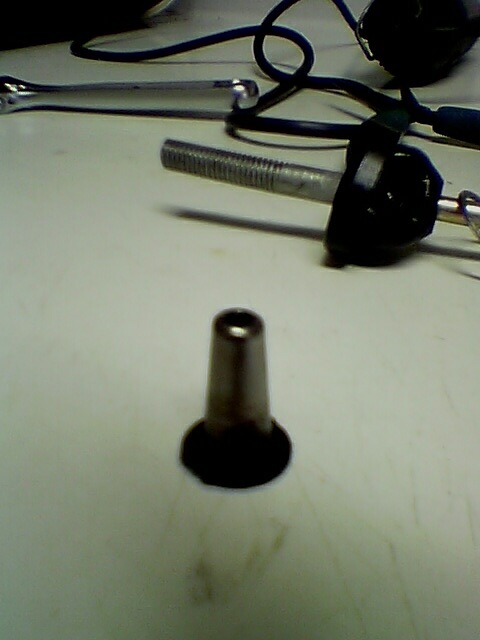
This is another view of the internal stop.

Using a dremel, cut the internal stop in half, this will allow for more pedal movement when adjustments are made.
This is all you do to the inside, then just put it back together. Start by putting the stop back in the spring, than put a small amount of brake fluid on the rubber seals on the piston and slowly guide the piston assembly back into the master, do not force anything because if you damage the seals, you most likely have to buy a new master. Wiggling the piston in small circles as the seals enter the master makes it easier. Getting that metal retaining ring back on is a HUGE pain. I had to slightly unwrap it and thread it in piece by piece using a very small flathead screwdriver, you’ll see what I’m talking about when you take it apart. Just be patient.
Making the Rod Adjustable:
Using a dremel, cut the rod by the eye that goes on the clutch pedal so there is about .25-.4 inches of ROUND part on the eye side. (sorry, no picture)
Using a 3/8” x 16 die, thread the round part on the eye piece until you can’t thread it anymore because it starts to become square. Make sure you use grease or cutting oil to lube the rod and catch the shavings. You should be able to get about 3-4 full good threads on it. Thread this “eye” piece into the coupling nut tightly so it won’t move or come out.
Now moving to the part of the rod that goes into the master, cut and additional .3-.5” inches off the rod to allow for shorting of the rod if needed.
Then using the same 3/8”x16 die, thread as far on the rod of the master end as you can. Again make sure to use plenty of grease or cutting oil.

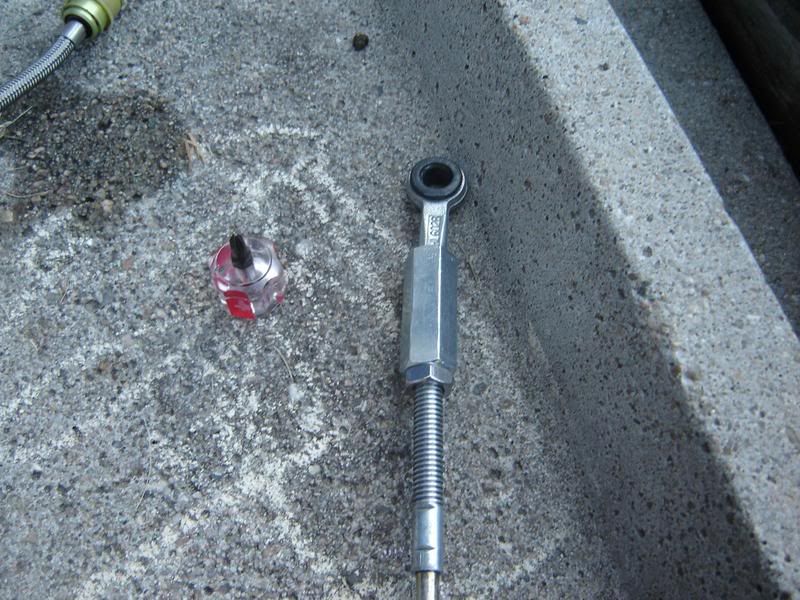
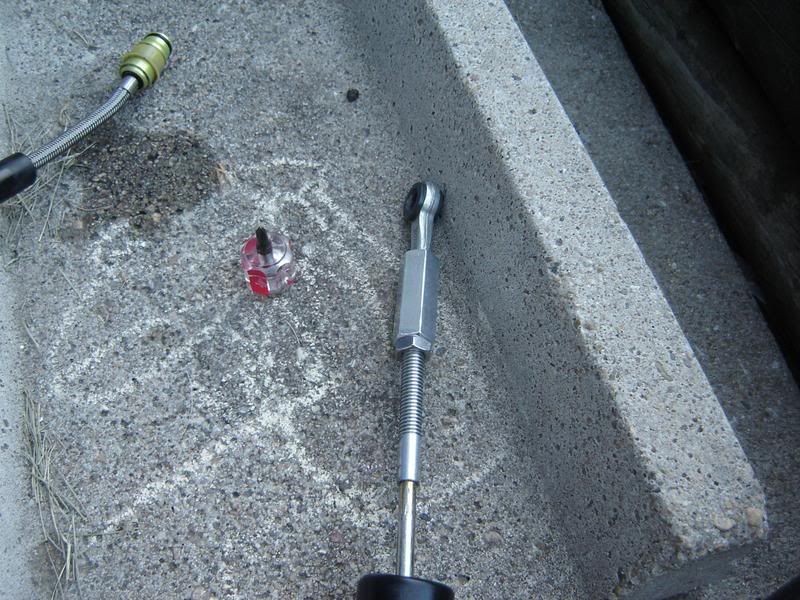
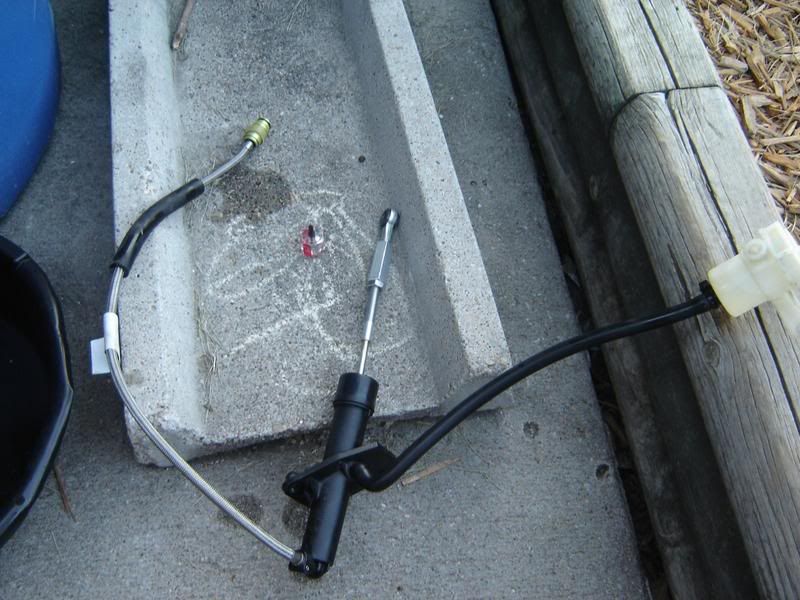
Thread the 3/8”x16 jam nut onto the rod, and than thread the coupling nut + “eye” piece assembly on as well. Finished!
This allows for lengthening and shortening of the master cylinder rod by approximately .5” in the shorter direction and .75” in the longer direction simply by turning the coupling nut + “eye” piece assembly as a single piece, than butting the jam nut up against the coupling nut to avoid unwanted movement.
what do you think, any tips or anything i should change?
ryan
EDIT/additions ;
Also another link to an adjustable master modification;
http://specializedstainless.com/29901/34701.html
ADJUSTING A MASTER CYLINDER RECOMENDATIONS;
It's a common misconception that you should put the pedal release point to where you want it.
What you should do is drive the car get the clutch fluid warm then adjust it.
The point is to get the freeplay out of the pedal & to the minimum.
You have to have a little freeplay so as to not put extra pressure on the slave/clutch when driving hot etc.
Get it to where there is about 1/8- 1/4 " a free play hot before you can feel it compressing fluid. It helps to adjust this & feel the pedal with your hand.
You can more easily differentiate the freeplay from the fluid compression point.
I stress this is a hot only adjustment.
This BTW is basically how all the OE MFG's out there with adjustable hydraulic clutch systems spec their adjustments as well.
this will optimize the master cylinder throw once you depress the pedal it is doing work by moving fluid to actuate the slave cylinder.
That way the minmum amount of the master cylinder's stroke is wasted & the clutch releases quick as your set up will allow.
Wrencher-
How To Make The Stock Master Cylinder Adjustable
By Ryan Prentiss (Tally TransAm)
Parts Needed:
3/8”x16 Jam Nut
3/8”x16x1.75” Coupling Nut
3/8”x16 Die
Dremel and Cutoff Wheel
Disassembly of Stock Master:
This is what it looks like when you take the rubber boot off the master. See the little metal ring holding the white plastic piece in, that holds everything together, you need to remove it. Take you time and be patient, it’s a pain. I found using a very small flathead screwdriver was the easiest method.
This is what it looks like when you start to pull the inside of the master out.
This is what will come out of the master cylinder. See the cone shaped object inserted into the spring on the left; that is the internal stop.
This is another view of the internal stop.
Using a dremel, cut the internal stop in half, this will allow for more pedal movement when adjustments are made.
This is all you do to the inside, then just put it back together. Start by putting the stop back in the spring, than put a small amount of brake fluid on the rubber seals on the piston and slowly guide the piston assembly back into the master, do not force anything because if you damage the seals, you most likely have to buy a new master. Wiggling the piston in small circles as the seals enter the master makes it easier. Getting that metal retaining ring back on is a HUGE pain. I had to slightly unwrap it and thread it in piece by piece using a very small flathead screwdriver, you’ll see what I’m talking about when you take it apart. Just be patient.
Making the Rod Adjustable:
Using a dremel, cut the rod by the eye that goes on the clutch pedal so there is about .25-.4 inches of ROUND part on the eye side. (sorry, no picture)
Using a 3/8” x 16 die, thread the round part on the eye piece until you can’t thread it anymore because it starts to become square. Make sure you use grease or cutting oil to lube the rod and catch the shavings. You should be able to get about 3-4 full good threads on it. Thread this “eye” piece into the coupling nut tightly so it won’t move or come out.
Now moving to the part of the rod that goes into the master, cut and additional .3-.5” inches off the rod to allow for shorting of the rod if needed.
Then using the same 3/8”x16 die, thread as far on the rod of the master end as you can. Again make sure to use plenty of grease or cutting oil.
Thread the 3/8”x16 jam nut onto the rod, and than thread the coupling nut + “eye” piece assembly on as well. Finished!
This allows for lengthening and shortening of the master cylinder rod by approximately .5” in the shorter direction and .75” in the longer direction simply by turning the coupling nut + “eye” piece assembly as a single piece, than butting the jam nut up against the coupling nut to avoid unwanted movement.
what do you think, any tips or anything i should change?
ryan
EDIT/additions ;
Also another link to an adjustable master modification;
http://specializedstainless.com/29901/34701.html
ADJUSTING A MASTER CYLINDER RECOMENDATIONS;
It's a common misconception that you should put the pedal release point to where you want it.
What you should do is drive the car get the clutch fluid warm then adjust it.
The point is to get the freeplay out of the pedal & to the minimum.
You have to have a little freeplay so as to not put extra pressure on the slave/clutch when driving hot etc.
Get it to where there is about 1/8- 1/4 " a free play hot before you can feel it compressing fluid. It helps to adjust this & feel the pedal with your hand.
You can more easily differentiate the freeplay from the fluid compression point.
I stress this is a hot only adjustment.
This BTW is basically how all the OE MFG's out there with adjustable hydraulic clutch systems spec their adjustments as well.
this will optimize the master cylinder throw once you depress the pedal it is doing work by moving fluid to actuate the slave cylinder.
That way the minmum amount of the master cylinder's stroke is wasted & the clutch releases quick as your set up will allow.
Wrencher-
Last edited by Tally TransAm; 06-25-2017 at 07:54 PM.

 02-11-2006, 03:36 AM
#5
TECH Senior Member
iTrader: (18)
Join Date: Jun 2002
Location: NW Houston, TX
Posts: 10,036
Likes: 0
Received 0 Likes
on
0 Posts

Originally Posted by Irocss85
looks good, but how bout a pic of it all together? what do you accomplish by adjusting the rod? how do you know where to adj. it to?
02-11-2006, 08:18 AM
#6
TECH Apprentice
iTrader: (168)
Join Date: Jul 2002
Location: Chicago Far Far South Subs
Posts: 359
Likes: 0
Received 0 Likes
on
0 Posts

Once again, thanks for the write up. I followed it and everything went smooth. 
When it came to sliding the piston back in I used a thin piece of plastic wraped around it to slide it in the bore so I didnt damage the seals and it worked great.
Dave
When it came to sliding the piston back in I used a thin piece of plastic wraped around it to slide it in the bore so I didnt damage the seals and it worked great.
Dave


Trending Topics

 07-11-2006, 02:52 PM
#10
TECH Resident
Join Date: Apr 2003
Location: Tulsa, Ok
Posts: 791
Likes: 0
Received 0 Likes
on
0 Posts
Originally Posted by Phlip00WS6
So is it possible to rebuild the master with new seals while your in there?
i ended up buying a use MC and canabalizing that for the seals i needed. cost me like $30 or $40 for a seal
 07-31-2006, 08:37 PM
#11
Launching!

Join Date: Jul 2005
Location: Bay Area CA
Posts: 278
Likes: 0
Received 0 Likes
on
0 Posts
Alright, differant question for this thread. I put everything back together and it seemed like the blue rod slid in way too easily into the housing. Sure enough, it is leaking out the top where the white platic piece is. However, looking at the pics it seems like there may be a seal on the top hat that you are supposed to cut, but the picture is kind of vague.
Unfortunently, my MS pulled a jack in the box move when I got that ring out so I don't know if there was a seal there to begin with. Anyone remember, or is there just the two seals in the middle of the rod?
Unfortunently, my MS pulled a jack in the box move when I got that ring out so I don't know if there was a seal there to begin with. Anyone remember, or is there just the two seals in the middle of the rod?
08-27-2006, 01:33 PM
#13
FormerVendor
iTrader: (15)

Join Date: Jun 2006
Location: Los Angeles, CA
Posts: 2,689
Likes: 0
Received 0 Likes
on
0 Posts
Has anyone else done this and have any pics of it put back together? And after you do this, is it basically the same as the McCleod adjustable mc but without the price tag??
08-27-2006, 05:42 PM
#14
TECH Addict
iTrader: (9)
Join Date: Apr 2002
Location: Texas, it's like your state, but better.
Posts: 2,085
Likes: 0
Received 0 Likes
on
0 Posts
well, yes and no. the stock master has a smaller bore than the mcloed unit. it wont moove near as much fluid as the aftermarket piece. as far as the seals go, i would try somewhere like martin fliud power in houston or some other hydraulic seal company. if they dont have it, they will probably be able to find them.
why dont you guys do the big line mod also? the fittings can be purchased from mcloed, and they allow the use of a much less restrictive 1/4" id braided line for no more pedal stick problems. that would make for a cheap reliable clutch system fix.
why dont you guys do the big line mod also? the fittings can be purchased from mcloed, and they allow the use of a much less restrictive 1/4" id braided line for no more pedal stick problems. that would make for a cheap reliable clutch system fix.
08-31-2006, 11:41 PM
#16
FormerVendor
iTrader: (15)
Join Date: Jun 2006
Location: Los Angeles, CA
Posts: 2,689
Likes: 0
Received 0 Likes
on
0 Posts
OH MY GOD! Getting that damn retaining ring back in was the most frustrating thing I've ever done 
Last edited by SPECIALIZED STAINLESS; 09-01-2006 at 12:03 AM.
09-08-2006, 11:35 AM
#17
On The Tree
iTrader: (8)
Join Date: Aug 2005
Location: Bellevue Ne
Posts: 107
Likes: 0
Received 0 Likes
on
0 Posts
I just followed the steps and had it all done in about an hour. Getting the retaining ring back on was pretty easy if you use two people. One to hold the plunger down and the other one starting the ring like you would put a key on a key chain. Seperate the ring and hold it in place with a small screw driver the then just spin it until it goes in. This is way better than spending 150-300 on an adjustable master. 
12-06-2006, 08:12 AM
#20
11 Second Club
iTrader: (3)

Join Date: Nov 2002
Location: berkeley ca
Posts: 732
Likes: 0
Received 0 Likes
on
0 Posts
any new mcleod twin people try this since this was last updated.....care to share your experience.
thank you in advance
Sincerley
Very frustrated mcleod twin owner
thank you in advance
Sincerley
Very frustrated mcleod twin owner