


T/A A4 Shifter Boot/Knob Mod Write-Up!

On The Tree
Joined: Feb 2007
Posts: 179
Likes: 0
From: Frisco, Texas
Copy & Paste Moderator


Joined: Apr 2002
Posts: 9,764
Likes: 208
From: Eastern MA
That company isn't a sponsor... but we do have a sponsor that carries it and for a lot less money.
This should be it:
http://www.ws6project.com/user_stor/...oducts_id=1860
This should be it:
http://www.ws6project.com/user_stor/...oducts_id=1860
They were custom made by CarMotorsports. I picked the logos I wanted, gave them a drawing of logo sizes and dimensional positions on the mat.
Set ran around $275 for all (4) - the rear mats are just plain though as you really can't see them anyway once in the car with the rollcage and so on...
Set ran around $275 for all (4) - the rear mats are just plain though as you really can't see them anyway once in the car with the rollcage and so on...
LS1 Tech Stories
The Best V8 Stories One Small Block at Time

Gas Monkey Built a 6-Wheel Ferrari Testarossa With a Corvette LT4 Engine
Verdad Gallardo
7 Most Reliable High-Performance Engines GM Has Ever Built
Verdad Gallardo
Amazing '71 Camaro Restomod Is Modern Muscle Car Under the Skin
Verdad Gallardo
6 Common C5 Corvette Failures and What's Involved In Repairing Them
Pouria Savadkouei
Retro Modern Bandit Pontiac Trans AM Comes With Burt Reynolds' Autograph
Verdad Gallardo
Top 10 Greatest Cadillac V Series Performance Models Ever, Ranked
Pouria Savadkouei
Top 10 Most Powerful Chevy Trucks Ever Made!

Hennessey's New Supercharged Silverado ZR2 Has 700 HP
Verdad Gallardo
Coachbuilt N2A Anteros Is an LS2-Powered C6 Corvette In Italian Clothes
Verdad Gallardo

I like to add to this awesome thread! BIG PROPS to 1QUIKWS6. I used your thread kind of as a guide. Since you went 3/4" on yours, I tested the waters on a 1" cut. It came out great! Here are plenty more pics to help those on modding your shifter by one full inch:
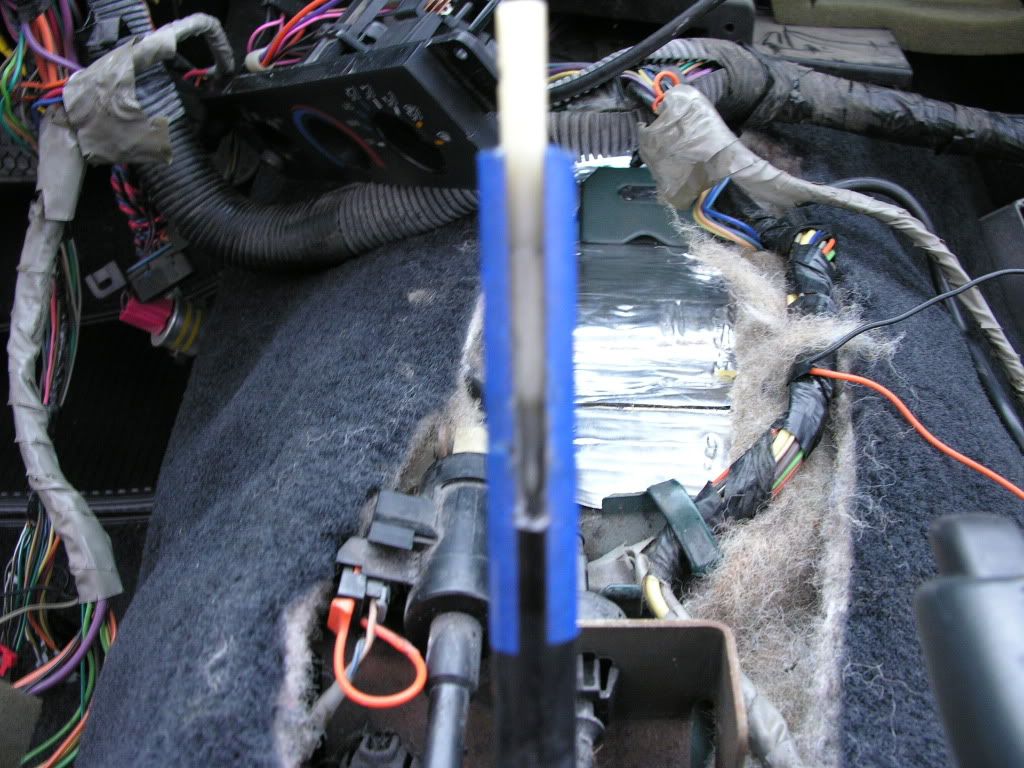
As you can see, here is the same factory shifter from my 1995 Bird with a 4L60E (same type of shifter that 1QUIKWS6 also modded).
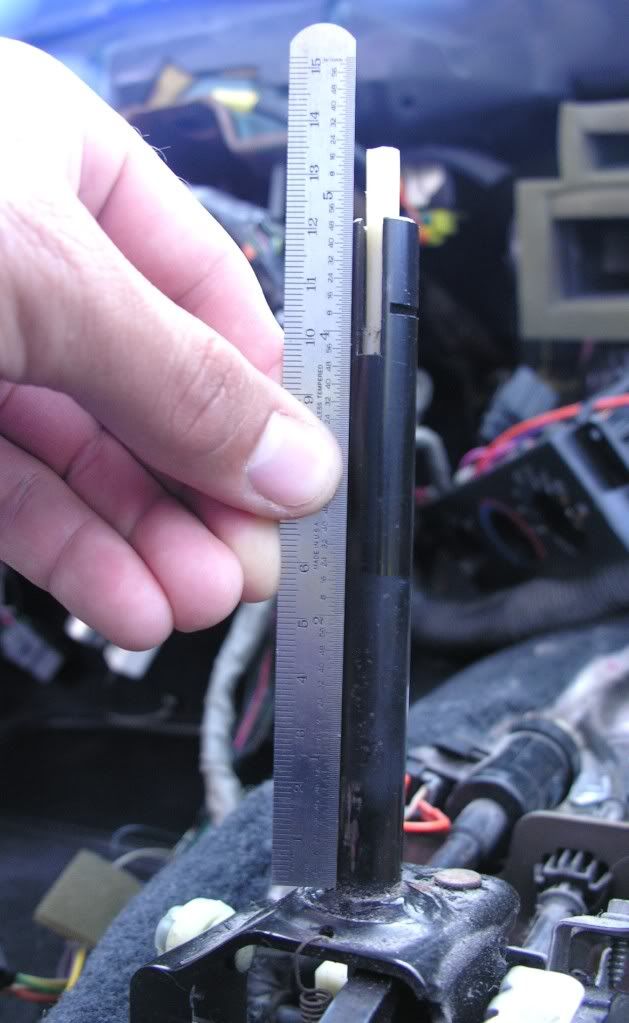
I followed 1QUIKWS6's instructions and when he means BE CAREFUL not to cut that little white plastic shifter plunger, you better believe it! This is a delicate procedure for sure. First thing I did was mask off a line where I was going to make the 1" cuts downward. I did this for the front side AND rear of the shifter. I used the recommended carbide cutting wheel on my rotary tool. It took 2+ hours but that's only because you have to be VERY careful when making your cuts. I measured down 1" and made a little cut mark:
FACTORY (no cutting yet)
Now here comes the fun part.. Be patient and it will pay off. I simply used the tape as the edge of my "cut line". Here, you can see where I measured off 1" and made the necessary cuts:
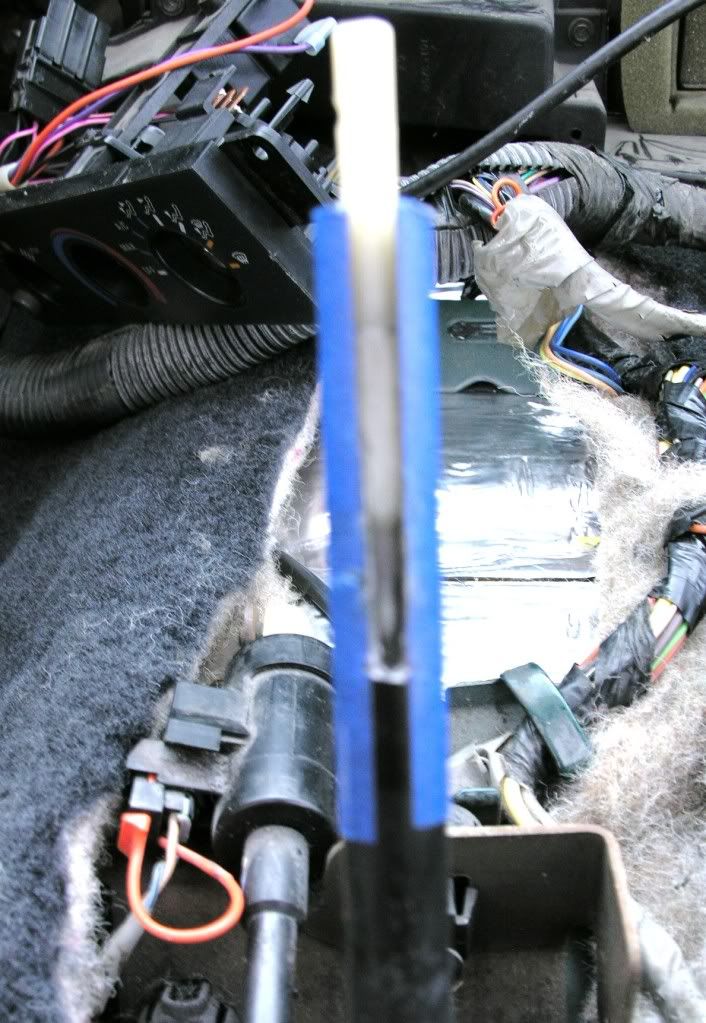
I repeated the process on the part of the shifter that faces the dash (thank goodness my dash and seats were out). It made it a little easier to maneuver around inside my car:
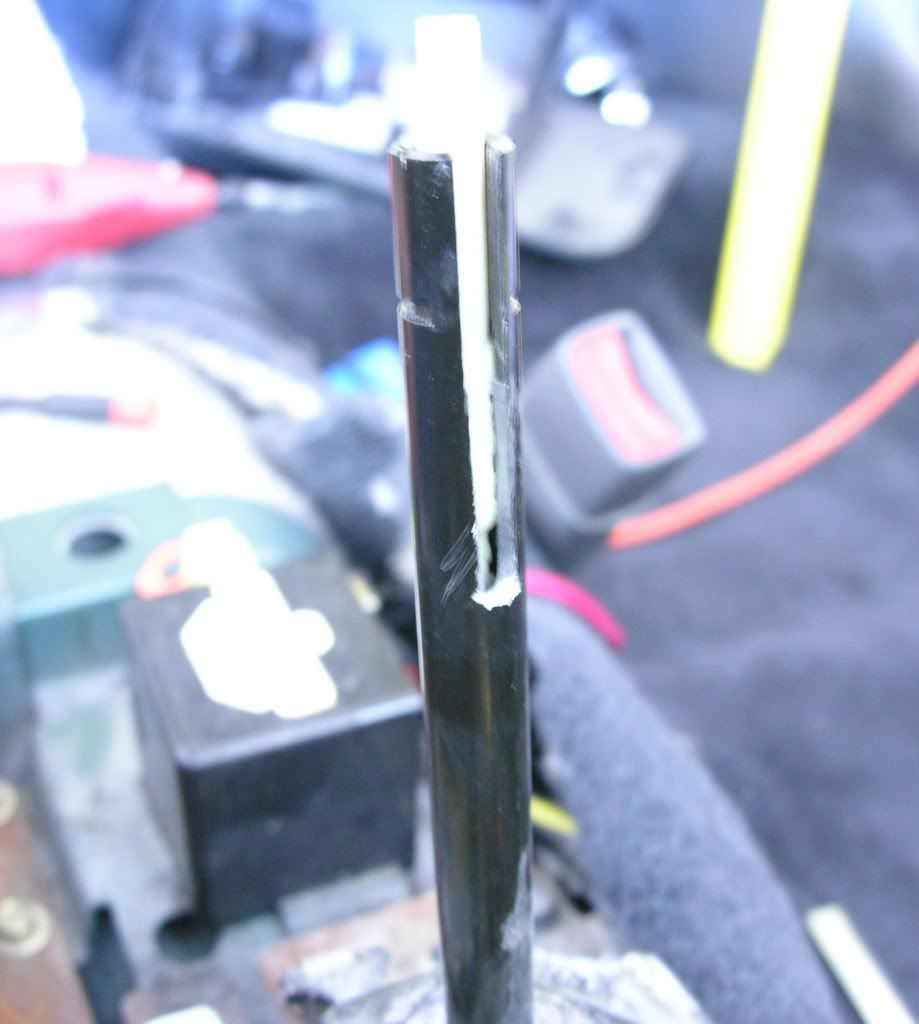
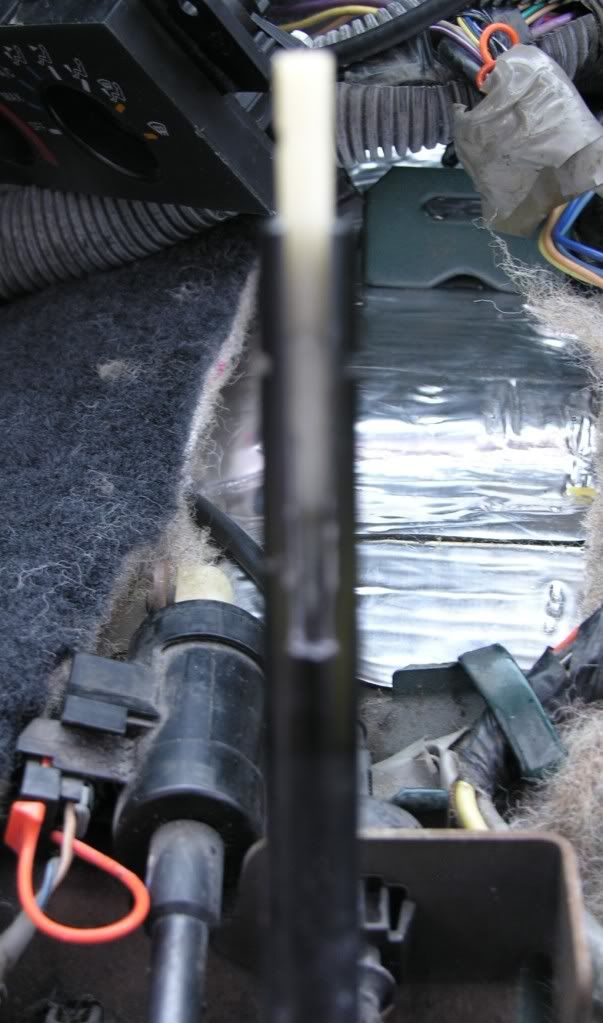
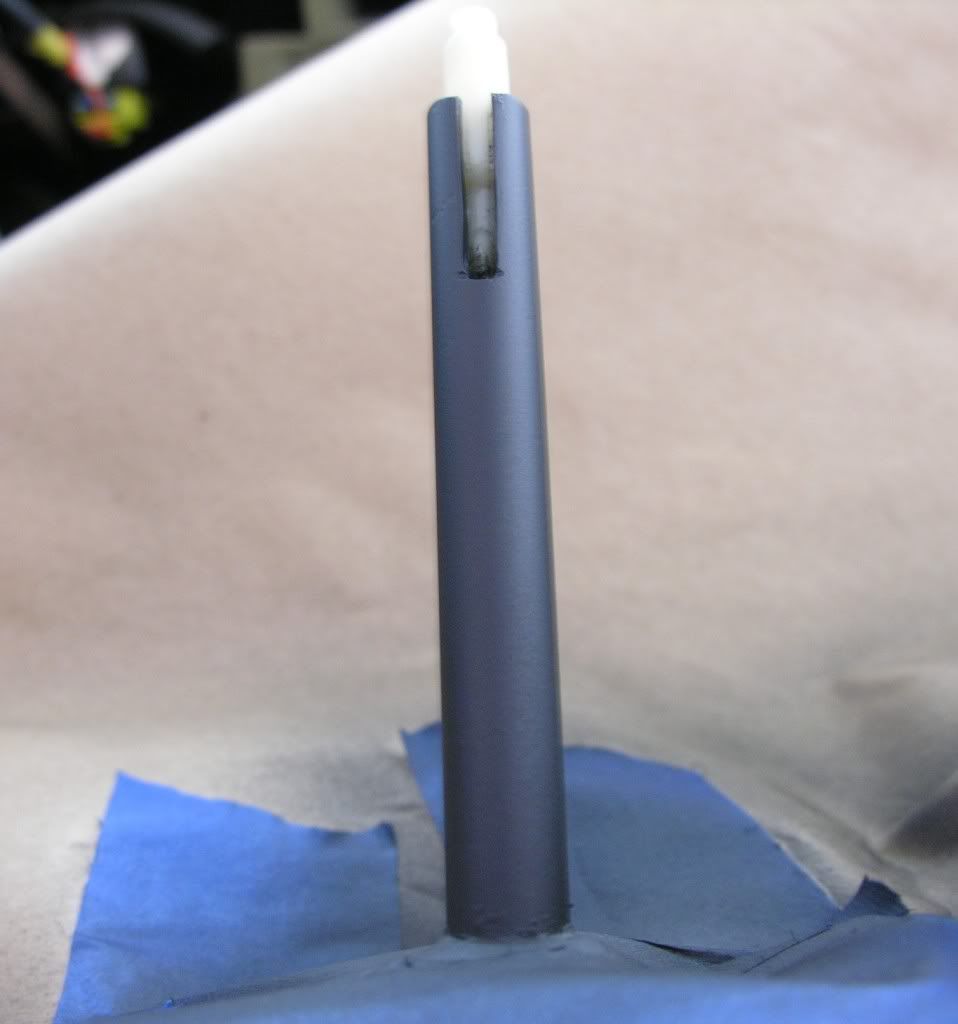
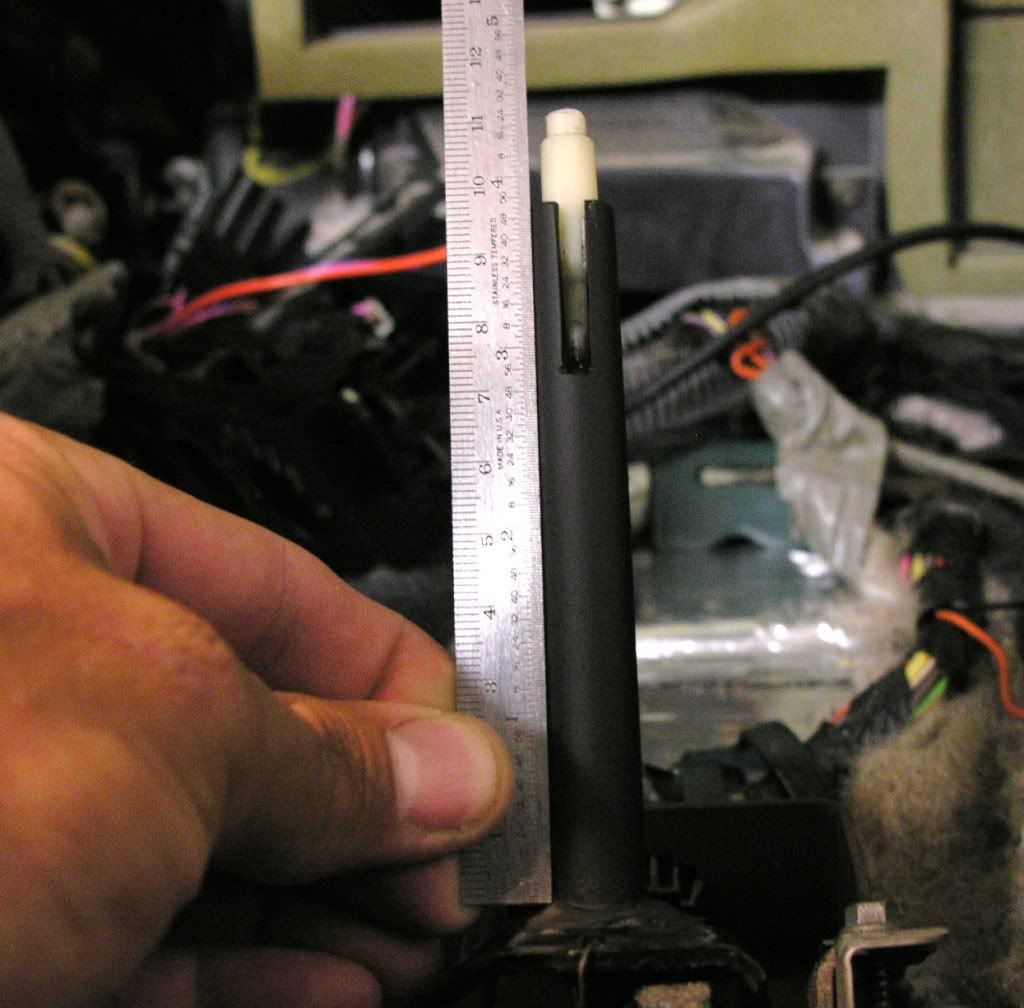
I then measured 1" down and cut all the way around the shifter. Here is what you are left with (a big white plastic plunger sticking out):

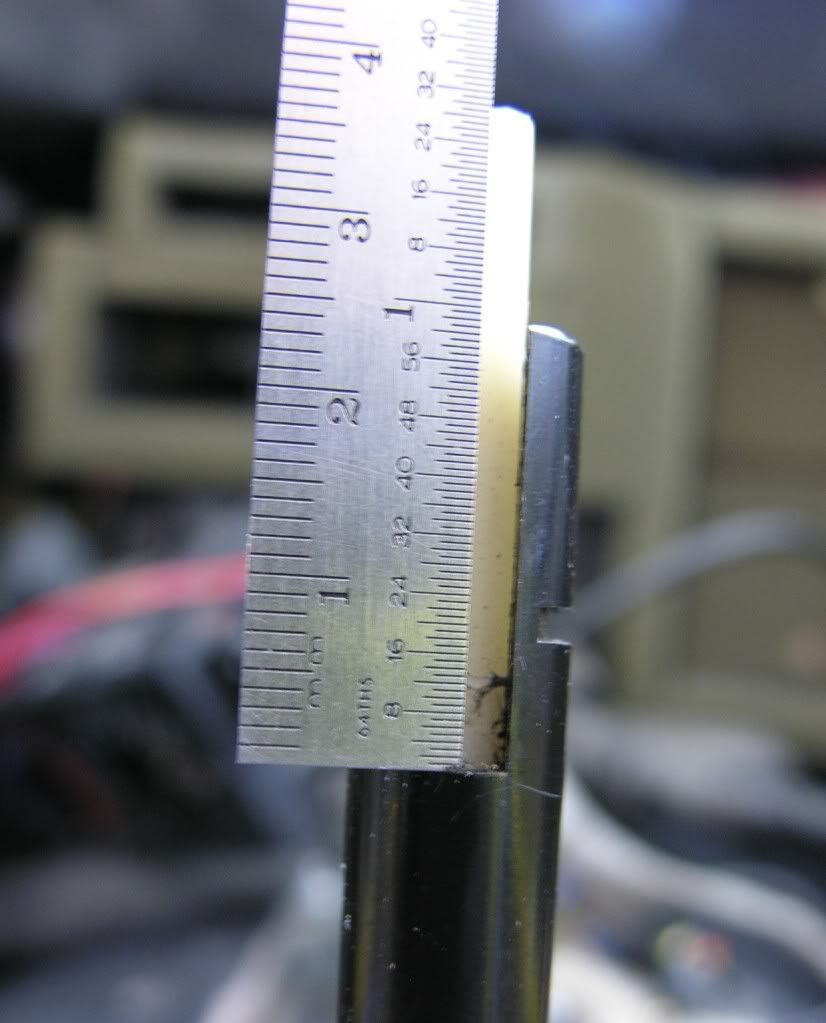
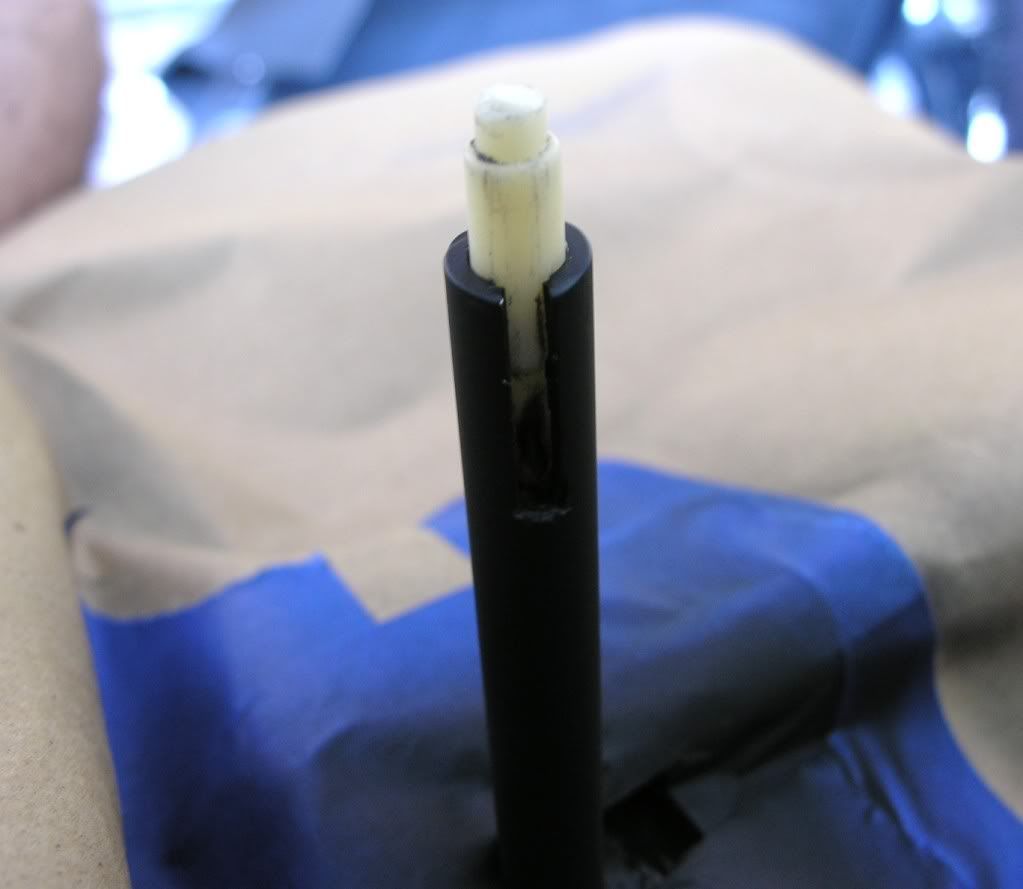
I measured the correct distance from the top of the metal (measuring upwards about 1.4 millimeters) and marked it to be cut. Again, I used simple tape to mark my cut line and used my rotary tool to chop it off to the correct length..
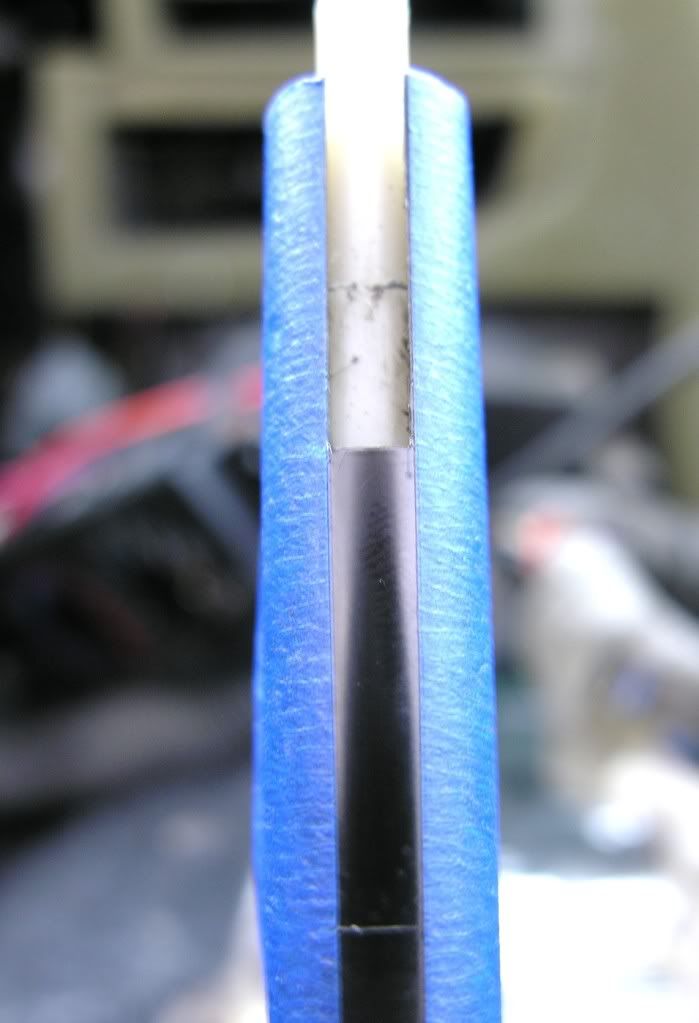
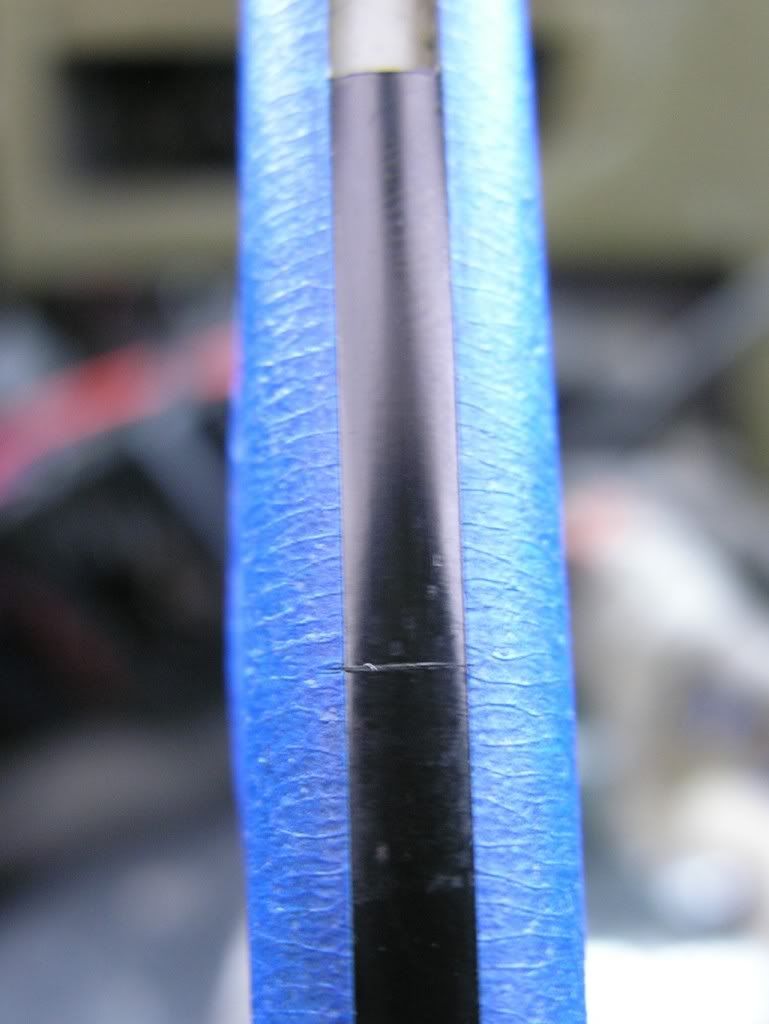
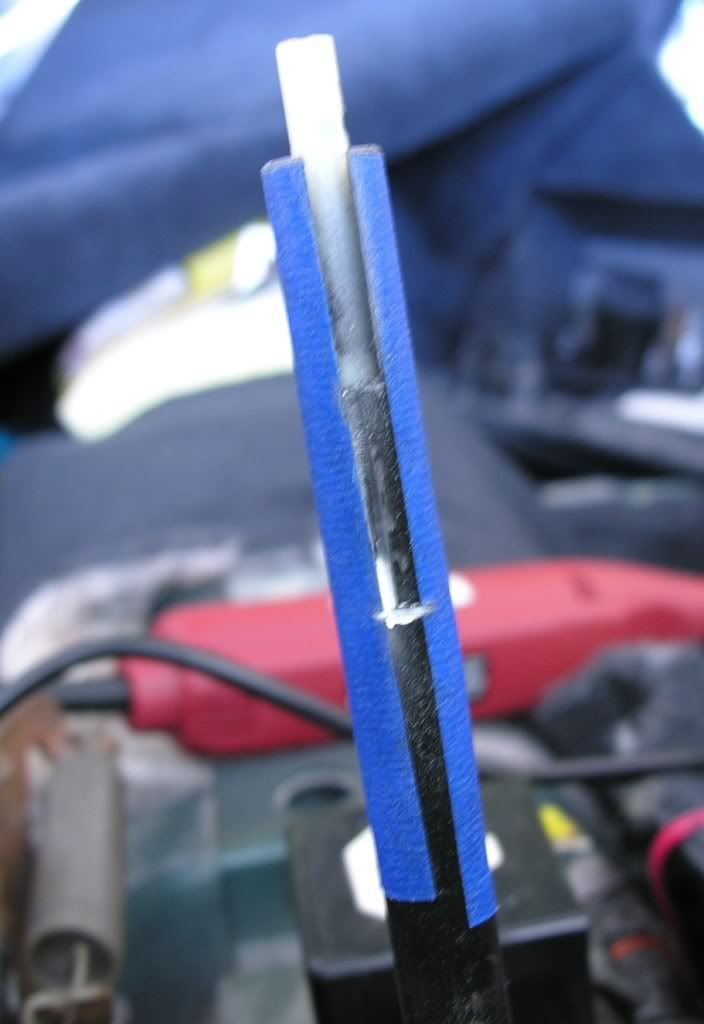
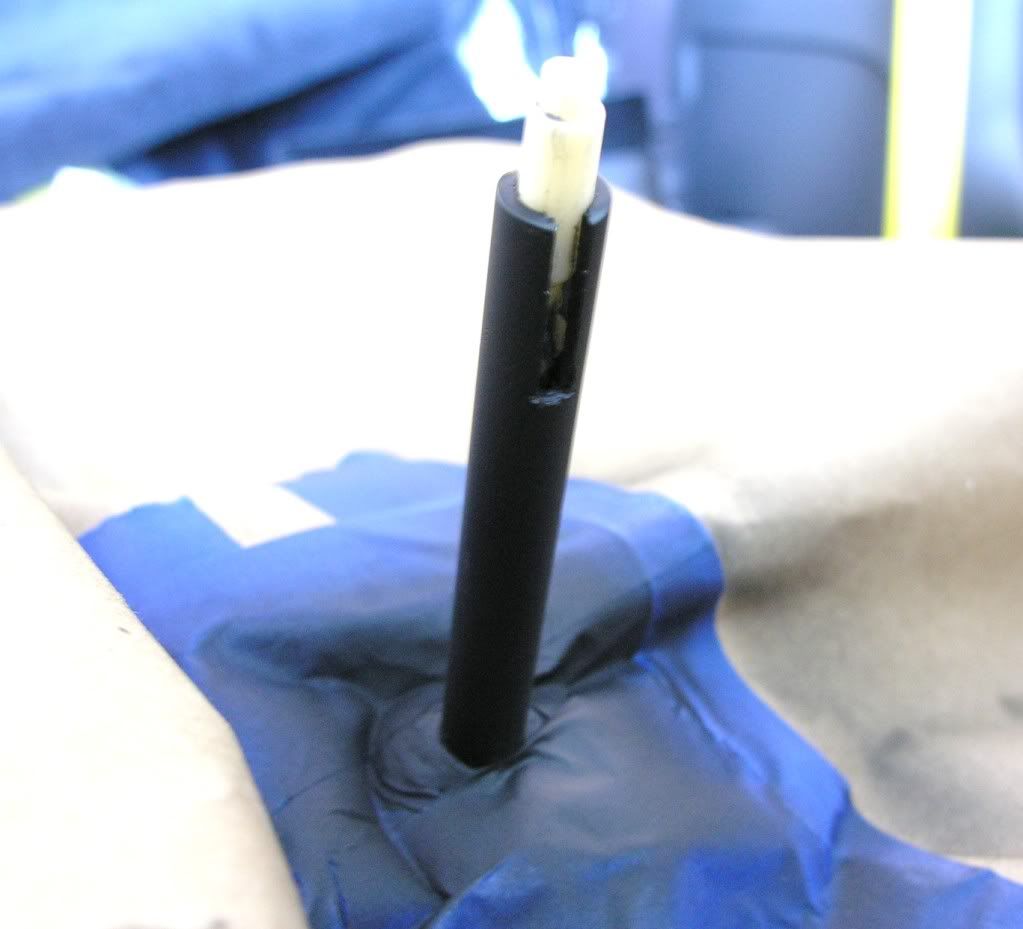
Here is the end result after all the cuts (unfinished at this point.. be sure to knock out any metal burrs or sharp edges with a small file):
It helps to use a decent sized flat head screw driver to hold the plastic plunger down while filing the top portion of the metal shifter:
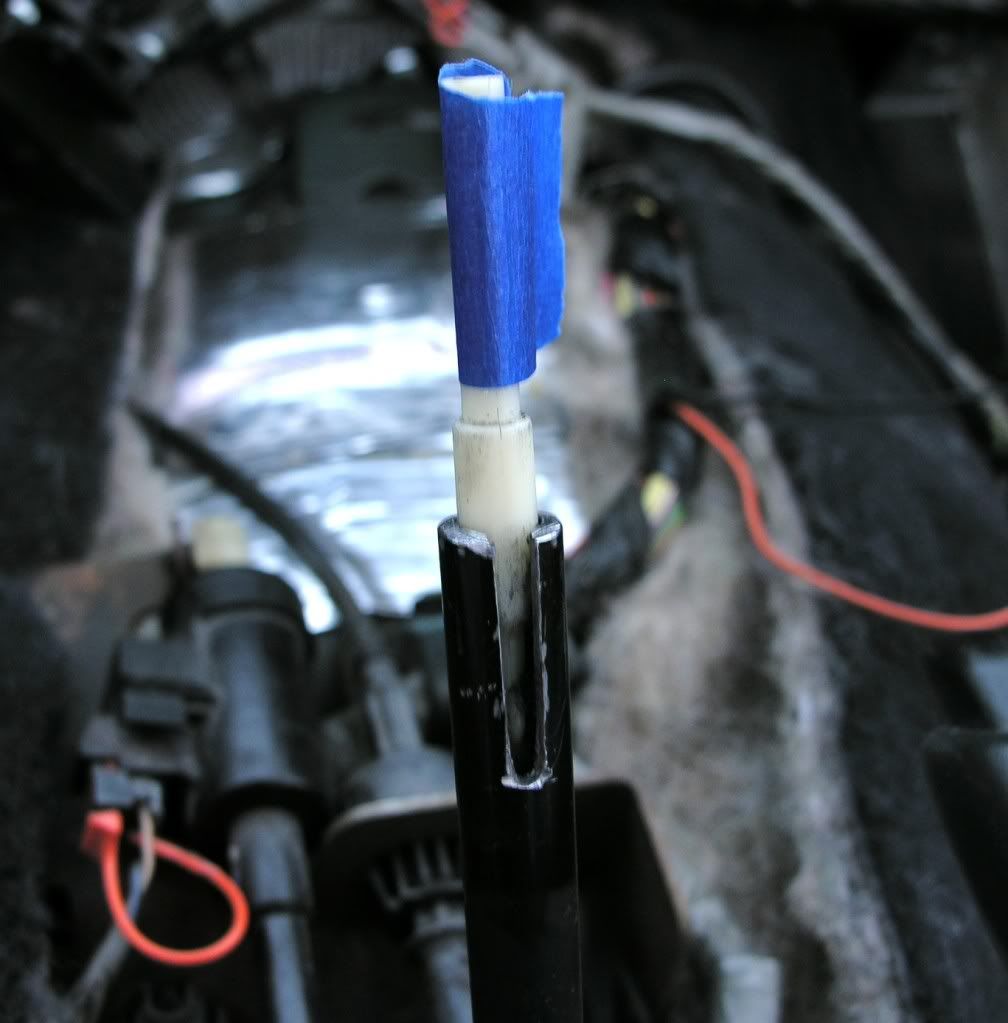
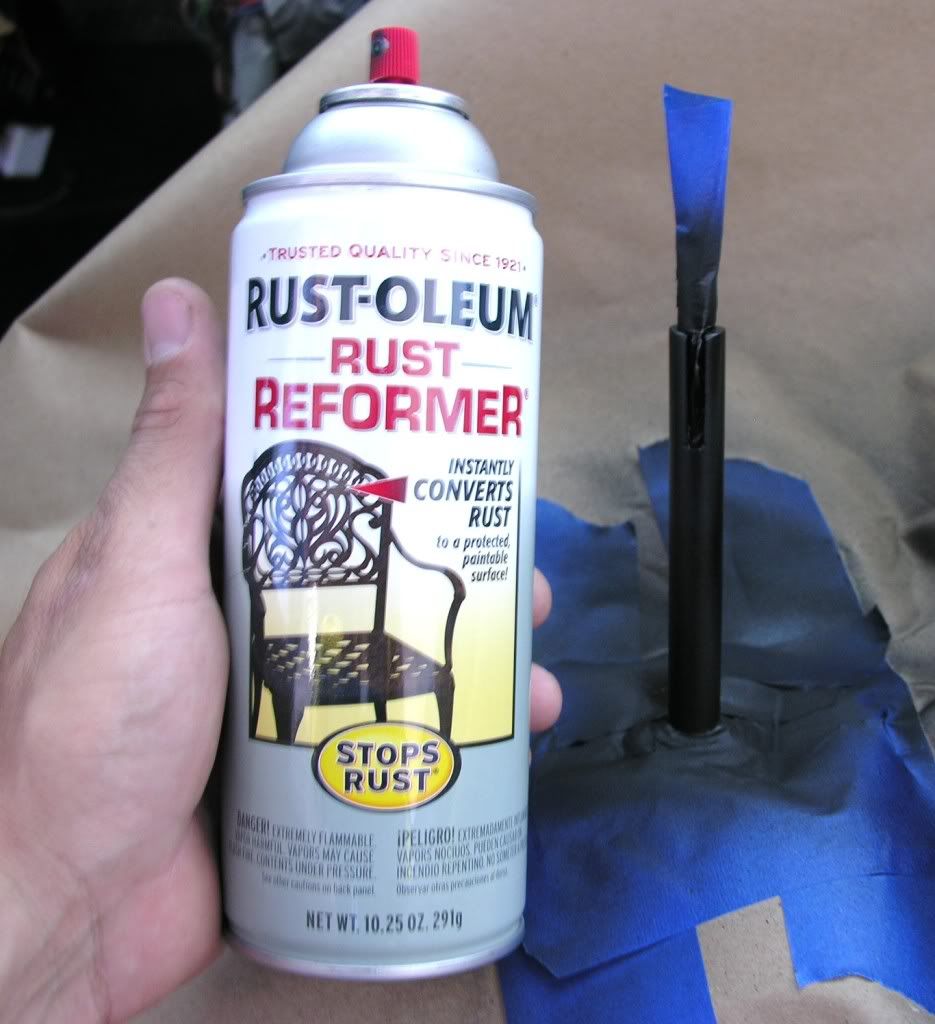
I masked off the area and taped up the white plastic plunger.. Any exposed bare metal is going to be painted to keep the rust monster from attacking:

So, here is the BEFORE:
And here is the AFTER (ONE full inch is the limit. The plastic plunger begins to taper down at 1 1/16". You will not be able to use your "set screws" after that):
As you can see, here is the same factory shifter from my 1995 Bird with a 4L60E (same type of shifter that 1QUIKWS6 also modded).
I followed 1QUIKWS6's instructions and when he means BE CAREFUL not to cut that little white plastic shifter plunger, you better believe it! This is a delicate procedure for sure. First thing I did was mask off a line where I was going to make the 1" cuts downward. I did this for the front side AND rear of the shifter. I used the recommended carbide cutting wheel on my rotary tool. It took 2+ hours but that's only because you have to be VERY careful when making your cuts. I measured down 1" and made a little cut mark:
FACTORY (no cutting yet)
Now here comes the fun part.. Be patient and it will pay off. I simply used the tape as the edge of my "cut line". Here, you can see where I measured off 1" and made the necessary cuts:
I repeated the process on the part of the shifter that faces the dash (thank goodness my dash and seats were out). It made it a little easier to maneuver around inside my car:
I then measured 1" down and cut all the way around the shifter. Here is what you are left with (a big white plastic plunger sticking out):
I measured the correct distance from the top of the metal (measuring upwards about 1.4 millimeters) and marked it to be cut. Again, I used simple tape to mark my cut line and used my rotary tool to chop it off to the correct length..
Here is the end result after all the cuts (unfinished at this point.. be sure to knock out any metal burrs or sharp edges with a small file):
It helps to use a decent sized flat head screw driver to hold the plastic plunger down while filing the top portion of the metal shifter:
I masked off the area and taped up the white plastic plunger.. Any exposed bare metal is going to be painted to keep the rust monster from attacking:
So, here is the BEFORE:
And here is the AFTER (ONE full inch is the limit. The plastic plunger begins to taper down at 1 1/16". You will not be able to use your "set screws" after that):
Last edited by officermartinez; Jun 2, 2009 at 02:26 PM.

awesome! does the WS6 store adapter work for all shift *****? because it says it only works with a 2 inch with tail. But if you have a boot it doesnt matter and it works will all standard ***** for M6 fbody's correct?
Well, the **** that I purchased uses a standard 16mm x 1.5 threading / tapped hole. I would imagine that the WS6 store sells the same "standard" threaded ****. It's basically a universal type threading. Just make sure it has a 16mm x 1.5 tapped hole. I purchased my MBA type adapter from a sponsor here (After Thoughts Auto).


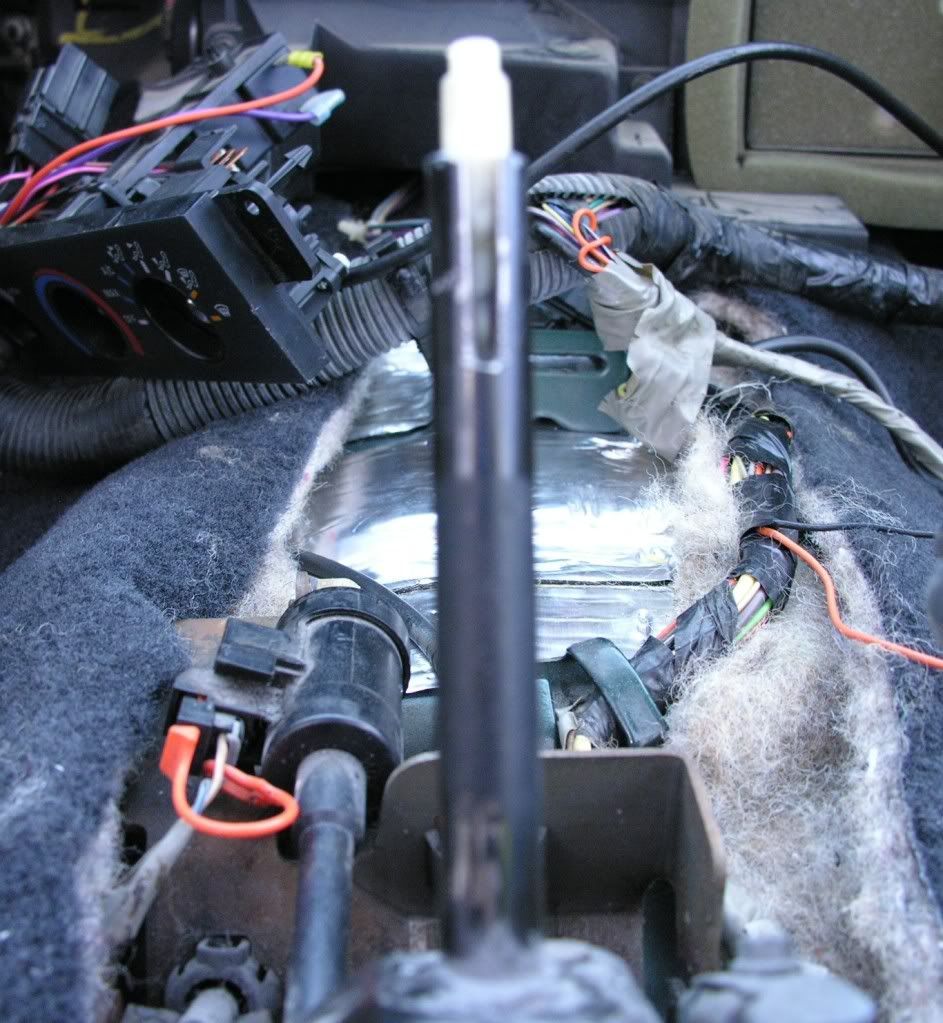
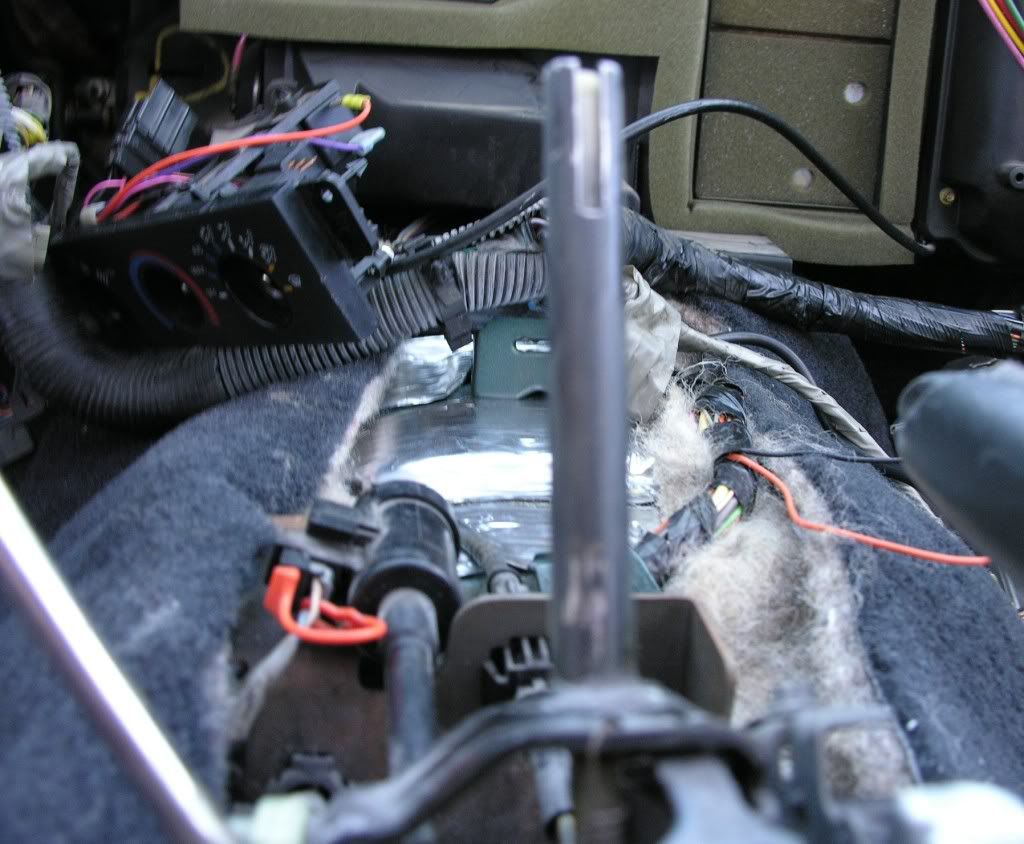
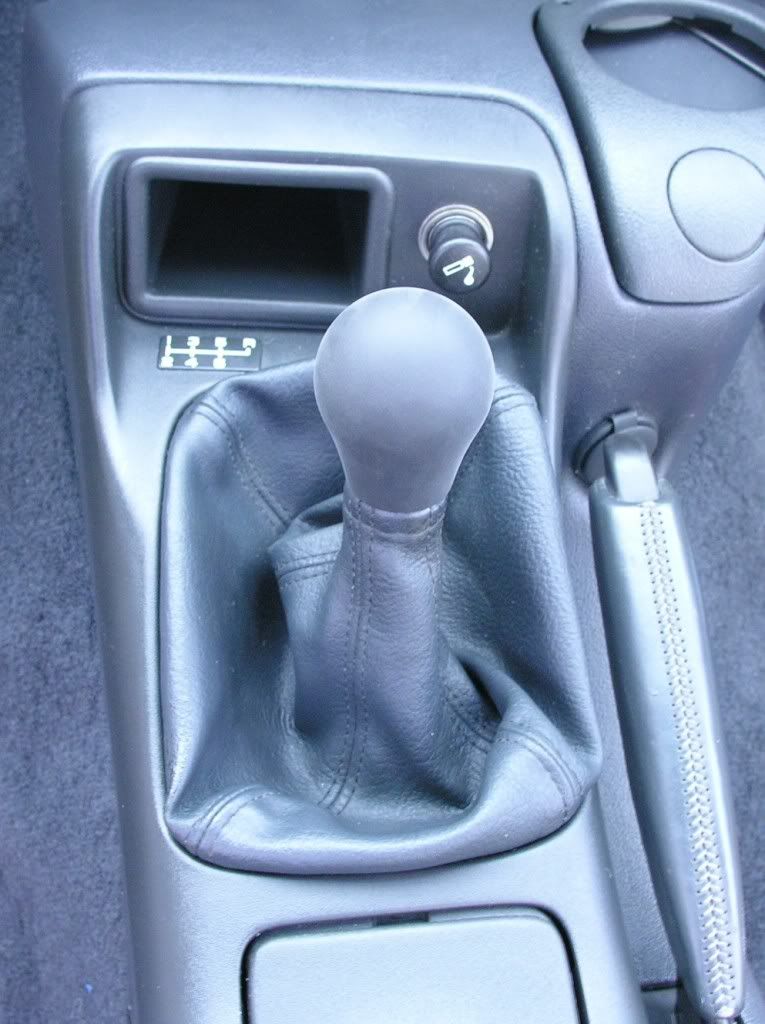
What I am about to post probably won't help you on your bare A4 console mounted shifter but if you had a boot or a M6 center console, here is a little twist on the install that will eliminate the play in your shifter when performing the MBA adapter mod.. Here is what you will need:
1. A small drill bit. I used a 1/16 drill bit.
2. Some small diameter wire. I used 16 gauge "soft" brass wire.
3. 3/4" outer diameter (5/8" inner diameter) rubber tubing.
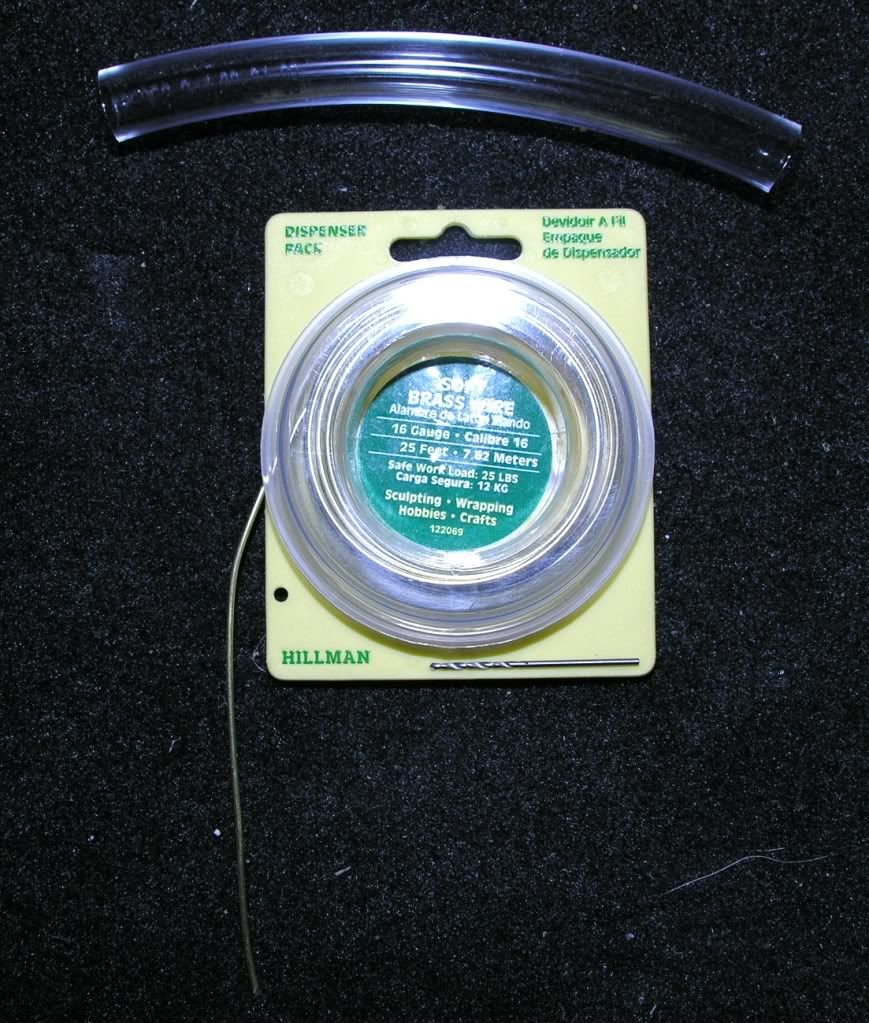
I purchased all of the above materials (minus the drill bit) at Lowes for less than 5 dollars.
What I did was completely remove those allen wrench / hex head screws off of the adapter. Next, safely drill a very small from one end of the open hex screw hole all the way through the inner plastic plunger where it comes out the other side on the opposite hex screw hole. Be careful as this is a more delicate type procedure. Now, you should be left will a perfect 1/16 hole drilled through the middle of your inner plastic plunger.
Simply cut off the desired length of your wire. I deburred the ends to elimate the "pinch marks" on the wire. With your MBA adapter in place, simply insert your wire through the open hole. Fold each end down. Now, take your 3/4" hose and cut it to your desired length and slip it down over your MBA adapter. This is going to be a tight fit. It took me about 10 minutes to get the tube to fit over the adapter (with the wire folded down). You no longer need those little set screws. The tubing also helps hold the shift boot in place! I did use some liquid wrench to "help" the tubing slip over the MBA adapter. Even then, it was STILL a challenge. That tubing will not budge! This completely took all of the "play" out of my adapter and overall, helped strengthen the MBA modification!
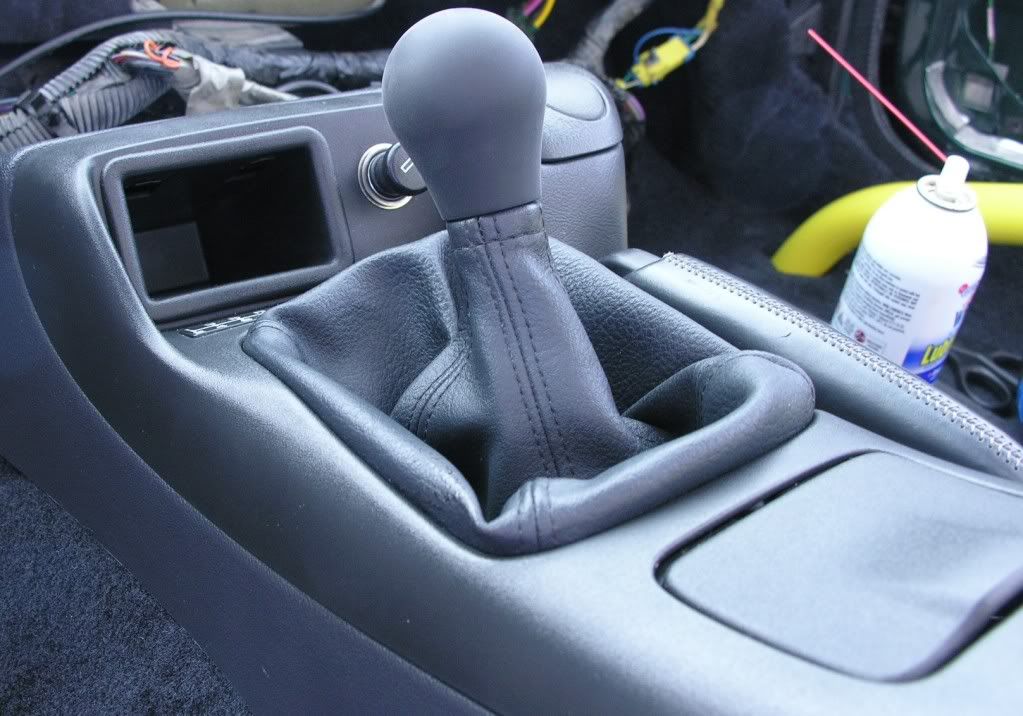
The end result should look like this:
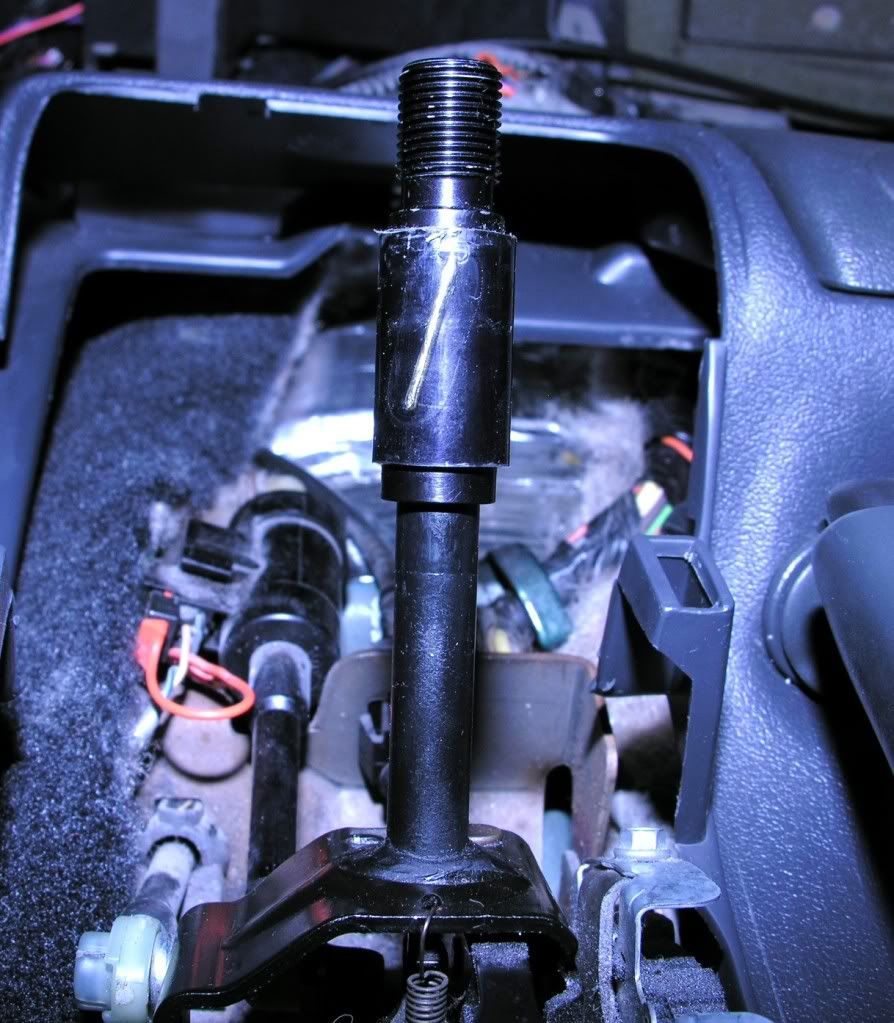
(NOTICE THE CAN OF LIQUID WRENCH. IT HELPS, TRUST ME!)

1. A small drill bit. I used a 1/16 drill bit.
2. Some small diameter wire. I used 16 gauge "soft" brass wire.
3. 3/4" outer diameter (5/8" inner diameter) rubber tubing.
I purchased all of the above materials (minus the drill bit) at Lowes for less than 5 dollars.
What I did was completely remove those allen wrench / hex head screws off of the adapter. Next, safely drill a very small from one end of the open hex screw hole all the way through the inner plastic plunger where it comes out the other side on the opposite hex screw hole. Be careful as this is a more delicate type procedure. Now, you should be left will a perfect 1/16 hole drilled through the middle of your inner plastic plunger.
Simply cut off the desired length of your wire. I deburred the ends to elimate the "pinch marks" on the wire. With your MBA adapter in place, simply insert your wire through the open hole. Fold each end down. Now, take your 3/4" hose and cut it to your desired length and slip it down over your MBA adapter. This is going to be a tight fit. It took me about 10 minutes to get the tube to fit over the adapter (with the wire folded down). You no longer need those little set screws. The tubing also helps hold the shift boot in place! I did use some liquid wrench to "help" the tubing slip over the MBA adapter. Even then, it was STILL a challenge. That tubing will not budge! This completely took all of the "play" out of my adapter and overall, helped strengthen the MBA modification!
The end result should look like this:
(NOTICE THE CAN OF LIQUID WRENCH. IT HELPS, TRUST ME!)
Hey guys -
I'm in the middle of this modification, but I have a question -
After completing the mod, what keeps me from simply sliding the adapter/**** combination off of the shifter?
Thanks in advance...
I'm in the middle of this modification, but I have a question -
After completing the mod, what keeps me from simply sliding the adapter/**** combination off of the shifter?
Thanks in advance...
