


1971 Nova Swap - 02 LS1/A4
Thread Starter
Joined: Jan 2006
Posts: 6,670
Likes: 6
From: Concord, CA
Well, Finally getting around to starting my thread of my 2nd swap project. My 1st swap was completed in Dec 2005, That was my 71 Chevelle Frame off RestoMod (see sig).
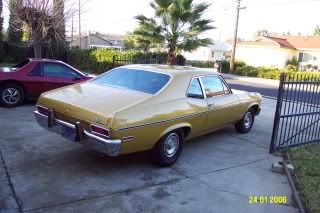
It is a 1971 Nova (6cyc/2sp) car that I've had for a few years, used it as a DD. It only has 27k original miles on it when I picked it up. But it had a hard life in the streets of San Francisco while the 1st owner went to school at USF. It then sat around for years after. It was then picked up in an Estate Sale by the 2nd owner. I then picked it up from him, He didn't want to spend the time and money on it. It now has 39k on it.
After Cleaning it up some and getting it running pertty good (for a 6cyl 2 sp car). It ran 19 sec at Infieon. So.. its going to be pertty simple to improve performance and milage.
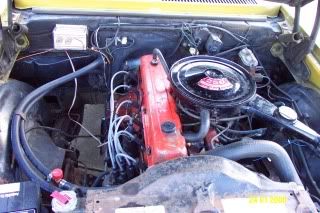
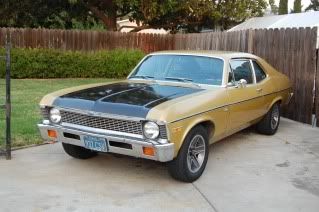
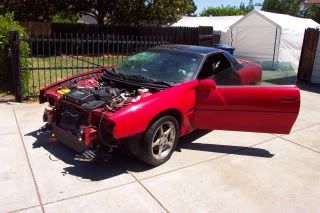
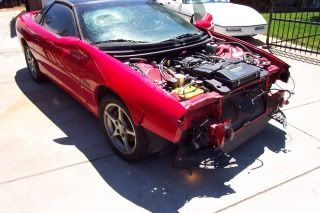
I picked up a 02' Z28 coupe with 80k on it and parted it out and will be swapping the LS1, 4L60E and Brakes from it into the Nova. I have sold off just about everything, but a few parts left.
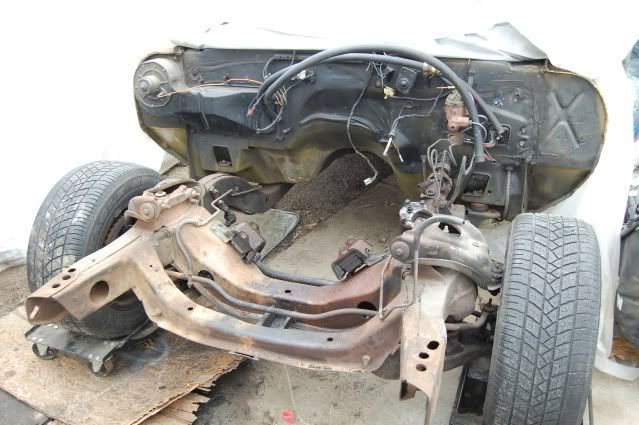
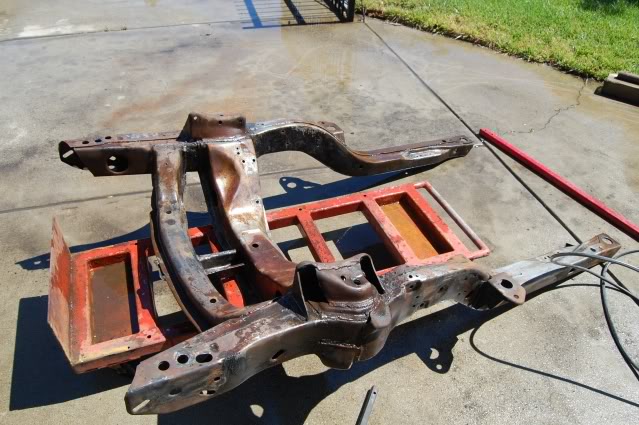
Start of the Disassembly, I will be cleaning the Firewall and under body and painting it, Powder Coating the SubFrame.

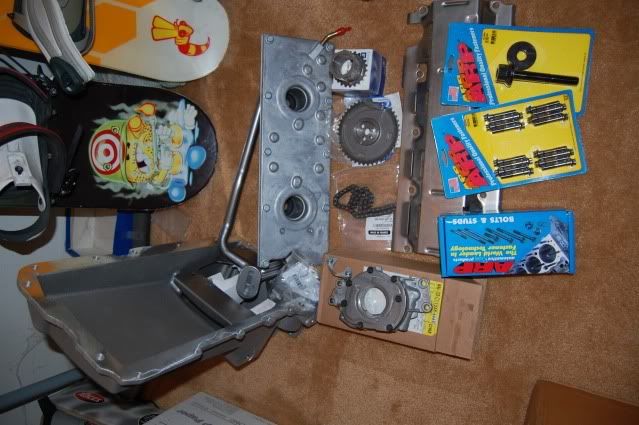
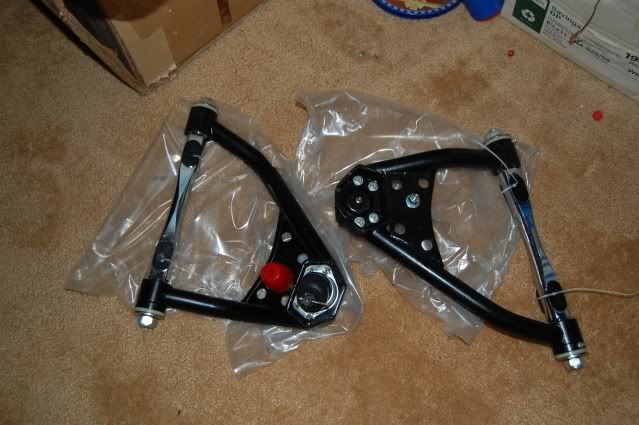
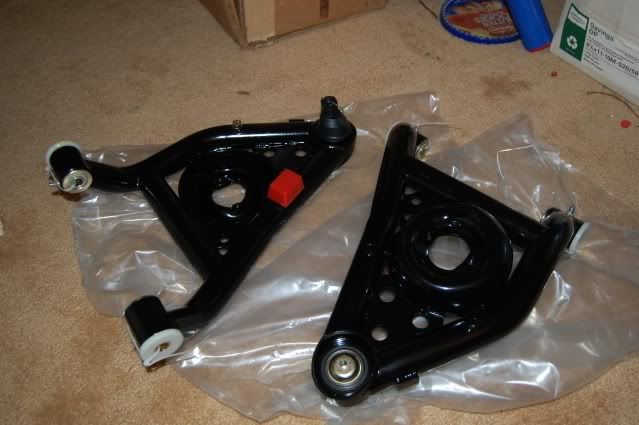
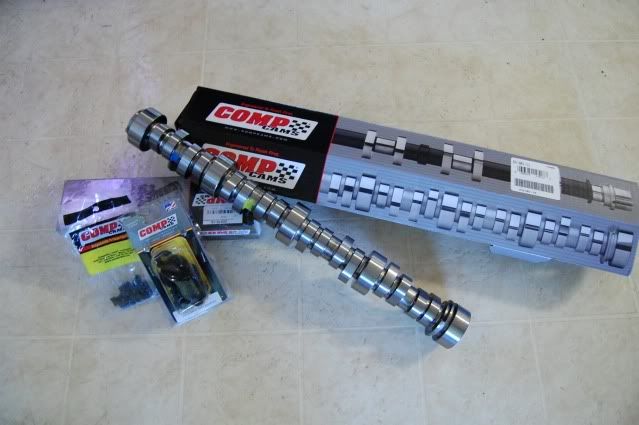
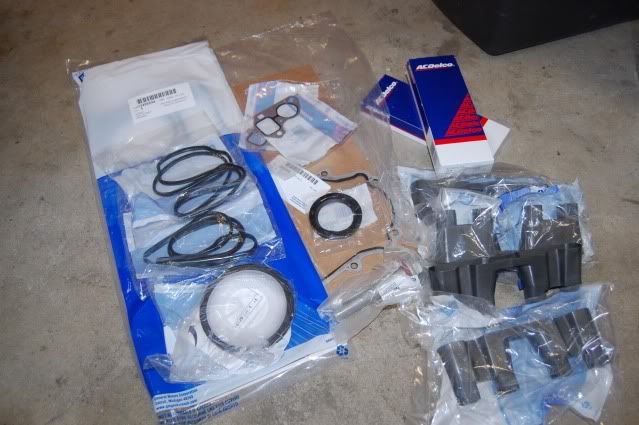
Here are some of the parts that I have collected, Comp Cam, srping, retainers, pushrods, POL Tubulare upper/lower A-Arm, Hotchkis TVS suspension, LS2 Timing Chain and Gears, LS6 PCV Valley Cover, RetroLSX Oil Pan, LS6 pump, Edelbrock Headers, ARP Rod/Head Bolts, etc..
It is a 1971 Nova (6cyc/2sp) car that I've had for a few years, used it as a DD. It only has 27k original miles on it when I picked it up. But it had a hard life in the streets of San Francisco while the 1st owner went to school at USF. It then sat around for years after. It was then picked up in an Estate Sale by the 2nd owner. I then picked it up from him, He didn't want to spend the time and money on it. It now has 39k on it.
After Cleaning it up some and getting it running pertty good (for a 6cyl 2 sp car). It ran 19 sec at Infieon. So.. its going to be pertty simple to improve performance and milage.
I picked up a 02' Z28 coupe with 80k on it and parted it out and will be swapping the LS1, 4L60E and Brakes from it into the Nova. I have sold off just about everything, but a few parts left.
Start of the Disassembly, I will be cleaning the Firewall and under body and painting it, Powder Coating the SubFrame.
Here are some of the parts that I have collected, Comp Cam, srping, retainers, pushrods, POL Tubulare upper/lower A-Arm, Hotchkis TVS suspension, LS2 Timing Chain and Gears, LS6 PCV Valley Cover, RetroLSX Oil Pan, LS6 pump, Edelbrock Headers, ARP Rod/Head Bolts, etc..
Last edited by bczee; Aug 3, 2017 at 08:31 AM.
Thread Starter
Joined: Jan 2006
Posts: 6,670
Likes: 6
From: Concord, CA
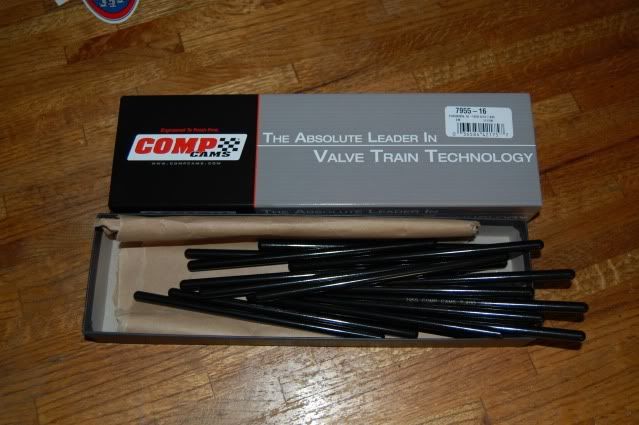
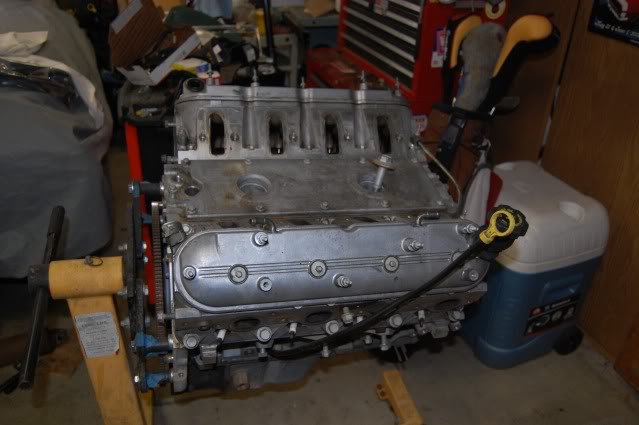
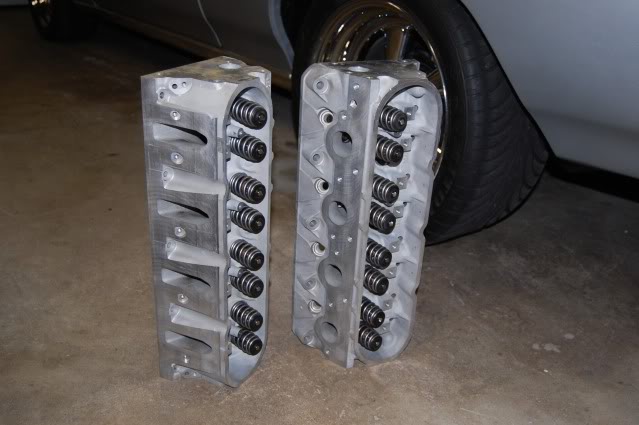
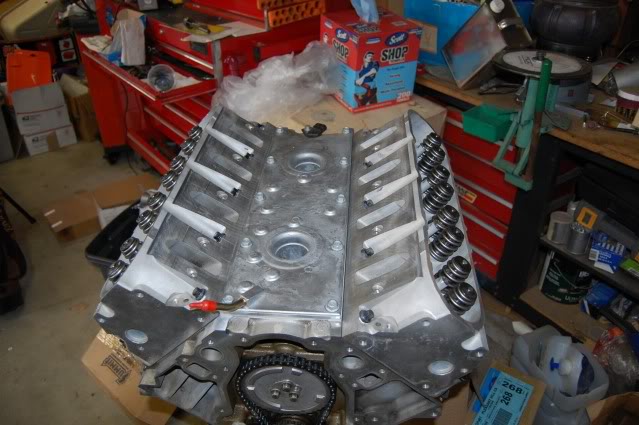
I cleaned up the Short block, had the Heads freshend up, New Comp Springs (918's), retainer, push rods, LS2/7 Lifter, LS6 oil Pump (I ported it some).
I used an old head bolt as a thread cleaner for the block

Replaced the Rod bolts with ARP's
Ported the pump just a bit to clean it up and take the sharp edges out..
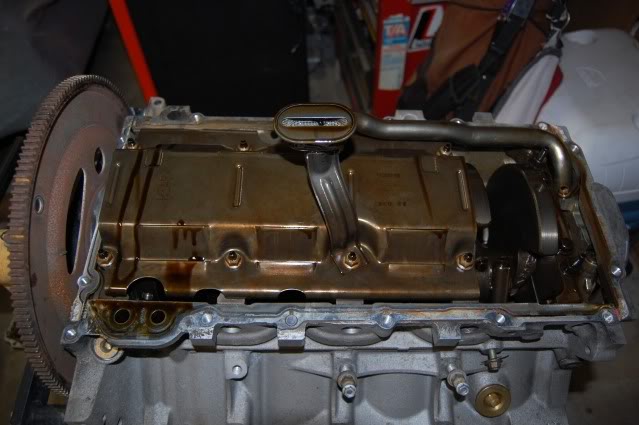
Use a full Tray, and used a BRP pick up tube Girdle to secure the Tube.
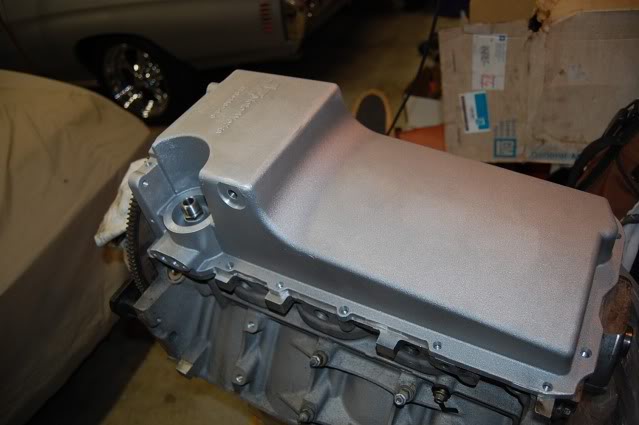
I am using the RetroLSX oil pan, I check to make sure there was clearance. Came out to about 3/4",
The RetroLSX Pan in place.

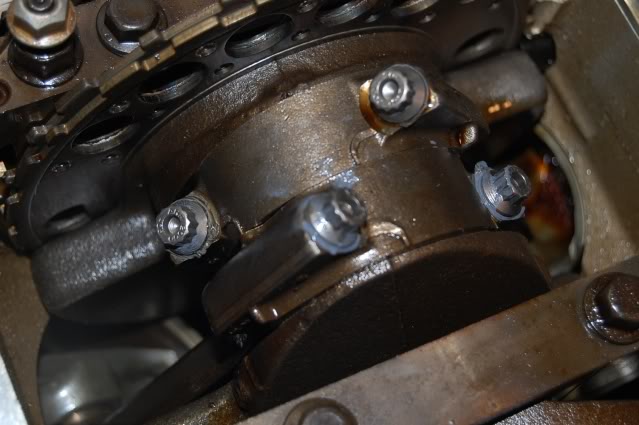
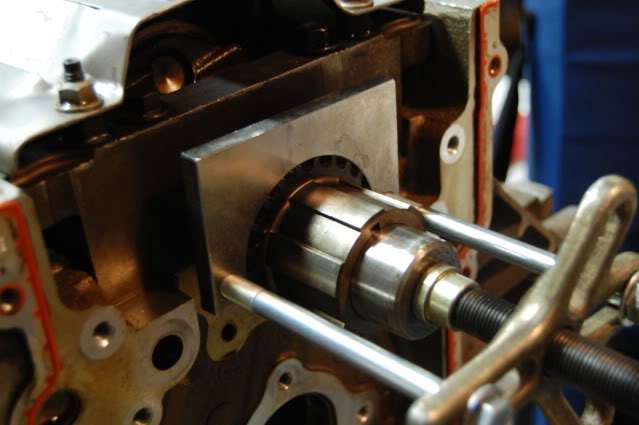
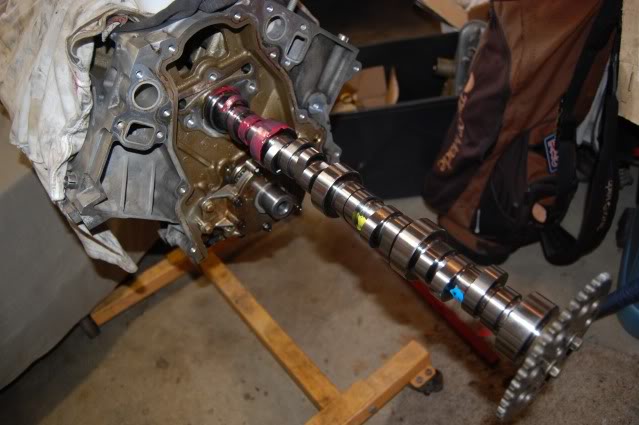
Removed and Replaced the Timing Crank Gear, I had the correct tool to remove, but just used a longer bolt and the old gear to press it back into place.

Replace the Cam (Thrumpr) and assembled the front. Checked the timing, it was 3 Degress advanced to much.. corrected that.
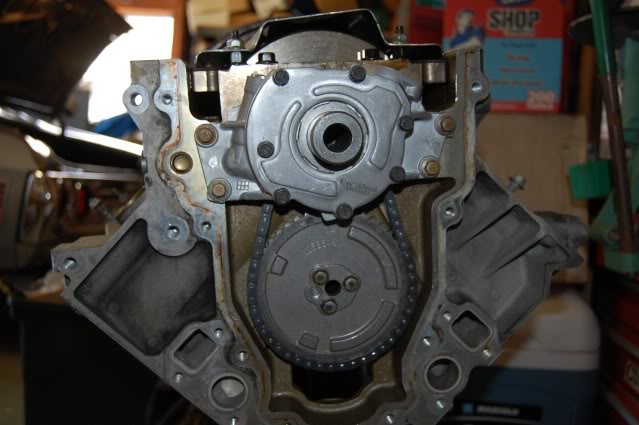
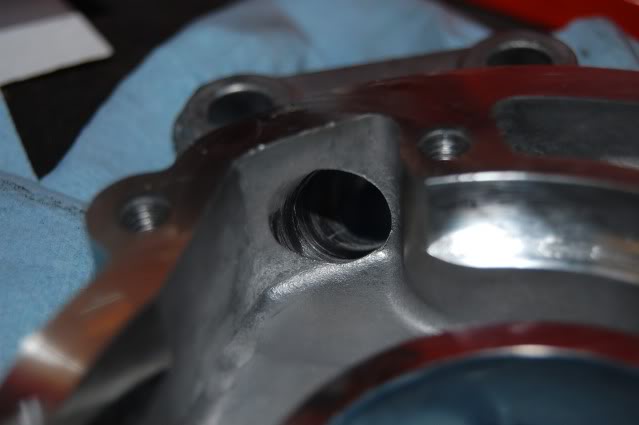
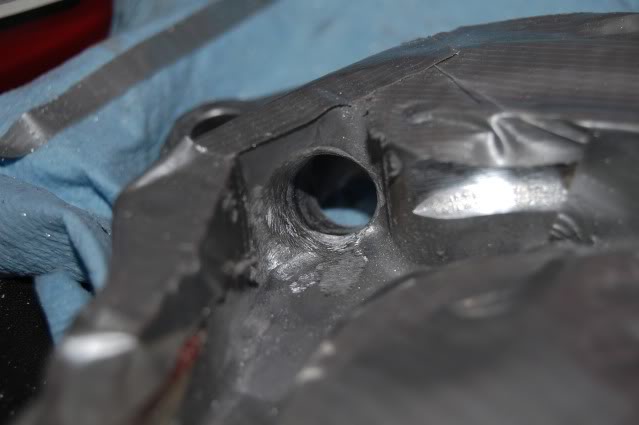
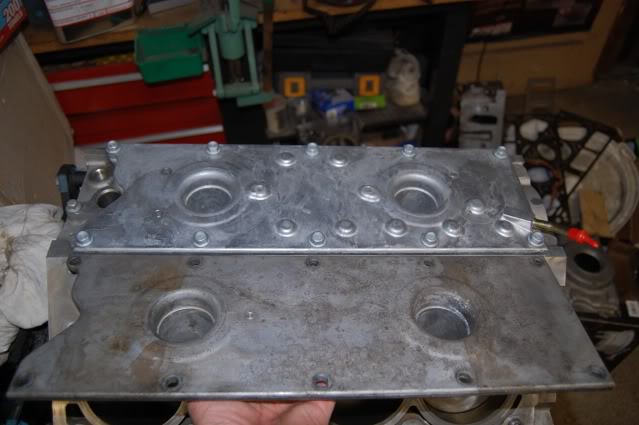
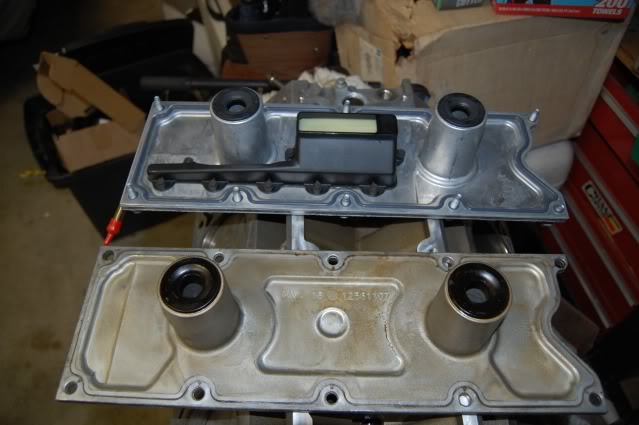
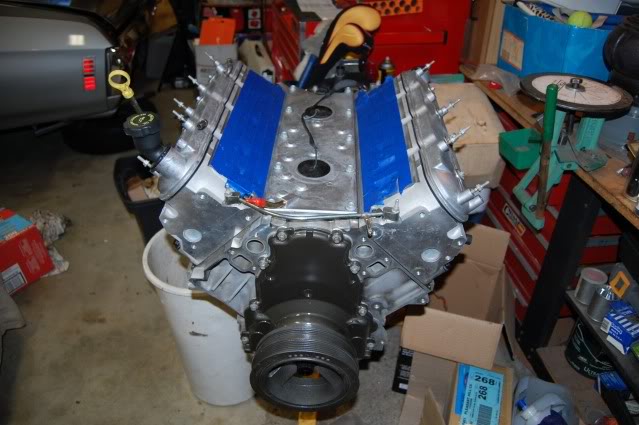
Swapped over to the LS6 type of PCV and Valley Cover, since the block was a 02 (LS1/LS6) block, there was not cutting needed.
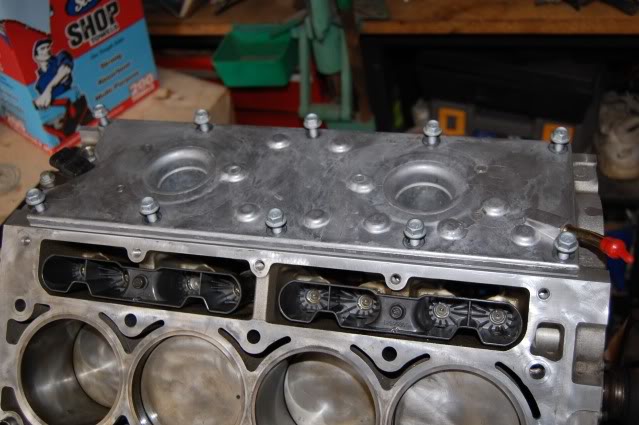
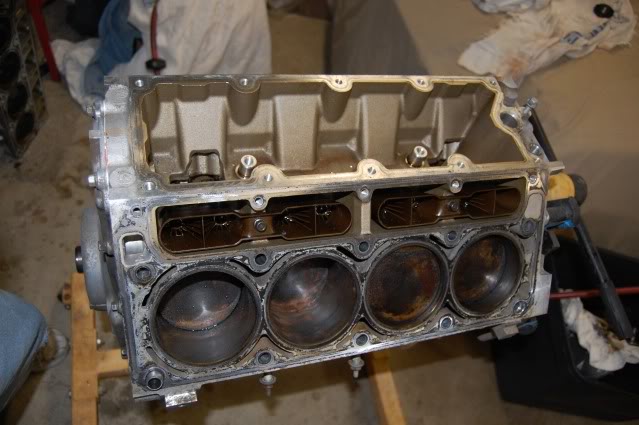
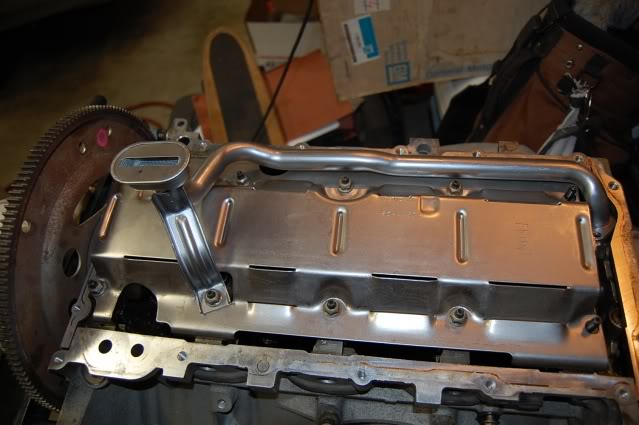
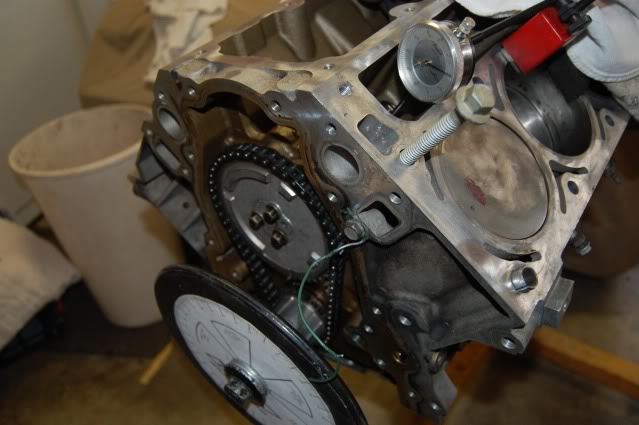
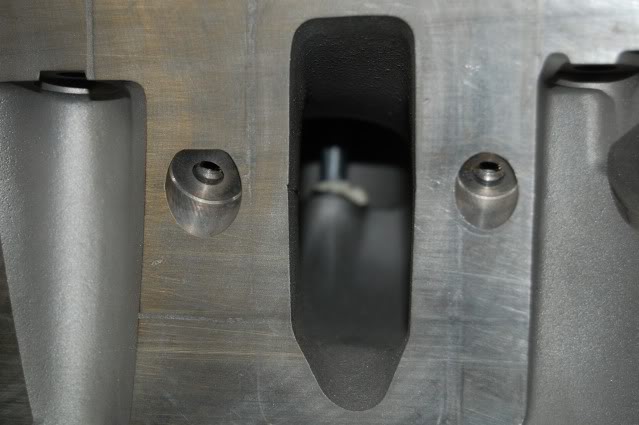
Used new LS2/LS7 lifter and guildes, did the drill mod on them. Notice I cleaned up the top of the piston and deck, used some scott-brite.
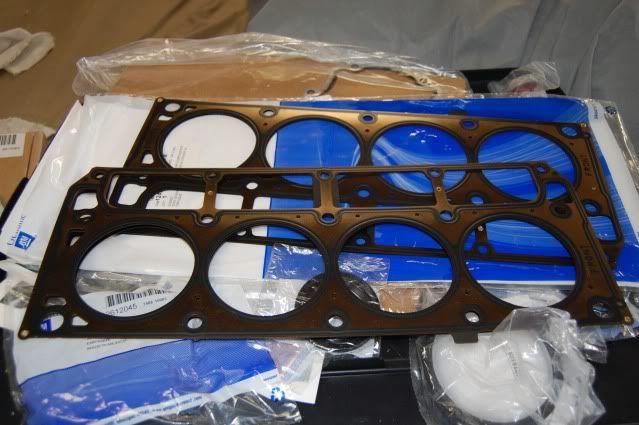
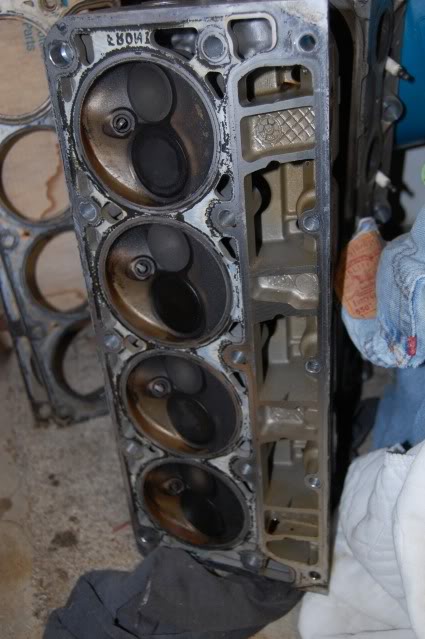
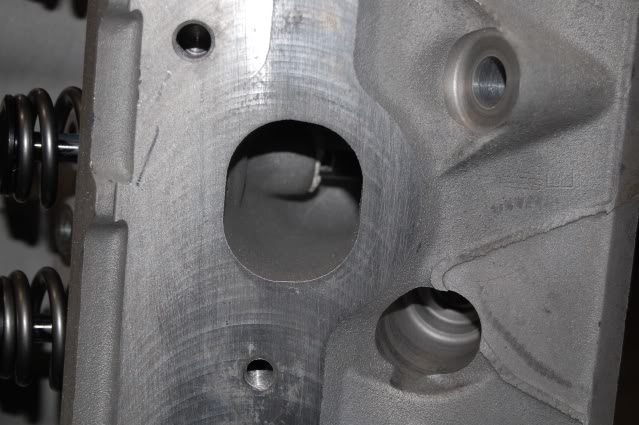
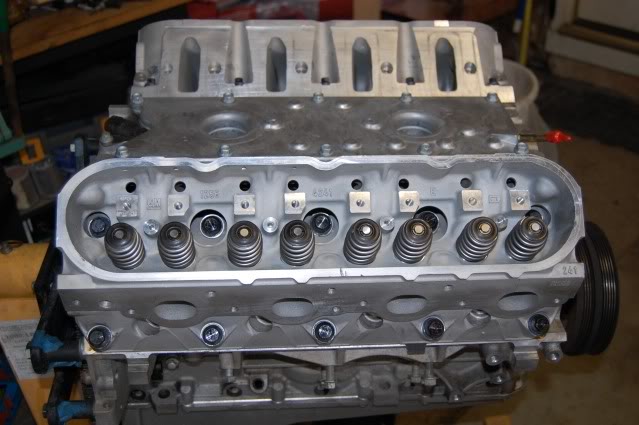
Got the heads back, secured them with GM gaskets and ARP Bolts.
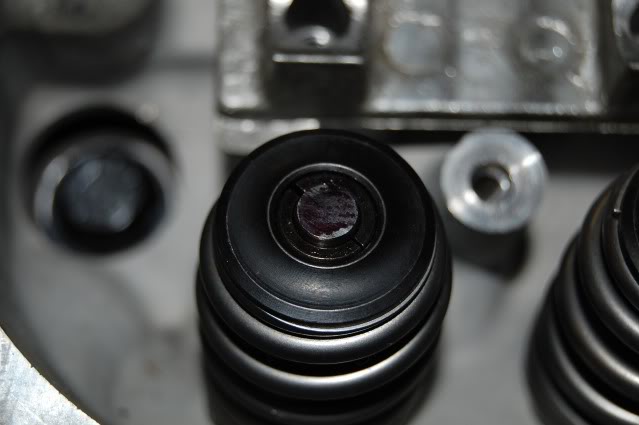
Checked the pattern on the valve.
Painted the front cover Gray and insalled new seal and the balancer.
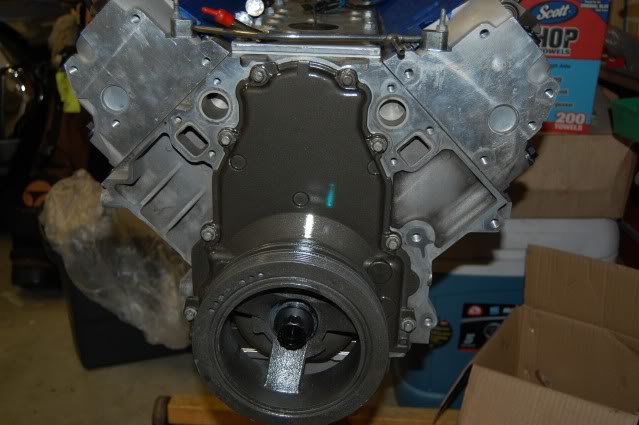
Just about ready to go !
I used an old head bolt as a thread cleaner for the block
Replaced the Rod bolts with ARP's
Ported the pump just a bit to clean it up and take the sharp edges out..
Use a full Tray, and used a BRP pick up tube Girdle to secure the Tube.
I am using the RetroLSX oil pan, I check to make sure there was clearance. Came out to about 3/4",
The RetroLSX Pan in place.
Removed and Replaced the Timing Crank Gear, I had the correct tool to remove, but just used a longer bolt and the old gear to press it back into place.
Replace the Cam (Thrumpr) and assembled the front. Checked the timing, it was 3 Degress advanced to much.. corrected that.
Swapped over to the LS6 type of PCV and Valley Cover, since the block was a 02 (LS1/LS6) block, there was not cutting needed.
Used new LS2/LS7 lifter and guildes, did the drill mod on them. Notice I cleaned up the top of the piston and deck, used some scott-brite.
Got the heads back, secured them with GM gaskets and ARP Bolts.
Checked the pattern on the valve.
Painted the front cover Gray and insalled new seal and the balancer.
Just about ready to go !
Last edited by bczee; Nov 7, 2010 at 12:11 AM.
Thread Starter
Joined: Jan 2006
Posts: 6,670
Likes: 6
From: Concord, CA
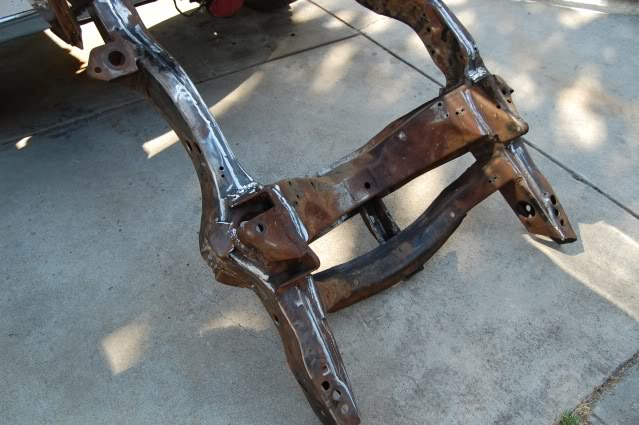
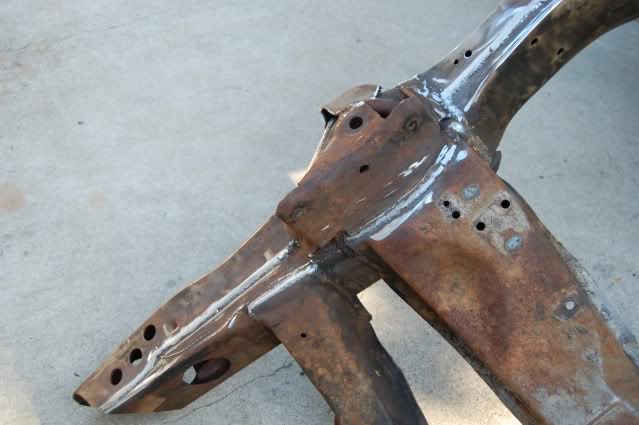
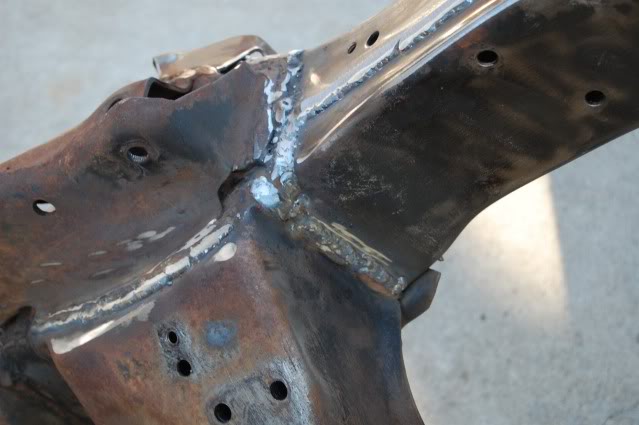
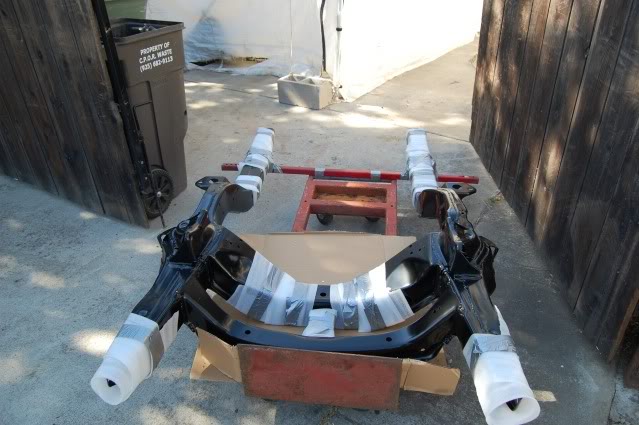
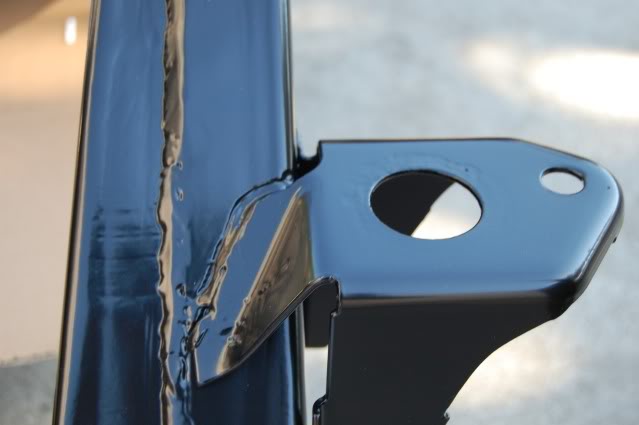
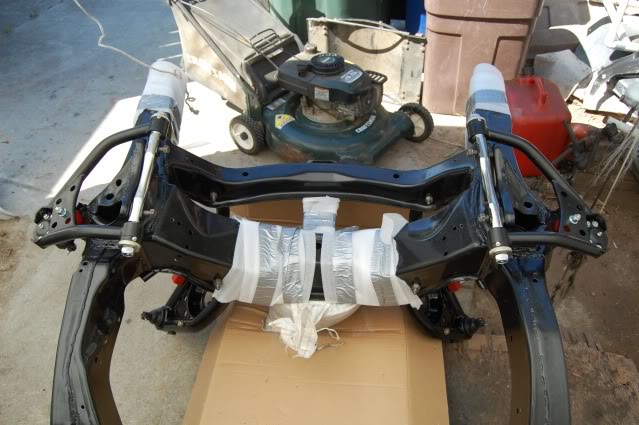
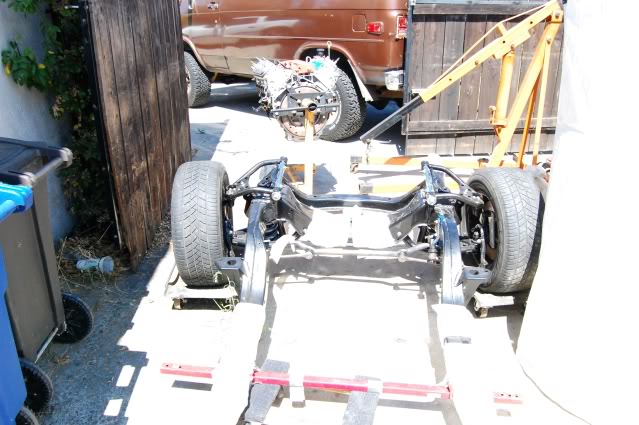
I cleaned up the Sub Frame and had a buddy help me weld up all of the seam on the sub frame. I than had it blasted and Powder Coated. Started to assemble the sub frame with the suspension.

Welded up sub frame.
Sub Frame back from the Powder Coater.
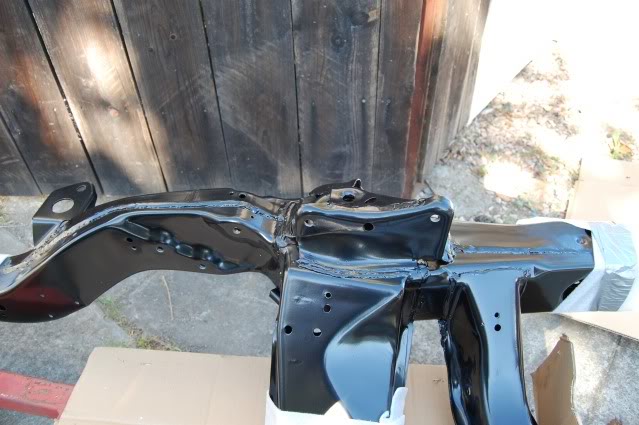
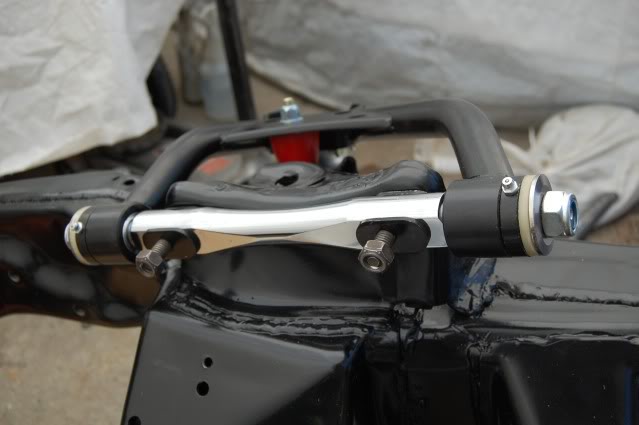
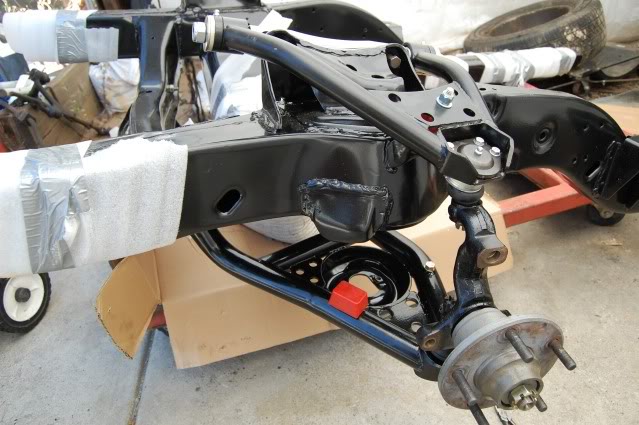
Installed the POL Lower A-Arms.
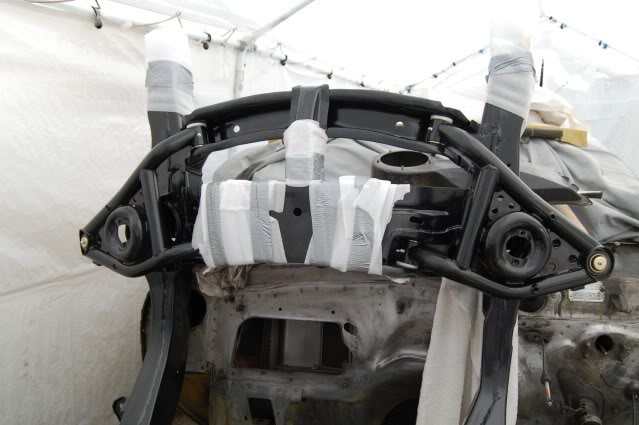
Installed the POL Upper A-Arms attacked the steering rods and spindle.
Welded up sub frame.
Sub Frame back from the Powder Coater.
Installed the POL Lower A-Arms.
Installed the POL Upper A-Arms attacked the steering rods and spindle.
Last edited by bczee; Nov 6, 2010 at 11:32 PM.
Thread Starter
Joined: Jan 2006
Posts: 6,670
Likes: 6
From: Concord, CA
I have one of the Eastwood Powder Coating Gun that I used for my Chevelle project. I have a spare oven to use.
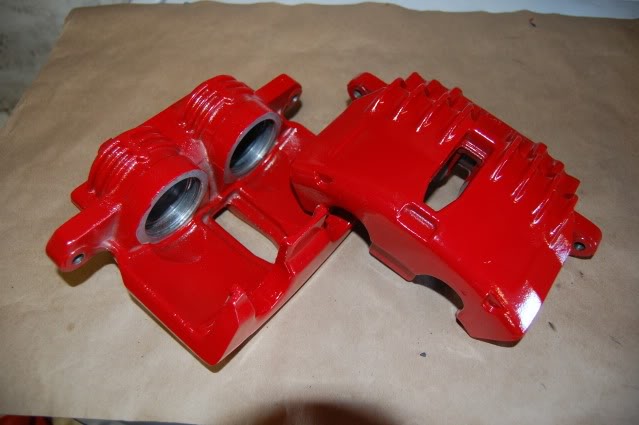
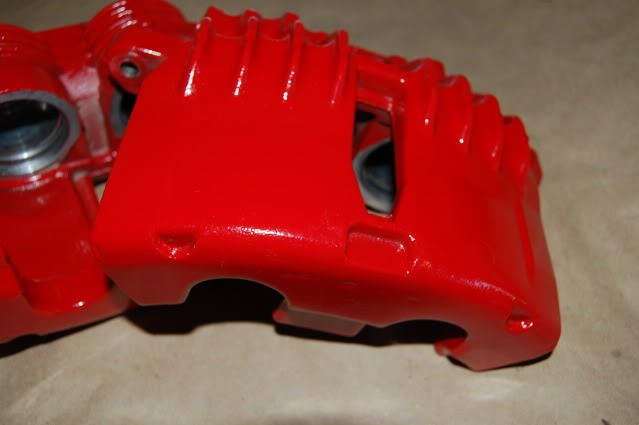
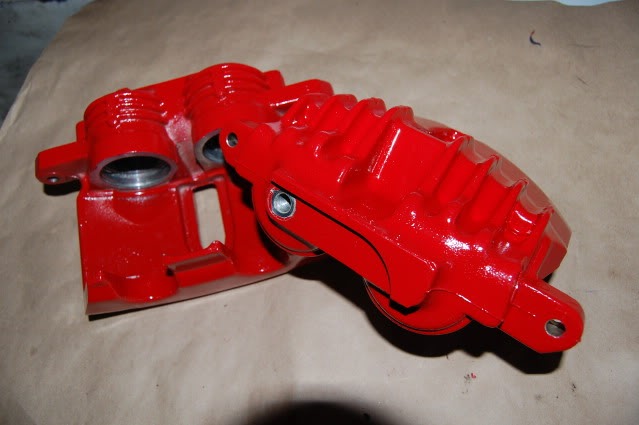
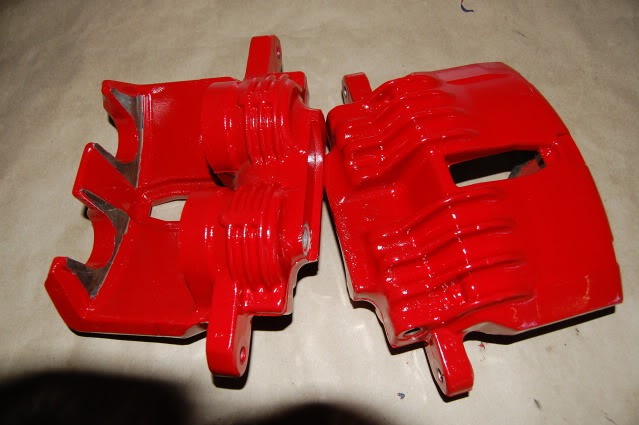
Finished parts.
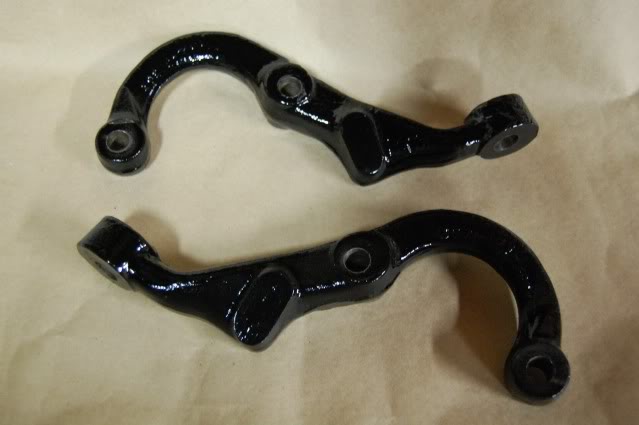
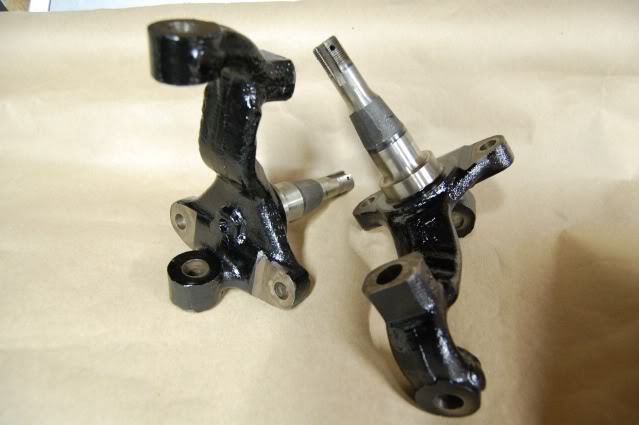
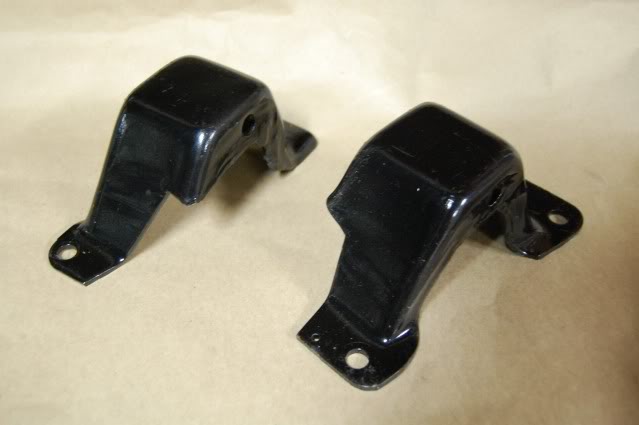
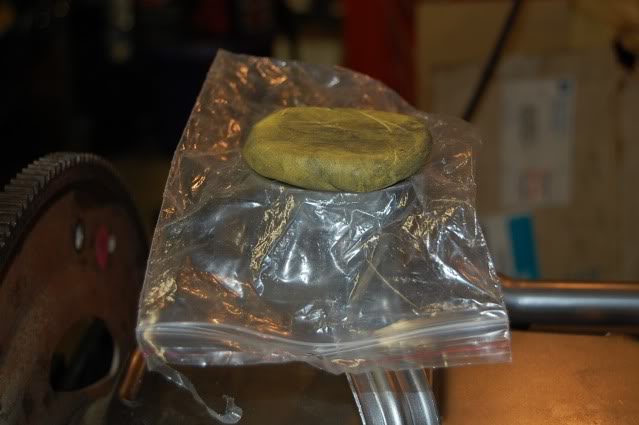
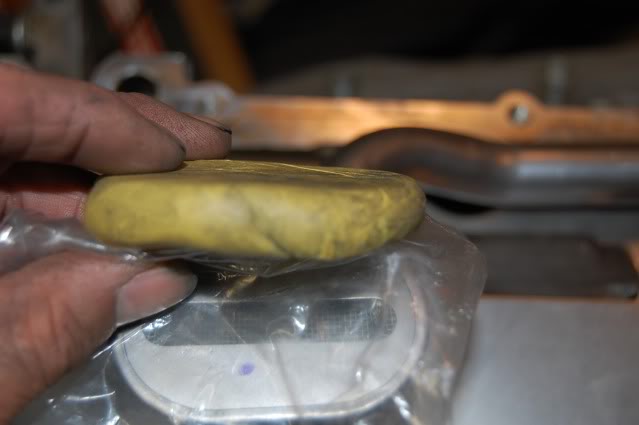
My first atempt at Calipers..
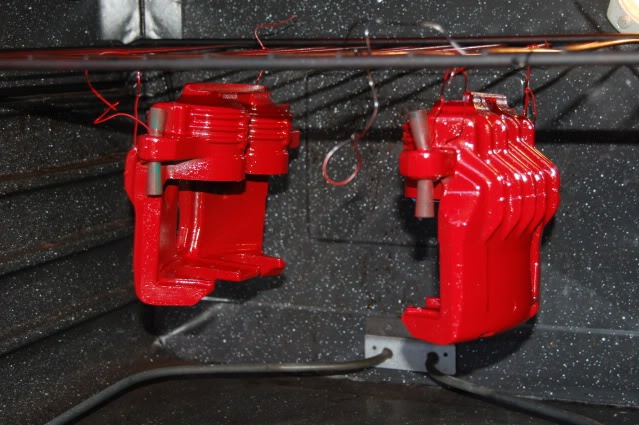
Finished parts.
My first atempt at Calipers..
Thread Starter
Joined: Jan 2006
Posts: 6,670
Likes: 6
From: Concord, CA
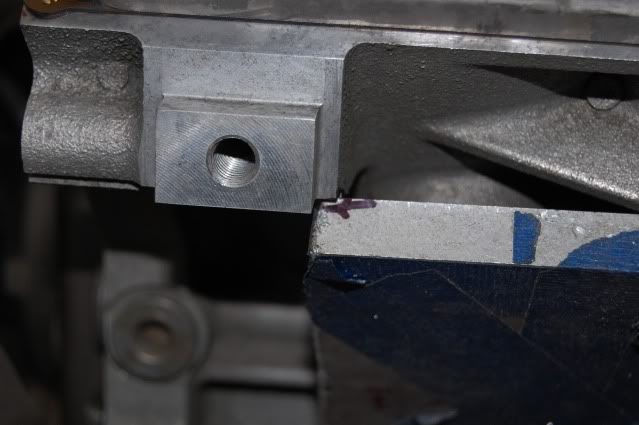
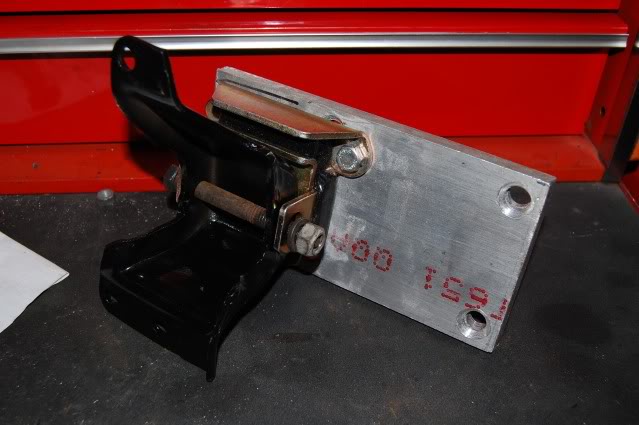
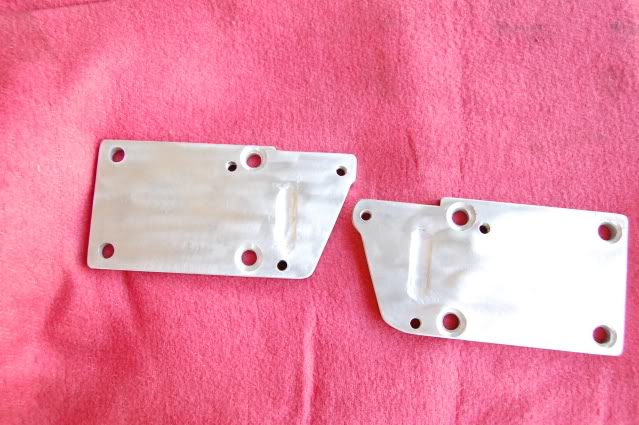
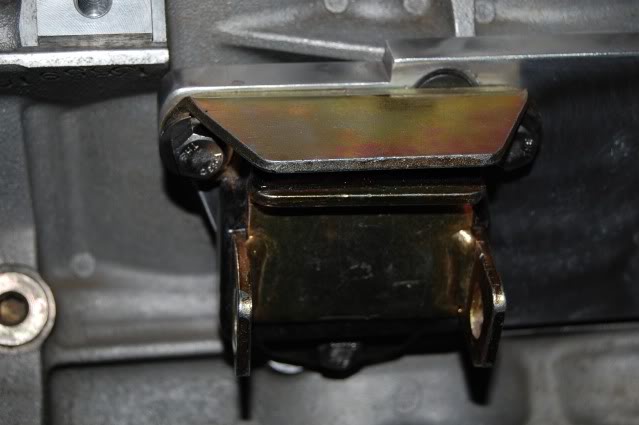
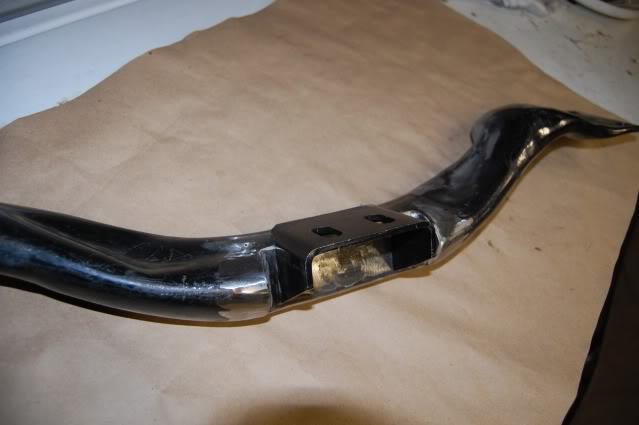
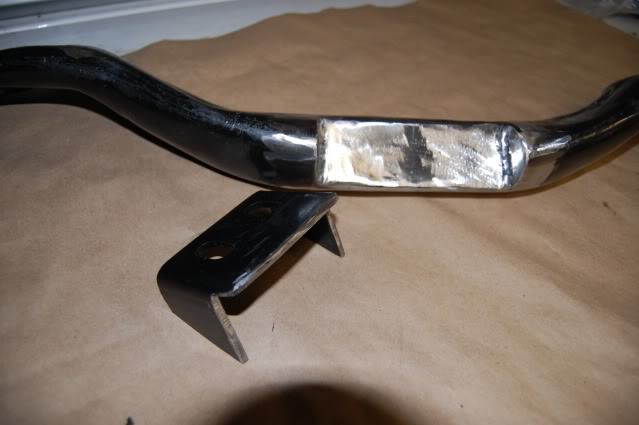
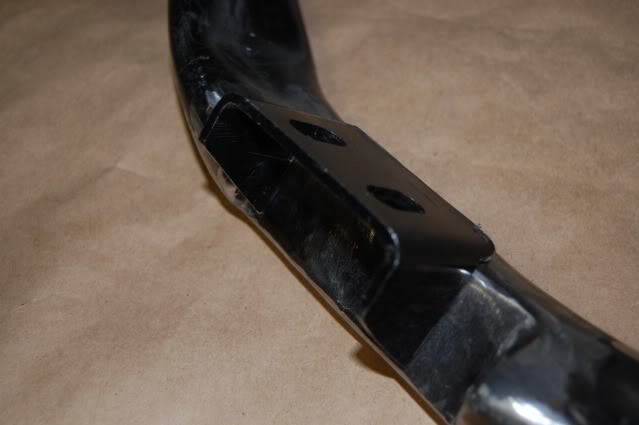
I build my own adapter plates out of 1/2" Aluminum, use Energy Suspension Short/Wide Poly Mounts, Picked up some SBC Frame stands as the 6cyl would not work.
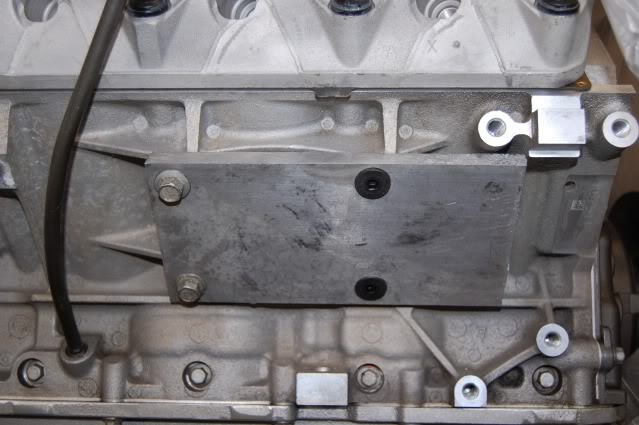
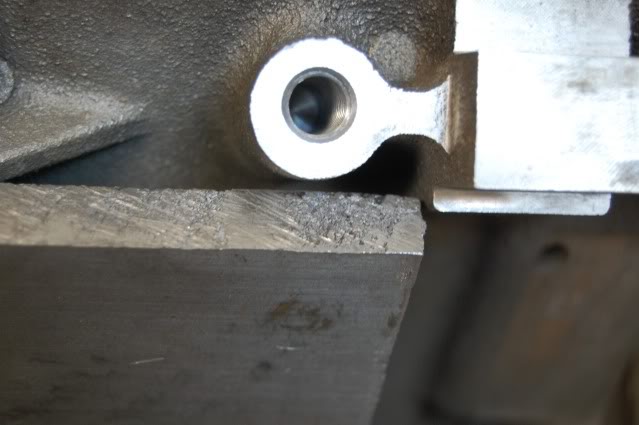
Had to shape around these area (both sides)
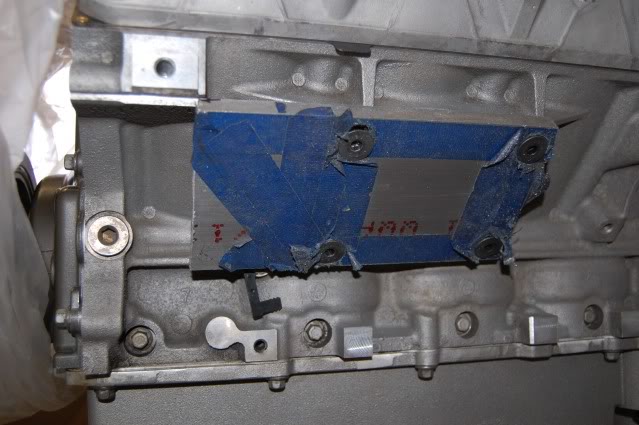
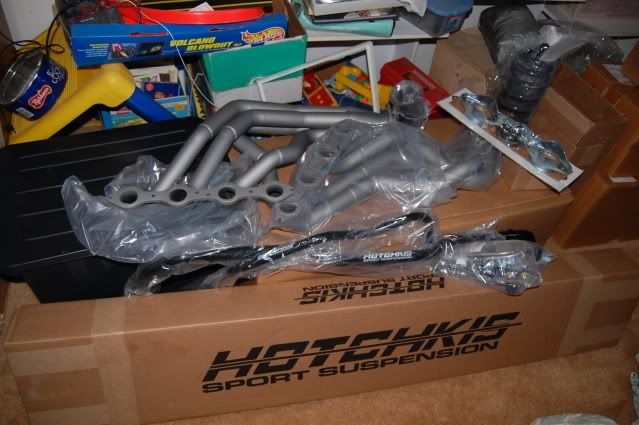
Going with 1" set back, Since I was going to use Edelbrock Headers, I looked at the Edelbrock and took some guess-ta-ments and layed out the pattern.
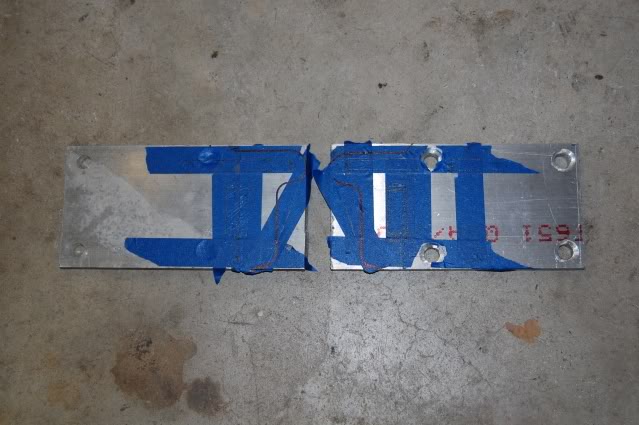
bolted up the mounts and stands
Had to shape around these area (both sides)
Going with 1" set back, Since I was going to use Edelbrock Headers, I looked at the Edelbrock and took some guess-ta-ments and layed out the pattern.
bolted up the mounts and stands
Trending Topics
Thread Starter
Joined: Jan 2006
Posts: 6,670
Likes: 6
From: Concord, CA
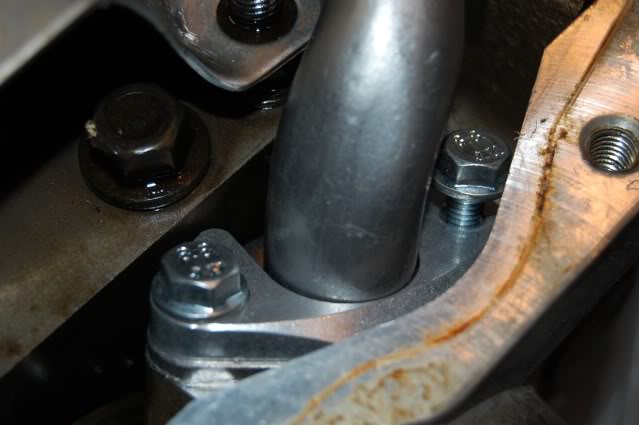
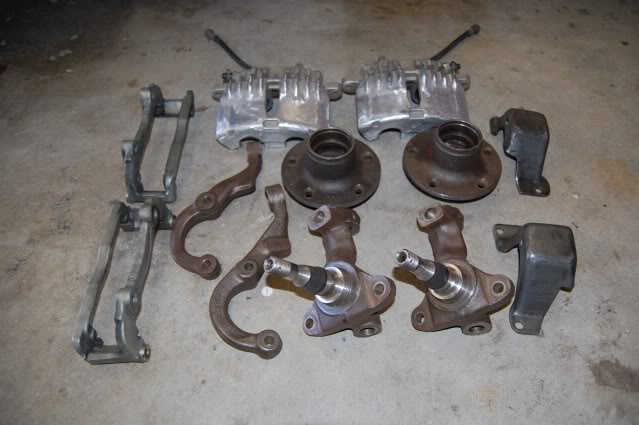
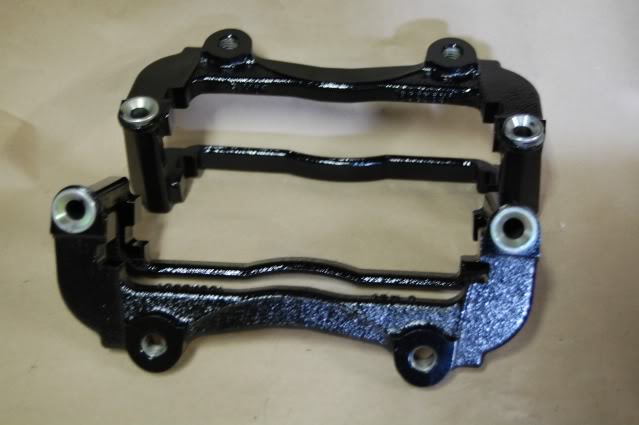
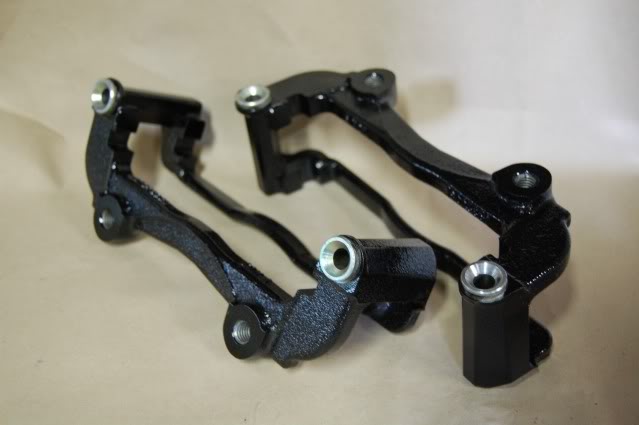
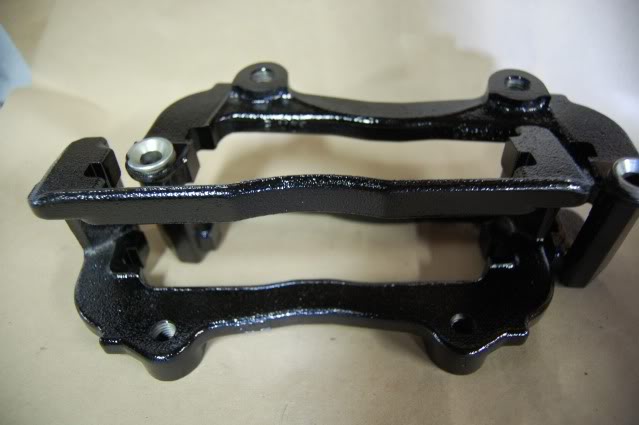
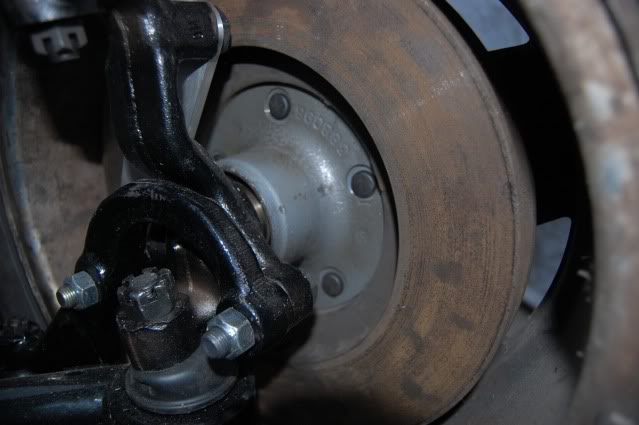
I ordered one of the Ebay LS1 Brake conversion kit. I came with everythng needed to mount the 4th Gen F-body brakes to the early GM Drum spindles.
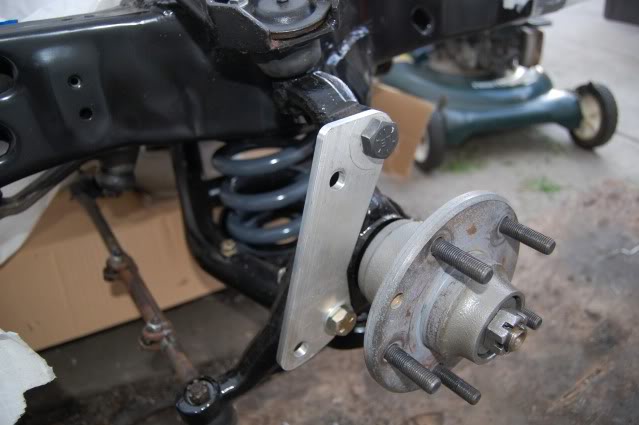
I had to turn down the Drum brake hub. The kit had new bolts, bearing and seals along with the adapter plate.
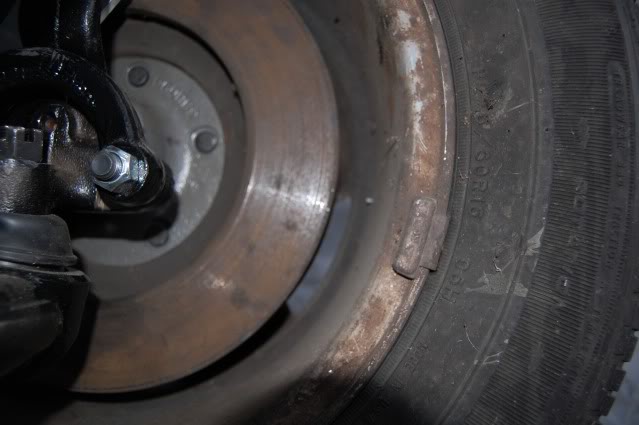
Hub turned down, painted and mounted on the spindle. I will get some new slotted rotor later and since I don't have any extra 16" or 17" wheel.. I had to leave the rest of the brake parts off while I used the 15" wheels.
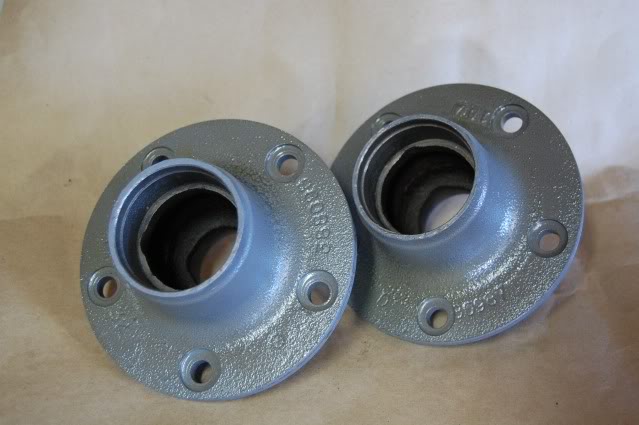

The Adapter plate for the Caliper bracket.
Tight fit.. but works
I had to turn down the Drum brake hub. The kit had new bolts, bearing and seals along with the adapter plate.
Hub turned down, painted and mounted on the spindle. I will get some new slotted rotor later and since I don't have any extra 16" or 17" wheel.. I had to leave the rest of the brake parts off while I used the 15" wheels.
The Adapter plate for the Caliper bracket.
Tight fit.. but works
LS1 Tech Stories
The Best V8 Stories One Small Block at Time

6 Common C5 Corvette Failures and What's Involved In Repairing Them
Pouria Savadkouei
Retro Modern Bandit Pontiac Trans AM Comes With Burt Reynolds' Autograph
Verdad Gallardo
Top 10 Greatest Cadillac V Series Performance Models Ever, Ranked
Pouria Savadkouei
Top 10 Most Powerful Chevy Trucks Ever Made!

Hennessey's New Supercharged Silverado ZR2 Has 700 HP
Verdad Gallardo
Coachbuilt N2A Anteros Is an LS2-Powered C6 Corvette In Italian Clothes
Verdad Gallardo
Awesome K5 Blazer Restomod Comes With C7 Corvette Power
Verdad Gallardo
10 Camaros You Should Never Buy

10 LS Engine Myths That Refuse to Die
Verdad Gallardo Thread Starter
Joined: Jan 2006
Posts: 6,670
Likes: 6
From: Concord, CA
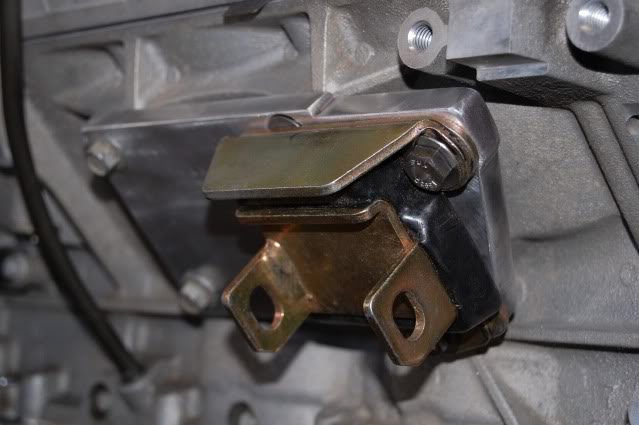
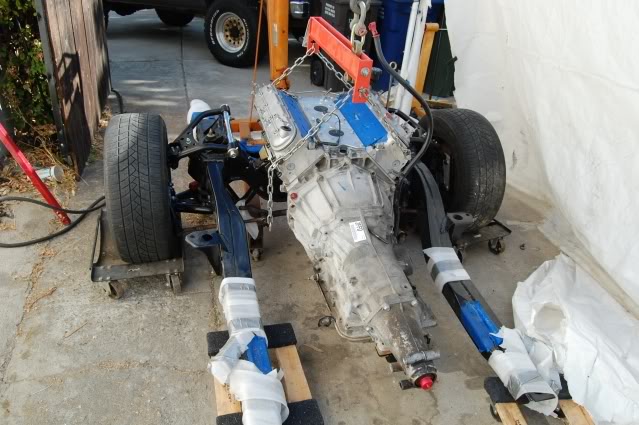
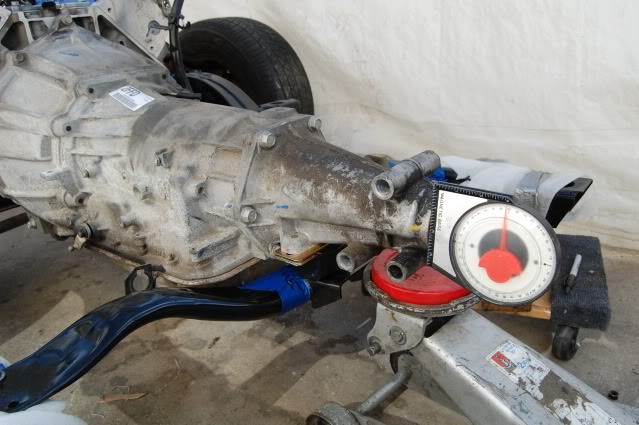
Time to drop the engine into the sub frame to do the final engine mount fitting to make sure nothing it in contact and that the mounts lines up with the frame stands. I know many have had problems with this (yes I did, but I resolve the issues).
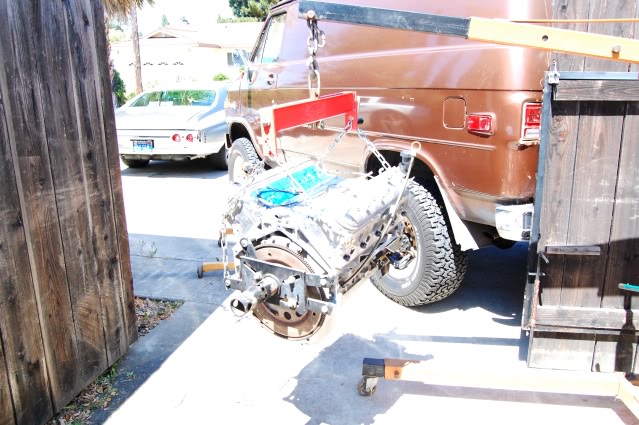
The through bolt was good in its alignement.. but the pan did make contact on the X-Member and the Alternator did also.. They were just making contact. To resolve the contact, I made some spacers and raised the frame stand 1/8". That made the Frame Stand and Engine Mount bolt mis-align now (as other have had this problem). I then oblonged the six bolt holes for the frame stands on the X-Member about 1/4" down/closer. This raising and moveing the Frame Stands closer together resolved the Throught Bolt mis-alignement.
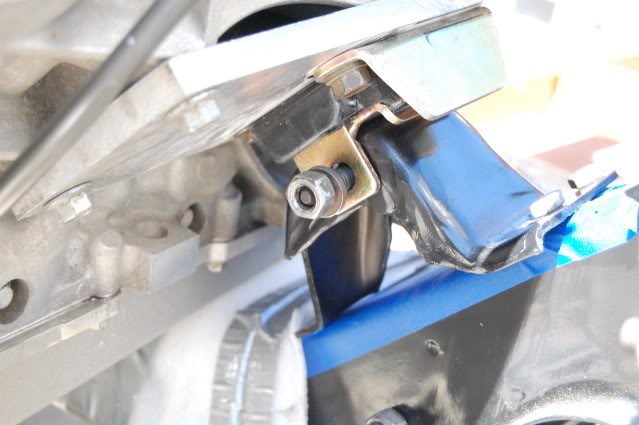
Distant from the Engine Flange to the PG X-member, it was going to be about 2" difference.
Mounted up the Trans for a check of the Crossmember.

The through bolt was good in its alignement.. but the pan did make contact on the X-Member and the Alternator did also.. They were just making contact. To resolve the contact, I made some spacers and raised the frame stand 1/8". That made the Frame Stand and Engine Mount bolt mis-align now (as other have had this problem). I then oblonged the six bolt holes for the frame stands on the X-Member about 1/4" down/closer. This raising and moveing the Frame Stands closer together resolved the Throught Bolt mis-alignement.
Distant from the Engine Flange to the PG X-member, it was going to be about 2" difference.
Mounted up the Trans for a check of the Crossmember.
Last edited by bczee; Nov 6, 2010 at 11:36 PM.
Thread Starter
Joined: Jan 2006
Posts: 6,670
Likes: 6
From: Concord, CA
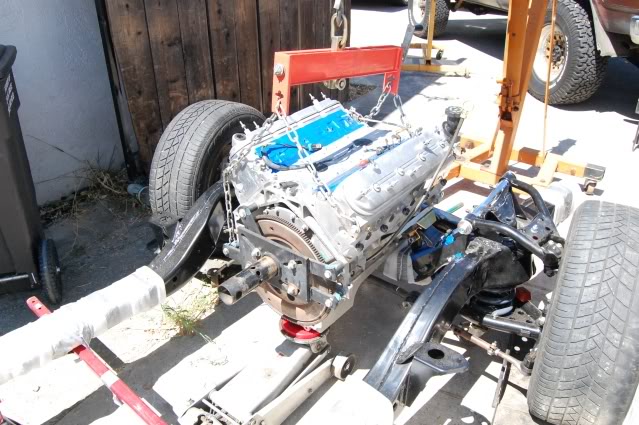
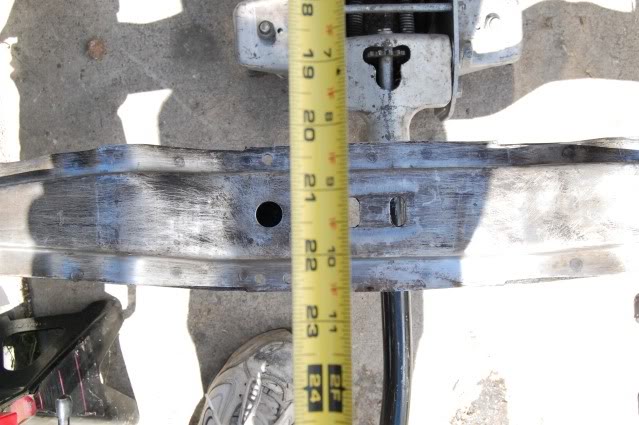
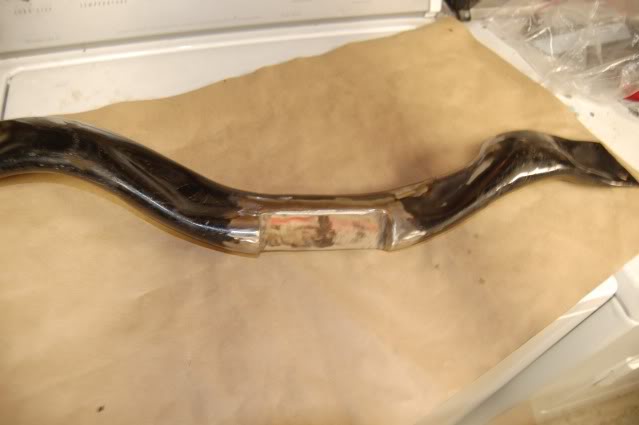
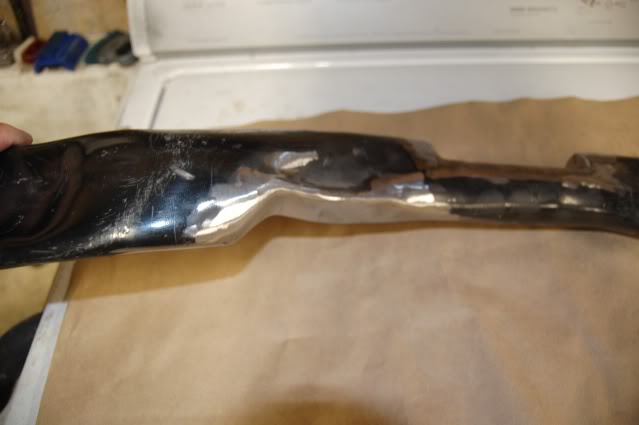
I picked up a TH400 Crossmember and started with that, since the PG one was not going to be easy to modify.
It was close !
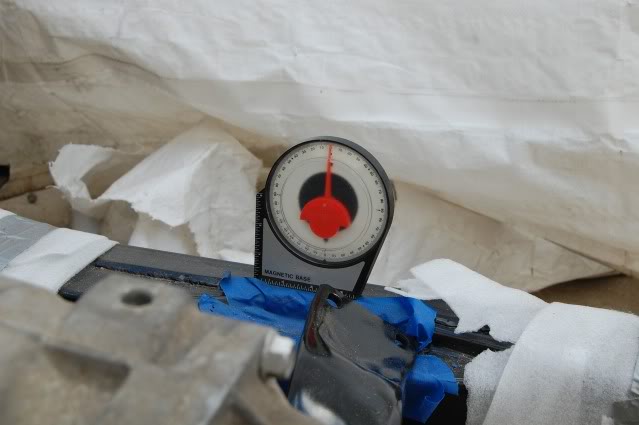
I made the frame rails level and then check the engine/trans tilt, just to see if I was in the ball park, I will do the final tilt adjustment later.
It was close !
but I had some contact near the pan and flange.

So it was time for the cutting wheels and welder.

It was close !
I made the frame rails level and then check the engine/trans tilt, just to see if I was in the ball park, I will do the final tilt adjustment later.
It was close !
but I had some contact near the pan and flange.
So it was time for the cutting wheels and welder.
Thread Starter
Joined: Jan 2006
Posts: 6,670
Likes: 6
From: Concord, CA
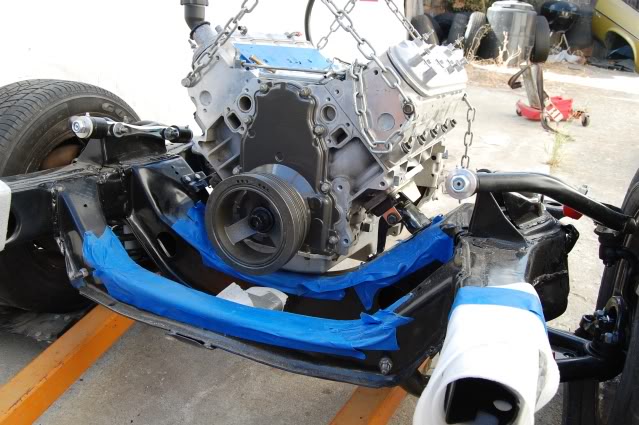
While I had the engine in place, I dropped in the headers to check out clearances.
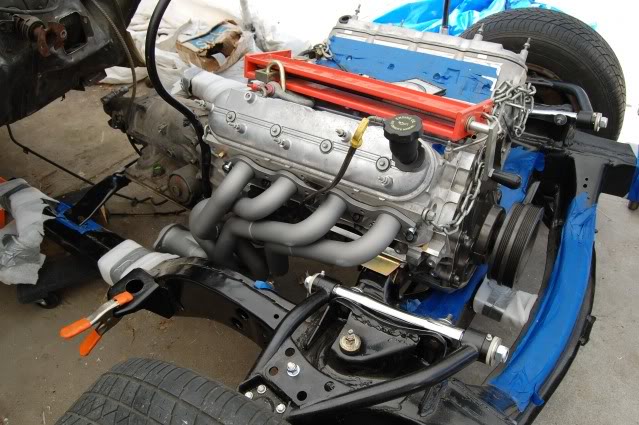
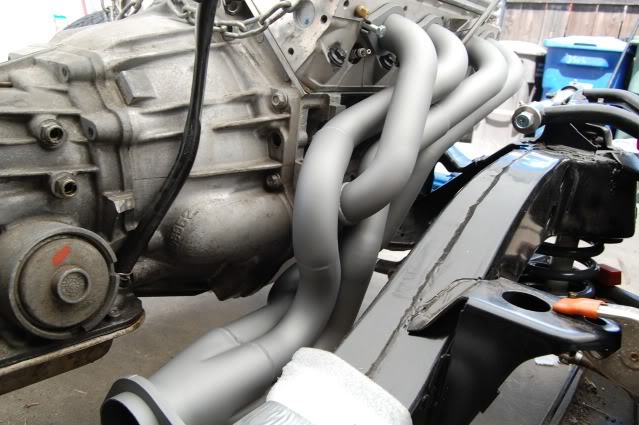
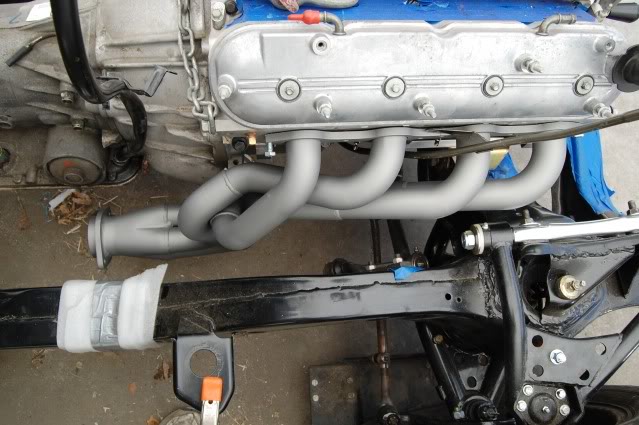
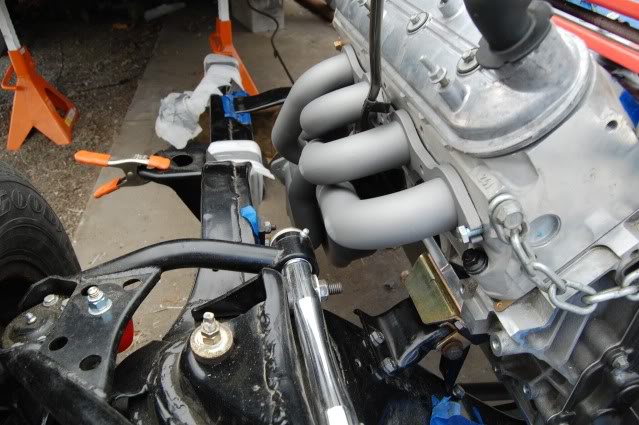
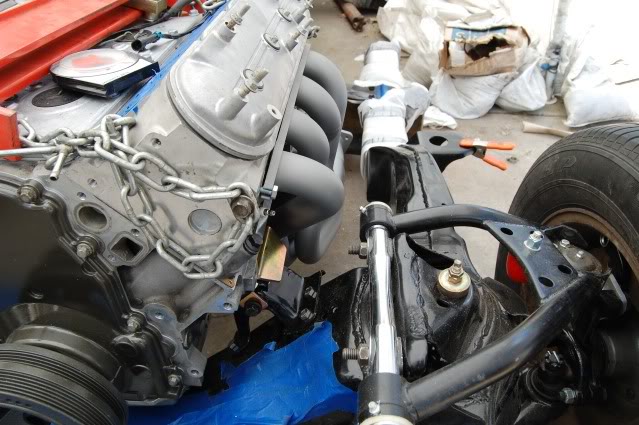
I did later install the steering box and there seems to be more than enough room all around. Fit seem great as they did on my Chevelle, which is the reason I when with Edelbrock again for my Nova.
That about does it for coming up to speed and where I am right now. Its been slow on the Firewall and under pan clean up.. it will be a while before I get that done.
Work and just Cruz'in around in the Chevelle, car shows and GTG are just seems to take up my time.
Once I get the paint on the firewall and bottom. I then will re-mount everything again for the final fitting and then continue with the rest of the accessories and wiring. Standby !
Love it. I wish I went with the hotchkis setup - or better yet sc&c - the first time I rebuilt my front end. I'll post the build on the x-body thread when I get to my computer (on the phone now)

 and it's about time a build thread popped up!!
On The Tree
Joined: Jan 2007
Posts: 116
Likes: 0
From: Florida
Looks great, thats the first time I've seen someone use the Edelbrock headers. What are you planning to use for fuel delivery?
I've always wondered if a 4.2/4L60E swap out of a Trailblazer would fit in a 68-74. That would turn some heads.
I've always wondered if a 4.2/4L60E swap out of a Trailblazer would fit in a 68-74. That would turn some heads.
Thread Starter
Joined: Jan 2006
Posts: 6,670
Likes: 6
From: Concord, CA
Thanks for the good word guys.. It funny, when I did my Chevelle, I had it pertty much all planed out.. With this Nova.. I kinda have an idea of what and how.. but nothing set for sure.. LOL
For the Fuel system, I think I am going to order a new tank, mod it for either a TanksINC unit or try using some other OEM sender/bucket/pump(and switching to a Walbro). Install an new 3/8" SS line where needed and use a 99+ FPR for filter and regulator.
Not sure about the steering box, if anything I'll just switch over to a OEM Quick Ratio box. but thanks for suggesting the Lee Unit.. I'll look around to see what I can find.
I can see that the project will be slowing down some now as I have to get the Trans refreshed and find a 12 bolt or something and the list goes on.. but I hope to get the firewall and under body painted soon so that I can get it back togehter and work on the accessories and wiring.
I don't see why with a little work the 4.2/4L60E would fit.. just have to work around the pan..
Last edited by bczee; Mar 5, 2012 at 08:26 PM.
On The Tree
Joined: Jan 2007
Posts: 116
Likes: 0
From: Florida
A Trailbazer drive shaft (not the long version) will fit if you go with a Currie 9" housing and chunk. The 3 inch factory aluminium drive shafts in Chevy Trailblazers are pretty stout, been running one for about a year now. Have to change rear U-joint to snap ring style to fit rearend yoke.
Looking good!
Looking good!
Last edited by 70Nova SS; Nov 8, 2010 at 06:20 PM.
Thread Starter
Joined: Jan 2006
Posts: 6,670
Likes: 6
From: Concord, CA
70NovaSS.. thanks for the tip..but i've sold off the Camaro Drive Shaft. was just going to get one made up.
nhra crazy - The tubular A-Arm's are from Performance Online (POL)... They seem to be ok... but I'll find out down the road if they hold up and work ok.
This project seem to be done one step at a time and designing it as I go LOL...
nhra crazy - The tubular A-Arm's are from Performance Online (POL)... They seem to be ok... but I'll find out down the road if they hold up and work ok.
This project seem to be done one step at a time and designing it as I go LOL...