


 .
. 

T/A A4 Shifter Boot/Knob Mod Write-Up!
Finally got around to this mod and thought I'd post a write-up. Sorry for some of the pics, but of course, it started to rain and I had to pull the car in where the lighting was not as good...
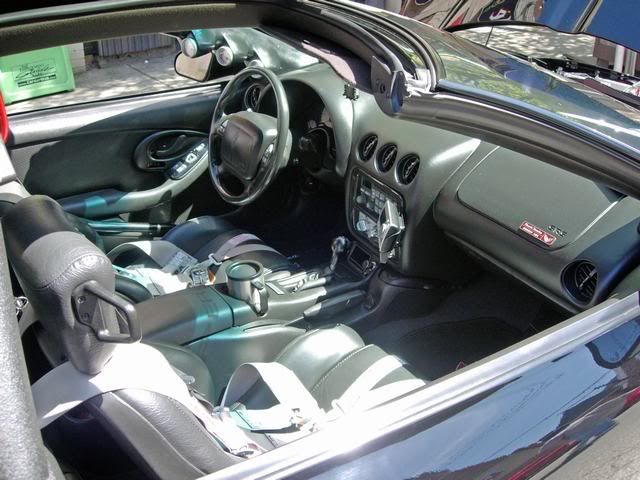
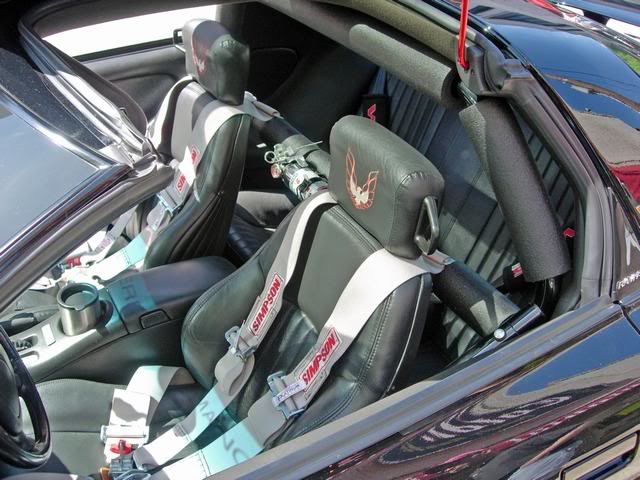
First, here are some pics of finished job:


The Shift **** I used is from MBA - Black with tail & engraved Silver Bird including shift adapter for A4. Unfotunately, MBA is no longer in business, but Thunder Racing bought up their remaining stock and still has all that is left in the world for sale. They do have the Shift *****, but I don't see any more of the Black with engraved Bird available on their site I bought mine new from a forum member just recently for a great price.
The Boot is a GM Part - from a 2002 Grand Am with auto tranny, P/N 22670660 Boot Asm 4.015 (Price - $34.51) Nice thing about this boot is that it is not simply a 'universal' boot that is way to large, needs to be cut down, and still bunches up a shitload around shifter - the height is exactly correct once the shift lever is cut down some. The opening in the Grand Am console around the shift lever is the exact same shape/size as the T/A so the bottom fits in the T/A opening perfectly! The top of the boot fits nice and tight around the tail of the shift **** once installed also.
Pics of Shift **** & A4 Adapter:


Step #1:
Remove stock T-handle shift **** by prying out the U-shaped retaining clip from the front of the shift **** with a small screwdriver - then pull **** off shift lever.
Step #2:
Remove Console top by first removing Coin Holder, then remove (2) screws that hold down rear of Console Top. Lift console top up, be sure to unfasten the small light for the shift indicator, and pull console top up and out. Shift lever will need to be in the '3' position for the console top to come off easily.
Step #3:
Remove Shift Indicator Housing from underneath of console top by taking out fastening screws. Then pull out all the Shift Leaves except for the one with the hole that the shift lever goes thru - this needs to be retained in order for the shift indicator to still function. Take your new Boot and install thru hole in console top from the underneath - there is no need to cut the boot or do any gluing, etc. The Boot already has a metal ring sewn into the bottom that is the shape/size of the console shift hole. Simply push boot thru hole till bottom of boot bottoms out, and re-install the Shift Indicator Housing/screws to effectively trap the boot between the console top and the housing.
Step #4:
Now it is time to cut down your stock Shift Lever (this is not entirely necessary, but the **** adapter will make your shift **** higher than it was and the boot will not go up & over the tail fully if you don't). I used a Dremel with a Abrasive Cut-Off Disk to cut the metal of the shift lever off at the small horizontal slots that are already cut into the lever to receive the old shift **** retaining u-clip. This is 3/4" lower than stock height and the grooves make a great guide for the (2) cuts. Be VERY CAREFUL to cut thru only the metal and not the inner white plastic Shift Plunger. You will see that you need to cut halfway around to remove one side and the rest of the way to remove the other half (these end up being in (2) pieces due to the vertical slots that are already in the shift lever). I then cleaned up/deburred the cut ends with a small file. Next you will need to elongate those (2) vertical slots by the same amount that we cut off the shift lever (3/4"). I used the Dremel with a Carbide 1/8"Dia Cutter to do this. Again, be VERY CAREFUL to grind slot longer without cutting into white plastic Inner Shift Plunger. I then deburred these edges with some emery paper. Lastly, you need to trim the top of the white plastic Inner Shift Plunger by the same amount (3/4") that you cut off shift lever. I used the Dremel with Abrasive Cut-Off Disc again for this task.
See pics of where you're at below-


Step #5:
Make sure you thoroughly clean out any metal shavings/chips, lube the sides of the top of the shift lever with some Lithium Grease, and install the A4 Shift Adapter. Slide it down over the shift lever, making sure to align the set screws in the adapter with the newly elongated vertical slots in the lever. I actually screwed (1) of the adapter small set screws in so that it was below the surface of the adapter - then installed the adapter - then tightened the other set screw opposite the first one till it was also recessed below surface of adapter. These set screws tighten down on the white plastic Inner Shift Plunger so that shifting is still possible. You will now push down on shift **** to change gears instead of pushing in on button as with stock shift ****.
It is highly important that you get both set screws below the surface of the adapter as the tail of the **** will slide over this area as it is threading onto the adapter. If you leave one stick out the least bit - the **** will catch and gall - possibly not being able to be installed fully or removed
This is what your shifter should look like at this step-

Step #6:
Now you will need to re-install your Console Top. Pull the shift lever back to the '3' position, slide the shift lever first thru the hole in the Shift Leaf and then up thru boot. Make sure to re-install shift indicator light. Re-install (2) screws at rear and coin holder.
Step #7:
Finally, install your new Shift **** by threading it fully onto adapter. I also first lubed the outside of the adapter and threads with some more Lithium Grease. Then pull top of Shift Boot up and over the tail of the ****. If you have trimmed your lever as above, the boot will go almost all the way up the tail to the ****. This is important as when the shifter is in the Park position, the boot will be stretched the furthest. If you don't trim the shift lever - the boot will want to slide off the tail and you will see some of the shift lever below the tail exposed. Again, this might not bother you, so trimming your lever would not be necessary. I did the install first without cutting the lever and definitely didn't like the fact that the adapter made the **** much higher than before - so cutting the lever solved both problems.
Now you're DONE!
Some last pics-


Hope this helps some of you out!
Next I'll be doing a 2-1/16" Gauge Install in the center (3) vents write-up with a new little twist Hint: the gauges will be installed angled toward the driver instead of straight in the vent openings.
>>>>>Mods - feel free to make this a 'sticky' if you think it is explained well enough - as questions on this mod come up all the time <<<<<<
-Jay-
First, here are some pics of finished job:
The Shift **** I used is from MBA - Black with tail & engraved Silver Bird including shift adapter for A4. Unfotunately, MBA is no longer in business, but Thunder Racing bought up their remaining stock and still has all that is left in the world for sale. They do have the Shift *****, but I don't see any more of the Black with engraved Bird available on their site
I bought mine new from a forum member just recently for a great price. The Boot is a GM Part - from a 2002 Grand Am with auto tranny, P/N 22670660 Boot Asm 4.015 (Price - $34.51) Nice thing about this boot is that it is not simply a 'universal' boot that is way to large, needs to be cut down, and still bunches up a shitload around shifter - the height is exactly correct once the shift lever is cut down some. The opening in the Grand Am console around the shift lever is the exact same shape/size as the T/A so the bottom fits in the T/A opening perfectly! The top of the boot fits nice and tight around the tail of the shift **** once installed also.
Pics of Shift **** & A4 Adapter:
Step #1:
Remove stock T-handle shift **** by prying out the U-shaped retaining clip from the front of the shift **** with a small screwdriver - then pull **** off shift lever.
Step #2:
Remove Console top by first removing Coin Holder, then remove (2) screws that hold down rear of Console Top. Lift console top up, be sure to unfasten the small light for the shift indicator, and pull console top up and out. Shift lever will need to be in the '3' position for the console top to come off easily.
Step #3:
Remove Shift Indicator Housing from underneath of console top by taking out fastening screws. Then pull out all the Shift Leaves except for the one with the hole that the shift lever goes thru - this needs to be retained in order for the shift indicator to still function. Take your new Boot and install thru hole in console top from the underneath - there is no need to cut the boot or do any gluing, etc. The Boot already has a metal ring sewn into the bottom that is the shape/size of the console shift hole. Simply push boot thru hole till bottom of boot bottoms out, and re-install the Shift Indicator Housing/screws to effectively trap the boot between the console top and the housing.
Step #4:
Now it is time to cut down your stock Shift Lever (this is not entirely necessary, but the **** adapter will make your shift **** higher than it was and the boot will not go up & over the tail fully if you don't). I used a Dremel with a Abrasive Cut-Off Disk to cut the metal of the shift lever off at the small horizontal slots that are already cut into the lever to receive the old shift **** retaining u-clip. This is 3/4" lower than stock height and the grooves make a great guide for the (2) cuts. Be VERY CAREFUL to cut thru only the metal and not the inner white plastic Shift Plunger. You will see that you need to cut halfway around to remove one side and the rest of the way to remove the other half (these end up being in (2) pieces due to the vertical slots that are already in the shift lever). I then cleaned up/deburred the cut ends with a small file. Next you will need to elongate those (2) vertical slots by the same amount that we cut off the shift lever (3/4"). I used the Dremel with a Carbide 1/8"Dia Cutter to do this. Again, be VERY CAREFUL to grind slot longer without cutting into white plastic Inner Shift Plunger. I then deburred these edges with some emery paper. Lastly, you need to trim the top of the white plastic Inner Shift Plunger by the same amount (3/4") that you cut off shift lever. I used the Dremel with Abrasive Cut-Off Disc again for this task.
See pics of where you're at below-
Step #5:
Make sure you thoroughly clean out any metal shavings/chips, lube the sides of the top of the shift lever with some Lithium Grease, and install the A4 Shift Adapter. Slide it down over the shift lever, making sure to align the set screws in the adapter with the newly elongated vertical slots in the lever. I actually screwed (1) of the adapter small set screws in so that it was below the surface of the adapter - then installed the adapter - then tightened the other set screw opposite the first one till it was also recessed below surface of adapter. These set screws tighten down on the white plastic Inner Shift Plunger so that shifting is still possible. You will now push down on shift **** to change gears instead of pushing in on button as with stock shift ****.
It is highly important that you get both set screws below the surface of the adapter as the tail of the **** will slide over this area as it is threading onto the adapter. If you leave one stick out the least bit - the **** will catch and gall - possibly not being able to be installed fully or removed
This is what your shifter should look like at this step-
Step #6:
Now you will need to re-install your Console Top. Pull the shift lever back to the '3' position, slide the shift lever first thru the hole in the Shift Leaf and then up thru boot. Make sure to re-install shift indicator light. Re-install (2) screws at rear and coin holder.
Step #7:
Finally, install your new Shift **** by threading it fully onto adapter. I also first lubed the outside of the adapter and threads with some more Lithium Grease. Then pull top of Shift Boot up and over the tail of the ****. If you have trimmed your lever as above, the boot will go almost all the way up the tail to the ****. This is important as when the shifter is in the Park position, the boot will be stretched the furthest. If you don't trim the shift lever - the boot will want to slide off the tail and you will see some of the shift lever below the tail exposed. Again, this might not bother you, so trimming your lever would not be necessary. I did the install first without cutting the lever and definitely didn't like the fact that the adapter made the **** much higher than before - so cutting the lever solved both problems.
Now you're DONE!
Some last pics-
Hope this helps some of you out!
Next I'll be doing a 2-1/16" Gauge Install in the center (3) vents write-up with a new little twist
Hint: the gauges will be installed angled toward the driver instead of straight in the vent openings.>>>>>Mods - feel free to make this a 'sticky' if you think it is explained well enough - as questions on this mod come up all the time <<<<<<
-Jay-
I've looked at a few pictures of others who have done the same thing and I would like to know if you wanted to, could you have the shifter sit lower? Can you trim it to have the ball sit down farther or are you already at a point that you can't go any more? Also, that's a manual shift ball which you got an adapter for. I had called TR about getting one of the ***** but they said they had no idea if you could use an adapter on it, so I paused on ordering. Where'd you get your adapter/how much? Thanks!
You probably could cut it down a little more - I've heard that some cut off 1" There is a point that if you cut off too much, you will reach an area where the plastic Inner Plunger changes diameter - and then the adapter won't work - hence you're screwed. 
I was happy with the height at cutting off the 3/4" and it just so happened that the machined grooves in the lever from the factory are 3/4" down & made the cutting easier.
The shift **** I bought was supposedly made specifically for the A4 and the matching adapter came with it. It might be that TR doesn't have any of these left (or maybe never did have any). Like I stated, I bought mine from a forum member a couple weeks ago. He originally purchased it from MBA but never used it.
Last edited by 1QUIKWS6; Apr 25, 2006 at 06:14 PM.
Trending Topics
LS1 Tech Stories
The Best V8 Stories One Small Block at Time

Gas Monkey Built a 6-Wheel Ferrari Testarossa With a Corvette LT4 Engine
Verdad Gallardo
7 Most Reliable High-Performance Engines GM Has Ever Built
Verdad Gallardo
Amazing '71 Camaro Restomod Is Modern Muscle Car Under the Skin
Verdad Gallardo
6 Common C5 Corvette Failures and What's Involved In Repairing Them
Pouria Savadkouei
Retro Modern Bandit Pontiac Trans AM Comes With Burt Reynolds' Autograph
Verdad Gallardo
Top 10 Greatest Cadillac V Series Performance Models Ever, Ranked
Pouria Savadkouei
Top 10 Most Powerful Chevy Trucks Ever Made!

Hennessey's New Supercharged Silverado ZR2 Has 700 HP
Verdad Gallardo
Coachbuilt N2A Anteros Is an LS2-Powered C6 Corvette In Italian Clothes
Verdad Gallardo
Originally Posted by 1QUIKWS6
Thanx! I didn't know if I would like it either - but the price for the **** was too good to pass up so I thought I'd give it a try...
! 


please keep us informed on the write up on the 3 gauges in the vents, i want to do that on mine, i love the idea of them on an angle facing the driver. btw, thanks for the a4 shifter boot write up also.
No problem! I'm just waiting for my new vents to come in from GM - didn't want to start screwing with the vents in the car until I had another set to replace them with if I don't get done in time, or make a boo boo before the next show 

great write-up, i think im going to cut down the shifter, but will i still be able to use the stock ****? if you cut the shifter down do you have to use some kind of adapter and a aftermarket ****?
Very nice writeup, and thanks for the info on the cutoff wheel. Worked a hell of a lot better than the cutting diskblade that I bought, the teeth went dull in no time on that one. I found out the hard way that the inner plastic stick gets a lot different once you get low.. I cut 3 inches off, planned to cut more off but alas didn't work. I'm not posting the pics, though, because it looks way too tall with my tall shiftknob that I purchased... now I need to find a shorter ****.
