Full blown custom Trans Am interior project (writeup)
#32
I really want to see how you wrap the arm rest. thats the only think keeping me from doing somthing like this. I also hope you do the dash. Ive yet to see anyone do the dash good.
#35
http://www.nytek-usa.com/nova_novasuede.htm
They're both from 3M, but I used the Super 77 on the suede. I wouldn't recommend trying to use Fastbond on fabric, because it has the consistency of Elmer's glue and would most likely bleed through.
Originally Posted by rons 00z
what glue did you use for the suede the 77 stuff or the 3m?
#36
Originally Posted by x2jesse1x
updates?
Updating.

So to start off here I must make it known that I royally SUCK at sewing. I really, really, really wish that this project could be 100% do-it-yourself, but I also want the end result to be show quality and at my skill level, that just isn't possible.
I'm doing the arm rests in a half and half wrap. As you'll see later, the upper half consisting of the switch panels and door grab will be done in Skintex. The lower half where your arm actually rests will be done in suede. The initial problem I discovered with this is that when these two materials are laid out side-by-side, even when there is a stitched seam holding them together, the end result is that it just looks kind've bland. So I needed something to jazz it up a little bit while providing a more finished look.
At the same time, to ensure that this project turns out to be as close as possible to how I originally envisioned it, I'll probably have better chances making a visual aid for the upholstery trim shop to have something to reference when they make the final draft.
So this first segment is my (weaksauce) attempt at creating a mockup for the trim shop.
This first pic is all of the materials laid out next to the sewing machine. I'm using a separate swatch of Skintex snake that is a slightly different pattern than the Skintex SF snake upholstery that I'm using throughout the rest of the interior. This pattern difference is very subtle, but just enough to lend contrast and act as a "parting line" between the Skintex SF on the upper arm rest and the suede:
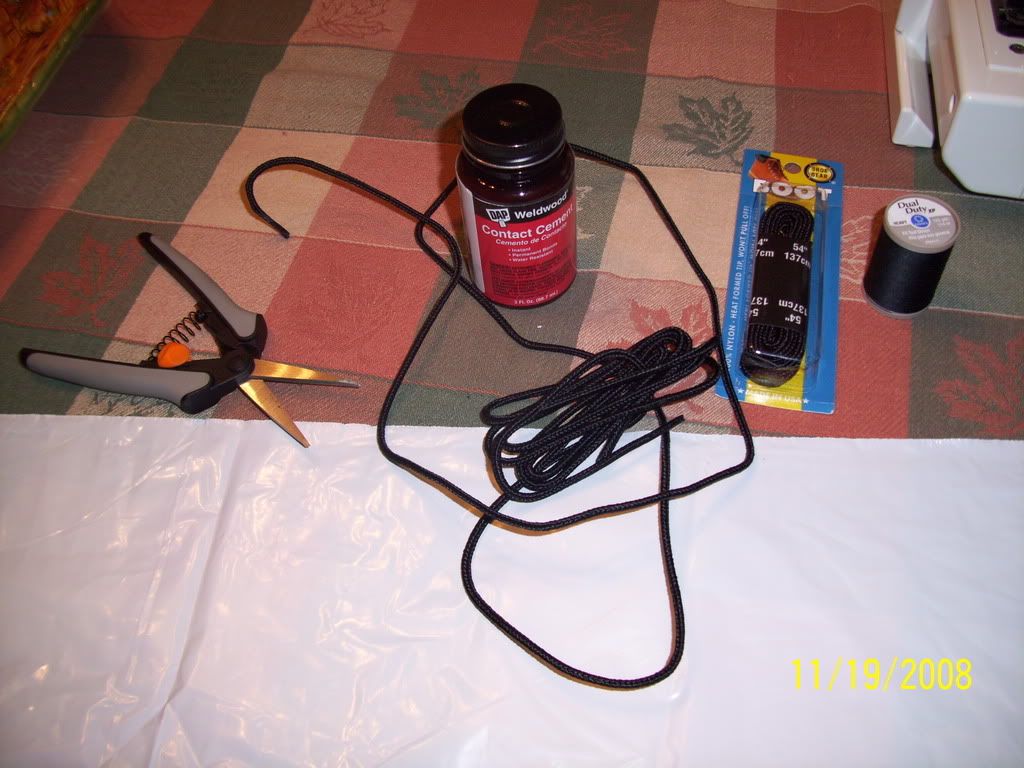
The first thing I've done is cut out the bias strip of Skintex. I've laid out a pair of heavy duty nylon boot laces to use as piping:
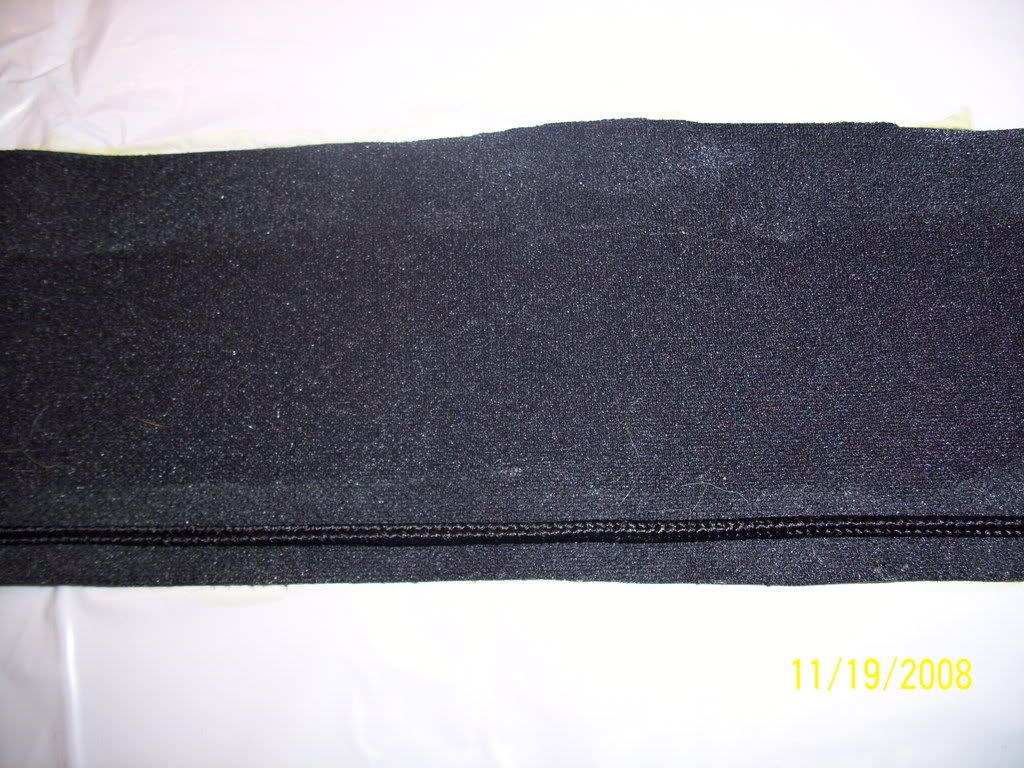
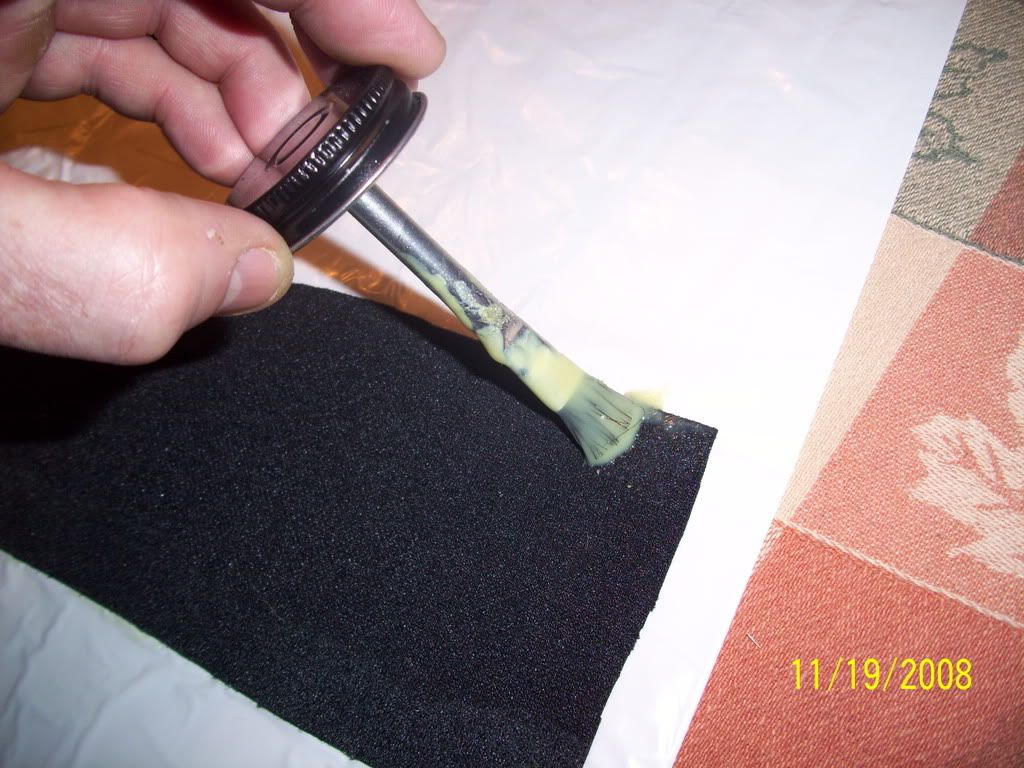
Next we'll use some Weldwood along the edges of the bias strip to attach the boot laces:
After laying down the boot laces, we'll start wrapping the edges of the vinyl over:
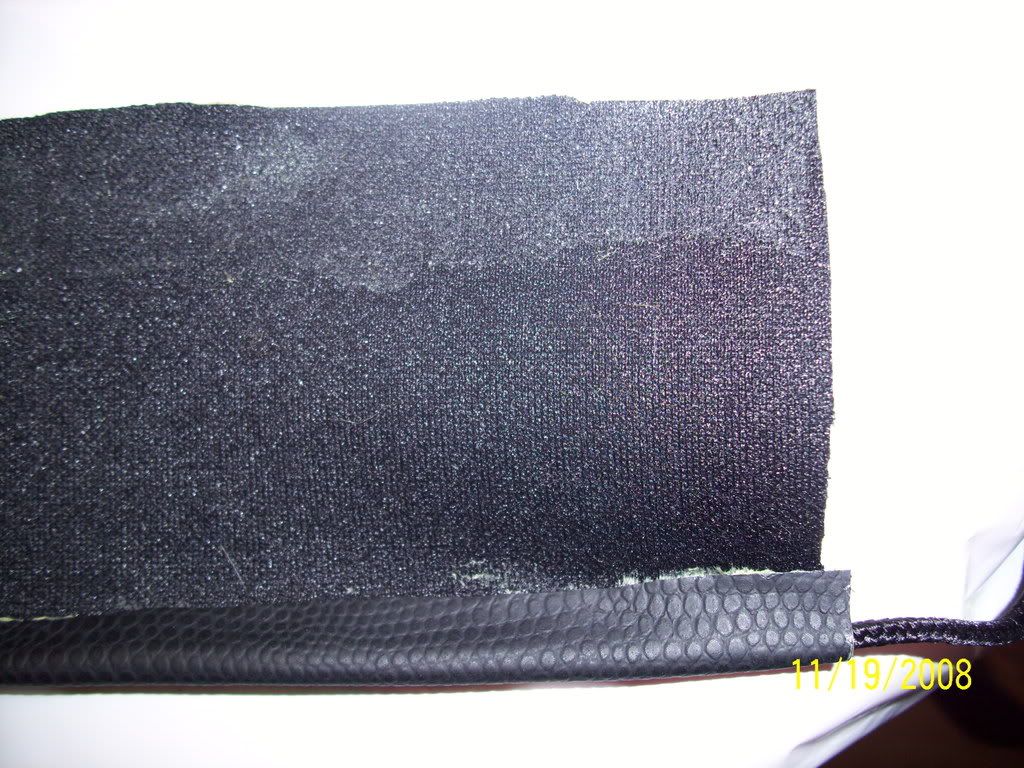
This takes a little patience, but you'll have to keep working the vinyl around the boot laces until it has a chance to "memorize" the shape:
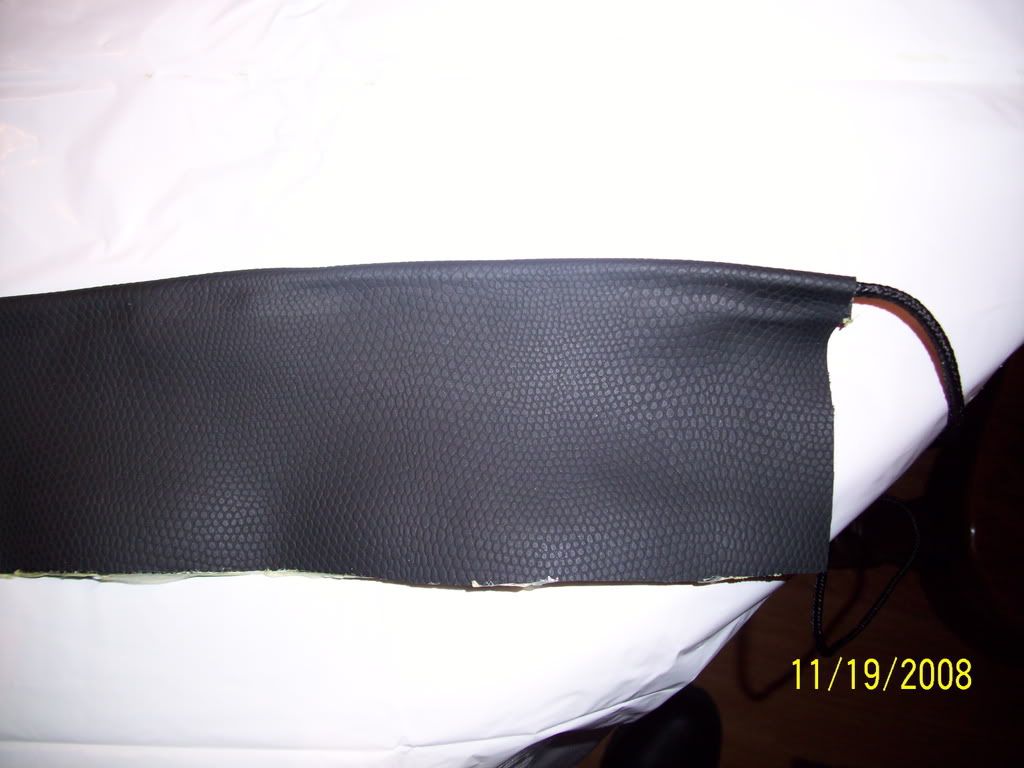
When we're done, we should have something similar to this:
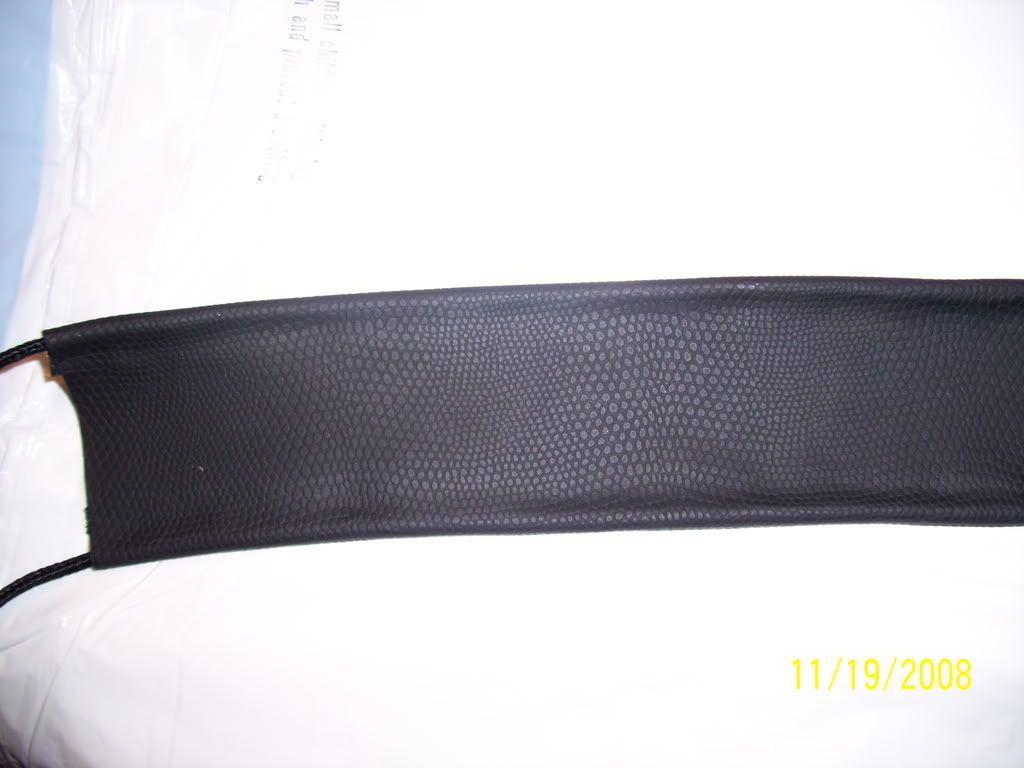
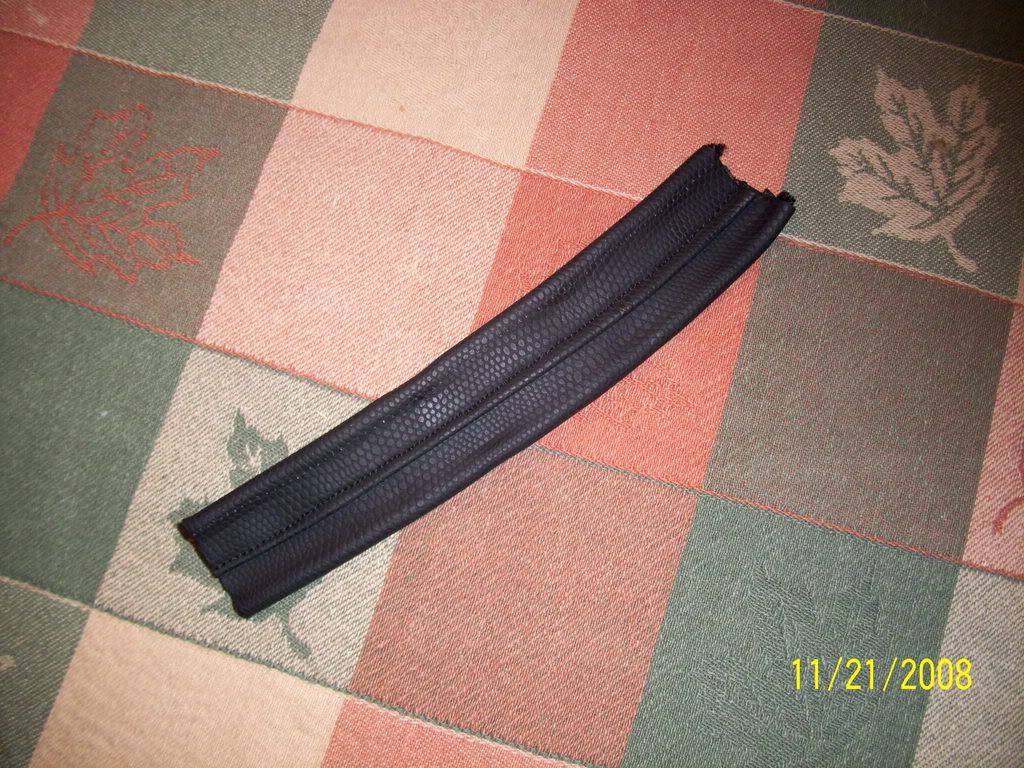
After getting the piping all situated and ready for sewing, I discovered that my sewing machine just didn't have enough "grunt" to feed the needle through two layers of vinyl. So unfortunately, I wasn't able to finish the piping edges the way I wanted. But this image is a pretty close representation of what the final finish will look like:
Now on to wrapping the arm rest in Skintex...
#38
You may want to grab a few beers for this next segment, because while it isn't (too) hard, it's pretty time consuming.
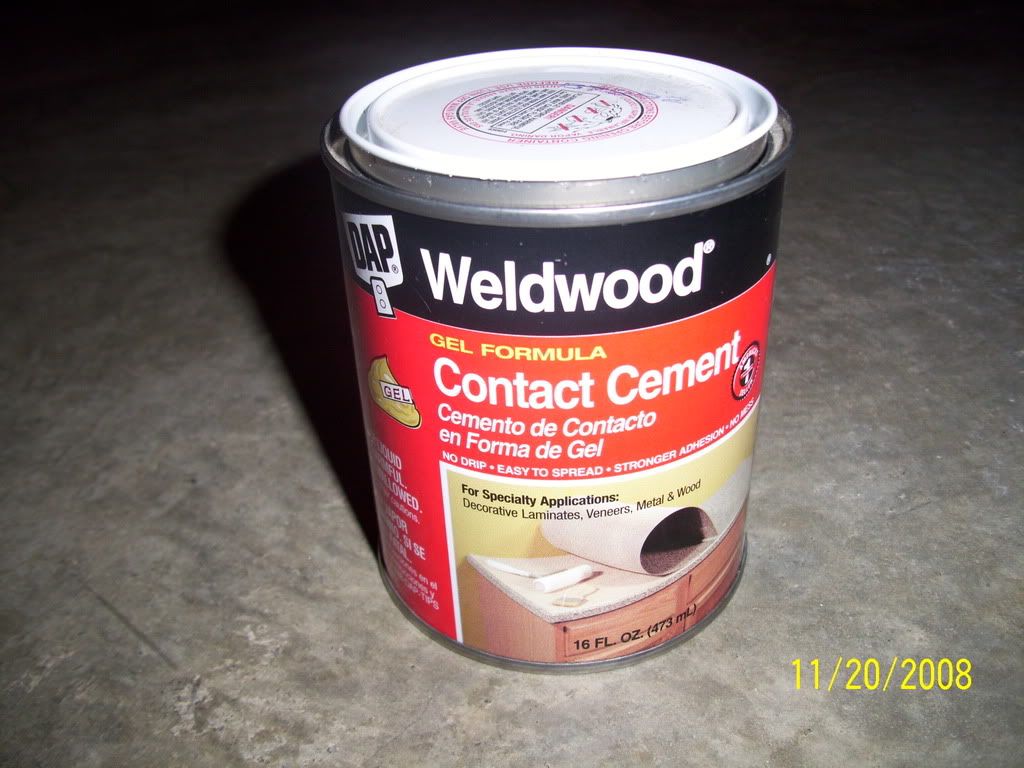
First off, we're going to use Weldwood "Gel" formula contact cement to do this part. The only reason is because the 3M Fastbond is just a bit too (runny) messy and I'm afraid of getting gluey fingerprints all over the vinyl:
I discovered that the trick to this is that instead of covering the entire surface of the armrest with glue all at once, just start at the tip and gradually work your way back, gluing as you go. I would also have to say at this point that it's a definite must to have some form of heat gun, (I used a regular household blow dryer), to aid in helping glue curing/vinyl forming.
Alright so let's fast forward past the gluing stage and get onto sewing.
I used a simple spool of heavy duty black upholstery thread and a sewing needle, old school style:
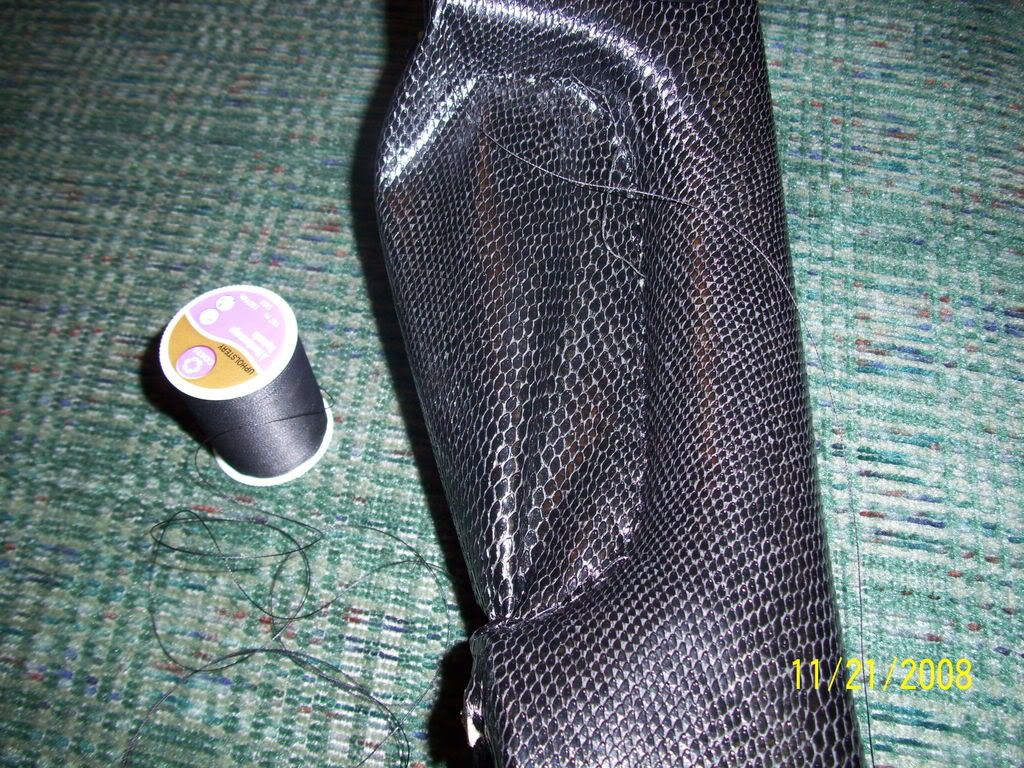
As you can see, my stitching pattern is horrible, but you'll find out a little later why this won't matter too much:
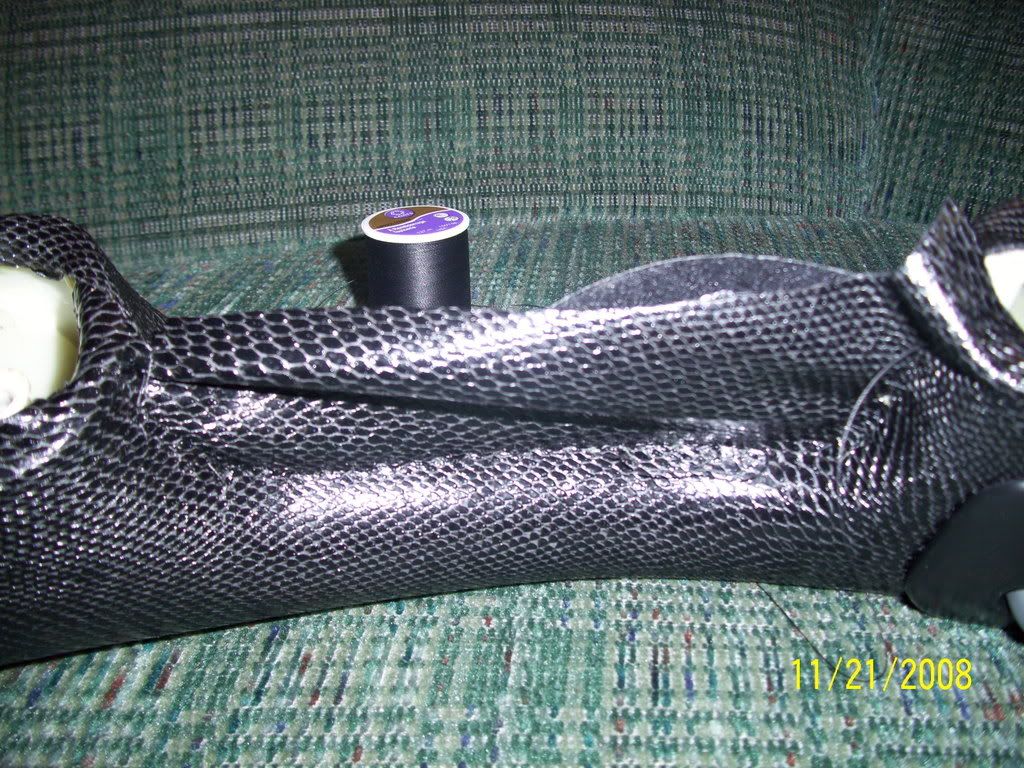
All in all, I ended up doubling back over my original row of stitches. The reason for this is because the first row of stitches is sort've like the "feeler" stage, where you're establishing a line of sight from which to stitch a straight seam, while the second row is where everything gets sinched down skin tight:
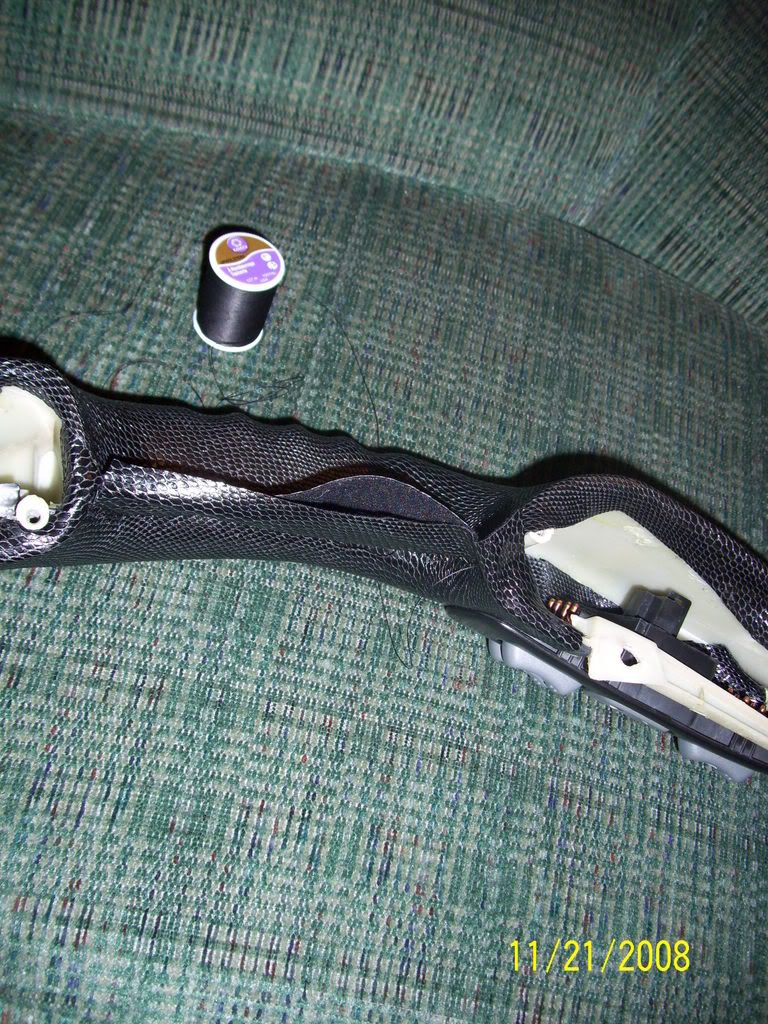
Okay, now that we've gotten a good, tight wrap on the vinyl and a relatively solid row of stitches, we can begin trimming away the excess vinyl with a pair of scissors:
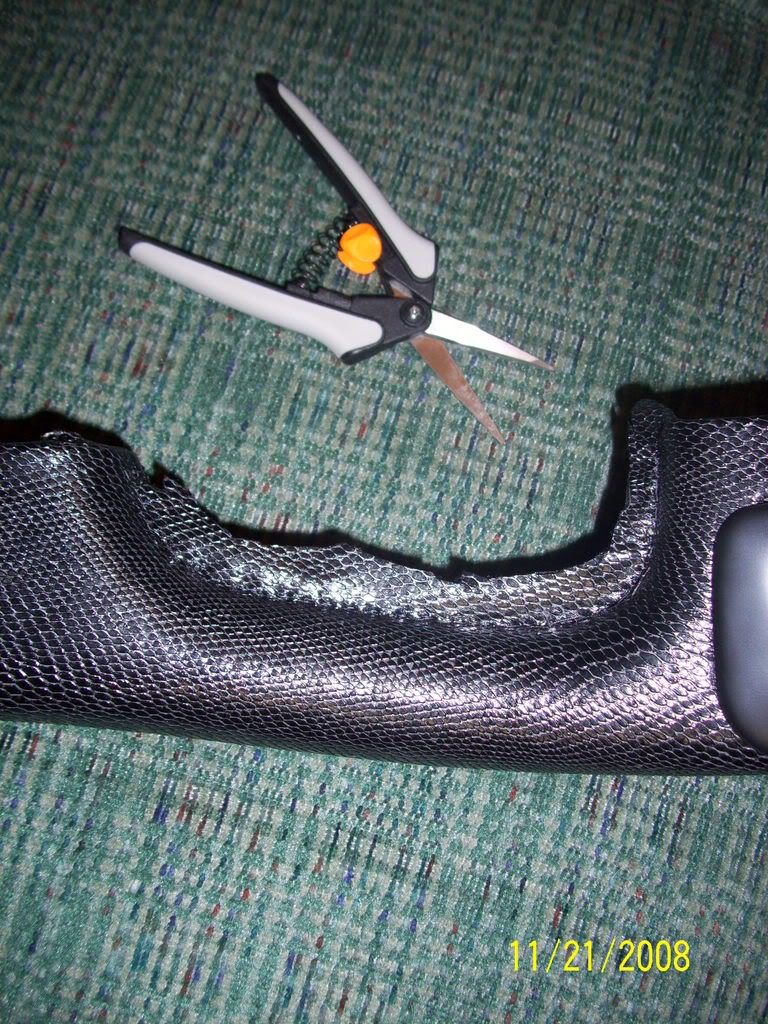
Unfortunately, scissors can only take away so much material, so as you can see in these next two pics, there's still a ridge left over that we'll have to take care of:
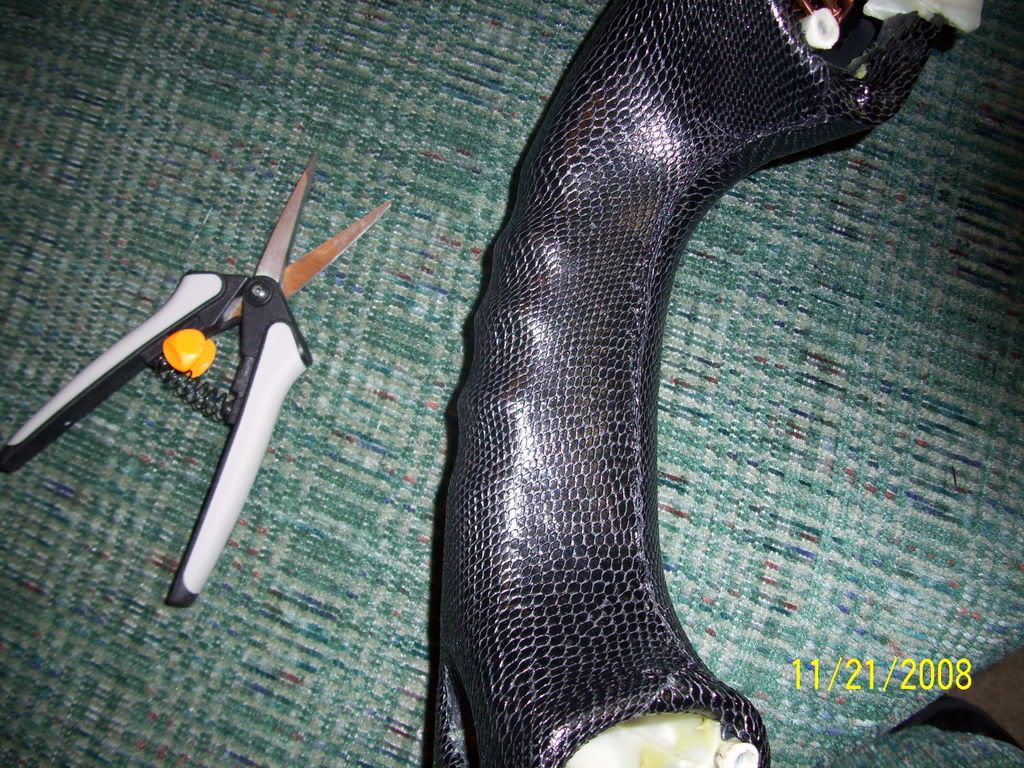
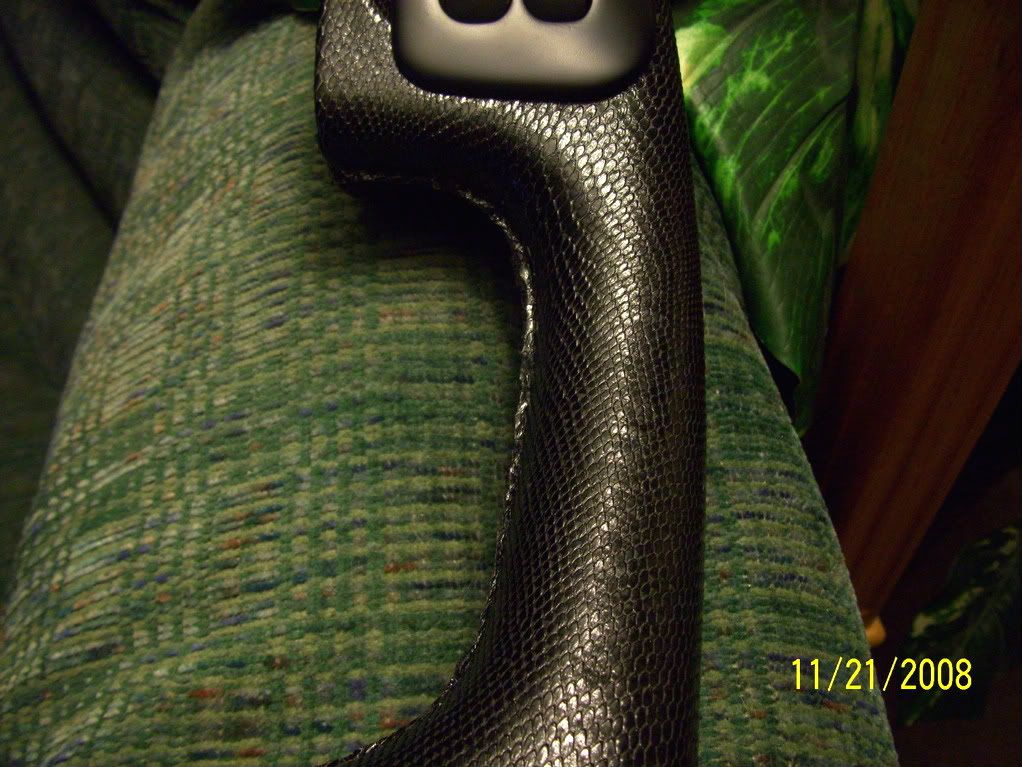
There are many different sanding bits that could be used to accomplish this, but I used a swiss roll on a 1/4" mandrel in my electric drill to knock down the excess trim:
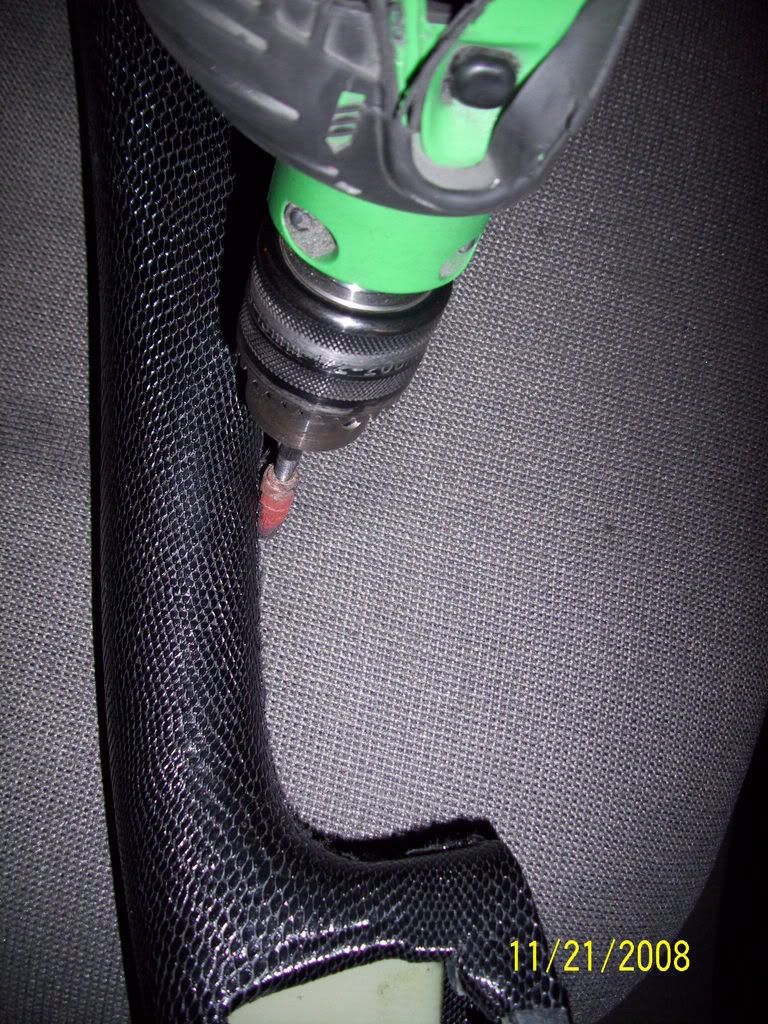
Alright, we're almost there but not quite. The sanding bit will take away most of the material that's left, but it will also leave somewhat of a rough edge along that inside seam. In addition, the sanding can't help but grind away some of the stitches, which won't immediately affect the seam but can become a problem in the longhaul during normal usage/wear & tear. We want this seam to last, so we're going to weld it shut permanently with a lighter:
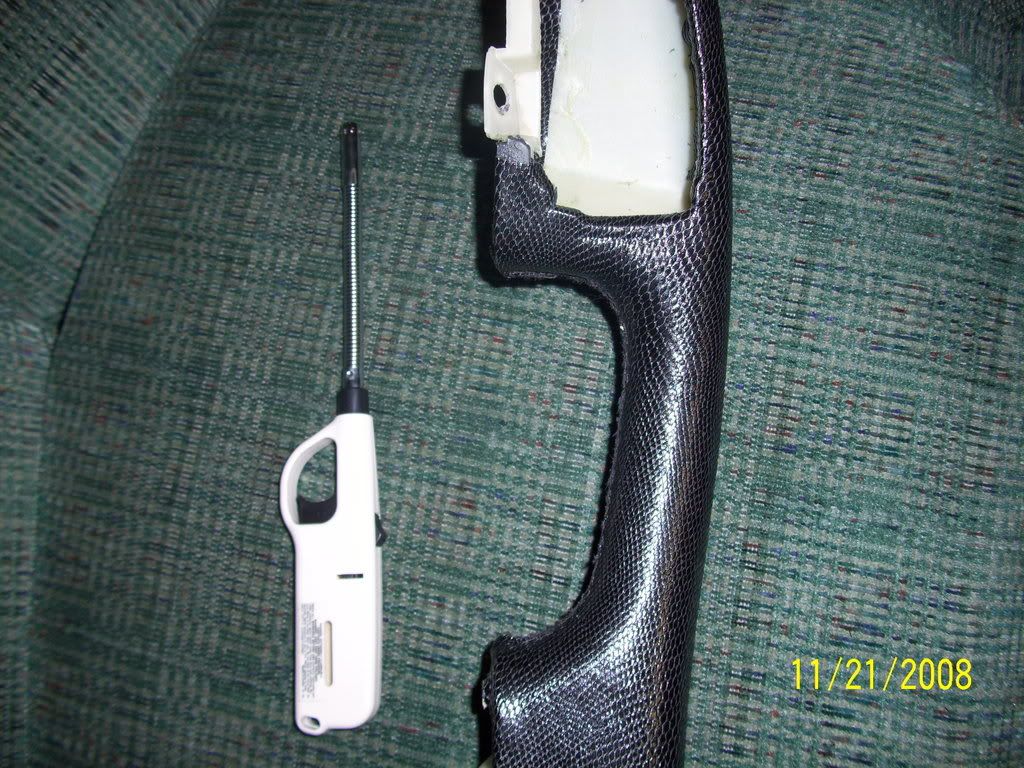
All you'll really want to do is allow the very tip of the flame to briefly lick the seam of the vinyl. Please be extremely careful during this step, as all it takes is for the flame to be near a spot for .5 seconds too long and your arm rest will have a permant hole. Go slowly and only allow the flame to come in contact with the vinyl in 1 inch or so increments. The trick to this is that immediately after the flame has licked the seal, you'll want to reach up with your thumb and press into it. The vinyl will (very momentarily) be in a state of "plasticization," and the pressing of your finger into the seam will allow both halves to meld together permanently.
And when we're done, we should have something that looks like this:
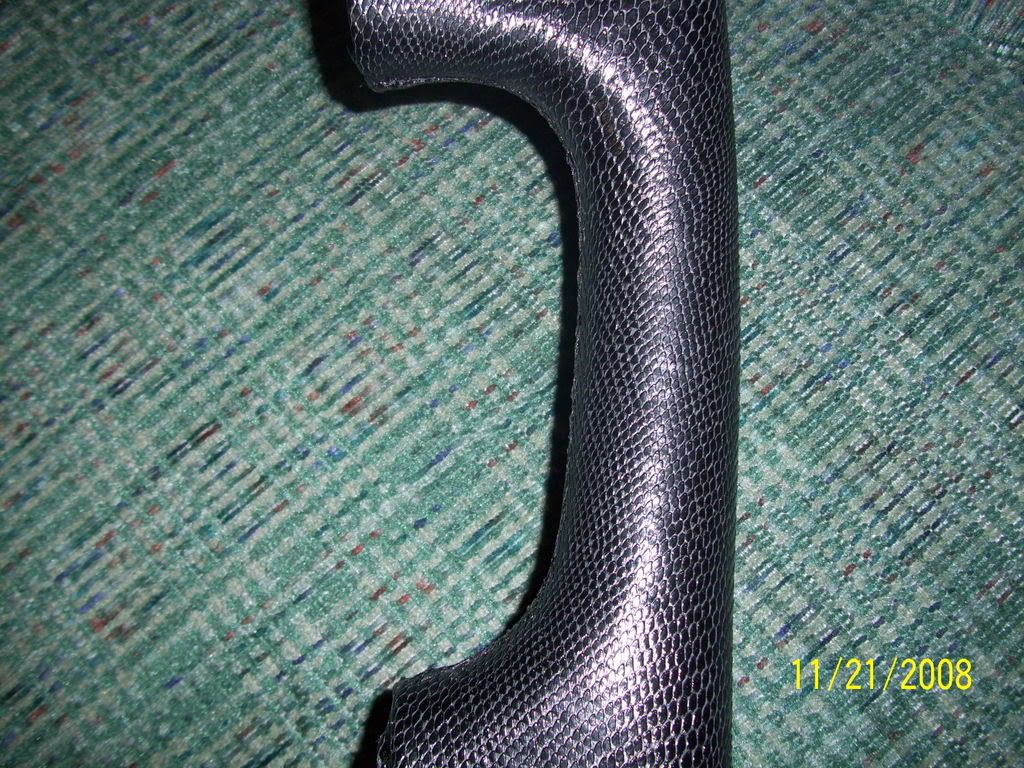
After the seam was welded, this allowed me to go back over it with the scissors and trim away all of those stray, out of line stitches left over from the hand sewing. Once the arm rest gets treated with a couple of light coats of SEM Landau black, everything will blend in and it will look factory.
One other point of note: the arm rests will be re-mounted back into the door frames using machine screws and zinc washers. The plastic sprews that were originally "heat staked" into the door frame are hollow on the inside, which allowed for the machine screws to thread right in with a screwdriver with no problems:
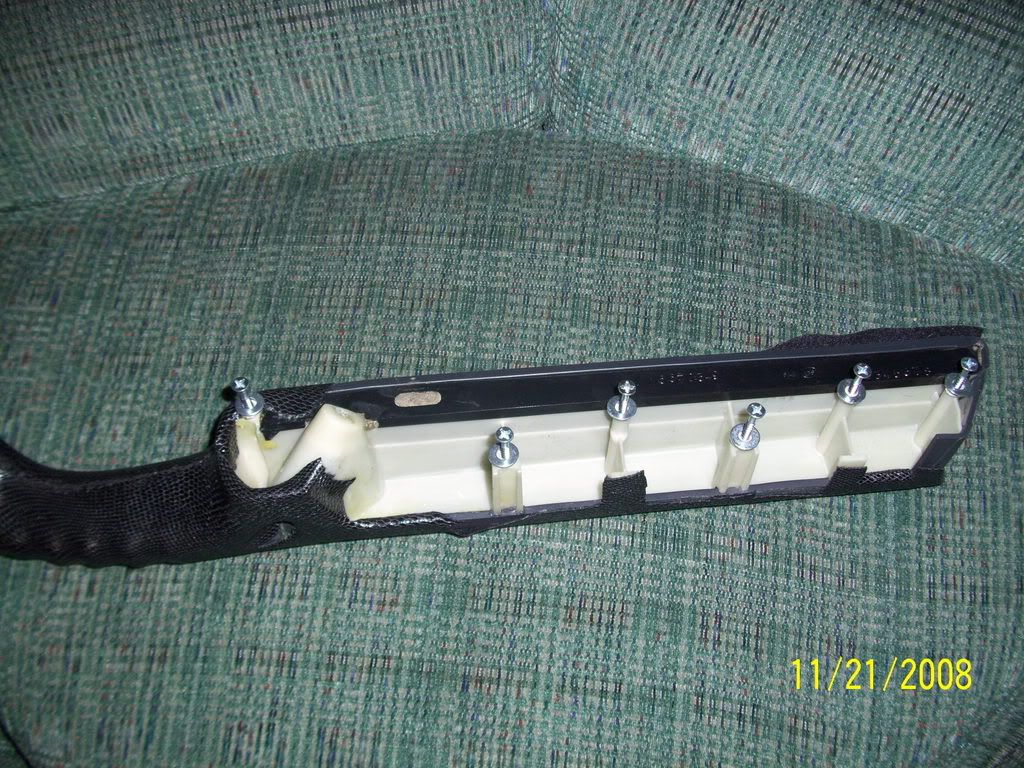
The next stop for these is the local trim shop. Stay tuned for the finished product.
First off, we're going to use Weldwood "Gel" formula contact cement to do this part. The only reason is because the 3M Fastbond is just a bit too (runny) messy and I'm afraid of getting gluey fingerprints all over the vinyl:

I discovered that the trick to this is that instead of covering the entire surface of the armrest with glue all at once, just start at the tip and gradually work your way back, gluing as you go. I would also have to say at this point that it's a definite must to have some form of heat gun, (I used a regular household blow dryer), to aid in helping glue curing/vinyl forming.
Alright so let's fast forward past the gluing stage and get onto sewing.
I used a simple spool of heavy duty black upholstery thread and a sewing needle, old school style:

As you can see, my stitching pattern is horrible, but you'll find out a little later why this won't matter too much:

All in all, I ended up doubling back over my original row of stitches. The reason for this is because the first row of stitches is sort've like the "feeler" stage, where you're establishing a line of sight from which to stitch a straight seam, while the second row is where everything gets sinched down skin tight:

Okay, now that we've gotten a good, tight wrap on the vinyl and a relatively solid row of stitches, we can begin trimming away the excess vinyl with a pair of scissors:

Unfortunately, scissors can only take away so much material, so as you can see in these next two pics, there's still a ridge left over that we'll have to take care of:


There are many different sanding bits that could be used to accomplish this, but I used a swiss roll on a 1/4" mandrel in my electric drill to knock down the excess trim:

Alright, we're almost there but not quite. The sanding bit will take away most of the material that's left, but it will also leave somewhat of a rough edge along that inside seam. In addition, the sanding can't help but grind away some of the stitches, which won't immediately affect the seam but can become a problem in the longhaul during normal usage/wear & tear. We want this seam to last, so we're going to weld it shut permanently with a lighter:

All you'll really want to do is allow the very tip of the flame to briefly lick the seam of the vinyl. Please be extremely careful during this step, as all it takes is for the flame to be near a spot for .5 seconds too long and your arm rest will have a permant hole. Go slowly and only allow the flame to come in contact with the vinyl in 1 inch or so increments. The trick to this is that immediately after the flame has licked the seal, you'll want to reach up with your thumb and press into it. The vinyl will (very momentarily) be in a state of "plasticization," and the pressing of your finger into the seam will allow both halves to meld together permanently.
And when we're done, we should have something that looks like this:

After the seam was welded, this allowed me to go back over it with the scissors and trim away all of those stray, out of line stitches left over from the hand sewing. Once the arm rest gets treated with a couple of light coats of SEM Landau black, everything will blend in and it will look factory.
One other point of note: the arm rests will be re-mounted back into the door frames using machine screws and zinc washers. The plastic sprews that were originally "heat staked" into the door frame are hollow on the inside, which allowed for the machine screws to thread right in with a screwdriver with no problems:

The next stop for these is the local trim shop. Stay tuned for the finished product.

#39
Here are a few pics of the door plastics being processed.
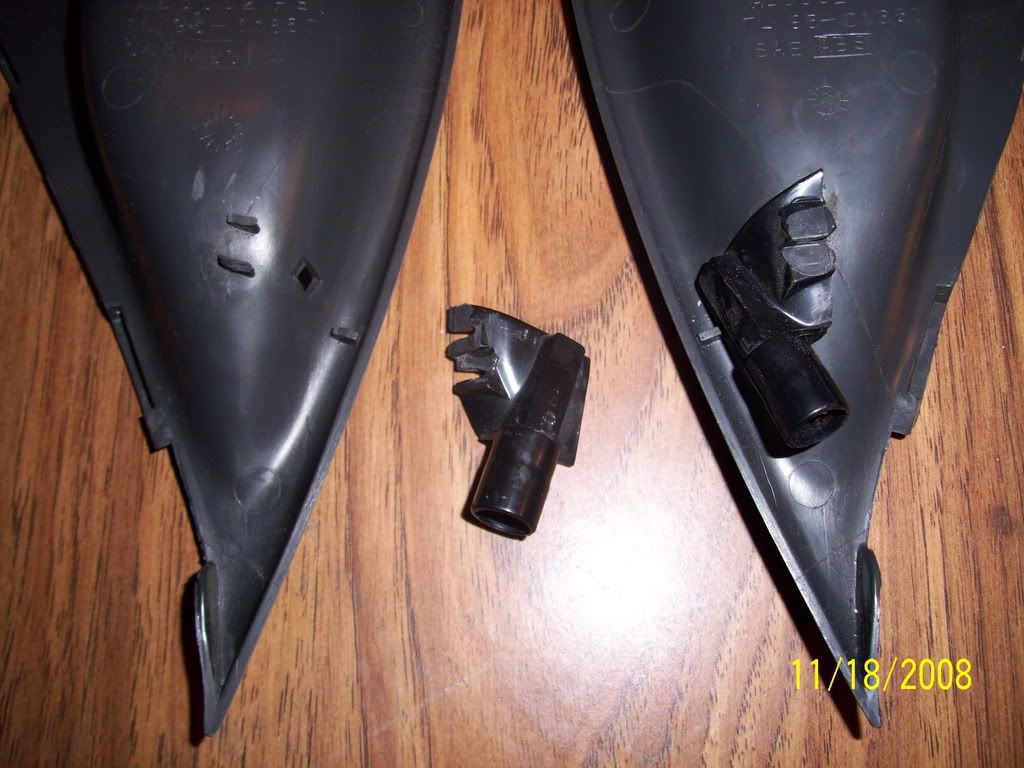
The first thing that must be done to the door handle bezels is to remove the light bulb holders from the back of them. This will ensure that the tiny red lenses won't get coated over with dye when the rest of the bezel gets dyed. To remove them, I simply ground the heat stakes off with an 80 grit roloc disc and gently wiggled them until they came loose:
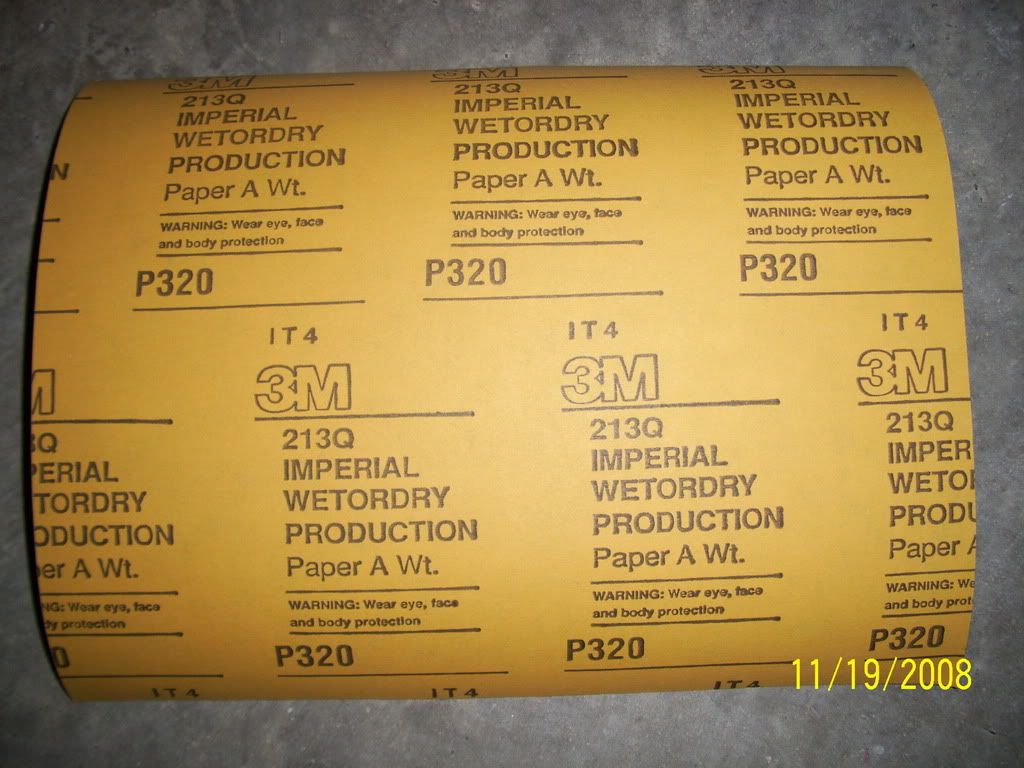
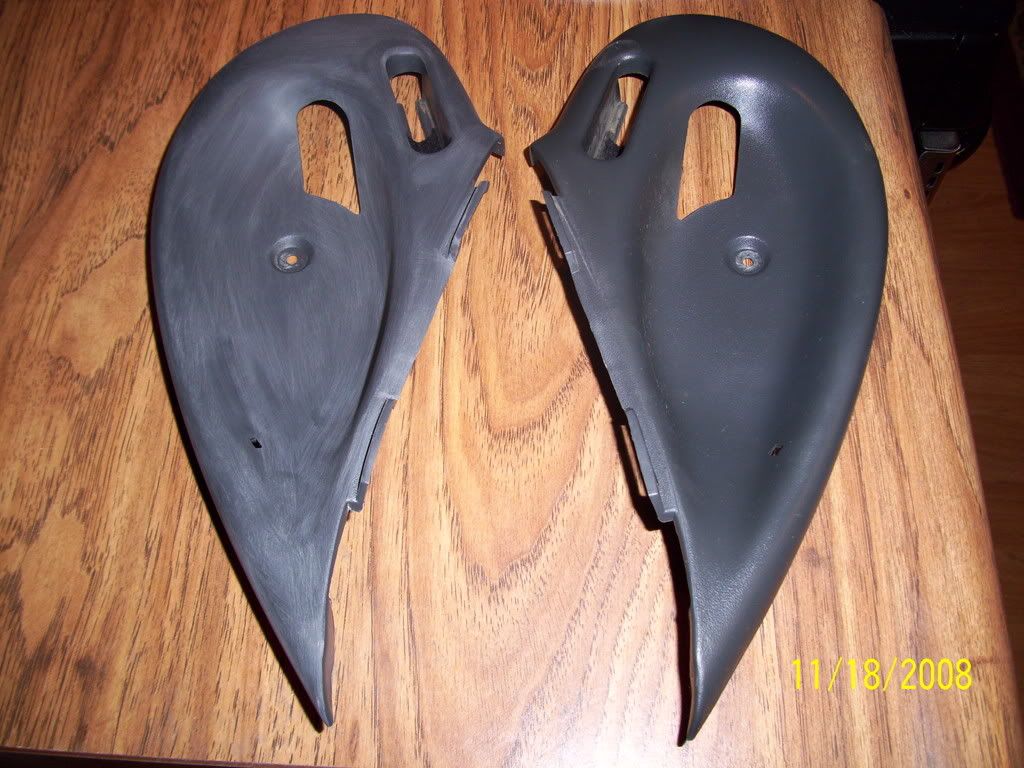
I used 3M 320 grit Wet Or Dry aluminum oxide to sand the graininess out of the finish:
A sanded bezel next to a stock charcoal gray one:
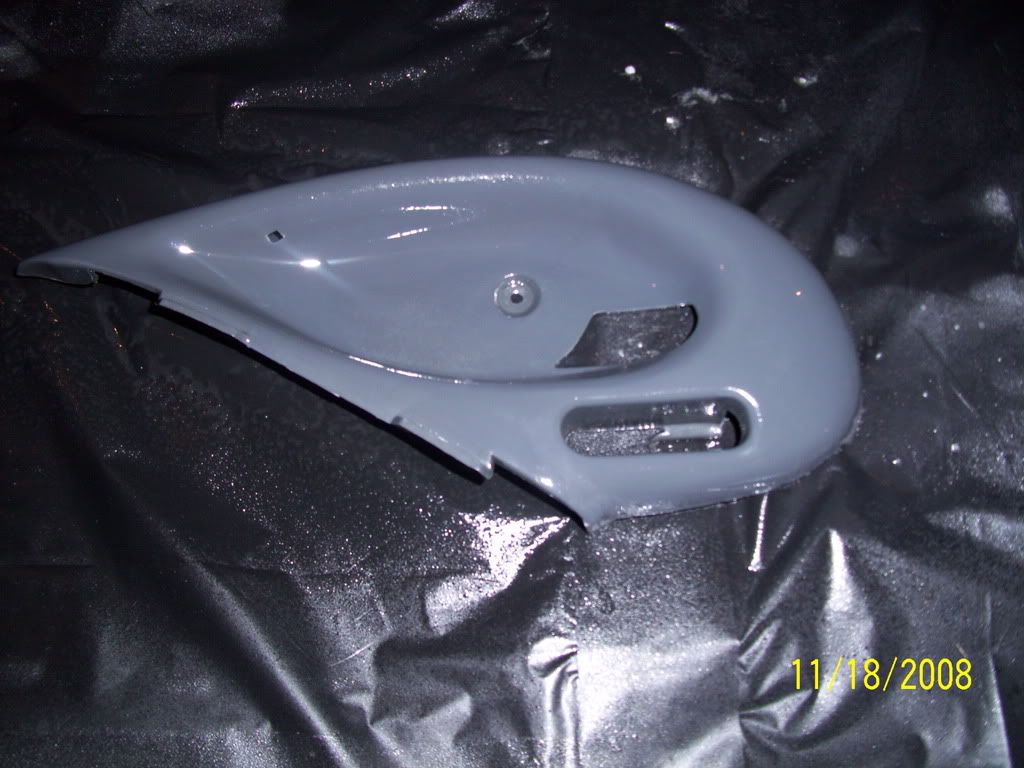
Next we'll give it a good once over with some adhesion promoter:
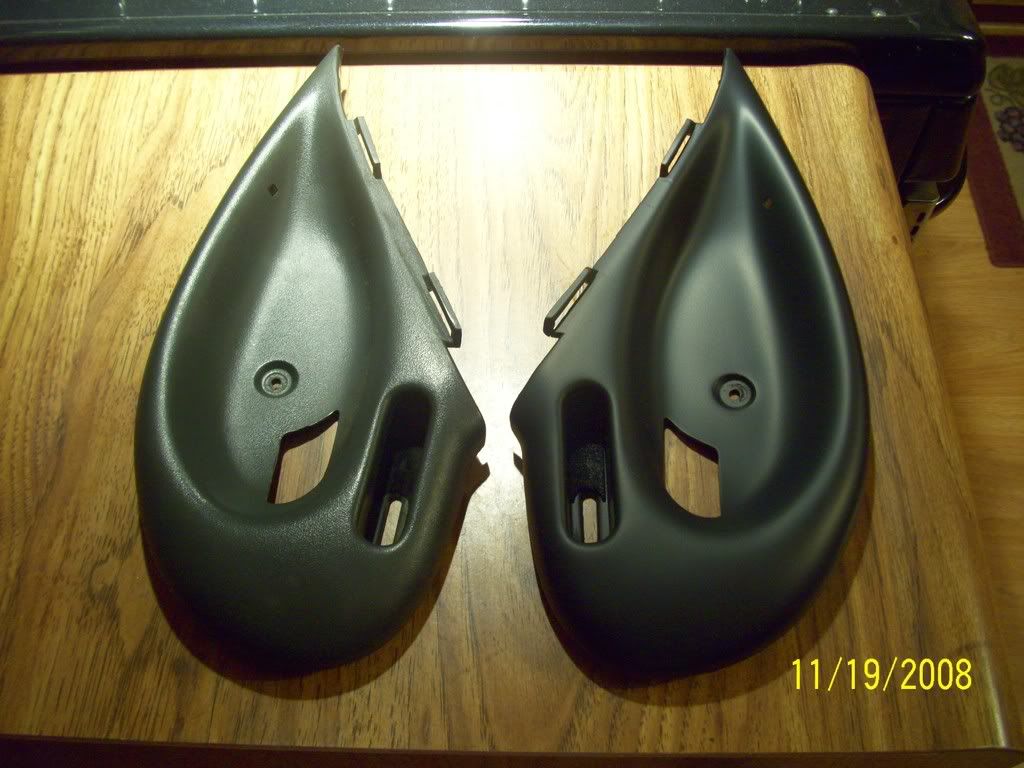
And the "before and after" shot, with the "after" being finished with Landau black:
This is a 3000K Luxeon Emitter from superbrightleds.com:
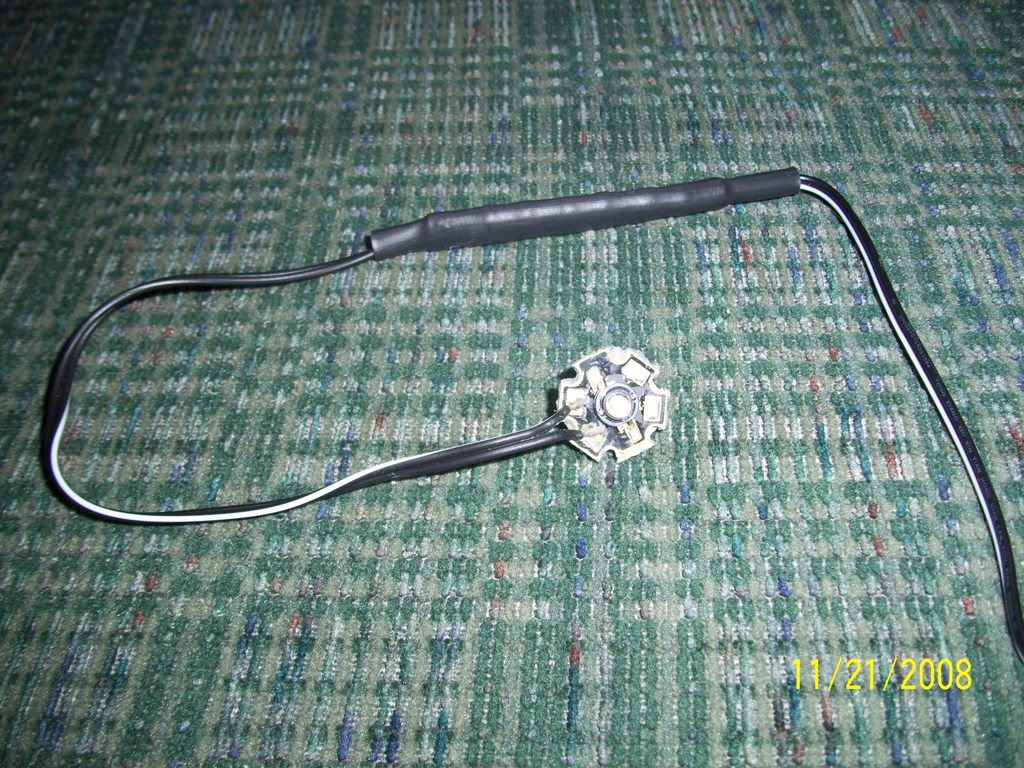
These will be mounted in place of the stock bulbs for better interior lighting:
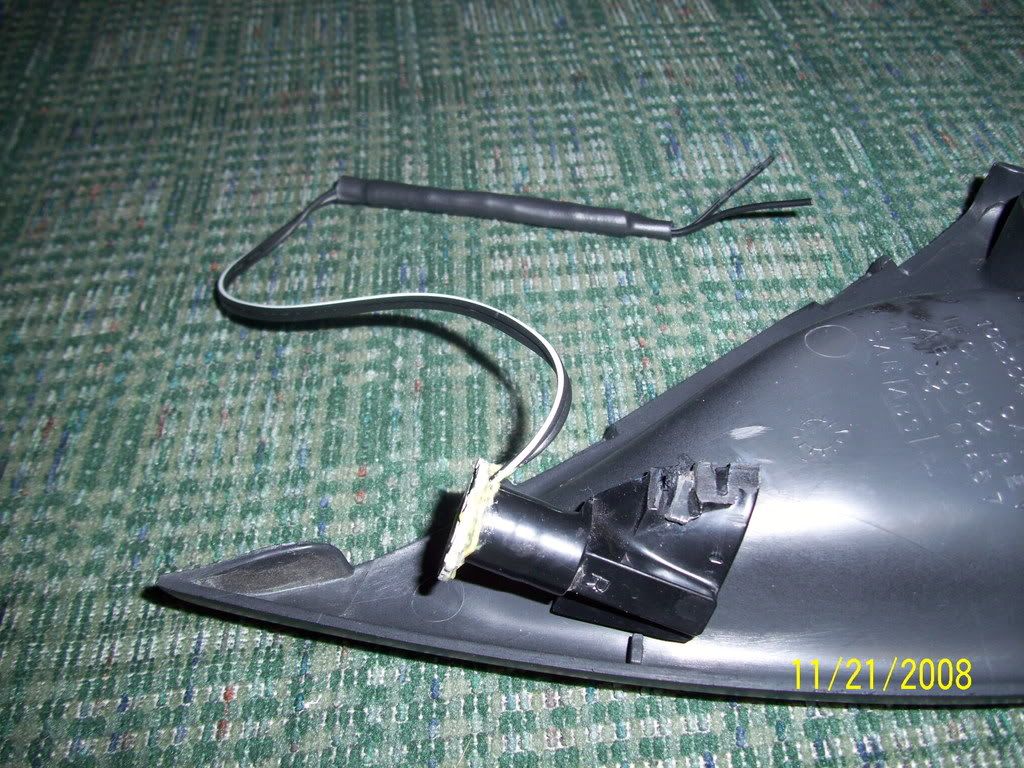
The first thing that must be done to the door handle bezels is to remove the light bulb holders from the back of them. This will ensure that the tiny red lenses won't get coated over with dye when the rest of the bezel gets dyed. To remove them, I simply ground the heat stakes off with an 80 grit roloc disc and gently wiggled them until they came loose:

I used 3M 320 grit Wet Or Dry aluminum oxide to sand the graininess out of the finish:

A sanded bezel next to a stock charcoal gray one:

Next we'll give it a good once over with some adhesion promoter:

And the "before and after" shot, with the "after" being finished with Landau black:

This is a 3000K Luxeon Emitter from superbrightleds.com:

These will be mounted in place of the stock bulbs for better interior lighting:

#40
Here's a preview of the door speaker pods buildup.
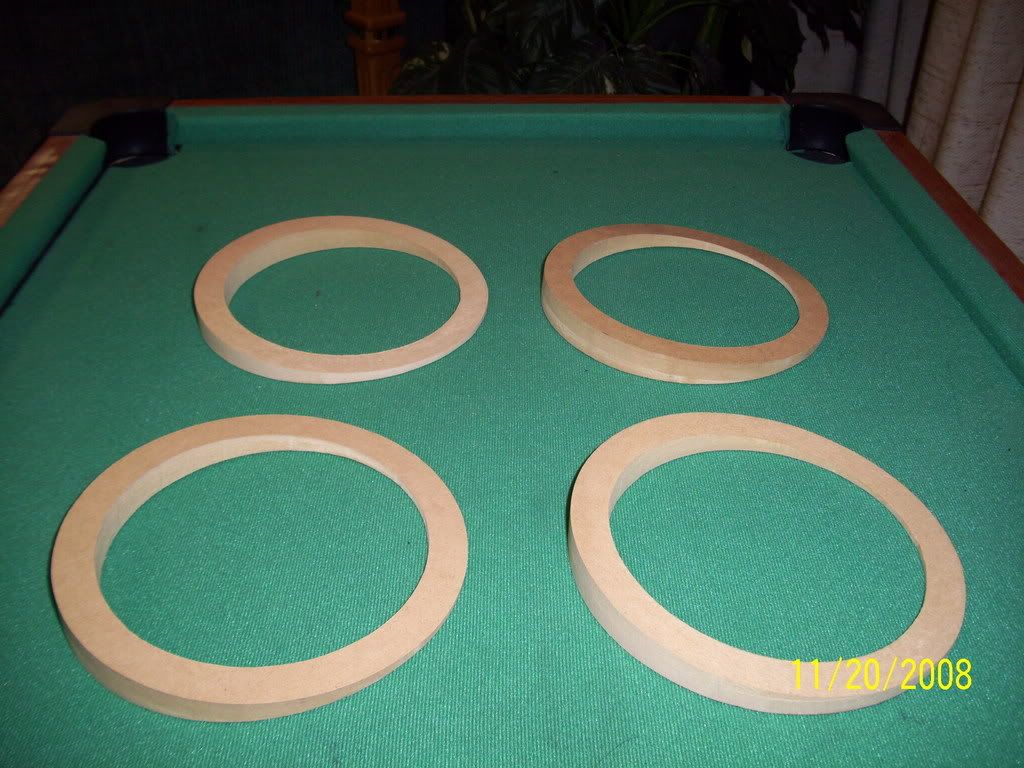
"Elite Installer Supply" angle mount MDF rings:
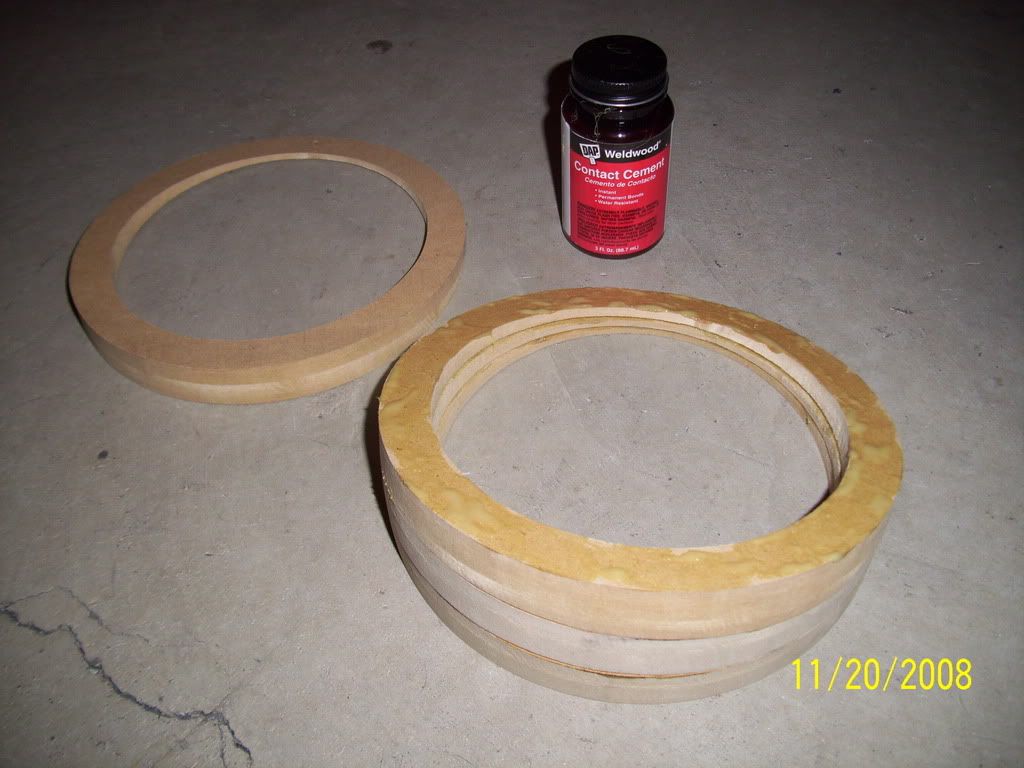
A little glue:
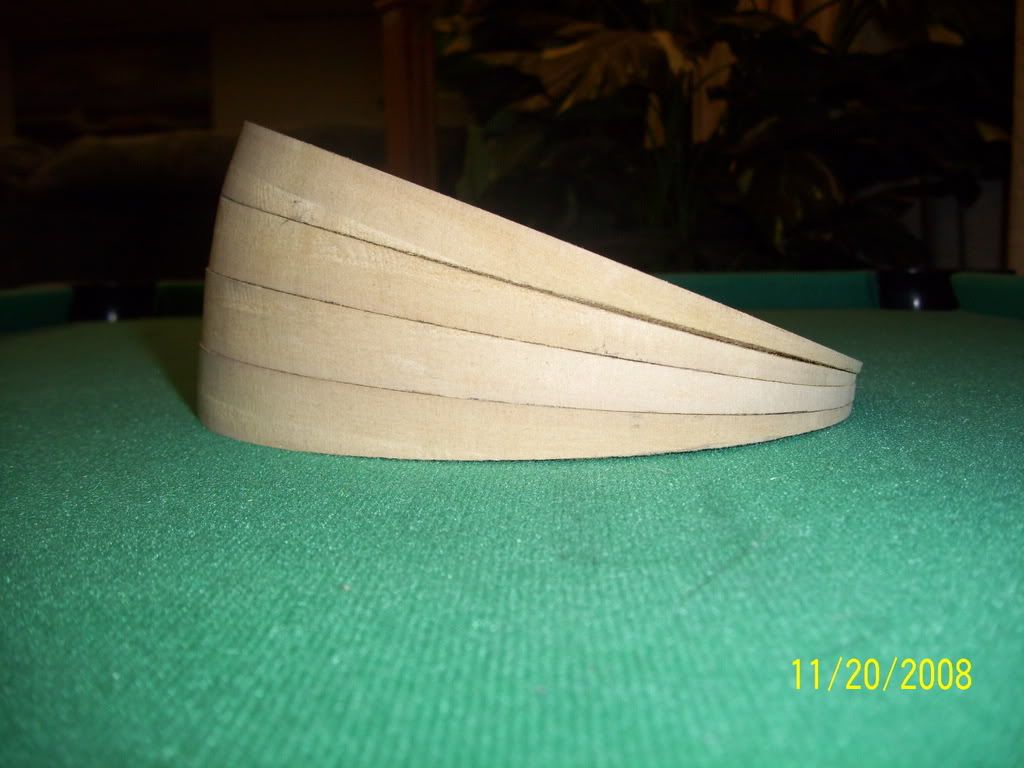
Stacked:
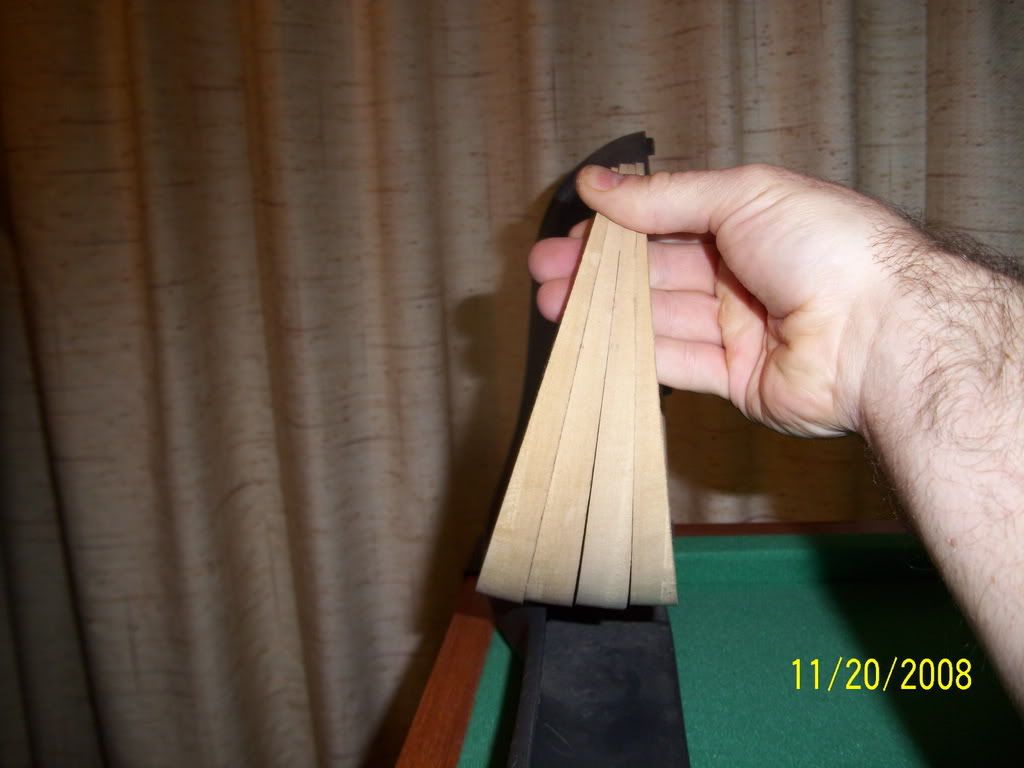
Door pod line of sight:
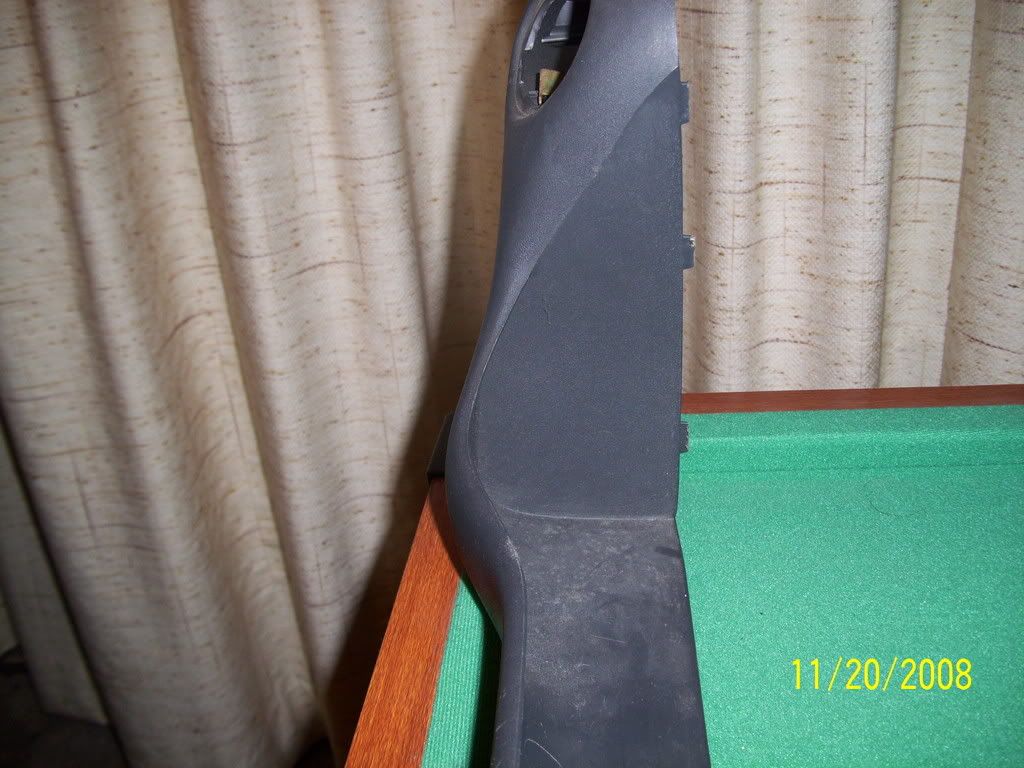
Line of sight comparison:
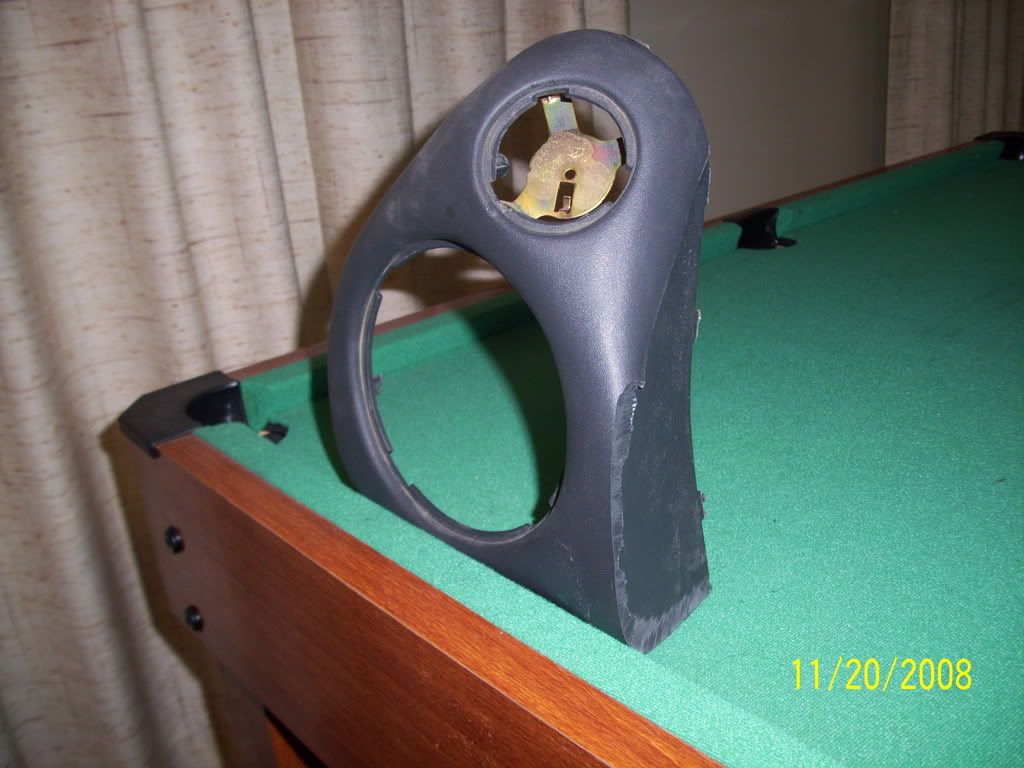
Door pod separated from the map pocket and ready for modification:
Stock speaker mounting bracket:
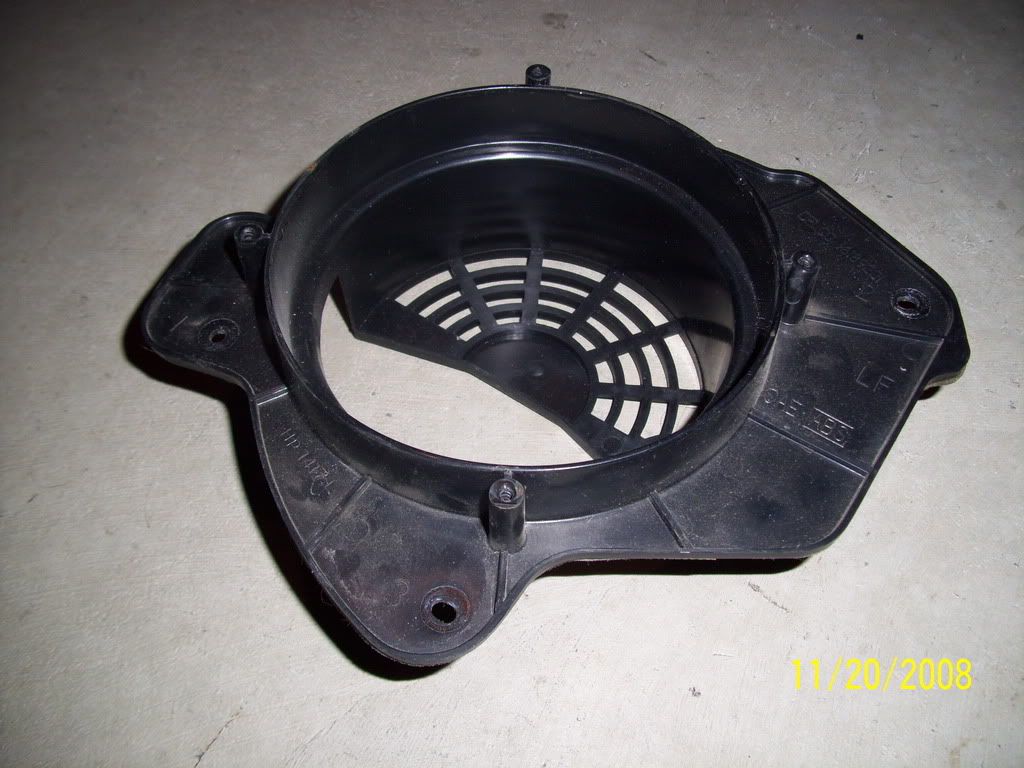
Shaving the brackets down flush to make accomodations for mounting the MDF speaker rings:
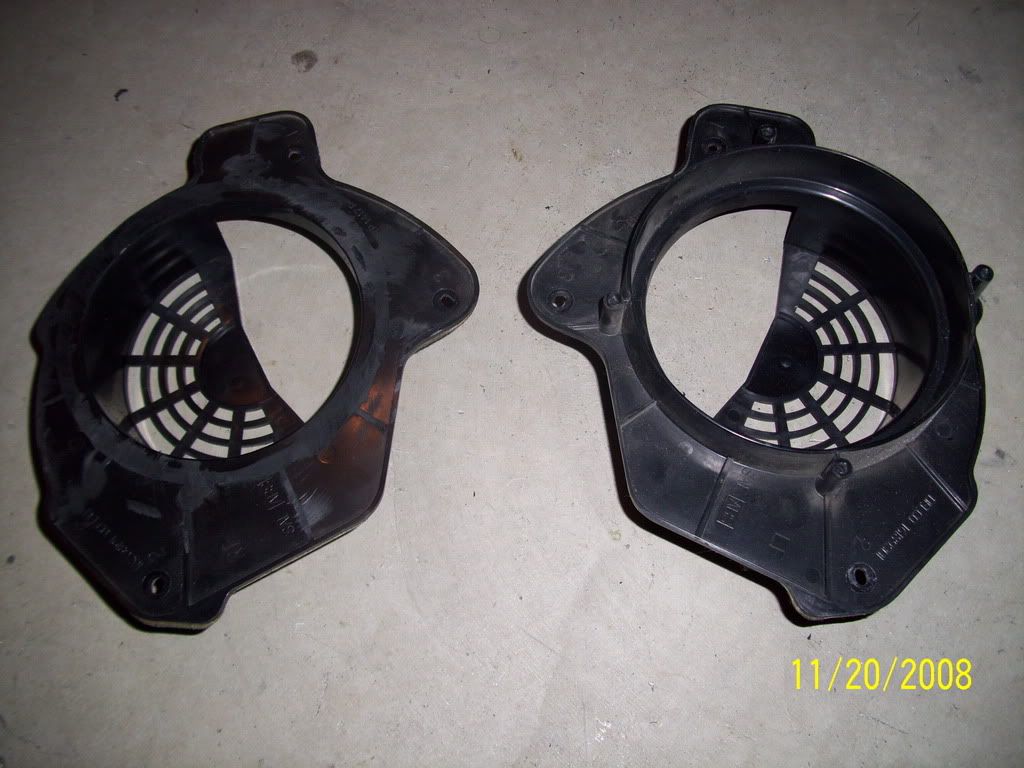
More to come on this.
I'm going to TRY to get these speaker pods finished in the time that the arm rests will be out at the trim shop. (Fingers crossed.)
Stay tuned...
"Elite Installer Supply" angle mount MDF rings:

A little glue:

Stacked:

Door pod line of sight:

Line of sight comparison:

Door pod separated from the map pocket and ready for modification:

Stock speaker mounting bracket:

Shaving the brackets down flush to make accomodations for mounting the MDF speaker rings:

More to come on this.

I'm going to TRY to get these speaker pods finished in the time that the arm rests will be out at the trim shop. (Fingers crossed.)
Stay tuned...


