


Project Budget 10 Second Camaro Thread
Thread Starter
TECH Fanatic
iTrader: (12)
Joined: Aug 2007
Posts: 1,818
Likes: 1
From: Cornfields near Pontiac, IL
Had a pretty early day at work so I used that plus with the decent weather, decided to get to work on all the stuff Ive accumulated/put off over the winter. So...
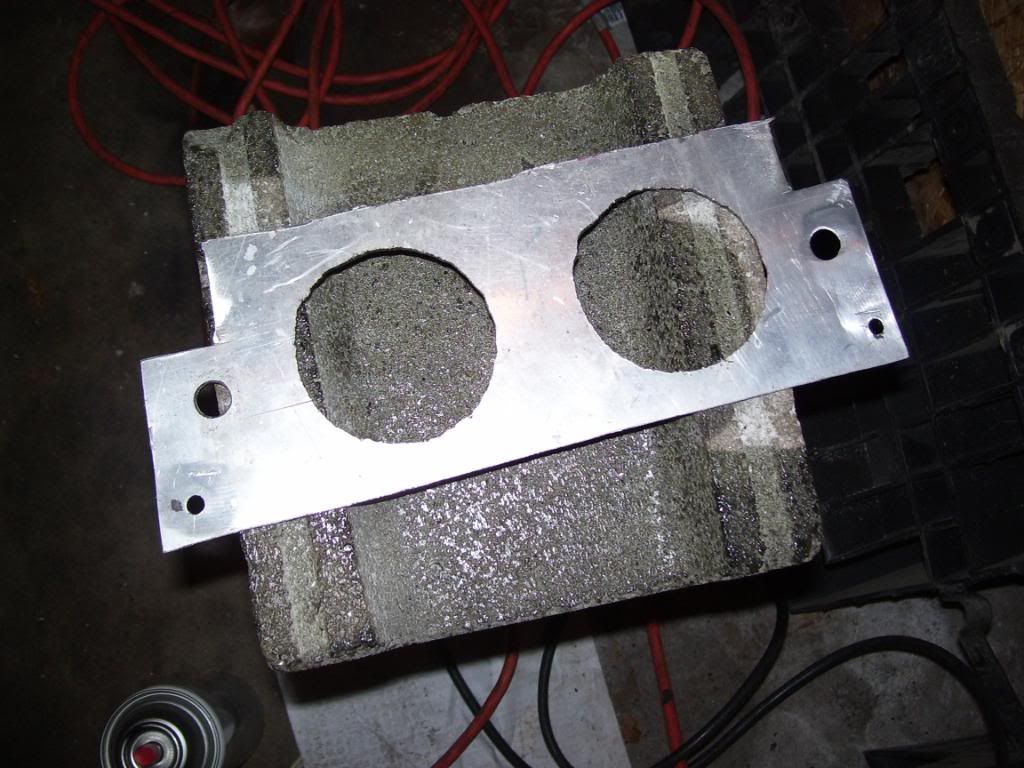
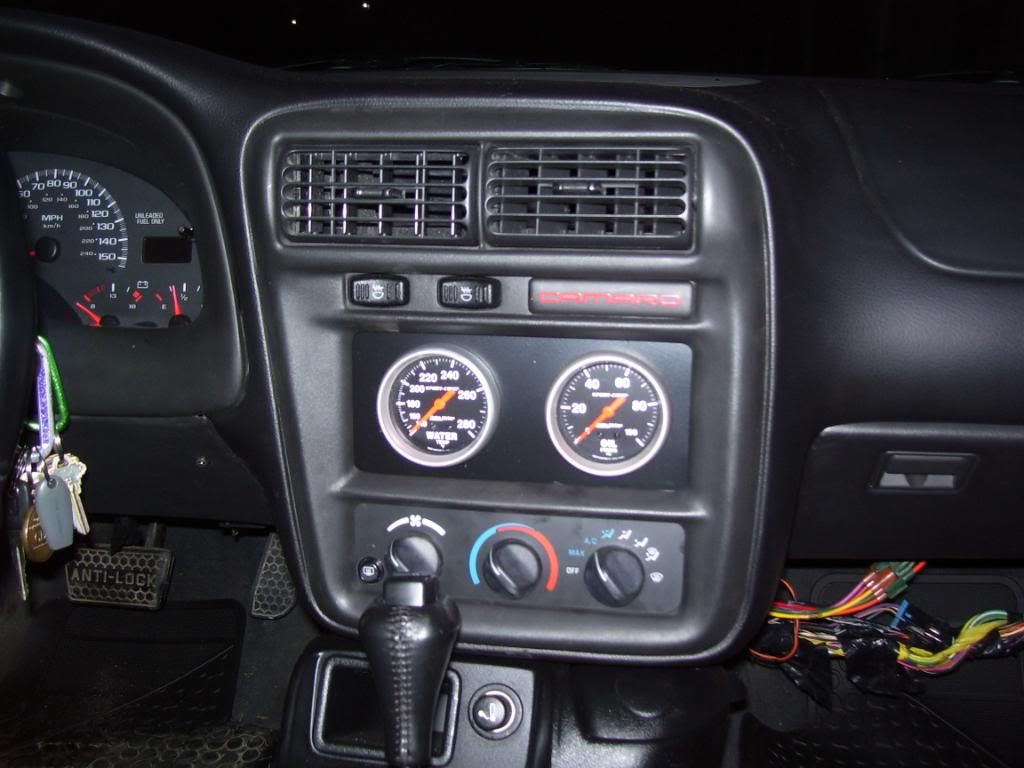
I made a radio/HVAC delete panel last summer for my Camaro that I tossed in the extra parts bin but after some thought decided I would reuse it but trim it so I can reuse the HVAC controls. Pic from this past summer of the plate installed...

Then I picked up some Autometer 2 5/8 oil and temp guages that have been collecting dust...Lets combine the two...

I trimmed the bottom off the panel so I can run the HVAC controls and drilled the two gauge holes with a hole saw drill bit. Measured and checked several times for dead center. Here is the raw radio delete/guage panel...
Filed down the rough edges and shot some self etching primer (panel will fisheye or run if not primed) and then a couple coats of SEM Landau Black interior pant...
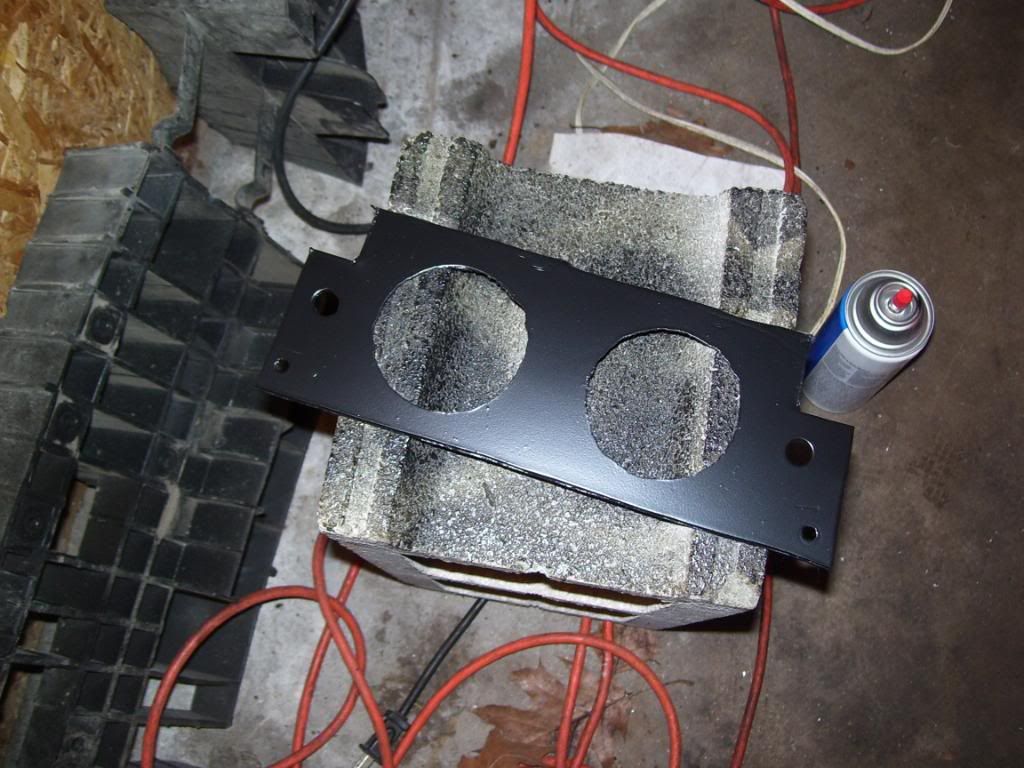
Couple shots of the gauges set in the panel awaiting install...
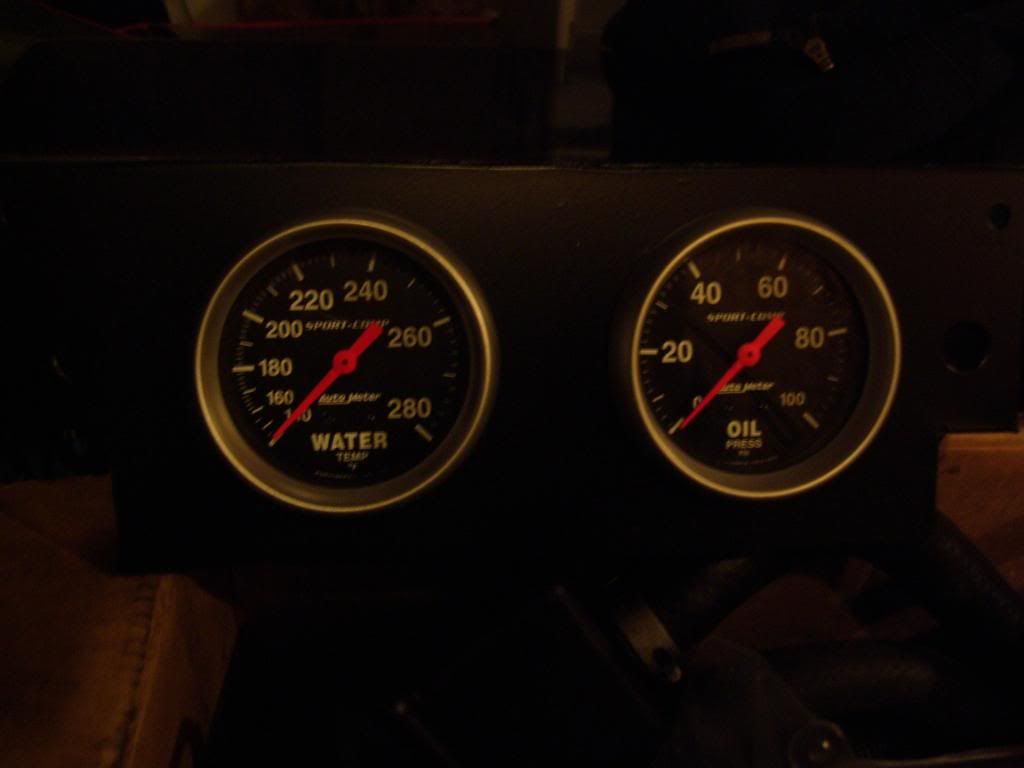
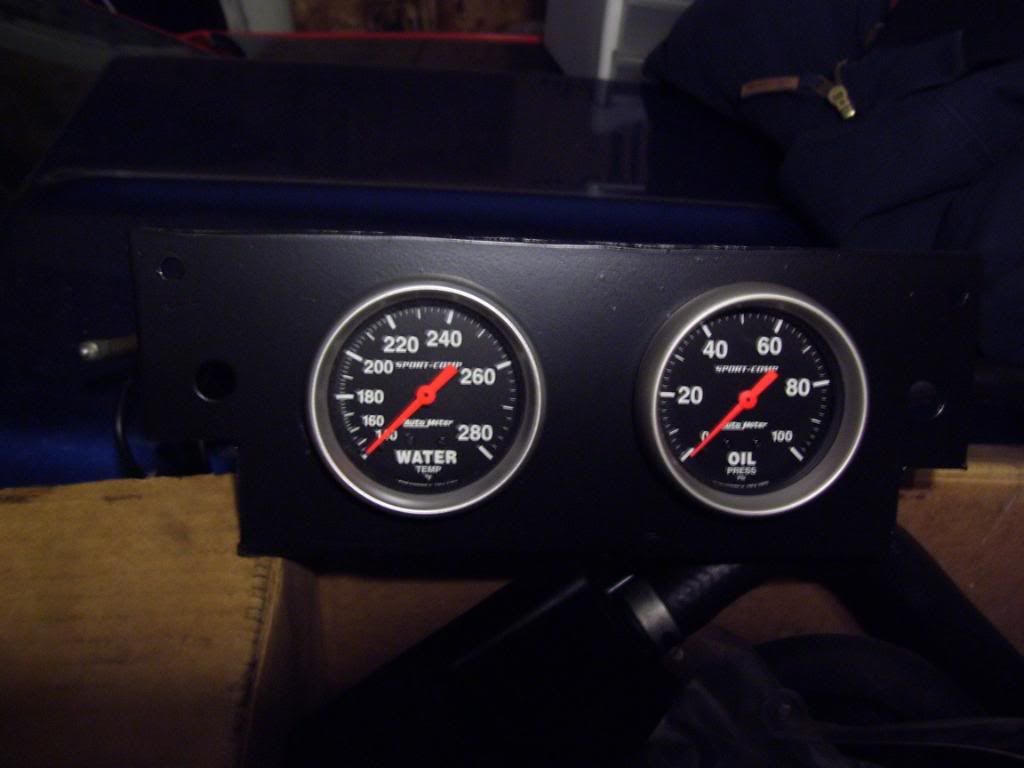
And bolted the panel up to the dash, installed the LS1 HVAC panel (which Jenny [ZGOBYBY] gave me as a freebie! Thanks!) and popped the cover panel back over it. Just test fitted for now. Going to run the wires tomorrow if I get time...
I made a radio/HVAC delete panel last summer for my Camaro that I tossed in the extra parts bin but after some thought decided I would reuse it but trim it so I can reuse the HVAC controls. Pic from this past summer of the plate installed...
Then I picked up some Autometer 2 5/8 oil and temp guages that have been collecting dust...Lets combine the two...
I trimmed the bottom off the panel so I can run the HVAC controls and drilled the two gauge holes with a hole saw drill bit. Measured and checked several times for dead center. Here is the raw radio delete/guage panel...
Filed down the rough edges and shot some self etching primer (panel will fisheye or run if not primed) and then a couple coats of SEM Landau Black interior pant...
Couple shots of the gauges set in the panel awaiting install...
And bolted the panel up to the dash, installed the LS1 HVAC panel (which Jenny [ZGOBYBY] gave me as a freebie! Thanks!) and popped the cover panel back over it. Just test fitted for now. Going to run the wires tomorrow if I get time...
Thread Starter
TECH Fanatic
iTrader: (12)
Joined: Aug 2007
Posts: 1,818
Likes: 1
From: Cornfields near Pontiac, IL
Some more decals/emblems came in the mail today. Bought a 69 RS/SS emblem from www.afterthoughtsauto.com (I guess the regular SS emblem doesnt fit right, so I went with the RS/SS emblem. I will post results...of course) to complete the SS theme and since I didnt have any blue anywhere else on the Camaro, the blue bowtie didnt really fit in.
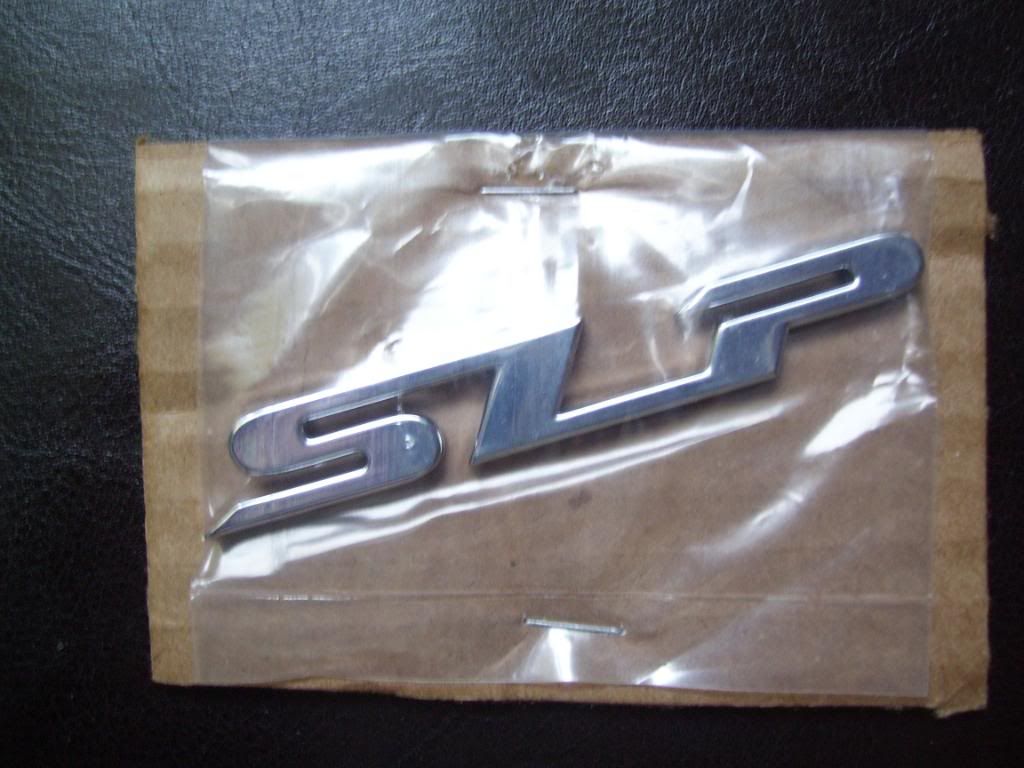
Also purchased the SLP decal for the taillight panel to balance out the drivers side which looks bare. A little something I guess...kinda rice move here since the Camaro wasnt a SLP SS or let alone an SS, but it looks good, so what the hell...
Should have these installed tomorrow or Monday...
Also purchased the SLP decal for the taillight panel to balance out the drivers side which looks bare. A little something I guess...kinda rice move here since the Camaro wasnt a SLP SS or let alone an SS, but it looks good, so what the hell...
Should have these installed tomorrow or Monday...
Thread Starter
TECH Fanatic
iTrader: (12)
Joined: Aug 2007
Posts: 1,818
Likes: 1
From: Cornfields near Pontiac, IL
Ive been trying to think of a way to "level" out my 6LE splitter since the factory bumper slopes up slightly. Picked up some spacers to put in between the bumper and splitter. May also give it a nicer look too. Heres a pic of the spacers as well as some bolts to plug the 02 sensor holes in the y-pipe...
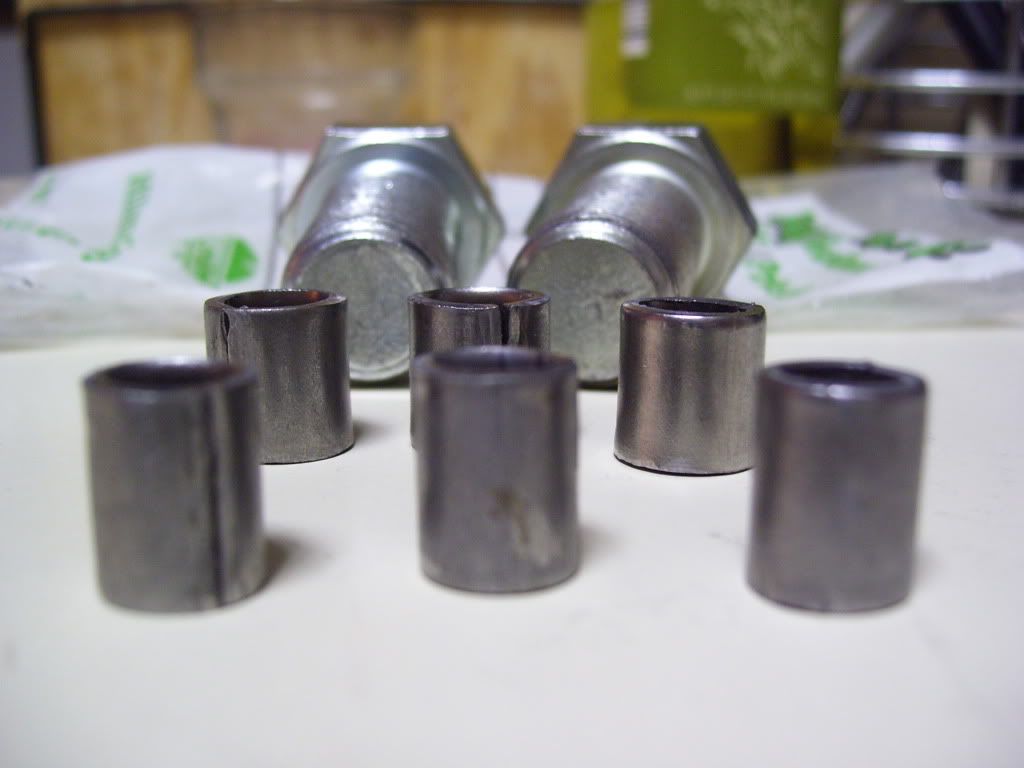
Started playing around with the spacers and I "think" they will work out just fine. I want to reinforce the back of the bumper with some larger washers so the bolts dont pull the plastic down. I had to stop due to an incoming thunderstorm so this is as far as I got for today.
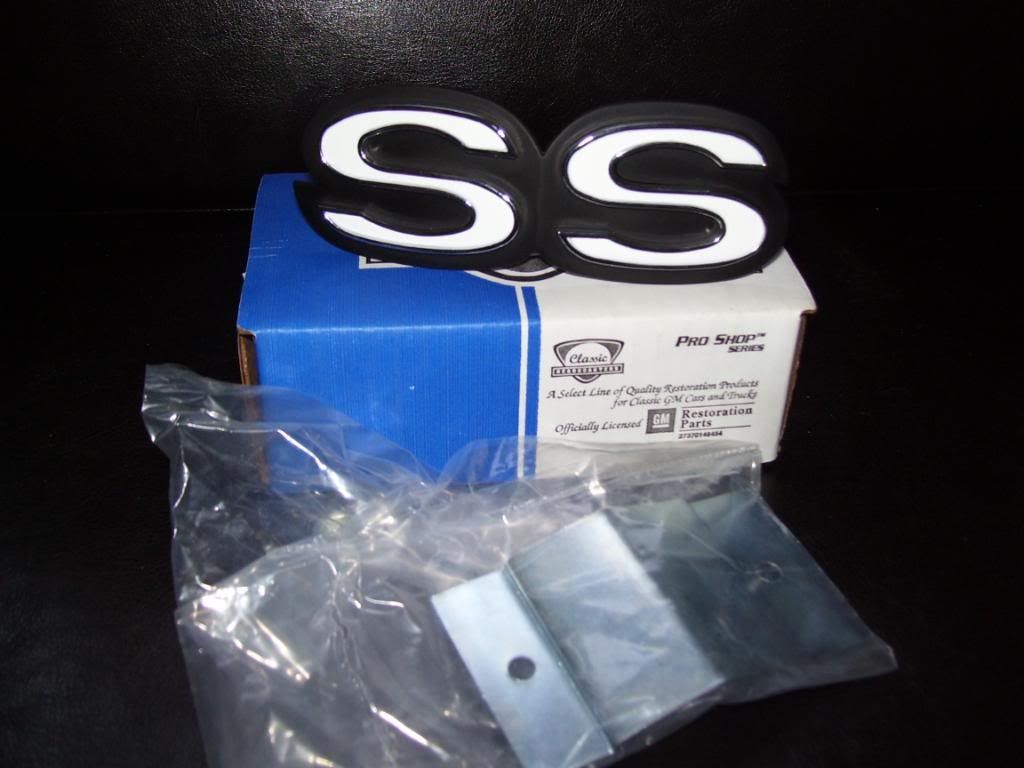
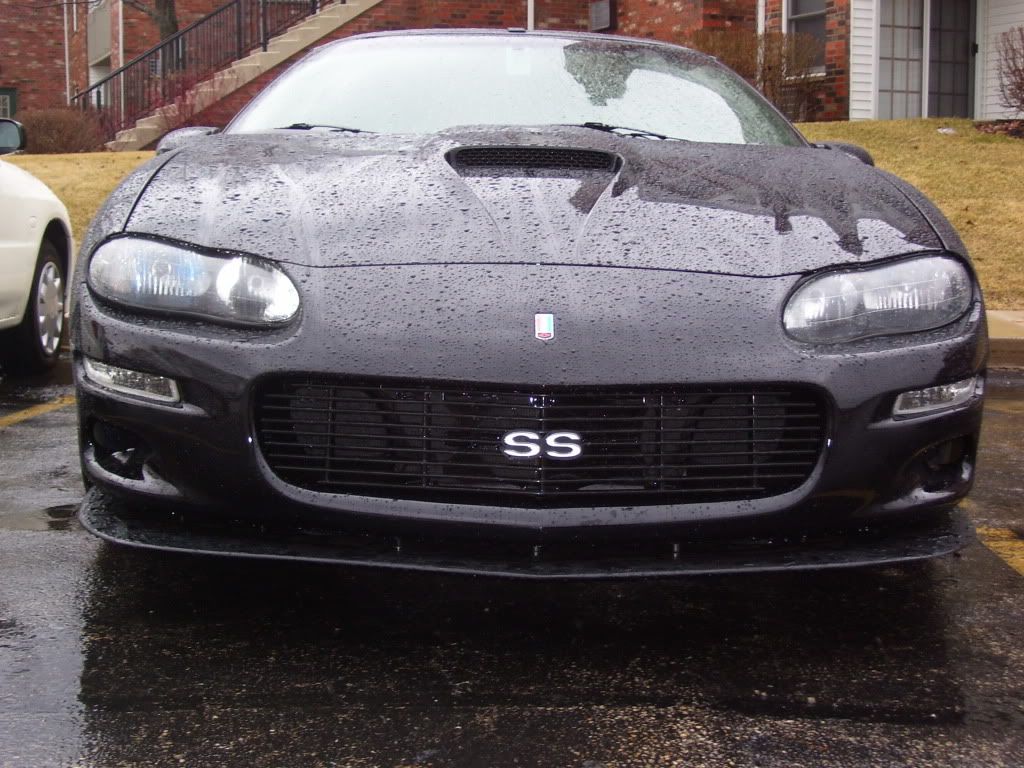
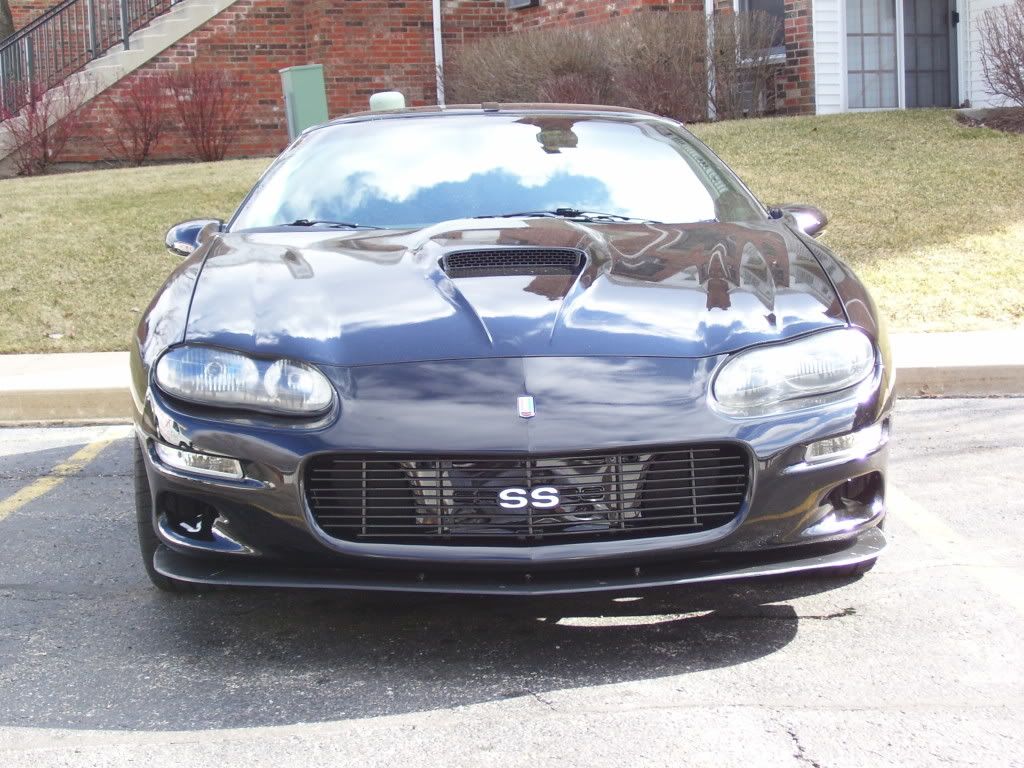
I also installed the SS emblem as well which fits almost too perfectly! Just had to trim off about 1/4 of the tabs and find a size larger speed nuts in place of the provided ones. Huge improvement over the bowtie IMO...
Started playing around with the spacers and I "think" they will work out just fine. I want to reinforce the back of the bumper with some larger washers so the bolts dont pull the plastic down. I had to stop due to an incoming thunderstorm so this is as far as I got for today.
I also installed the SS emblem as well which fits almost too perfectly!
Just had to trim off about 1/4 of the tabs and find a size larger speed nuts in place of the provided ones. Huge improvement over the bowtie IMO... Thread Starter
TECH Fanatic
iTrader: (12)
Joined: Aug 2007
Posts: 1,818
Likes: 1
From: Cornfields near Pontiac, IL
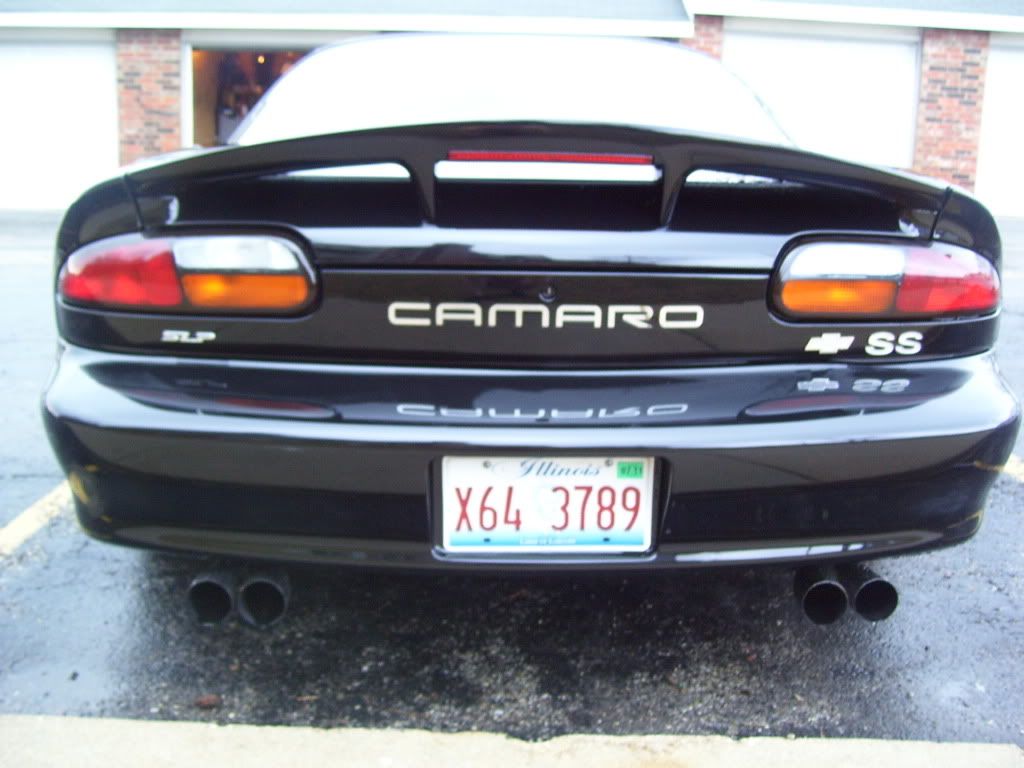
Got a break in the storm and went out to wipe the Camaro down to check for hail damage (none yet...just started hailing again  ) and decided to install the SLP emblem. Looks good on the rear and balanced it out. Really liking how all these emblems are "making" the car!
) and decided to install the SLP emblem. Looks good on the rear and balanced it out. Really liking how all these emblems are "making" the car! TECH Resident
Joined: Jan 2004
Posts: 960
Likes: 1
From: Vacaville CA
Ive been trying to think of a way to "level" out my 6LE splitter since the factory bumper slopes up slightly. Picked up some spacers to put in between the bumper and splitter. May also give it a nicer look too. Heres a pic of the spacers as well as some bolts to plug the 02 sensor holes in the y-pipe...
Started playing around with the spacers and I "think" they will work out just fine. I want to reinforce the back of the bumper with some larger washers so the bolts dont pull the plastic down. I had to stop due to an incoming thunderstorm so this is as far as I got for today.
I also installed the SS emblem as well which fits almost too perfectly! Just had to trim off about 1/4 of the tabs and find a size larger speed nuts in place of the provided ones. Huge improvement over the bowtie IMO...
Started playing around with the spacers and I "think" they will work out just fine. I want to reinforce the back of the bumper with some larger washers so the bolts dont pull the plastic down. I had to stop due to an incoming thunderstorm so this is as far as I got for today.
I also installed the SS emblem as well which fits almost too perfectly!
Just had to trim off about 1/4 of the tabs and find a size larger speed nuts in place of the provided ones. Huge improvement over the bowtie IMO... lol looks good tho man!
 Thread Starter
TECH Fanatic
iTrader: (12)
Joined: Aug 2007
Posts: 1,818
Likes: 1
From: Cornfields near Pontiac, IL
LS1 Tech Stories
The Best V8 Stories One Small Block at Time

Gas Monkey Built a 6-Wheel Ferrari Testarossa With a Corvette LT4 Engine
Verdad Gallardo
7 Most Reliable High-Performance Engines GM Has Ever Built
Verdad Gallardo
Amazing '71 Camaro Restomod Is Modern Muscle Car Under the Skin
Verdad Gallardo
6 Common C5 Corvette Failures and What's Involved In Repairing Them
Pouria Savadkouei
Retro Modern Bandit Pontiac Trans AM Comes With Burt Reynolds' Autograph
Verdad Gallardo
Top 10 Greatest Cadillac V Series Performance Models Ever, Ranked
Pouria Savadkouei
Top 10 Most Powerful Chevy Trucks Ever Made!

Hennessey's New Supercharged Silverado ZR2 Has 700 HP
Verdad Gallardo
Coachbuilt N2A Anteros Is an LS2-Powered C6 Corvette In Italian Clothes
Verdad Gallardo Thread Starter
TECH Fanatic
iTrader: (12)
Joined: Aug 2007
Posts: 1,818
Likes: 1
From: Cornfields near Pontiac, IL
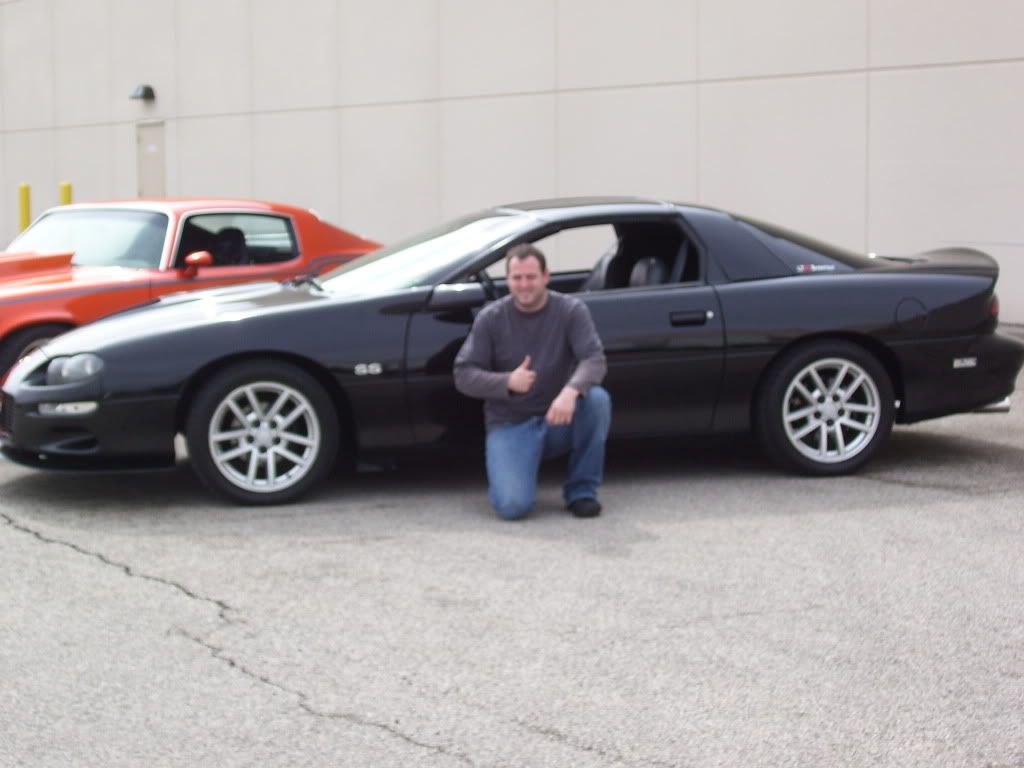
Was actually pretty nice Monday and went cruising around with my friend and decided to stop and snap a couple pictures of our cars together.
Anyways, you all know my Camaro, my buddys is a 70/71 (?) 440 SBC/Tremic 5 speed car that pictures dont do it justice. Wins trophies every show we go to.
Taken behind a Kohls building lol...
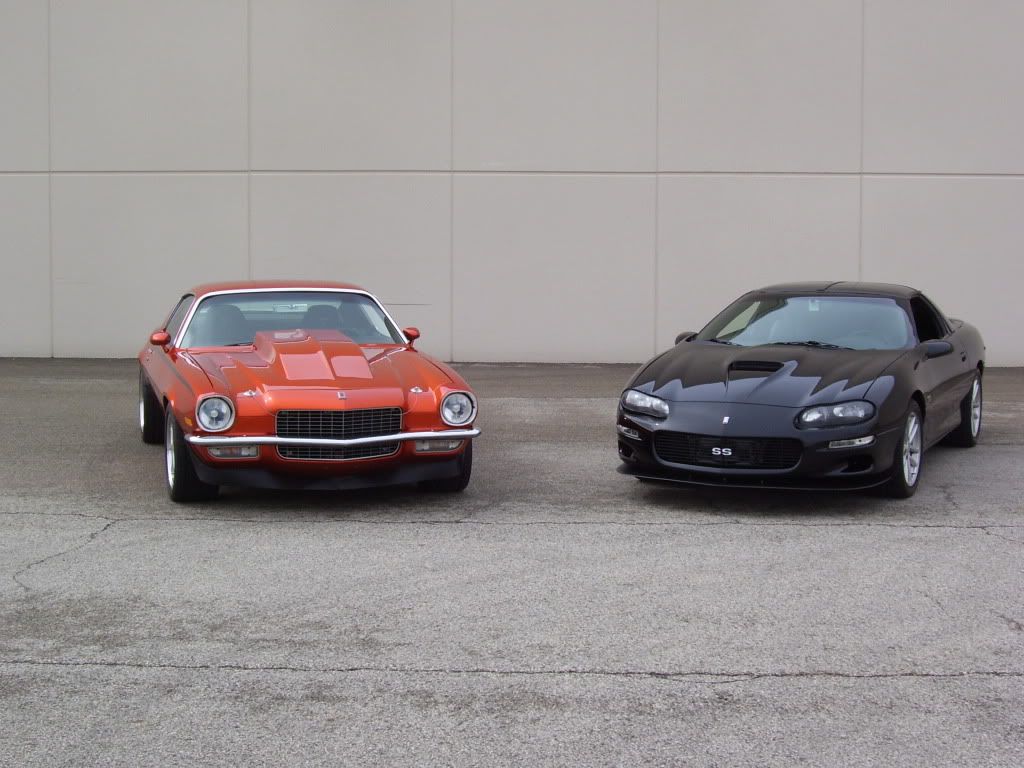
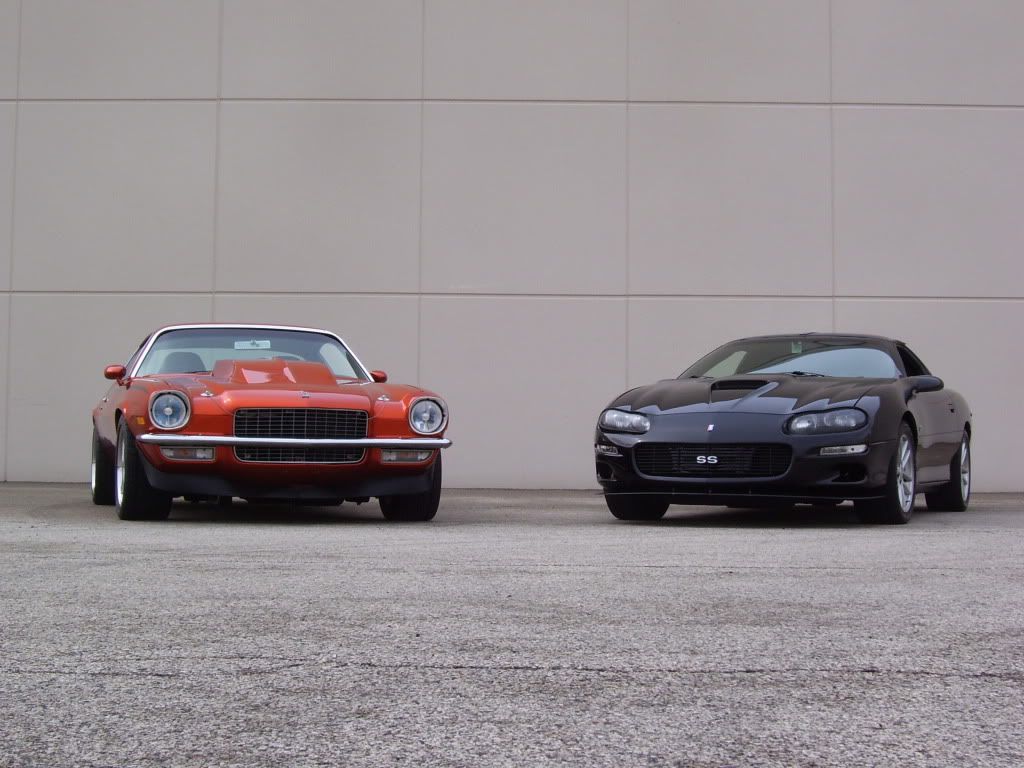
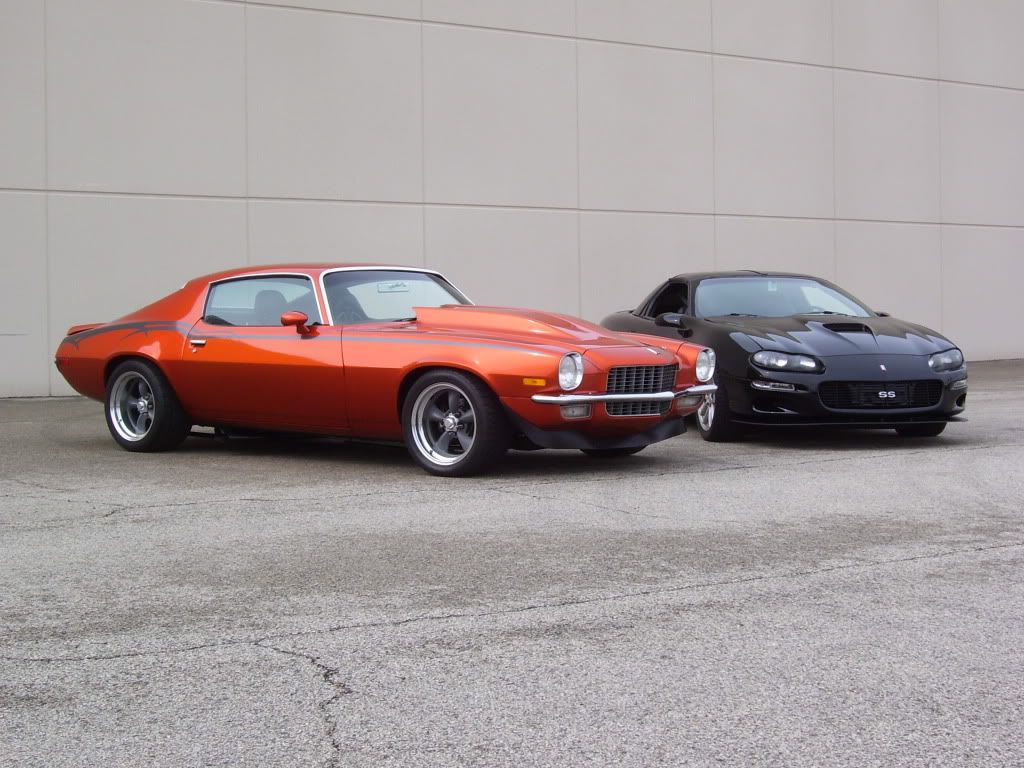
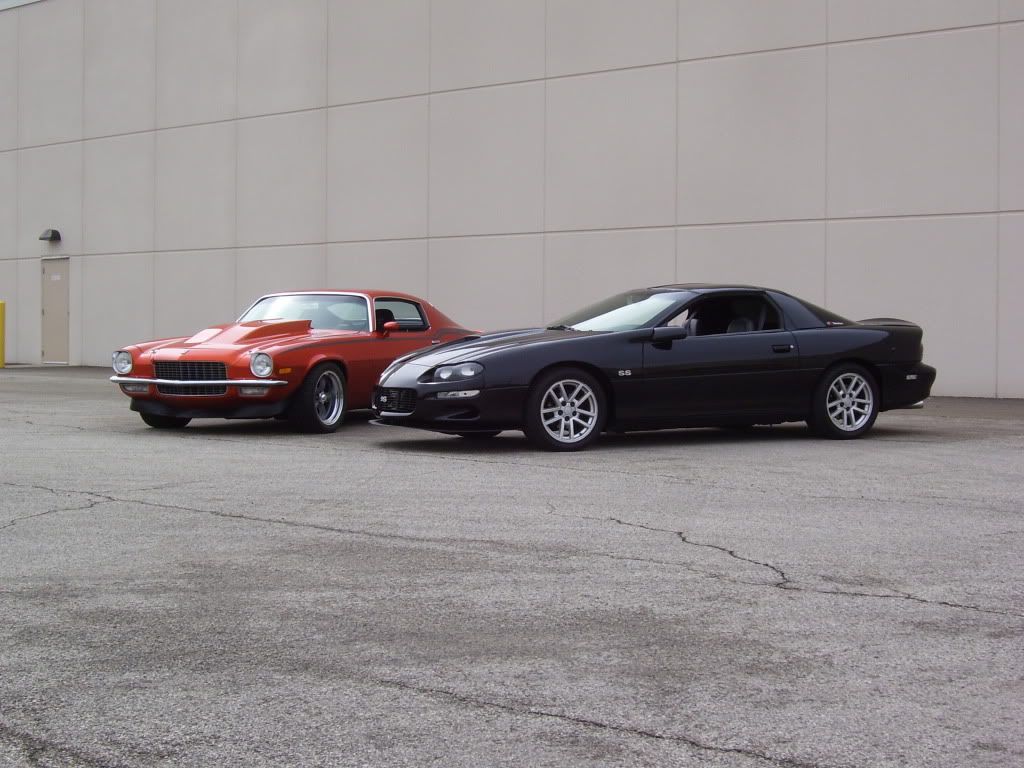
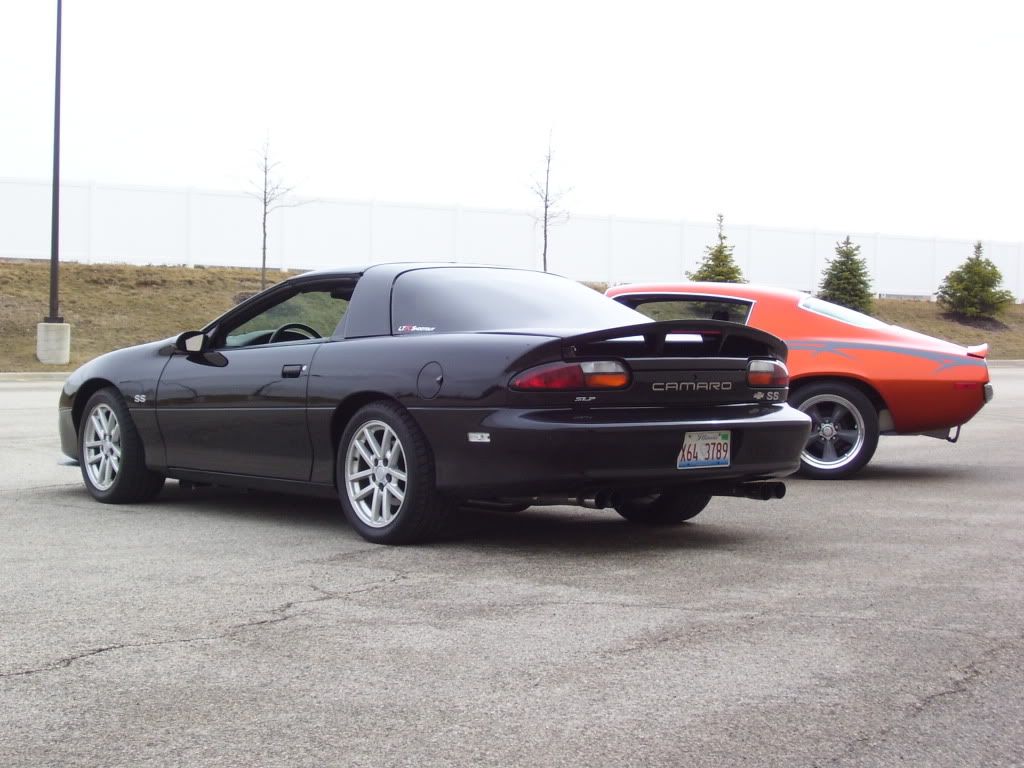
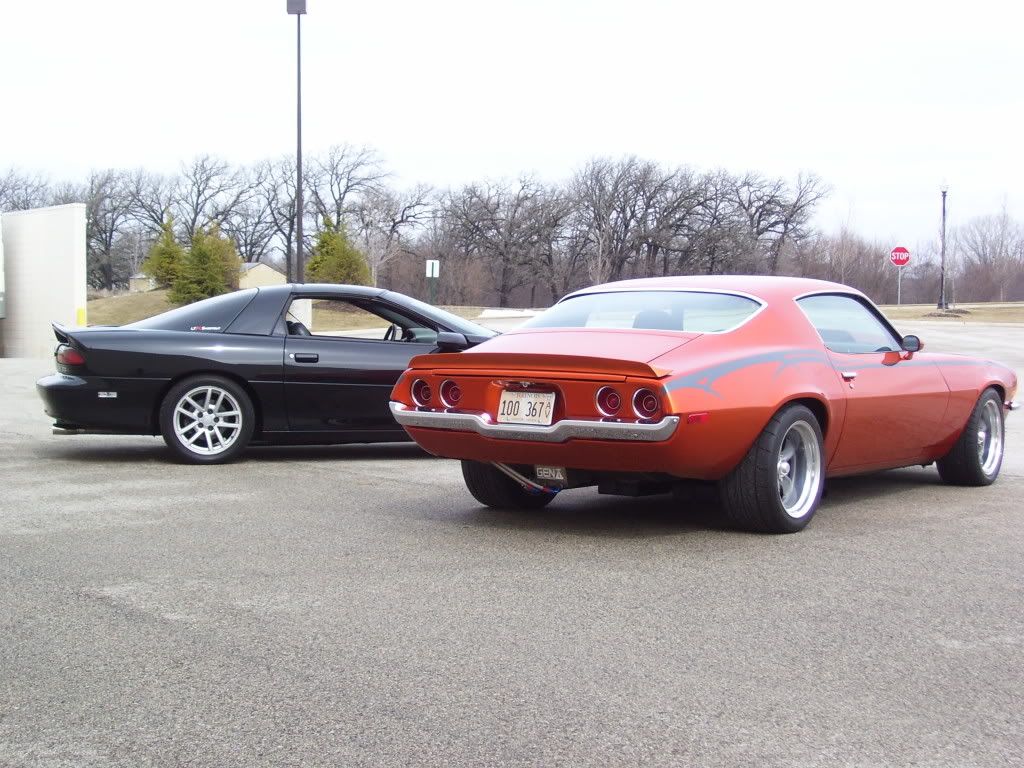
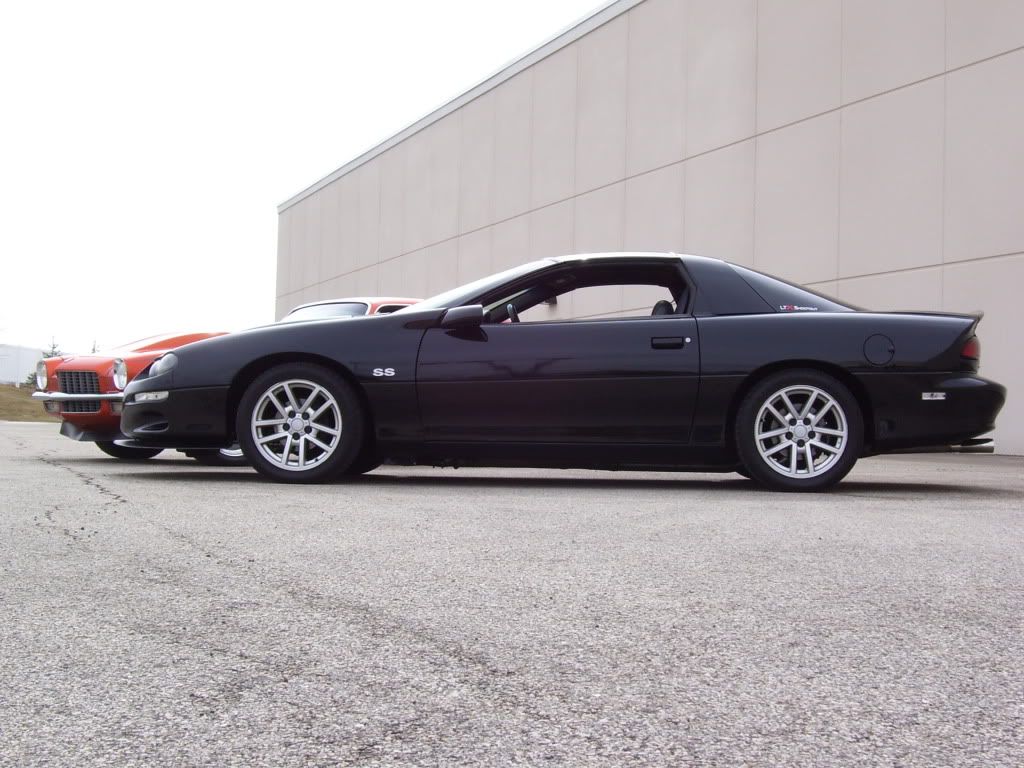
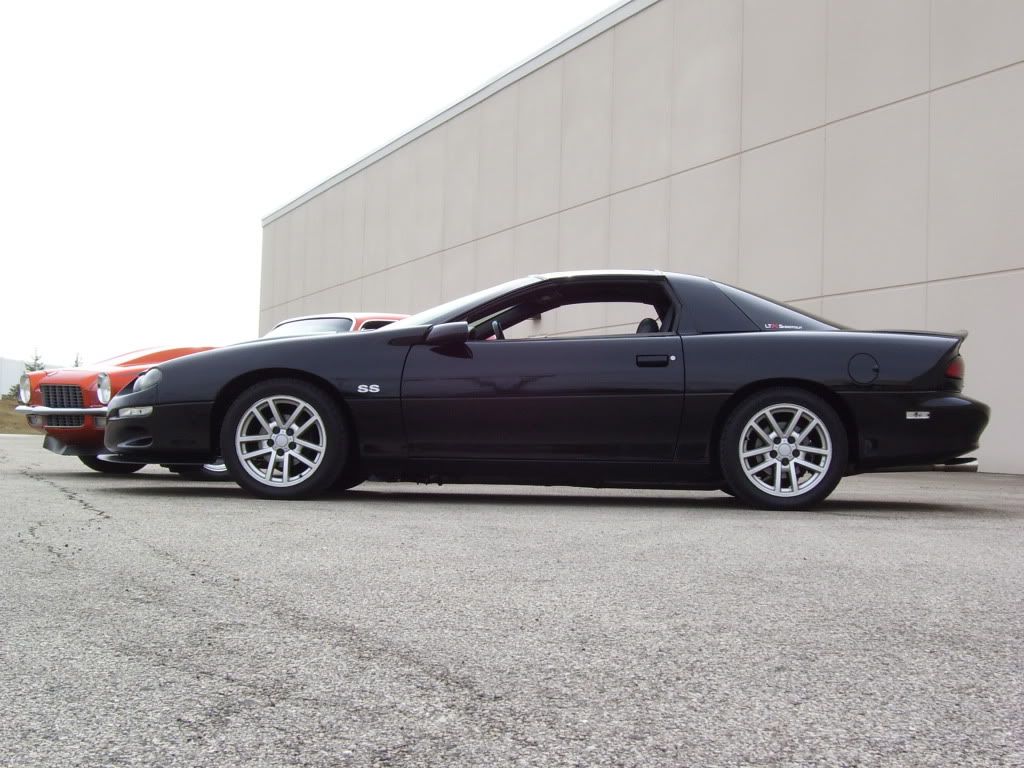
And just me being stupid lol
Anyways, you all know my Camaro, my buddys is a 70/71 (?) 440 SBC/Tremic 5 speed car that pictures dont do it justice. Wins trophies every show we go to.
Taken behind a Kohls building lol...
And just me being stupid lol

Thread Starter
TECH Fanatic
iTrader: (12)
Joined: Aug 2007
Posts: 1,818
Likes: 1
From: Cornfields near Pontiac, IL
Yeah, he does...shoulda gone and checked it out in person, those 2 black marks in front of the house are from me too leaving his place Monday!
Thread Starter
TECH Fanatic
iTrader: (12)
Joined: Aug 2007
Posts: 1,818
Likes: 1
From: Cornfields near Pontiac, IL
Thread Starter
TECH Fanatic
iTrader: (12)
Joined: Aug 2007
Posts: 1,818
Likes: 1
From: Cornfields near Pontiac, IL
I am still tweaking the splitter to fit perfectly, here is what Ive gotten so far...
I have three 1/2 inch spacers between the bumper and splitter in the center three slots and then the rest of the bolts snug up against the bumper.
Seems to be "level" now, although I will get a level on it and check a couple spots to be sure...damn OCD! lol
Then I will pull everything back off, smooth the beveled edge a little bit (came trimmed but unfinished) so I will sand that with some 320 grit and then paint the splitter black along with all the hardware I will be using.


Got a break in the storm and went out to wipe the Camaro down to check for hail damage (none yet...just started hailing again ) and decided to install the SLP emblem. Looks good on the rear and balanced it out. Really liking how all these emblems are "making" the car!
) and decided to install the SLP emblem. Looks good on the rear and balanced it out. Really liking how all these emblems are "making" the car! 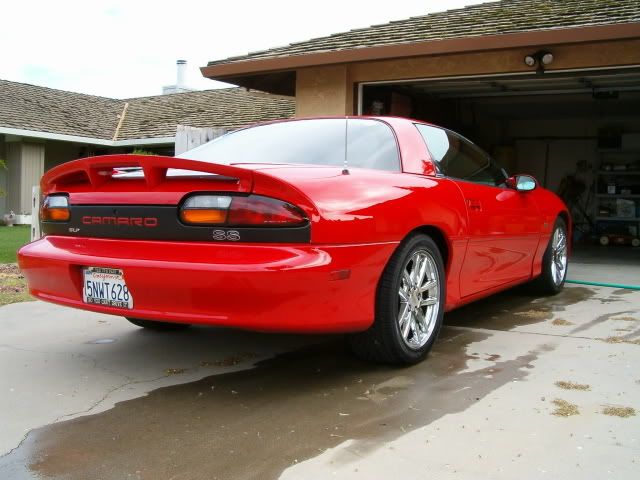
Thread Starter
TECH Fanatic
iTrader: (12)
Joined: Aug 2007
Posts: 1,818
Likes: 1
From: Cornfields near Pontiac, IL
Thread Starter
TECH Fanatic
iTrader: (12)
Joined: Aug 2007
Posts: 1,818
Likes: 1
From: Cornfields near Pontiac, IL
You can tell spring is approaching in my garage...starting to get a collection of parts waiting to be installed. Here are a few pics of stuff Ive gathered for my 4th gen Camaro...
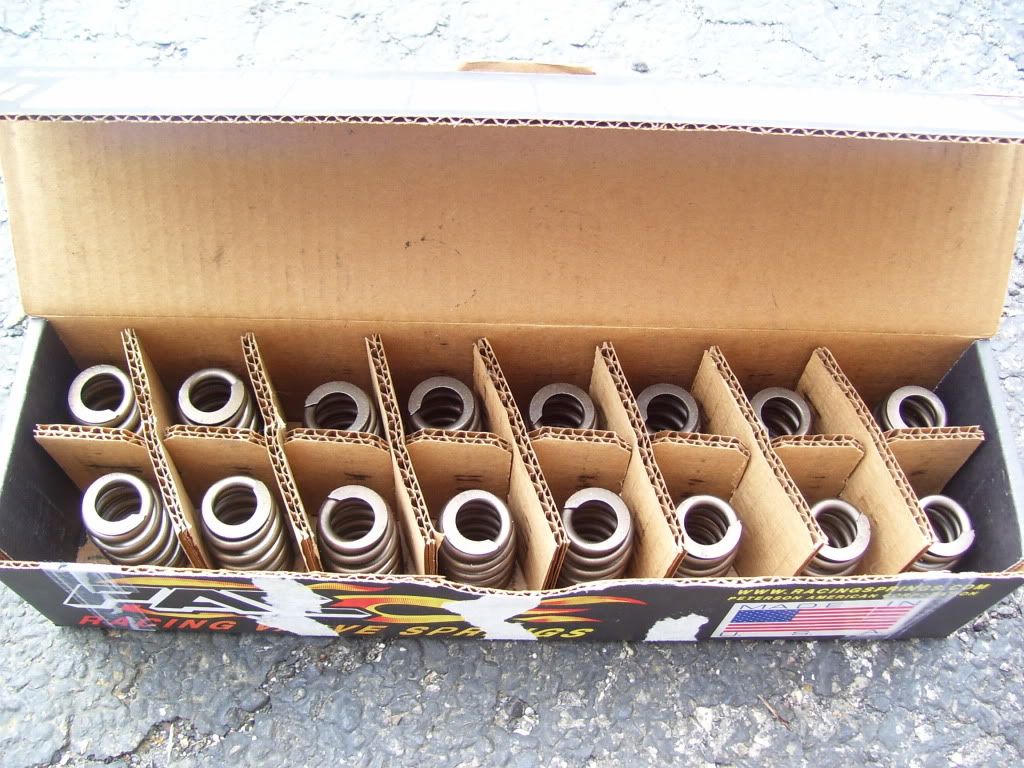
First, getting back to the performance aspect of the build and trying to reach my goal, picked up a set of new PAC Beehive springs to go along with my Crane 227 cam and 1.6 Comp Cam RRs. Just need gaskets and a timing chain now.
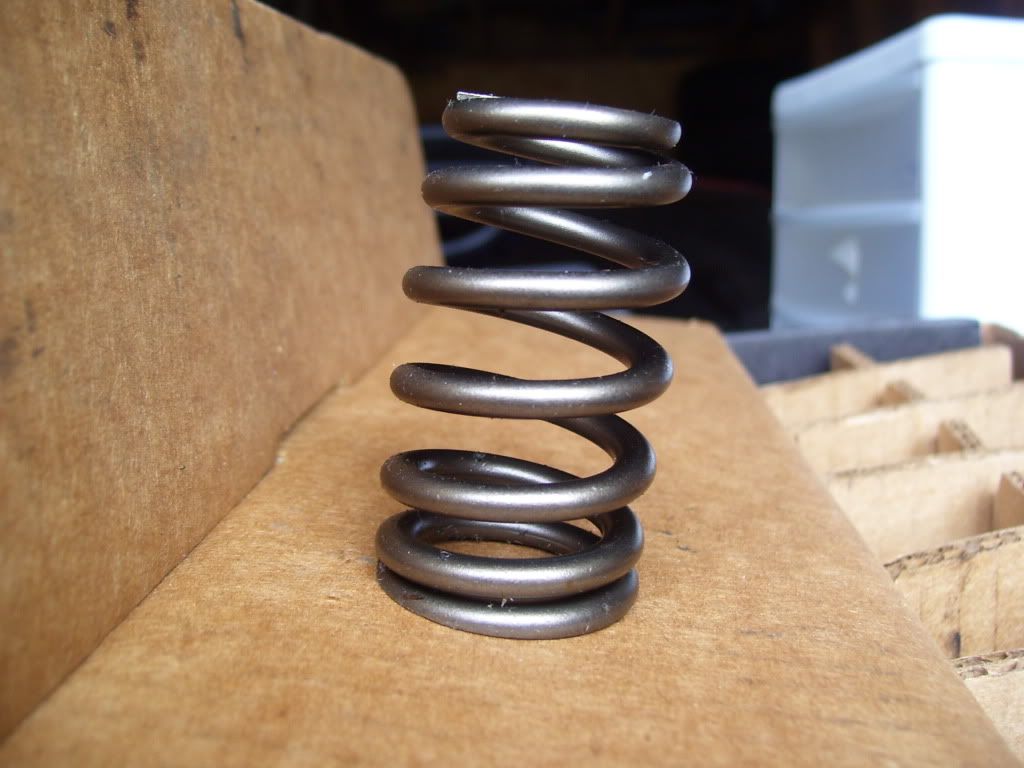
Closeup of spring...
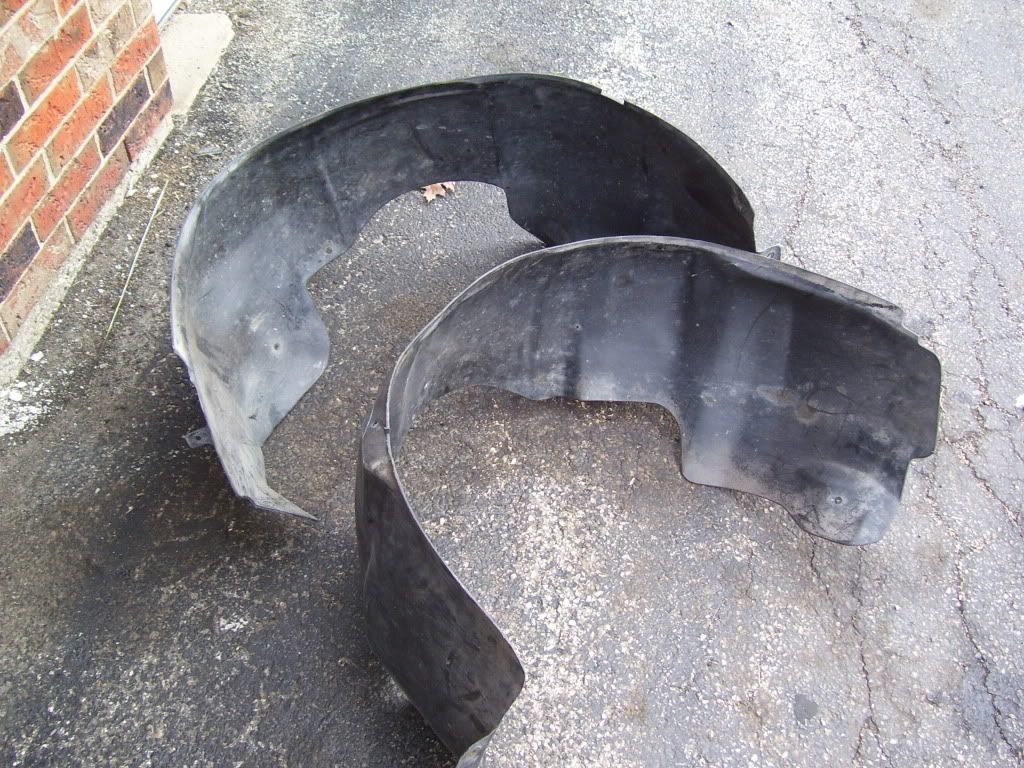
When I was building a full out race car, I tossed out my front fender inner wheelwell plastics (they were torn anyways from the previous owner driving around with the fronts not attached) So I was getting tired of cleaning out the fronts of my door jambs and getting pebbles and dirt all over my towels so I purchased a pair of mint wheelwell plastics from Z28-4Ever who bought them for me from 97Lt1TA on here as part of a trade for some "Hockey Stripe" kit that I didnt end up using. Anyways, just needs a good cleaning and some tire shine and should look like new. Probably install these today...
Another thing I have laying around that is killing me is a Silver Metallic Manta stripe kit that I purchased from www.fourthcircledesigns.com. My friend isnt satisfied with the paint job he did on my Camaro so he wants to repaint it for me this spring (along with welding up my old RK sport spoiler holes) so I have to wait until he does the paint job to put these on. Should look nice when installed and my friend Jeff is going to clear over them so there isnt a hard edge and a cleaner look.
Hood stripe just laying on the car...
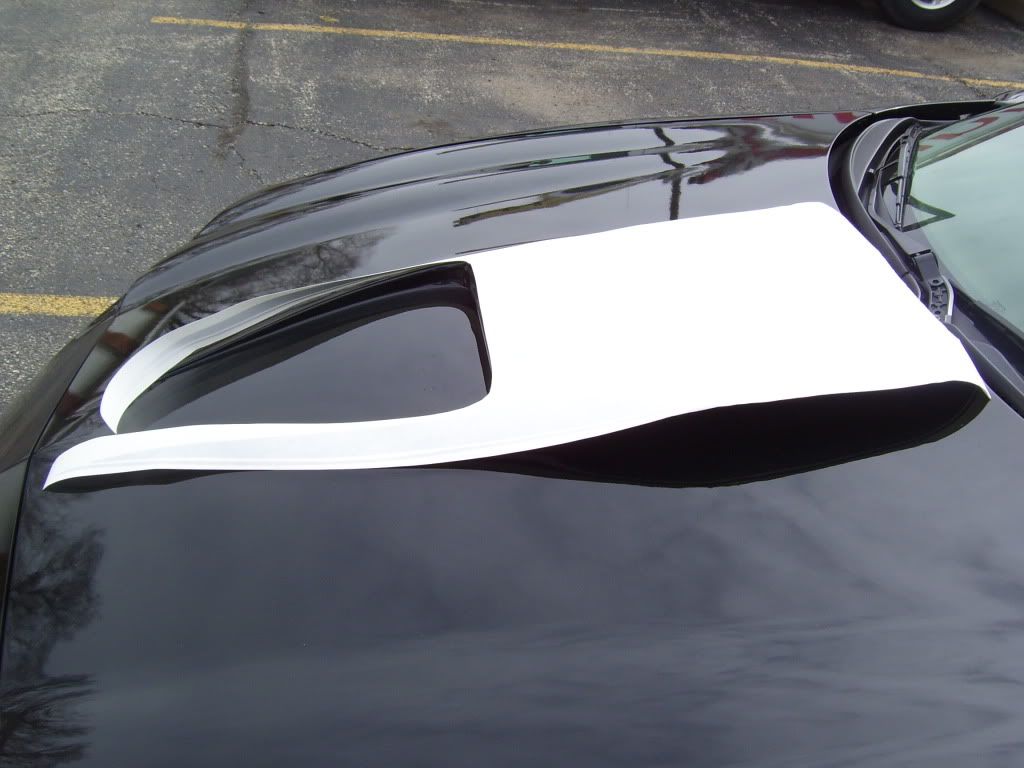
Spoiler stripe set on the car. Also have a stripe that goes under the spoiler as well that was included in the kit.
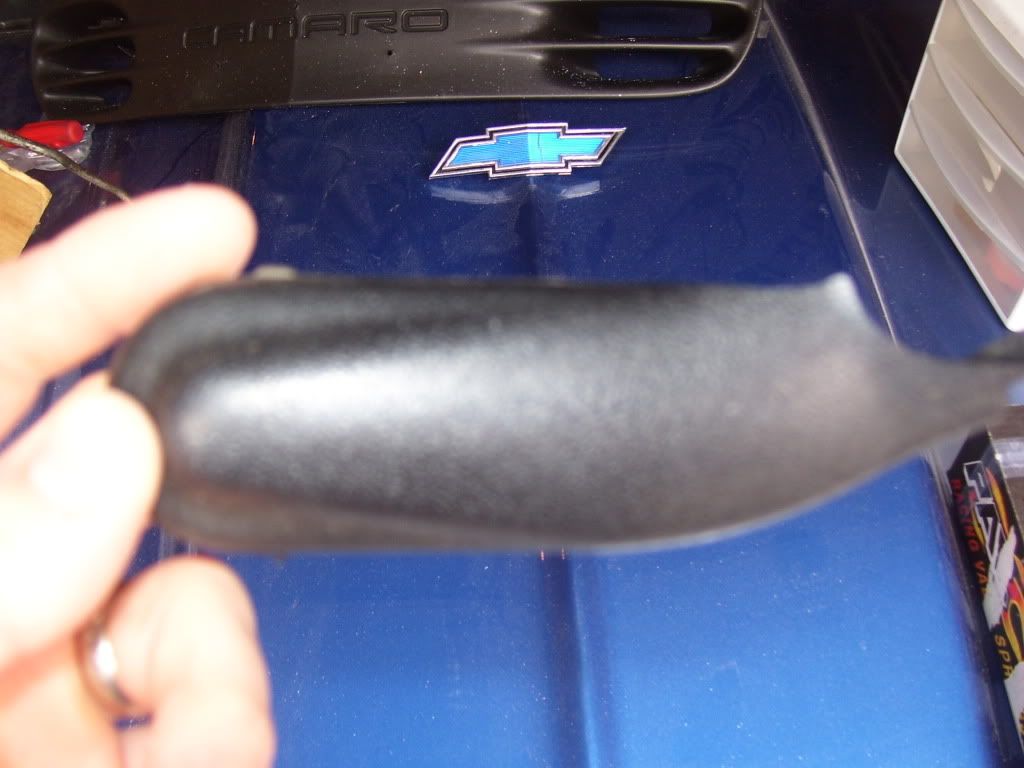
Also looking for both of these parts...just the covers that go over the wiper arm bolts. Both of mine are damaged. PM me if anyone has a spare set.
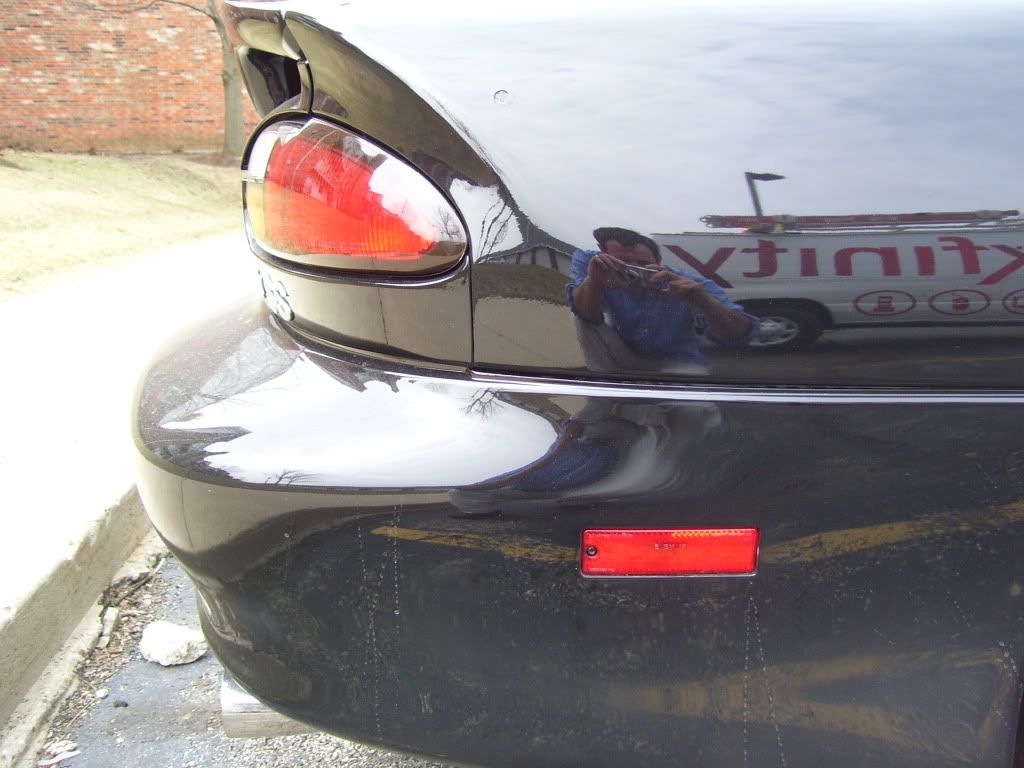
Replaced my clear rear marker lights as well with the stockers. Just think that the rear markers should match the taillights. Looks a little better...
First, getting back to the performance aspect of the build and trying to reach my goal, picked up a set of new PAC Beehive springs to go along with my Crane 227 cam and 1.6 Comp Cam RRs. Just need gaskets and a timing chain now.
Closeup of spring...
When I was building a full out race car, I tossed out my front fender inner wheelwell plastics (they were torn anyways from the previous owner driving around with the fronts not attached) So I was getting tired of cleaning out the fronts of my door jambs and getting pebbles and dirt all over my towels so I purchased a pair of mint wheelwell plastics from Z28-4Ever who bought them for me from 97Lt1TA on here as part of a trade for some "Hockey Stripe" kit that I didnt end up using. Anyways, just needs a good cleaning and some tire shine and should look like new. Probably install these today...
Another thing I have laying around that is killing me is a Silver Metallic Manta stripe kit that I purchased from www.fourthcircledesigns.com. My friend isnt satisfied with the paint job he did on my Camaro so he wants to repaint it for me this spring (along with welding up my old RK sport spoiler holes) so I have to wait until he does the paint job to put these on. Should look nice when installed and my friend Jeff is going to clear over them so there isnt a hard edge and a cleaner look.
Hood stripe just laying on the car...
Spoiler stripe set on the car. Also have a stripe that goes under the spoiler as well that was included in the kit.
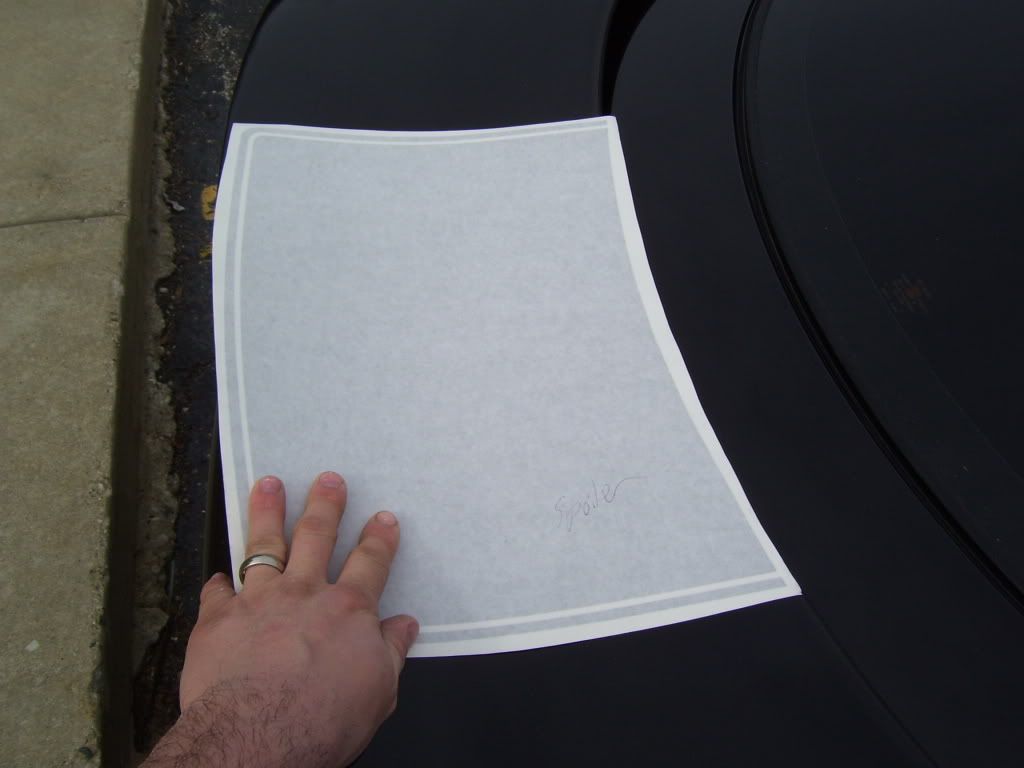
Also looking for both of these parts...just the covers that go over the wiper arm bolts. Both of mine are damaged. PM me if anyone has a spare set.
Replaced my clear rear marker lights as well with the stockers. Just think that the rear markers should match the taillights. Looks a little better...
Thread Starter
TECH Fanatic
iTrader: (12)
Joined: Aug 2007
Posts: 1,818
Likes: 1
From: Cornfields near Pontiac, IL
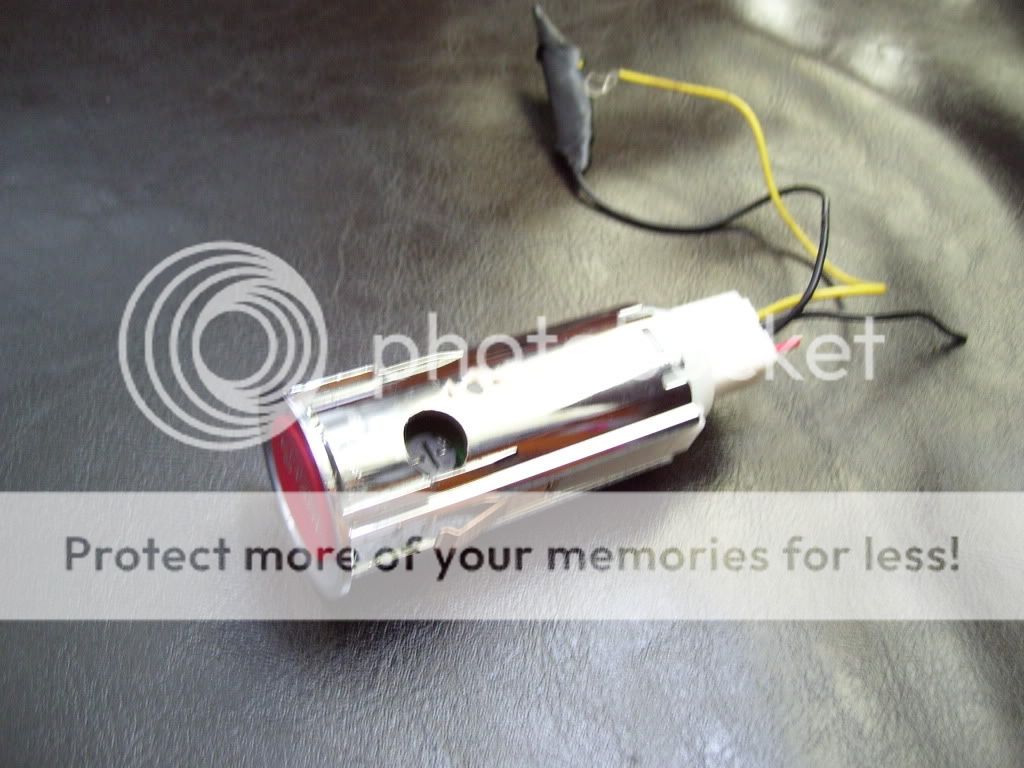
Pretty much as soon as I wrote the last post, the mail came with a package from Mark (ssteven) with a Push Button Start. Thanks again Mark! I really appreciate the gesture! Got the push button as a freebie so definatly a cool mod thats only going to cost me my time and a couple wires/relays. I plan on installing this in the center console where the cigarette lighter went.
Front view...
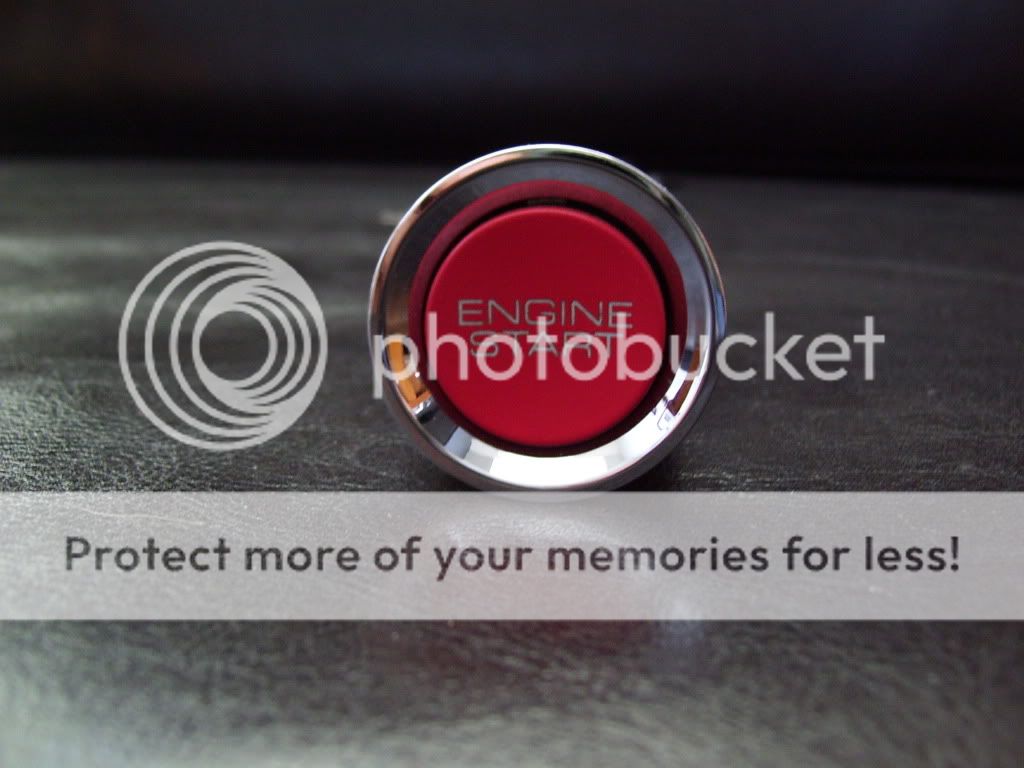
The whole part...
Front view...
The whole part...
Thread Starter
TECH Fanatic
iTrader: (12)
Joined: Aug 2007
Posts: 1,818
Likes: 1
From: Cornfields near Pontiac, IL
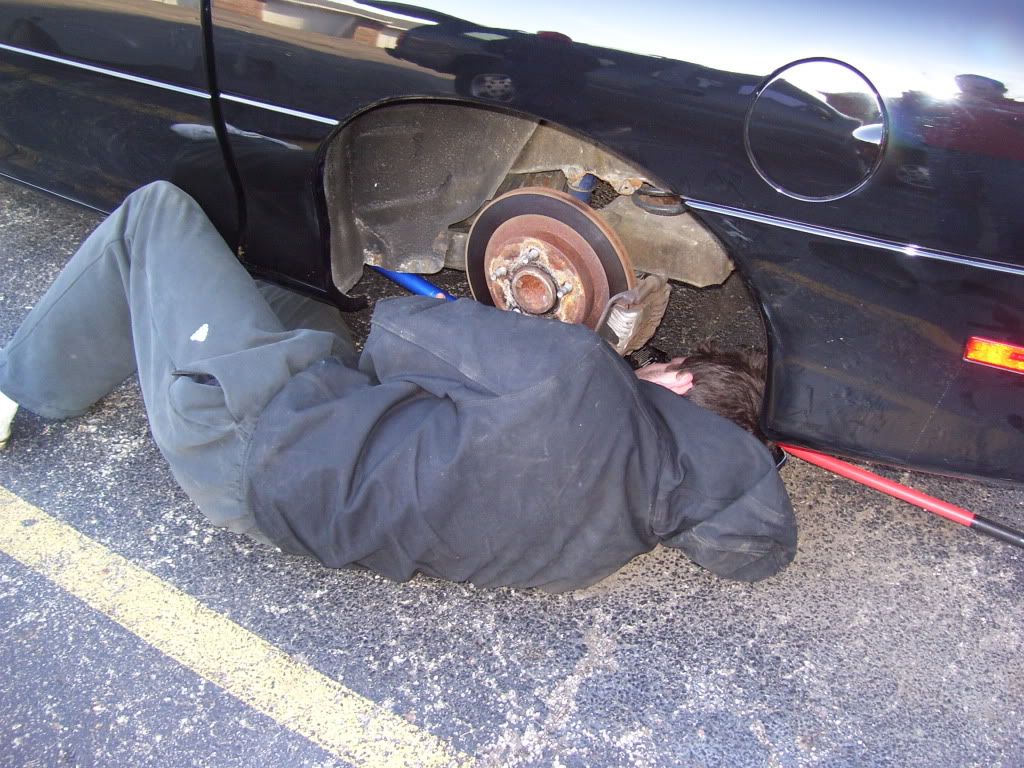
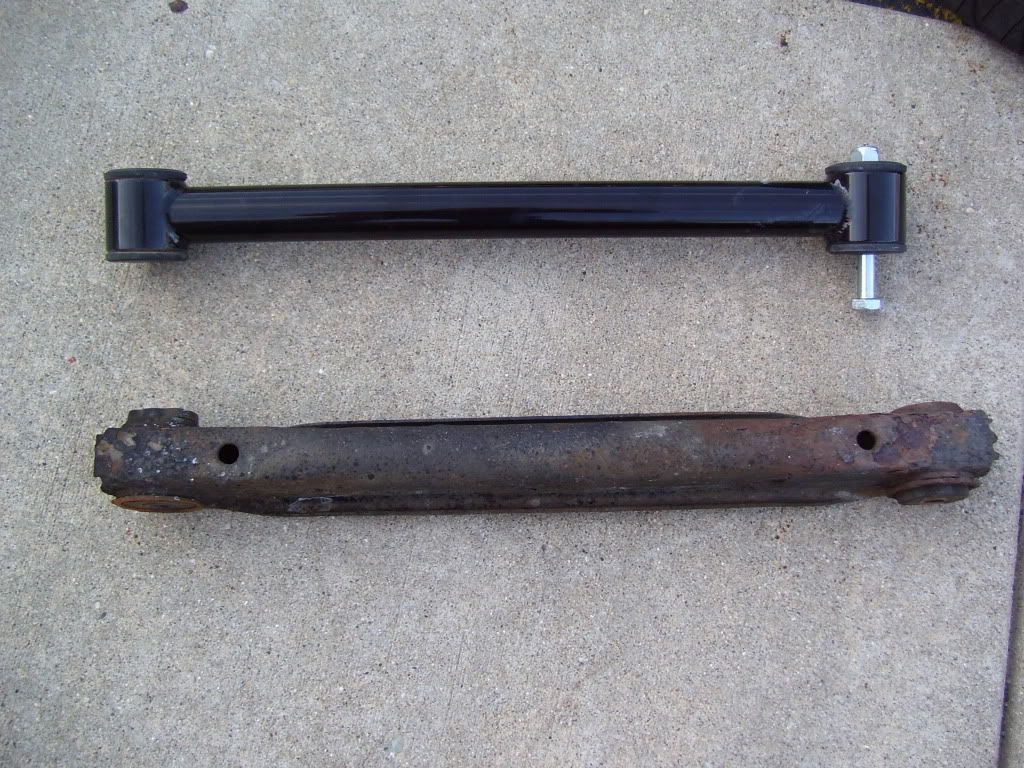
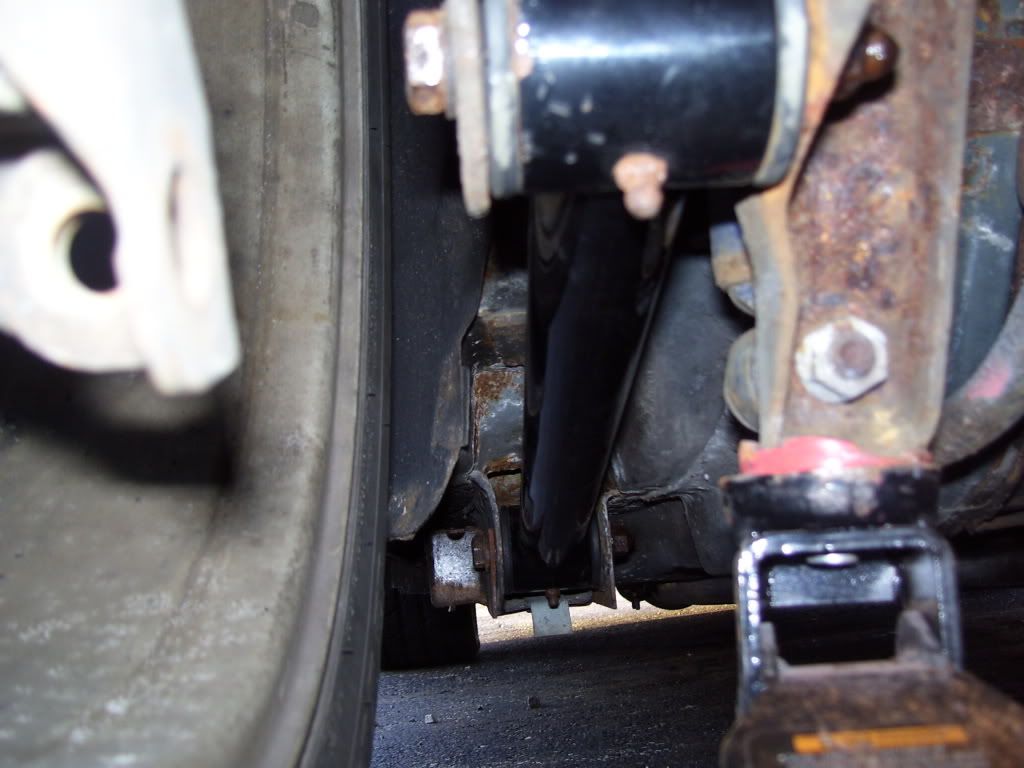
While I was priming Jason's (am_muscl) new cowl hood, Jason started to install my UMI tubular LCA's. Due to the cold temp and daylight, we just got the drivers side done today and going to finish the other side tomorrow. These bolts are really rusty so glad this is getting done now. Here are some pics of the LCA swap...
Jason trying to break a bolt free...
UMI LCA vs Stocker...
One side done...
Jason trying to break a bolt free...
UMI LCA vs Stocker...
One side done...