


Project Budget 10 Second Camaro Thread
Thread Starter
TECH Fanatic
iTrader: (12)
Joined: Aug 2007
Posts: 1,818
Likes: 1
From: Cornfields near Pontiac, IL
The hood should be coming tomorrow. Not sure if I will have to trim much on it or not, but i'll snap a picture of it when i trial fit it. Its a Glasstek 4 inch cowl.
Thread Starter
TECH Fanatic
iTrader: (12)
Joined: Aug 2007
Posts: 1,818
Likes: 1
From: Cornfields near Pontiac, IL
LS1 Tech Stories
The Best V8 Stories One Small Block at Time

Gas Monkey Built a 6-Wheel Ferrari Testarossa With a Corvette LT4 Engine
Verdad Gallardo
7 Most Reliable High-Performance Engines GM Has Ever Built
Verdad Gallardo
Amazing '71 Camaro Restomod Is Modern Muscle Car Under the Skin
Verdad Gallardo
6 Common C5 Corvette Failures and What's Involved In Repairing Them
Pouria Savadkouei
Retro Modern Bandit Pontiac Trans AM Comes With Burt Reynolds' Autograph
Verdad Gallardo
Top 10 Greatest Cadillac V Series Performance Models Ever, Ranked
Pouria Savadkouei
Top 10 Most Powerful Chevy Trucks Ever Made!

Hennessey's New Supercharged Silverado ZR2 Has 700 HP
Verdad Gallardo
Coachbuilt N2A Anteros Is an LS2-Powered C6 Corvette In Italian Clothes
Verdad Gallardo
Thread Starter
TECH Fanatic
iTrader: (12)
Joined: Aug 2007
Posts: 1,818
Likes: 1
From: Cornfields near Pontiac, IL
Thread Starter
TECH Fanatic
iTrader: (12)
Joined: Aug 2007
Posts: 1,818
Likes: 1
From: Cornfields near Pontiac, IL
Got the hood I wanted since I bought the car. Glasstek 4 inch cowl induction hood. Just got done test fitting it. Looks pretty good on the car. Has a little bit of a gap between the front of the hood and the bumper I'm going to have to play with, but other than that, got it lined up pretty close considering I did it by myself.
Also I tried mocking up the LS1 lid base and it hits the hood too. So may have to trim underneath the hood a bit.
Cost total so far...
Summit Race Seats with leather covers (bought used) $100
Alternator Relocate/PS Delete Bracket & Belt (bought used) $75
Sheet Metal for A/C/Heat-Delete Block Off Plate (Menards) $4.60
Grant Steering Wheel...$29.95
Wheel Adapter Kit...$20.95
LS1 Lid Base...Traded for LT1 CIA
SLP Lid...$102 (Summit)
Glasstek 4 Inch Cowl...$400 (bought used)
Total...$732.50
Snapped a couple pictures today. Should look really nice once its painted.


And one of both my cars together! I like this one...

Also I tried mocking up the LS1 lid base and it hits the hood too. So may have to trim underneath the hood a bit.
Cost total so far...
Summit Race Seats with leather covers (bought used) $100
Alternator Relocate/PS Delete Bracket & Belt (bought used) $75
Sheet Metal for A/C/Heat-Delete Block Off Plate (Menards) $4.60
Grant Steering Wheel...$29.95
Wheel Adapter Kit...$20.95
LS1 Lid Base...Traded for LT1 CIA
SLP Lid...$102 (Summit)
Glasstek 4 Inch Cowl...$400 (bought used)
Total...$732.50
Snapped a couple pictures today. Should look really nice once its painted.
And one of both my cars together! I like this one...
Last edited by Black94Z28; Feb 8, 2009 at 06:24 PM.
Thread Starter
TECH Fanatic
iTrader: (12)
Joined: Aug 2007
Posts: 1,818
Likes: 1
From: Cornfields near Pontiac, IL
Kind of what I have in mind for the build for when the current engine goes, wanted to go 396, but keep in mind this is a budget build and want to go as fast as possible for the least amount of money. Also this engine will be sprayed. Would like to build it so it can handle more than a 150 shot. Any ideas or changes would be appreciated as well. Just kind of a generic list, will change it as I get input.
Engine:
355 LT1
847 Cam
Port and Polish Factory Heads and Intake
TB-??? (worth getting an aftermarket or just porting the stock?)
Forged Pistons (Probably the best for N20??)
Forged Rods
ARP Rod Bolts
Trans:
Th350
aprox 3600-3800 stall
Trans cooler
Rear End:
9 Inch or 12 Bolt
4.10 gears
Wheels/Tires:
Fronts 15x3.5s
Rears: 15x8s with 28x10.50 MT ET Drags
Other:
Aftermarket Ignition (best for N20 car?)
Nitrous kit (would like to do 200-250)
Thread Starter
TECH Fanatic
iTrader: (12)
Joined: Aug 2007
Posts: 1,818
Likes: 1
From: Cornfields near Pontiac, IL
Today's progress...I wanted to pull the wheelwells out so I could try and fab up some bracket to keep the front bumper sturdy and also wanted to tackle the wire relocate mod tomorrow. I got those out pretty easy and found a bunch of leaves and stuff behind them.
Also pulled the EVAP canister and the lines that go to the intake manifold. Feels like maybe 5 pounds or so? For those who dont know, there is a goofy looking line that comes out with the fuel lines and runs to the passenger side of the intake manifold. What I did was i took the line off and the little assembly off and capped the plug on the throttle body. Then behind the drivers rear tire there is a rubber shield thats held in by a 7 mm bolt and a little plastic push pin. After you take that off, you will see the canister. There are 3 rubber lines running to the canister, i simply pulled them off and wiggled the canister till it slide off the bracket. Right now Im researching wether to cap the evap lines or if i need to vent them somehow, looks like 3 rubber hoses that went into the canister. Ill try and snap a pic of the canister before i **** can it.
After that I jacked the back end of the car up and pulled the exhaust heat shields out, maybe another 2-3 pounds there. I wanted to pull the horns too since I didnt install the horn button when I did the steering wheel, but I left that for tomorrow.
Last edited by Black94Z28; Feb 10, 2009 at 08:34 PM.


Thread Starter
TECH Fanatic
iTrader: (12)
Joined: Aug 2007
Posts: 1,818
Likes: 1
From: Cornfields near Pontiac, IL
Yeah, it was in the 60s i think yesterday. Actually had to take the top down in the TA while I was driving around town.

That is the next thing on the list to do. Looking at the Weld Prostars, not sure what I am going to run in the back. 15x8s or 10s?
Thread Starter
TECH Fanatic
iTrader: (12)
Joined: Aug 2007
Posts: 1,818
Likes: 1
From: Cornfields near Pontiac, IL
Today's progress...
Was raining out so really couldnt do too much other than go back and try and take more weight out from under the dash. I already had it apart the first time to take the HVAC sytem out, but this time I want to take the firewall insulation out.
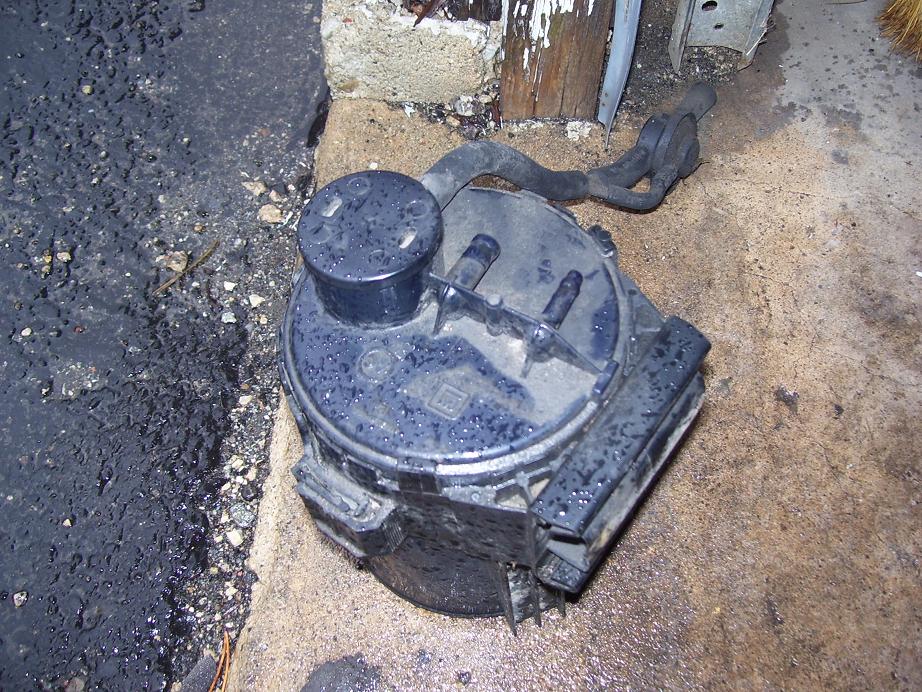
Also grabbed some pictures of the EVAP removal I did yesterday. This pic is of the actual canister located behind the drivers rear tire. Just kinda wiggled it free.
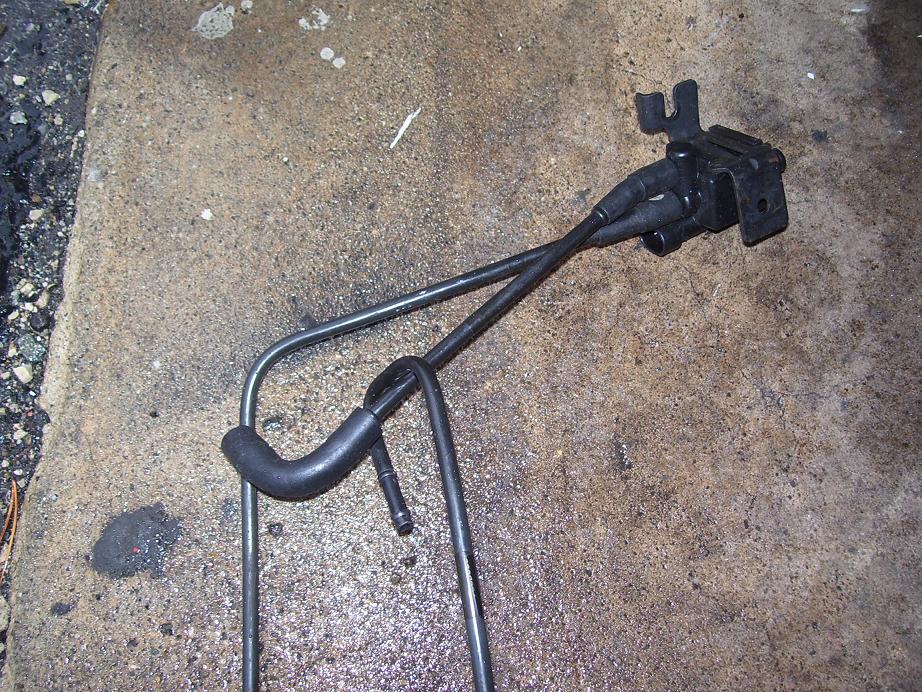
Here are the lines I pulled from the engine bay. The little block piece is attached to the intake by a 7 mm bolt. I ended up capping the TB where it connected to.
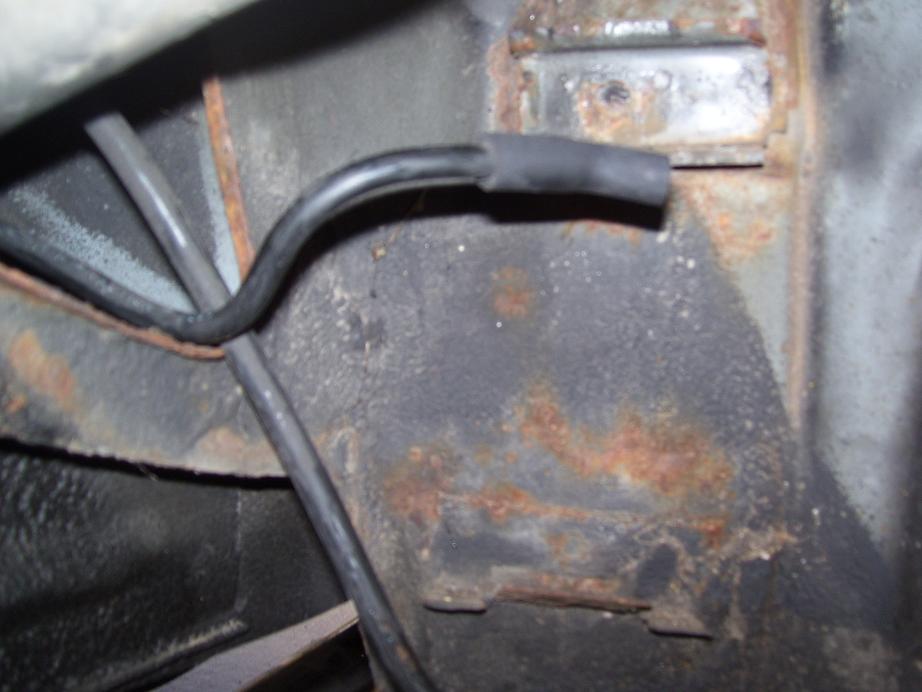
Here is what I am unsure of what to do with...whether to cap these or vent them somehow. Anyone know? Id like to wrap this part up.
And here is what I've been doing today. Took the dash off again and was able to pull this insulation on top of the dash off. It just sits there and someone probably could do it just by lifting the top of the dashpad up and sliding it out. Probably weighs a good 5-6 pounds. Also you can see there is this black rubber insulation thats on the firewall I want to pull off. Looks like it goes under the carpet too, not sure how big of a PITA this is, but I'm going to attempt that tomorrow hopefully since I was running out of daillight. I know this is all little stuff, but hey it all adds up and trying to get this car as light as possible

Was raining out so really couldnt do too much other than go back and try and take more weight out from under the dash. I already had it apart the first time to take the HVAC sytem out, but this time I want to take the firewall insulation out.
Also grabbed some pictures of the EVAP removal I did yesterday. This pic is of the actual canister located behind the drivers rear tire. Just kinda wiggled it free.
Here are the lines I pulled from the engine bay. The little block piece is attached to the intake by a 7 mm bolt. I ended up capping the TB where it connected to.
Here is what I am unsure of what to do with...whether to cap these or vent them somehow. Anyone know?
And here is what I've been doing today. Took the dash off again and was able to pull this insulation on top of the dash off. It just sits there and someone probably could do it just by lifting the top of the dashpad up and sliding it out. Probably weighs a good 5-6 pounds. Also you can see there is this black rubber insulation thats on the firewall I want to pull off. Looks like it goes under the carpet too, not sure how big of a PITA this is, but I'm going to attempt that tomorrow hopefully since I was running out of daillight. I know this is all little stuff, but hey it all adds up and trying to get this car as light as possible