Finally got my engine bay decent looking
 06-14-2010, 04:50 PM
#1

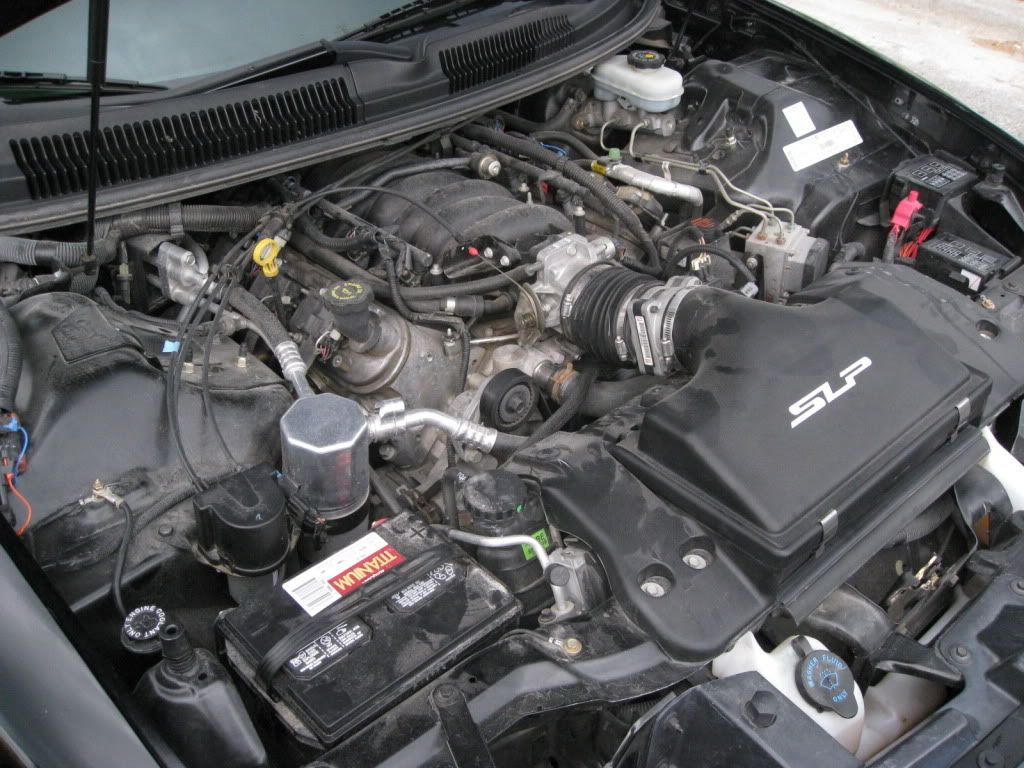
Before
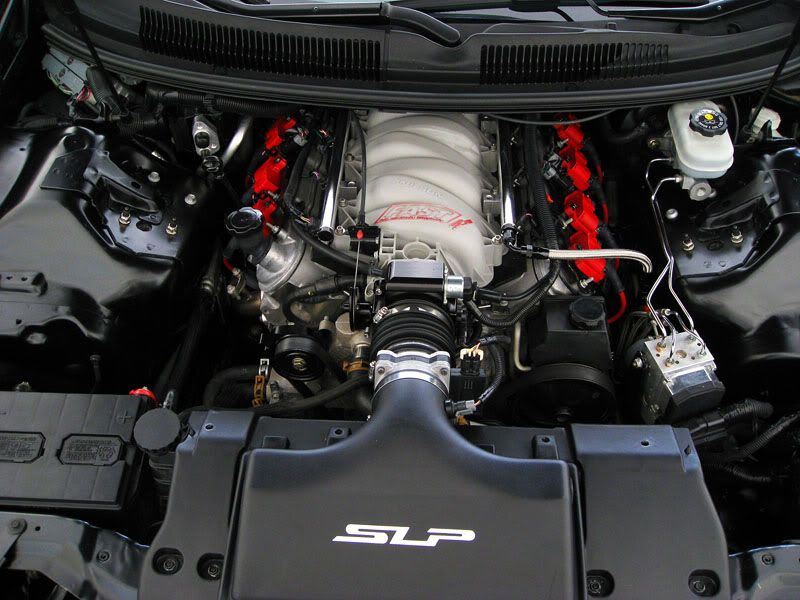
After
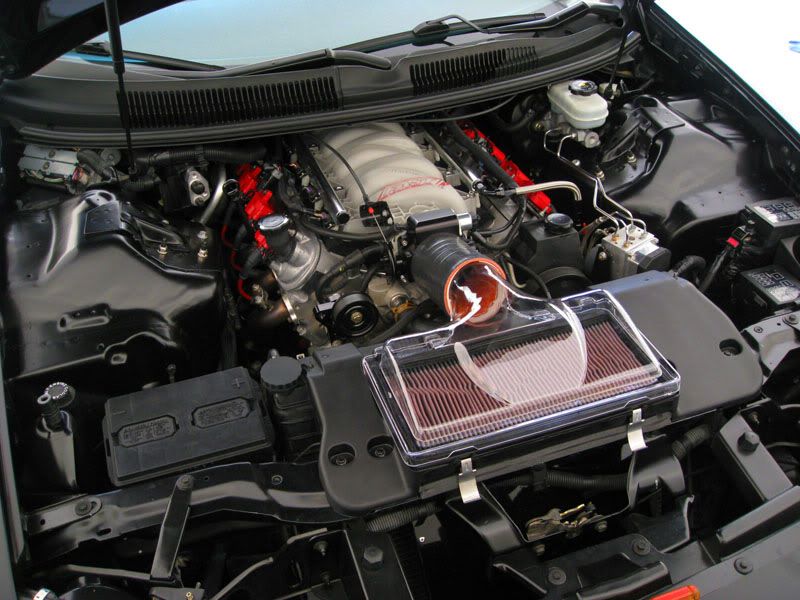
And here's a little of whats to come later on when I go SD tune
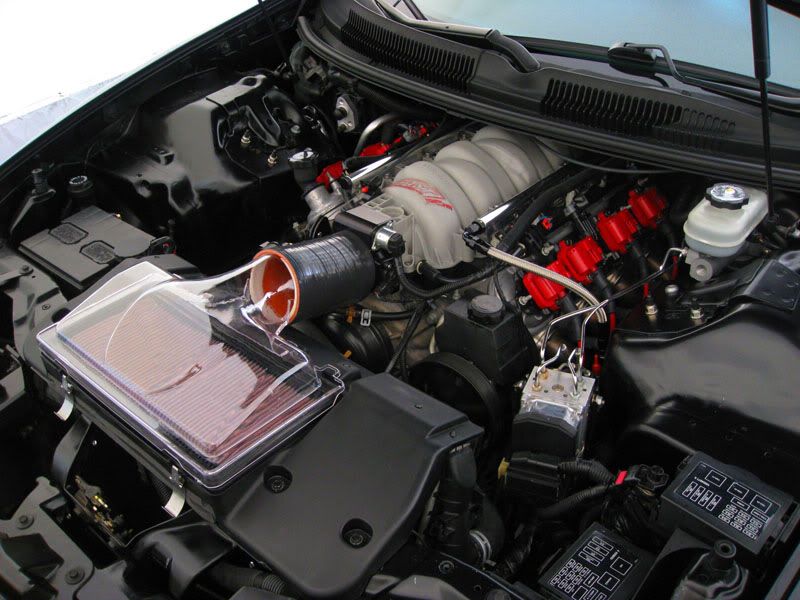
Here's everything I did that I can remember
- Installed FAST 92/NW 92
- Installed Nasty Performance polished billet fuel rails
- Installed steel braided fuel lines with black anodized fittings
- Installed LS6 valley cover and re-routed PCV fittings and hoses
- Relocated TCS
- Removed A/C for my new Chrs1313 Ram air kit which is amazing btw
- Removed windshield washer reservoir because its worthless lol
- Painted front bumper support
- Painted backs of headlights
- Painted dipstick
- Painted coils
- Painted battery's lettering
- Polished brake lines
- Polished air lid clips
- Painted some bolts black
- Wrapped up wires in new electrical tape to hide more of it
- New PS cap
** Still more stuff to do.. **
- Valve covers and coil brackets powdercoated glossy black
- Possibly painted FAST 92 to glossy black or glossy red
- Sand and polish the IAC motor
- Paint air lid support base glossy black
- Get shock towers repainted and all holes filled/smoothed etc.
- Cut the length of the dipstick down
- Oil filler neck removed and oil cap directly onto valve cover
- Powdercoat radiator and water pump nasty looking clasps
- PCM and brake master cylinder covers
- More **** I can't think of
Let me know what you guys think
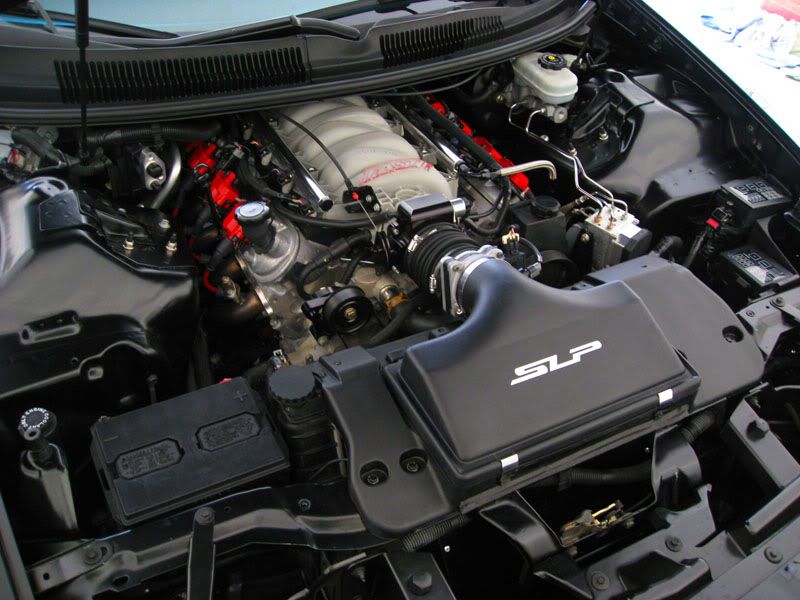
After
And here's a little of whats to come later on when I go SD tune
Here's everything I did that I can remember
- Installed FAST 92/NW 92
- Installed Nasty Performance polished billet fuel rails
- Installed steel braided fuel lines with black anodized fittings
- Installed LS6 valley cover and re-routed PCV fittings and hoses
- Relocated TCS
- Removed A/C for my new Chrs1313 Ram air kit which is amazing btw
- Removed windshield washer reservoir because its worthless lol
- Painted front bumper support
- Painted backs of headlights
- Painted dipstick
- Painted coils
- Painted battery's lettering
- Polished brake lines
- Polished air lid clips
- Painted some bolts black
- Wrapped up wires in new electrical tape to hide more of it
- New PS cap
** Still more stuff to do.. **
- Valve covers and coil brackets powdercoated glossy black
- Possibly painted FAST 92 to glossy black or glossy red
- Sand and polish the IAC motor
- Paint air lid support base glossy black
- Get shock towers repainted and all holes filled/smoothed etc.
- Cut the length of the dipstick down
- Oil filler neck removed and oil cap directly onto valve cover
- Powdercoat radiator and water pump nasty looking clasps
- PCM and brake master cylinder covers
- More **** I can't think of
Let me know what you guys think


Trending Topics
06-14-2010, 05:51 PM
#8
what I normally do is use a combination of Simple Green/Engine Brite both the spray and foamy kinds and spray the **** out of everything after I have covered the PCM and any electrical connections with suran wrap etc.
I let that sit for about 10-12 minutes on a cool engine. After that I hose the living **** out of everything lol. Simple Green is corrosive so it needs to be washed off really well. I have done this on a slightly warm engine and it may work a little better it just depends.
After that I normally dry everything off with some microfibers. For periodic cleanings I just use glass cleaner every other day or so and clean it all up nice again.
I have used a lot of different Tire Foams and engine detailers such as CD2 and found that most of that **** is more a pain then the rewards are worth. The best stuff to apply that kind of product to is going to be your wire looms and hoses etc. Spraying on surfaces such as the shock towers or air lid base support just gets annoying because after you rub it good once, its gone.
06-14-2010, 05:56 PM
#9
Later on if I ever have the car to a shortblock, I'll be cutting the heater box and removing the A/C inlets but I will still retain the heat I just have to fab up a plate back there. I would also like to relo the PCM behind the firewall too. We will see
06-14-2010, 06:22 PM
#13
https://ls1tech.com/forums/appearanc...tion-pics.html
This is the tutorial I followed.. it was simple to do other than getting the PCM out and cutting the wires for the TCS and connecting them again. I did not use a soldering iron and solder.. I just got 4 butt connectors and 16 gauge wire and it works fine. The wiring is ran right along side the rest of the wires under the shock tower in the fender well.
This is the tutorial I followed.. it was simple to do other than getting the PCM out and cutting the wires for the TCS and connecting them again. I did not use a soldering iron and solder.. I just got 4 butt connectors and 16 gauge wire and it works fine. The wiring is ran right along side the rest of the wires under the shock tower in the fender well.
06-14-2010, 06:54 PM
#15
TECH Fanatic

Join Date: Jul 2007
Posts: 1,516
Likes: 0
Received 0 Likes
on
0 Posts
FWIW for your rad hoses you should go to your local auto parts store and get some normal worm drive hose clamps and some heat shrink that will fit around the strap.
Install them on the hoses and mark the length of the clamp that goes around the hose.
Now cut the heat shrink tubing down to the appropriate lengths and heat shrink around the hose clamp.
Then install the hose clamps back onto the hoses with the drive part of the clamp on the bottom of the hose. Voila!! probably one of the cleanest looking hose clamps you can have on any car.
06-14-2010, 07:09 PM
#16
FWIW for your rad hoses you should go to your local auto parts store and get some normal worm drive hose clamps and some heat shrink that will fit around the strap.
Install them on the hoses and mark the length of the clamp that goes around the hose.
Now cut the heat shrink tubing down to the appropriate lengths and heat shrink around the hose clamp.
Then install the hose clamps back onto the hoses with the drive part of the clamp on the bottom of the hose. Voila!! probably one of the cleanest looking hose clamps you can have on any car.
Install them on the hoses and mark the length of the clamp that goes around the hose.
Now cut the heat shrink tubing down to the appropriate lengths and heat shrink around the hose clamp.
Then install the hose clamps back onto the hoses with the drive part of the clamp on the bottom of the hose. Voila!! probably one of the cleanest looking hose clamps you can have on any car.