
How-to: Lancer Evo Recaro seats on stock seat rails
 11-28-2010, 01:41 PM
#41
TECH Addict
iTrader: (14)
Join Date: May 2005
Location: Simi Valley, CA.
Posts: 2,727
Likes: 0
Received 0 Likes
on
0 Posts

Looks awesome, i loved those seats when i sat in them. Just food for thought for anyone who has an issue with them being a bit higher than the stock seat, someone does make a set of lowering brackets for the stock EVO seats. Its worth a look for someone to copy them for this application 
http://cgi.ebay.com/ebaymotors/Mit-E...Q5fAccessories
http://cgi.ebay.com/ebaymotors/Mit-E...Q5fAccessories


 02-12-2011, 09:28 PM
#44
TECH Enthusiast
Thread Starter
iTrader: (8)

Join Date: Feb 2005
Posts: 532
Likes: 0
Received 0 Likes
on
0 Posts
EDIT: Did you do anything to modify the seat height? I still haven't figured out a way to lower my seat a little for more headroom.
02-12-2011, 10:12 PM
#45
Thanks, I might make another piece that contours the seat better..but for now its alright.
And no, I looked at the bottom of the seat and there isn't a way that I could come up with to have a lower seat height. If anyone comes up with a good idea, I would be up for redoing the brackets.
Also thanks for the inspiration of doing this upgrade.
02-12-2011, 11:26 PM
#46
TECH Enthusiast
Thread Starter
iTrader: (8)
Join Date: Feb 2005
Posts: 532
Likes: 0
Received 0 Likes
on
0 Posts
Thanks, I might make another piece that contours the seat better..but for now its alright.
And no, I looked at the bottom of the seat and there isn't a way that I could come up with to have a lower seat height. If anyone comes up with a good idea, I would be up for redoing the brackets.
Also thanks for the inspiration of doing this upgrade.
And no, I looked at the bottom of the seat and there isn't a way that I could come up with to have a lower seat height. If anyone comes up with a good idea, I would be up for redoing the brackets.
Also thanks for the inspiration of doing this upgrade.
02-13-2011, 05:14 PM
#47
The "spacer" around the two bolt holes on each side of the seat could be cut off, and then you wouldn't have to use washers to compensate on the other side. It only looks like it'd save about 1/4", though. The real problem is the design of the driver's power seat rail. If there was a way to fix how the seat sits on the rail, that would make this upgrade perfect. I've just been too lazy to pull everything back out again
I had looked at that when I installed mine. But if you cut those off, the seat would not sit flat on the brackets because the springs on the bottom of the recaro seat would be pushing against the brackets that hold the seat to the rails.
02-13-2011, 08:57 PM
#49
TECH Enthusiast
Thread Starter
iTrader: (8)
Join Date: Feb 2005
Posts: 532
Likes: 0
Received 0 Likes
on
0 Posts
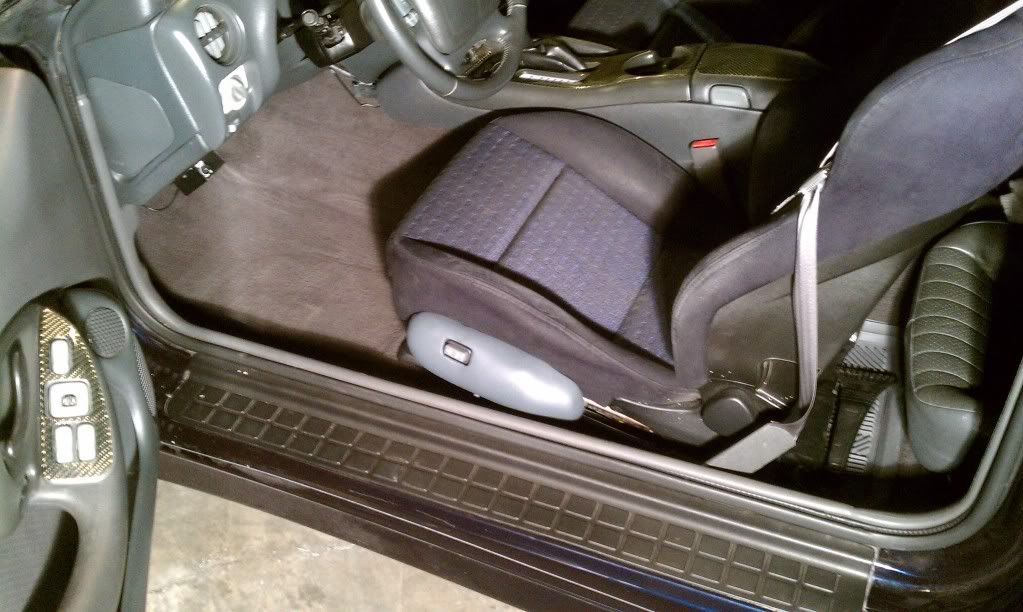
If you have a power driver's seat, it will sit higher than a manual seat. It doesn't really help forward visibility at all, and the less headroom is a little annoying. I'm sure it would be even worse with a helmet on.
02-13-2011, 09:20 PM
#51
TECH Enthusiast
Thread Starter
iTrader: (8)
Join Date: Feb 2005
Posts: 532
Likes: 0
Received 0 Likes
on
0 Posts
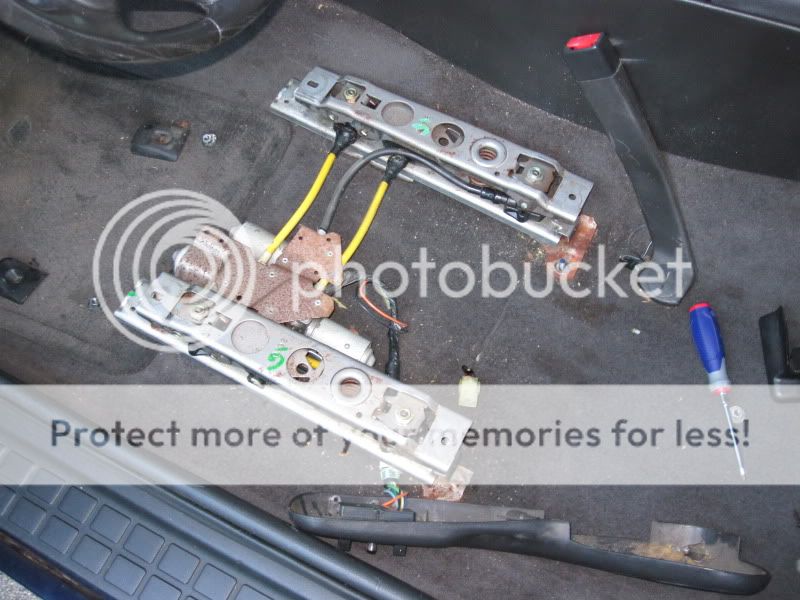
After going back and looking at this pic of the driver's power rail setup:
I've identified the problem areas here:
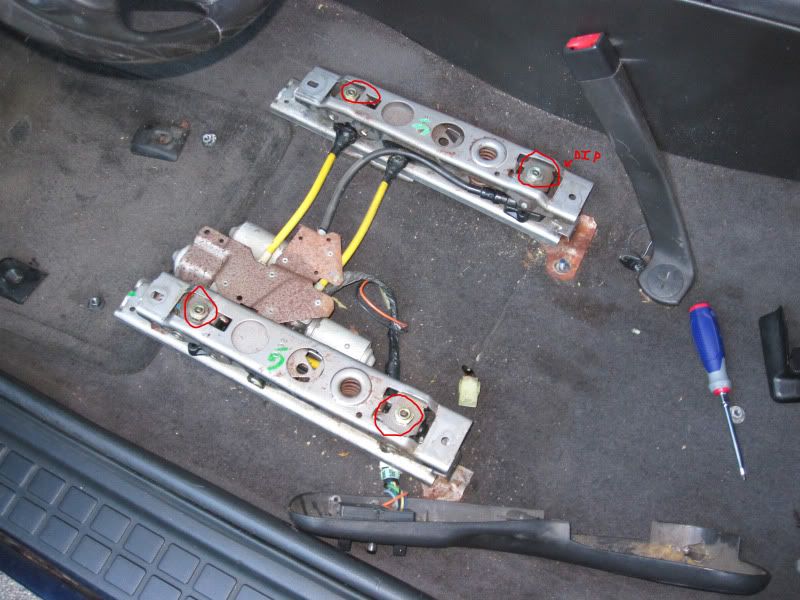
The circled areas are the actuators(?) that tilt the front and rear parts of the seat. The "dip" is just that, an area on all 4 corners of the rails where the rail dips down after the actuators. IIRC, the brackets basically sit directly on the tops of the actuators. If there was a way to get the brackets and seat to sit lower than the actuators, that would be perfect. In fact, if the brackets mounted flush to the level of the bolt holes on the rails, the Recaro seat would be at roughly the same height as the stock seats.
I've identified the problem areas here:
The circled areas are the actuators(?) that tilt the front and rear parts of the seat. The "dip" is just that, an area on all 4 corners of the rails where the rail dips down after the actuators. IIRC, the brackets basically sit directly on the tops of the actuators. If there was a way to get the brackets and seat to sit lower than the actuators, that would be perfect. In fact, if the brackets mounted flush to the level of the bolt holes on the rails, the Recaro seat would be at roughly the same height as the stock seats.
02-13-2011, 09:25 PM
#52
TECH Enthusiast
Thread Starter
iTrader: (8)
Join Date: Feb 2005
Posts: 532
Likes: 0
Received 0 Likes
on
0 Posts
Another idea I had was possibly hammering the **** out of the floor pan to make it lower/flatter. I don't know if this would weaken the affected area, and what effect it would have on any components directly underneath the car as well as ground clearance.
02-13-2011, 11:11 PM
#53
I don't know if it is possible due to clearance, but could you make the adapter bracket look like this ---\___/--- Where the --- s would mount to the power seat bracket and the ___ s are dropped down a little. That would lower the seat some if it is possible.