My custom vertical radiator project.
 02-12-2011, 07:10 PM
#21
TECH Regular
iTrader: (5)

Join Date: Feb 2007
Location: La Puente/ Whittier, CA
Posts: 418
Likes: 0
Received 0 Likes
on
0 Posts

I love this! I would so do this if I had the guts and money. I would worry too much about the stability of the core suport with that much material cut away.

 02-13-2011, 01:40 AM
#26
I'll be sure to keep you guys posted, i've got some welding to do to fill in the ends of the core support which are now openly hollow as you can see, as well as filling the holes on the top before i can lay any filler on it and start smoothing it out, but it should look super clean. Thanks man!
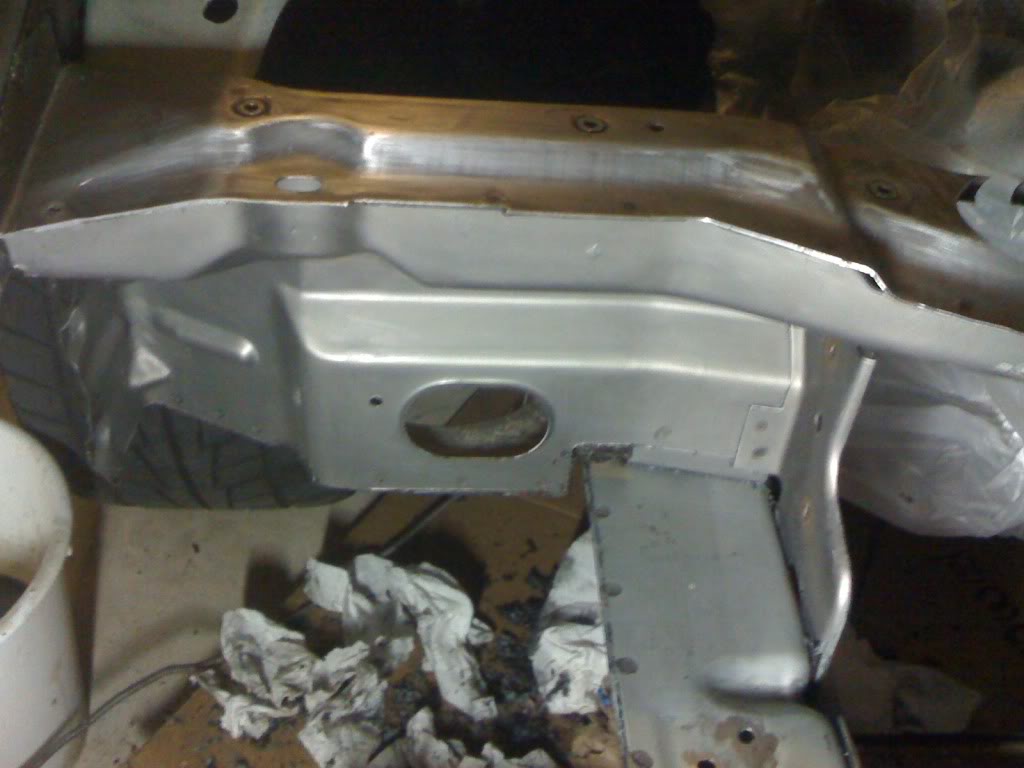
Thanks man, i'm really liking it too of course. Honestly yes, the core support has a substantial loss of rigidity compared to stock, obviously without the radiator installed the top feels like a high gauge aluminum can. I can bend it by hand, but with the radiator underneath it, it's pretty much as sturdy as can be, and will be alot better once i weld up the sides of the support.
I intend on attaching the fans exactly like "roadtrip120." His setup is right here. I've PM'd him about his set up, but have yet to hear back from him. lets hope he chimes in.
Thanks man. i answered your question a quote or two above.
Yes, i've relocated the entire harness that goes to the fuse box and everything underneath the dash. the only wiring in the engine bay is the "engine" harness, and of course wiring for the headlights, and fans will be run separately and again, of course hidden from sight.
well thanks man, i'm glad i'm picture saving worthy. haha
after all, i'm not even 20 yet.
I intend on attaching the fans exactly like "roadtrip120." His setup is right here. I've PM'd him about his set up, but have yet to hear back from him. lets hope he chimes in.
well thanks man, i'm glad i'm picture saving worthy. haha
after all, i'm not even 20 yet.
 02-13-2011, 09:18 PM
#32
TECH Addict
iTrader: (24)
Join Date: Oct 2006
Location: Webb City, MO...out in the garage
Posts: 2,610
Likes: 0
Received 0 Likes
on
0 Posts
i was seriously contemplating doing this to mine while i had it apart, i didn't end up doing it and now your pictures are filling me with regret.
....damnit...nice job though for sure!
....damnit...nice job though for sure!
02-13-2011, 10:33 PM
#33
Thanks, both of your cars are sick too bro.
I don't have a link to the fans i'm going to use because as previously stated i have yet to get a reply from the person i PM'd about the fan setup he's running.
No, the hood latch assembly still bolts to the front of the support.
lol, there's obviously an lt1 in the bay. even visible in the pictures. Thanks though man.
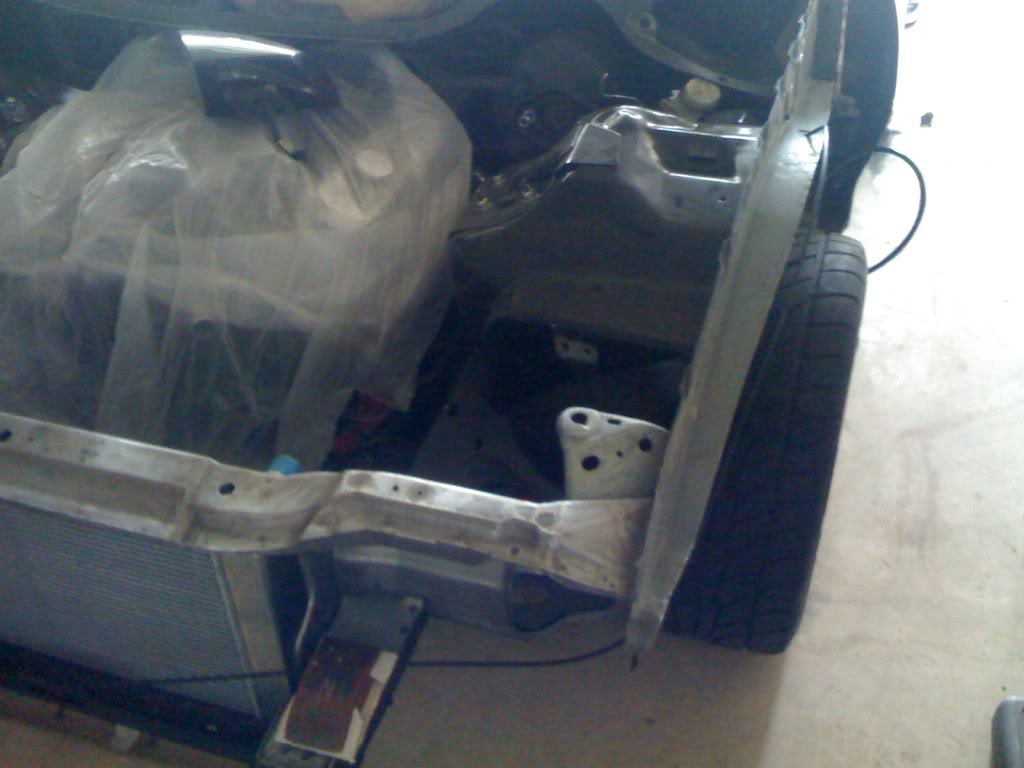
I'm sure with modification the the condenser and cooler you could squeeze them in front of the radiator. As for the FMIC, usually people mount those alot further forward like where the bumper support is located, so i see this being in no way involved with that.
Awe man, i would have loved to have seen your car with this setup, youre bay is sick as it is, and this would put it at a whole new level. I mean, you could still do it, you'd just have to repaint the core support once it was finished.
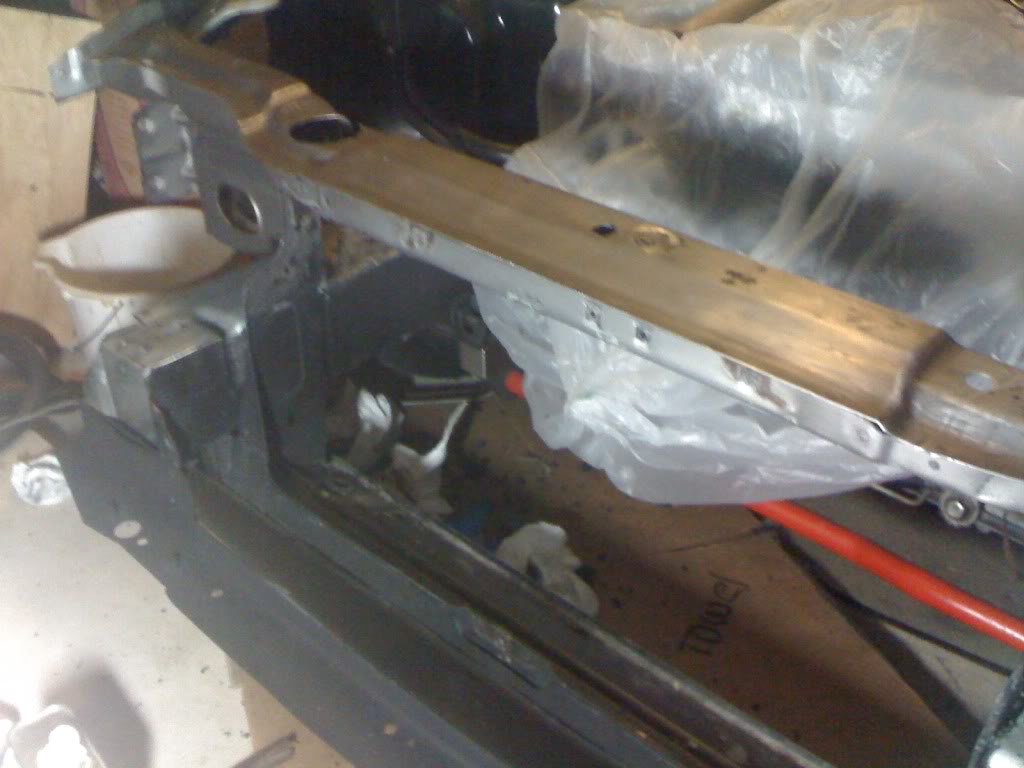
so i got an update. Today i spent most of the day with a can of aircraft stripper, and stripped the core support and associated structure completely down to bare metal. I want to do it up right, and not skimp in any way, so this is it. I don't own a welder, or know how to weld, so i need to find somebody that can weld a few things up for me. If anyone knows anybody In San Antonio area willing to help me out, let me know. I'd appreciate it. I'll need to get the holes and sides of the support welded up before i lay down any filler. but here it is for now. I've still gotta finish up stripping the drivers side a bit more, but it was killing my back leaning over the bay scraping all day, lol.
enjoy.
No, the hood latch assembly still bolts to the front of the support.
so i got an update. Today i spent most of the day with a can of aircraft stripper, and stripped the core support and associated structure completely down to bare metal. I want to do it up right, and not skimp in any way, so this is it. I don't own a welder, or know how to weld, so i need to find somebody that can weld a few things up for me. If anyone knows anybody In San Antonio area willing to help me out, let me know. I'd appreciate it. I'll need to get the holes and sides of the support welded up before i lay down any filler. but here it is for now. I've still gotta finish up stripping the drivers side a bit more, but it was killing my back leaning over the bay scraping all day, lol.
enjoy.
02-14-2011, 08:45 AM
#34
TECH Fanatic
iTrader: (1)
Join Date: Oct 2003
Location: Marrero/ New Orleans
Posts: 1,025
Likes: 0
Received 0 Likes
on
0 Posts
dont think i would have taken all the way down with the stripper
because you just remover the factory e-coat now you will need 2 seal it up with some epoxy and its hard 2 get in all the crakes and creases as good as the factory does it
because you just remover the factory e-coat now you will need 2 seal it up with some epoxy and its hard 2 get in all the crakes and creases as good as the factory does it
02-14-2011, 09:28 AM
#35
TECH Veteran
iTrader: (14)
yeah after reading that i wasnt very clear sorry
the camaro front bumper can allow for air to flow straight through the radiator as you have it placed (but does require cutting i think cant remember if its open behind the grill openings or not) but the firebird or transam bumper relys only on the lower airdam to get airflow accross the radiator.
the camaro front bumper can allow for air to flow straight through the radiator as you have it placed (but does require cutting i think cant remember if its open behind the grill openings or not) but the firebird or transam bumper relys only on the lower airdam to get airflow accross the radiator.
 02-15-2011, 10:34 PM
#37
yeah after reading that i wasnt very clear sorry
the camaro front bumper can allow for air to flow straight through the radiator as you have it placed (but does require cutting i think cant remember if its open behind the grill openings or not) but the firebird or transam bumper relys only on the lower airdam to get airflow accross the radiator.
the camaro front bumper can allow for air to flow straight through the radiator as you have it placed (but does require cutting i think cant remember if its open behind the grill openings or not) but the firebird or transam bumper relys only on the lower airdam to get airflow accross the radiator.
AC is already ditched.
02-16-2011, 12:49 AM
#38
here is a recent picture with the hood latch assembly and header panel brackets bolted on just to show this setup leaves all the factory mounting points. Idk if a washer fluid tank would fit though, i don't have one, and i don't care. Lol.
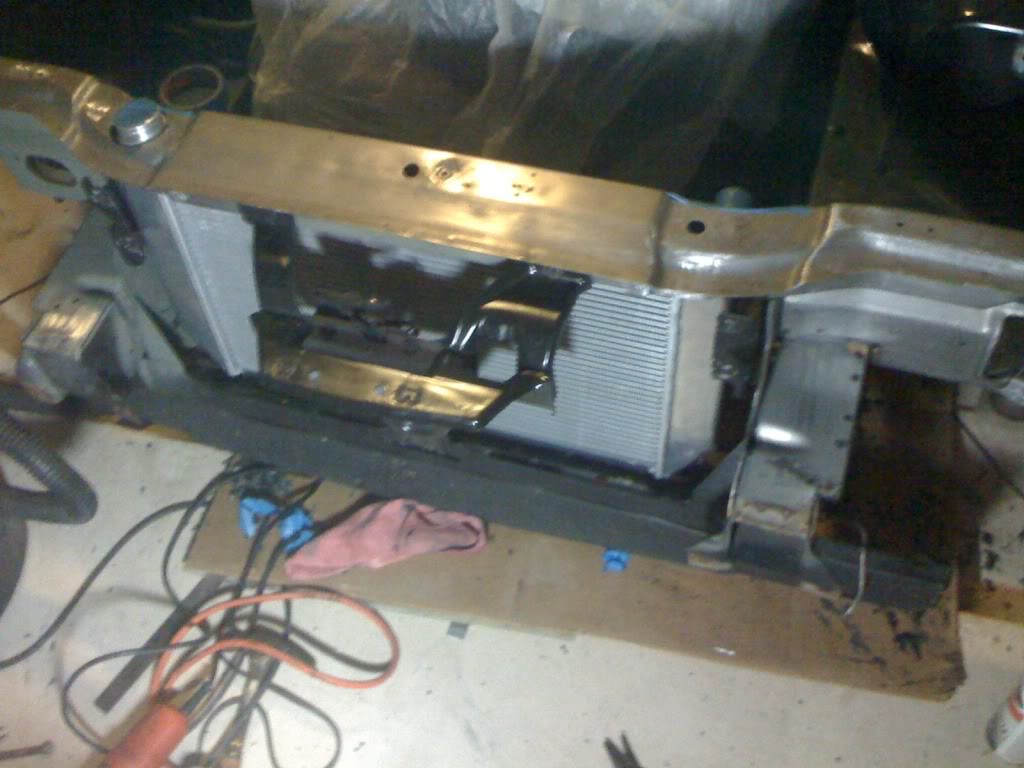
on the flip side, for you guys interested in this setup with AC. You obviously would not be able to use the stock sized condenser as it's way too big for this space. I did however take some measurements. If you were to keep AC, the max dimensions of the condenser to be able fit in front of the radiator setup would be 26.25" wide, and 12.875" high. The thickness of the condenser could be pretty thick though, but knowing they're not, there would be plenty of room on that aspect of it.
on the flip side, for you guys interested in this setup with AC. You obviously would not be able to use the stock sized condenser as it's way too big for this space. I did however take some measurements. If you were to keep AC, the max dimensions of the condenser to be able fit in front of the radiator setup would be 26.25" wide, and 12.875" high. The thickness of the condenser could be pretty thick though, but knowing they're not, there would be plenty of room on that aspect of it.
02-21-2011, 10:36 PM
#39
Kinda off topic for the Vertical radiator setup, but i ended up cutting my inner fenders out the other day, and weighed it after. 5lbs off each side. 10lbs total.
i left the lip because that's where i'll be putting my wiring for the headlights, fans, etc.

i left the lip because that's where i'll be putting my wiring for the headlights, fans, etc.