


Polishing tail lights...
Thread Starter
TECH Enthusiast
iTrader: (1)
Joined: Sep 2008
Posts: 584
Likes: 0
From: Fairfax, Virginia
Bah... I was really hoping that wouldn'tt be the case. I can't justify the price of one for just this.
Last edited by Adam2001WS6; May 30, 2011 at 05:27 PM.
I restore headlights on a daily basis. I start with 500 (or 220 if they're REALLY bad), move to 1000 grit, then 1500, 2000, then clear. If you're polishing/waxing, I would go to 2500 as well. Sand in opposite directions every time, horizontal, vertical, horizontal, vertical, with each grit, so you can see yourself removing the sanding scratches from the previous grit. Use a household sponge with the wetsand paper, it'll give you better results. You can get a little drill attachment polishing bonnet (foam) from harbor freight or an auto parts store, and use a drill with some regular rubbing compound, or some PlastX, and polish until it's shiny. Follow up with wax and you're set. You can skip the 1000 grit step if you've done 800.
Thread Starter
TECH Enthusiast
iTrader: (1)
Joined: Sep 2008
Posts: 584
Likes: 0
From: Fairfax, Virginia
I restore headlights on a daily basis. I start with 500 (or 220 if they're REALLY bad), move to 1000 grit, then 1500, 2000, then clear. If you're polishing/waxing, I would go to 2500 as well. Sand in opposite directions every time, horizontal, vertical, horizontal, vertical, with each grit, so you can see yourself removing the sanding scratches from the previous grit. Use a household sponge with the wetsand paper, it'll give you better results. You can get a little drill attachment polishing bonnet (foam) from harbor freight or an auto parts store, and use a drill with some regular rubbing compound, or some PlastX, and polish until it's shiny. Follow up with wax and you're set. You can skip the 1000 grit step if you've done 800.
LS1 Tech Stories
The Best V8 Stories One Small Block at Time

6 Common C5 Corvette Failures and What's Involved In Repairing Them
Pouria Savadkouei
Retro Modern Bandit Pontiac Trans AM Comes With Burt Reynolds' Autograph
Verdad Gallardo
Top 10 Greatest Cadillac V Series Performance Models Ever, Ranked
Pouria Savadkouei
Top 10 Most Powerful Chevy Trucks Ever Made!

Hennessey's New Supercharged Silverado ZR2 Has 700 HP
Verdad Gallardo
Coachbuilt N2A Anteros Is an LS2-Powered C6 Corvette In Italian Clothes
Verdad Gallardo
Awesome K5 Blazer Restomod Comes With C7 Corvette Power
Verdad Gallardo
10 Camaros You Should Never Buy

10 LS Engine Myths That Refuse to Die
Verdad Gallardo Thread Starter
TECH Enthusiast
iTrader: (1)
Joined: Sep 2008
Posts: 584
Likes: 0
From: Fairfax, Virginia
No.... I've just washed with soap/water/wax and the 2 bucket system. Just got into the "detailing" arena... sorry. I have been more about the performance aspect until my aesthetics side has decided to catch up with me...
You can get a cheap rotary buffer from Harbor Freight for around $35 (just watch for sales or use a coupon). I've been using it for awhile and never had any probs. Just invest in some decent pads .
as others have said, 800 grit, was way to coarse to start with wet sanding or drysanding for what you were wanting to do. im doing a pair for Lt1 tail lights right now (removing non-clearcoated tint), and I have been using a combination of 0000-Steel wool and 2000 grit sandpaper (wetsanding them).
from there i am using a cutting compound and then doing a 2 stage polish (with a variable speed orbitar buffer) to the lenses.
never, and i mean NEVER sand anything without first understanding what the different grades of coarsesness sandpaper comes in.
simply put, you started off with a much to aggressive grade of sandpaper. you are now in the correction (stepping up to finer grades of sandpaper). you are now starting to get the results you wanted from the beginning. one thing is that im not seeing a circular pattern in your sanding (all your lines look to be horizontal). if you are not going in a circular pattern, you need to be.
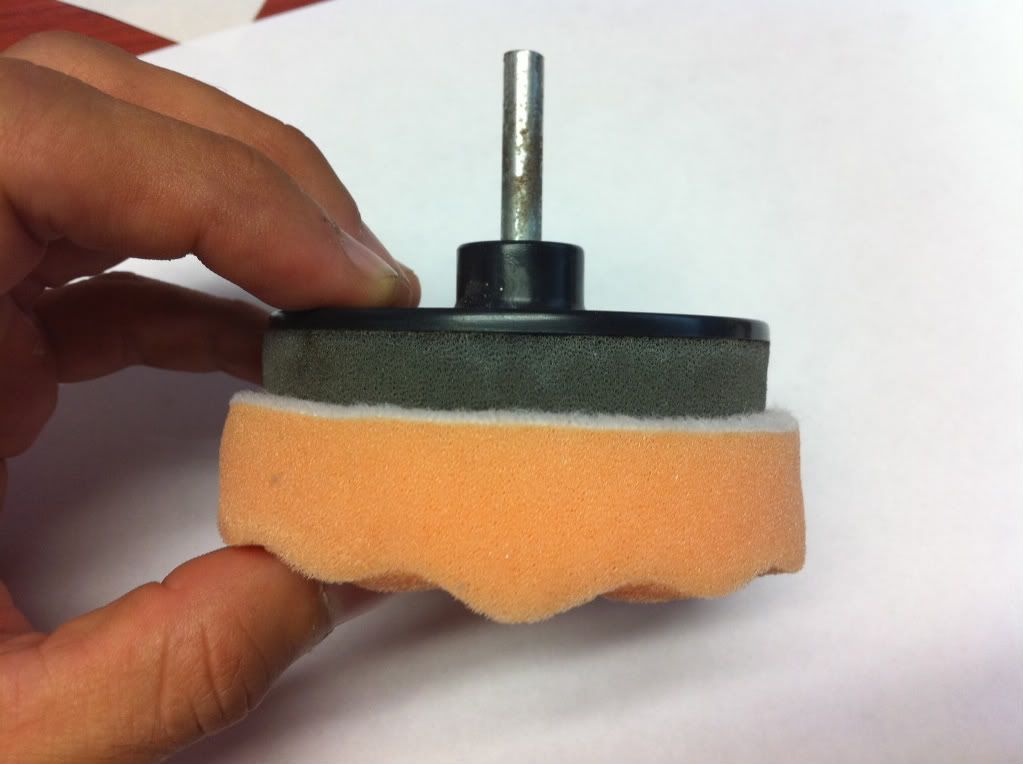
here are a few pics of what im doing. i currently have one lens finished and 1/2 way through the other.
beginning lens:
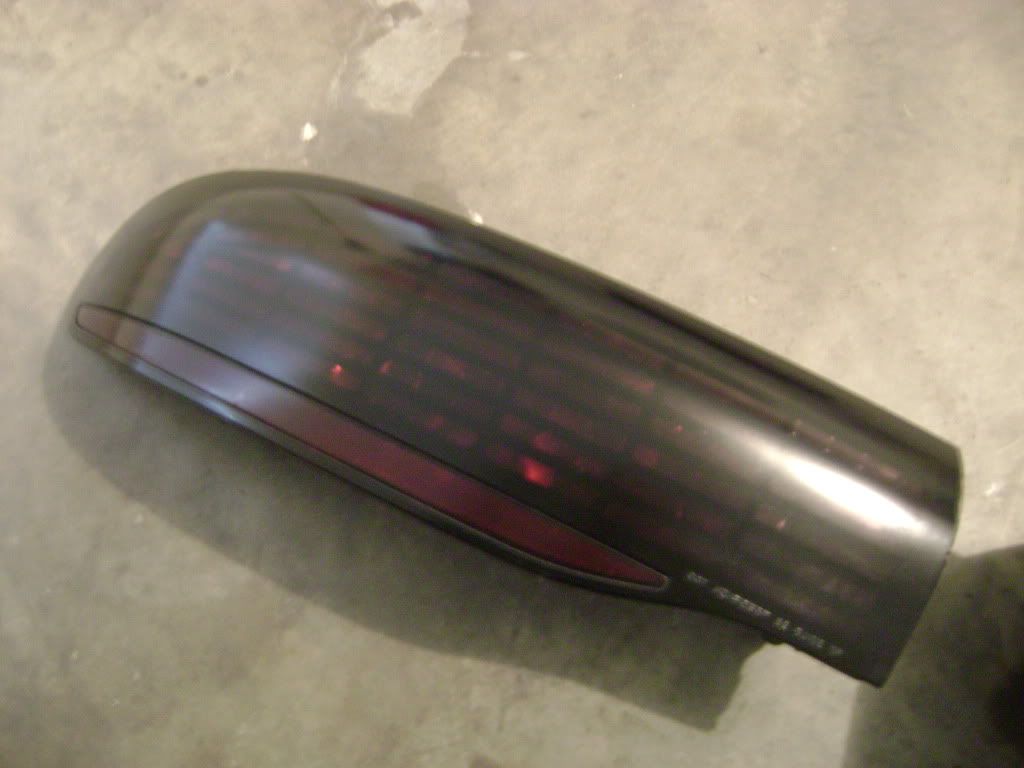
from left to right (2 stage polish, 2000 grit wetsand, tinted portion of tail light):
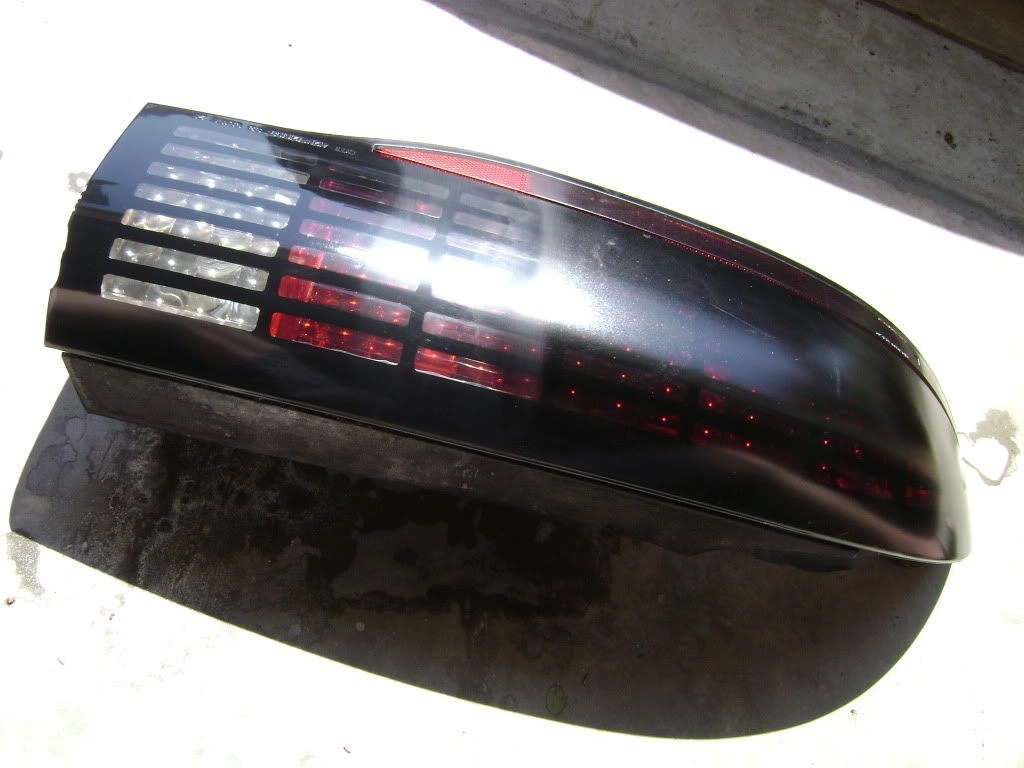
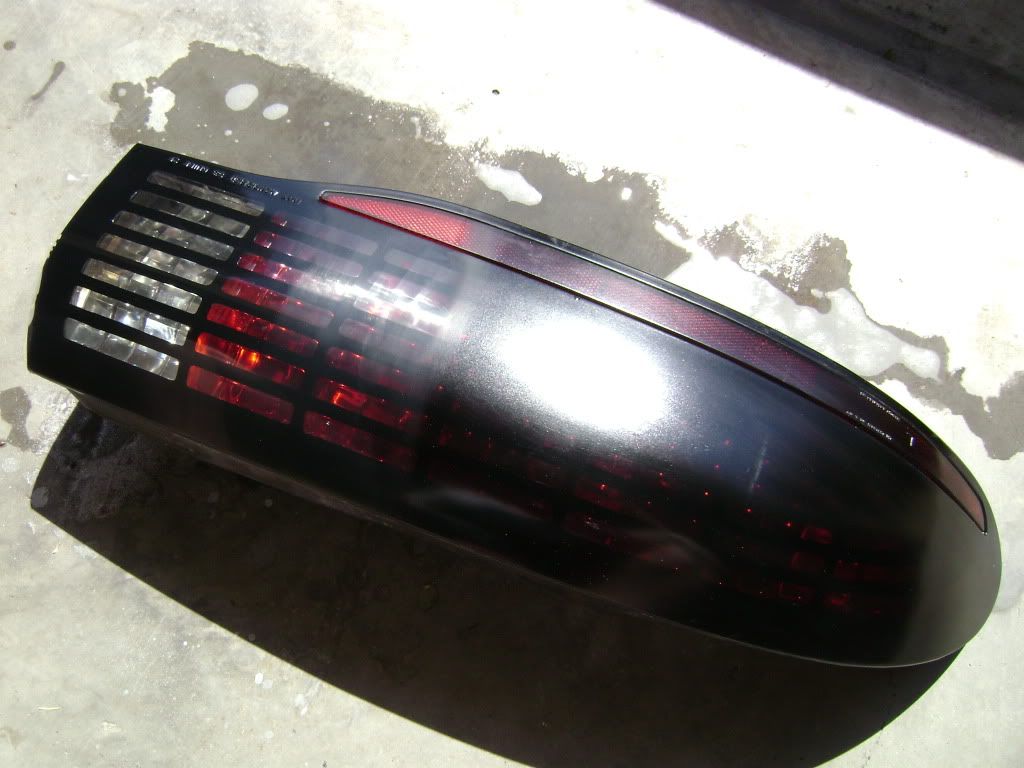
good luck with the rest...
from there i am using a cutting compound and then doing a 2 stage polish (with a variable speed orbitar buffer) to the lenses.
never, and i mean NEVER sand anything without first understanding what the different grades of coarsesness sandpaper comes in.
simply put, you started off with a much to aggressive grade of sandpaper. you are now in the correction (stepping up to finer grades of sandpaper). you are now starting to get the results you wanted from the beginning. one thing is that im not seeing a circular pattern in your sanding (all your lines look to be horizontal). if you are not going in a circular pattern, you need to be.
here are a few pics of what im doing. i currently have one lens finished and 1/2 way through the other.
beginning lens:
from left to right (2 stage polish, 2000 grit wetsand, tinted portion of tail light):
good luck with the rest...
FYI autogeek.net is having 15% off and free shipping on everything today. I just bought a nice pc da, 7 different pads and lots of microfiber and a whole line of polishes waxes and sealants. About 200 bucks!
Don't sand in circles. You risk getting material trapped and creating deeper scratches that are very obvious and you'll have to go back down a notch to remove them. Sand in horizontal and vertical motions.
You need a Rotary buffer. PC vibrates too much for efficient lens correction. Harbor Freight has a cheap one that will work for you, especially if your budget is tight. Get a 3" backing plate and 4" wool and polishing pads, and Meguiars 105/205. You'll be good to go.

go to autozone and get the 3m paint scuff remover kit that has 2 different pads a black one and one of those orange ones and compound and some 3000 grit. It will make it look like glass when done after the 3000 grit and the buff and polish.
No! He's sanding correctly. Sanding in circles makes ***** that will create deeper scratches, and makes it more difficult and time consuming for the next finer grit.

Thread Starter
TECH Enthusiast
iTrader: (1)
Joined: Sep 2008
Posts: 584
Likes: 0
From: Fairfax, Virginia
I'm looking at harbor freight and I see the have the 10" random orbital buffer, 7" electronic polisher, 6" palm polisher, and 3" pneumatic polisher.... Which would be best not only for the lenses, but overall. I don't want one that will be too large/ineffective for the lenses but not so small that it takes forever and a day to polish wax the car...
You are trying to remove scratches made with 800 grit sandpaper: With a 2000 grit paper. It is going to take you a long time. You might want to work it up to 2000 starting with 1000 going very LIGHTLY. As you get to 2000 grit the marks will dissappear.
Finally you need a true polisher small 2-3" size: Not a random orbit, but a true spinning wheel to finish it up. Use 3M perfect it "step 2" to get what you want,
"step 3" if you want the ultimate shine.
I have done this same thing myself to lenses.
Finally you need a true polisher small 2-3" size: Not a random orbit, but a true spinning wheel to finish it up. Use 3M perfect it "step 2" to get what you want,
"step 3" if you want the ultimate shine.
I have done this same thing myself to lenses.
Thread Starter
TECH Enthusiast
iTrader: (1)
Joined: Sep 2008
Posts: 584
Likes: 0
From: Fairfax, Virginia