2002 Camaro Morimoto Mini H1 install

 01-16-2012, 05:07 PM
#23
Staging Lane
Thread Starter

Join Date: Sep 2010
Posts: 92
Likes: 0
Received 0 Likes
on
0 Posts

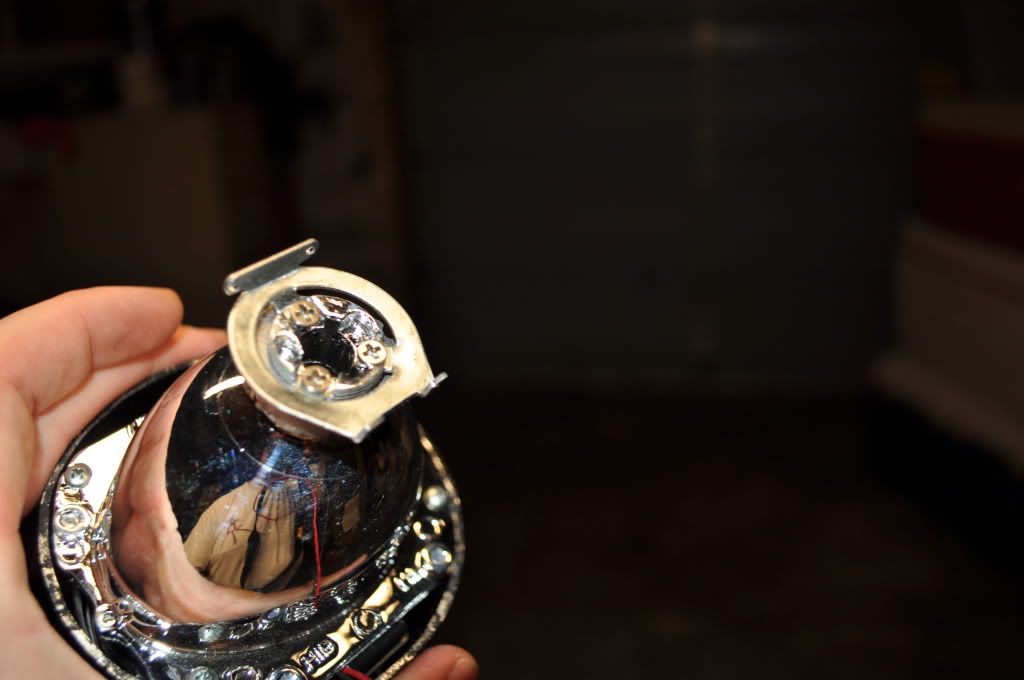
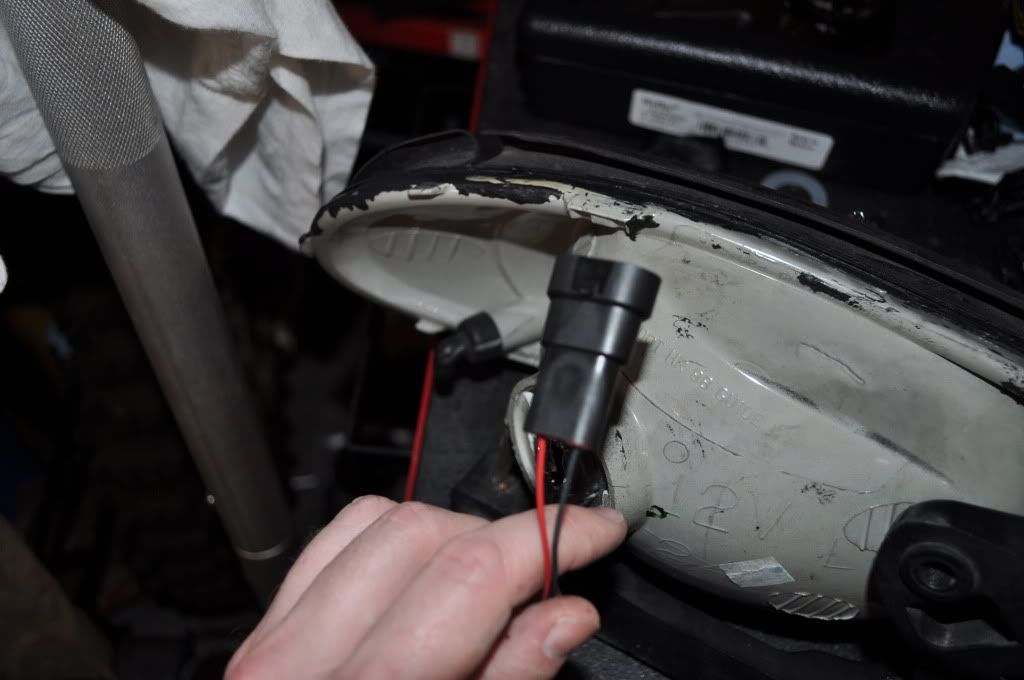
The second pic shows where I ground off 2 rows of 3 little tabs around the circle on the back side of the headlight assembly, so the washer (pictured) would sit flat on the back of the assembly (with the tabs on, it was just barely teetering on the tabs, so having a flat surface makes it a stronger contact). The locknut is not shown in the picture. All the parts (locknut, washer, etc.) are included with the kit. The projector is basically like a through-bolt, where you put the projector in the front, and then use the washer and locknut on the back side to lock it in the assembly. A silicone washer goes on the projector from the front, to give it a flat surface to mount on, and it probably does a decent job of sealing up the hole from the front (so it is water proof) and I used some silicone sealant on the back side of the hole just to make sure it is water proof.
UPDATE:
I talked to TRS today and they said they will ship me a replacement projector since the one has a messed up cutoff line. This means, of course, that I have to take apart one side again to put the new projector in, so when I do that, I'll take a few pictures to show anyone interested the process of installing one.
01-16-2012, 11:44 PM
#25
12 Second Club
iTrader: (2)
Join Date: Apr 2009
Location: PNW
Posts: 900
Likes: 0
Received 0 Likes
on
0 Posts
Awesome.looks great man. Can't wait for my tax return. Been planning this for a little bit. I like my ddm 55w hid kit but puts off too much glare and has bad hot spots. The morimito is definitely the way to go. $300 is a very good price for a very well designed kit.
01-17-2012, 10:56 AM
#26
Copy & Paste Moderator

Nice results. 
I've added this to the Lighting FAQ:
https://ls1tech.com/forums/appearanc...hting-faq.html
Since there is a post about 55 watt above....
Stick with 35 watt HID in the Morimoto Mini projectors. 55 watt will damage the chrome in the projector bowls ruining output.
I've added this to the Lighting FAQ:
https://ls1tech.com/forums/appearanc...hting-faq.html
Since there is a post about 55 watt above....
Stick with 35 watt HID in the Morimoto Mini projectors. 55 watt will damage the chrome in the projector bowls ruining output.
 02-18-2012, 07:41 PM
#28
Copy & Paste Moderator
If you are talking about keeping the lows on with the highs (necessary when using the high beam wires to activate the bi-xenon solenoid), you don't need a diode. You can make a minor mod to the stock wiring to keep the high beams on with the low beams. This is how the stock headlights work on the 1998-2002 Firebird. The mod alters the Camaro's wiring to act just like the Firebird's wiring. The mod is listed in the Lighting FAQ.
02-18-2012, 08:11 PM
#29
If you are talking about keeping the lows on with the highs (necessary when using the high beam wires to activate the bi-xenon solenoid), you don't need a diode. You can make a minor mod to the stock wiring to keep the high beams on with the low beams. This is how the stock headlights work on the 1998-2002 Firebird. The mod alters the Camaro's wiring to act just like the Firebird's wiring. The mod is listed in the Lighting FAQ.
02-20-2012, 12:18 PM
#34
TECH Resident
iTrader: (23)

Join Date: Oct 2008
Location: Rhode Island
Posts: 990
Likes: 0
Received 0 Likes
on
0 Posts
that looks great. much better than things I've been seeing on here lately. Could you post a pic or two during the day with the car being further away to see what they look like? I am considering this and it so happens you have a black ss also...pics would be great!
02-21-2012, 01:07 PM
#35
Staging Lane
Thread Starter
Join Date: Sep 2010
Posts: 92
Likes: 0
Received 0 Likes
on
0 Posts
Thanks VIP1. I'm glad to be able to contribute something to this joint.
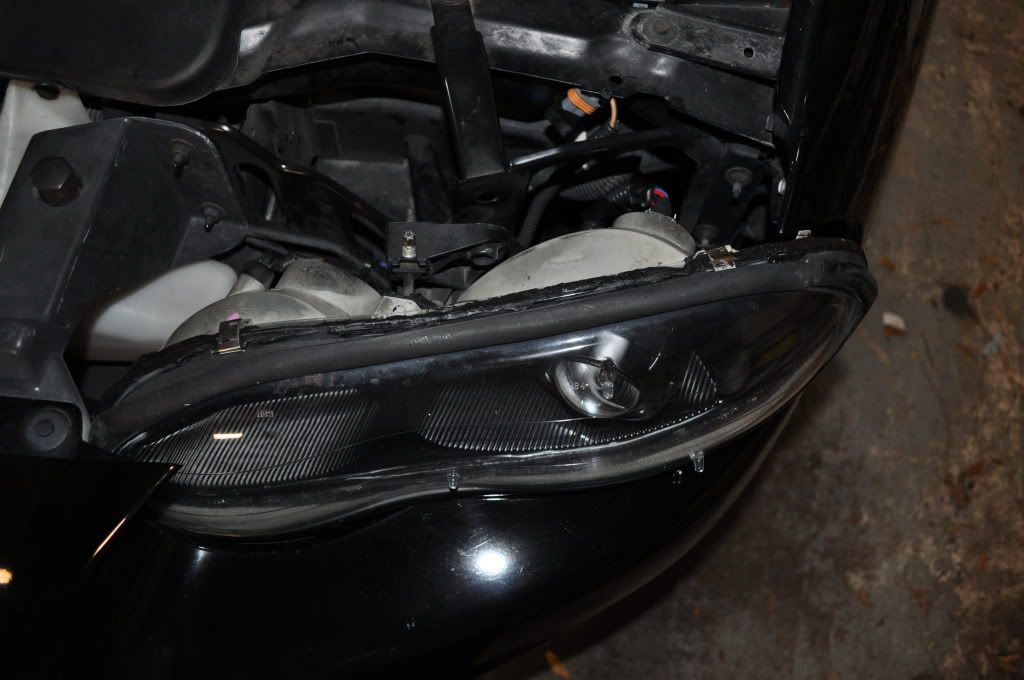
Here are some pictures from taking apart the driver side headlight assembly to install the new projector.
This is somewhat of a walkthrough on how to install these projectors, but it is not everything.
Correction on my first post, it is a T15 TORX socket to adjust the headlights (up/down; left/right) with the factory adjustment bolts.
Mark 12 o'clock right above the hole for the factory low beam headlight when the headlight assembly is on the car. When the projector is mounted in the headlight assembly on the car, the middle of the groove on the upper side of it should be at 12 o'clock for the cutoff to be horizontal. Get it close to that point, then adjust it to get it perfectly horizontal when it's mounted on the car. (explained at end)
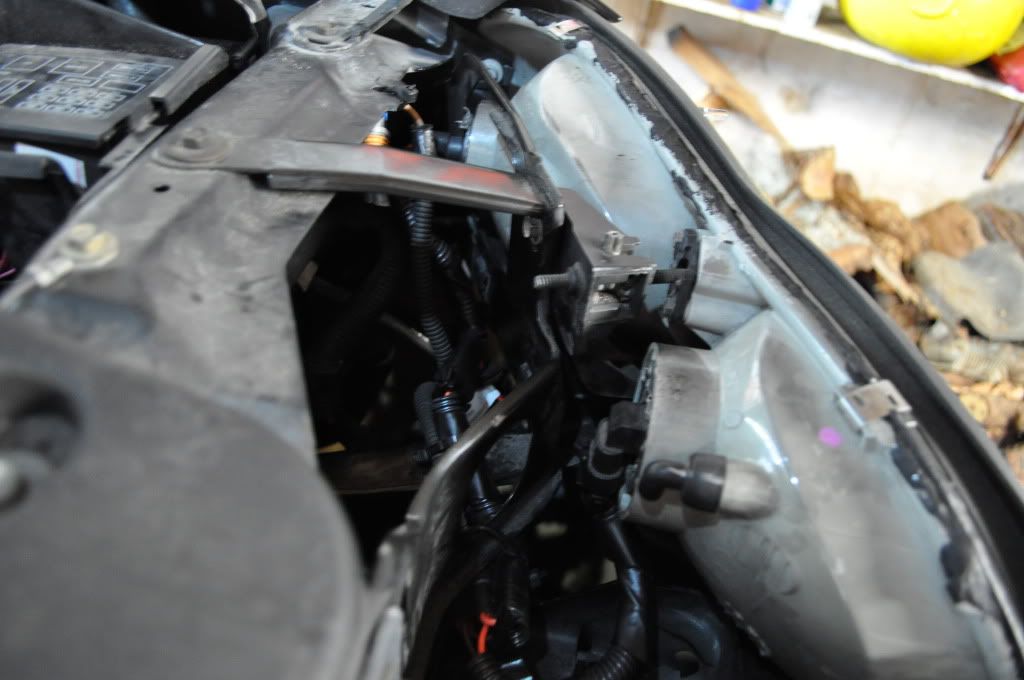
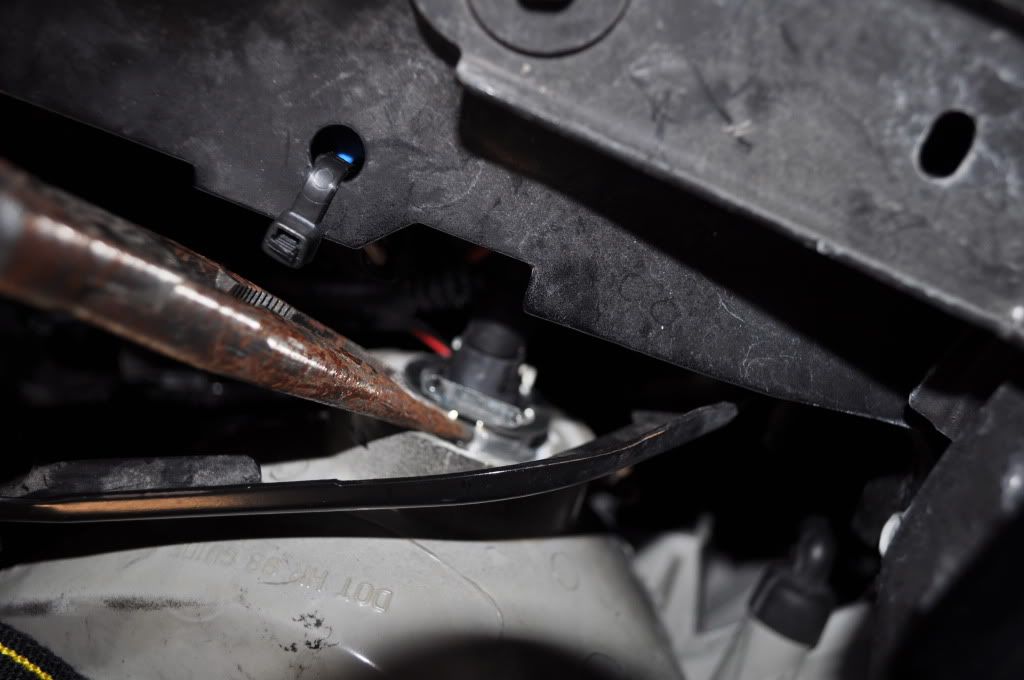
1. Remove bolt (10 mm) from headlight assembly (directly under the horizontal support). Then slide assembly toward center of car until the brackets and screw on the assembly are in the open space. Rotate the assembly so the end that is closer to the fender is pushed toward the front of the car. Disconnect the bulb wires, and remove the assembly from car.
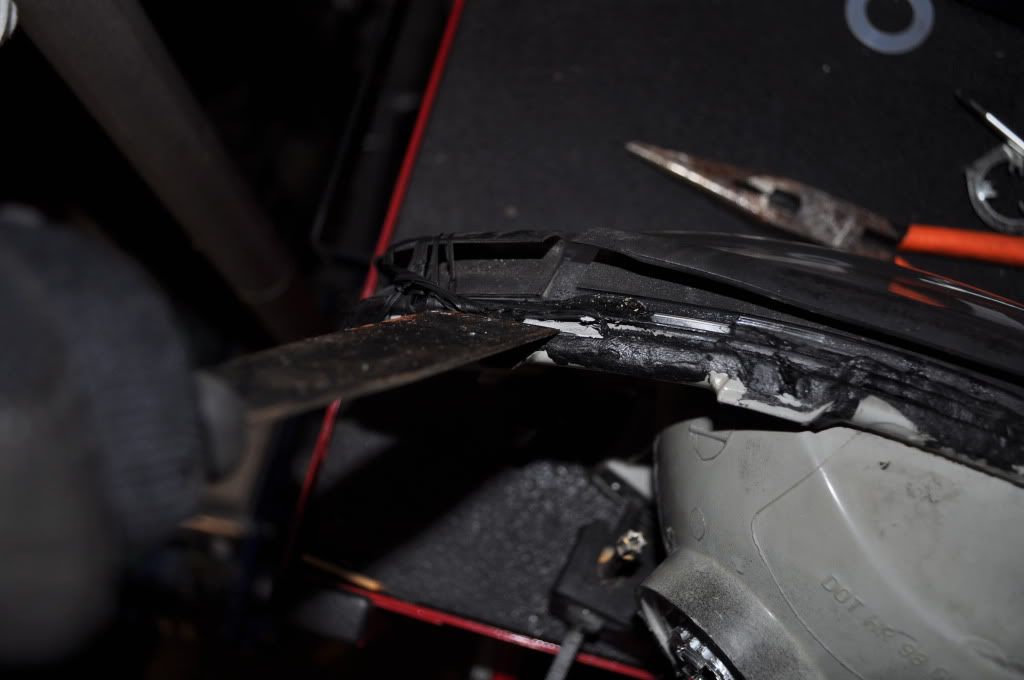
2. Place assembly on work bench/ Remove the 4 metal clamps (2 on top and 2 on bottom) that hold the clear front to the rear. Put on mechanix or work gloves to protect from getting burned. I heated up the top side first for about a minute, going back and forth over the seam where the front and rear of the assembly meet. I worked the top side open a little bit with a gasket scraper, then heated up and pried the bottom half, then slowly worked open the top and bottom halves.
3. Remove factory bulbs, and the metal retaining clip on the factory low beam. Just bend the tabs on it and it pops right out.
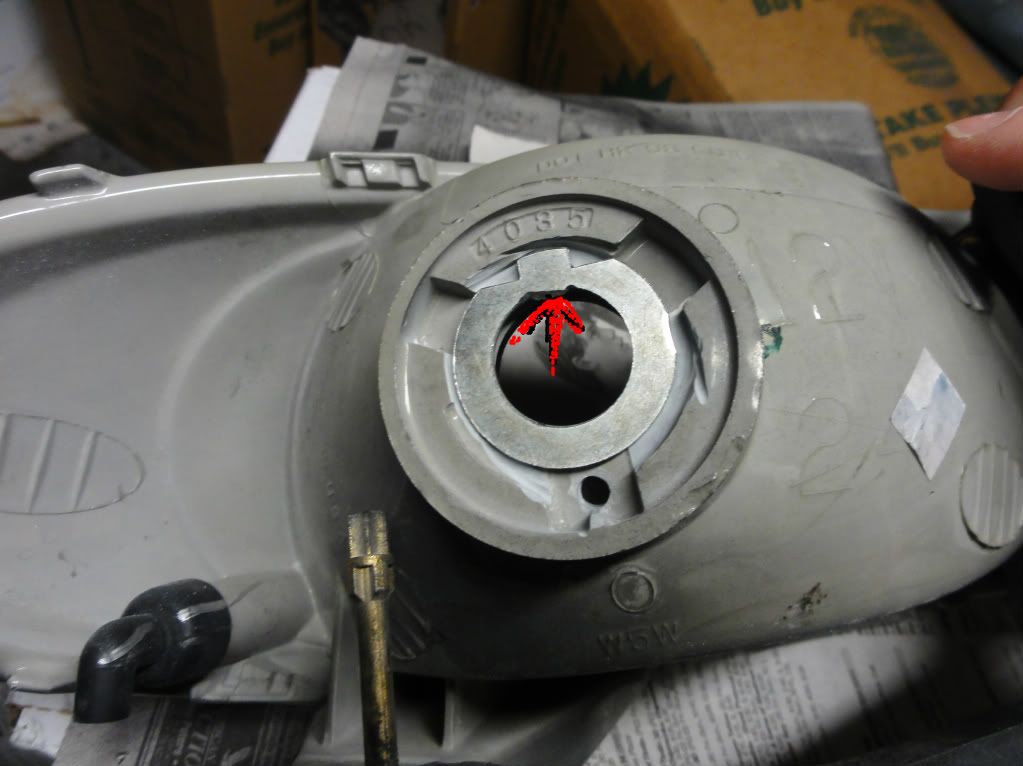
4. I recommend using a Dremel, and cutting the 3 tabs off the front of the low beam opening (so the projector will sit farther back, and flat), and cutting the two rows of tabs closer to the center of the opening for the bulb on the back of the assembly (so the washer sits flat). Drill a small hole underneath the bulb opening to run the wires for the high beam solenoid. (Pictured in first post)
5. If not painting - skip this step. Prep the assembly and shrouds for paint, or buy plastic primer and it will likely have about the same result. Paint assembly and shrouds. NOTE: If you want maximum light from the factory high beam, do NOT paint that bucket black, as the factory bulb uses the reflection from the chrome on the assembly to project light. Use a work light or something like that to bake the paint on and speed up drying time.
6. Place ballasts and relays on car. I described this in the first post. Solder a diode (check with TRS for the correct one) into a 14 gauge wire, and tap into the positive factory low beam wire on the car to the factory high beam wire on the car, the ones closer to the battery. Connect factory low beam wire on car, that is closest to battery, to the harness. Connect harness connectors to the ballasts - one has to be run under some stuff to reach the driver side of the car. Connect wires on ballasts to headlights. Connect positive wire on relay to the positive terminal on battery. Connect negative wire on relay to a ground on car or battery.
7. Attach shrouds to projectors with the 4 screws. They are rectangular bolt pattern, and will only line up with projector bolt holes one way.
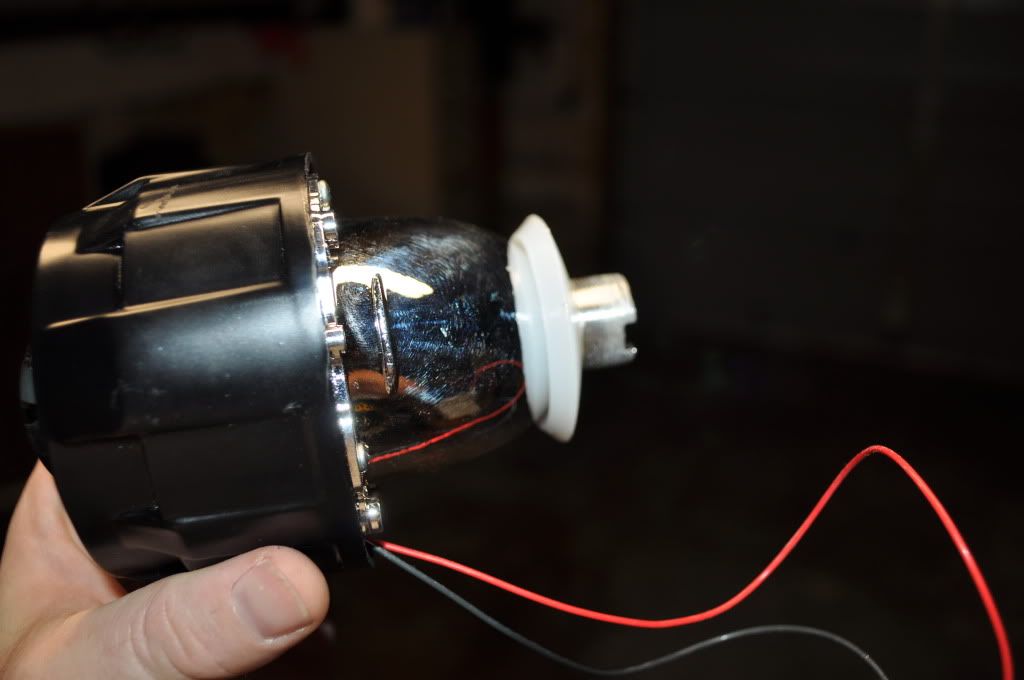
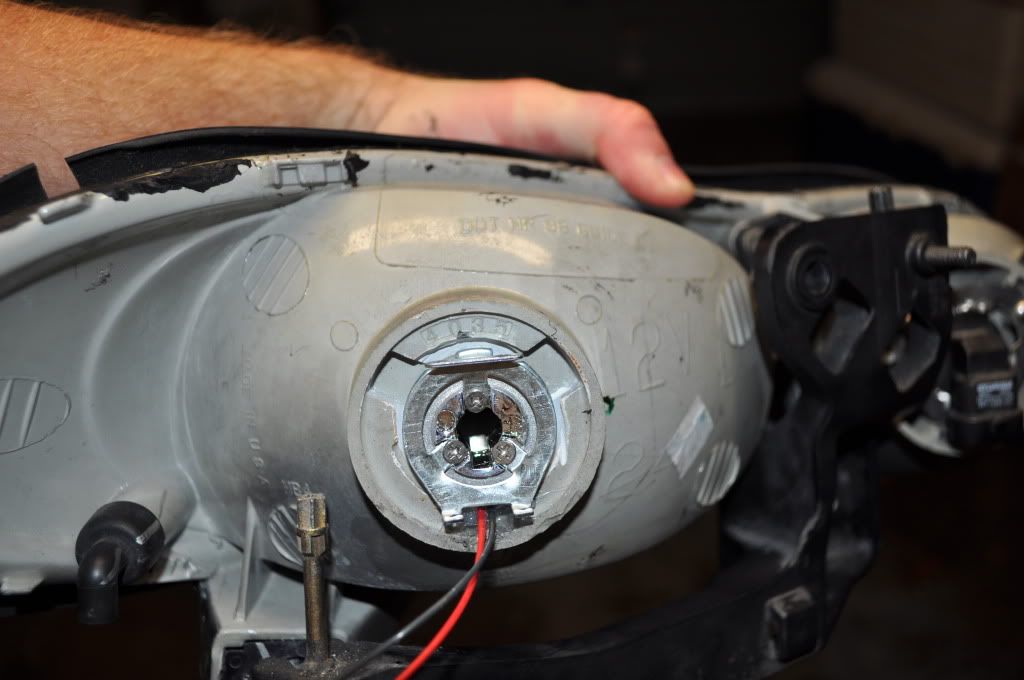
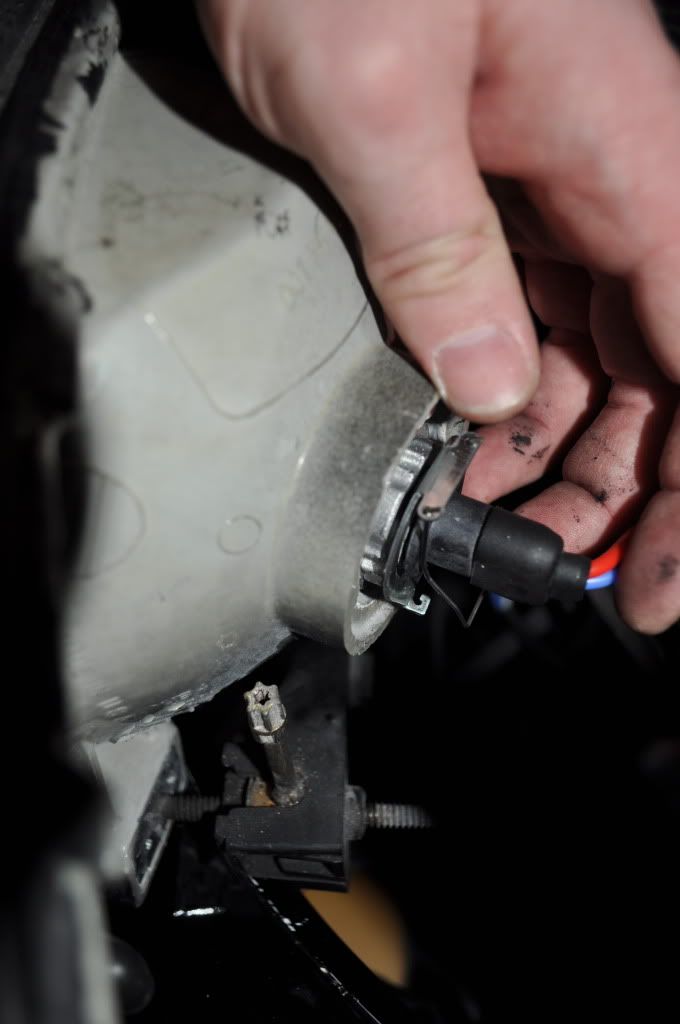
8. Install projectors into headlight assembly. The bulb holder has to be removed by unscrewing the 3 screws that attach it to the projector. Be careful, the screws strip easily so apply some pressure when screwing/unscrewing them, and they are very small so don't lose them. Place silicone washer on projector housing. Run wires through hole drilled. Insert projector housing through opening. Place washer on the back of the projector housing. I had to slightly grind the washer where it fits in the groove on the projector housing, so the washer would go over threads. Place locknut on projector housing and tighten it. Don't go crazy on the torque, but it should be very firm on there.
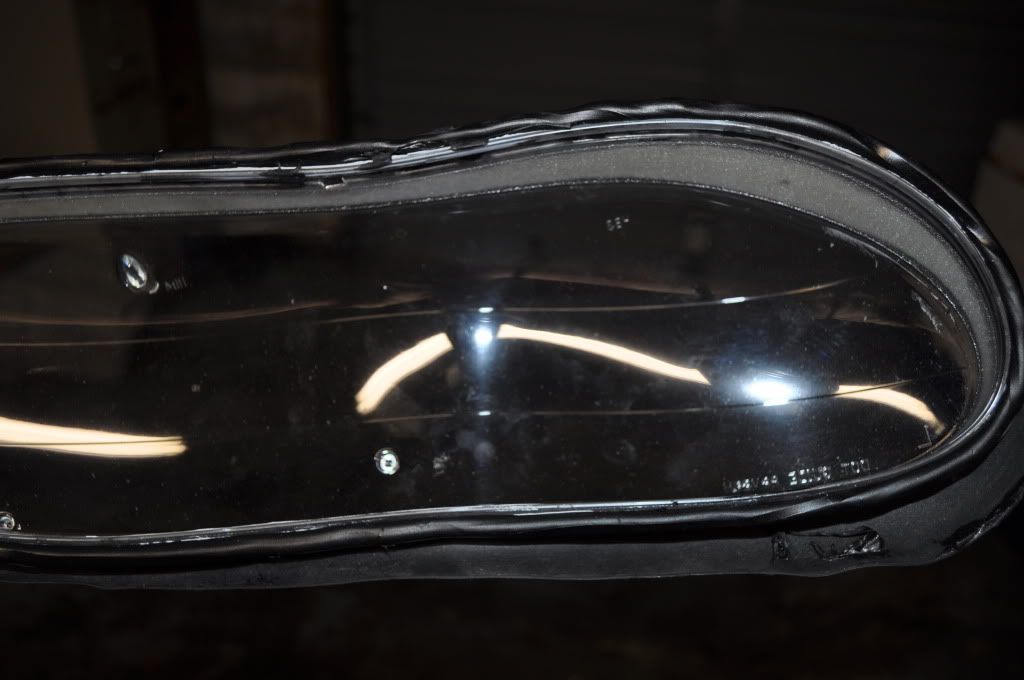
9. Place butyl tape on front of headlight assembly. Put mechanix or work gloves on and reassemble headlight assembly. Heat up both halves, and apply pressure to front and back halves to seal them. Use clamps to hold together front and back until it cools. Run finger over the butyl to seal in the groove and remove excess. Use the 4 factory metal clips to secure it. Optional: use silicone to seal hole for solenoid wires.
10. Install bulb holder with the 3 screws. Make sure the screws are tight, if one or more of the screws is/are loose, it will affect the light. Don’t tighten it with crazy strength, just make sure the bulb holder is on there securely.
11. Put little rubber things on wires for solenoid, then put wires into the plastic holder, which is for the male end of the splitter. There is one wire for the factory high beam on the car to the factory high beam headlight, but now there is a high beam on the projector and the factory high beam headlight, so there is a splitter to get both high beam lights to run off the one factory high beam wire on the car. Or you can choose to not use the factory high beam headlight, and just run the factory high beam wire on the car directly to the connector on the projector.
11. Connect the wires for the bulb to the ballast. Take headlight assembly to the car, near its mounting point on the car to install the bulb into the projector. This is how the metal clip works to secure the bulb. Put the two ends into the small holes, then bend the clip over the bulb, and slide the end into the gaps. I used needle nose pliers because the clip is fairly strong to securely hold the back of the bulb to the projector.
12. Install headlight assembly.
13. Go to where you plan on aiming the headlights. Turn on the headlights and adjust the horizontal cutoff by rotating the projector at the locknut with needle nose pliers. The projector should be very tight on there, but with the silicone washer, you should still be able to rotate it some, probably won’t have to more than 1/2 inch or so if you marked where 12 o'clock is on the headlight assembly, when it’s mounted on the car.
13. Use headlight aiming instructions from Walter's thread to aim headlights.
If highbeam bulb is not working on the projector, could be the tap connectors didn't pierce the wires, or the diode could be in the wrong direction.
If you want to protect the wires, use wire loom around all the wires, and secure with electrical tape.
Enjoy having a lot better headlights at night.
It's all pretty straightforward once you see it, but if anyone has any questions, send me an email.
Here are some pictures from taking apart the driver side headlight assembly to install the new projector.
This is somewhat of a walkthrough on how to install these projectors, but it is not everything.
Correction on my first post, it is a T15 TORX socket to adjust the headlights (up/down; left/right) with the factory adjustment bolts.
Mark 12 o'clock right above the hole for the factory low beam headlight when the headlight assembly is on the car. When the projector is mounted in the headlight assembly on the car, the middle of the groove on the upper side of it should be at 12 o'clock for the cutoff to be horizontal. Get it close to that point, then adjust it to get it perfectly horizontal when it's mounted on the car. (explained at end)
1. Remove bolt (10 mm) from headlight assembly (directly under the horizontal support). Then slide assembly toward center of car until the brackets and screw on the assembly are in the open space. Rotate the assembly so the end that is closer to the fender is pushed toward the front of the car. Disconnect the bulb wires, and remove the assembly from car.
2. Place assembly on work bench/ Remove the 4 metal clamps (2 on top and 2 on bottom) that hold the clear front to the rear. Put on mechanix or work gloves to protect from getting burned. I heated up the top side first for about a minute, going back and forth over the seam where the front and rear of the assembly meet. I worked the top side open a little bit with a gasket scraper, then heated up and pried the bottom half, then slowly worked open the top and bottom halves.
3. Remove factory bulbs, and the metal retaining clip on the factory low beam. Just bend the tabs on it and it pops right out.
4. I recommend using a Dremel, and cutting the 3 tabs off the front of the low beam opening (so the projector will sit farther back, and flat), and cutting the two rows of tabs closer to the center of the opening for the bulb on the back of the assembly (so the washer sits flat). Drill a small hole underneath the bulb opening to run the wires for the high beam solenoid. (Pictured in first post)
5. If not painting - skip this step. Prep the assembly and shrouds for paint, or buy plastic primer and it will likely have about the same result. Paint assembly and shrouds. NOTE: If you want maximum light from the factory high beam, do NOT paint that bucket black, as the factory bulb uses the reflection from the chrome on the assembly to project light. Use a work light or something like that to bake the paint on and speed up drying time.
6. Place ballasts and relays on car. I described this in the first post. Solder a diode (check with TRS for the correct one) into a 14 gauge wire, and tap into the positive factory low beam wire on the car to the factory high beam wire on the car, the ones closer to the battery. Connect factory low beam wire on car, that is closest to battery, to the harness. Connect harness connectors to the ballasts - one has to be run under some stuff to reach the driver side of the car. Connect wires on ballasts to headlights. Connect positive wire on relay to the positive terminal on battery. Connect negative wire on relay to a ground on car or battery.
7. Attach shrouds to projectors with the 4 screws. They are rectangular bolt pattern, and will only line up with projector bolt holes one way.
8. Install projectors into headlight assembly. The bulb holder has to be removed by unscrewing the 3 screws that attach it to the projector. Be careful, the screws strip easily so apply some pressure when screwing/unscrewing them, and they are very small so don't lose them. Place silicone washer on projector housing. Run wires through hole drilled. Insert projector housing through opening. Place washer on the back of the projector housing. I had to slightly grind the washer where it fits in the groove on the projector housing, so the washer would go over threads. Place locknut on projector housing and tighten it. Don't go crazy on the torque, but it should be very firm on there.
9. Place butyl tape on front of headlight assembly. Put mechanix or work gloves on and reassemble headlight assembly. Heat up both halves, and apply pressure to front and back halves to seal them. Use clamps to hold together front and back until it cools. Run finger over the butyl to seal in the groove and remove excess. Use the 4 factory metal clips to secure it. Optional: use silicone to seal hole for solenoid wires.
10. Install bulb holder with the 3 screws. Make sure the screws are tight, if one or more of the screws is/are loose, it will affect the light. Don’t tighten it with crazy strength, just make sure the bulb holder is on there securely.
11. Put little rubber things on wires for solenoid, then put wires into the plastic holder, which is for the male end of the splitter. There is one wire for the factory high beam on the car to the factory high beam headlight, but now there is a high beam on the projector and the factory high beam headlight, so there is a splitter to get both high beam lights to run off the one factory high beam wire on the car. Or you can choose to not use the factory high beam headlight, and just run the factory high beam wire on the car directly to the connector on the projector.
11. Connect the wires for the bulb to the ballast. Take headlight assembly to the car, near its mounting point on the car to install the bulb into the projector. This is how the metal clip works to secure the bulb. Put the two ends into the small holes, then bend the clip over the bulb, and slide the end into the gaps. I used needle nose pliers because the clip is fairly strong to securely hold the back of the bulb to the projector.
12. Install headlight assembly.
13. Go to where you plan on aiming the headlights. Turn on the headlights and adjust the horizontal cutoff by rotating the projector at the locknut with needle nose pliers. The projector should be very tight on there, but with the silicone washer, you should still be able to rotate it some, probably won’t have to more than 1/2 inch or so if you marked where 12 o'clock is on the headlight assembly, when it’s mounted on the car.
13. Use headlight aiming instructions from Walter's thread to aim headlights.
If highbeam bulb is not working on the projector, could be the tap connectors didn't pierce the wires, or the diode could be in the wrong direction.
If you want to protect the wires, use wire loom around all the wires, and secure with electrical tape.
Enjoy having a lot better headlights at night.
It's all pretty straightforward once you see it, but if anyone has any questions, send me an email.
Last edited by NeoLoco; 02-21-2012 at 07:21 PM.
 02-21-2012, 01:57 PM
#38
Morimoto has certainly improved their projectors since the last time I bought them, at least with the mounting system. The old version I got wasn't bad, but the newer ones look to be better (better shroud attachment, better silicone washer design, better screws on the bulb retainer for example).
02-26-2012, 10:48 AM
#40
Which is the positive wire on the high beam, Green or Black? just wiring mine up now.
Tapping into the green wire fried one of my diodes (the one listed) factory high beam flickered with the projector on so I think I screwed up somewhere, tapping into the black did nothing.
I made sure the strip was facing the right way & tapped into the positive before the ballast as shown in the diagram.
Last edited by MasterV8; 02-26-2012 at 12:27 PM.