dash pad repair *back support question*
#1
so my dash recently cracked bffft..anyway i took it out brought it home it broke again... i glued it back together using epoxy resin and used cardboard to strengthen the cracks as ive seen from many threads. my question is do i leave it like that? its so brittle and i dont want to do this twice. should i randomly glue cardboard to the back? here is where am at..

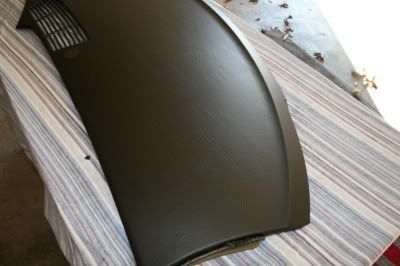
am going to leather wrap it. i dont feel confidence enough preparing it and painting it. the cracks are slightly uneven do i need filler or just slap the leather on and call it a day? sorry for the long post. opinions are appreciated thanks!

am going to leather wrap it. i dont feel confidence enough preparing it and painting it. the cracks are slightly uneven do i need filler or just slap the leather on and call it a day? sorry for the long post. opinions are appreciated
 thanks!
#3
Hmm I've seen people use cardboard like you've got it. I would probably make the pieces a little wider though, to give the previous cracks some support, but you look pretty good.
Also what do you mean cracks are uneven?
Also what do you mean cracks are uneven?
#4
TECH Addict
iTrader: (1)
Join Date: Apr 2012
Location: Ellijay, GA
Posts: 2,769
Likes: 0
Received 0 Likes
on
0 Posts
mines in pieces on the back porch because of how brittle it is. every time I fix a crack and pick it up, it cracks somewhere else. I've been looking for someway to reinforce the entire back so I can wrap it but it may just be to far gone.
#5
uneven is that 1 of the cracks is slightly raised in proximity to the other, thats the closes i could get them to fit. am thinking to use filler but am getting real busy..
you could use fiber glass sheets to reinforce it. i was going to but i couldnt find any, i dont have good working space (am doing this in my bedroom lol) and no availability of such materials here in middle east..ugh
#7
On The Tree
iTrader: (4)
I wrapped mine. I went to walmart and got the $5/yd fake leather/vinyl stuff (i got two yards but you only need about 1) and used 3M "Trim Adhesive" in a spray can. Ive had it forever but it had a picture of a guy installing a vinyl top on a car on the can. Pics can be seen on my instagram if you want to see the finished product, but be warned it aint pretty. And if its sunny it glares like a bitch.

Instagram: _skid87
First I trimmed the piece to an approximate size, then sprayed the adhesive on both surfaces like the can said and then slapped it on there. At first youll think wtf did I do wrong because itll be all wrinkly and appear like itll never lay down smooth. I then used a hair dryer and a bondo spreader and just worked it for what seemed like an eternity. Then I trimmed the edges to an inch or so and hot glued them to the back side, this only works marginally well. Id use some more of that adhesion spray if you had it, I ran out.
If I had it to do over again id do the vent different, thats the only place I half assed it and it shows. I just cut an oval all shitty with a box knife, I should have cut strips and pulled them through the vent and glued them to the back side I think.
Trending Topics
#9
TECH Junkie
iTrader: (22)
When I took it out for the second time, I reinforced the back with thin pieces of wood wherever it cracked. Then for the top I used outdoor black carpet.
When I tried to wrap mine in vinyl it came out bad (I'm not very crafty) and as stated it will reflect in sunlight. Kind of annoying seeing your dashpad on the windshield as you are driving.
The carpet is keeping it all together on the topside and looks OK, the underside is doing alright. I'm going to pull it again though, I reinforced the one section too much so the edge is up in the air a bit, going to take care of it so it sits flat and plan to add piping of some sort to it so it will look more finished.
#13
TECH Enthusiast
iTrader: (6)
Join Date: Nov 2008
Location: Puyallup WA
Posts: 698
Likes: 0
Received 0 Likes
on
0 Posts

I did that back in 08, still looks just as good(other than it has lifted around the vent area some over time). that was also my first time ever doing anything like that.
looks like you only live about an hour away form me.
looks like you only live about an hour away form me.
#14
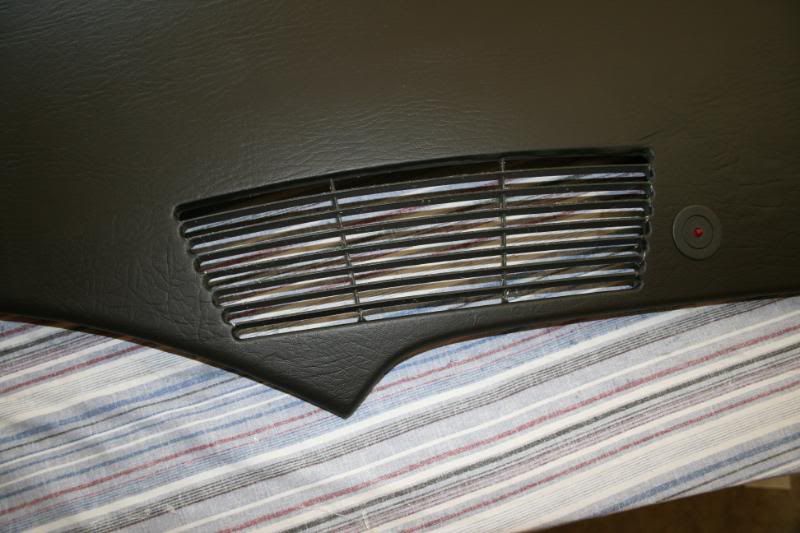
yep, ive seen your thread before. i did almost the same thing but i got rid of the vents. instead i put some stainless steel mesh and called it a day. it doesnt look perfect like yours coz mine broke into 3 or 4 pieces :/ i should have used some filler and evened it out but am too lazy.
#16
so i put it back on the car. it looks okay although 1 crack is showing through the leather :/
and i dont like the AC vent that much..i could have done a better job but i lack the correct tools..ugh all in all i can live with that! id get it to look perfect if i could do it again but oh well..


and i dont like the AC vent that much..i could have done a better job but i lack the correct tools..ugh all in all i can live with that! id get it to look perfect if i could do it again but oh well..


