Appearance & Detailing Interior & Exterior Appearance Modifications

Bunch of little underhood appearance thingies

Thread Tools
 
Search this Thread
 
Old 03-16-2014, 07:16 PM
  #1  
TECH Resident
Thread Starter
iTrader: (31)
 
UnVMySS's Avatar
 
Join Date: Jun 2009
Posts: 950
Likes: 0
Received 0 Likes on 0 Posts

Talking Bunch of little underhood appearance thingies

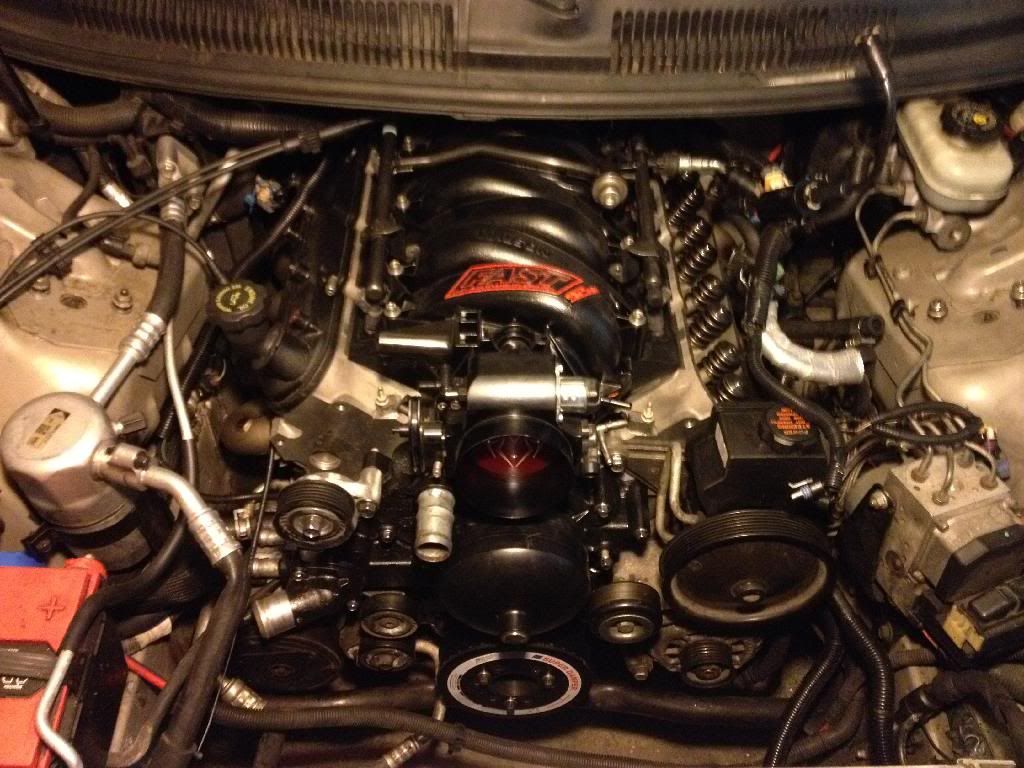
Nothing special... But during my head swap, I decided to brighten some things up. Love it or hate it, I think it came out ok.
Had a grey fast 92... Painted it up.


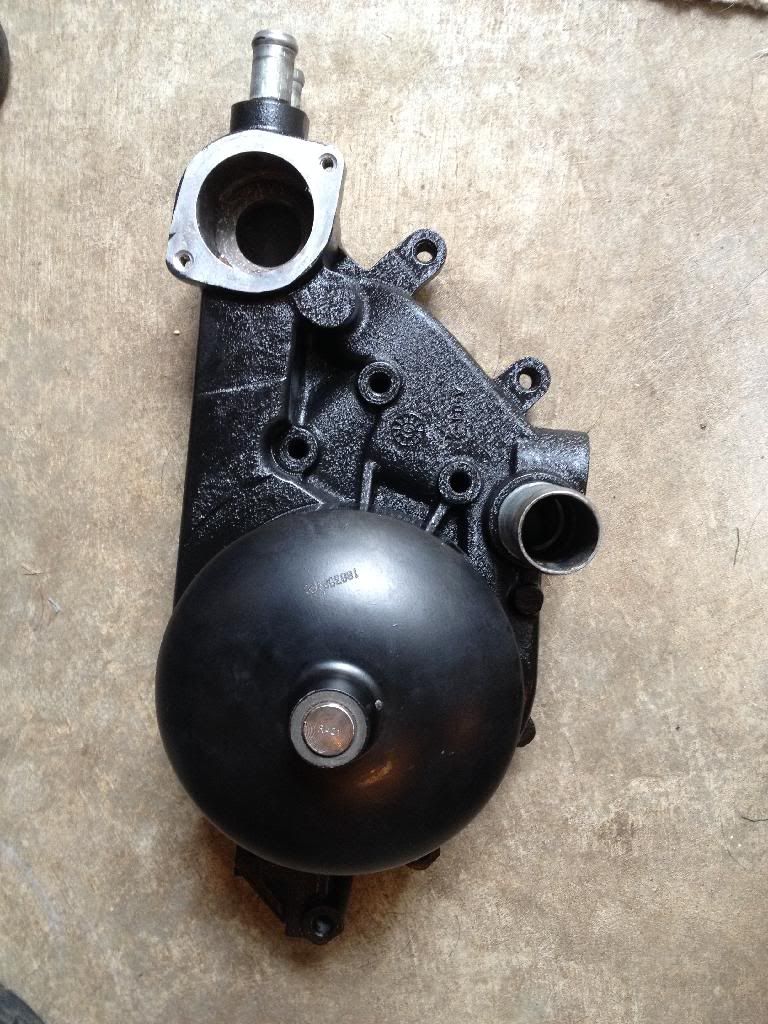
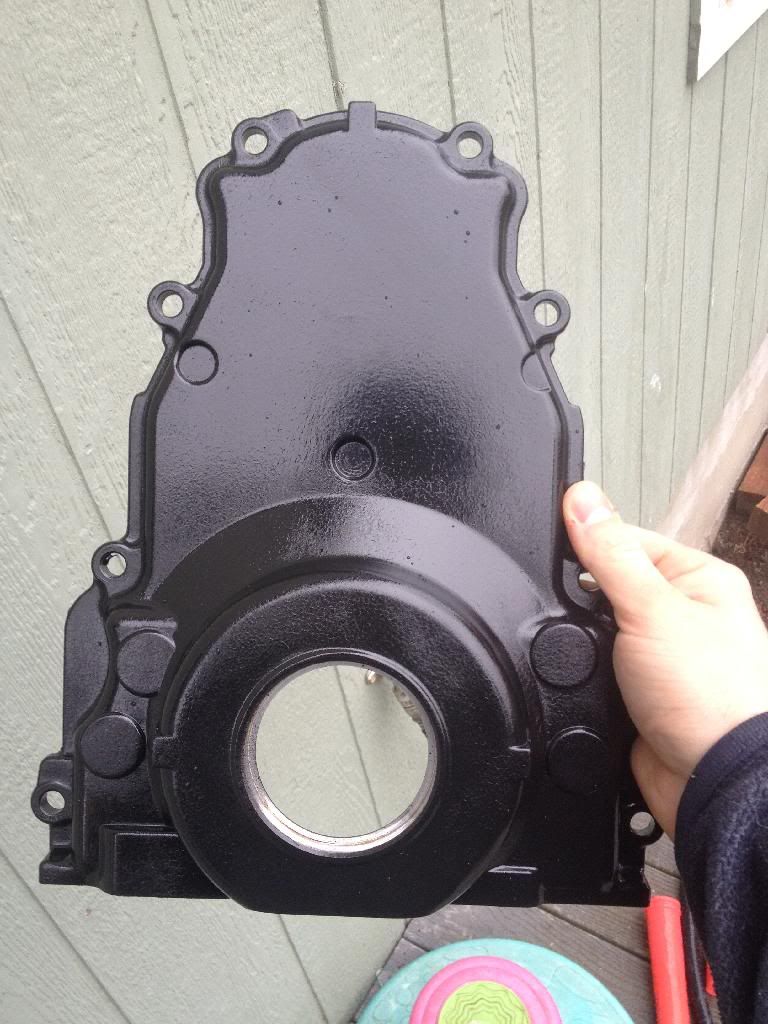
Crinkle coated valve covers, timing cover, and water pump.


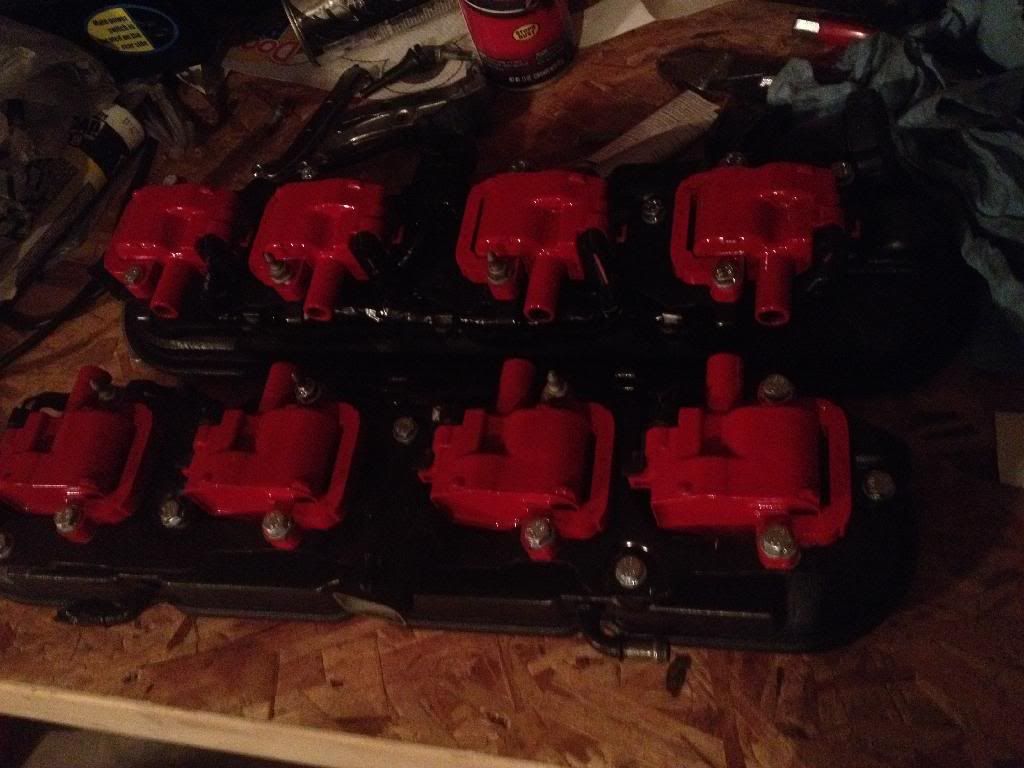
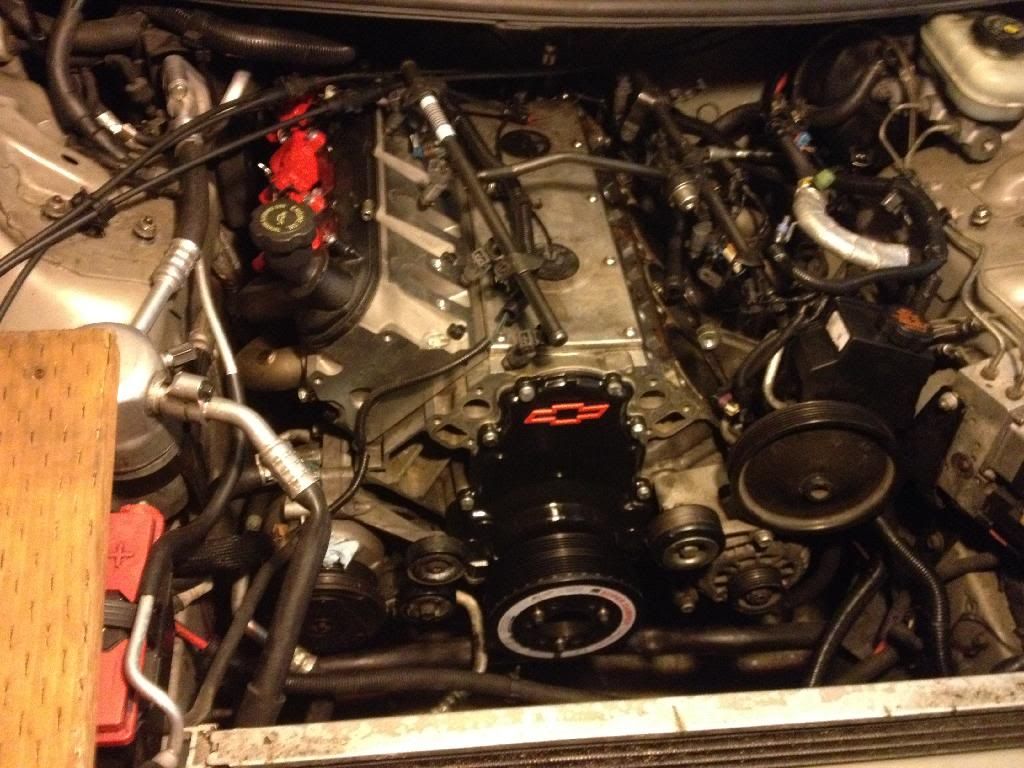
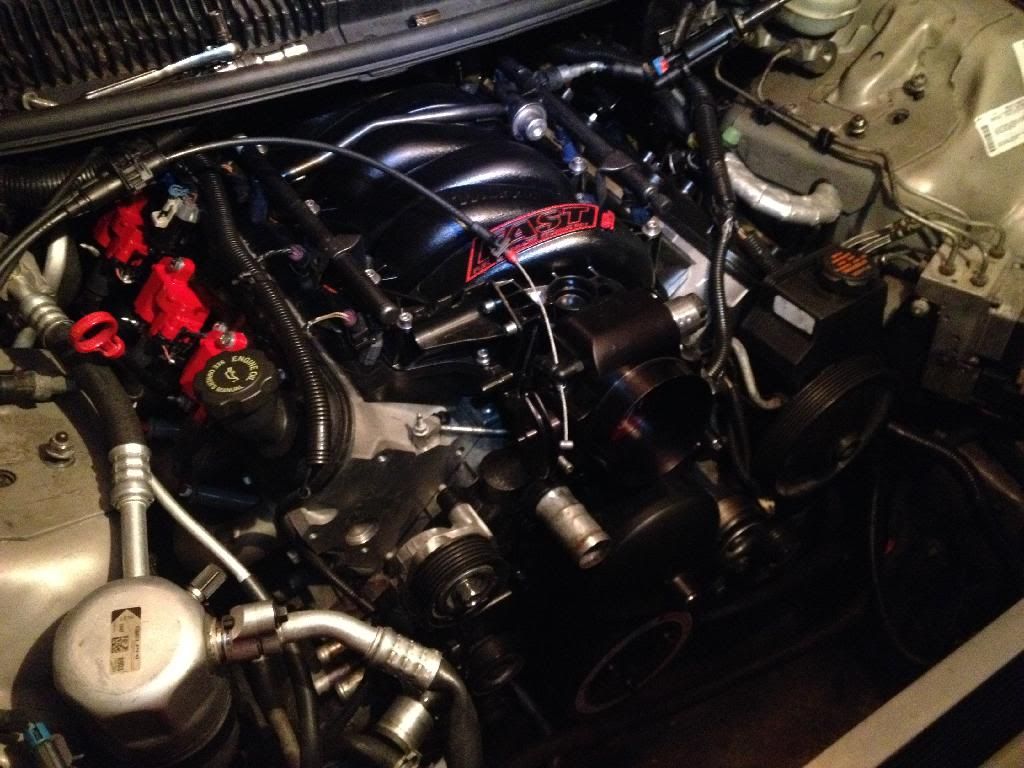
Also painted coils... And put the ATi super Damper on


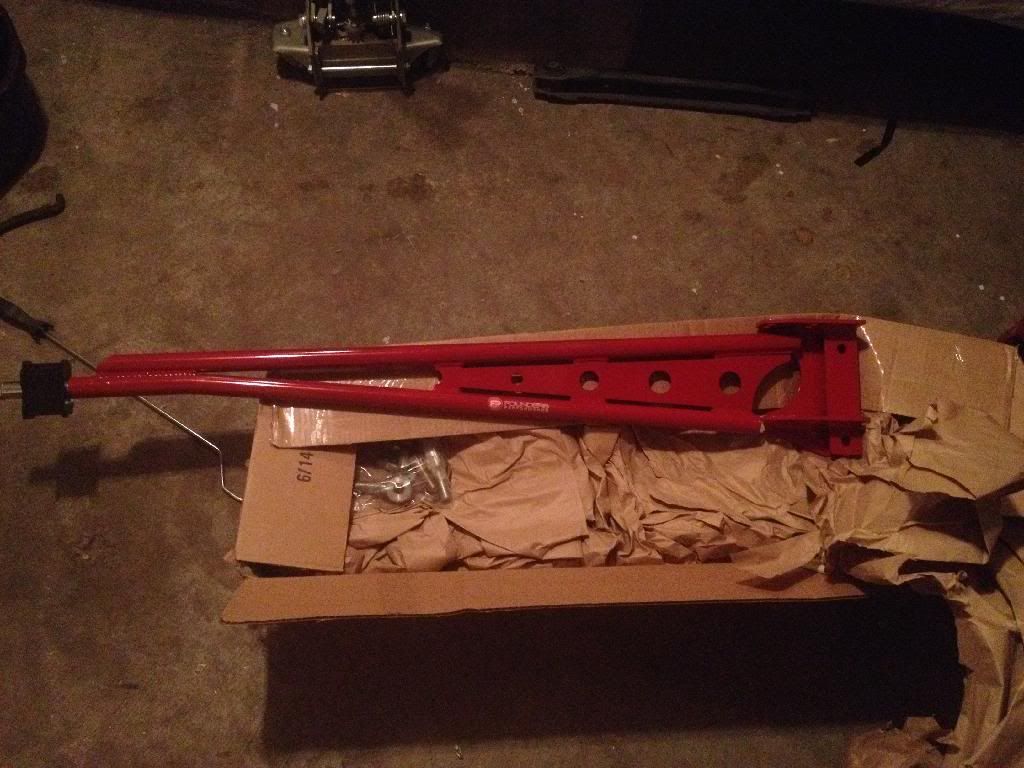
Torque arm...almost ready to go on


Also polished a ton of bolts.


And where it sits now, almost done...
Old 03-16-2014, 07:43 PM
  #2  
11 Second Club
iTrader: (127)
 
YURVIEW's Avatar
 
Join Date: Jun 2002
Location: MS
Posts: 984
Likes: 0
Received 0 Likes on 0 Posts

Default

Awesome job. Nice touches. Like the red coils on black covers!!
Old 03-16-2014, 10:17 PM
  #3  
11 Second Club
iTrader: (107)
 
tnmotown's Avatar
 
Join Date: Aug 2007
Location: Cali
Posts: 1,459
Received 24 Likes on 16 Posts

Default

Looks great! I like the red coils on the black covers also. Gives it a really nice touch.

I just might have to do the same to my car lol! So how did you paint the coils?
Old 03-16-2014, 11:35 PM
  #4  
TECH Resident
Thread Starter
iTrader: (31)
 
UnVMySS's Avatar
 
Join Date: Jun 2009
Posts: 950
Likes: 0
Received 0 Likes on 0 Posts

Default

Thanks fellas. I thought it looked good too.
Old 03-17-2014, 12:05 AM
  #5  
TECH Resident
Thread Starter
iTrader: (31)
 
UnVMySS's Avatar
 
Join Date: Jun 2009
Posts: 950
Likes: 0
Received 0 Likes on 0 Posts

Default

As far as painting them... I cleaned each one really good, then sprayed an adhesion promoter on them. Then a light primer, then used high temp paint on them. I hung them on fishing line while spraying. Once done, I baked at 200 degrees for 2 hours so the paint could cure really good, then I polished them. Lots of work but they're shiny.
Old 03-17-2014, 12:01 PM
  #6  
12 Second Club
 
Chevyman1968's Avatar
 
Join Date: Apr 2013
Location: Bourg La
Posts: 232
Likes: 0
Received 0 Likes on 0 Posts
Default

Looks good!!
Old 03-17-2014, 03:20 PM
  #7  
TECH Enthusiast
iTrader: (10)
 
YellowTA1's Avatar
 
Join Date: Jun 2005
Location: Lindale, Texas
Posts: 663
Likes: 0
Received 0 Likes on 0 Posts

Default

nice touches, I've been wandering how people paint their coils, now I know!
Old 03-17-2014, 03:34 PM
  #8  
11 Second Club
iTrader: (18)
 
thunderstruck507's Avatar
 
Join Date: Mar 2008
Location: Northwest AR
Posts: 8,357
Received 22 Likes on 17 Posts

Default

When I painted my coils I just shot them with wheel paint then clear. If you really want to add the the clean look swap out the ugly stock bolts for stainless allen headed cap screws.

I did mine gunmetal with black brackets. Subtle but clean IMO.

Old 03-17-2014, 03:53 PM
  #9  
TECH Enthusiast
iTrader: (10)
 
YellowTA1's Avatar
 
Join Date: Jun 2005
Location: Lindale, Texas
Posts: 663
Likes: 0
Received 0 Likes on 0 Posts

Default

Originally Posted by thunderstruck507
When I painted my coils I just shot them with wheel paint then clear. If you really want to add the the clean look swap out the ugly stock bolts for stainless allen headed cap screws.

I did mine gunmetal with black brackets. Subtle but clean IMO.

location to get stainless allen headed cap screws? size?
Old 03-17-2014, 04:40 PM
  #10  
11 Second Club
iTrader: (18)
 
thunderstruck507's Avatar
 
Join Date: Mar 2008
Location: Northwest AR
Posts: 8,357
Received 22 Likes on 17 Posts

Default

I got them locally at a bolt supply store. They weren't cheap at around $26 a set. But I just looked and you can get them on ebay cheap. Search ls1 stainless coil bolts or stainless 6mm x 1
Old 03-17-2014, 07:06 PM
  #11  
TECH Regular
iTrader: (14)
 
contraststriker's Avatar
 
Join Date: Apr 2005
Location: Tampa, FL
Posts: 442
Likes: 0
Received 0 Likes on 0 Posts

Default

Get your thread/pitch and length, then pick some up from McMaster-Carr. They aren't a sponsor but they're a pretty generic site selling all kinds of non-car things so maybe mods won't delete it. Also get button head screws, IMO they look a little nicer...and they can be polished
Old 03-17-2014, 07:57 PM
  #12  
TECH Enthusiast
iTrader: (1)
 
silverWS.6's Avatar
 
Join Date: Dec 2010
Location: OKC
Posts: 588
Likes: 0
Received 2 Likes on 2 Posts
Default

Looks good! Now do the TCS Relocation and get those wires out of the way!


I also painted my coils but I just a good cleaning and high temp paint. They look good but not as good as those. I might redo my valve covers using that method though!
Old 03-18-2014, 09:48 PM
  #13  
TECH Resident
Thread Starter
iTrader: (31)
 
UnVMySS's Avatar
 
Join Date: Jun 2009
Posts: 950
Likes: 0
Received 0 Likes on 0 Posts

Default

What all is involved for the TCS relocation? I am also going to do the wire tuck mod and would like to do a few other things to clean up the bay.
Old 03-19-2014, 09:21 AM
  #14  
TECH Enthusiast
iTrader: (10)
 
YellowTA1's Avatar
 
Join Date: Jun 2005
Location: Lindale, Texas
Posts: 663
Likes: 0
Received 0 Likes on 0 Posts

Default

Originally Posted by UnVMySS
What all is involved for the TCS relocation? I am also going to do the wire tuck mod and would like to do a few other things to clean up the bay.
great step-by-step write-up here with pics....

https://ls1tech.com/forums/appearanc...tion-pics.html
Old 03-20-2014, 08:16 AM
  #15  
TECH Resident
Thread Starter
iTrader: (31)
 
UnVMySS's Avatar
 
Join Date: Jun 2009
Posts: 950
Likes: 0
Received 0 Likes on 0 Posts

Default

Thank you I will check it out!
Old 03-20-2014, 09:14 AM
  #16  
TECH Veteran
iTrader: (4)
 
crimson_bird's Avatar
 
Join Date: Aug 2009
Location: The Bay Area, CA
Posts: 4,143
Likes: 0
Received 7 Likes on 3 Posts
Default

looks good! love the intake


all that black up front will make it a tad harder to spot a leak in the future though.
Old 03-20-2014, 10:22 AM
  #17  
TECH Resident
Thread Starter
iTrader: (31)
 
UnVMySS's Avatar
 
Join Date: Jun 2009
Posts: 950
Likes: 0
Received 0 Likes on 0 Posts

Default

Ehh, its a summer cruiser that sits in my garage for the most part... So if it leaks there should be fluid on my garage floor. After the engine is done and running, I will be getting a staggered set of either ccw classics or FM10's...
Old 03-22-2014, 05:41 PM
  #18  
TECH Resident
Thread Starter
iTrader: (31)
 
UnVMySS's Avatar
 
Join Date: Jun 2009
Posts: 950
Likes: 0
Received 0 Likes on 0 Posts

Default

Well thanks for the advice. It was fairly easy.

Old 03-22-2014, 05:42 PM
  #19  
TECH Resident
Thread Starter
iTrader: (31)
 
UnVMySS's Avatar
 
Join Date: Jun 2009
Posts: 950
Likes: 0
Received 0 Likes on 0 Posts

Default

And I plan on doing the wire tuck mod here soon.
Old 03-22-2014, 07:08 PM
  #20  
TECH Enthusiast
iTrader: (30)
 
CO99Z28Vert's Avatar
 
Join Date: Apr 2007
Location: Longmont, CO 80504
Posts: 674
Likes: 0
Received 3 Likes on 3 Posts
Default

Man the car is looking amazing good job!


Quick Reply: Bunch of little underhood appearance thingies


All times are GMT -5. The time now is 01:45 AM.