Painting the Front Bumper Center Support
 04-22-2015, 09:55 PM
#1
TECH Regular
Thread Starter
Mine is faded, light gray and ugly.
I'd like to remove it, take the support to the body shop for a professional black painting.
Has anyone else done this? any pictures to share?
Can I just remove the support bracket without taking the front bumper off?
I'd like to remove it, take the support to the body shop for a professional black painting.
Has anyone else done this? any pictures to share?
Can I just remove the support bracket without taking the front bumper off?
 04-22-2015, 11:00 PM
#2
11 Second Club
iTrader: (3)
Join Date: Dec 2008
Location: Chandler, AZ
Posts: 138
Likes: 0
Received 0 Likes
on
0 Posts

You don't need to have a shop spray it, you can rattlecan it yourself and it will come out fine. That's how I did mine, and it's held up for 7 years now.
To remove it, just pull the tabs out holding it to the bumper and the body and slide it out. I think there may be a bolt or two in the back, it's been awhile since I did mine, but definitely no need to remove the front bumper.
To remove it, just pull the tabs out holding it to the bumper and the body and slide it out. I think there may be a bolt or two in the back, it's been awhile since I did mine, but definitely no need to remove the front bumper.
04-23-2015, 01:23 PM
#5
TECH Fanatic

Ls1.com has a thread on this in the appearance section.
04-23-2015, 09:25 PM
#7
TECH Regular
Thread Starter
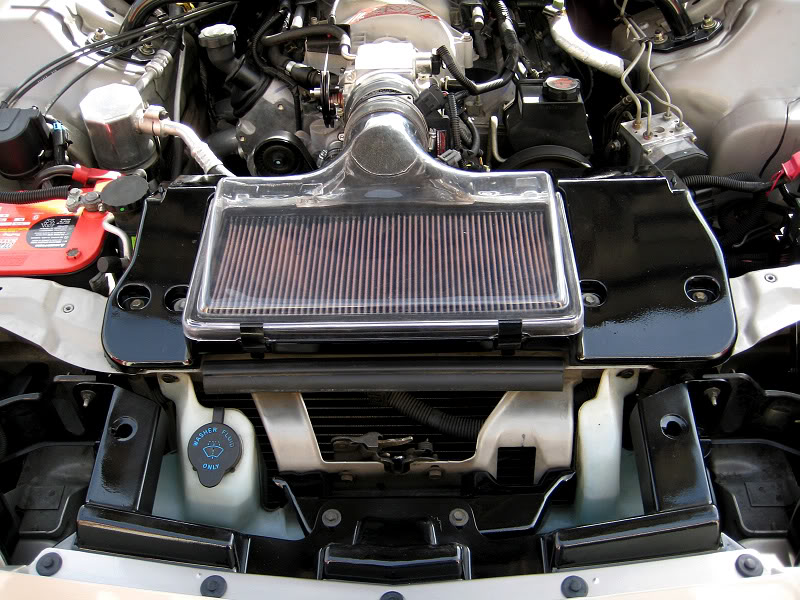
Thanks for sharing - like all else said =, Nice Engine Bay!
Trending Topics
04-25-2015, 06:35 PM
#8
TECH Regular
Thread Starter
So I went ahead and removed all the nuts, plugs and bolts to remove the front bumper support. Only to find there is something else holding to the front bumper, center plug.
I'm not sure if this is a rivet of some sort, or what.
This is on a Firehawk, right behind the front nose emblem. I'm not sure if GM or SLP put this tach in.
Do I need to drill it out?
I'm not sure if this is a rivet of some sort, or what.
This is on a Firehawk, right behind the front nose emblem. I'm not sure if GM or SLP put this tach in.
Do I need to drill it out?
04-27-2015, 09:00 AM
#9
TECH Fanatic
I don't think I would drill it out. Isn't there some way to just slide it out?
04-27-2015, 09:48 AM
#10
TECH Veteran
iTrader: (14)
So I went ahead and removed all the nuts, plugs and bolts to remove the front bumper support. Only to find there is something else holding to the front bumper, center plug.
I'm not sure if this is a rivet of some sort, or what.
This is on a Firehawk, right behind the front nose emblem. I'm not sure if GM or SLP put this tach in.
Do I need to drill it out?
I'm not sure if this is a rivet of some sort, or what.
This is on a Firehawk, right behind the front nose emblem. I'm not sure if GM or SLP put this tach in.
Do I need to drill it out?
Sometimes the front bumper will sag a bit and the fix is usually to use something besides the plastic push pins to secure the bumper. When mine had the firebird bumper on it to address the gap between the hood and bumper they put a self tapping screw in the center tab for the front bumper (the shop that installed my slp HO hood) and it closed the gap.
Its possible as this is a hawk that slp put that rivet in to address the same issue when the hood was installed from the factory or a previous owner maybe?
The only way to remove a rivet like that is to drill out though.
04-27-2015, 09:52 AM
#11
TECH Regular
Thread Starter
Thanks for the reply everyone!
I'm pretty sure SLP put the rivet in, for I read 2 other posts about this rivet and it being on a firehawk also.
I was easily able to drill the rivet out, and to remove the support frame for painting. I'll install a new rivet in its place when I put it all back together again.
Good info for other Firehawk and other 3rd party hood installs.
04-27-2015, 09:58 AM
#12
TECH Veteran
iTrader: (14)
I would tend to agree its likely something SLP did, rivets are not a very common fastener for the DIY crowd.
On a side note when I later switched to the TA bumper I no longer needed the screw and bumper and hood fit more flush.
On a side note when I later switched to the TA bumper I no longer needed the screw and bumper and hood fit more flush.
 05-01-2015, 03:43 PM
#14
TECH Regular
Thread Starter
I finally got the damn thing off - what a PITA.
Removing the small black bracket under it helped, some.
The fun part is going to be getting it all back together. But not until after some painting!
Removing the small black bracket under it helped, some.
The fun part is going to be getting it all back together. But not until after some painting!
Last edited by michaelhawk; 05-02-2015 at 08:24 AM.


 05-08-2015, 05:30 AM
#18
If the overall goal is to make it black, rattle can is an option, but will always look rattle canned...
Yes, a body shop will be nicer in appearance, more durable, but may be too nice depending on what else is going on under there cosmetically. Might want to take advantage of having a few other things painted while you're at it if the goal is to make things nice in more than one area.
Hydro dip (what I did) is also an option....but again, it can snowball into having other pieces done.
Last edited by LPE 403; 05-08-2015 at 05:38 AM.


