Custom Tail Light Filler Panel
 03-19-2022, 03:01 PM
#1
Copy & Paste Moderator
Thread Starter

Formula still in storage, but I made a new custom filler panel. I'll install it when I get the car out of storage in about a month.
I used a Cricut Maker vinyl cutter and a package of different vinyl color squares that I bought on Amazon (EZ Craft 12x12 Permanent Adhesive Vinyl).
I can't take credit for the font or the bird. I found both online and adjusted to fit. I liked how they had a "Tron" vibe. The font is called "Origin Tech". The bird I saw posted in a couple places including Pinterest.
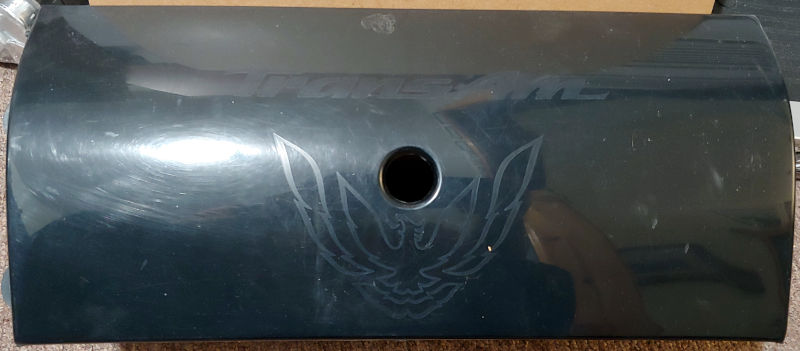
Pic of spare panel that I bought on ebay. It had a broken tab that I had to repair (not show in pics).
https://fadingarrow.com/images/Fireb...-%20Before.jpg
http://fadingarrow.net/images/Firebi...-%20Before.jpg
I had to sand down the panel (multiple stages and wet sanding) to remove the old emblems and smooth out some of the blemishes. No pics of that unfortunately.
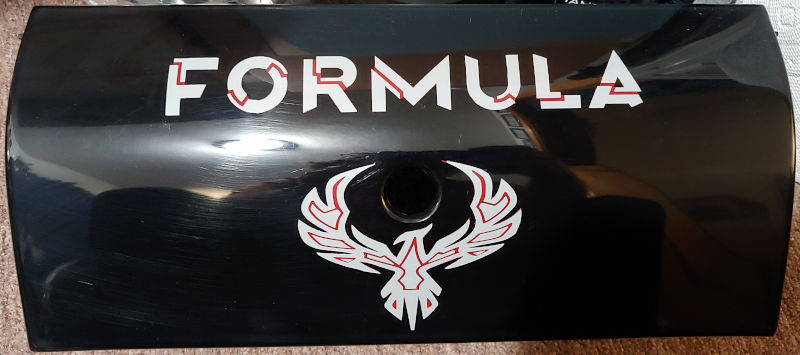
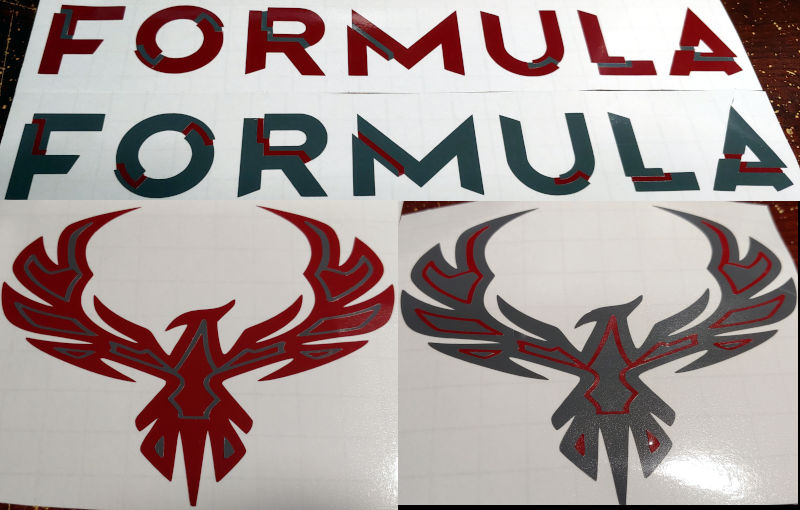
I tried a couple colors. First attempt is Light Grey with Dark Red infill. This is the light grey on top of the dark red cut to shape by hand. The later versions are actually both printed and pieces swapped to make infill instead of layers. More pics and info below.
https://fadingarrow.com/images/Fireb...%20Attempt.jpg
http://fadingarrow.net/images/Firebi...%20Attempt.jpg
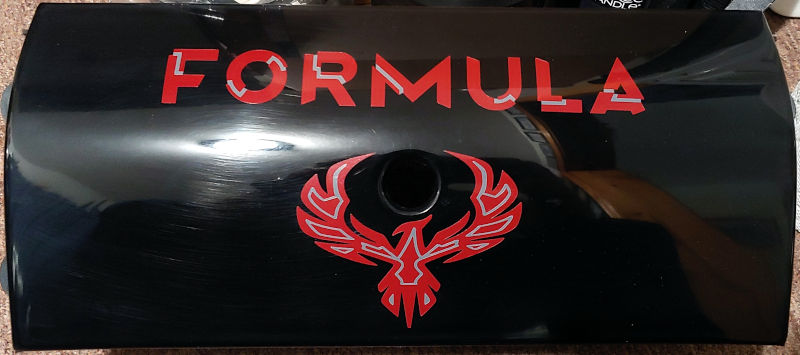
Second attempt is the dark red with a darker grey infill.
https://fadingarrow.com/images/Fireb...%20Attempt.jpg
http://fadingarrow.net/images/Firebi...%20Attempt.jpg
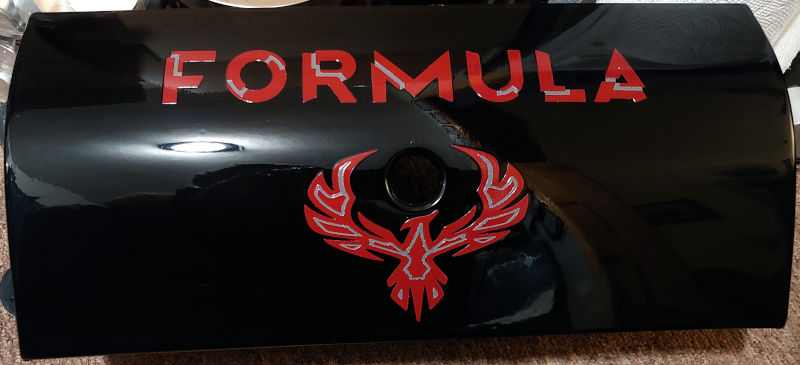
I liked that second onw so I cleared it and polished it. It isn't 100% perfect, but it is much better than how it started and better than what is on the car.
https://fadingarrow.com/images/Fireb...0-%20After.jpg
http://fadingarrow.net/images/Firebi...0-%20After.jpg
I've had some bad luck in the past just clearing over vinyl. The spray clear would work its way under the vinyl and bubble it up. To combat that, when I made center caps for my Mustang and interior decals, I brushed on a couple coats of Mod Podge Puzzle Saver and used a Satin Clear (I didn't want gloss). That worked well for that purpose. For this though, I wanted a smooth glossy finish. So I experimented with a wipe-on/wipe-off approach. I used a paper towel to wipe on some Mod Podge Puzzle Saver on the vinyl to get into the crevices and edges and wiped it off so none stayed on any visible surface. This sealed the crevices and edges. After that dried, I tend added a couple coats of gloss clear, wet sanded (on black area avoiding vinyl), polished, waxed. I think it came out alright.
I actually printed both the Grey and Red patterns completely and cut/swapped pieces to make the dual color pattern of the final version. The infill pieces in the letters are actually part of the background and would normally be pulled away and discarded, but I decided to cut them from the background and keep as infill. I actually still have the color swapped (grey with red infill) version unused. Not sure what I'm going to do with it. Maybe put it on the side of my bookcase with other stickers that I have there.
https://fadingarrow.com/images/Fireb...h%20Colors.jpg
http://fadingarrow.net/images/Firebi...h%20Colors.jpg
I kept saying "printed" above, but its a vinyl "cutter" not a printer. You put the sheet in the cutter and it cuts out the pattern. You then need to remove/weed-out the pieces you don't need to have/keep the pattern you do need. So above when I say "printed" I meant that it came from the vinyl cutter and not me cutting by hand.
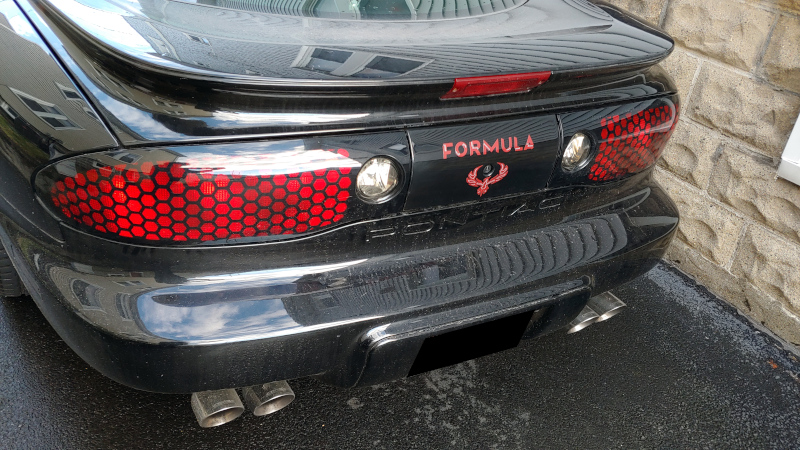
Here is a pic of the panel installed. The car is dirty. I just got it out of storage and its been raining.
https://fadingarrow.com/images/Fireb...0Installed.jpg
http://fadingarrow.net/images/Firebi...0Installed.jpg
I used a Cricut Maker vinyl cutter and a package of different vinyl color squares that I bought on Amazon (EZ Craft 12x12 Permanent Adhesive Vinyl).
I can't take credit for the font or the bird. I found both online and adjusted to fit. I liked how they had a "Tron" vibe. The font is called "Origin Tech". The bird I saw posted in a couple places including Pinterest.
Pic of spare panel that I bought on ebay. It had a broken tab that I had to repair (not show in pics).
https://fadingarrow.com/images/Fireb...-%20Before.jpg
http://fadingarrow.net/images/Firebi...-%20Before.jpg
I had to sand down the panel (multiple stages and wet sanding) to remove the old emblems and smooth out some of the blemishes. No pics of that unfortunately.
I tried a couple colors. First attempt is Light Grey with Dark Red infill. This is the light grey on top of the dark red cut to shape by hand. The later versions are actually both printed and pieces swapped to make infill instead of layers. More pics and info below.
https://fadingarrow.com/images/Fireb...%20Attempt.jpg
http://fadingarrow.net/images/Firebi...%20Attempt.jpg
Second attempt is the dark red with a darker grey infill.
https://fadingarrow.com/images/Fireb...%20Attempt.jpg
http://fadingarrow.net/images/Firebi...%20Attempt.jpg
I liked that second onw so I cleared it and polished it. It isn't 100% perfect, but it is much better than how it started and better than what is on the car.
https://fadingarrow.com/images/Fireb...0-%20After.jpg
http://fadingarrow.net/images/Firebi...0-%20After.jpg
I've had some bad luck in the past just clearing over vinyl. The spray clear would work its way under the vinyl and bubble it up. To combat that, when I made center caps for my Mustang and interior decals, I brushed on a couple coats of Mod Podge Puzzle Saver and used a Satin Clear (I didn't want gloss). That worked well for that purpose. For this though, I wanted a smooth glossy finish. So I experimented with a wipe-on/wipe-off approach. I used a paper towel to wipe on some Mod Podge Puzzle Saver on the vinyl to get into the crevices and edges and wiped it off so none stayed on any visible surface. This sealed the crevices and edges. After that dried, I tend added a couple coats of gloss clear, wet sanded (on black area avoiding vinyl), polished, waxed. I think it came out alright.
I actually printed both the Grey and Red patterns completely and cut/swapped pieces to make the dual color pattern of the final version. The infill pieces in the letters are actually part of the background and would normally be pulled away and discarded, but I decided to cut them from the background and keep as infill. I actually still have the color swapped (grey with red infill) version unused. Not sure what I'm going to do with it. Maybe put it on the side of my bookcase with other stickers that I have there.
https://fadingarrow.com/images/Fireb...h%20Colors.jpg
http://fadingarrow.net/images/Firebi...h%20Colors.jpg
I kept saying "printed" above, but its a vinyl "cutter" not a printer. You put the sheet in the cutter and it cuts out the pattern. You then need to remove/weed-out the pieces you don't need to have/keep the pattern you do need. So above when I say "printed" I meant that it came from the vinyl cutter and not me cutting by hand.
Here is a pic of the panel installed. The car is dirty. I just got it out of storage and its been raining.
https://fadingarrow.com/images/Fireb...0Installed.jpg
http://fadingarrow.net/images/Firebi...0Installed.jpg
Last edited by VIP1; 04-09-2022 at 06:29 PM.

The following 3 users liked this post by VIP1:
03-19-2022, 03:20 PM
#2
Copy & Paste Moderator
Thread Starter
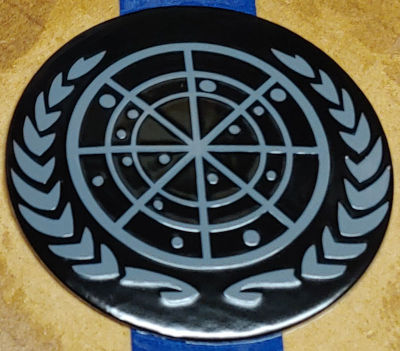
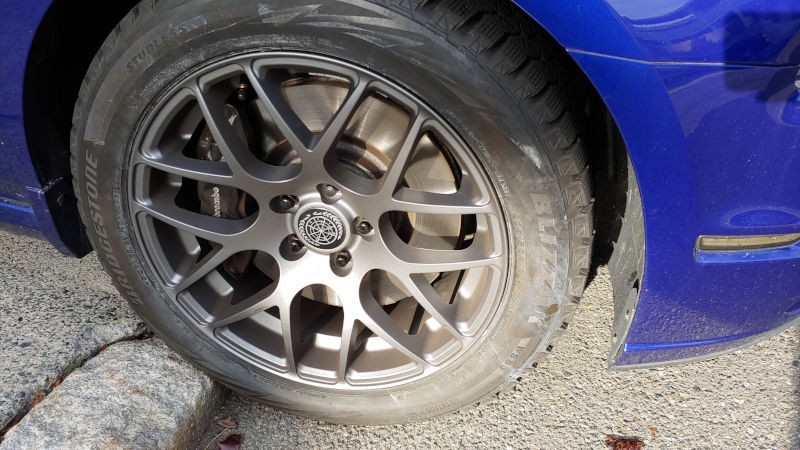
For Reference, here are some center caps for my Mustang. These are thin metal center caps with vinyl on top, completely coated in a few layers of Mod Podge Puzzle Saver, then a few layers of Satin Clear.
They are installed on the wheels with 3M Trim Tape. They are aligned so the gap in the pattern at the bottom is lined up with the air fill stem on the wheel.
Star Trek fans will recognize that this is a mashup of a couple different generations of the United Federation of Planets logo.
https://fadingarrow.com/images/Musta...%20Painted.jpg
http://fadingarrow.net/images/Mustan...%20Painted.jpg
https://fadingarrow.com/images/Musta...%20Closeup.jpg
http://fadingarrow.net/images/Mustan...%20Closeup.jpg
https://fadingarrow.com/images/Musta...Insstalled.jpg
http://fadingarrow.net/images/Mustan...Insstalled.jpg
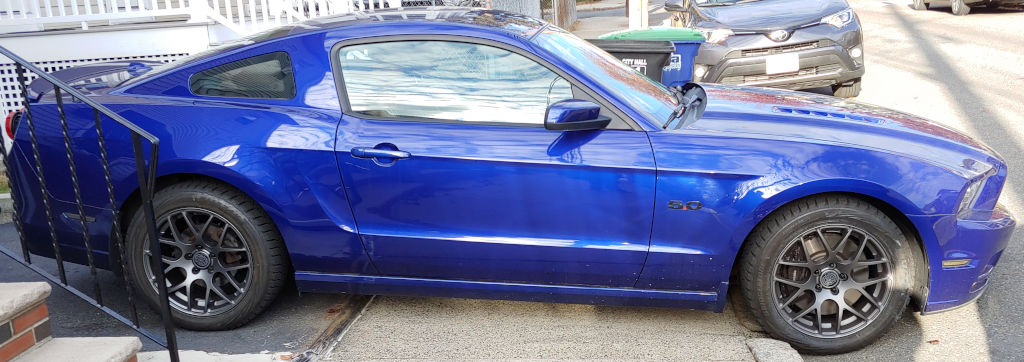
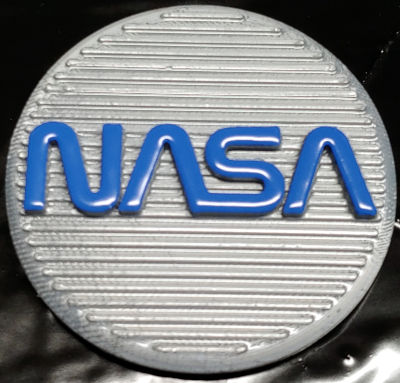
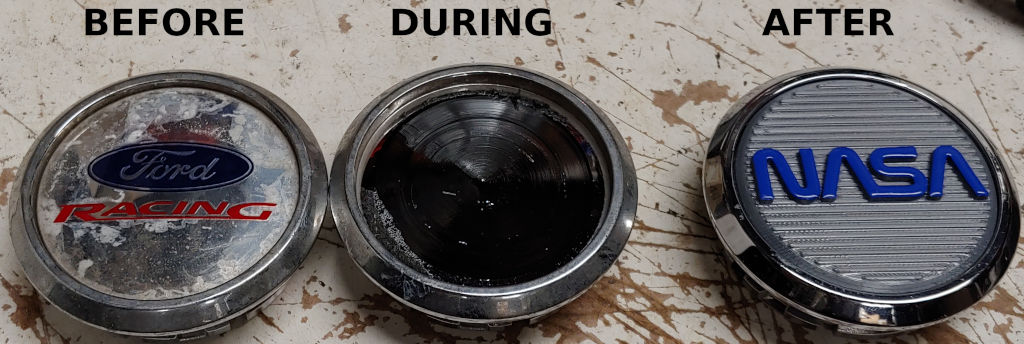
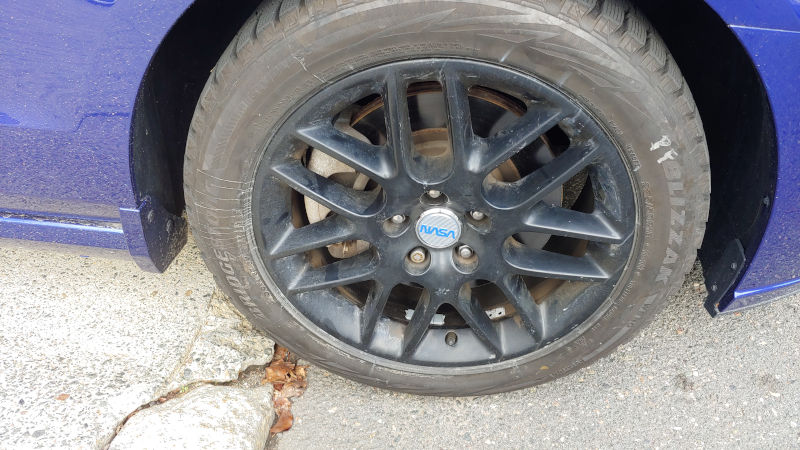
These are my current winter wheels (the old wheels no longer fit after upgrading to Brembo Brakes). My previous winter wheels had a different set of custom center caps. They were 3D Printed NASA center caps (in Grey and Blue to match the color of the car).
The grey is the base filament (not color painted), only the blue is color painted (brushed on by hand with acrylic). The whole thing has a few coats of spray satin clear.
https://fadingarrow.com/images/Musta...%20Painted.jpg
http://fadingarrow.net/images/Mustan...%20Painted.jpg
https://fadingarrow.com/images/Musta...Comparison.jpg
http://fadingarrow.net/images/Mustan...Comparison.jpg
https://fadingarrow.com/images/Musta...%20Closeup.jpg
http://fadingarrow.net/images/Mustan...%20Closeup.jpg
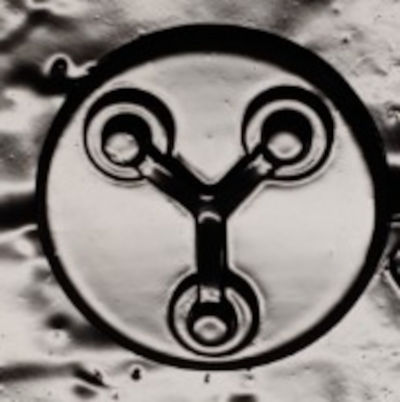
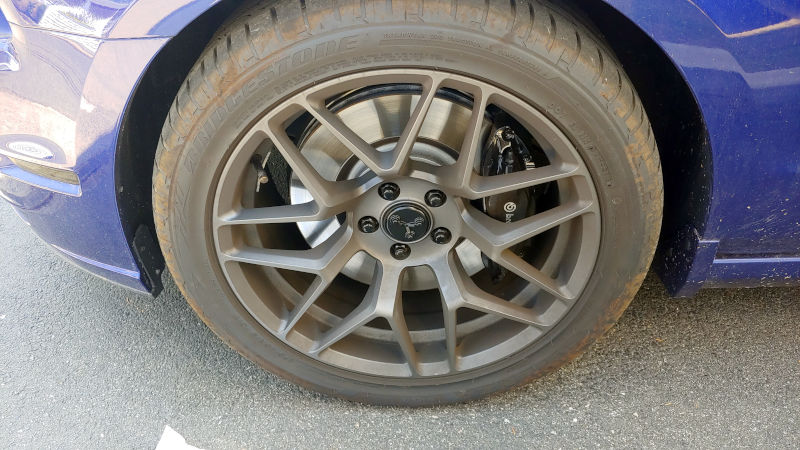
My current summer wheels have 3D Printed stylized version of the Flux Capacitor in black (from Back to the Future).
I forget what color filament I used for this, but I spray painted them black and satin clear.
https://fadingarrow.com/images/Musta...%20Painted.jpg
http://fadingarrow.net/images/Mustan...%20Painted.jpg
https://fadingarrow.com/images/Musta...%20Closeup.jpg
http://fadingarrow.net/images/Mustan...%20Closeup.jpg
They are installed on the wheels with 3M Trim Tape. They are aligned so the gap in the pattern at the bottom is lined up with the air fill stem on the wheel.
Star Trek fans will recognize that this is a mashup of a couple different generations of the United Federation of Planets logo.
https://fadingarrow.com/images/Musta...%20Painted.jpg
http://fadingarrow.net/images/Mustan...%20Painted.jpg
https://fadingarrow.com/images/Musta...%20Closeup.jpg
http://fadingarrow.net/images/Mustan...%20Closeup.jpg
https://fadingarrow.com/images/Musta...Insstalled.jpg
http://fadingarrow.net/images/Mustan...Insstalled.jpg
These are my current winter wheels (the old wheels no longer fit after upgrading to Brembo Brakes). My previous winter wheels had a different set of custom center caps. They were 3D Printed NASA center caps (in Grey and Blue to match the color of the car).
The grey is the base filament (not color painted), only the blue is color painted (brushed on by hand with acrylic). The whole thing has a few coats of spray satin clear.
https://fadingarrow.com/images/Musta...%20Painted.jpg
http://fadingarrow.net/images/Mustan...%20Painted.jpg
https://fadingarrow.com/images/Musta...Comparison.jpg
http://fadingarrow.net/images/Mustan...Comparison.jpg
https://fadingarrow.com/images/Musta...%20Closeup.jpg
http://fadingarrow.net/images/Mustan...%20Closeup.jpg
My current summer wheels have 3D Printed stylized version of the Flux Capacitor in black (from Back to the Future).
I forget what color filament I used for this, but I spray painted them black and satin clear.
https://fadingarrow.com/images/Musta...%20Painted.jpg
http://fadingarrow.net/images/Mustan...%20Painted.jpg
https://fadingarrow.com/images/Musta...%20Closeup.jpg
http://fadingarrow.net/images/Mustan...%20Closeup.jpg
Last edited by VIP1; 03-19-2022 at 03:54 PM.
The following users liked this post:
InfiniteReality (03-29-2022)
03-20-2022, 02:30 PM
#3
TECH Fanatic


That looks really good! Any interest in making and selling them? The filler panel, I mean.
Last edited by Nathan C; 03-20-2022 at 02:31 PM. Reason: Add
The following users liked this post:
Nathan C (04-09-2022)