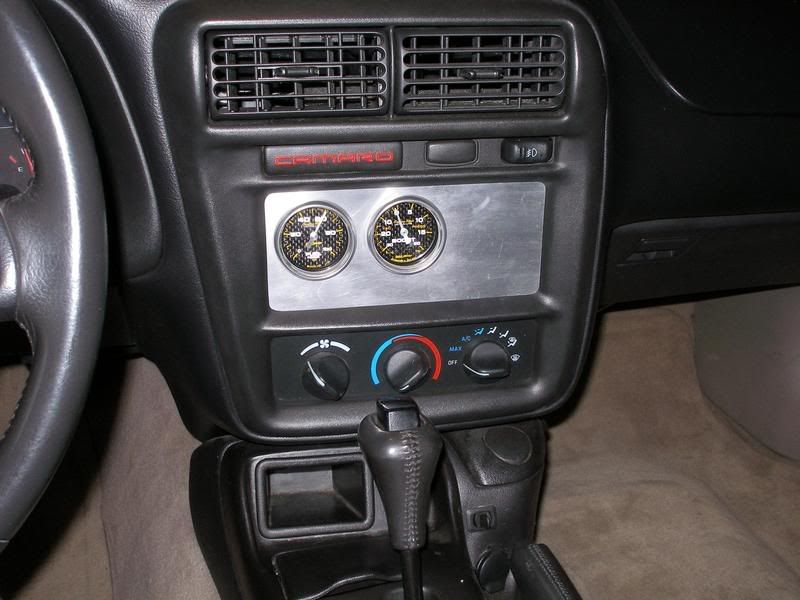
gauge/switch panel i made
#22
11 Second Club
Thread Starter
iTrader: (1)
Join Date: Jun 2004
Location: In a van down by the river, Missouri
Posts: 655
Likes: 0
Received 0 Likes
on
0 Posts

there is no other way short of making a mold of the entire center console.
tape, screws, epoxy thats the only choices no matter what.
post #4 - screws & mount (corrected)
post #8 - epoxy
post #12 - mount behind air vent & screws to radio mount
tape, screws, epoxy thats the only choices no matter what.
post #4 - screws & mount (corrected)
post #8 - epoxy
post #12 - mount behind air vent & screws to radio mount
Last edited by One Bad Z; 09-22-2007 at 11:09 PM.
#23
Rehab is for quitters...
iTrader: (57)
Join Date: Jun 2005
Posts: 1,921
Likes: 0
Received 0 Likes
on
0 Posts

Originally Posted by One Bad Z
there is no other way short of making a mold of the entire center console.
tape, screws, epoxy thats the only choices no matter what.
post #4 - epoxy
post #8 - epoxy
post #12 - mount behind air vent & screws to radio mount
tape, screws, epoxy thats the only choices no matter what.
post #4 - epoxy
post #8 - epoxy
post #12 - mount behind air vent & screws to radio mount
Here is what I did:
I wanted to recess the small switches so they did not stick out so far, so I had to attach a bracket to the back using screws...

I just used longer screws and left the screws long in the back...

That way I could use the same screws to make a straddle to "clamp" it to the back of the console, using the long screws as studs basically...

Then I smoothed the front over the screw heads with bondo and finished it up, so far it has not moved or loosened up at all.

Hope this helps.
#27
11 Second Club
Thread Starter
iTrader: (1)
Join Date: Jun 2004
Location: In a van down by the river, Missouri
Posts: 655
Likes: 0
Received 0 Likes
on
0 Posts

Originally Posted by Spd-Kilz
Getav8, I know this is a rather ignorant question, but how did you go about replacing your radio / HVAC with the carboon fiber? How did you do it, and where did you get the parts?
Thanks!
Thanks!
Can get aluminum, plastic, carbon fiber (ebay) at local hobby store.
for the radio panel you will need...
two screws (longer than the stock ones).
4 nuts, 2 for each side used as spacers (or whatever you come up with to use as a spacer). Otherwise there would be about 1/2" gap from the outer trim to the panel you make. (measurements may be different on a T/A)
If you put gauges there they can be mounted with the supplied hardware they come with.
Easiest way to make the panel would be to take an outline of the radio mount. Either on cardboard or the actual material being used. I used tin snips to cut the aluminum.
HVAC would be done similar way.
radio delete panel

my current gauge setup

this pic shows how to mount panel in the air vent

#28
TECH Fanatic
iTrader: (17)
Originally Posted by XtinctZ28
Nope, no epoxy on mine. I wanted a mechanical method to tighten it if it ever came loose...
Here is what I did:.....Hope this helps.
Here is what I did:.....Hope this helps.
J.


