


Removing Side Molding
Originally Posted by DopeFedZ
Removing the sidemoldings makes the car look so much cleaner. Remove the emblems while you are at it.
Originally Posted by DopeFedZ
Removing the sidemoldings makes the car look so much cleaner. Remove the emblems while you are at it.

your car is perfect!!!! looks so clean, im just not so sure i want to take my badges off but it deffinatly looks bad ***!!!!
So I tried the Spider Wire method and didn't have much luck. Perhaps I should have spent the extra buck on the 15 lb line but I went with the 6 lb line because I didn't expect to have to exert so much force. A lot of the time I ended up sawing right through the trim with the line.
The method I eventually used was I got it started with the Spider Wire and eventually used a "pull + cut adhesive with pocket knife" method. Worked for me.
The method I eventually used was I got it started with the Spider Wire and eventually used a "pull + cut adhesive with pocket knife" method. Worked for me.
Originally Posted by Kalgorn
So I tried the Spider Wire method and didn't have much luck. Perhaps I should have spent the extra buck on the 15 lb line but I went with the 6 lb line because I didn't expect to have to exert so much force. A lot of the time I ended up sawing right through the trim with the line.
The method I eventually used was I got it started with the Spider Wire and eventually used a "pull + cut adhesive with pocket knife" method. Worked for me.
The method I eventually used was I got it started with the Spider Wire and eventually used a "pull + cut adhesive with pocket knife" method. Worked for me.
You guys are getting way to deep into this. All I did was get a bit of fishing line under there to pop it up and pulled it off by hand. Rolled the rest of the tape off with my thumb. Took a total of 30 min for everything on my 01 
Originally Posted by YellowMonster87
you were rubbing the spider wire to close to the trim the key is to keep the line as close to the actual paint/door as possible that way you cut through the tape and not the actual plastic trim...it takes a moment to get the angle down but once you do it literally took me prolly 2min per side to get the molding cut off. and the temp out was only maybe 45-55*F out.....no heat necessary however the hotter the day the easier it is to cut the tape....spider wire doesnt matter how much lbs test you use mostly becuase the way its developed it has a smaller diamater but a much higher tensil strenth or whatever..thats why i use it in both this application and fishing.....lesss bulk and more strength
LS1 Tech Stories
The Best V8 Stories One Small Block at Time

Topdon ONE vs. Artidiag 800 BT2: Which is the Diagnostic Tablet For You?
Pouria Savadkouei
Gas Monkey Built a 6-Wheel Ferrari Testarossa With a Corvette LT4 Engine
Verdad Gallardo
7 Most Reliable High-Performance Engines GM Has Ever Built
Verdad Gallardo
Amazing '71 Camaro Restomod Is Modern Muscle Car Under the Skin
Verdad Gallardo
6 Common C5 Corvette Failures and What's Involved In Repairing Them
Pouria Savadkouei
Retro Modern Bandit Pontiac Trans AM Comes With Burt Reynolds' Autograph
Verdad Gallardo
Top 10 Greatest Cadillac V Series Performance Models Ever, Ranked
Pouria Savadkouei
Top 10 Most Powerful Chevy Trucks Ever Made!

Hennessey's New Supercharged Silverado ZR2 Has 700 HP
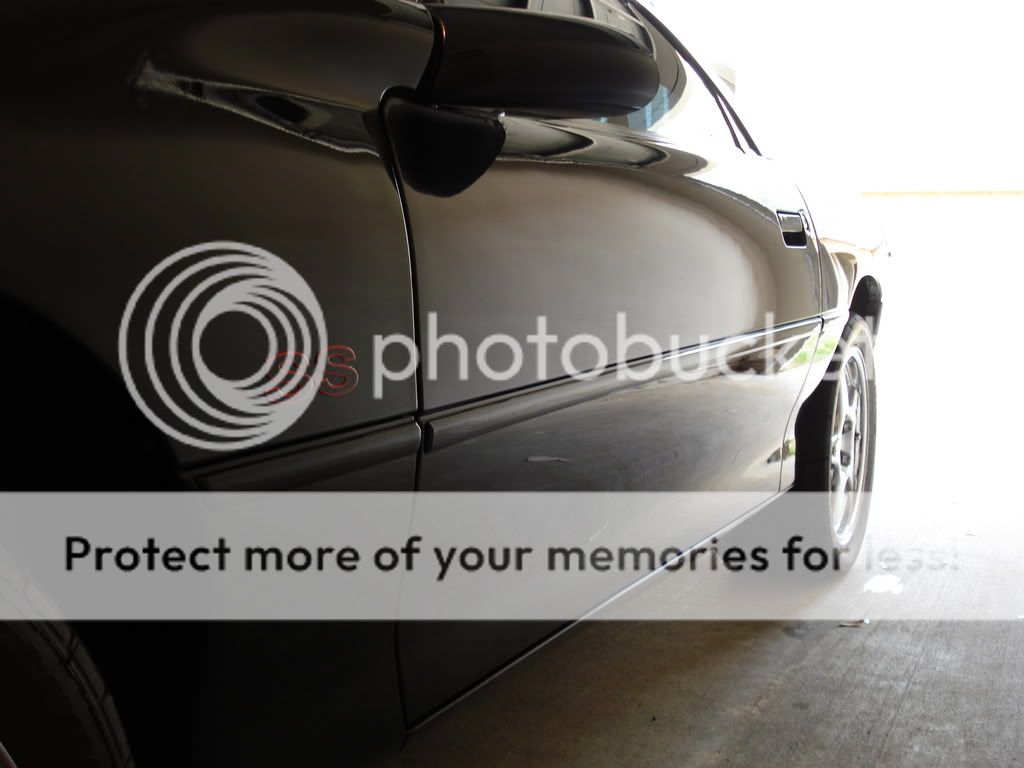
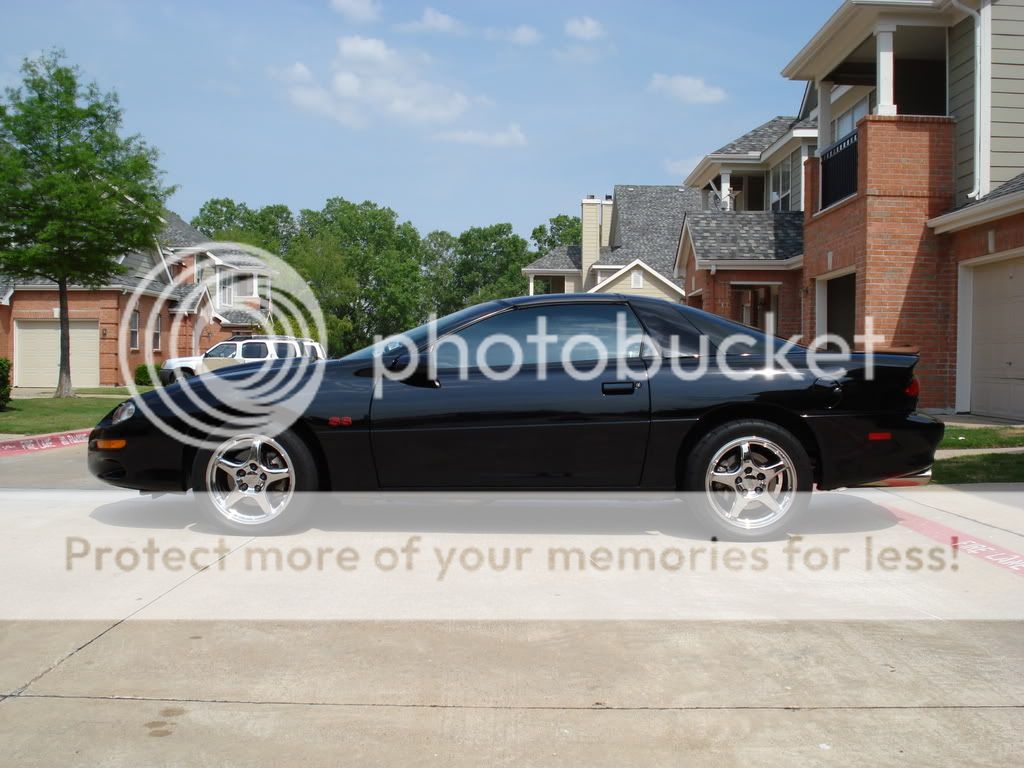
Verdad Gallardo I decided to go out on a whim and remove the trim off the doors and the quarter panels this afternoon after cleaning up the car. It took about 1.5 hours to do both sides, which consisted of removing the trim, using WD40 to remove the left over residue, and then waxing back over the area once done. I took both before and after shots...
Items used: Extension cord, GF's Hairdryer (finally a good use for it), WD40, Wax...
It makes the car look so much cleaner, IMO...


Items used: Extension cord, GF's Hairdryer (finally a good use for it), WD40, Wax...
It makes the car look so much cleaner, IMO...
Originally Posted by Red 01SS
You guys are getting way to deep into this. All I did was get a bit of fishing line under there to pop it up and pulled it off by hand. Rolled the rest of the tape off with my thumb. Took a total of 30 min for everything on my 01


TECH Resident
Joined: Feb 2003
Posts: 827
Likes: 0
From: Dallas, TX
I can't speak for the Camaros but the TA/ Firebird molding is too low to prevent any harm from a door ding. I just park on the corners and away from people.
I just did this a couple days ago with a hairdryer to heat up the molding/adhesive then just pulled it off by hand and rolled the adhesive back while it was still warm with my thumb.
First door took an hour by pulling only the molding off first....second door took less than 10 minutes by using the hairdryer and rolling the tape back while I was pulling it off. Definitely a much cleaner appearance.


On The Tree
Joined: May 2007
Posts: 103
Likes: 0
From: Upstate NY
I figured this is the cheapest mod I can do so I made it the first one I do to my 95 formula. I took off the driver door molding. I didn't use the fishing line, I just pulled on the molding and it came right off. But then I had the black gunk to scrape off. All I can say is that THIS will teach you what patience is all about. It probably took me a good 4 hours of continuous picking at it (and I didn't use tools, just my fingers and fingernails). I tried bug and tar remover, tried Goo-Gone, tried hair dryer. All those things may have helped but no more than 10% combined. FOUR freaking hours it took me to get the stupid thing off  and now there's no more black junk but there's a whole bunch of glue still stuck to it. And I gave up. I'm going to go to Advance Auto and pick up some automotive glue remover, maybe that'll help.
So now I'm driving like an idiot with one side with molding and the other one without. I can't wait till I waste another Sunday on picking the passenger's side off.
Was it worth it though?
Definitely!
and now there's no more black junk but there's a whole bunch of glue still stuck to it. And I gave up. I'm going to go to Advance Auto and pick up some automotive glue remover, maybe that'll help. So now I'm driving like an idiot with one side with molding and the other one without. I can't wait till I waste another Sunday on picking the passenger's side off.
Was it worth it though?
Definitely!
Staging Lane
Joined: Mar 2007
Posts: 89
Likes: 1
From: Texas
Originally Posted by flymybird
So now I'm driving like an idiot with one side with molding and the other one without. I can't wait till I waste another Sunday on picking the passenger's side off.
